[ page 6 ]
F-16 in 1/72 scale : kit review & modelling reports of TAMIYA kits
... continued
from page 5...
..
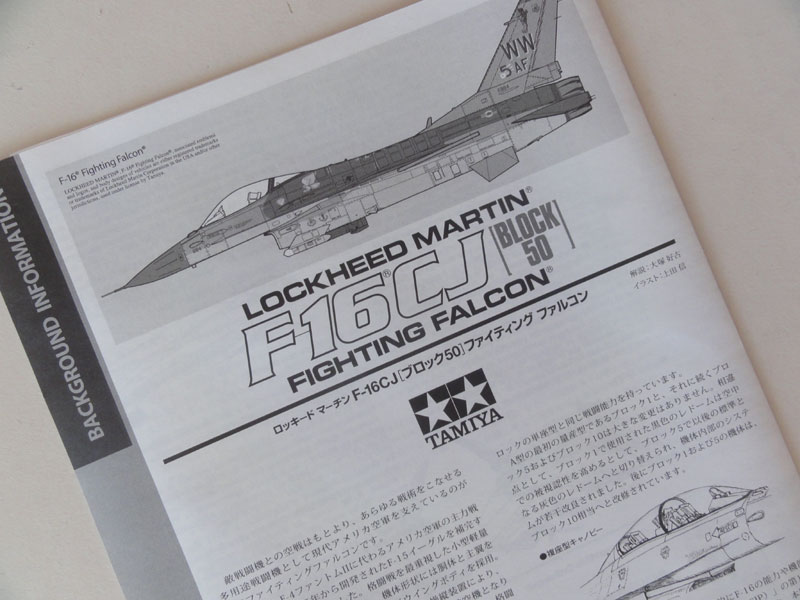
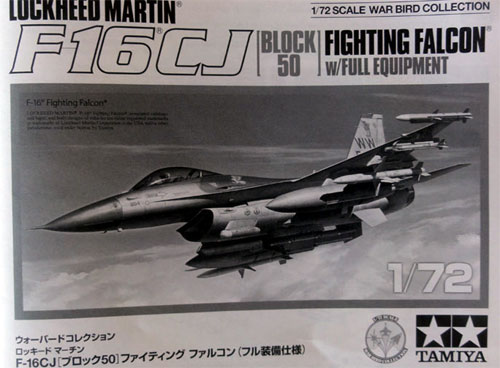
TAMIYA picked for these kits the F-16CJ Block 50 that was an upgraded "MLU like" USAF F-16C block 50 with the General Electric GE F110 engine rear section and exhaust. So the kit has also the wider style "big mouth" intake (its wide is about 20 mm in 1/72 scale).
The kit looks very good and
was released in two packages: 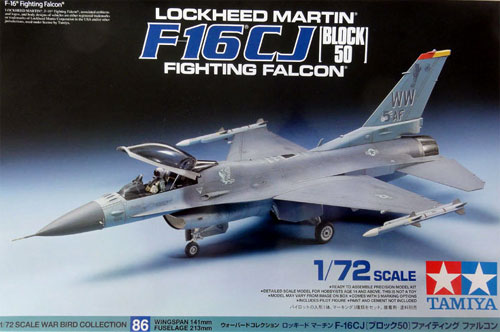
(1) No. 60786 : F-16 CJ / Block
50 with a few missiles only: two AIM-9M Sidewinder and two AIM-120C AMRAAM
;
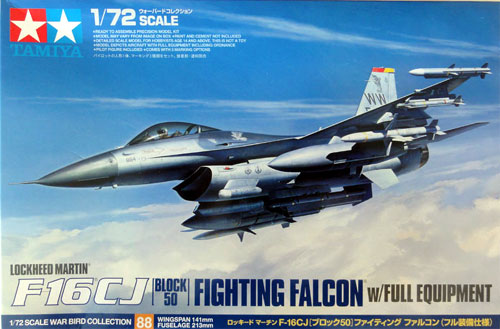
(2) No. 60788: the same
kit called "with full equipment" that comprise additional stores/ weaponry so not only
two AIM-9M Sidewinder and two AIM-120C AMRAAM but also:
two 370 gallon standard wing tanks
with pylons,
one 300 gallon standard central
tank with pylon,
two AIM-9X advanced Sidewinder
missiles,
two AGM-88 HARM ground attack missiles,
two AN/ALQ-184 ECM pods,
two AN/ASQ-213 HTS pods,
AN/AAQ-33 Sniper XR pod and pylon,
The instructions are fine and
there is also a separate F-16 history information sheet which is nice. It
shows the main F-16 variations. 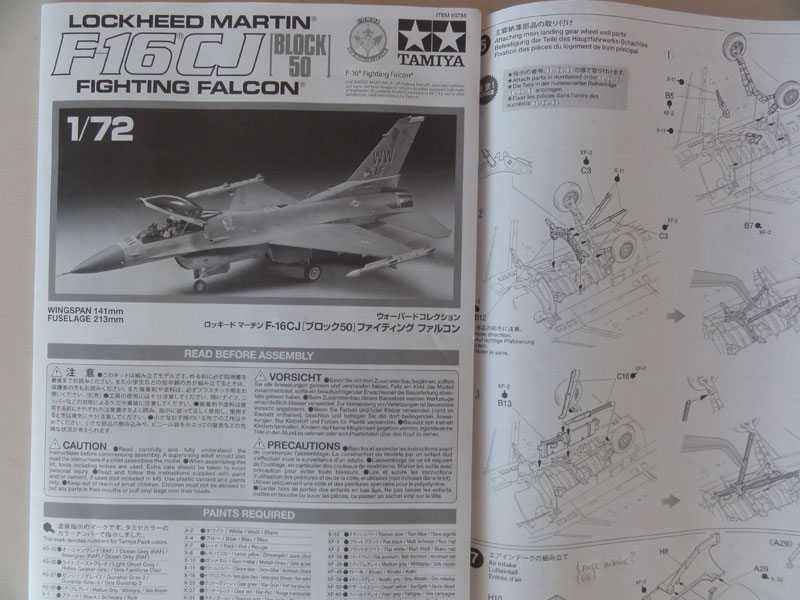
Most sprues with parts are common.
Two ejection ACES seats are in the kit as parts (it suggests also that TAMIYA
will issue later on a dual as the forward upper fuselage is a separate part).
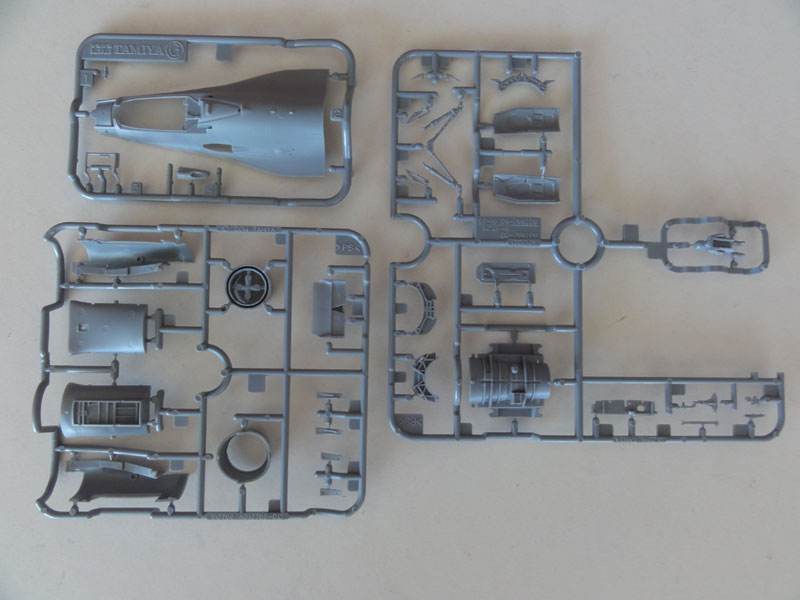
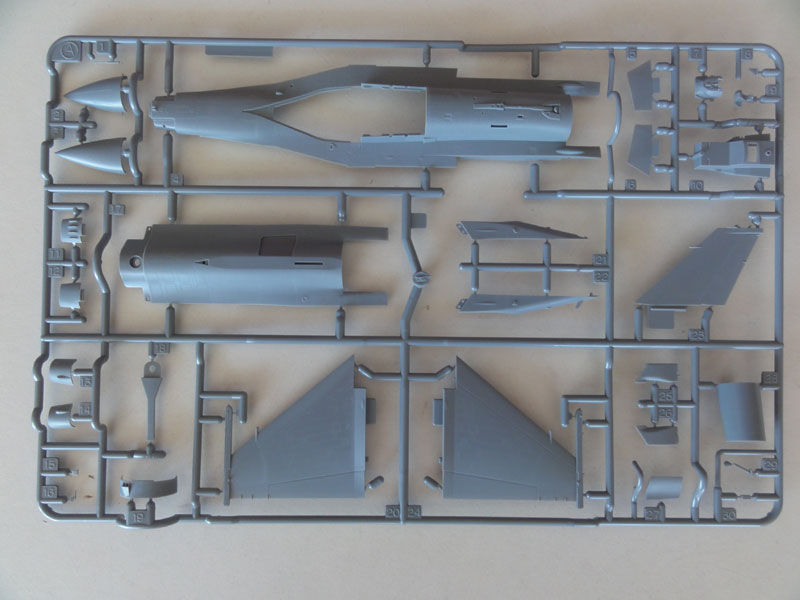
There are 6 sprues in each kit
with fine medium grey parts and a single clear canopy sprue (not tinted,
so clear). It is a pity that in the standard kit no 370 gallon wing fuel tanks are supplied. 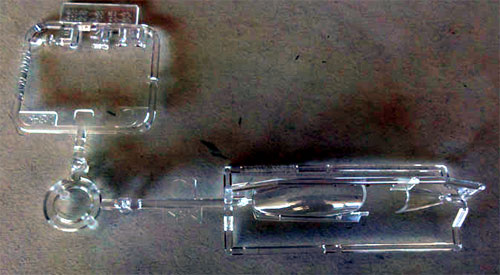
The package 60788 so for the "full
equipment" has sprue inserts to complement the parts as seen here in the red
squares: 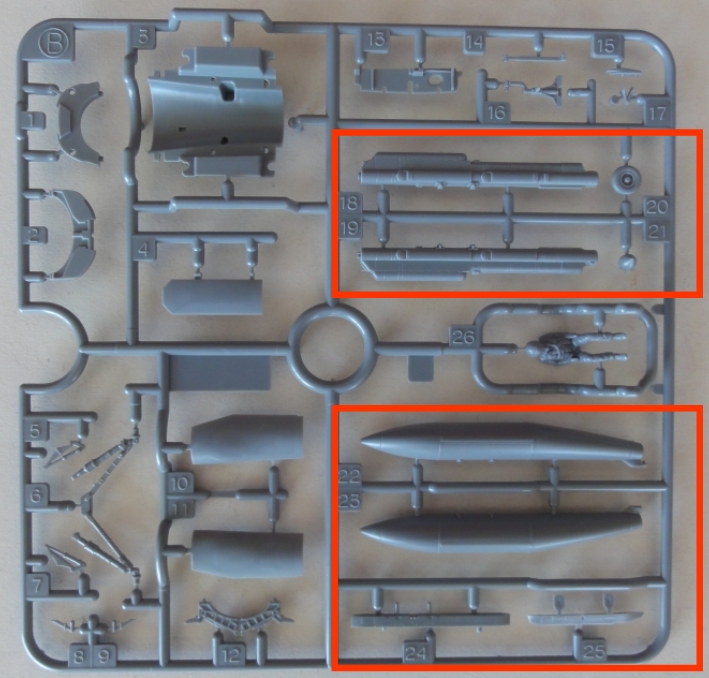
and two sprues of these:
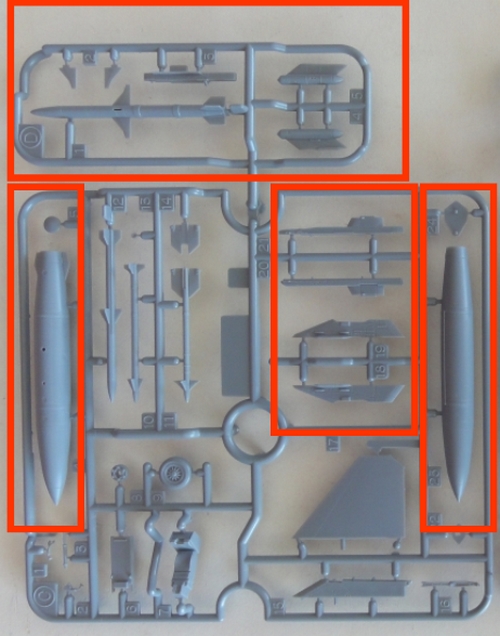
the "equipment", some of
it seen here 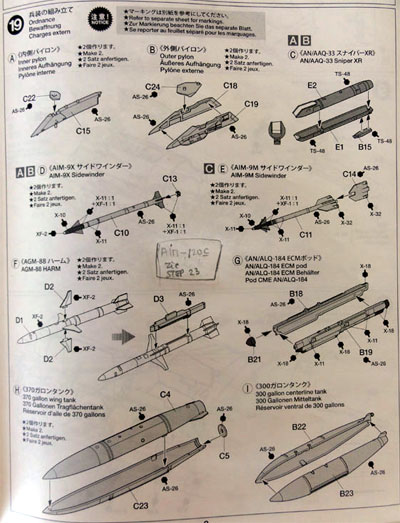

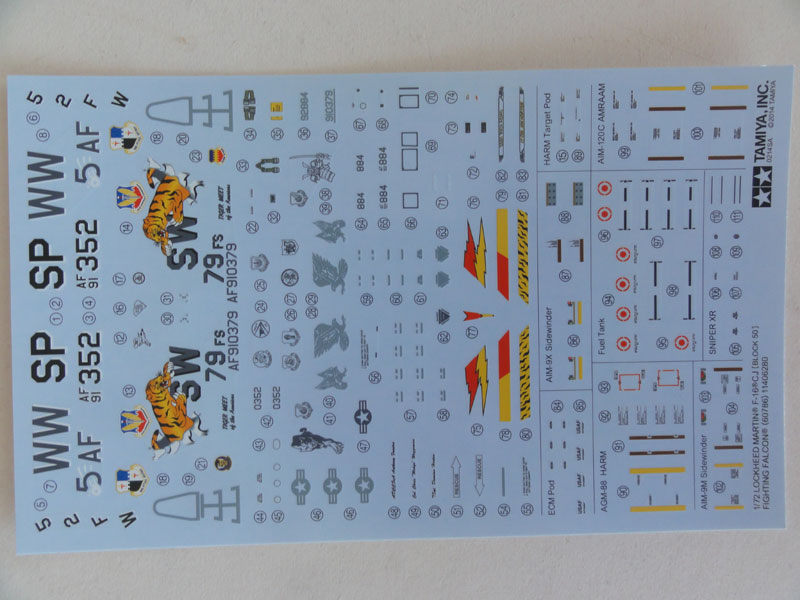
The decals are common in
both packages and comprise three USAF schemes:
[A] F-16 CJ Block 50 of USAF 5th
air force based at Misawa Japan, 2010, coded "WW";
[B] F-16 CJ Block 50 USAFE, 52
fighter wing at Spangdahlem, Germany, 2011, coded "SP";
[C] F-16 CJ Block 50 USAF 79 FIS/
20 Fighter Wing with Tiger badge, based at Buckley AFB, Colorado USA, coded
"SW", 2001;
Stencilling is provided but NO walkway lines. That is a pity as even on many later Block USAF F-16's these walkway lines are clearly present. So you need to source these elsewhere.
On the positive side: two variants of the in flight refuelling markings and for the F-16 "with equipment" kit the decals for the stores/ weaponry.
The kit has the thicker main wheels
with correct bulged main gear doors as for later Block F-16's .
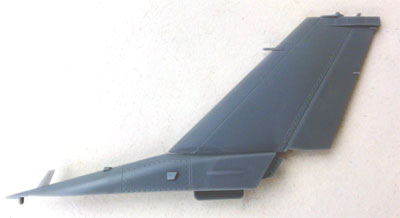
The tail has the thick fin base
but with the standard rear tail fairing (USAF like). The edges look a bit
too sharp, I think the lower thicker section should blend a bit more towards
the upper fin section.
The IFF antennas in front of the
canopy are in the kit in part #A11 but also the option to fit a clean part
#A12 without these.
The later style wing tip AMRAAM missile
launchers are integrally moulded with the wing halves.
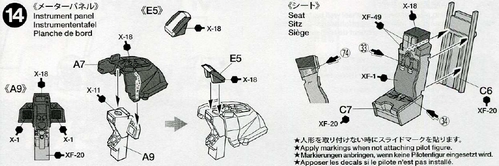
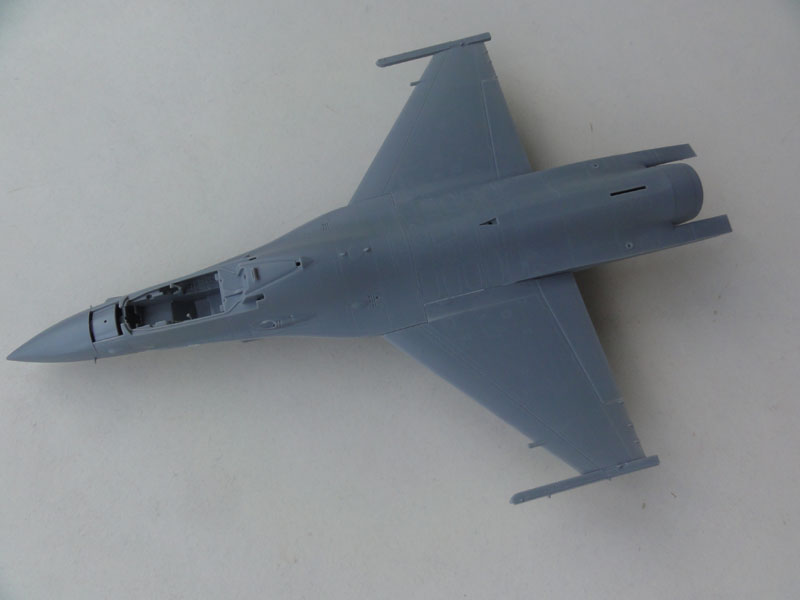
The cockpit is small but looks
good with instrument panels with raised details and HUD seems to be the later
style one. There is also a fine pilot figure in the kit.
There are some unused parts, such
as to have a clean intake edge without the small side intakes with parts #H4,
H5. There is also a spare nose wheel.
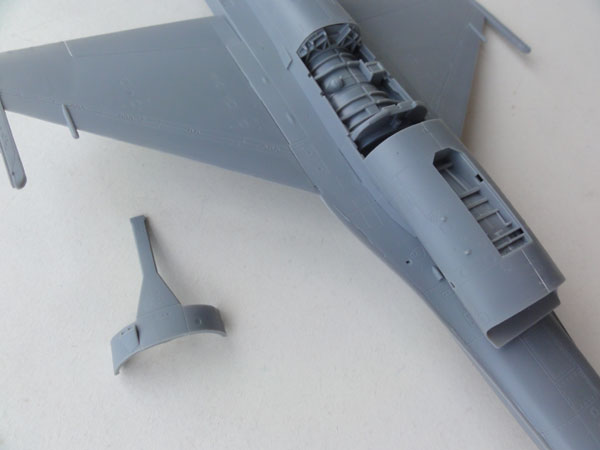
The surface engraving with fine recessed panels looks great. There is even a loose separate panel at the upper right fuselage next to the vertical tail. (though I do not know why..). The RWR fairings on the nose sides are on separate parts 3A13, a14.
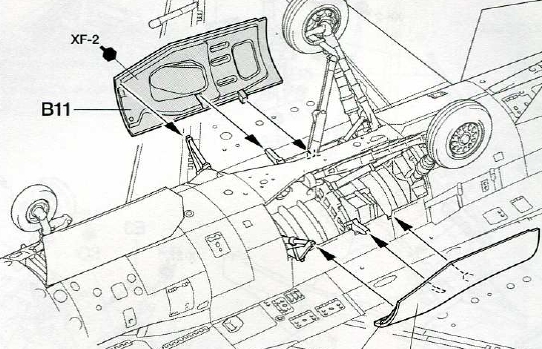
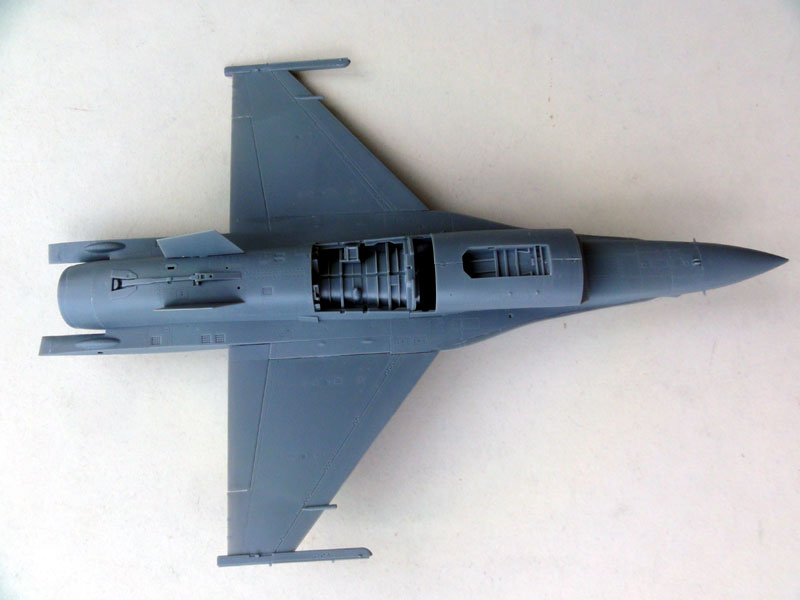
The
insides of gear bays and
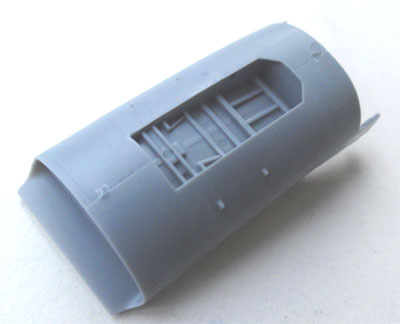
wheel looks very good. The GE F110 engine exhaust pipe is one part, is
deep
but has no rear afterburner ring moulded inside. (No Pratt and Whitney
F100-229 exhaust is in the kit as applicable for other later Block
aircraft).
The lower outside engine bay shape
("a somewhat big oval") looks based on the
1/32 Tamiya F-16 kit research and so not more circular shaped.
The wing has two halves so needs carefull setting the dihedral. (the wing halves for the kit with "full equipment" has holes to fit the different pylons; the basic kit has no pylons so no holes in the lower wing.
Great that TAMIYA has released
this F-16 CJ kit in 1/72 scale. Several kits will be made, so....
page 1
page 2
page 3
page 4
page 5
page 6
page 7
page 8
page 9
page 10
page 11
page 12
page 13
page 14
page 15
page 16
page 17
page 18
page 19
page 20
page 21
page 22
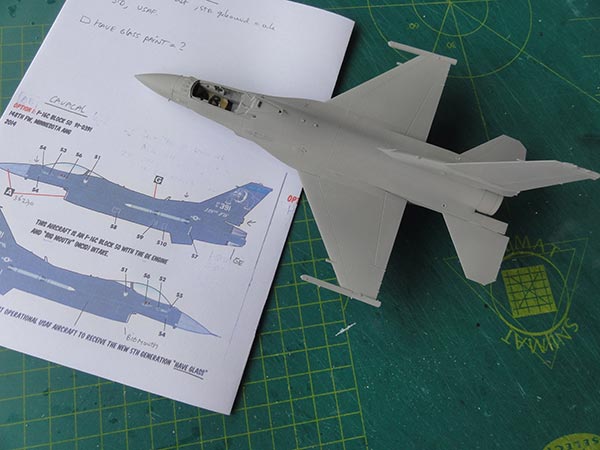
[21] The first Tamiya kit will be made as per kit for a USAF F-16C Block 50 with GE engine and wide intake MCID in an "agressor training scheme" as I had decals from Caracal set 72019 "F-16 Vipers- Next generation".
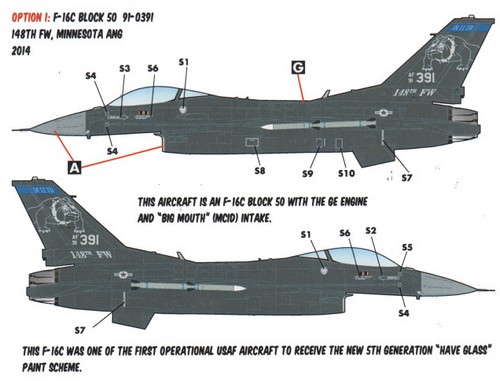

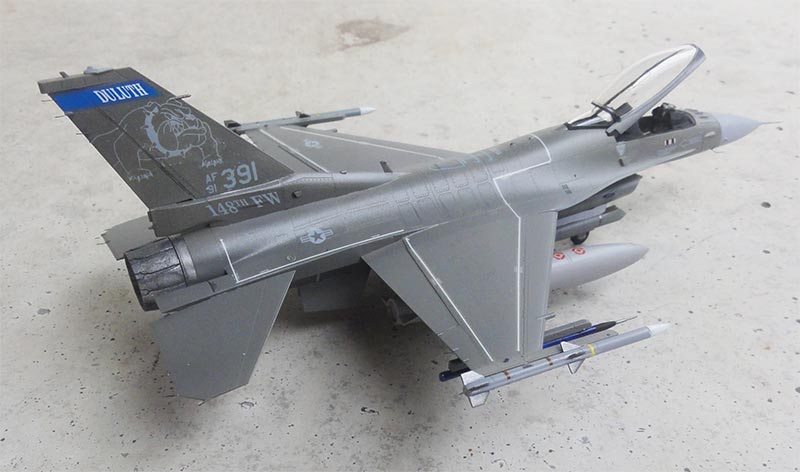
The ANG 148 FW based at Minnesota ANG operates the type in probably a "Have Glass V" paint scheme. This paint seems to have "lower observable radar" characteristics. Looking at photo's on the Internet I saw some variation in paint schemes with some aircraft having light grey nose and darker finishes and other much darker schemes. The kit can be assembled straight out of the box for this scheme.
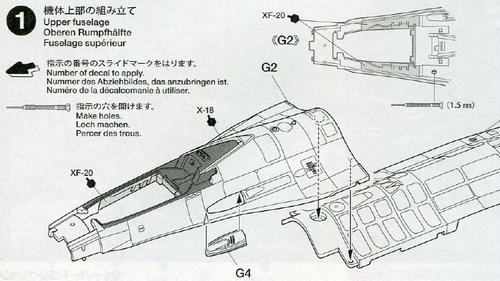
STEP 1
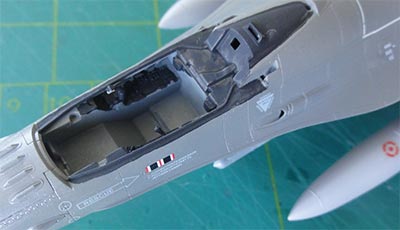
The
cockpit looks great but I did not bother to paint it at this stage, it
is reachable later on. later Block aircraft had much black areas in the
cockpit in order to use the night vision goggles by the pilot. The gun
nozzle
part G4 fits pretty good. The main undercarriage bay has enough detail
including
the battery.
The forward fuselage halve was glued FIRST to the aft section to ensure a flush fit.
STEP 2
There is an alternative part A12
without the IFF antennas. 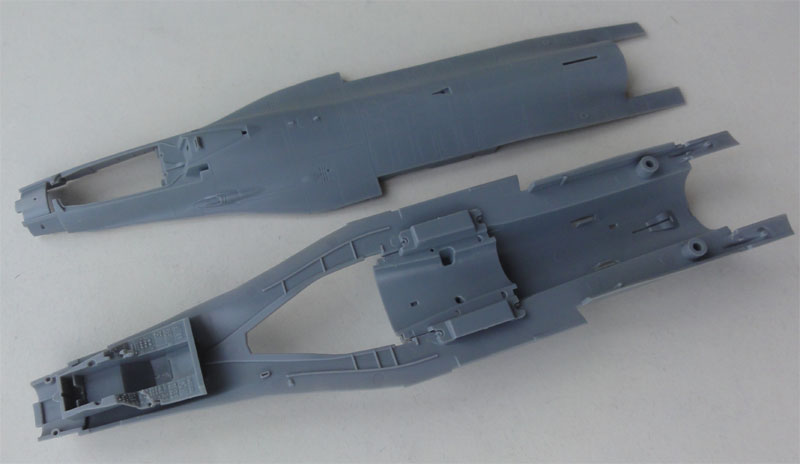
STEP 3
The wing halves have outboard advanced
wing tip launchers for later generation missiles including the AMRAAM.
Ensure here that the wing is horizontal
and flat. In the right fuselage a hole needs to be opened
up and a small cooling outlet to be fitted. 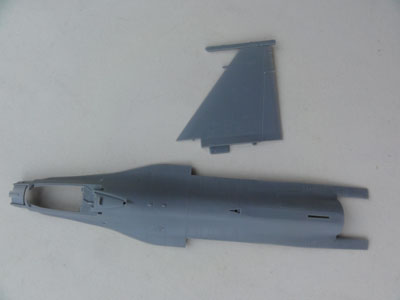 .
. 
STEP 4
Do not yet fit the exhaust.
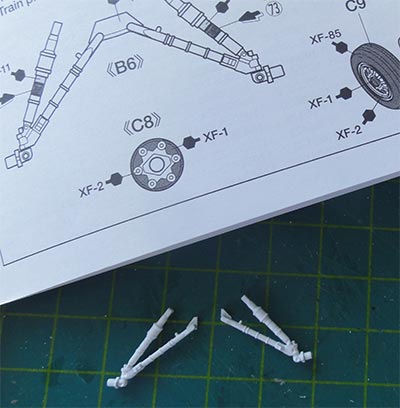
STEPs 5,6, 9
The undercarriage will be fitted
later. The gear legs are one "V" shaped piece. It can be cut in half to fit much later.
STEPs 7, 8
The wider style big mouth intake is in the kit and was assembled as per instructions. (Its width is about
20 mm in 1/72 scale as opposed to the smaller intake 17 mm width).
The intake tunnel is deep enough.
There is an insert with parts H2, H3 but unused parts are also in the kit
to fit the small auxiliary scoops at the sides (but not used for this
version). One some air forces there is here a different type of intake scoop. 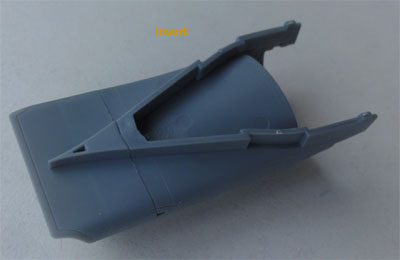
Now some basic checking is done for the overall assembly. It looks great and it seems no filler / putty is needed.
The vertical tail is one of other parts still to be fitted but the rear and lower base fairing depends on the particular F-16 air force model to be made. (in this kit the USAF type aft base fairing is provided so without any long fairing often containing the brake chute).
I feel the kink between the lower F-16C tail base and upper tail is a bit
"too pronounced / too sharp". Maybe I will sand it a bit more flush.
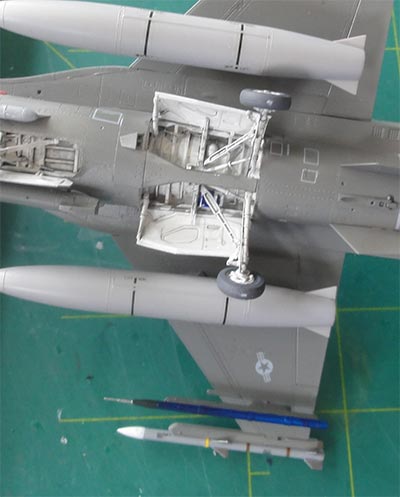
Some parts were now given a base
white coat like the insides of the doors, undercarriage struts and so on
while still on their sprues. Also the main gear bay got a first white coat
with the airbrush. 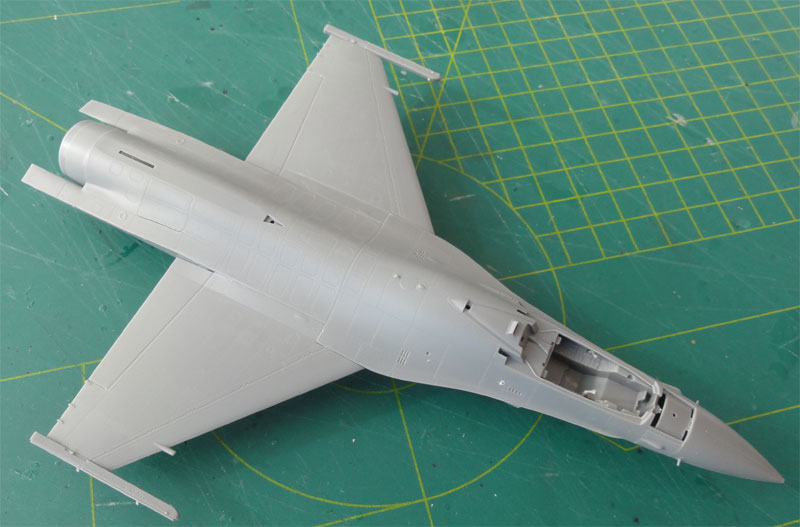
(The small outlet below the canopy for the Block 50 is not yet fitted on this photo).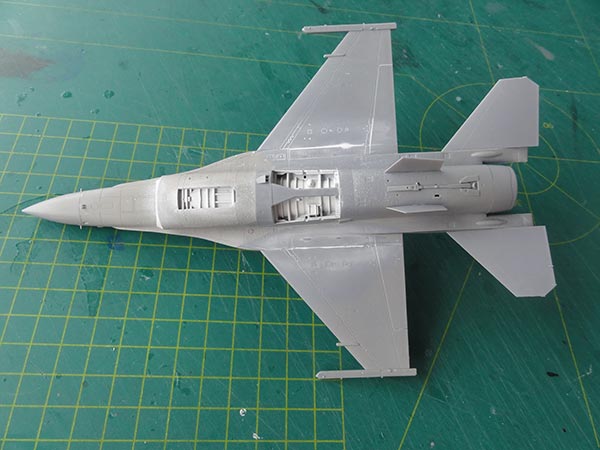
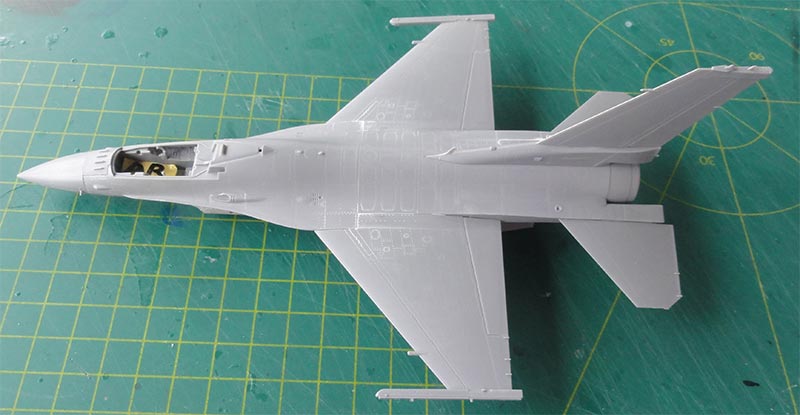
The vertical tail (std USAF layout) fitted well, I only needed a tiny amount of filler near the dorsal spine antenna. The stabilizers have a fixed good angled shaft to fit.
Just a tiny bit of filler was needed at the wing-fuselage joints and gun panel.
After a bit sanding the usual light grey base coat airbrushed showed no more surprises, the Tamiya kit fits very good.
Time for the paint scheme for the 148 FW HAVE GLASS V
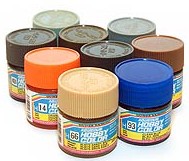
I started with the radar nose: it got a FS36270 color airbrushing Gunze Sangyo H306.
The model would also get some stores/ wepons from one of the Tamiya kits "with equipment". I saw 148 FW aircraft also with original light grey FS36375 coloured special targeting pod pylons and fuel tanks. So these were given an airbrush coat of Gunze Sangyo H308 and not the darker HAVE GLASS colours.
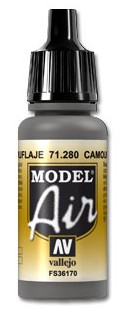
(1) Now the question was: what is the HAVE GLASS V colour? It seems the scheme has first a colour of Federal Standard FS36170 (similar to that of later F-35 aircraft). I purchased from Vallejo acrylic #72.280 for this.
The overall colour was first airbrushed over the entire model as well as all the outsides of undercarriage doors etc.
(2) There is also a metallic hue over this HAVE GLASS paint. I saw there are some paint brands that provide this but I settled for a varnish mix of Johnson Future/Pledge with some drops of Vallejo aluminium acrylic #71.062. This gives a metallic hue. The amount of drops of aluminium needs a bit trying out. After a few airbrushed coats I felt I had a good result. (The paint actually dried so I did not have the problems as with my big 1/32 scale F-35 JSF Lightning II). The canopy glass probably also has a tinted HAVE GLASS varnish so I misted with the airbrush this mix of varnish over the clear kit canopy, be carefull here though.
The overall varnish also made it possible to apply as a next step the decals without any risk of "silvering". From the CARACAL set 72019 the 148 FW decals came. They are very thin so take care when applying them. TAMIYA unfortunately provides no walkway line decals but these are seen on these HAVE GLASS F-16's. The thin walkway lines were thus sourced from other decals sets, they are of the very light grey variety.
When decalling was done, the installment of the smaller parts was tackled. All smaller parts fit very well.
STEPs 5,6 and 11
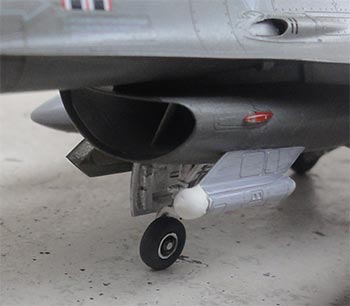
The single piece main undercarriage strut center section was cut and the two legs could be fitted.
The main gear paint is white. I also saw that many 148 FW aircraft had "off white" main gear hubs so these were brush painted. The main gear wheels are to be set at a small tilt angle. Than fit the main gear doors seen in STEP 11. I added a few "hydraulics" with thin metal wires.
The nose undercarriage seen in STEPs 8,9 fits well but I added a very tiny retraction actuator as the leg base. The front door also has the later Block landing lights package (part #E4).
A bit wash was added inside the gear bays and gear legs; a mix of acrylic varnish and black paint will do.
STEPs 14,15
The cockpit looks good and even the pilot figure does fit if you wish to install him. The main base cockpit interior colour is medium grey but with many black areas inside (see the F-16 walk around page here...). The ACES seat looks to be good and of the later style Block seat type. I added harnesses and straps from painted tape. The later style HUD is provided as appropriate for the later Block F-16's.
STEPs 17,18
The canopy fits well but in open position I shortened the pegs about 2 mm of part #G3.
Two side handles are missing inside the canopy, these were made from black stretched sprue.
STEPs 19-22
These deal with the stores/ weaponry for the kit with "full equipment". For the 148 FW after looking at photo's I installed:
- two AIM-120C AMRAAM missiles on the wing tips;
- two 370 gallon standard wing tanks in lighter grey but with darker coloured pylons;
- AN/ASQ-213 HTS pod on the left lower intake with a lighter FS36375 coloured pylon
- AN/AAQ-33 Sniper XR pod and pylon on the right lower intake; this pod is provided in clear parts and needs some painting; the pylon installment was for me a bit unclear, I had to install it a little more aft.
- AN/APX-95 TACTS (ACMI) training pod on the lower outboard wing pylon; this was obtained from Hasegawa Weapons set V, no. X72-9.

The nice pitot as per kit was installed. On each wing tip and stabilizer 2x3 static dischargers and 3 on the vertical tail were added made from fishing wire (and painted black).
The model for this HAVE GLASS V scheme got not the standard semi-gloss varnish end coat but a gloss varnish mix of Johnson Future/Pledge acrylic but with again with few drops of Vallejo aluminium acrylic #71.062. This gives a metallic hue.
Canopy was installed open and.... the model was ready!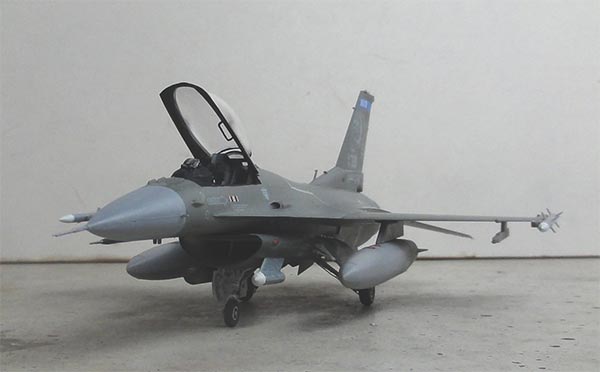


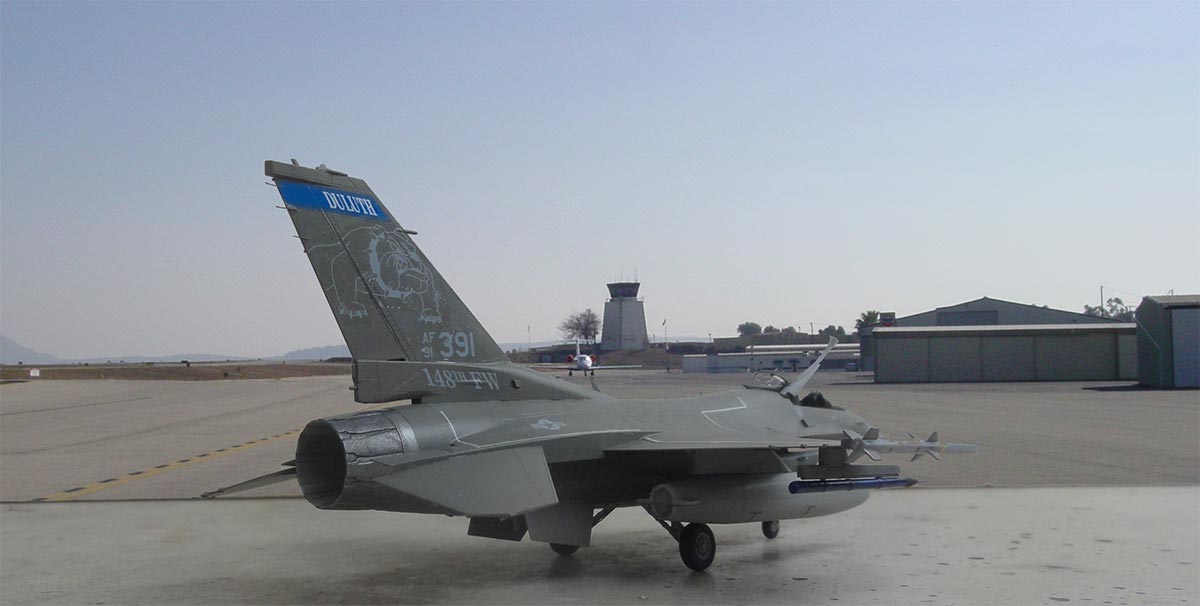
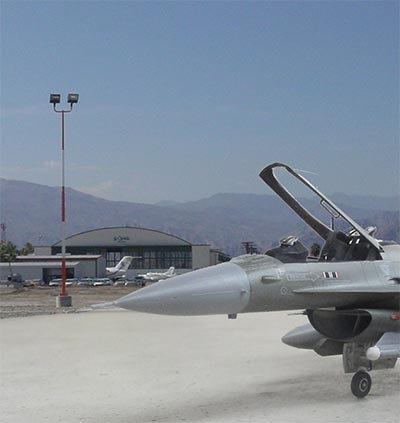
F-16C Block 50, "HAVE GLASS V", 148 FW Minnesota ANG
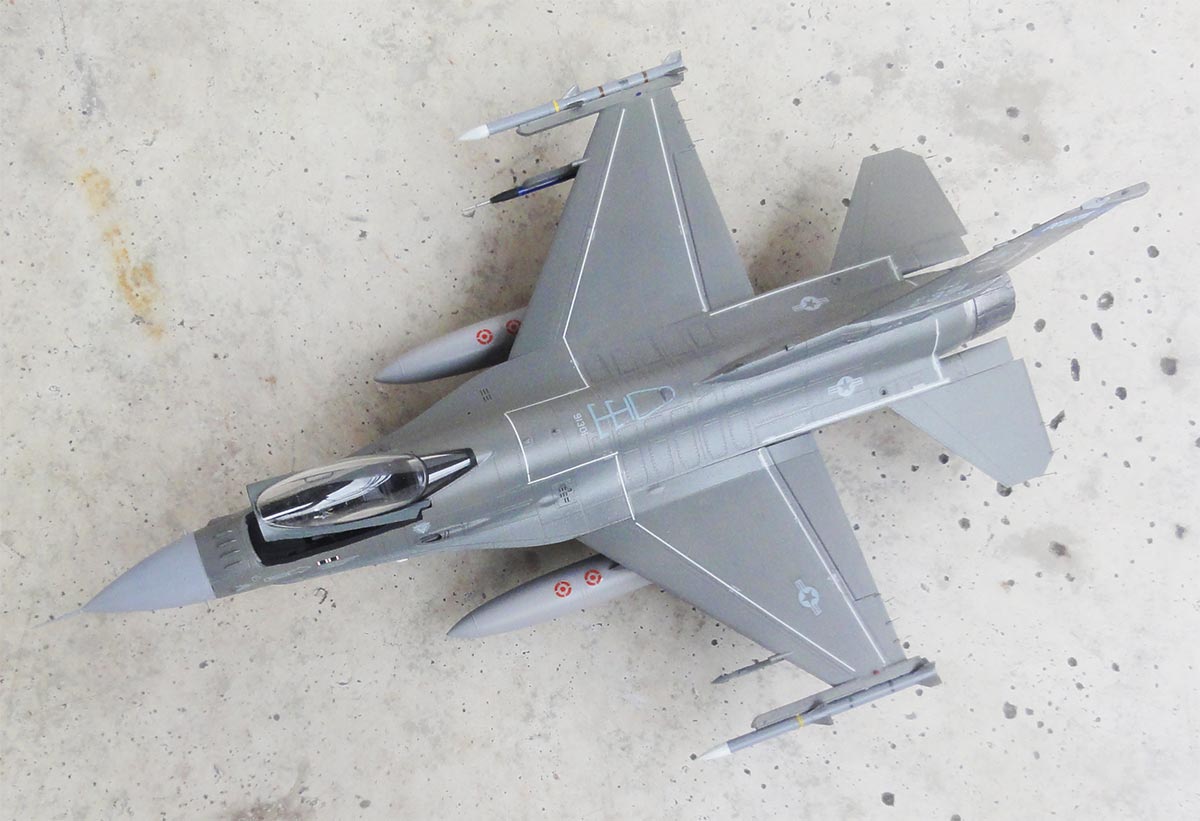
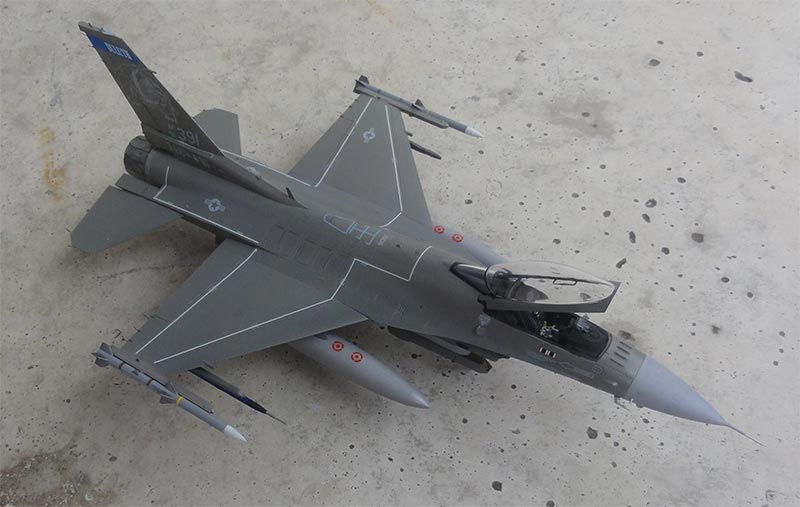
The slight metal "HAVE GLASS" scheme can be slightly distinguished with a metallic hue under these lighting conditions.
... and set in a scenery at the West in the USA....
(Another nice model, another few Tamiya F-16 kits are still to be made including a conversion to a Block 52, see page 16.... ).
On to next F-16 [ Page 7... ] with Kinetic kit
..

(c) Copyright "designer"/ All rights reserved. Your comments are welcomed by webmaster
Created this page
August 24, 2016 ;
updated
July 21, 2018