[ page 17 ]
F-16 in 1/72 : modelling reports of HASEGAWA kits
... continued from page 16...
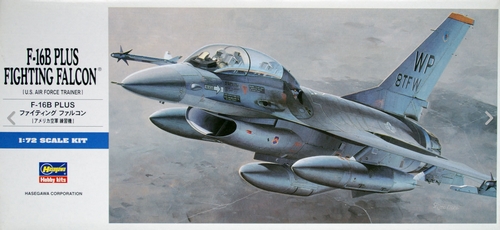
Another Hasegawa early F-16D kit but now with boxno. #00445 was now tackled.
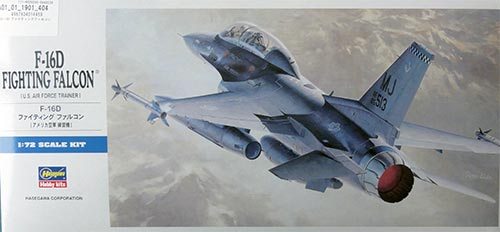
A similar kit was described on page 11 made as a Turkish F-16D early Block 30B.
It has decals for a -
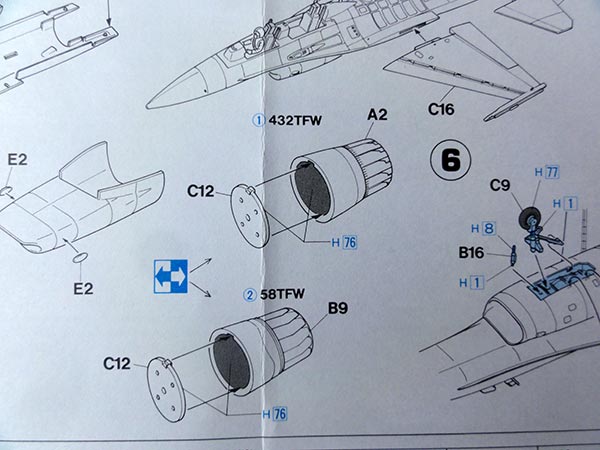
- Block 30A of the USAF 13 TFS Panthers, 432 TFW, Misawa AB Japan
- Block 25 USAF 312 TFTS Scorpions, 58 TFW at Luke AFB.
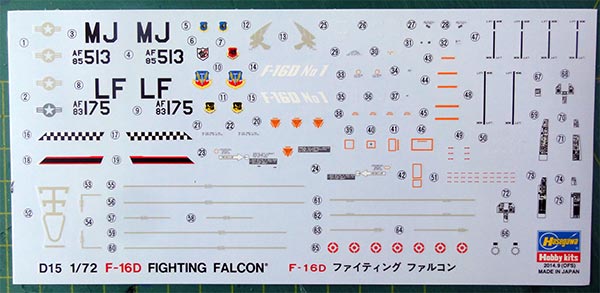
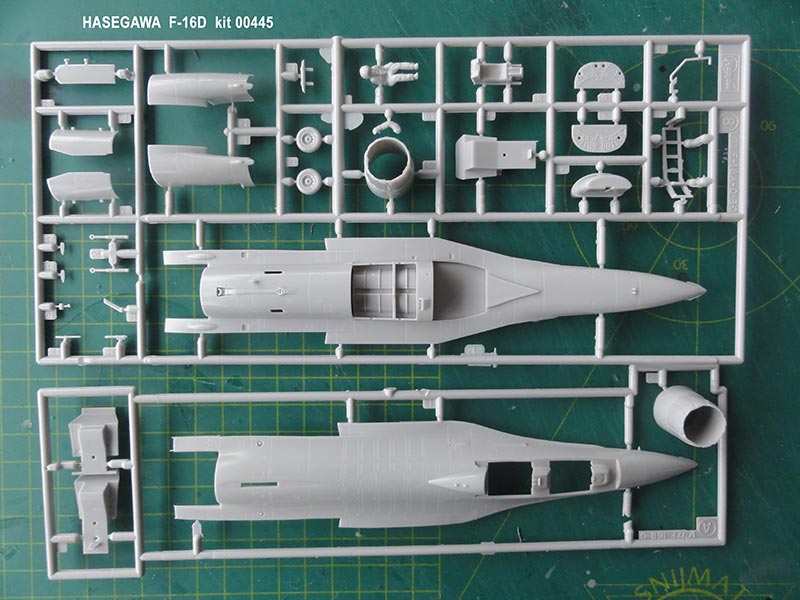
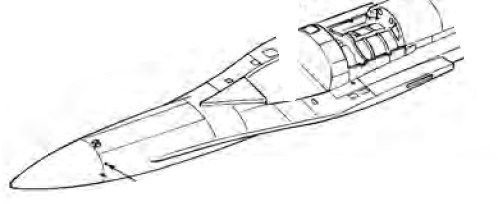
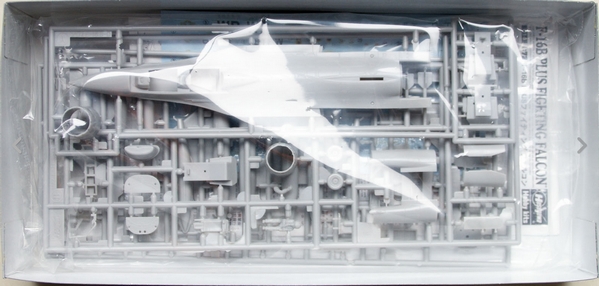
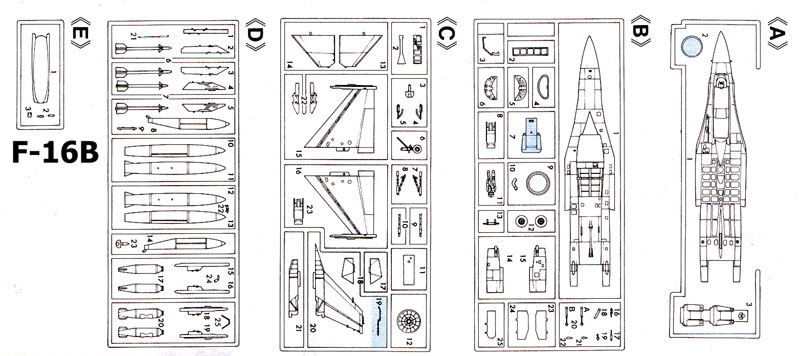
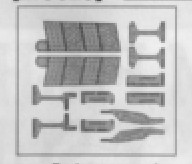
The kit #00445 parts are seen here.....
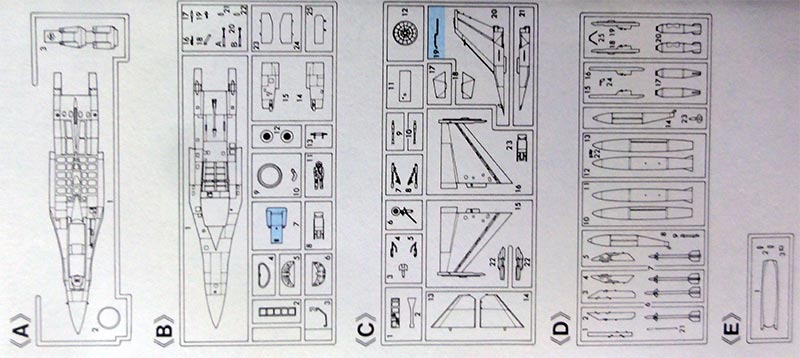
The vertical C/D thick base tail has the standard USAF layout without parachute fairing.
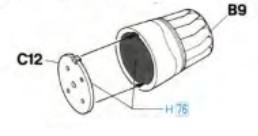
It has the choice for 2 exhausts: the standard Pratt and Whitney F100 and the General Electric F110 using part #B9. Only the small intake is in this kit which is correct for an early Block F-16D.
 [29]
[29]
I opted to do a CONVERSION into a much later F-16D Block 50.
NOTE: Hasegawa released a F-16DJ later Block 50 kit #00125 with the larger intake and additional parts in an extra sprue "F"; but I could not find this limited release kit of 2000 for sale in any shop nor internet. So no other choice to do a conversion.
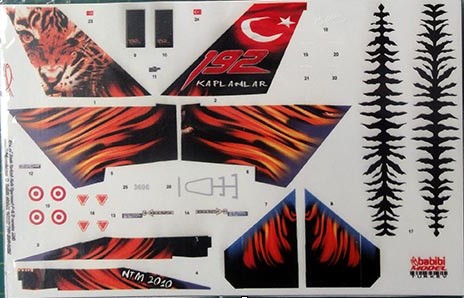
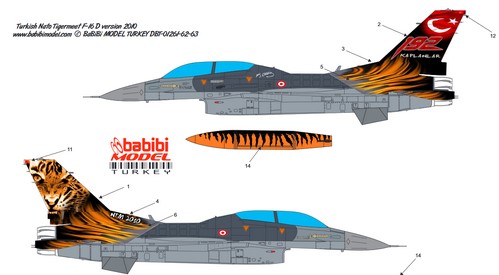
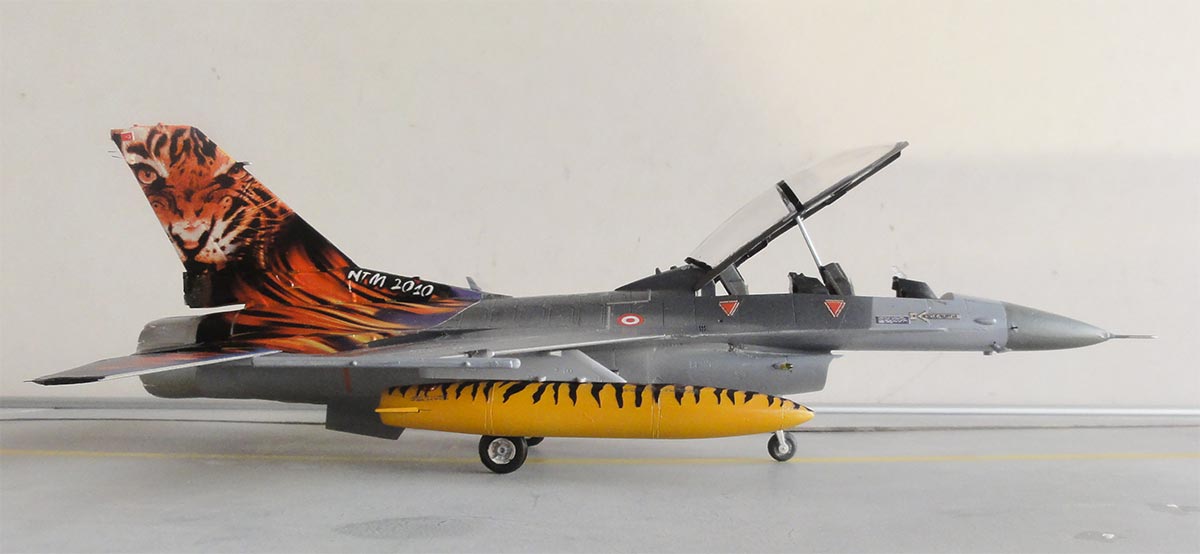
From my modelling friend Bas I got some BABIBI decals DBT-01261-62-63 from Turkey for an attractive Turkish Air Force F-16D Block 50 aircraft in a NATO TIGER MEET 2010 scheme:
This Block 50 uses an uprated General Electric F110 engine but also has the large MCID intake. I had fortunately such a spare intake from a later TAMIYA F-16C Block 50 kit (as described on page 6 ).
When combining the Hasegawa parts such as using exhaust part #A2 and the other big intake and some smaller changes the conversion to a Block 60 can be done and includes for example installing "bulged" gear doors for the heavier later Blocks undercarriage.
(Note:
all 1/72 Hasegawa F-16 kits have the old style standard F-16 gun port
with vents; the later Blocks have a gun port with slightly
different vents; this is very small so I did not bother to change
this). ![]()
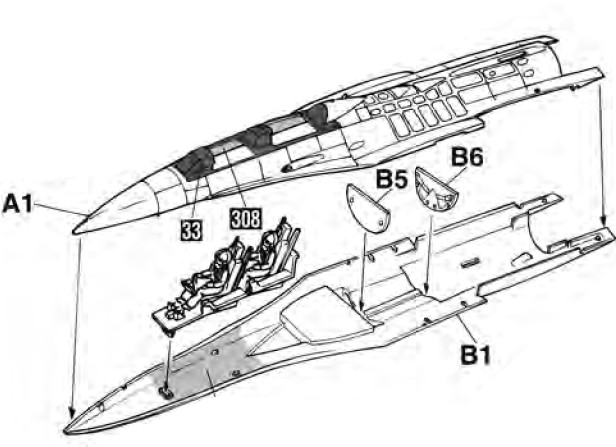
The basic construction started with the simple cockpit parts, the upper fuselage shell and the lower fuselage shell. Make sure to fit the bulkhead part #B6 in perfect symmetry, otherwise the gear will not be symmetric. (On the nose no IFF antennas were seen, sometimes called the "bird slicers").
(So for the conversion do NOT use the Hasegawa small intake parts #B4, B14, B15, C11 as another intake is to be installed).
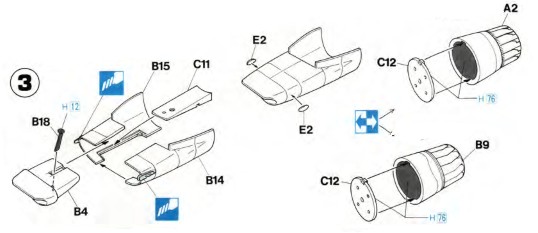

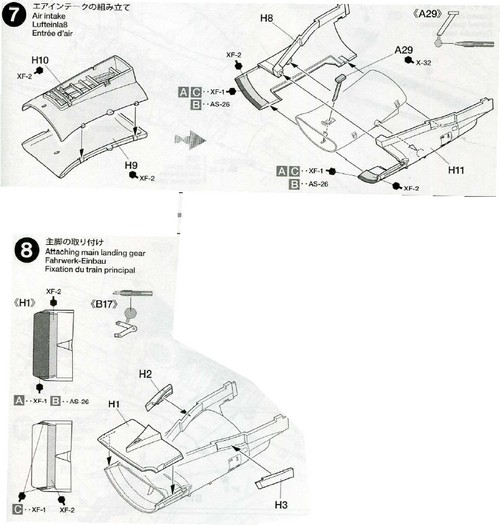
A spare TAMIYA large intake was assembled including its nose gear bay using parts as
described in the TAMIYA instructions STEPs 7 and 8:
![]()
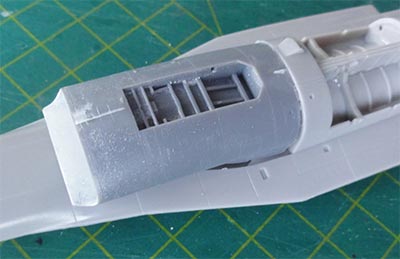
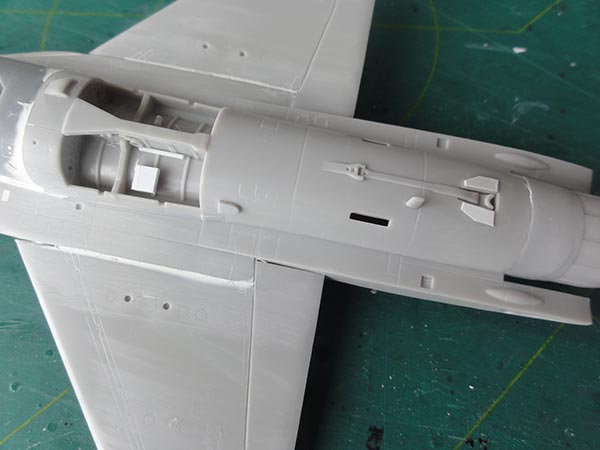
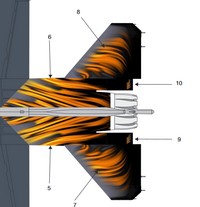
The assembled Tamiya big intake is seen in the darker grey plastic.
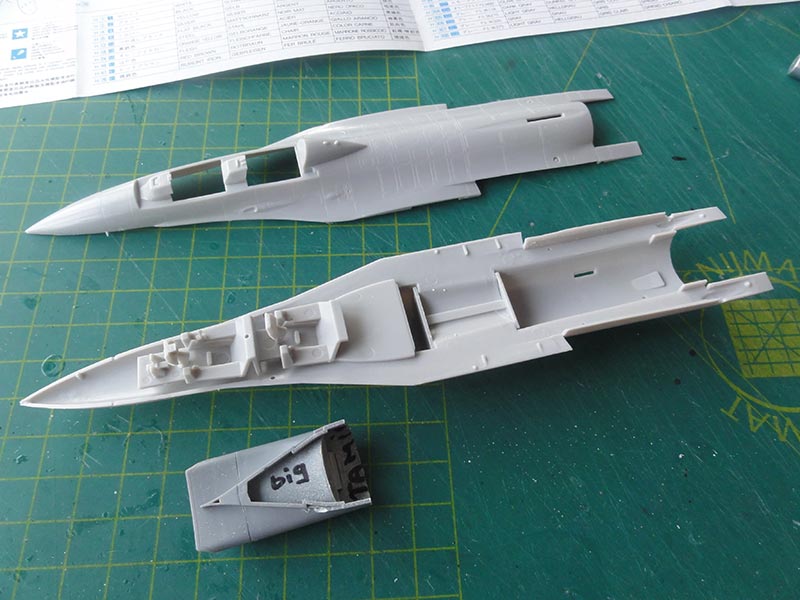
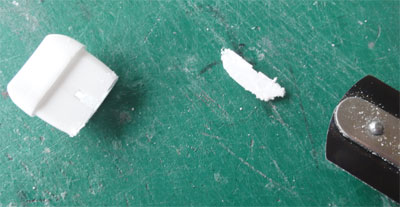
I needed to remove the forward "V" base shape on the TAMIYA intake
in order to fit flush with the fuselage part #B1 in order to get a
level horizontal fit. The small inlets on the intake
base Tamiya parts #H2 and H3 were used as well. Note that these smaller inlets
may vary between F-16 Blocks.
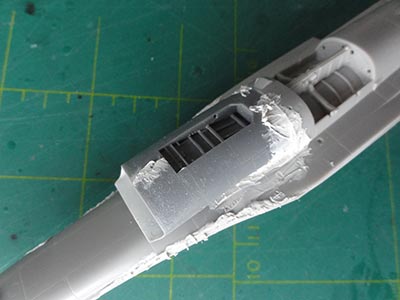
The various gaps were filled with putty and the whole lot sanded at this stage for easier handling.
The rear exhaust section Hasegawa part #B9 for the GE engine needed a bit sanding as well to get a flush joint. After the fuselage was ready, the wing followed.
First the Hasegawa kit wing tip old style LAU-114 missile rails were cut off with a razor saw and replaced by the later style AMRAAM capable LAU-129 rails. I had some spare rail parts that can be found in e.g. later Revell MLU kits and these rails were set in place.
As with the other Hasegawa kits, the wing halves need careful alignment to get perfect symmetry and the joints also again needed putty and sanding. Inside the main gear bay the missing battery pack was added from some thick plastic. Near the tail hook two small re-enforcement plates were also added made from thin card.
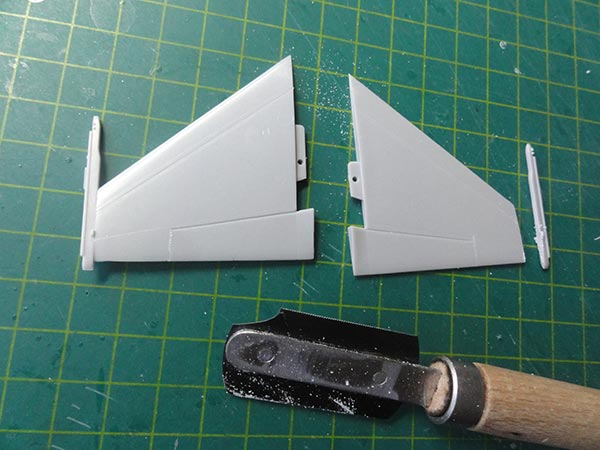
I also had a spare C/D type thick base standard vertical tail from a TAMIYA kit so this one was used on this kit as well as it is a bit finer than the Hasegawa tail. But you can also use the standard Hasegawa parts. The vertical tail was not yet installed to make airbrushing later on easier.
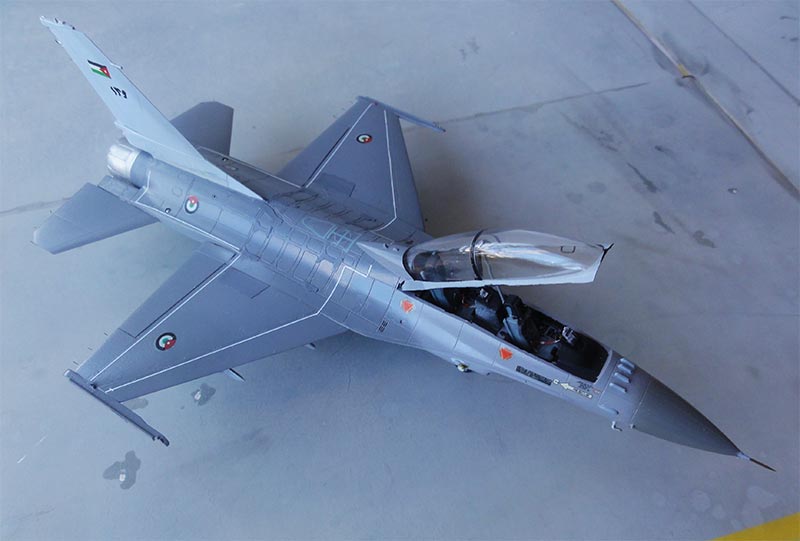
All is seen below here such as the LAU-129 wing tip rails; NOTE the RHAW "beer can" antennas on the wing leading edges are not yet fitted...

Near the right side of the big intake an extra small vent was fitted made from scrap.
This photo summarizes was had been done till now:
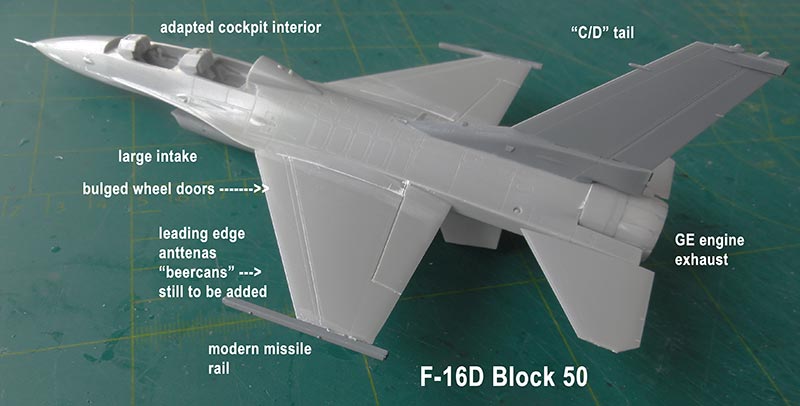
Now the RWAH antennas on the wing leading edges were made that look like "beer
cans" were made from rod, shaped and fitted as these are not provided
in this early Hasegawa kit.
> In the later F-16DJ kit #00125 these are parts #F1 and F2 shown here:
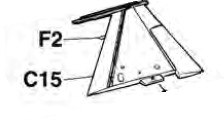
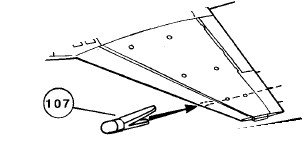
... and in a Revell F-16C kit these are excellent parts #107, 108.
Each
RWAH antenna where it meets the wing leading edge should have a
small section both above the leading edge AND below the leading edge.
(The Hasegawa kit "beer cans" should be corrected a bit here).
The later Block 50 had the heavier stronger landing gear with slightly thicker wheels and "bulged" main gear doors. I did not have any door spares so had to improvise. On the main gear doors a piece of circular plastic card was glued and the edges filled with white glue or use putty.
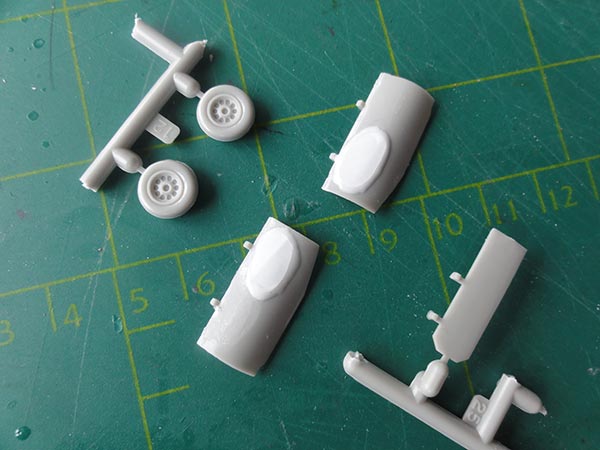
I used the kit wheels though not sure if the wheel hub has the correct pattern.
On the inside nose gear door the later Blocks have the landing lights re-positioned so these lights were cut-off from the main gear legs. A small plastic strip at the front on the inside the nose gear door was added for this lights set "package".
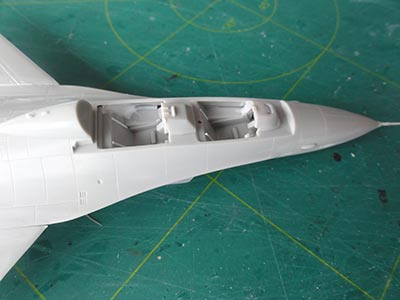
The cockpit interior side consoles show some gaps with the side walls. With some plastic strip and white glue these gaps were closed:

The model was now ready for a first base light grey coat airbrushing Revell Aqua 75 "Steingrau". Any surface imperfections were restored with putty and sanding and the model ready for the final paint finish.
![]()
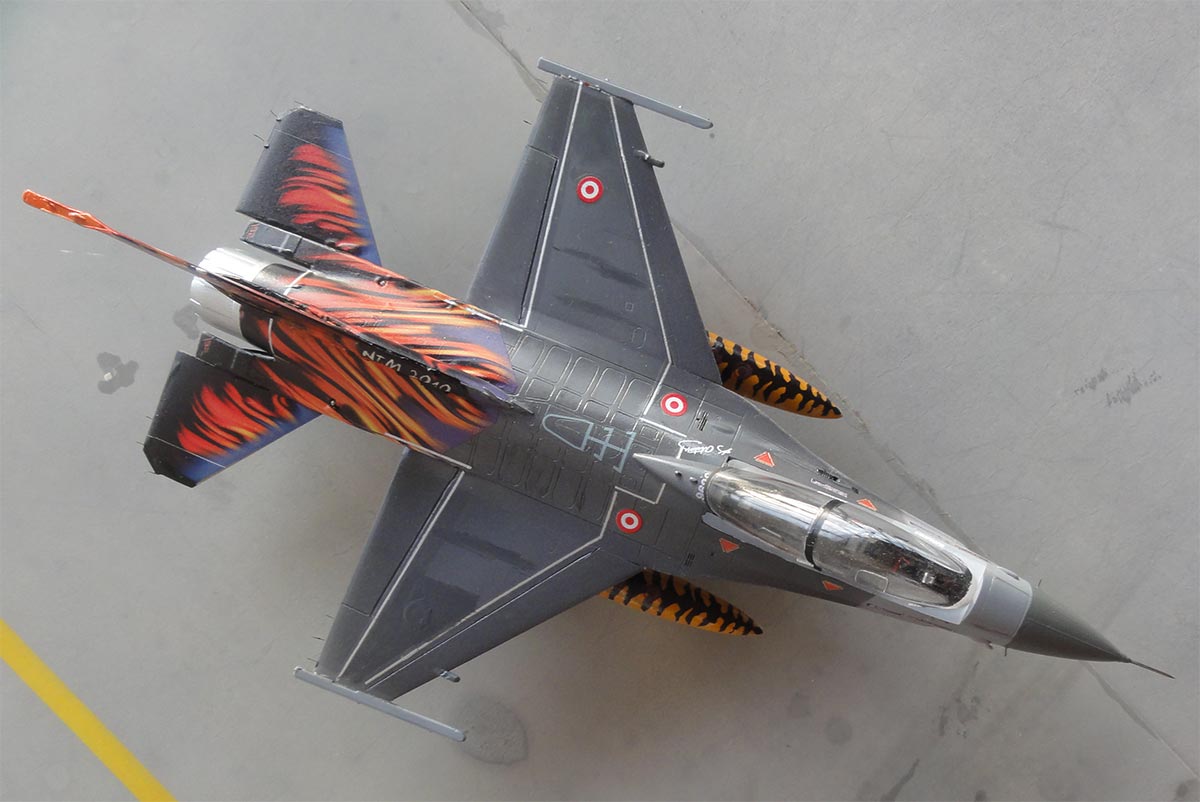
The
Turkish TIGER F-16 scheme has for most part the standard
NATO F-16 Federal Standard colours. At the rear the "flames" and Tiger
Meet 2010 markings are decals and this is shown in the BABIBI instructions (that can be dowloaded from the Babibi website.)
The KAPLANLAR text seen on the tail means TIGERS in Turkish. Note that Babibi shows 2 roundels on top and 2 below of the wing.. it should only be one each.
First airbushed were the lower surfaces FS36375 (airbrushing Gunze Sangyo H308 acrylic), masking done and then at mainly the forward upper fuselage FS36270 (using Gunze H306), and on the rear upper areas and wing FS36118 (using Gunze H305).
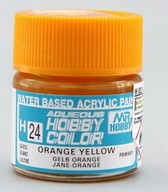
Next for the TIGER at some of the upper rear tail areas and the 370 gallons wing fuel tanks yellow was airbrushed. The yellow is also a bit orange and I found Gunze Sangyo H24 acrylic to be a good match.
Decalling was to be done at this stage for better handling. First the model got airbrushed a few layers of gloss Johnson Future/Pledge varnish coat to prevent decal "silvering".
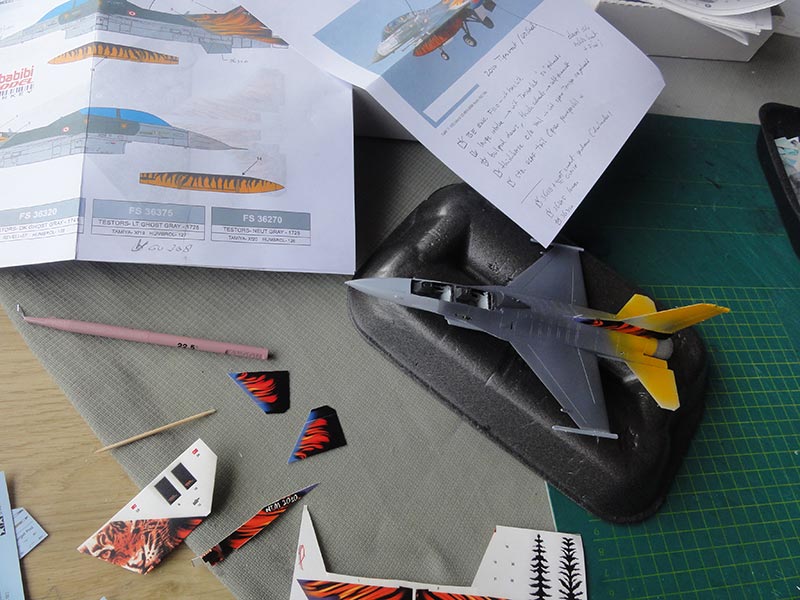
The Babibi decals for the "tiger stripes and flames" are unfortunately rather thick and seem to be a sort of foil. This foil will not adhere to any surface curves nor irregularities. I tried decal softening fluid such as DACO strong but this did not work. I encouraged decal setting by inscribing with a VERY sharp ophthalmic knife the decal foil at many places to get it more settled.

But the result is still not perfect...... so I can not recommend these decals.
At all the upper edges of the tails were a decal did not fully meet the edge, some painting was done with a brush in the appropriate colour like black and orange yellow.
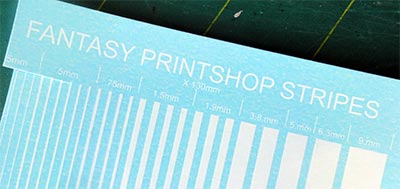
I did not have walkway stripes (probably used on another model) so got very light grey stripes from the decal spare box using thin stripes from Fantasy printshop. And only 4 Turkish AF roundels were added as seen on photos.

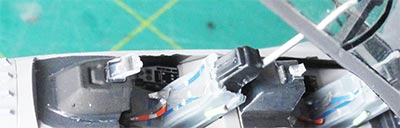
Cockpit seats came from the kit with harnesses added from tape and other bits. On the instrument consoles decals were used as per kit.
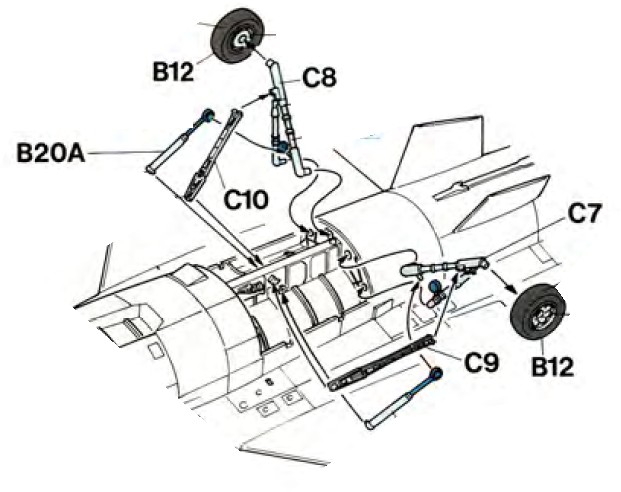
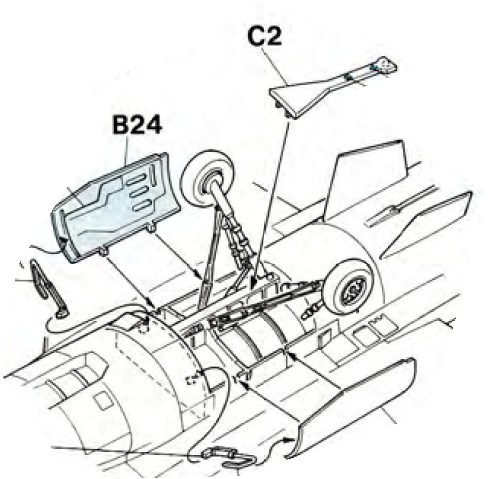
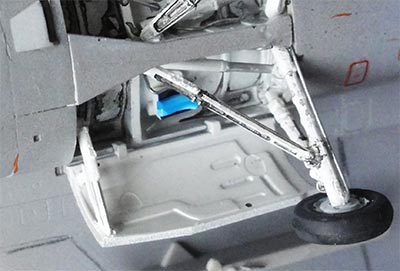
The landing gears were installed after the bay had been painted white on their insides. make sure that the main gear legs #C7, C8 are fitted in perfect symmetry. The home made "bulged" doors were set in place as well.
The standard now yellow tanks with their black TIGER stripes were fitted with the standard pylons.
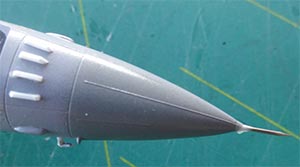
Finishing the model was standard as with the many other F-16 models made. Some 15 static dischargers made from fishing line were installed, a pitot tube made from a needle on the nose and the anti-collision lights painted.
A semi-gloss varnish coat with the usual technique was airbrushed on top in a few thin layers to give an even sheen and protect the decals.
As a final step the two seat canopy was to be set open on this model. Inside the canopy 2x2 handles were added.
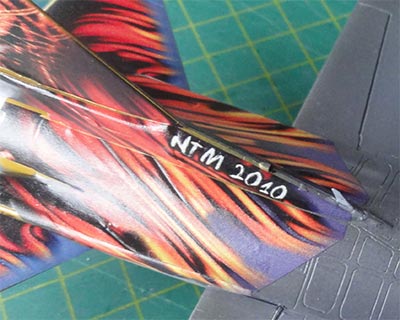
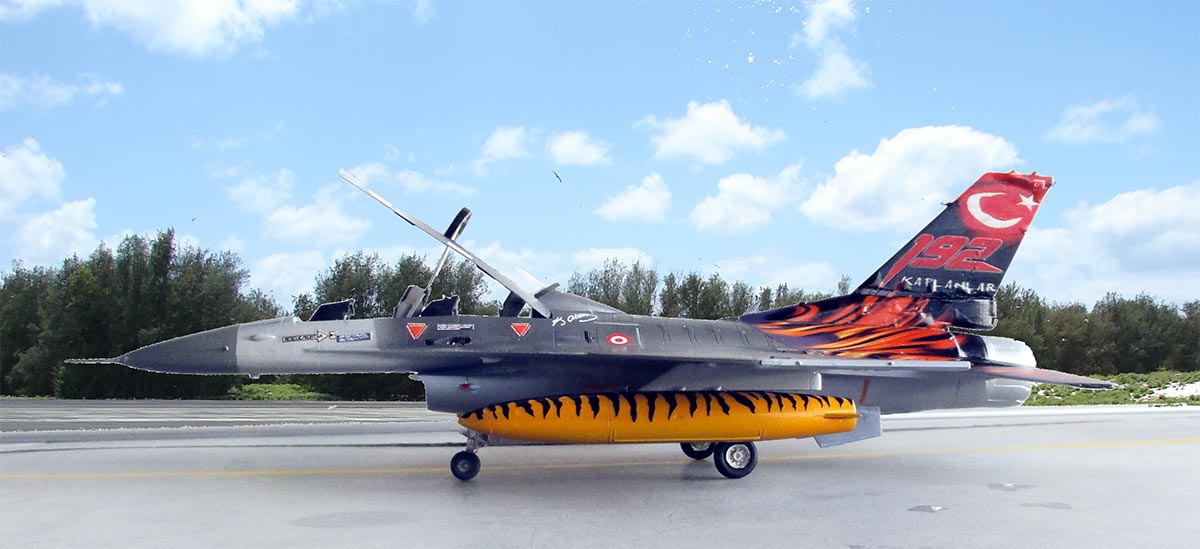
That completed the F-16D Block 50 as seen at the NATO TIGER MEET 2010.
![]()
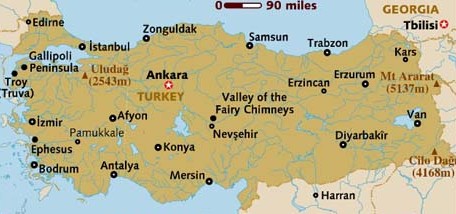
More info about the "Türk Hava Kuvvetleri" here...
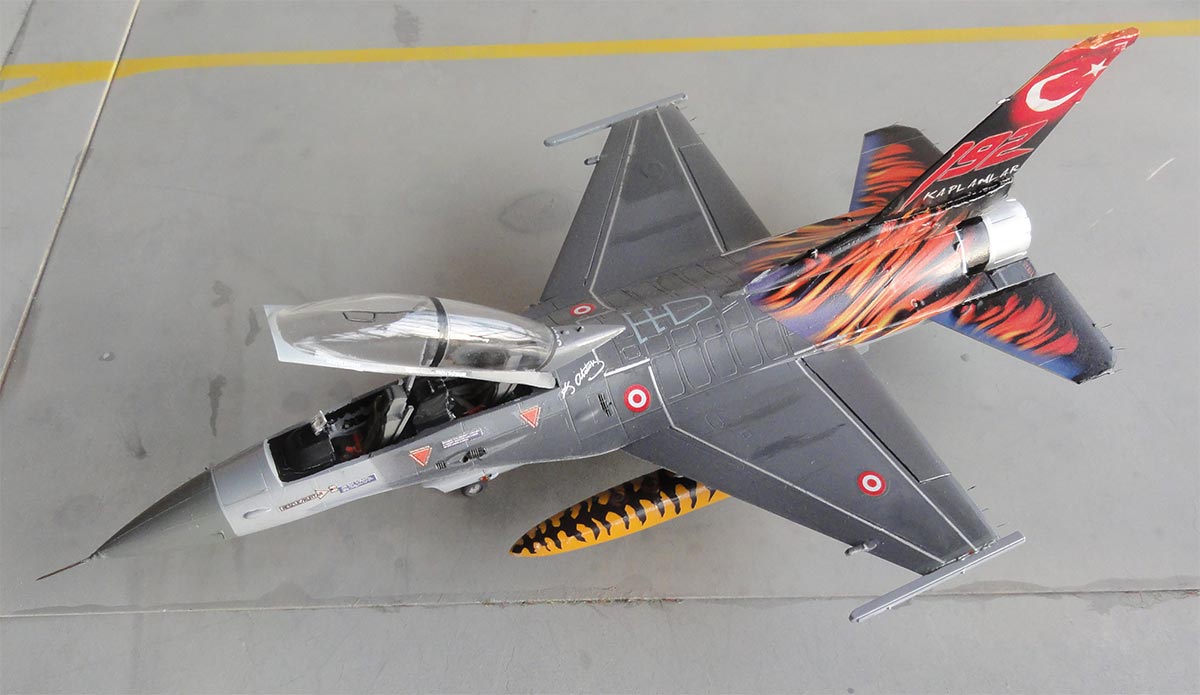
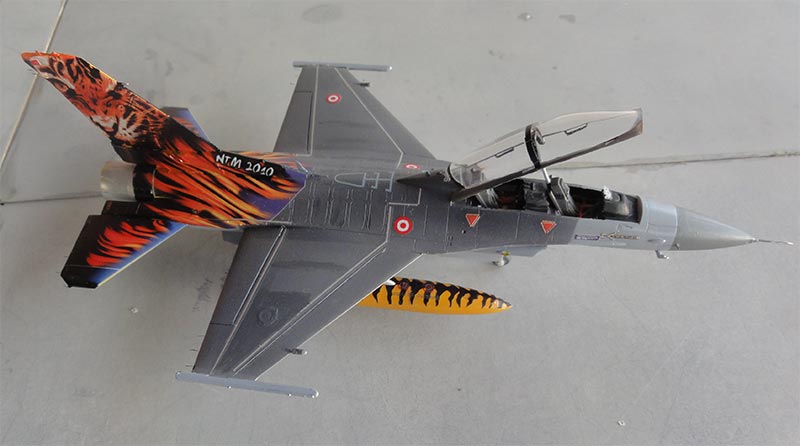
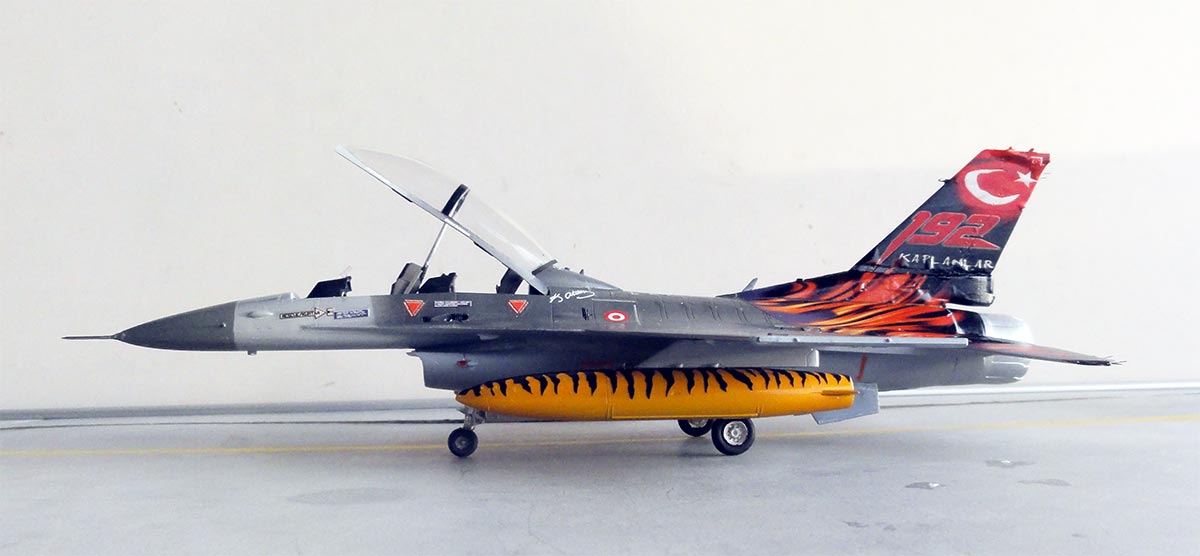
F-16D Block 50 , no. " 93-0696 " of 192 squadron of the Türk Hava Kuvvetleri during TIGER MEET 2010


page 1
page 2
page 3
page 4
page 5
page 6
page 7
page 8
page 9
page 10
page 11
page 12
page 13
page 14
page 15
page 16
page 17
page 18
.....
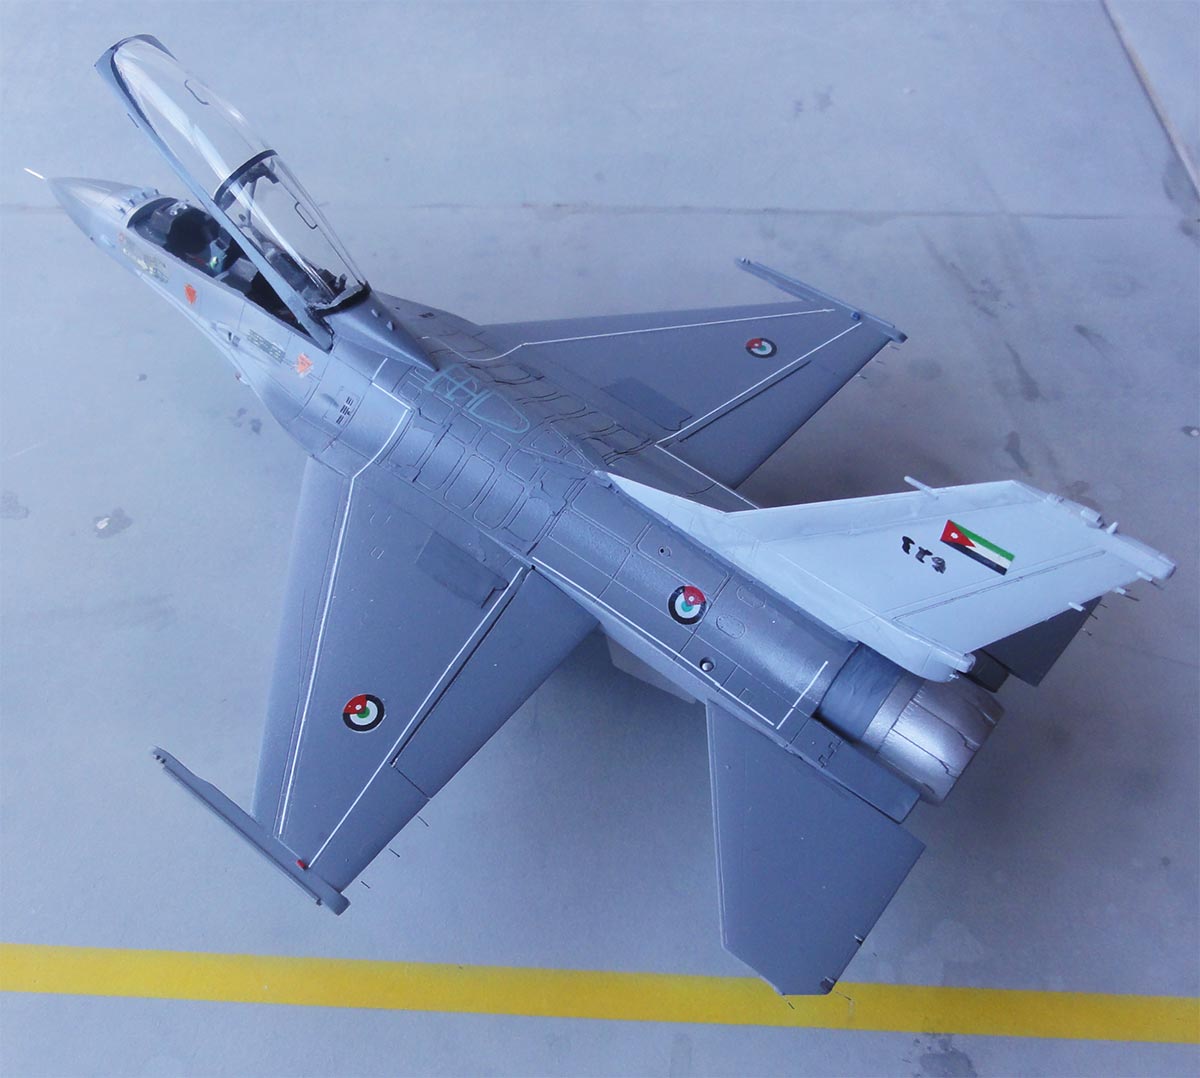
Jordan also uses the F-16 with various Blocks purchased over the years. (See for more details at the end of this article).
 [ 30 ]
A Jordan F-16B would be nice to model... So another old 1/72 Hasegawa F-16B model kit #814 was made, now as an F-16BM (MLU) aircraft. The kit is extensively described on page 5...
The usual Hasegawa kit parts are in the kit with the small air intake. The standard USAF vertical tail is appropriate for many Jordan F-16's though also aircraft may have the longer parachute housing.
The kit has the early LAU-114 wing tip launch rails moulded on the wing tips. Despite that Jordan purchased upgraded MLU F-16's they still appear to have the old style wing tip missile LAU-114 launchers (as provided in the kit, so no modification needed here).
Just a few modifications are needed but can be applied later on. So the kit was made as per Hasegawa instructions but again I made the intake deeper by cutting off the rear section with a razor saw.
Align as with all Hasegawa F-16 kits the wing halves correctly.
After basic assembly, the model got a base grey coat. All looked good and the Jordan F-16's appears to have retained the "standard" NATO F-16 grey camouflage.
So airbrushed were:
- lower surfaces FS36375 (airbrushing Gunze Sangyo H308 acrylic),
- mainly the forward upper fuselage FS36270 (using Gunze H306),
- on rear upper areas and wing FS36118 (using Gunze H305).
- radar nose was airbrushed a bit darker grey using approx FS36231 (Gunze H317).
As the model was to become a F-16 MLU, some small modifications were now done (you can also do these earlier):
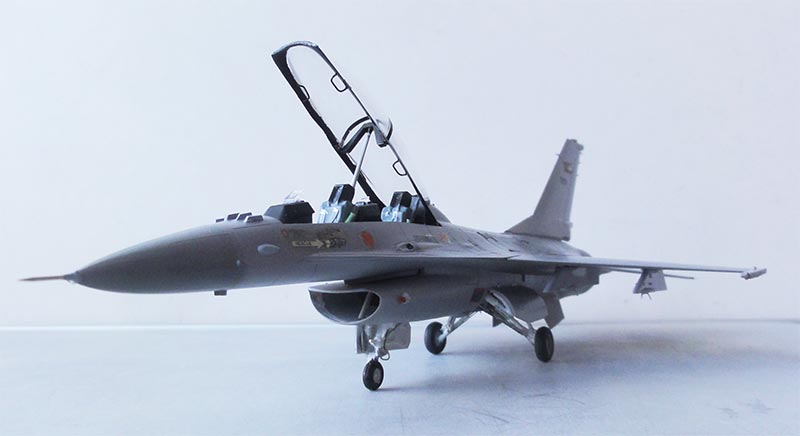
- [1] adding the IFF antennas "bird slicers" in front of the canopy; I did not have a spare part so made these 4 antennas from thin card cut in the correct shape as seen on many other F-16 kits made.
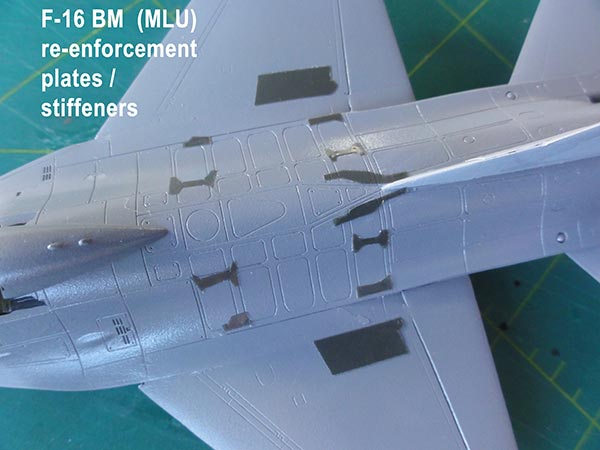
- [2] adding stiffener re-enforcement plates on the central fuselage and inboard wing roots; I did not have an etched metal set anymore so the stiffeners were made of bits of masking foil cut in the correct shape using the KLu F-16 MLU model stiffener pattern. (Note: alternatively Model Maker also has an aftermarket foil set #CV72001 for the F-16 stiffeners).
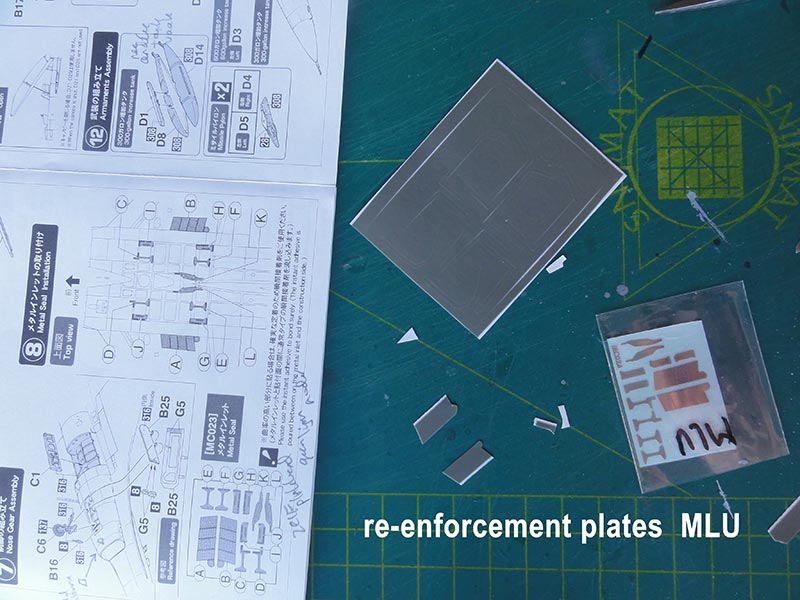
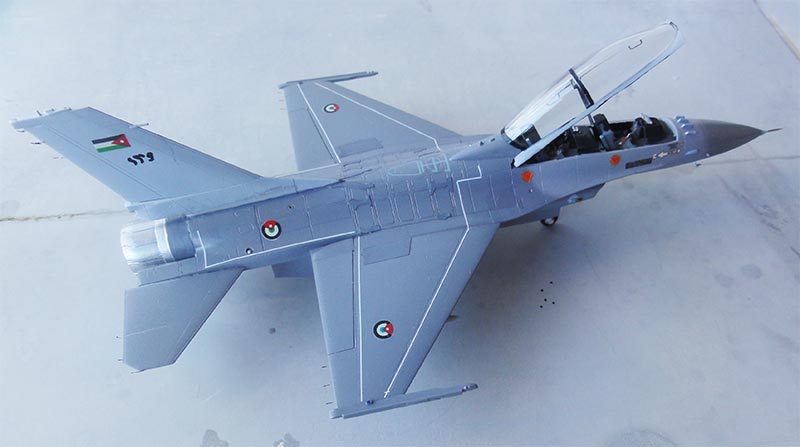
.... with these added.... still to be over painted.
The Jordan air force roundels and the flags were hard to find. I was lucky to have a couple of old 1/72 Airfix Westland Scout helicopter kits #01042 that have these roundels as one of the scheme choices. All appear also to have a good size for the F-16 model. I needed 3 Scout decal sheets though to get the 3x2 roundels.
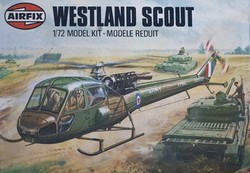

These Airfix decals were quite old so to make sure they would remain intact, a gloss Microscale Liquid Decal Film was paint brushed over them. All roundels were cut out with small scissors and set onto the model without any problem.
Before applying the decals the model got airbrushed a few layers of gloss Johnson Future/Pledge varnish coat to prevent decal "silvering".
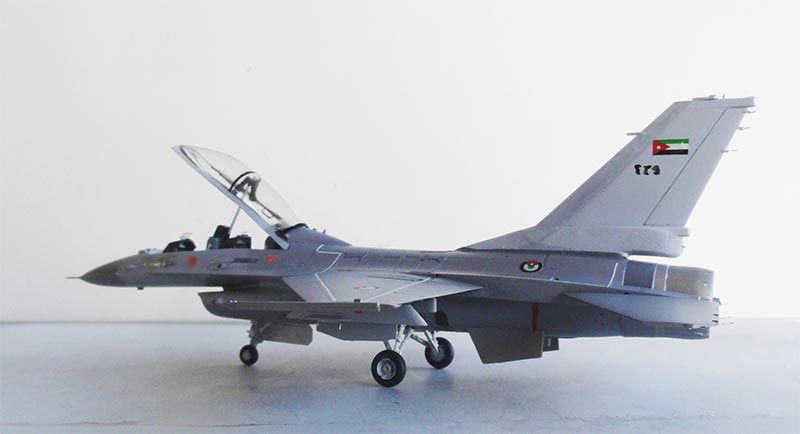
On this model the walk way lines were also needed. These were made from thin white/ light-grey lines from a Fantasy Printshop decal sheet but can also be found in various F-16 decal sheets. The standard F-16 "warnings, stencils and markings" came from various F-16 sheets. The small "arabic aircraft number" on the tail was hand painted with a fine brush in black looking at a photo.


The model was finished the usual way with installing the landing gear with the flat main doors. On the gear legs hydraulic lines were added made from tin metal wire. The landing lights were however cut of from the main gear legs and the lights package repositioned inside the from nose gear door typical for the MLU and later F-16 Blocks. Some paint "wash" was also added inside with a brush.

It was decided to only fit some pylons below the wing, so a "clean" configuration. These pylons had simply been airbrushed the lower colour (FS36375) earlier.
The cockpit got the kit ejection seats but with some harnasses added. Inside the instrument decals were added as per kit.
To get a nice overall sheen the model got a semi-gloss varnish coat airbrushed on Johnson Clear/Pledge with 10% added Tamiya Flat Base X21 mixed in and 10% Iso Propa Alkohol (IPA) and one drop of glycerine to improve flowing.
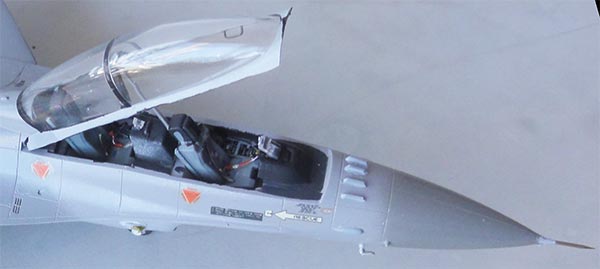
Almost done.... the canopy was set in place after it got inside the 2x2 handles and the inside of the frames were painted black. The central canopy frame running of the transparant section was simply made of a black decal.
That completed another nice F-16 model.
JORDAN
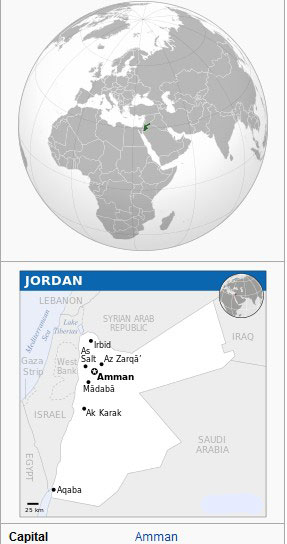

[area 89,342 sq.km | population 10,2 million | capital: Amman | nominal GDP per capita USD 4,300]
Jordan was before the Second Word War in the British Middle East Protectorate but became independent in 1946. September 1955 the "Arab Legion Air Force" became the Royal Jordanian Air Force "Silāḥ ul-Jawu al-Malakī ’al-Urdunī."
The air force was British oriented and the first jets were De Havilland Vampires and other types like transports like the Miles Marathon, Vickers Viking, Rapides and Doves. Some Harvards and Chipmunks were used for pilot training. By 1958 the British RAF was completed withdrawn for the region. End 1950s some 24 Hawker Hunter F6 fighter jets arrived and a few years later even ex-Taiwanese Lockheed F-104A Starfighters (?). During the Six Days War of June 1967 with Israel many Hunters were lost and additional Hunters acquired, often second hand including some 35 FGA.73, 73A, 73B and 3 T.66B trainers. Even in the 1970s some former ex-KLu/ Royal Netherlands Air Force Hunters were acquired. Many of these Hunters went on to Oman from 1975 as some 30 Northrop F-5A jets and 6 F-5B trainers arrived, many ex-Iranian from the Sjah of Persia. Later on quite some modern Northrop F-5E/F Tigers were purchased: 61 F-5E and 12 F-5F (and many of the older F-5's going to Greece).
Helicopters used were Westland Scouts, Whirlwind and a few Alouette III. A dozen Scottish Aviation Bulldog mk.125a were used for training as well.
In 1979 a sort of peace treaty was agreed with Israel and Egypt bringing more stability in the region. From France Dassault Mirage F-1 aircraft from 1982 replaced the old F-104 Starfighters with some 17 F-1CJ and 2 F-1BJ trainers delivered. The August 1990 - February 1991 Gulf War with Iraq invading Kuwait led to drastic problems with spares and..... several F-5E Tigers were apparantly sold to Singapore.
In 1994 a stable peace agreement was settled by Jordan with neighbouring Israel. The USA started to support the Jordanian armed forces and the Air Force saw the first delivery of the F-16. The first F-16A and F-16B aircraft arrived with the US "Peace Falcon" programs from end 1997. This comprised 12 second hand F-16A Block 15 converted to ADF standard and a F-16B. (the ADF version can be recognized by its pretty long and bulky fairing on both base sides of the vertical tail). It appears that later on some 17 additional F-16 ADF aircraft were purchased. More F-16's were needed and it was decided to purchase used ex-NATO F-16AM and F-16BM aircraft that were up to MLU standard from The Netherlands and Belgium. Some first aircraft arrived from 2008 with 18 F-16AM and 7 F-16BM from Belgium and starting in 2017 from The Netherlands some 13 F-16AM and 8 F-16BM. The Royal Jordanian Air Force no. 1 and 2 squadrons fly with these F-16's that can be seen with variations in the tail configuration with or without the long parachute fairing. As noted, overall some 79 F-16 aircraft were acquired second-hand. February 2022 the US agreed to supply some 16 brand new F-16C/D Block 70. End 2022 some 10 Air Tractor AT-80 light attack prop aircraft will be delivered.
Other aircraft in the Royal Jordanian Air Force are transport types like the C-130 Hercules and CASA C-295 as well as a few Ilyushin IL-76 freighters. For training some BAe Hawk mk.63 are used, PC-21 and Cessna's. Helicopters used are heavylift Mi-26, the UH-60 Black Hawk, AH-1 and some MD-530.

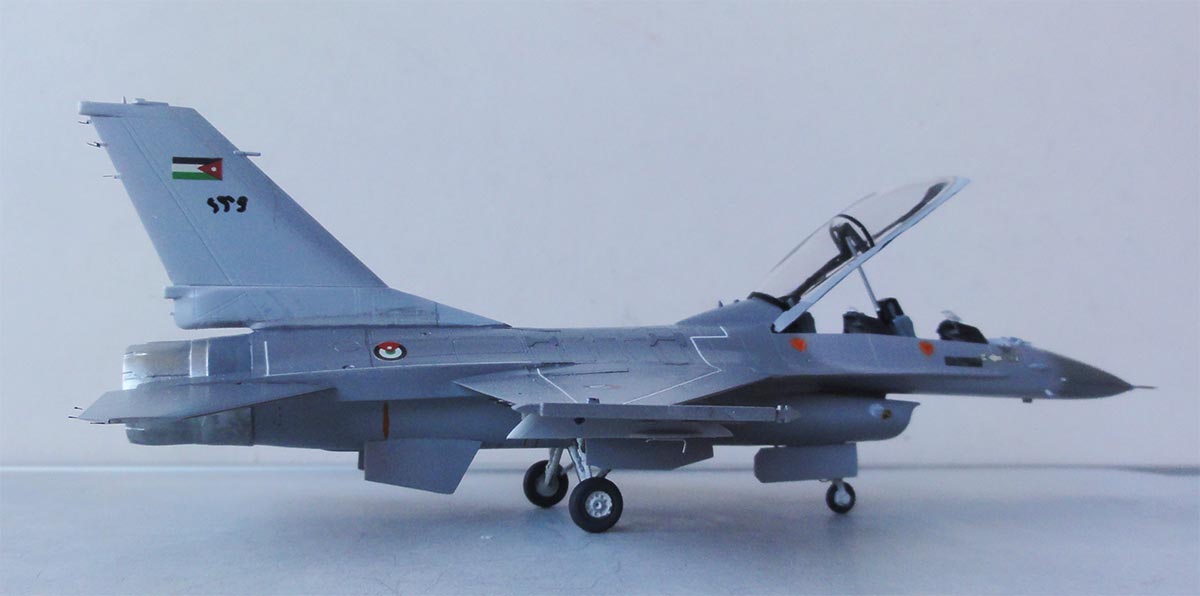


 ... at Salti air base, Jordan...
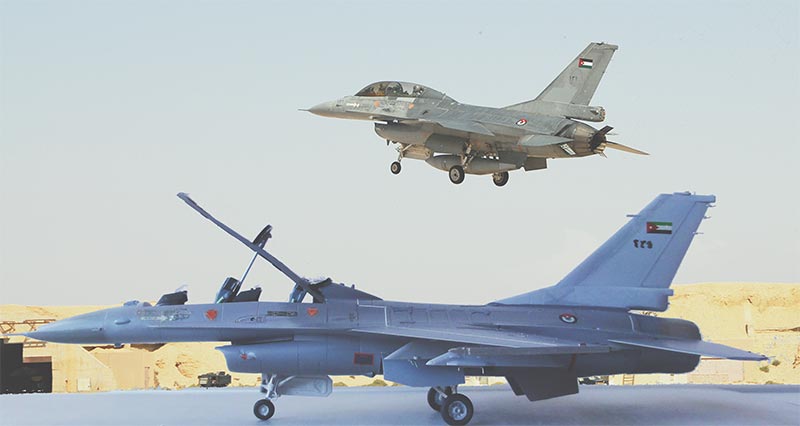

(c) Copyright "designer"/ All rights reserved. Your comments are welcomed by webmaster
Created this page
March 14, 2019