[ page 2 ]
General Dynamics F-16 in 1/72 scale : kit review & modelling report
.. continued from
page 1...
..
 [4]
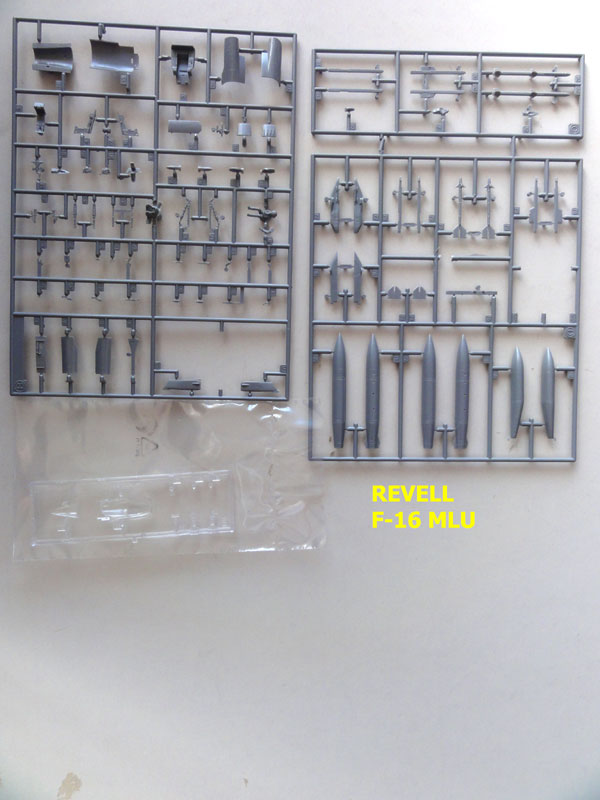
[4] Revell issued a very nice kit #04612 for a F-16A MLU in 2000.

This very good kit can be recognized (from the older Revell kit) as the upper fuselage has two halves: a forward nose section and the rear section with integrally moulded wing.
The nice thing of this kit is thus a single full piece for the wing, so no filling and alignment needed here!
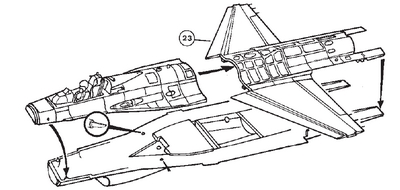
The parts include the initial earlier Pratt and Whitney F100 engine parts with the initial normal air intake, the normal wheels #46 and initial normal (non-bulged) gear doors. Panel lines look correct for the early F-16 blocks.
(The kit was also issued as a two seater F-16B with a separate sprue for the other upper nose; more on that in future kits to be made).
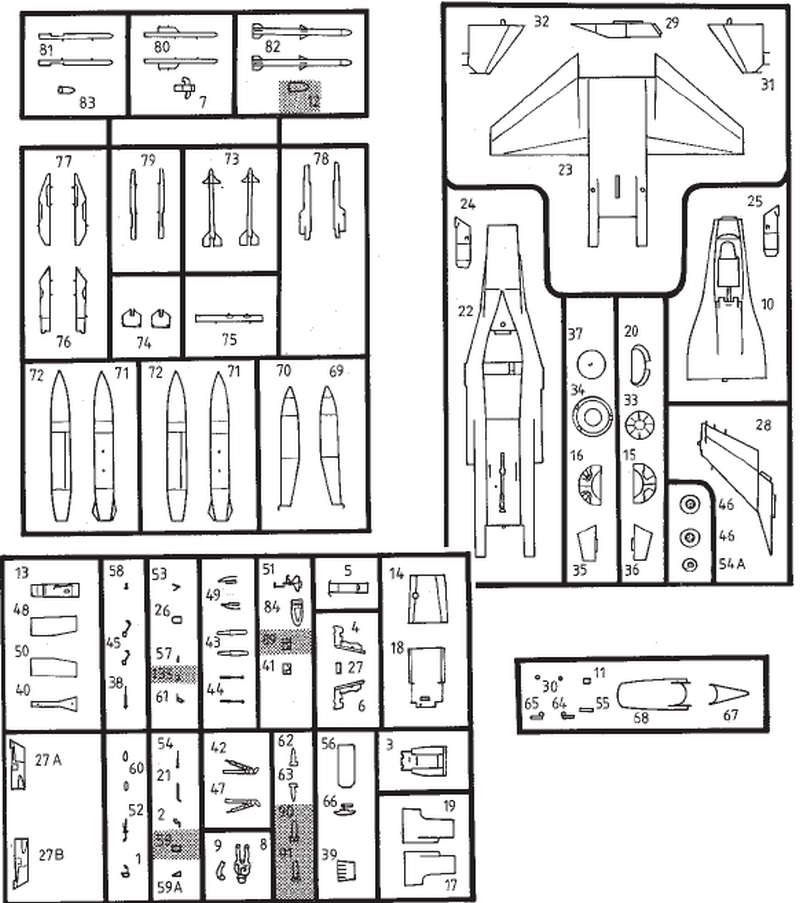
Spare parts are the different intake stubs #90, 91 with anti-collision lights and 2 styles of gun port panels, for the older F-16 Blocks and the later Blocks (so a spare one #12 like for the F-16C).
The stores in this Revell kit are I think AIM-120C AMRAAMs, AIM-9L/M Sidewinders with the later LAU-129 wing tip missile launch rails. The stores look to be accurate.
The Royal Netherlands Air Force also used older AIM-120B AMRAAMs and these had bigger fins: when AIM-120B are needed, you may get these from e.g. Hasegawa weaponset X72-9 or Hasegawa F-16CJ kits.
The very good Revell parts are seen here.... 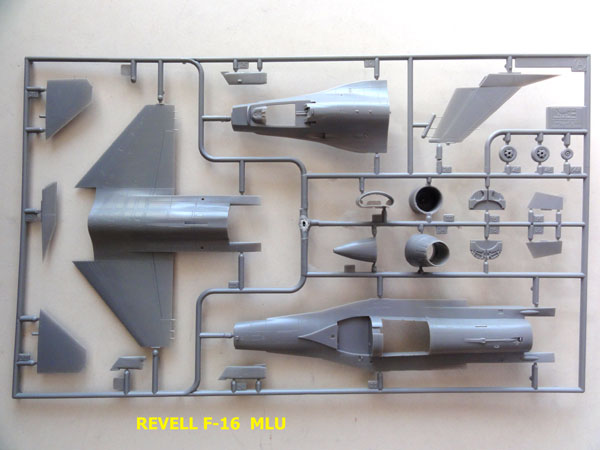
NOTE:
I have also seen complete different
part layouts for another Revell F-16A kit such as #03971 where for example
two types of stabilizers are in the sprues...; these are thus not the same
kits! I have no clue if #03971 is a complete different kit.
A few of these latest kits will be made.
page 1
page 2
page 3
page 4
page 5
page 6
page 7
page 8
page 9
page 10
page 11
page 12
page 13
page 14
page 15
page 16
page 17
page 18
page 19
page 20
page 21
page 22
......
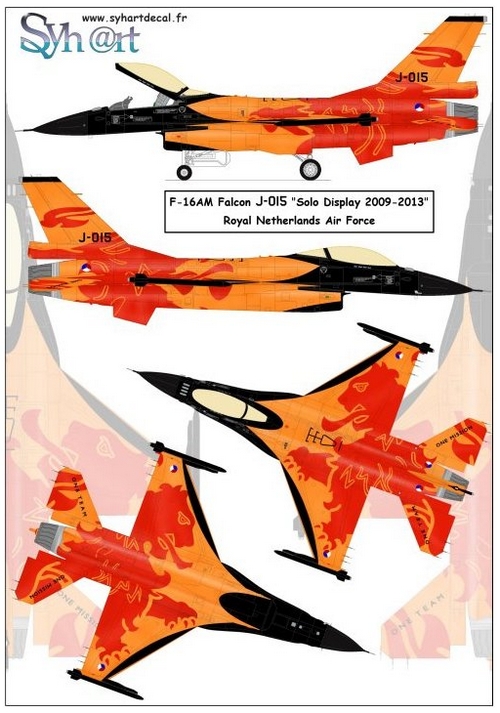
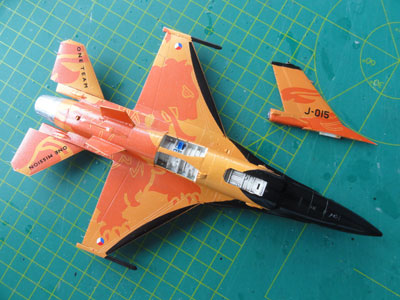
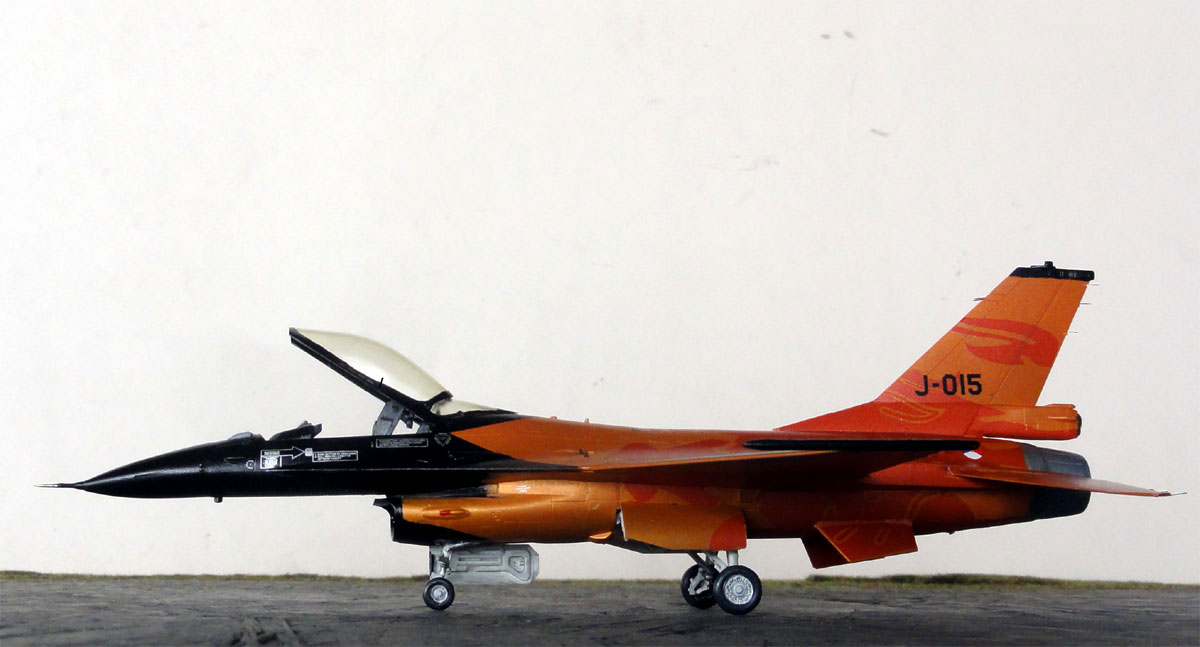
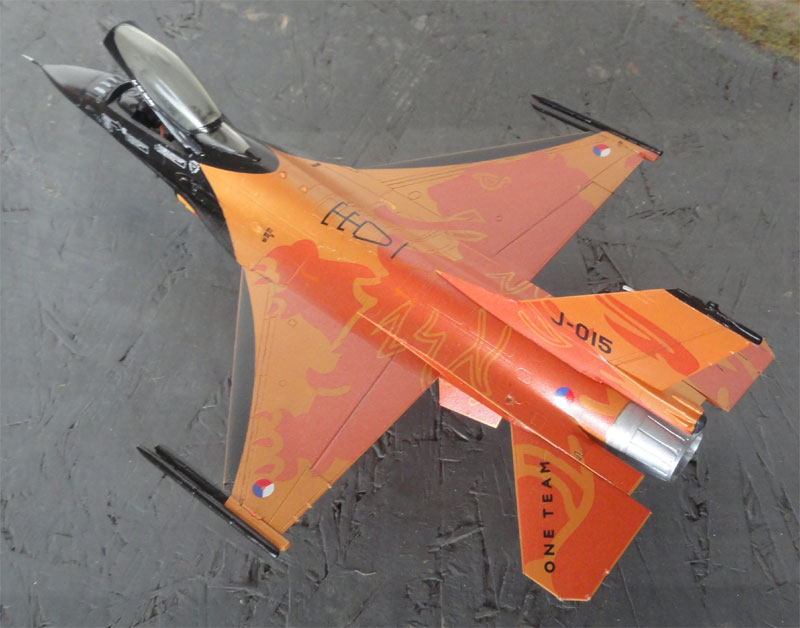
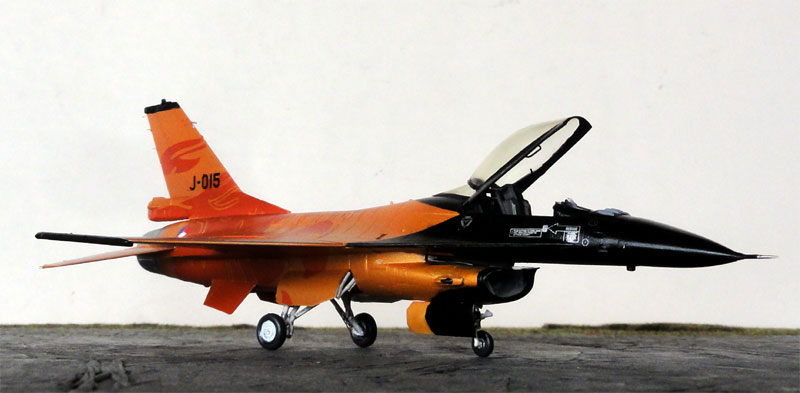
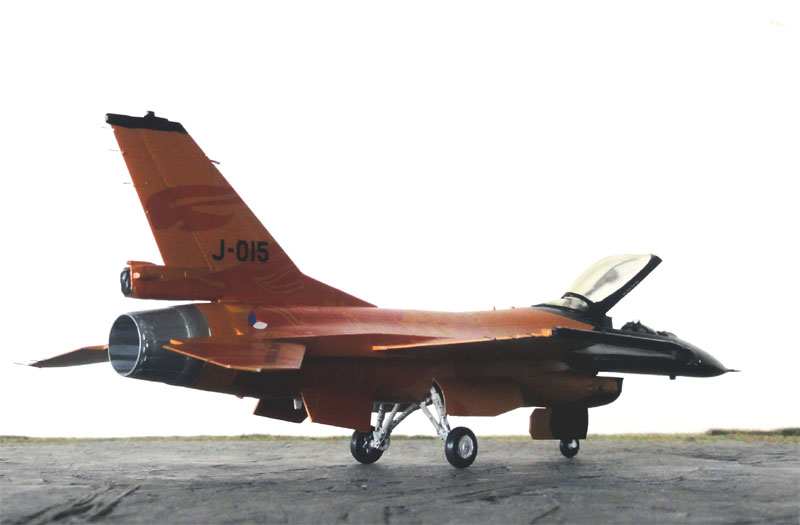
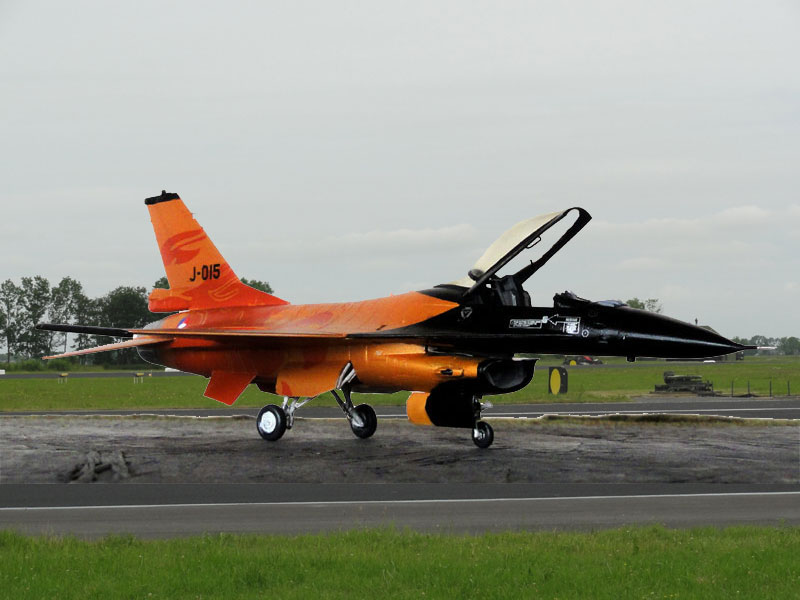
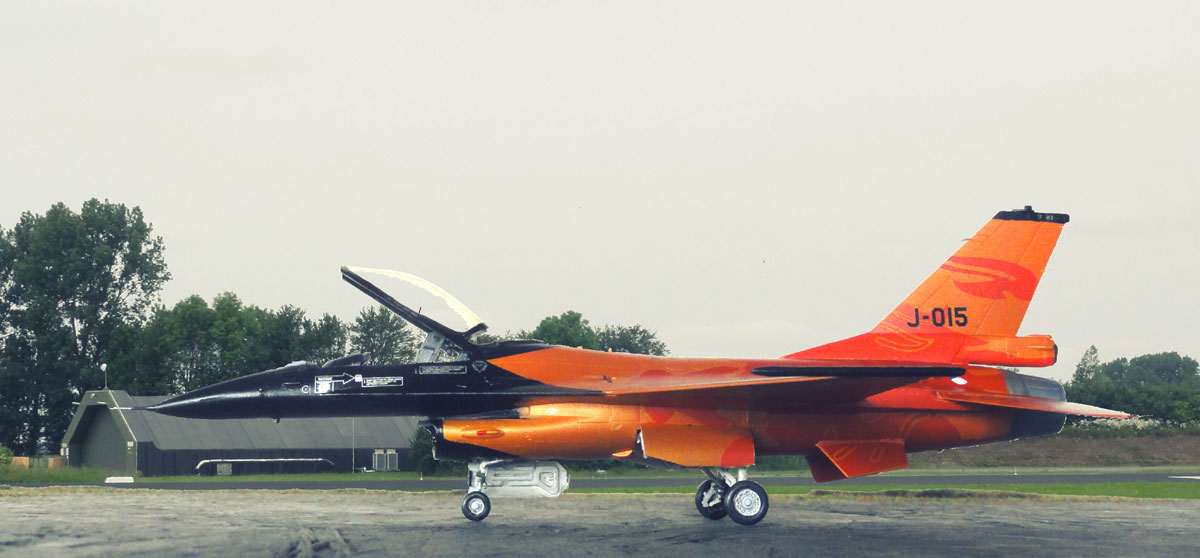
The above described Revell kit #04612 from 2000 was released as kit #03980 in 2014 and has the same parts. But it now came with a nice set of full decals for a Royal Netherlands Air Force Solo display orange demonstration F-16A Block 20 MLU aircraft with the typical Dutch "Orange Lion" solo display markings.
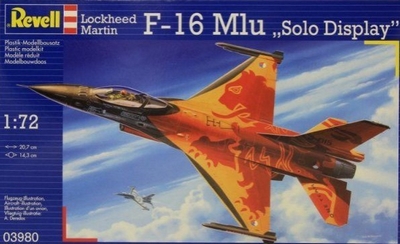
The Revell F-16A MLU kit is very fine with nice engraved panel lines and fine parts. There is a choice of IFF antennas on top of the nose or not and different rear tail fairings. Different types of gun port panels and anti-collision light fairings on the intake are provided as well as the later LAU-129 wing tip launch rails.
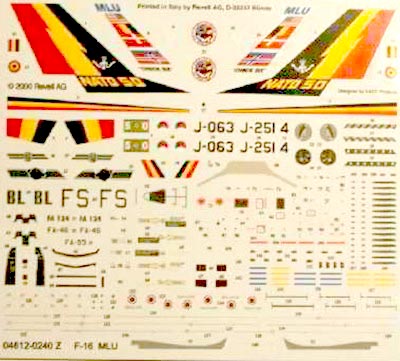
The Revell decals provided are very
good and probably the design was done by Syhart.

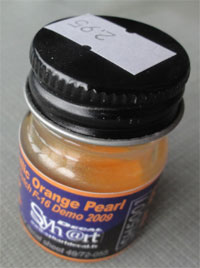
But I also purchased the Syhart decal set itself and the special metallic orange enamel paint #SH5001 of Syhart. The decals set of Syhart is a bit more "orange" and looks a bit more convincing than the Revell kit decals. But the Revell Dutch roundels on the other hand look slightly better.
I will also use the special Syhart
orange pearl paint.
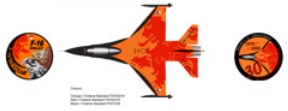
The scheme is seen here...
The model was simply assembled as
per instructions. I ensured that the upper fuselages halves were glued
first without any amidst ridge ans so to avoid filling and sanding. The cockpit interior
colours for the aircraft upgraded to MLU standard contains large portions
of black to avoid blinding the pilot when he/she is wearing night vision
goggles.
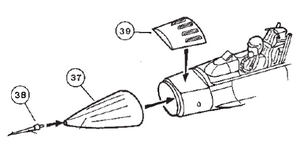
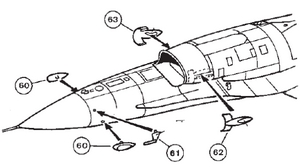
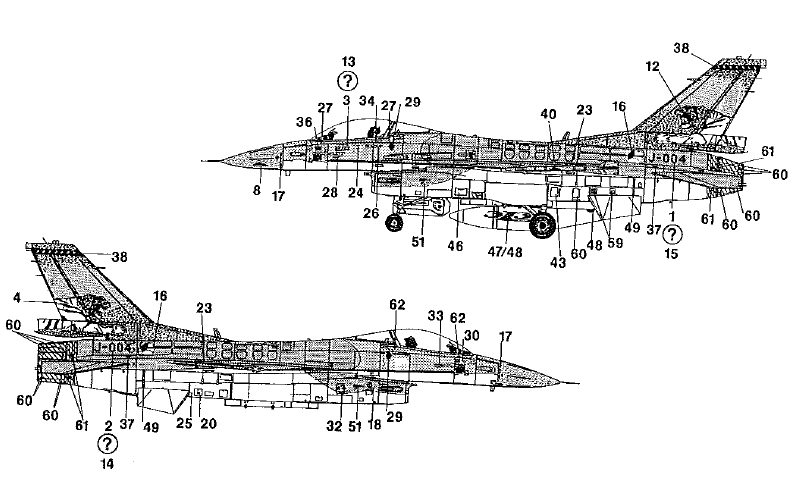
(0) The Royal Netherlands Air Force
F-16A/B type long rear tail base fairing with parachute is nicely provided in the kit
(as parts #27A and #27B ). The intake lights #62 and #63 should be a bit
adapted by cutting off the forward flenges. The little stubs for the ECM
pod can also be removed from intake halve #17. For the MLU use the applicable IFF
antennas, so part #39 is to be used.
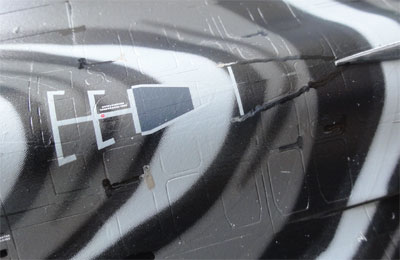
The
F-16 MLU also got some stiffener re-enforcement plates
on the upper fuselage for strengthening the airframe during the update.
Note that these plates may differ depending on the specific block and
maintenance done per air force and even individual F-16. Check out the
usual layout/ pattern on this 1/32 page here....
These stiffener plates are thin in 1/72 scale, these will be suggested later on with painting. (I know there are thin after market sets for them but these are not really needed as the plates are 1/8 mm thick in scale; in some later Hasegawa kits like the ADF kit they are included as metal stick-on foil as well as in some Modelmaster decalsets).
Assembly went on quickly with hardly
any filler. No pylons nor stores will be fitted. A base grey coat was airbrushed
to check for any flaws. When OK, following the paint instructions, first
a couple of coats of orange was airbrushed using the Revell
Aqua #30 Orange as an underlying
base coat. Do not forget to airbrush the gear doors as well.
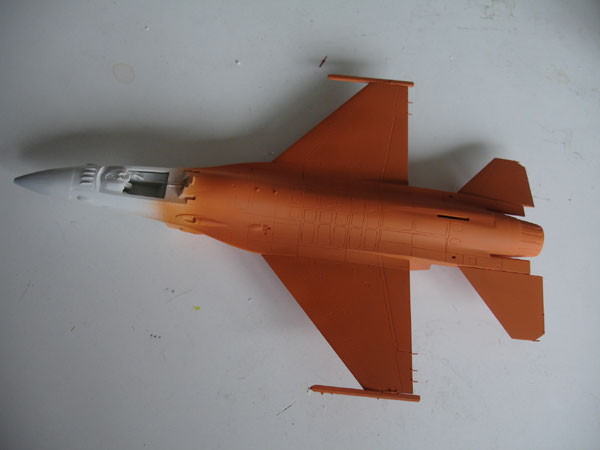
..... and also the lower areas
 ..
..
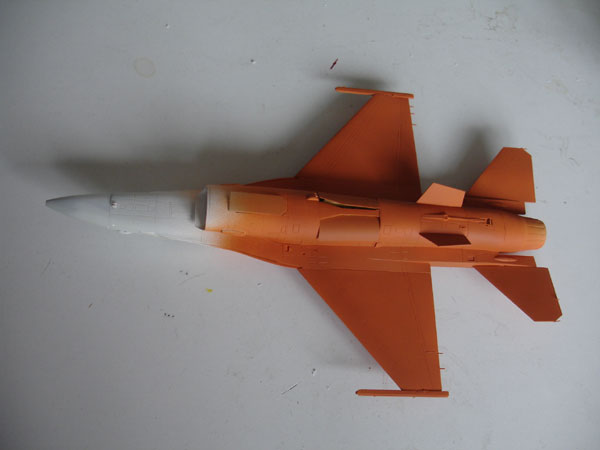
When dried, next followed the special
Syhart
SH5001 orange pearl paint. This needs only a few airbrushed
coats to cover because of the orange Revell undercoat. The overall model
was left to dry for 72 hours.
The orange areas were masked to airbrush
the forward fuselage to the exact black pattern with the black paint using
Tamiya
X18 gloss black. For the wing edges, decals from Revell are provided
so this is much easier to be done later. The result is seen here...
Note that the tail will be fitted
later on.

The gloss paint is good as base for
the decals. This was done and it took about 3 hours to get all the Syhart
decals and a few Revell used decals in place.

The decals have accurate dimensions,
but sometimes I cut a decal is several parts to ensure a good fit. Plenty
of DACO decals setting solution, the "strong one", was also used
to persuade the decals to get onto the surfaces.
 .....
.....
The results are good. Note that I
used the Revell roundel decals.
The final assembly
of the smaller parts was as per instructions but please note:
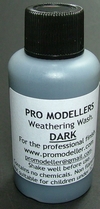
(1) The main gear legs are bit awkward and a few extra details from thin wire added in the gear bays. The normal (non-bulged) doors and standard wheels are in the kit and correct for this scheme. Some PROMODELLER black wash was applied inside the gear bays and on the gear legs. But the remainder of the aircraft is splendidly clean!
(2) The vertical tail with the long parachute fairing was fitted and any tiny gaps filled with white glue, this needs no extra painting. The MLU type stiffener plates on the upper fuselage was handpainted with a fine brush in orange.
(3) The nose pitot was made from a metal needle.
(4) The anti-collision lights on the intake and wing tips got a drop of blue and red paint followed by a drop of Micro Kristal Clear.
(5) Inside the exhaust pipe, horizontal "fume burn stripes" were hand painted using white paint to suggest the ceramic coating.
(6) the stiffener plates (as noted above) on the fuselage top were suggested by painting these in orange with a fine paint brush.
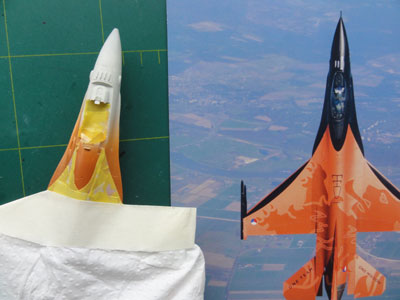
(7) The canopy got a slightly yellow "glow" on to it as seen on most later upgraded Dutch F-16 aircraft and this was achieved with a airbrushed thin mix of Tamiya X24 clear yellow and acrylic varnish.
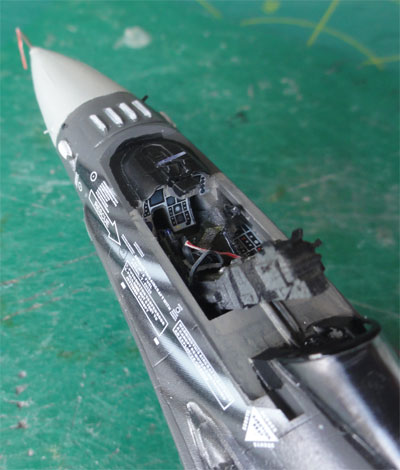
(8) Inside the canopy, 2 handling side bars were added made from thin black coloured plastic "stretched sprue". These are always seen in the lower inside F-16 canopy frame. For the MLU, in addition a tiny stretched sprue rod was added in the left mid section, this is the helmet cue'ing position sensor. Also, the HUD display was added as per kit (HUD styles may vary per F-16 block).
(9) The wing tips and stabilizers static dischargers extended bits are too thick I feel so cut off and replaced these with thin fishing wire painted black.
(10) "Smoke winders" were fitted on
the wing tips. There are variations seen and often with no fins. On the
real plane there is also a significant gap between the rail and the Smoke winder, so this was retained.
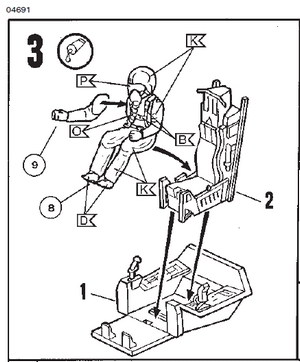
(11) this Revell kit ACES ejection seat looks good and got some harness straps made from painted
tape. The seat was simply fitted in the cockpit as well as some decals
for the side consoles and instruments.
(12) on the radar nose, very thin "lightning evasion strips" are seen but in 1/72 these are so thin that I did not bother further.
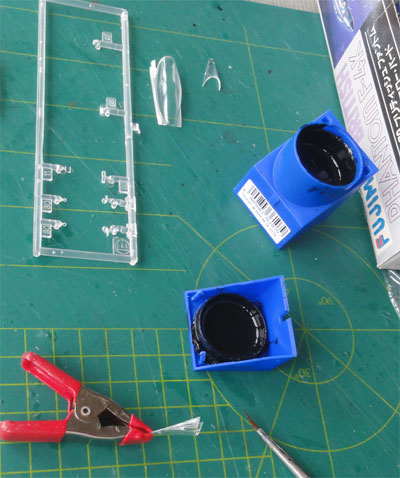
The model now got a gloss varnish coat, this will give an even sheen and will protect the decals. A coat of Johnson Future/ Pledge was applied with the airbrush is several thin layers using the usual technique...
The canopy frames were hand painted
gloss black with a fine paint brush. The canopy was set open and the rear
glass section set in place with white glue.
..
..
.... and on Leeuwarden AFB in the North
of The Netherlands....
 ..
..
.
For information
on the real KLu display team, check out their website at http://www.f16demoteam.nl
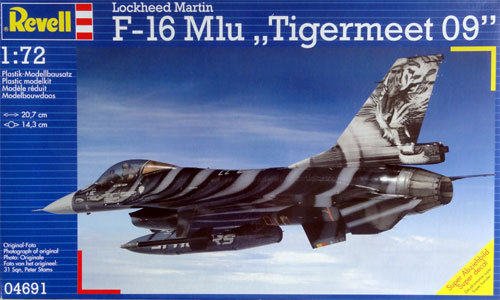
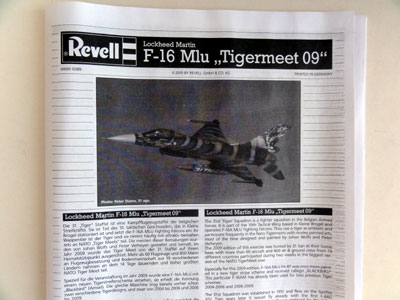
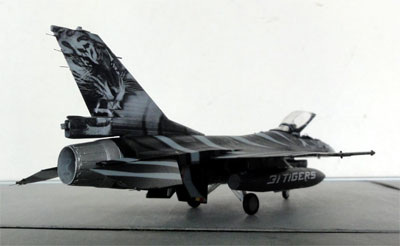
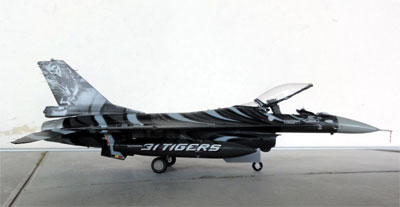
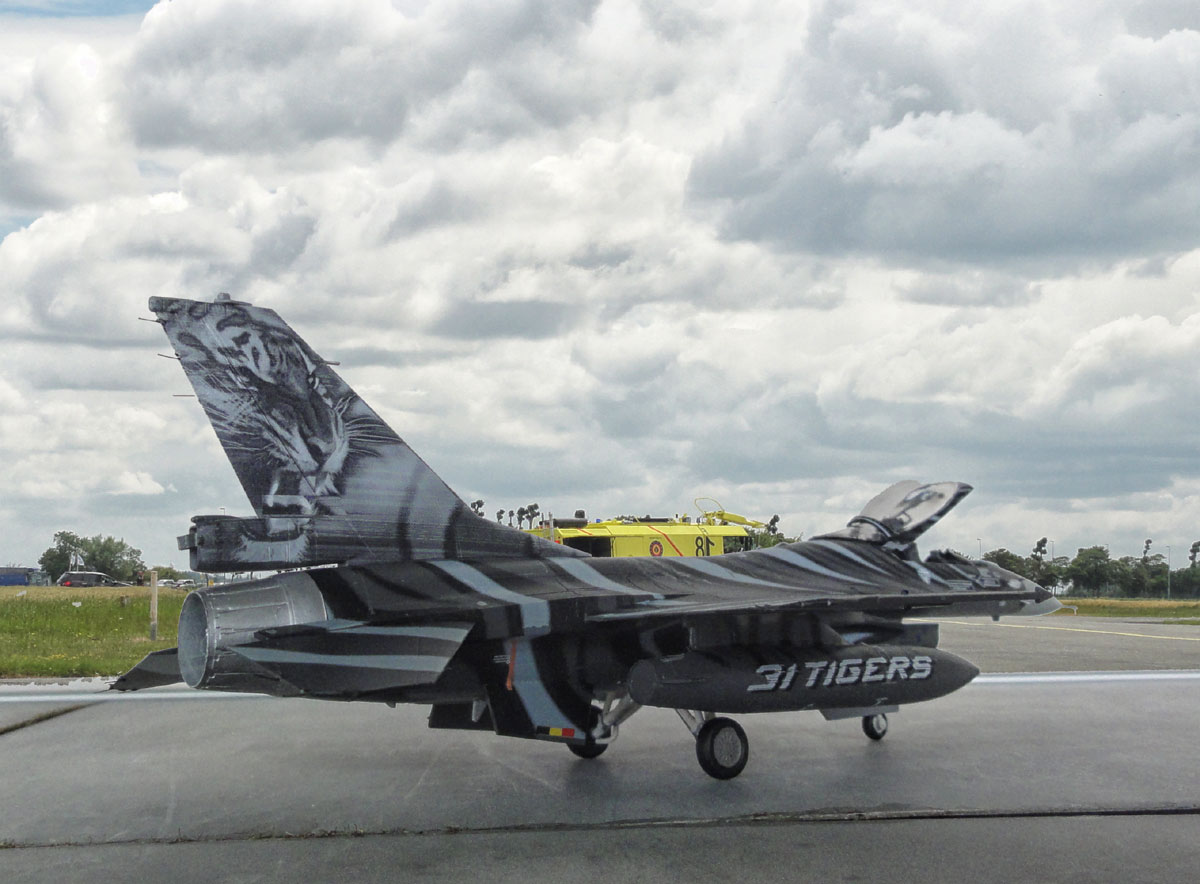
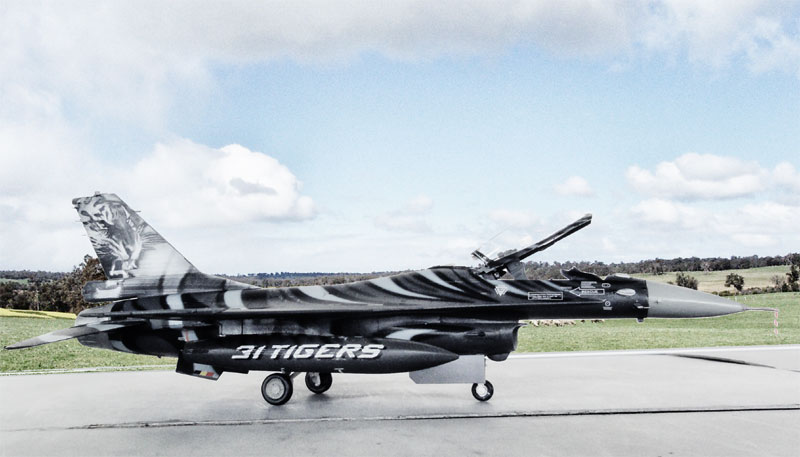
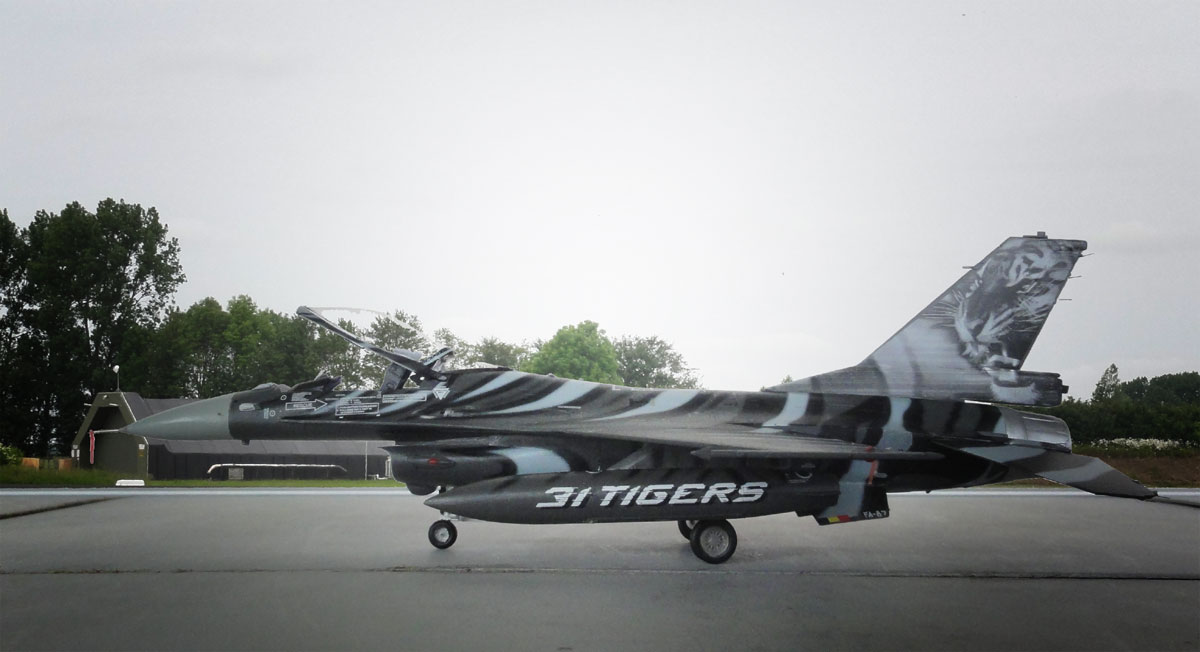
[5]The new Revell kit later also appeared in other boxes with new decals like Revell kit #04691 for a NATO Tiger meet 2009 Belgium Air Force (BAF) aircraft.
This kit release is from 2010 and has the same parts as kit #04612 from 2000. The kit has the correct Pratt and Whitney F100 engine exhaust and smaller normal air intake for the BAF F-16A Block 15 MLU coded "FA87" aircraft. The engraved panel lines also look correct. The kit has the appropriate later LAU-129 wing tip launch rails.
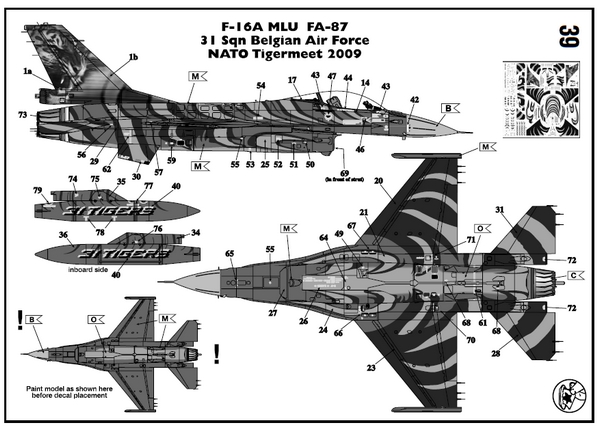
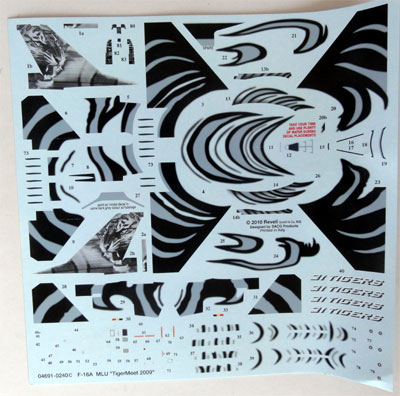
The decals for the Black-grey NATO
Tigermeet 2009 Belgian F-16A of no. 31 squadron coded "FA-87" scheme
are included and very nice with full markings.
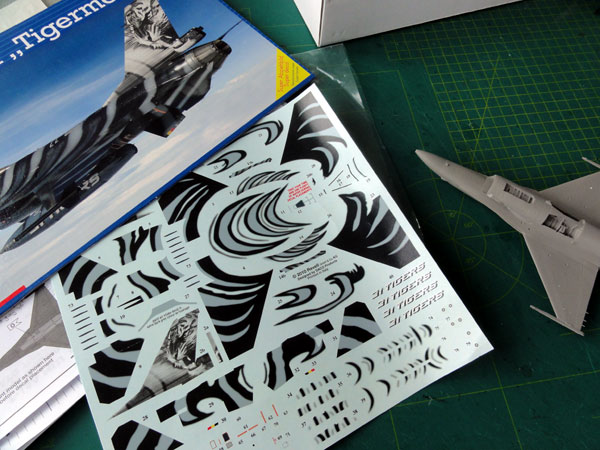
The scheme adapted was as per kit with a vey nice TIGERMEET 2009 scheme and the kit was assembled as per instructions also using the kit experiences from above.
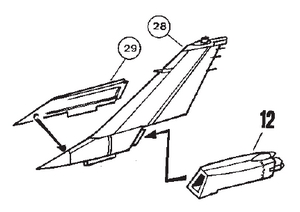
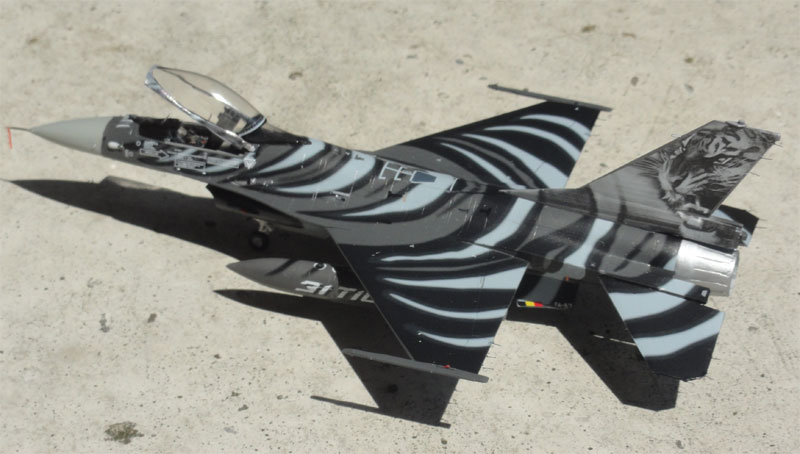
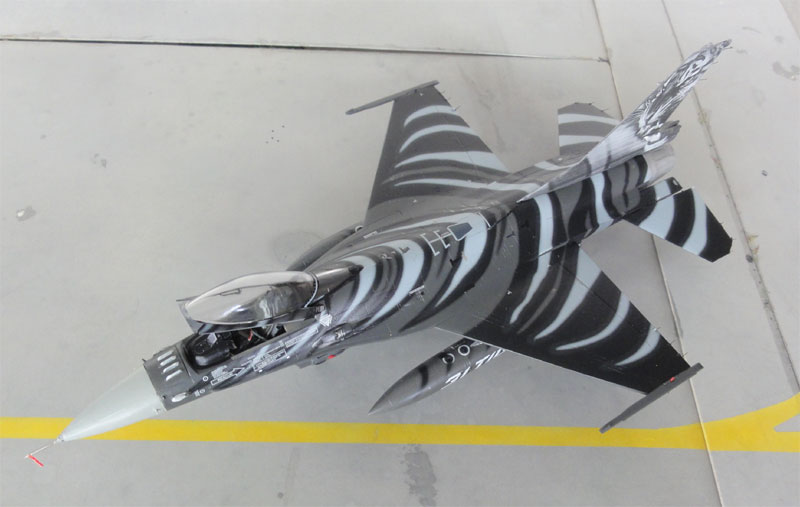
The Belgian Air Force F-16A/B Block 15 has the rear tail base long fairing with an ECM system. The parts are very nicely in this Revell kit (as parts #24 and #25 with part #26). Also the very small scoop on the tail base is nicely done.
The intake anti-collision lights #62 and #63 should be a bit adapted by cutting off their forward flenges. The little stubs for the ECM pod can also be removed from intake halve part #17.
For the MLU use the applicable IFF antennas, so part #39 is to be used.
The Belgian MLU also got the MLU
type stiffener plates on the upper fuselage. These stiffener plates
are thin in 1/72 scale, and will be suggested later on with painting.
The model got a base grey colour
to check for any flaws. When everuthing looked good, next came a grey colour
airbrushed for this Tiger scheme. It was not black paint nor FS36118, but
I used about FS36081 which looked better using
Gunze Sangyo H301 acrylic. And in the lower mid center of the
fuselage, grey FS36375 area was retained (using light grey "76"). This
is well shown in the Revell instructions. The decals will match pretty
well on these colours.
Decalling was fine with the EXCEPTION
of the large upper fuselage decals #11 and #63, these are much too large!
So cut in several sections and quite a large bit is not needed. Use again
the DACO deccal setting. Also, the lower decals #25, 24 on the intake need
some cutting. The nose decals #43, 44, 13 are way too big as well
so need cutting.
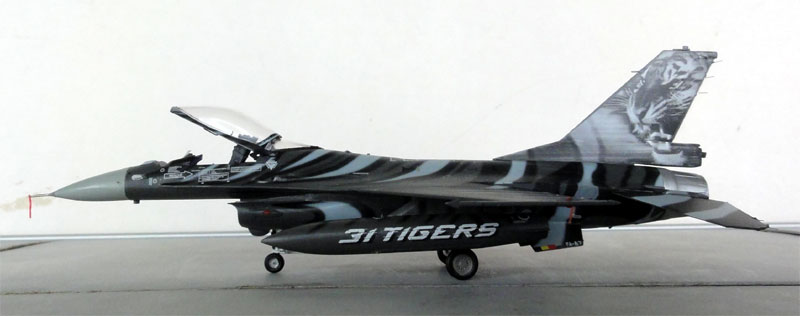
Final finishing was mostly as done on the other kit described above, but this time the canopy was NOT tinted.
- The main gear legs are bit awkward and a few extra details from thin wire added in the gear bays. Some PROMODELLER black wash was applied inside the gear bays and on the gear legs.
- The vertical tail was fitted and any tiny gaps filled with white glue, this needs no extra painting.
- The nose pitot was made from a metal needle.
- The anti-collision lights on the intake and wing tips got a drop of blue and red paint followed by a drop of Micro Kristal Clear.
- Inside the exhaust pipe, horizontal stripes were hand painted using white paint to suggest the ceramic coating.
- The Belgian ECM fairing part #83 is nicely provided, but 2 very tiny ECM antenna stubs above the fairings #60 on the nose were added as well (see photo below).
- the IFF antennas on the nose (on part #39) were painted medium grey with a fine paint brush.
- The wing tips and stabilizers static dischargers extended bits are too thick I feel so cut off and replaced these with thin fishing wire painted black.
- the kit ACES seat looks good and
got some harness straps made from painted tape. The seat was simply fitted
in the cockpit as well as some decals for the side consoles and instruments.
The cockpit was kept clean and is a well kept "office" in any F-16.
- On the radar nose, very thin lightning
evasion strips are seen but in 1/72 these are so thin that I did not bother
further.
- The large wing pylons and standard fuel tanks were added as well with their appropriate colours and their TIGER decals.
- The stiffener plates on the fuselage
spine in the pattern for the F-16A MLU were suggested with a toothpick with
black and medium grey paint. I
used photos from the DACO "Uncovering the F-16" book. There are 2 long
running stiffeners from the tank filler panel to the tail and various "finger
like" stiffeners between the various spine panels. (some other brand kits
have thin etched metal foil for these such as the Hasegawa F-16 ADF kits whereas Model Maker has a thin foil set #CV72001 ).
.
The model now got a gloss varnish
covering coat, this will give an even sheen and will protect the decals:
a coat of Johnson Future/ Pledge was applied with the airbrush is several
thin layers using the usual
technique...
Finally the canopy was tackled. Please
take care when removing it from the clear sprues, it is very brittle so
use a razor saw! Inside the canopy, 2 handling side
bars were added made from thin sprue. This is always seen inside a F-16 canopy.
The canopy was this time NOT tinted. The thin frames were hand painted gloss black with a fine
paint brush and grey as well. The Tiger striping decals were set on. The
canopy was kept clear and was set open and the rear glass section set in
place with white glue.
That completed a nice model of a Belgian
Air Force F-16A Block 15 MLU "coded "FA87" of no.31 squadron during the TIGERMEET 2009
 ..
.. .
. ..
..

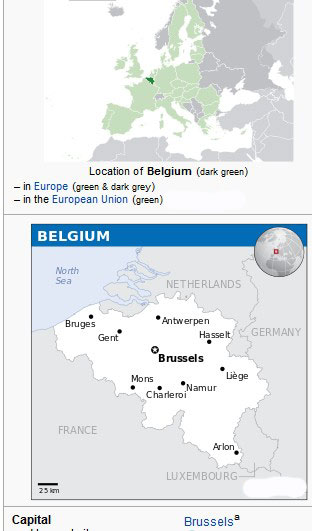
The Belgian Air Force is one of the oldest air forces in the world, established in 1909. At the outbreak of World War One several squadrons with Farman biplanes were set up and enemies encountered that entered Belgian air space. Later, the remaining aircraft joined the Allied efforts to fight the German fronts that split the country until the end of the blooddy war. With the outbreak of the Second World war for Belgium in May 1940 aircraft were types like Fairey Battles, Fairey Fox, Koolhoven FK.56, Gloster Gladiators, Fiat CR.42 and Hurricanes amongst other types but the fight lasted only a few weeks.
After the Second World War the Cold War emerged and as NATO country, the Belgian Air Force operated aircraft as most other European NATO countries like the Meteor, Thunderjets and Thunderstreaks but also peculiar types like Avro Canucks! These were followed by F-104 Starfighters and Mirage V as well as trainers like the T-33 and Magister. In the 1970's the F-104 and Mirages were replaced by some 160 General Dynamics F-16A and F-16B aircraft that were also license built. Later on, the F-16 MLU program was executed. Belgian aircraft also participated in various NATO operations with its Allies including surveillance of NATO Baltic states air spaces.
Training is done with SF.260 and Alphajets and some transport aircraft are the C-130, Falcon and Embraer 135/145 and VIP A321 with also the large Airbus A400 on order. Belgian F-16 bases are at Florennes and Kleine Brogel and end 2022 some 45 F-16AM and 8 BM are still operated. They are to be replaced by 34 F-35A Lightining II jets with first training starting in 2022 in the USA.
Due to the agressive war of Russia against Ukraine started 2022, some 30 F-16 will be handed over to the Ukraine.
 .
.
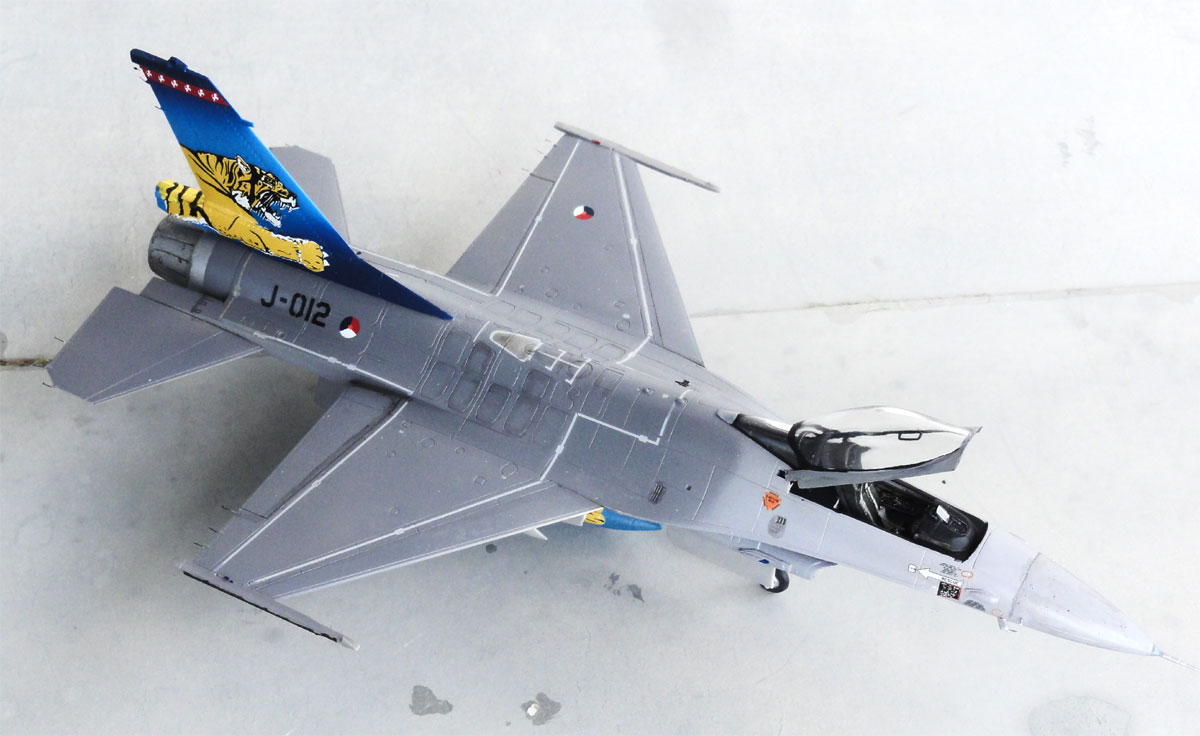
Belgian
Air Force F-16A Block 15 MLU "FA87 " of no. 31 squadron during the TIGERMEET 2009
Also check out a Belgium AF F-16B
here...
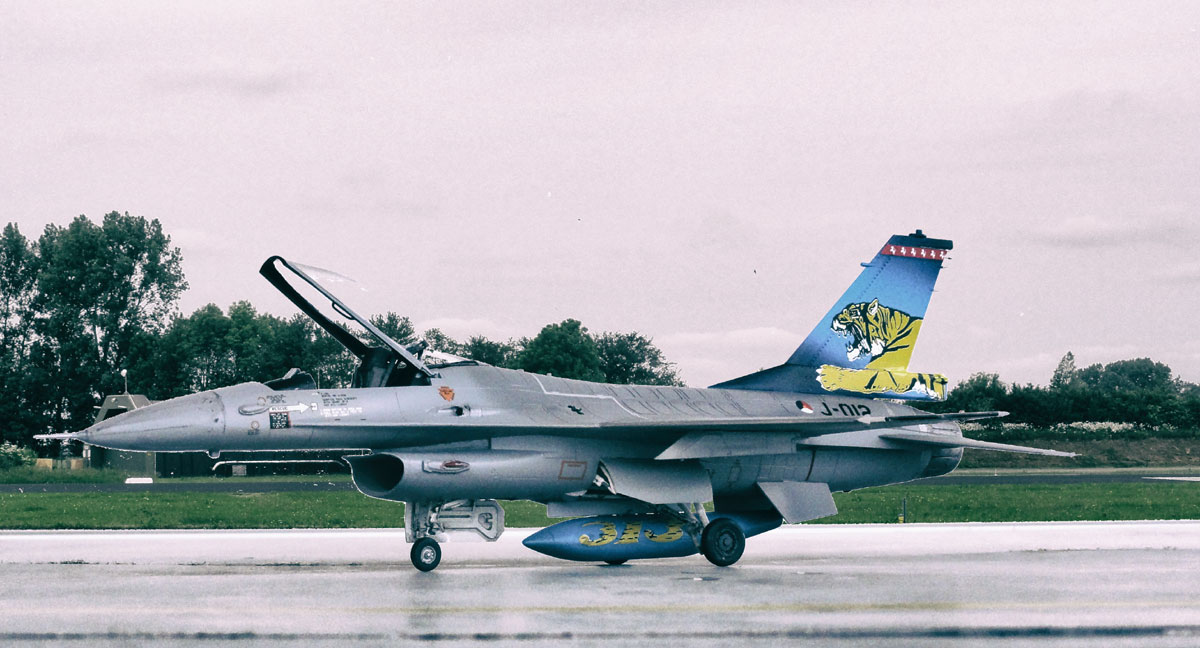
[6]Another Revell F-16 MLU kit #04612
was made in scheme of the Royal Netherlands Air Force (KLu) no. 313 squadron.
It was made an as earlier F-16A Block 15 before the MLU upgrade but fitted with the long parachute fairing at the vertical tail base, which is in the kit.
Note that the KLu TIGER decals were retrieved from another Revell F-16 kit no. 04330: this old kit released in 1993 is NOT the same as the later MLU seen above which is a far better kit.
This model was made as described above but it would get the standard NATO F-16 colour scheme but made as an F-16A before the MLU upgrade:
so no advanced IFF antennes were fitted, remove the antennes from the use Revell kit part #39 and sand it smooth in front of the nose. The model should also have the early LAU-114 wing tip launch rails.
The intake lights #62 and #63 should be a bit adapted by cutting off the forward flenges. The little stubs for the ECM pod can also be removed from intake halve #17. (And no stiffener plates were applicable at that time, these were applied later with the MLU).
Assembly and final finishing was done as for the kits described above....
Colours are the NATO standard F-16 with Federal Standard FS36270 lower surfaces, FS36375 and FS36118 rear upper areas. The acrylic colours airbrushed were: FS36270 with Gunze Sangyo H306, FS36375 using Gunze Sangyo H308 and for FS36118 Gunze Sangyo H305.
The TIGER tail and central fuel tank have a blue'ish colour that varies from dark blue to medium blue. I used as base Revell Aqua blau 52 acrylic with some white mixed in to get the different blues.
Decals were applied on a gloss
undercoat. For the TIGER tail decals, plenty of DACO decal setting
was needed. Touching up can be done for the yellow with Gunze Sangyo #H4
and some black paint for the stripes.
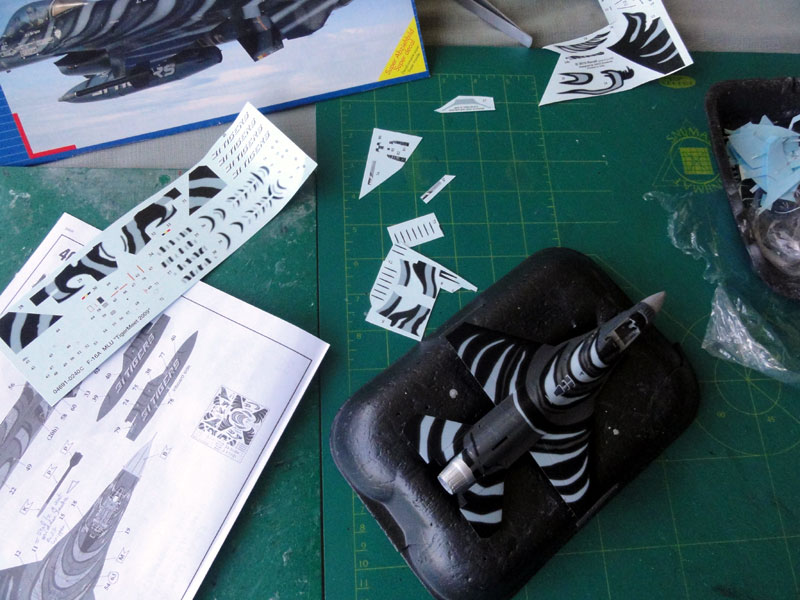
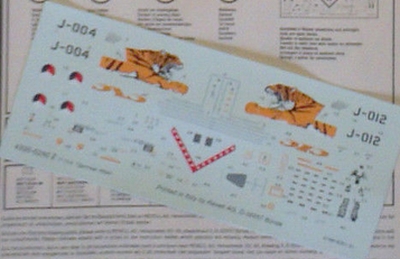
Here the decal instructions are seen and
the tiny but goot decal sheet...
Final completion included new thin static dischargers, lights, metal pitot. No stores were fitted except the coloured central fuel tank.
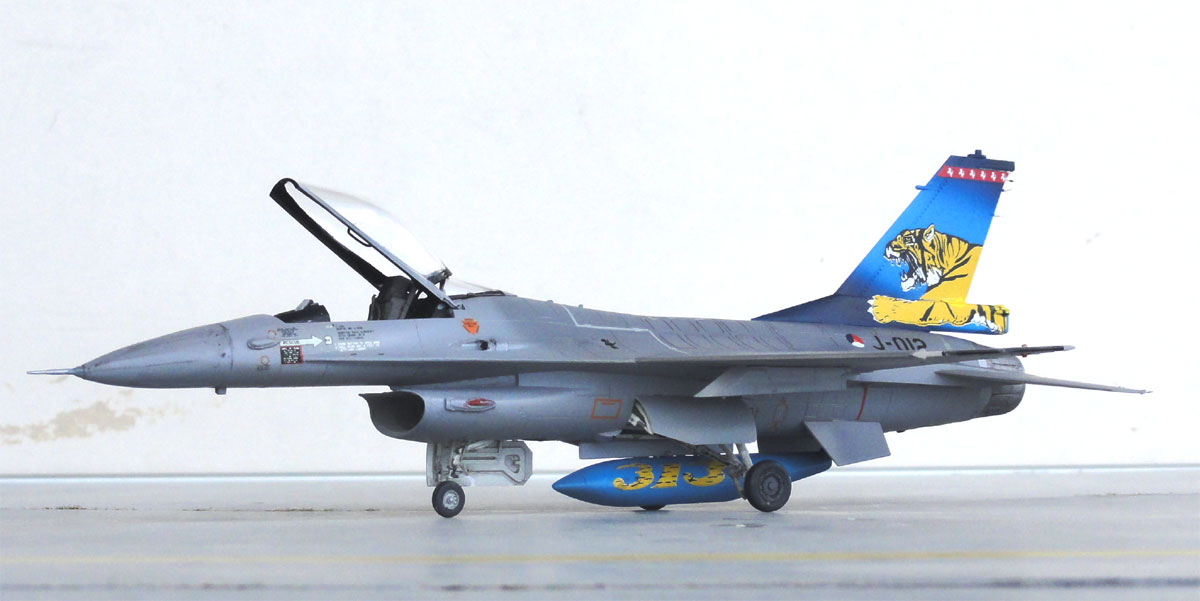
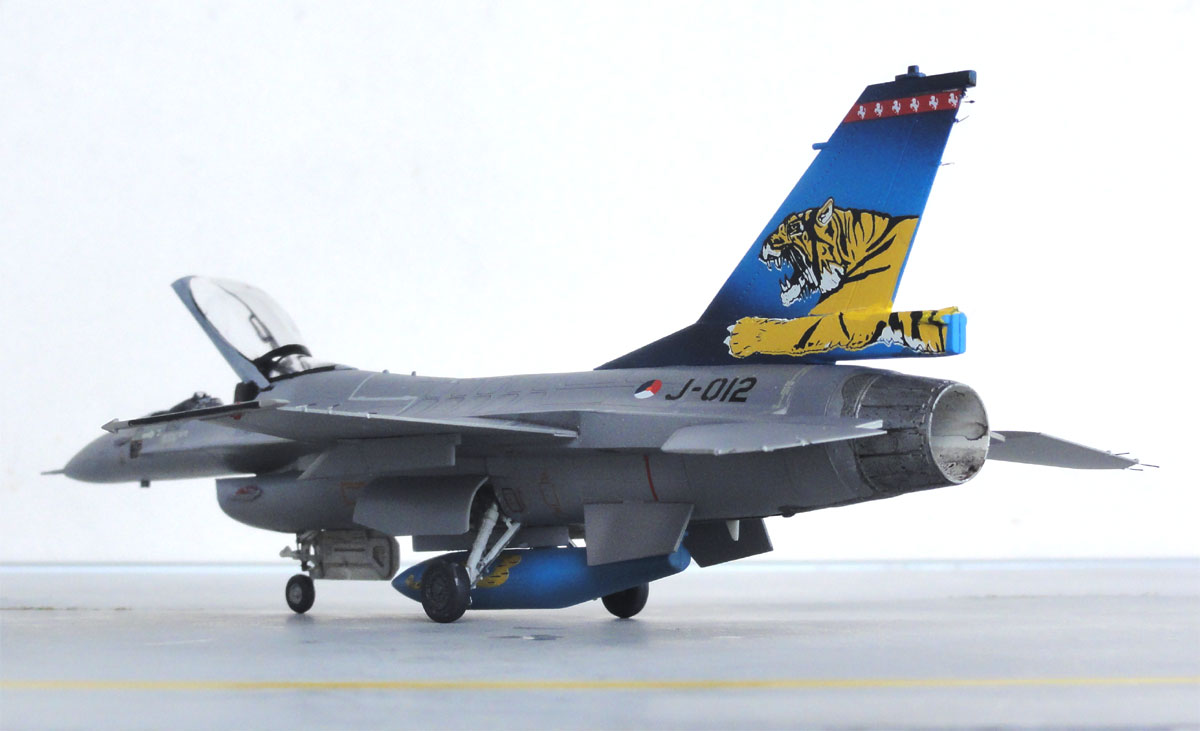
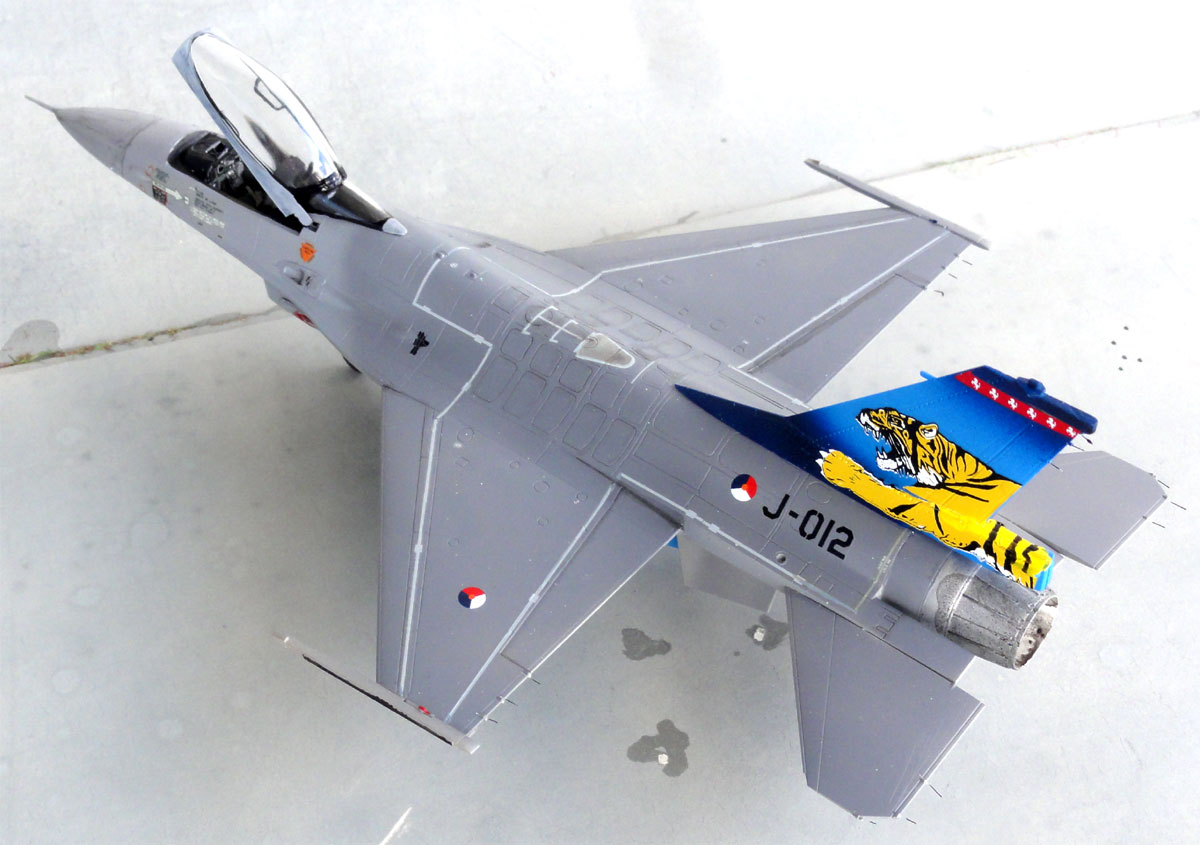
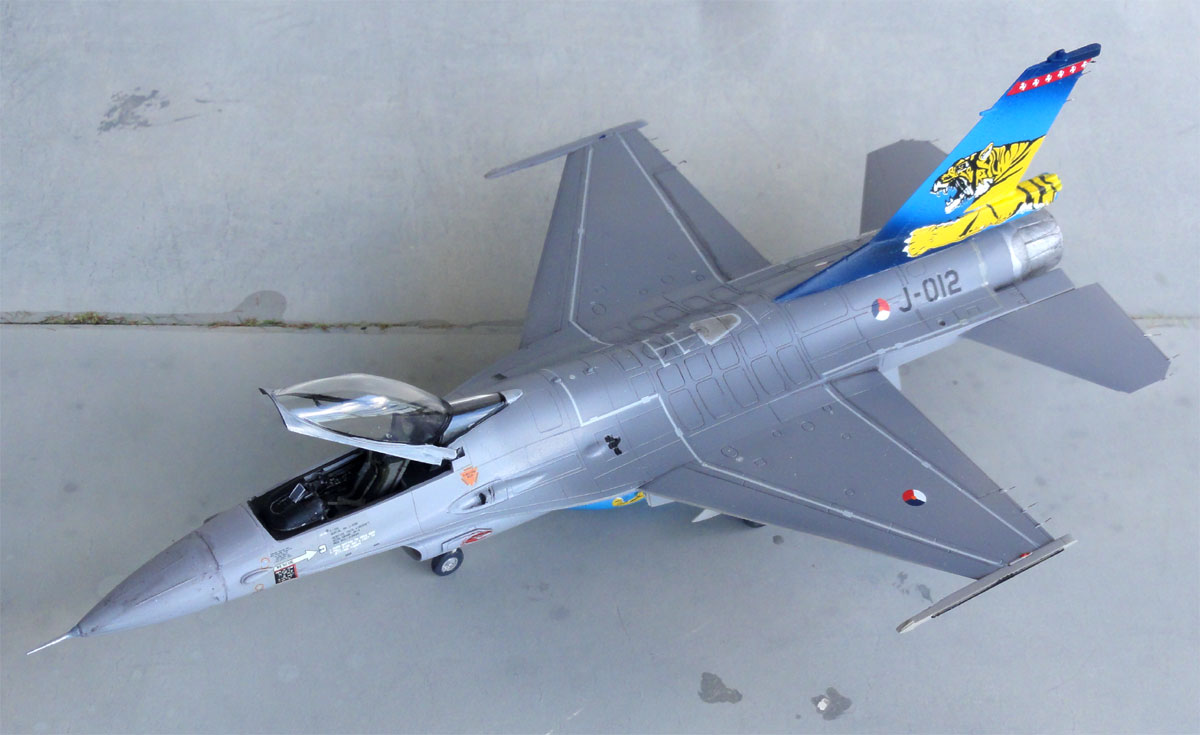
A nice KLu
no. 313 squadron TIGER F-16A Block 15 of the Tiger meet 1991 is now in
the model collection.
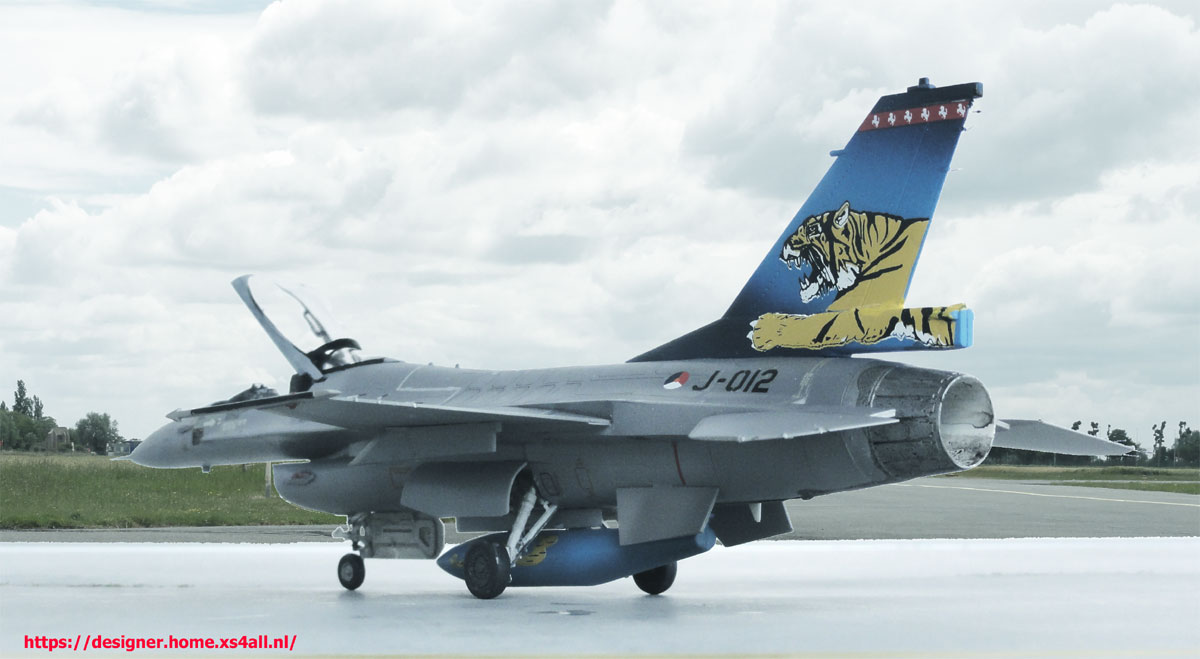
.... on a rainy day....
On to next F-16 [ Page 3... ]
..
Back to 1/72 Models
(c) Copyright "designer"/ All rights reserved. Your comments are welcomed by webmaster
Created this page
June 29, 2016