[ page 22 ]
F-16 in 1/72 scale: kit review & modelling reports of HASEGAWA kits
... continued from
page 21...
..
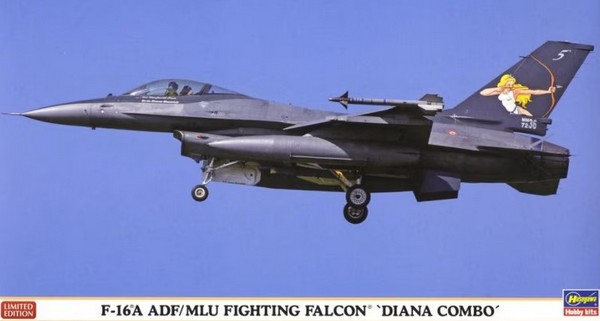
Another F-16 release of Hasegawa came in 2016 as "Diana Combo" kit #02172. It had 2 kits with decals with Diana markings:
[1] F-16A ADF, Italian Air Force, 5th Stormo/ 23 Gruppo, 2010. Aircraft coded MM7236;
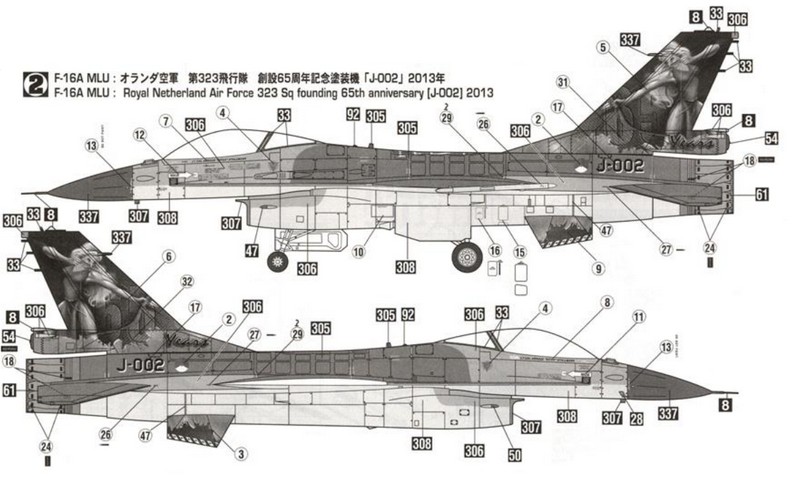
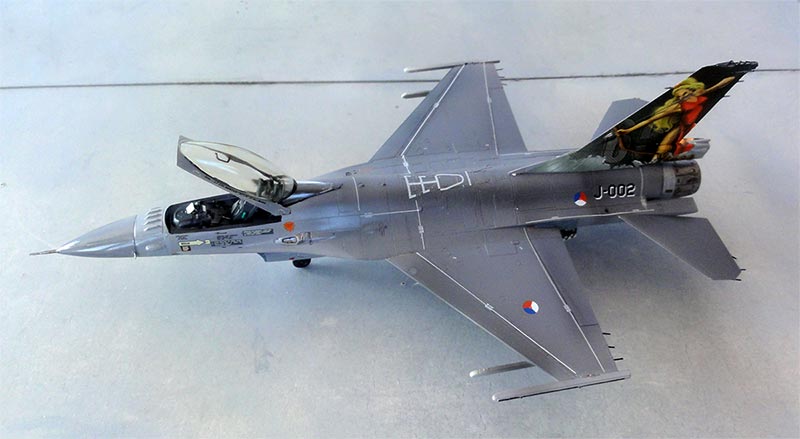
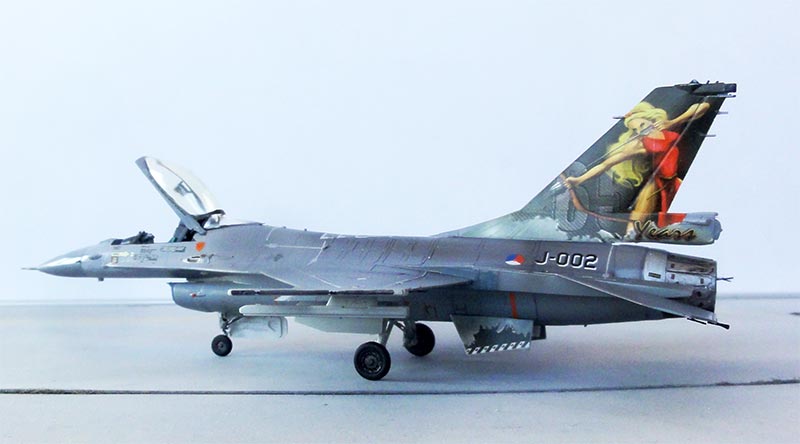
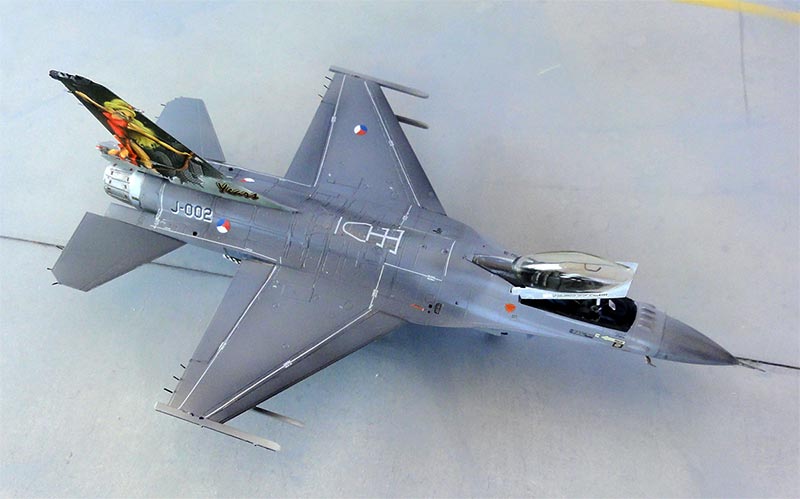
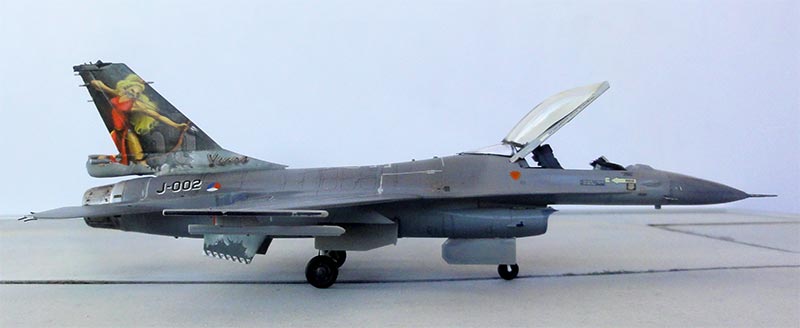
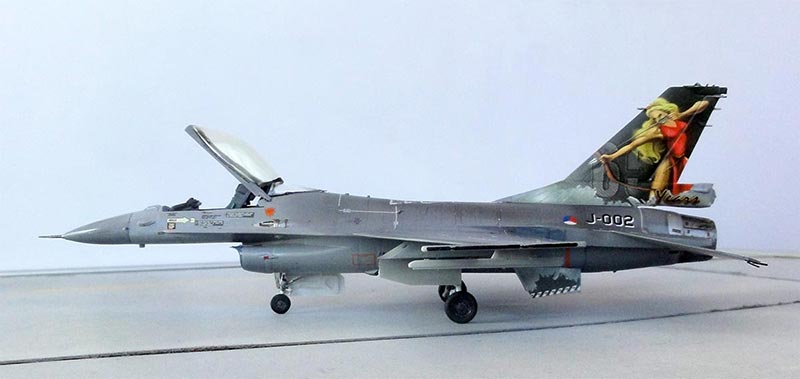
[2] F-16A MLU, Royal Netherlands Air Force "Koninklijke Luchtmacht", 323 squadron 65 jaar, 2013. Aircraft coded J-002.
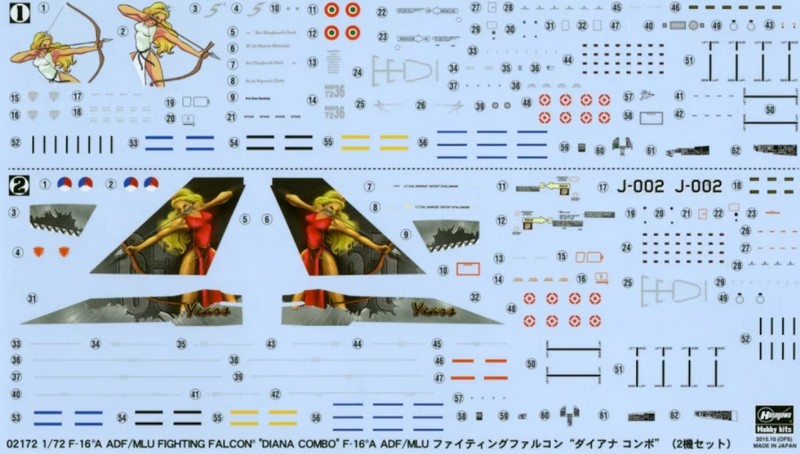
The decals are excellent and extremely fine printed:
The package has many common sprues as the Hasegawa F-16 ADF release discussed on page 12 and the older F-16A "Plus kit".
The F-16 ADF parts are 4 plastic sprues and 1 clear sprue of the original F-16A kit but also 1 additional sprue with another vertical tail, some new AMRAAM capable missile launchers and parts for the advanced IFF antennas below the intake and in front of the canopy. Some of the older parts are not used.
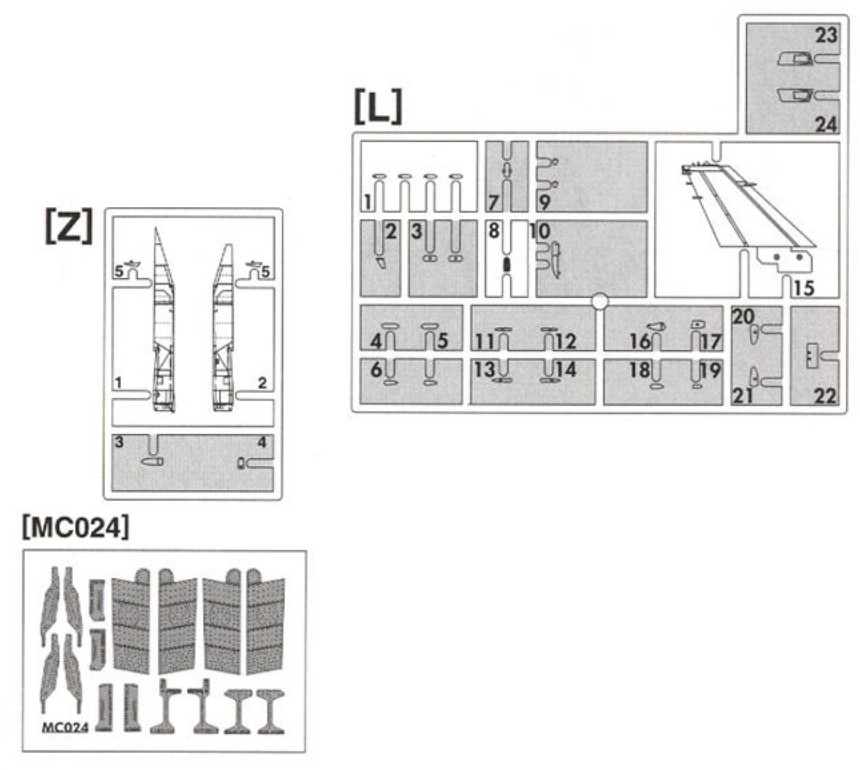
The F-16 MLU parts are a separate sprue and the standard sprues. You also get thin etched stiffener plates as appropriate for the MLU.
Each kit has the standard small intake, standard horizontal stabilizers as well as the normal main wheels and flat main gear doors. Also different types of IFF antennas are included.
It was decided to make the kit [2] MLU as supplied for the Royal Netherlands Air Force "J-002".
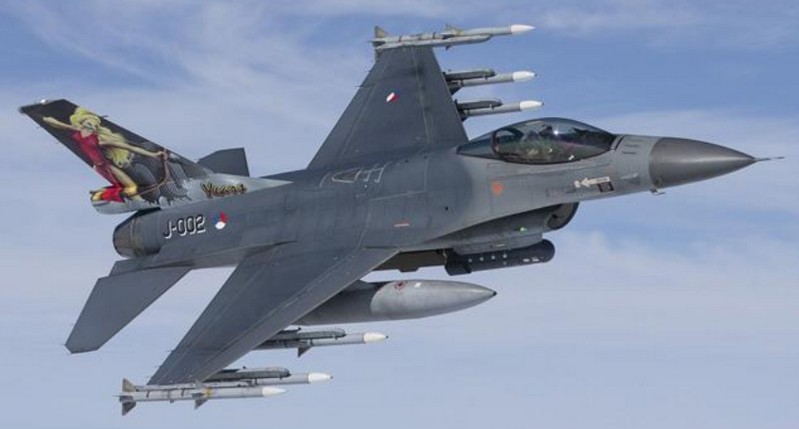
photo RNLAF / Ministry of Defense
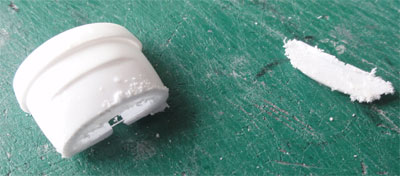
Assembly was done as described in the excellent Hasegawa instructions which are well researched. But as the kit intake is a bit undeep, the rear section of part #B4 was cut off with a razor saw to get a deepened look.
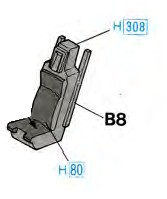
The cockpit is basic but the throtlle and control stick are there and you get instrument decals. The one piece ACES II seat #B8 is very simple and can be replaced by after market ones or detail it yourself such as by adding straps/ harness.
Open up in the fuselage nose the holes for IFF antennas as seen here...
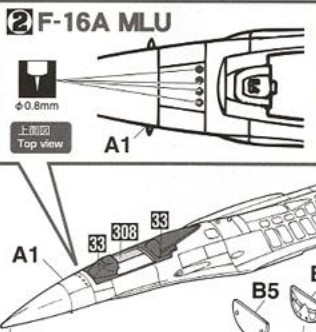
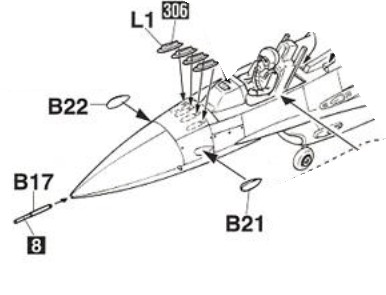
The main parts were now joined. The two ventral fins #C17, C18 were not yet installed.
As with all Hasegawa kits the wing halves installment needs care to ensure a correct dihedral. Putty and filler is needed. Also, the rear engine section needs quite some sanding to get flush surfaces.
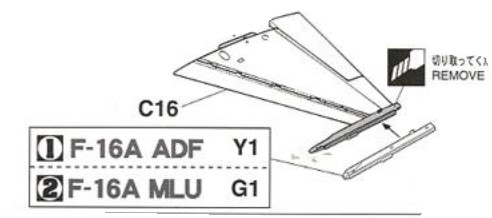
Hasegawa clearly shows they did good research as the instructions indicate where to do small changes to the parts. For example replacing the early wing tip launch rails with the later style LAU-129 rails for which new parts #G1 are provided.
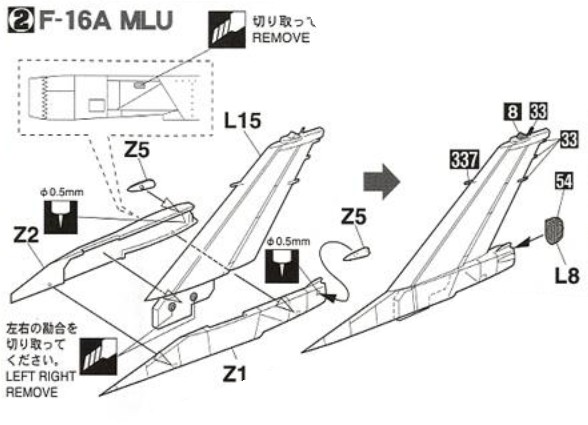
On the vertical tail of the MLU the Royal Netherlands Air Force F-16's have the lower rear parachute fairing. The kit has this with a vertical tail split in 2 sections with this extended fairing. Part #L8 is the parachute pack end. (NOTE that the small pitot at the tail leading edge is not always seen, check photos; on the J-002 it is installed so as per kit).
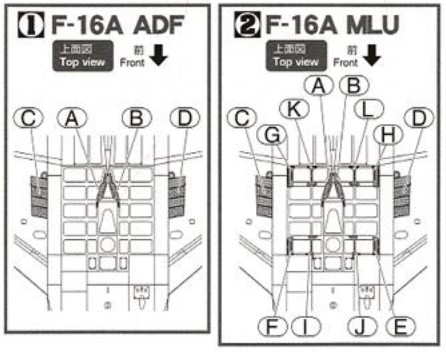
The typical upgraded MLU stiffener plates are nicely provided as self adhesive metallic plates in the kit. Note that these plates may differ depending on the specific block and upgrade done per air force and even individual F-16. Check out the usual layout/ pattern on this 1/32 page here.... or drawing [2] seen above. Stick these plates to the upper fuselage.
Do not yet install the landing gears and smaller parts. A coat of base grey was airbrushed to look for any imperfections. Any gaps and ridges were filled and sanded. (the smaller parts like landing gears were thus not yet fitted).
Colour scheme
Colours for the F-16A MLU of the Royal Netherlands Air Force "KLu" are overall standard NATO scheme of greys Federal Standard FS 36118, 36270 and 36375. Colours were airbrushed with my favourite Gunze Sangyo Mr.Hobby acrylics:- FS36375 at lower surfaces with H308;
- FS36370 with H306;
- FS36118 with H305.
The nose was airbrushed approx FS35237 with H337.
The MLU got also at the time top secret RAM paints/ materials which show a bit through different grey hues such as on the tail leading edge, intake leading edge and aft of the trailing edge flaps on the fuselage sides. Hasegawa suggested FS36320 for these, so H307 was painted (except on the tail).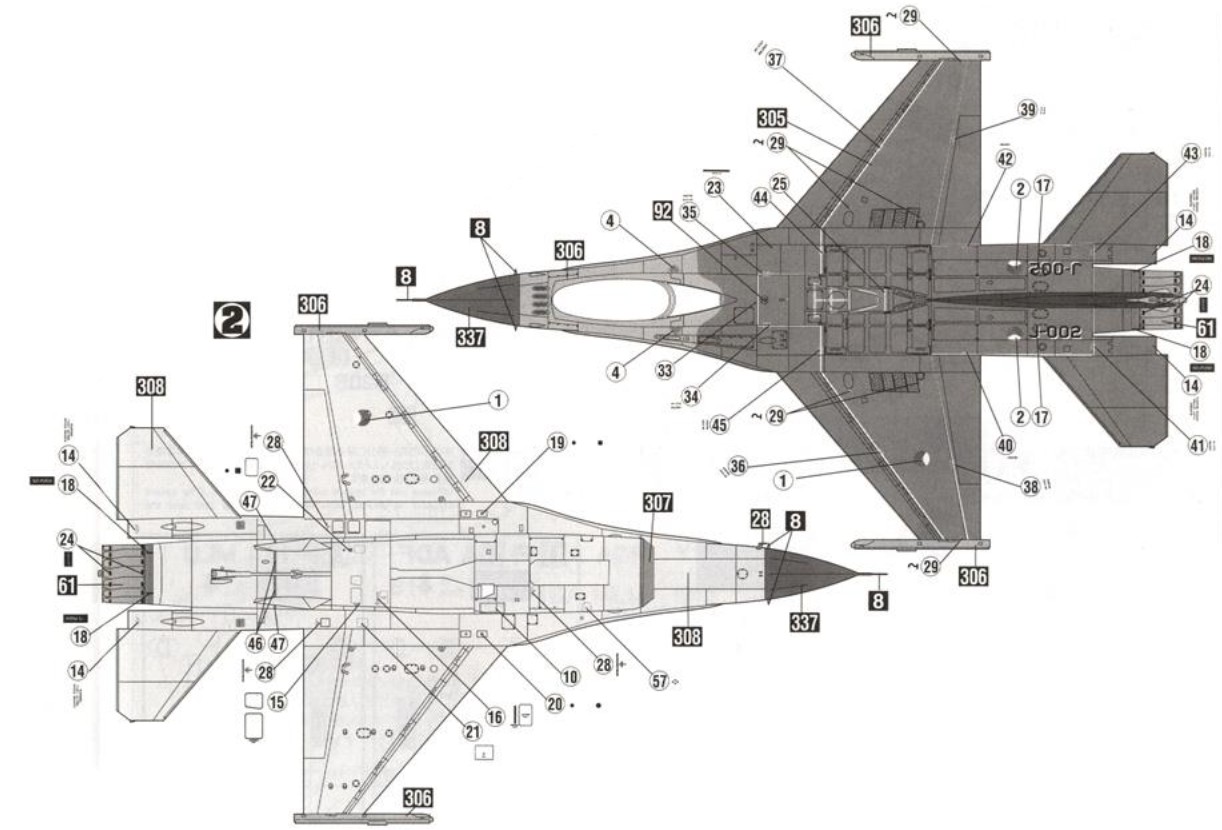
The exhaust was airbrushed aluminium with some different hues.
The surfaces of the model were already glossy, so the decals [2] as per kit could now be applied. These Hasegawa decals are really good and the walk way lines are very thin and nice.
![]()
Further assembly
The nose landing gear is one piece
with an integrally moulded nose wheel. Some painting and wash may improve
how it looks.
At the main gear legs indeed remove the 2 light bits as on the MLU the main landing lights were moved to the inside nose gear door, part #G5. For the rest, assembly is straight forward such as the main gear with white bays and gear legs. Inside the main gear bay I added the missing blue painted battery pack and some hydraulics from thin metal wire.
In the medium grey painted cockpit tub the instrument decals were set. The HUD was set in place and on the seat #B8 added details were harnesses.

The 2x3 wing + 2x3 stabilizer + 1x3 tail = 15 static dischargers were added made from thin fishing wire and painted black (or use EZ flex line).
At the right side the small pitot #D24 was fitted aft of the radar nose. (In earlier kit releases this pitot was forgotten by Hasegawa in the instructions).

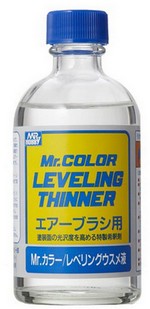
The overall model got a varnish coat airbrushed on Johnson Clear/Pledge thinned with 10% Gunze Sangyo Mr.Hobby Levelling Thinner to improve flowing.
The canopy colour appears to be a little gold tinted as this later MLU had RAM material in the canopy. A few drops of thinned with Tamiya thinner + Tamiya X-24 clear yellow were dropped inside the canopy and rolling the canopy during drying. This give a subtle thin gold tint.
Inside the canopy, 2 handling side bars were added made from thin sprue. This is always seen in a F-16 canopy.
That completed this very nice F-16AM KLu "J-002" model.
page 2
page 3
page 4
page 5
page 6
page 7
page 8
page 9
page 10
page 11
page 12
page 13
....
THE NETHERLANDS
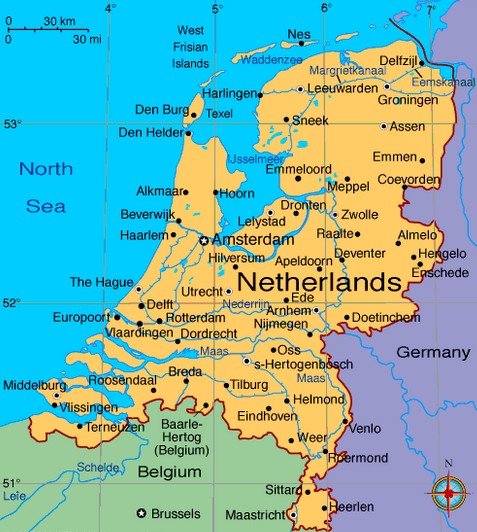

This particular "J-002" aircraft c/n 6D-159 (32203) was delivered as F-16A Block 15 and put into KLu service 1990. In 1995 it was upgraded to F-16AM Block 20 "Mid Life Update" and got later also the newer MLU M1 to M6 upgrades. In 2010 it had the Diana tail celebrating the 65 year no.323 KLu squadron based at Leeuwarden, The Netherlands. In Spring 2024 this jet J-002 was still operational with the KLu, probably now with no.312 squadron at Volkel
September 27, 2024 was the farewell flight of the RNLAF F-16 after 45 years of service. Many remaining jets are donated to the Ukraine due to the agressive attack and imperialistic war caused by Russian Federation.
The Dutch F-16 jets are replaced by the F-35A.
ROC / TAIWAN
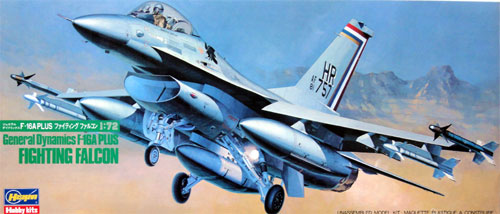
Yep, another F-16A Hasegawa
kit no.1193 of the "F-16A Plus" was made, now to represent a jet from
Republic of China (ROC) Taiwan Block 15/20. The kit itself was described on page 1...
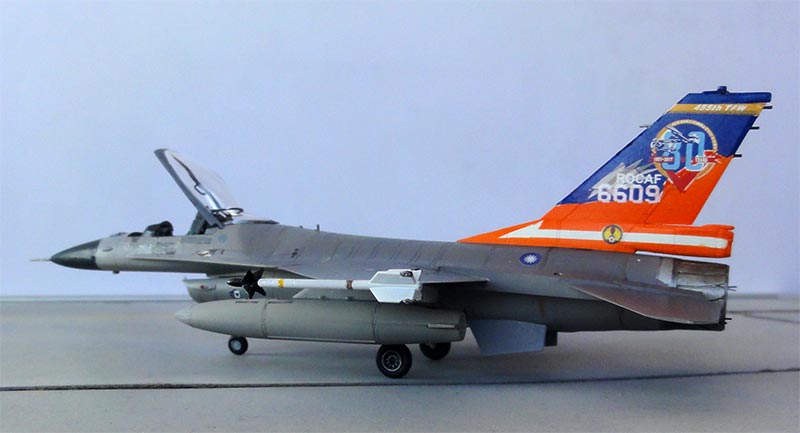
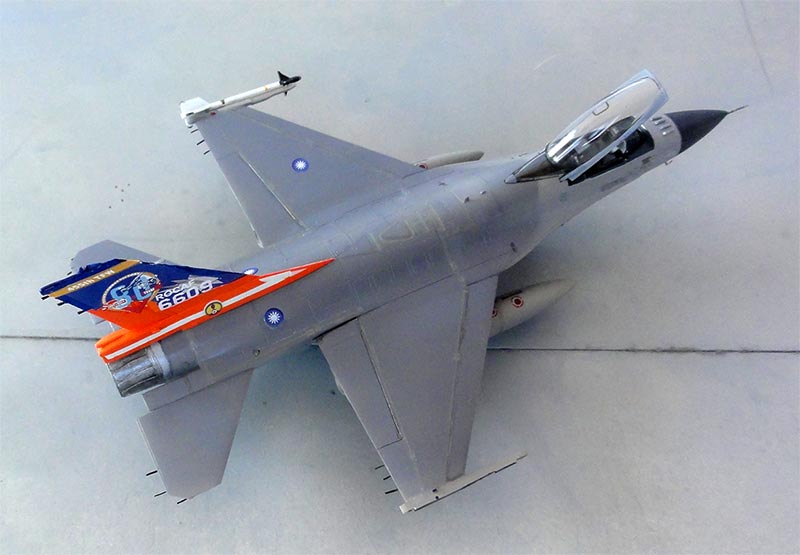
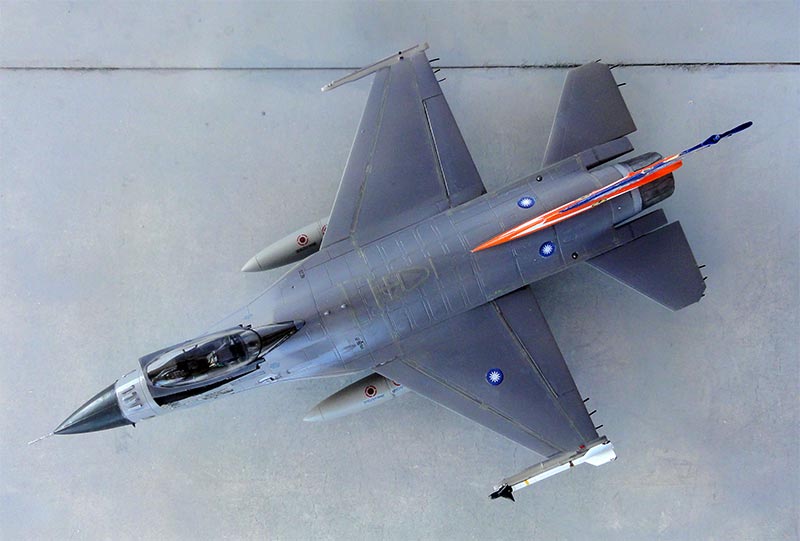
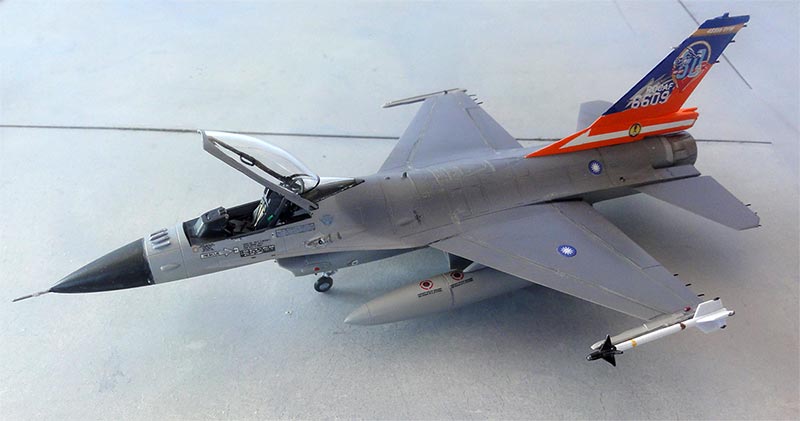
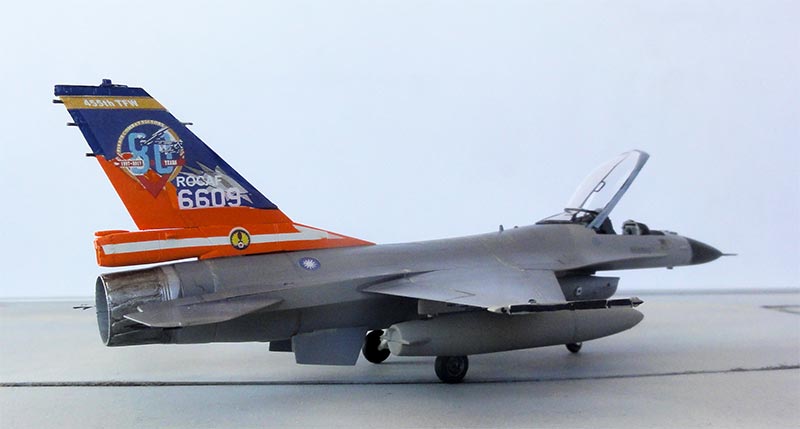
I had decals for a nice looking jet from WAND set WDD72021 from Taiwan. The scheme is for the 80th anniversary of the 814 combat unit of the ROC Air Force. F-16A serial 93-0710 "6609" / TA-9 delivered as Block 20 to Taiwan under the U.S. "Peace Fenghuang" program and later upgraded to "Block 72 V".
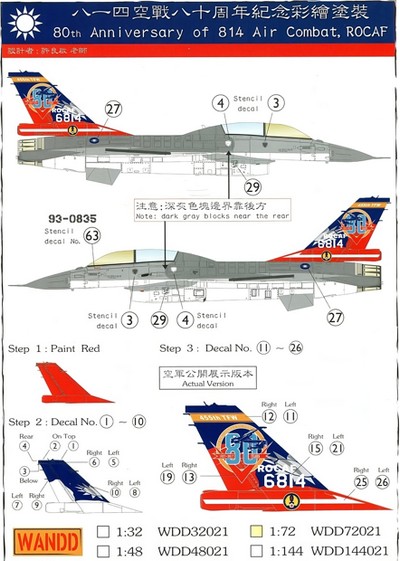
It has a long tail parachute fairing (similarly to the KLu F-16); a few parts for this fairing were found in the spares box (some kits like from Revell MLU have these).
Otherwise, the kit was built as described with a few improvements like a deeper intake. IFF antennas are on the nose in front of the canopy, these were set.
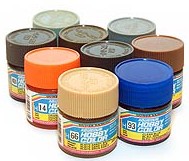
The standard F-16 colours were airbrushed with Gunze Sangyo Mr.Hobby acrylics:
- FS36375 at lower surfaces with H308;
- FS36370 with H306 forward fuselage area, tail and ventral fins;
- FS36118 with H305 the rear upper fuselage.
The nose was painted a dark grey black mix.
Half of the vertical tail was masked and airbrushed Revell orange/red 30 Aqua and the other areas are decals. Some edges of blue were painted.
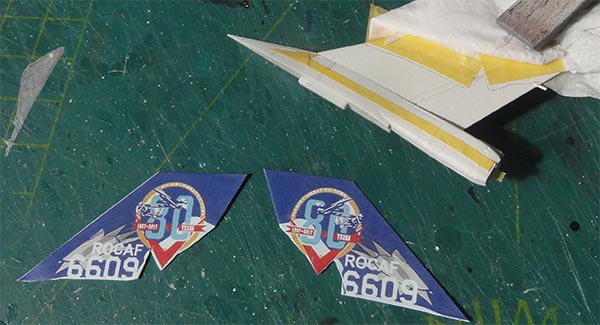
It was not clear if there were wing walkway lines, I applied the decals though. The usual stripes seen at the ventral fins were not set.
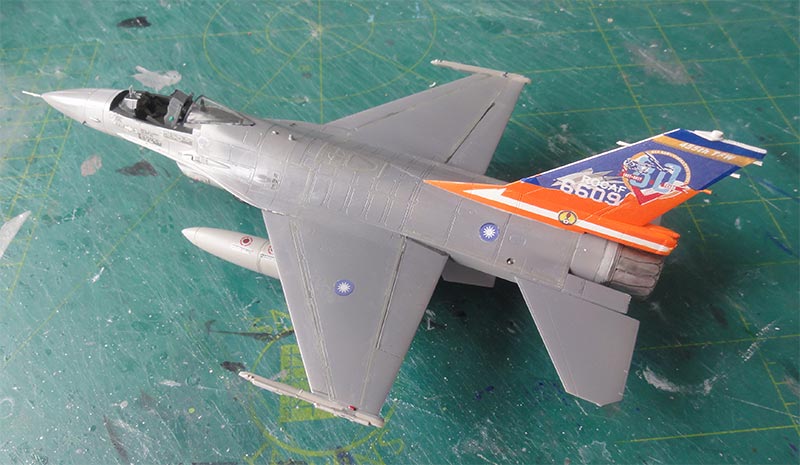
The overall model got a varnish coat airbrushed on Johnson Clear/Pledge thinned with 10% Gunze Sangyo Mr.Hobby Levelling Thinner to improve flowing.
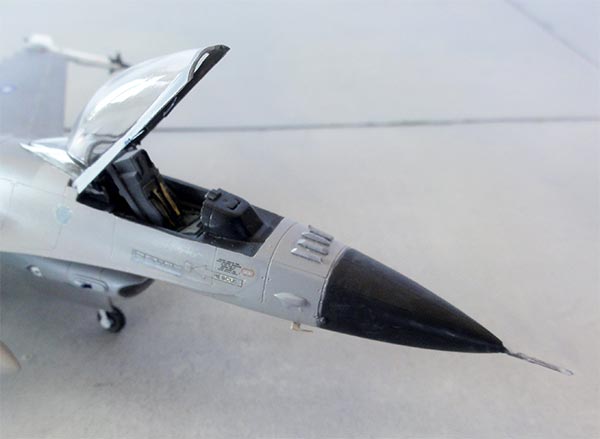
Note the IFF plates/ antennas, small pitot, nose pitot and drak grey/black radar nose. The kit canopy was installed after it had its frames painted and 2 handling bars set inside. The tail also has a small pitot. The photo also shows the static dischargers.
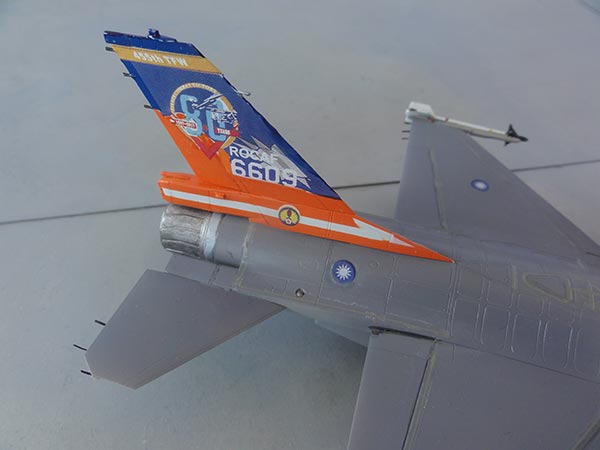
A nice ROCAF F-16 is now in the collection.
TAIWAN
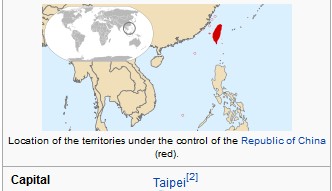


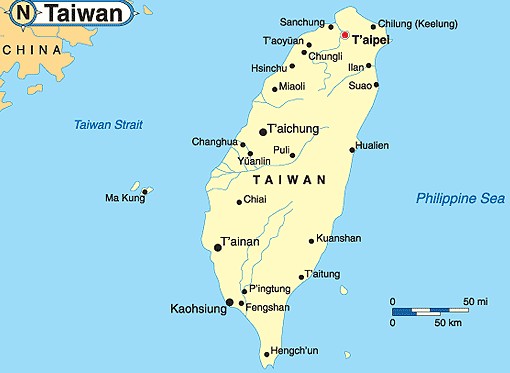
[ area: 36,200 sq.km | population: 23,5 million | capital: Taipei | nom. GDP 25,000 USD per capita ]
Taiwan, the large island off the coast of mainland China is an independent democratic country as "Republic of China" (ROC). The democratic republic is constantly threatened to be invaded by neighbouring China.
More info about the ROC Taiwan air force on my Mirage 2000 page here....
... in scenery...
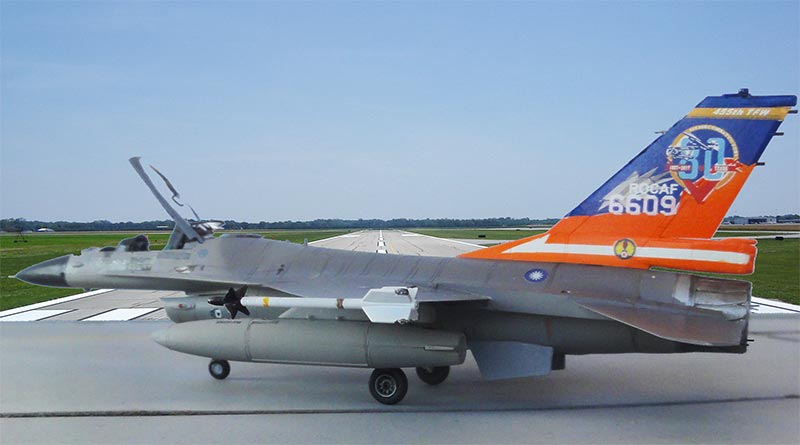

(c) Copyright "designer"/ All rights reserved. Your comments are welcomed by webmaster
Created this page Sept 27, 2024