[ page 9 ]
F-16 in 1/72 scale : kit review & modelling report
... continued from
page 8...
..
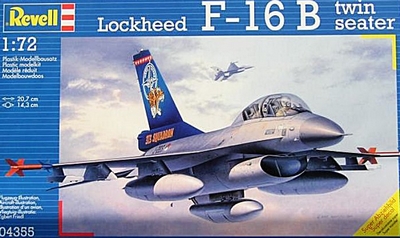
Revell issued a very nice kit #04355 for a F-16B twin seater.
This very good kit can be recognized
(from the older Revell kit) as the upper fuselage has two halves: a forward
nose section and the rear section with integrally moulded wing.
It has otherwise many common parts with kit #04612. The single seat nose part #10 is still in the sprues!
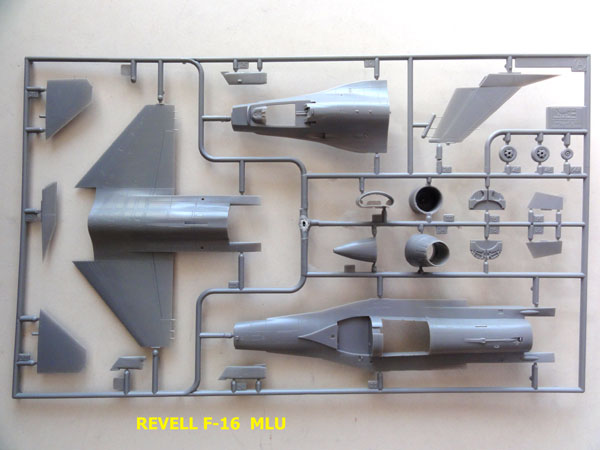
The nice thing of this kit is thus
a single full piece for the wing, so no filling and alignment needed here. The F-16B parts layout is seen below:

Stores
in this Revell kit are I think
AIM-120C AMRAAMs, AIM-9L/M Sidewinders and fuel tanks. The later style
correct LAU-129 missile wing tip lauch rails are provided. The Royal
Netherlands
Air Force also used older AIM-120B AMRAAMs and these had bigger fins.
When
AIM-120B are needed, you may get these from e.g. Hasegawa weaponset
X72-9
or Hasegawa F-16CJ kits.
Decals are good and in this kit release for:
(1) F-16B Block 5 Royal Netherlands Air Force (KLu) 313 squadron during NATO tiger meet with a TIGER on the tail.
(2) F-16B Belgian Air Force, coded "FS", Florennes base (year 2004).
(3) F-16B-15Sp, USAF, 363 wing of 9 AF as based at Shaw, April 1985, coded "SW".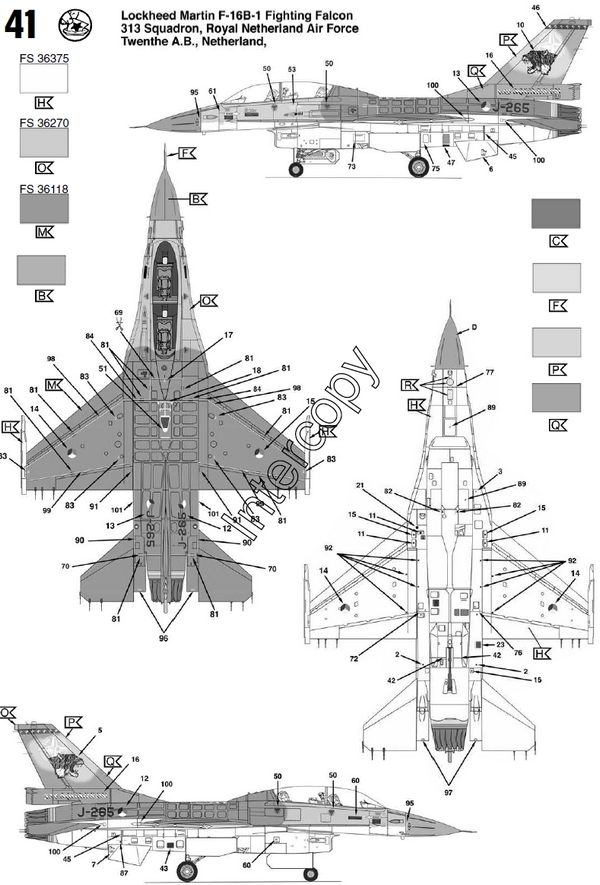

The standard NATO F-16 scheme has the greys Fed.Std colours FS36270, 36118 and white 36375 at the lower surfaces.
page 1
page 2
page 3
page 4
page 5
page 6
page 7
page 8
page 9
page 10
page 11
page ....
[17]F-16B KLu Orange Jumper
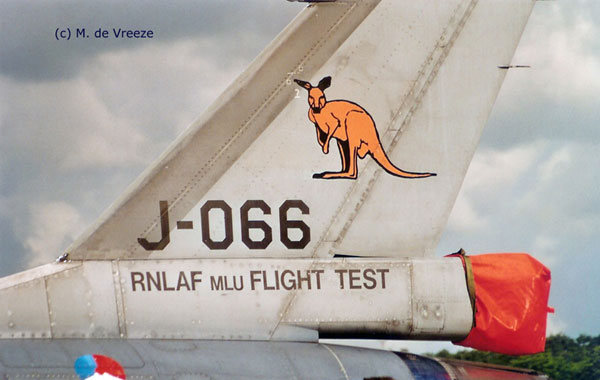
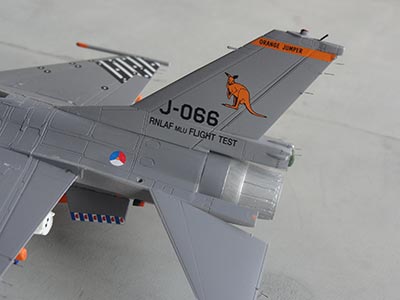
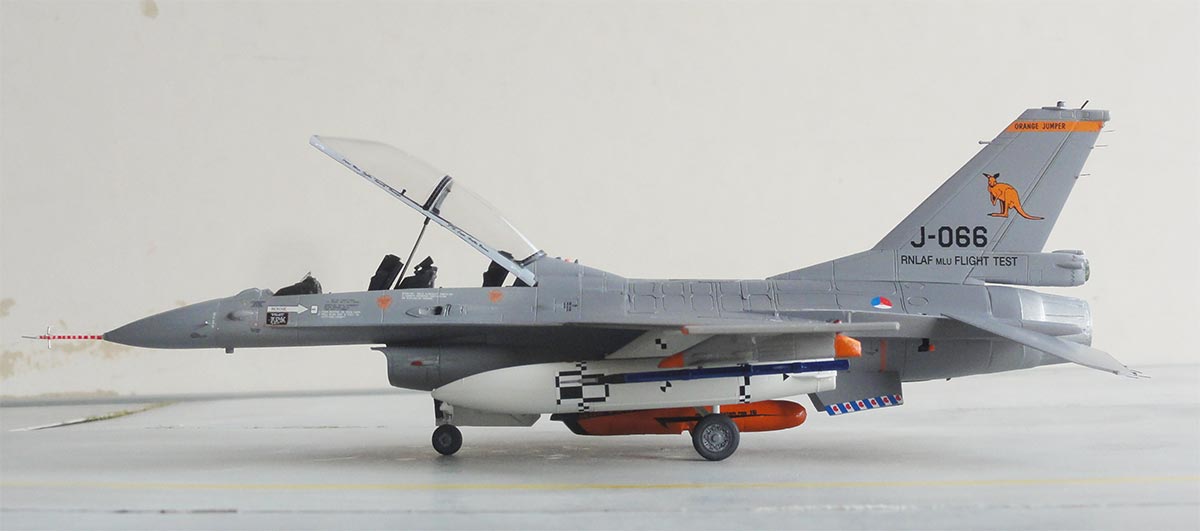
The Royal Netherlands Air Force (KLu) also has a test aircraft two seater F-16B Block 15 MLU.The real aircraft was used for testing delivery of ordnance but also for new systems, seekers, avionics and much more. This aircraft has the nickname "Orange Jumper", with code " J-066".
This Revell F-16B kit can be made as this F-16B Block 15 MLU test aircraft of the Royal Netherlands Air Force.
NOTE: I made this kit in 2011 in 1/32 scale, so will used the information obtained than. And a special article was published in our IPMS NL MIP Magazine nr 2010-4 with drawings by my modelling friend Joop Dionet.
More info including my own ORANGE JUMPER Walkaround can be seen on the Dutch IPMS.NL page here... [external link].
I purchased a Belgian 1/72 scale ASTRA decalset #7220 for this "Orange Jumper" aircraft. These decals are great with many details and excellent instructions.
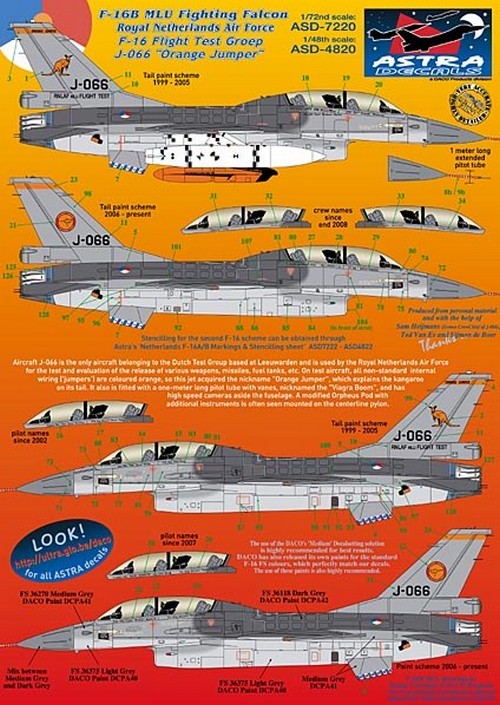
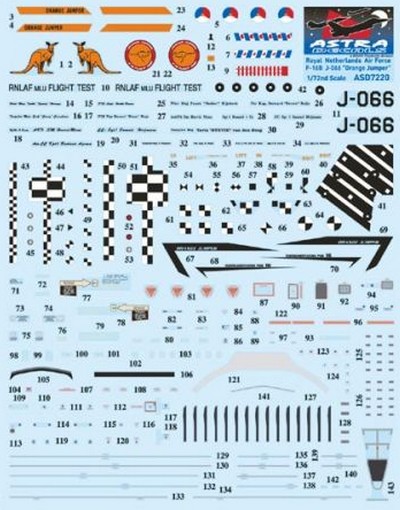
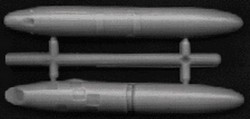
The set gives you very nicely also the TEST pod (looking like an ORPHEUS pod). In the decals also the wing tip stripes are provided as decal. You have the option for 2 variations of the ORANGJE JUMPER: with Kangaroo or Round badge on tail. Very nice is also a small set with stickers for the stiffener plates.
I will use the Kangaroo as photographed by me seen here...
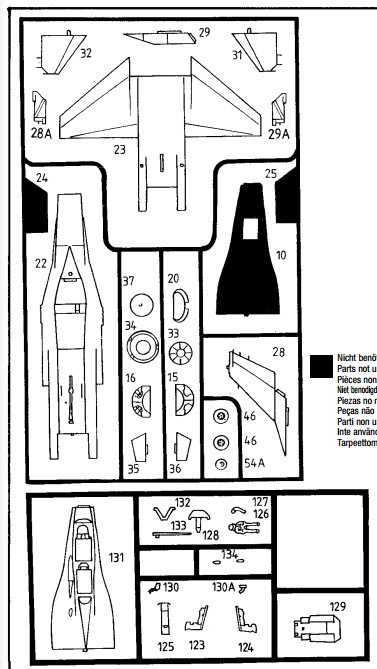
The Revell kit is very good and only needs a few small modifications and additions but it can easily be done. So nothing blocks making this TEST aircraft.
The surfaces have very fine with nice engraved panellines and fine parts. There is in the kit parts a choice of IFF antennas or not and rear tail fairings.
![]()
The model was mainly simply assembled as
per instructions with a few small adaptions.
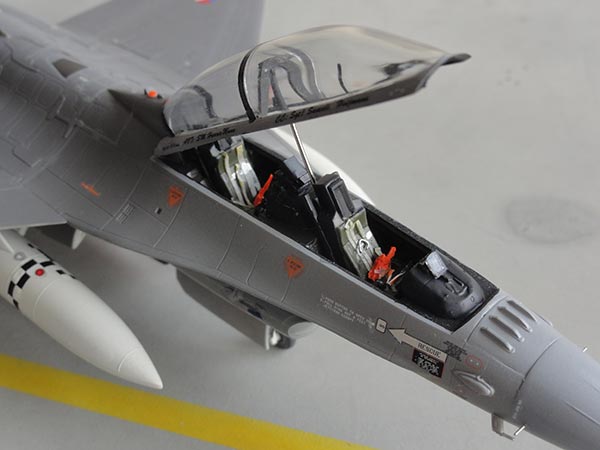
The cockpit interior colours for the aircraft upgraded to MLU standard contains large portions of black to avoid blinding the pilot when he/she is wearing night vision goggles. So also in the ORANGE JUMPER test aircraft. The rear cockpit tub of the kit is seen here.
I ensured that the upper fuselages halves with the two seat nose section were glued first without any ridge to avoid filling and sanding.
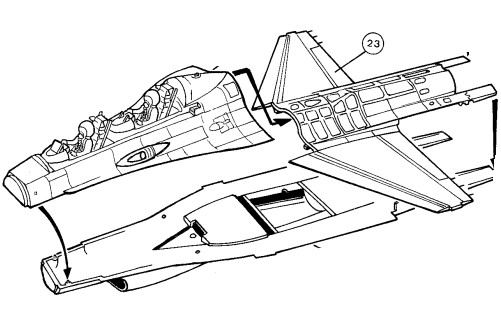
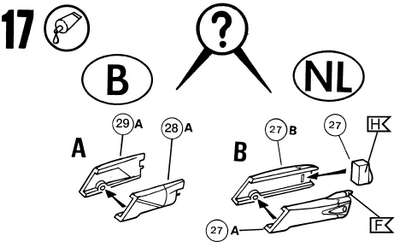
For the MLU use the applicable IFF "bird slicers" antennas, so in STEP 21 part #39 (still provided) is to be used. The appropriate later style LAU-129 missile wing tip lauch rails are used as provided. The intake lights #134 seen in STEP 30 are fine. Assembly went on quickly with hardly any filler needed.
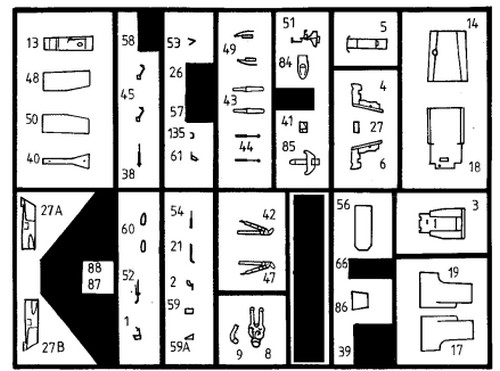
The upgraded MLU aircraft also got some stiffener plates on the upper fuselage for strengthening the airframe against fatigue. The MLU type stiffener plates were provided as "stickers" in this ASTRA set as well. What you need depends on the specific F-16 model made. These were put in place before airbrushing (here seen after that was done....).
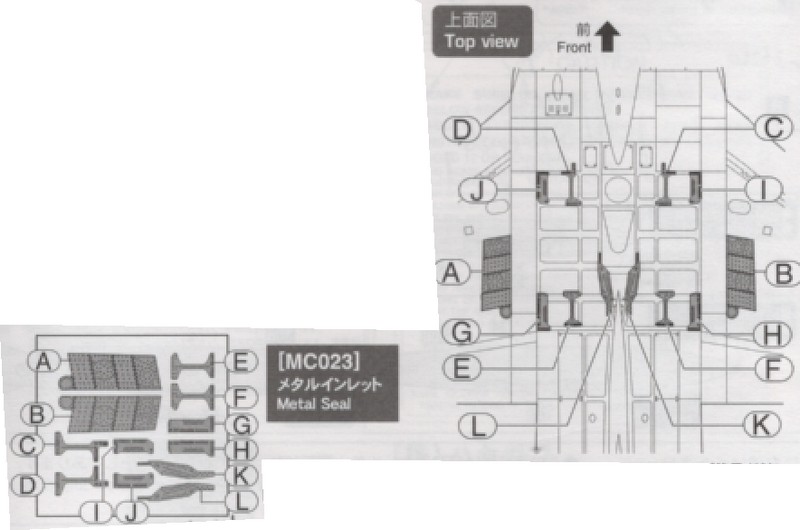
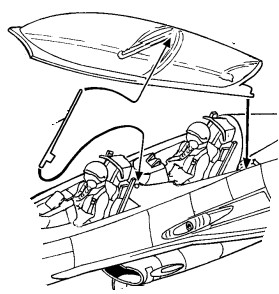
Here is a MLU stiffener drawing that I found in another Hasegawa kit:
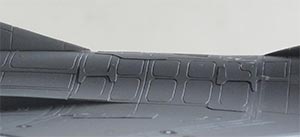
and on the model....
A base grey coat was airbrushed to check for any flaws. When OK, following the paint instructions the final colours were airbrushed:
Colours are the standard F-16 "greys" with Federal Standard FS36270, FS36375 and FS36118 rear upper areas. The acrylic colours airbrushed were: FS36270 with Gunze Sangyo #306, FS36375 using Gunze Sangyo #308 and for FS36118 Gunze Sangyo #305.
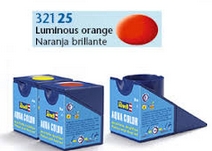
The ORANGE JUMPER has some bright orange panels, particularly at the pylons. These were brush painted using Revell Aqua #25 orange.
OK, colours applied. Time for decals. A gloss paint base is good as before applying the decals so the model got a gloss coat with the airbrush. I used Johnson FUTURE / PLEDGE but obviously use the method you prefer.
It took about 3 hours to get all the ASTRA decals in place. The wing tip striping is a decal and the remainder of the decals are fine and all provided including the walkway lines in the ASTRA set. The ASTRA decals have accurate dimensions and are well researched. The results are good.
After decals were applied, the model now got a semi mat
varnish
coat. This will give an even sheen and will protect the decals. In this
case I used a Gunze Sangyo acrylic mix of 40% Gunze thinner, 50% Gunze
H30 Clear with some 10% Gunze Flat Base H40 mixed in. It was applied
with the
airbrush in several thin
layers.
The final assembly
of ORANGE JUMPER was as per kit instructions but please note:
(1) The mid instrument coaming in
the cockpit for the rear test engineer has additional instruments on
the ORANGE JUMPER. This higher coaming was made with some thin card.
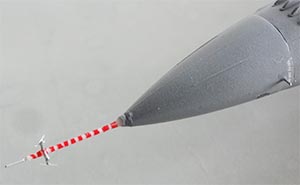
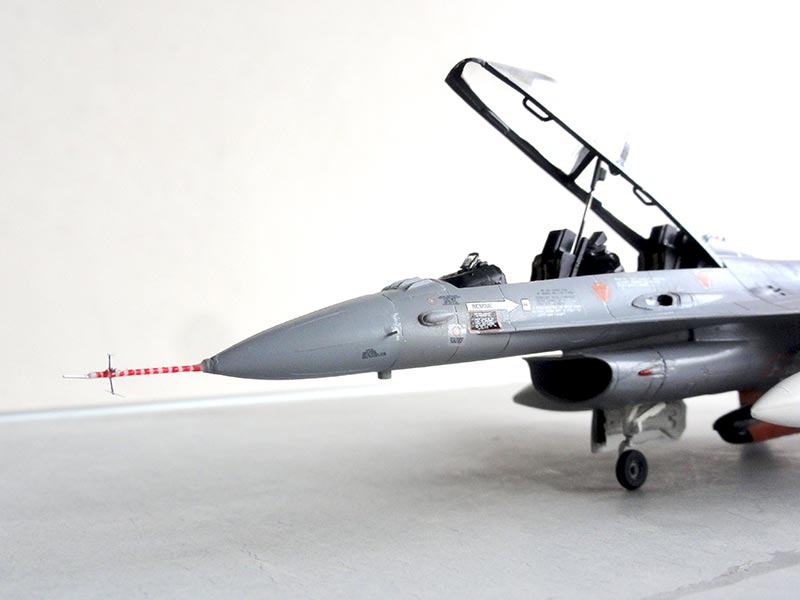
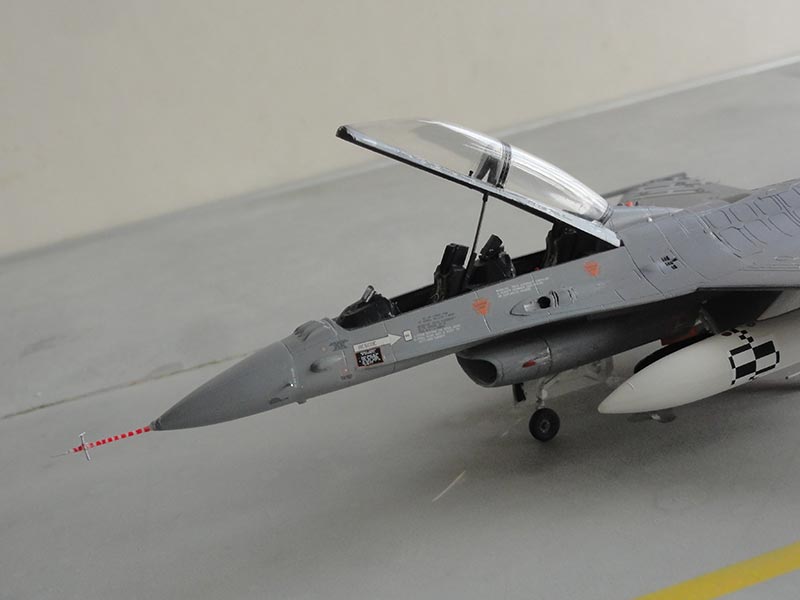
(2) The nose pitot of the ORANGE JUMPER is longer. It is ironically called "viagra boom". This was made from a white piece of rod and the tiny red stripes were painted. Also, the air flow vanes were added made from very thin wire.
(3) A small camera painted orange is fitted at the upper spine aft of the cockpit on ORANGE JUMPER. This was made with a small piece of plastic.
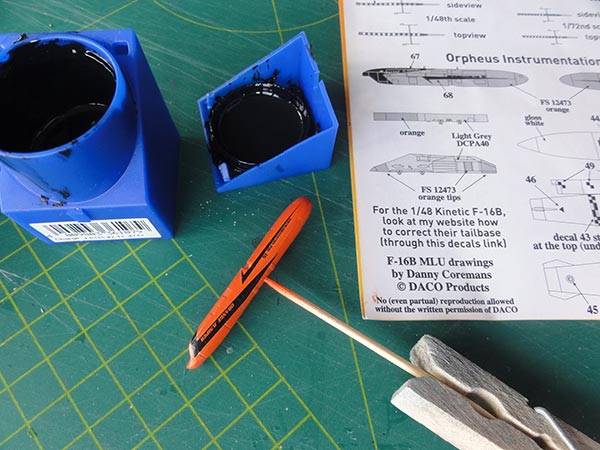
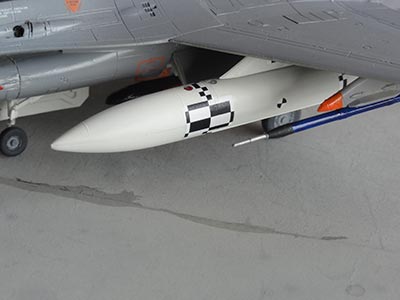
(4) The special test pod of the ORANGE JUMPER is a converted ORPHEUS pod with not cameras but instruments. The pod is provided with 2 parts with the decal set. It was painted bright orange with Revell Aqua #25 orange, the ASTRA decals were added and the remainder of the black upper surfaces painted gloss black.

(5) Two small video cameras are fitted on the ORANGE JUMPER below the lower fuselage. These were made from scrap plastic and painted black and orange.
(6) The 15 wing tips, tail and stabilizer static dischargers extended bits are too thick. These were replaced with thin fishing wire painted black.
(7) The undercarriage and bays are standard (so thin wheels and flat doors as on the F-16A/B). Fitting the main gear legs is bit awkward and added were a few extra details like hydraulic lines from thin wire added in the gear bays. The battery was painted blue. Some PROMODELLER black wash was applied inside the gear bays and on the gear legs. The MLU landing lights were fitted inside the nose undercarriage door. (on old F-16's these were fitted at the main gear struts).
(8) The vertical tail was fitted and any tiny gaps filled with white glue, this needs no extra painting.
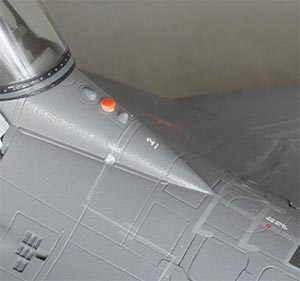
(9) The anti-collision lights on the intake and wing tips got a drop of blue and red paint followed by a drop of Micro Kristal Clear.
(10) Inside the exhaust pipe, horizontal
stripes were hand painted using white paint to suggest the ceramic coating.
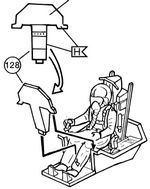
(11) the two kit ACES ejection seats in
the Revell kit look good. They got some harness straps made from painted
tape. I added some warning vanes inside the cockpit from orange tape.
(12) The fuel tanks (see kit instructions STEP 35) are fine. For the ORANGE JUMPER these are white with black squared panels. These are all provided nicely in the ASTRA set.
I suggested a small test probe from blue sprue on an outboard wing pylon. And also I fitted a test ACMI pod from a Hasegawa weapons set X72-009. Various blue details were painted.
(13) The canopy is sometimes clear and sometines a bit tinted on the ORANGE JUMPER. I used the clear canopy as per kit. Inside the canopy, 2x2 handling side bars were added made from thin rod. These are always seen in a F-16 canopy. The inside of the frames were painted black. The central canopy frame running of the transparant section was simply made of a black decal.
For the MLU, in addition a tiny stretched sprue rod was added in the left mid section, this is the helmet cueing position sensor. Also, the HUD display was added.
The canopy (kept clear here) was set open installed. I replaced a section of the raising bar part #133 by a metal needle. I also added the small temperature probes on the nose and the standard pitot #61.
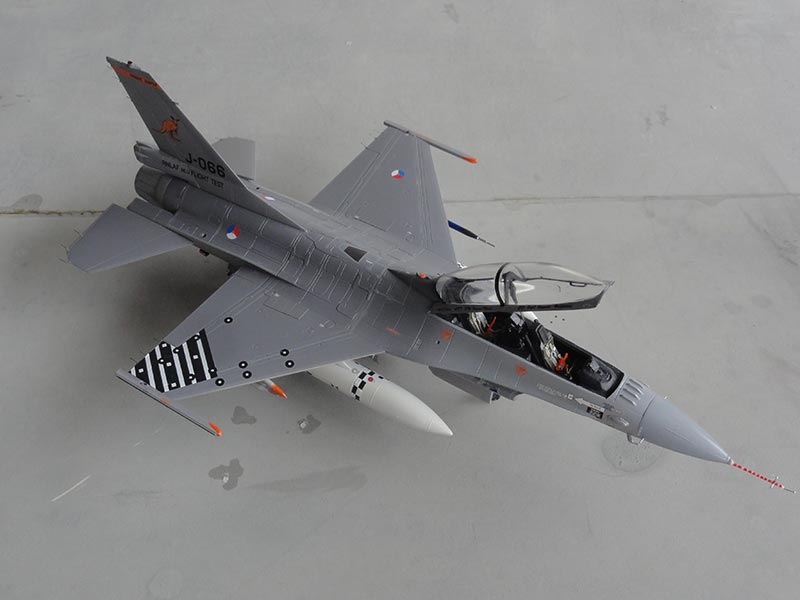
That completed a very nice 1/72 F-16BM [Block 15 MLU] ORANGE JUMPER (a companion to the many other KLu F-16 models made) and the large 1/32 scale Orange Jumper kit I made.
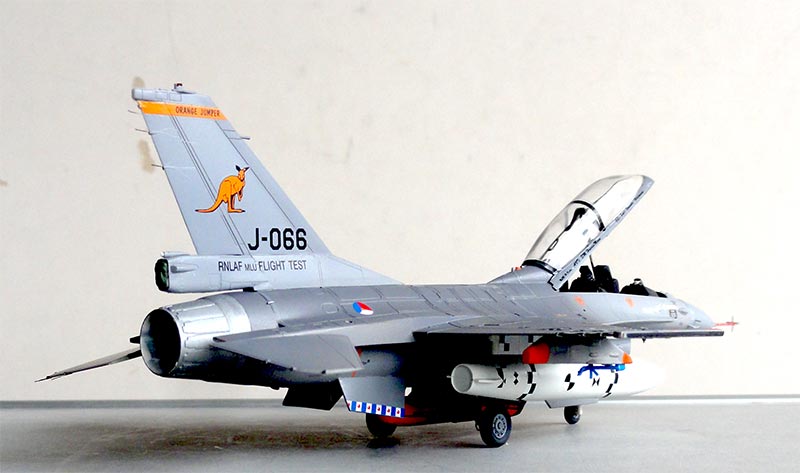
Note the Frisian flag at the ventral fins as the test F-16BM "Orange Jumper" is based at Leeuwarden AFB in the Dutch Friesland province.
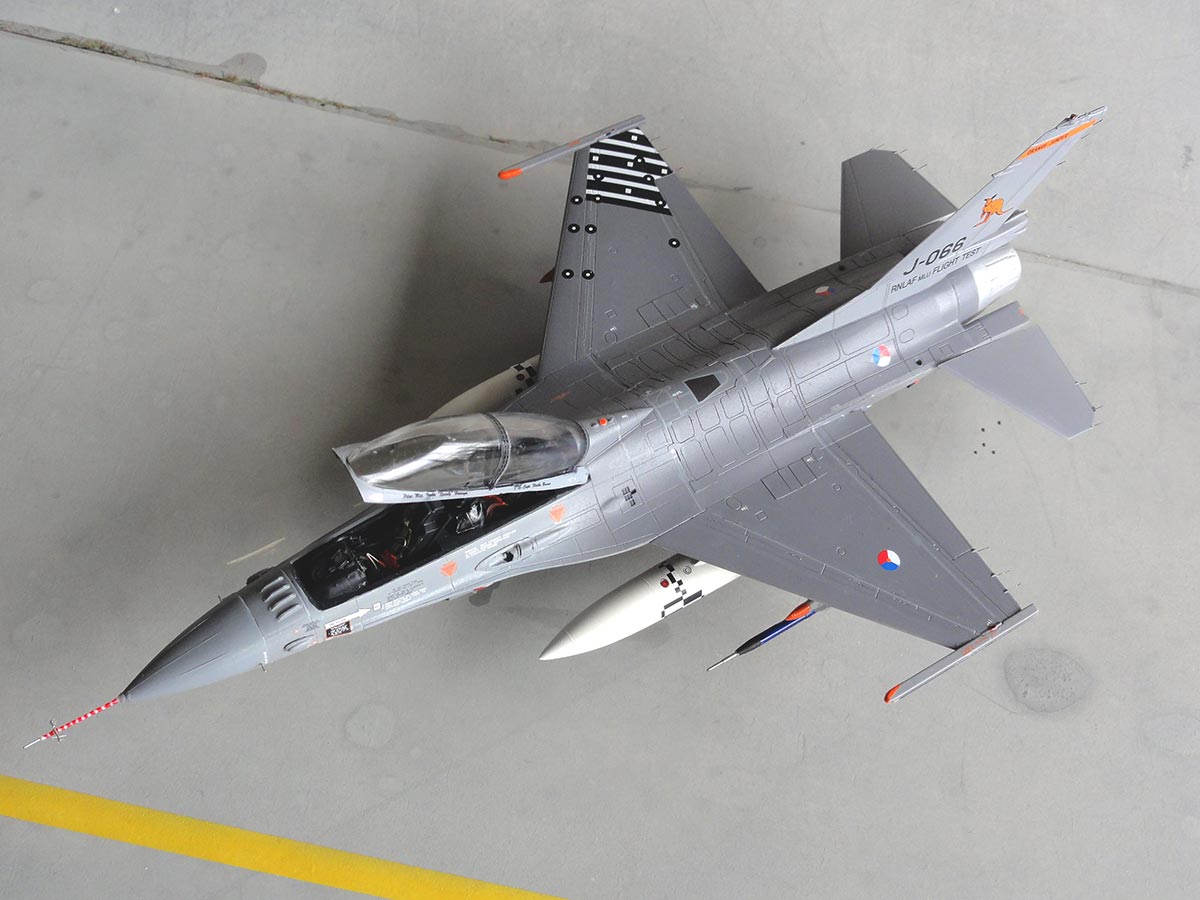
Here the special camera calibration stripes are seen on the right top wing.
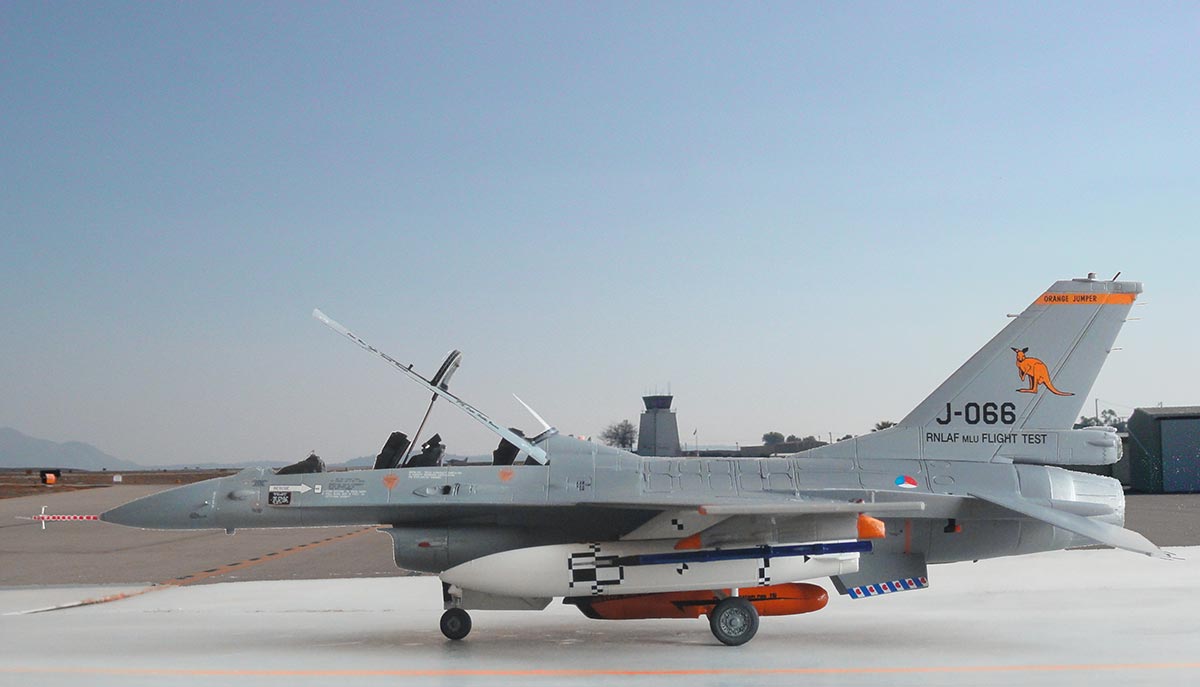
ORANGE JUMPER on deployment in the USA....
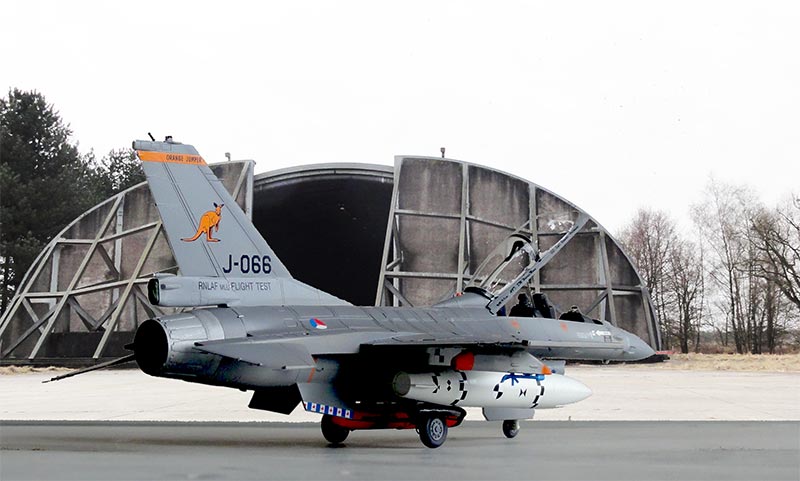
.... and at a Dutch Air Base.
On to next F-16 [ Page 10.... ]
..
Back to 1/72 Models

(c) Copyright "designer"/ All rights reserved. Your comments are welcomed by webmaster
Created this page April 16, 2017