[ page 16 ]
F-16 in 1/72 scale: modelling reports of another few TAMIYA kits
... continued
from page 15...
..
The kit is very nice and another few will be made.
 [ 27 ]
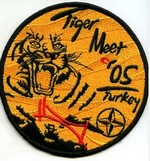
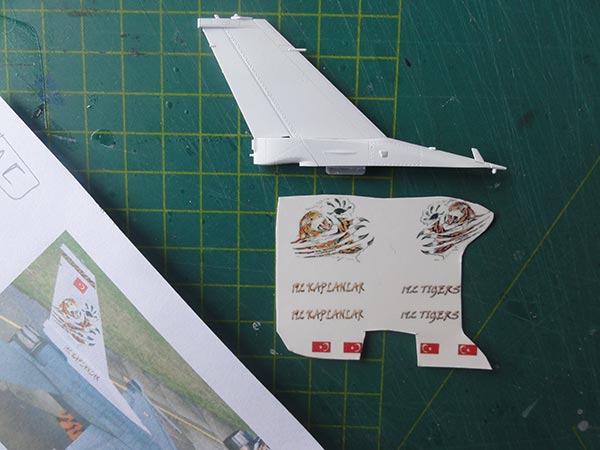
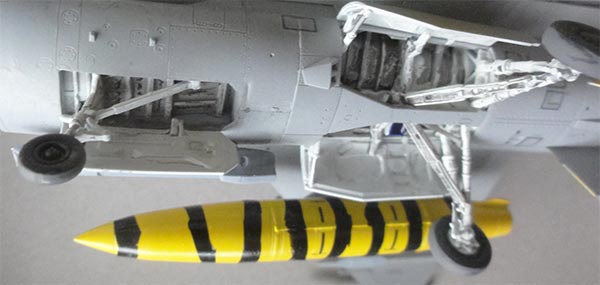
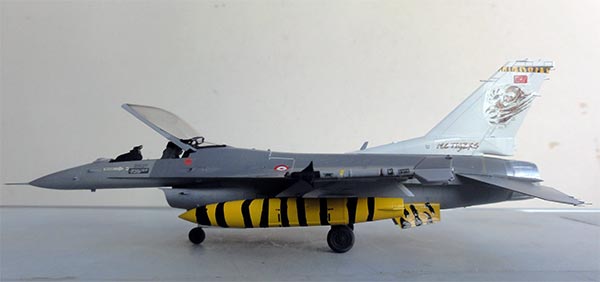
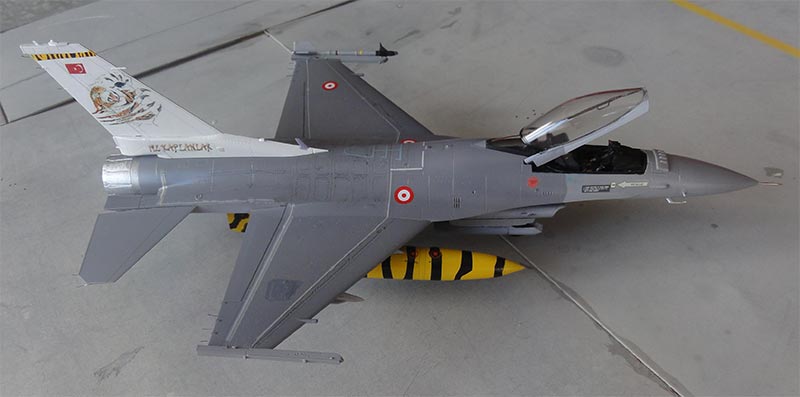
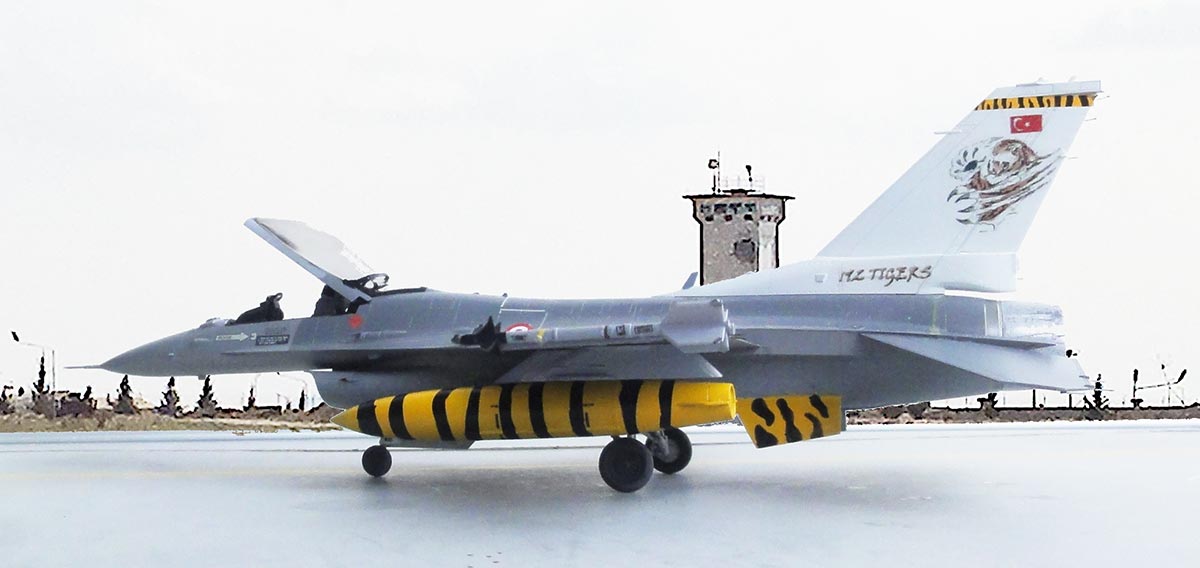
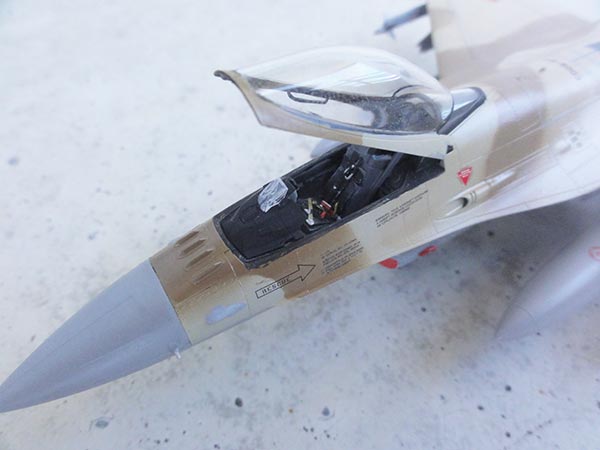
This one was made as a F-16C Block 50 of the Turkish Air Force in a NATO TIGER MEET 2005 scheme. I saw some very nice photos on the internet [external link] of this single seater that looks great. It had a tail with TIGER markings which will be made through home printing.
The TAMIYA kit for the Block 50 was made as per instructions. It has all the parts such as the "big mouth" MCID intake, thick base tail, "beer can" antennas on the wing leading edges, heavy stronger undercarriage with bulged wheel doors, the LAU-129 wing tip launchers and various smaller bits. A small change was however the type of IFF antennas ("bird slicers") in front of the cockpit.
The later style IFF antennas are on a raised panel: I had a spare part #Y6 from a Hasegawa F-16 ADF kit with these raised IFF antennas and glued this on the Tamiya part #A12 :
The standard NATO F-16 colours are appropriate with the desired TIGER scheme, except for the white/very light grey vertical tail. The tail parts were thus not yet fitted prior to the airbrushing. Note that various vents, antenna and bulges are seen on this C/D tail. The standard USAF tail end is there, so without any parachute pack.

The standard NATO F-16 Fed.Std colours are:
- FS36375 using Gunze Sangyo H308 mostly
on lower surfaces and wing fuel tanks;
- FS36270 using Gunze Sangyo H306 on
lower fins, radarnose and spine, wing tip launchers;
- FS36320 using Gunze Sangyo H307 on
forward fuseage, small areas of intake and fuselage sides;
- FS36118 using Gunze Sangyo H305 mostly
on aft upper surfaces;
The insides of the big intake were painted white as well as the insides of gear bays and undercarriage doors.
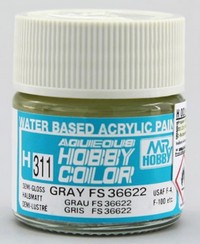
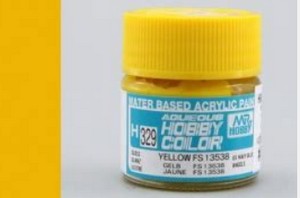
The yellow wing fuel tanks got a coat of Gunze Sangyo H329 yellow acrylic. For the vertical tail I airbrushed Gunze Sangyo H311 acrylic which is a very light grey-white FS36622.
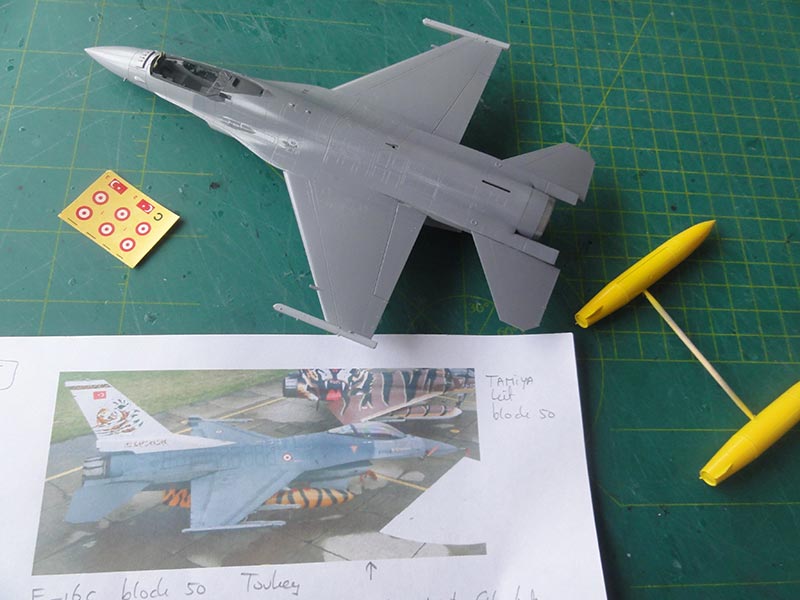
The TIGER markings were to be home printed. This is feasible as the tail is white and the print can be done either on clear or white decal paper.
I found a few very good photos on the internet of this TIGER aircraft showing the starboard and port tail areas (these are not symmetrical).
The printer at home is a suitable high resolution 600 DPI Epson XP-530 inkjet printer. I made first prints on plain white paper of the TIGER drawing, flags and titels/ texts to do measurements.
I determined the needed photo size for the tail in 1/72 scale. Re-sizing was done in my graphics program, each photo was made into a drawing and printed on plain paper again to check the correct size. Check, double check.
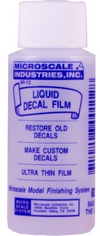
When it seemed good, each drawing was printed on special decal paper: I use Bare Metal Foil White decal sheet, in my case for use with an inkjet printer.
After printing leave the print to dry for 24 hours. Than, on the printed decal no less than 5 coats of Johnson Pledge / Future varnish were airbrushed. This should protect the printed inkjet inks. New followed a coat of Microscal Liquid decal film applied with a wide brush. The prints were ready after 24 hours drying. Each printed marking should be individually cut out just as other decals. It can be applied onto the model.
The remainder of the decals came from the spares box and various kits:
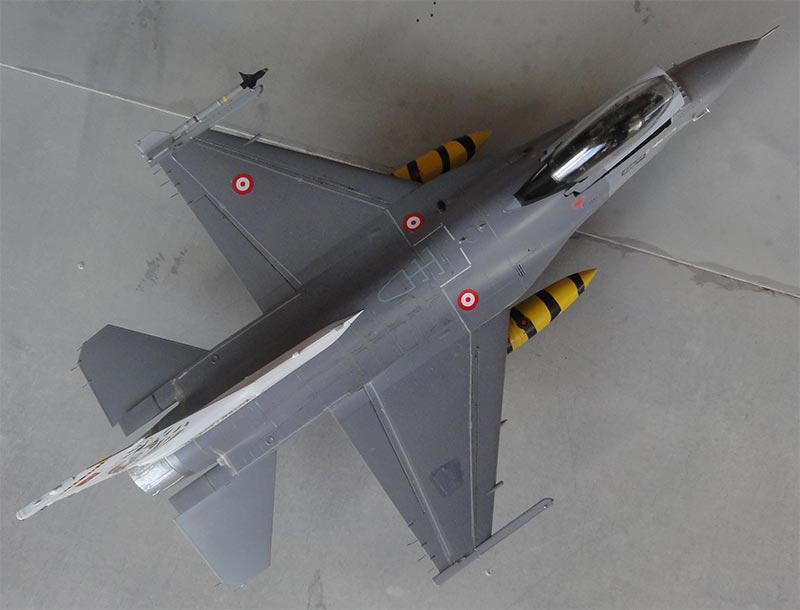
- the Turkish roundels from an ESCI F-16A kit #9041 released in 1985.
- the light grey walkway lines were obtained from other F-16 decals.
- the TIGER tail band can by coincidence be found in the TAMIYA decals as per kit.
Note that the position of the roundels
on the wing on Turkish AF F-16's vary between starboard or port
side.
The model was completed as usual. The ACES seat looks to be good for a later style Block seat type and harnesses were added made from tape and other
bits. On the instrument consoles decals were used as per kit. The later style HUD is
provided as appropriate for the later Block F-16's.
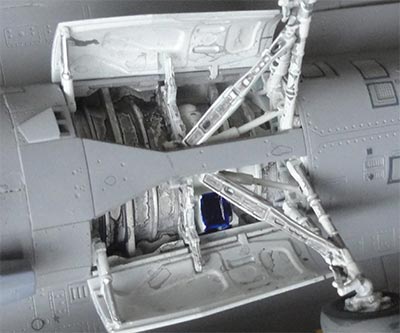
The
landing gears were installed. The single piece main undercarriage "V" strut center section was cut in two so the two separate legs could now be fitted. A few
"hydraulics" added made from thin metal wires on the legs and inside the bays. A bit wash was added inside the gear bays and
gear legs; a mix of acrylic varnish and black paint will do. The front gear door has the later Block
landing lights package (part #E4).
The kit exhaust pipe was set in place as seen in STEP 4 of the instructions. The exhaust insides were painted with white strakes for the "keramic" feathers. Inside the part no afterburner ring is moulded by Tamiya unfortunately, I simple painted the end plate black.
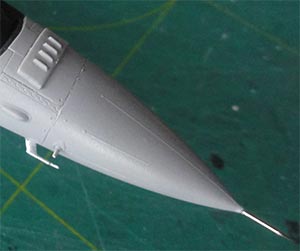
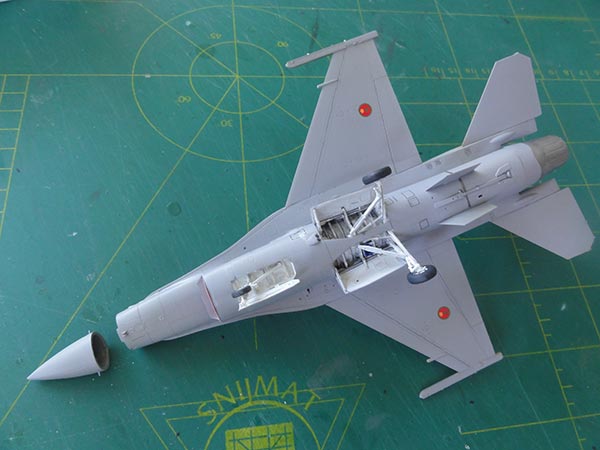
Some 15 static dischargers (only 2mm long each) were cut from fishing line and set in place. On the nose the pitot tube was made from a needle and the anti-collision lights on the intake painted. On the wing tip an AIM-9L Sidewinder missile was installed as well as the various pylons.
The overall model got a semi-gloss varnish coat airbrushed on Johnson Clear/Pledge with 10% added Tamiya Flat Base X21 mixed, one drop of Glycerine to improve flowing and thinned with some 10% Iso Propa Alkohol.
As a final step the canopy was to be set open on this model. Two side handles are missing inside the canopy, these were made from black stretched sprue. The canopy fits well but in open position I shortened the pegs about 2 mm of part #G3.
Some details of the model are seen here:

![]()

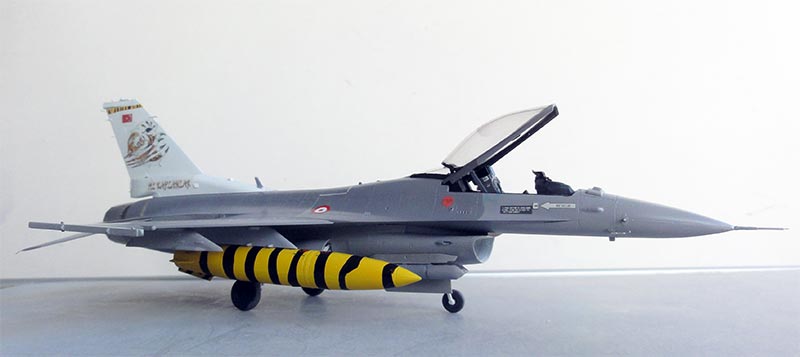

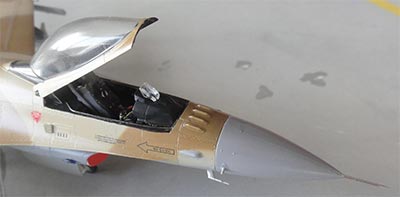
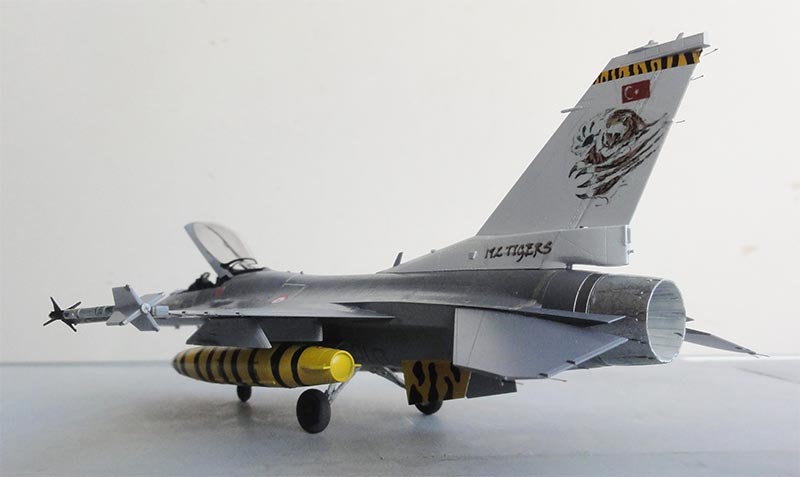 Turkish Air Force F-16C Block 50 during NATO TIGER MEET 2005
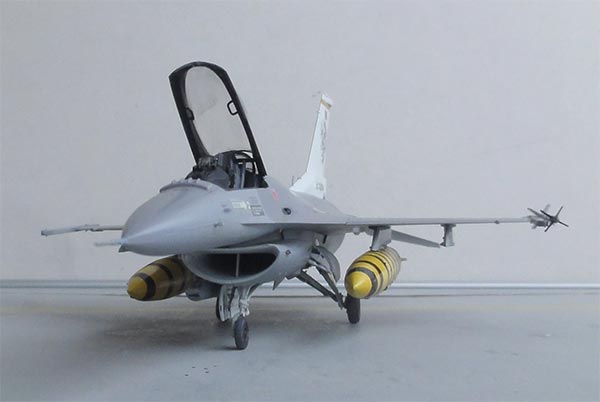

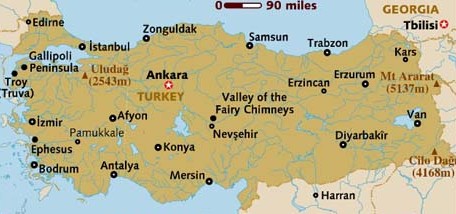
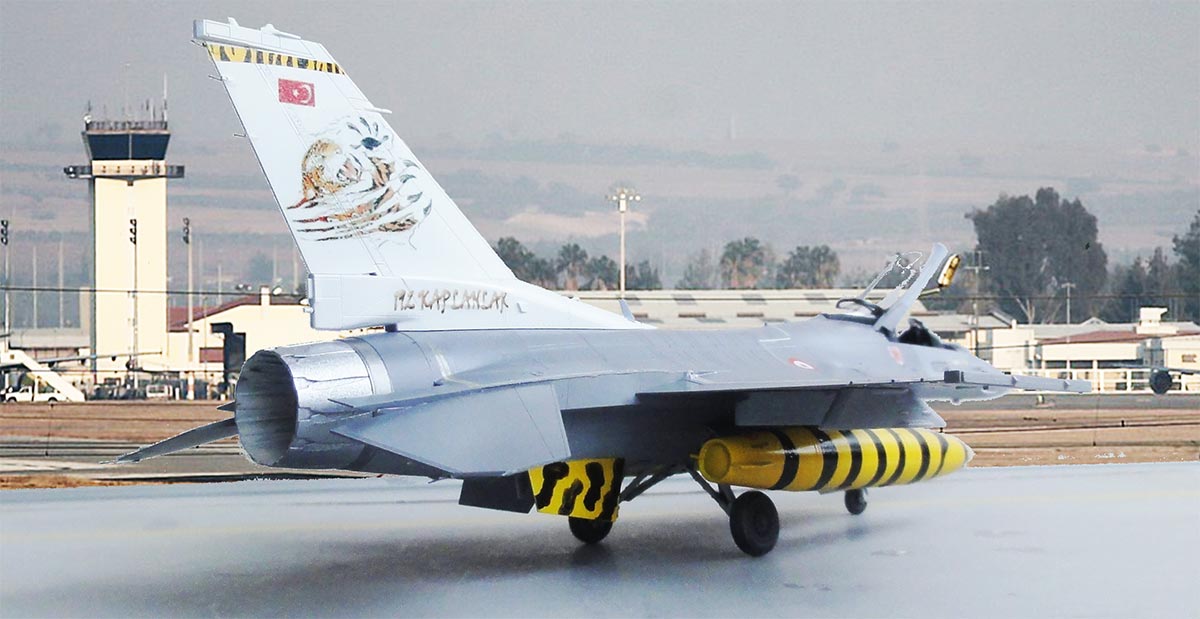 ... at Incirclik air base, Turkey....
page 2
page 3
page 4
page 5
page 6
page 7
page 8
page 9
page 10
page 11
page 12
page 13
page 14
page 15
page 16
page 17
...
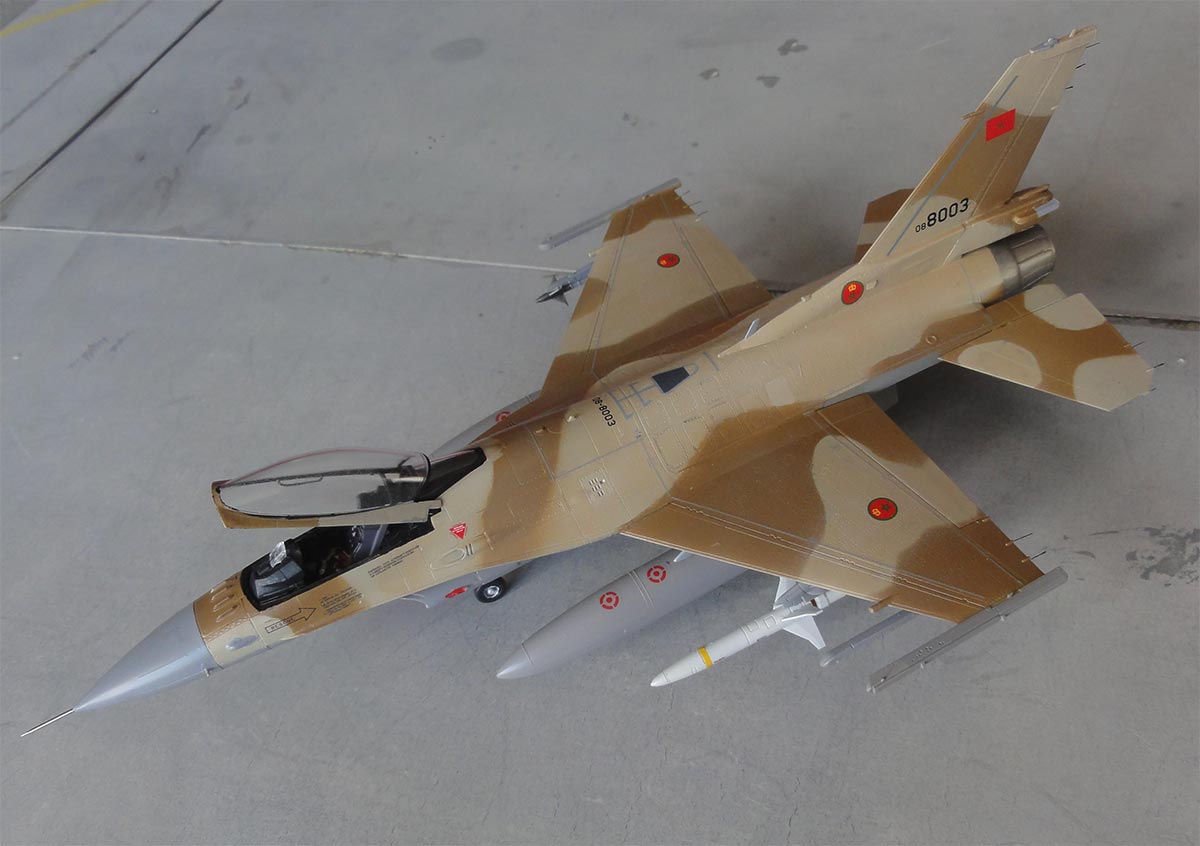
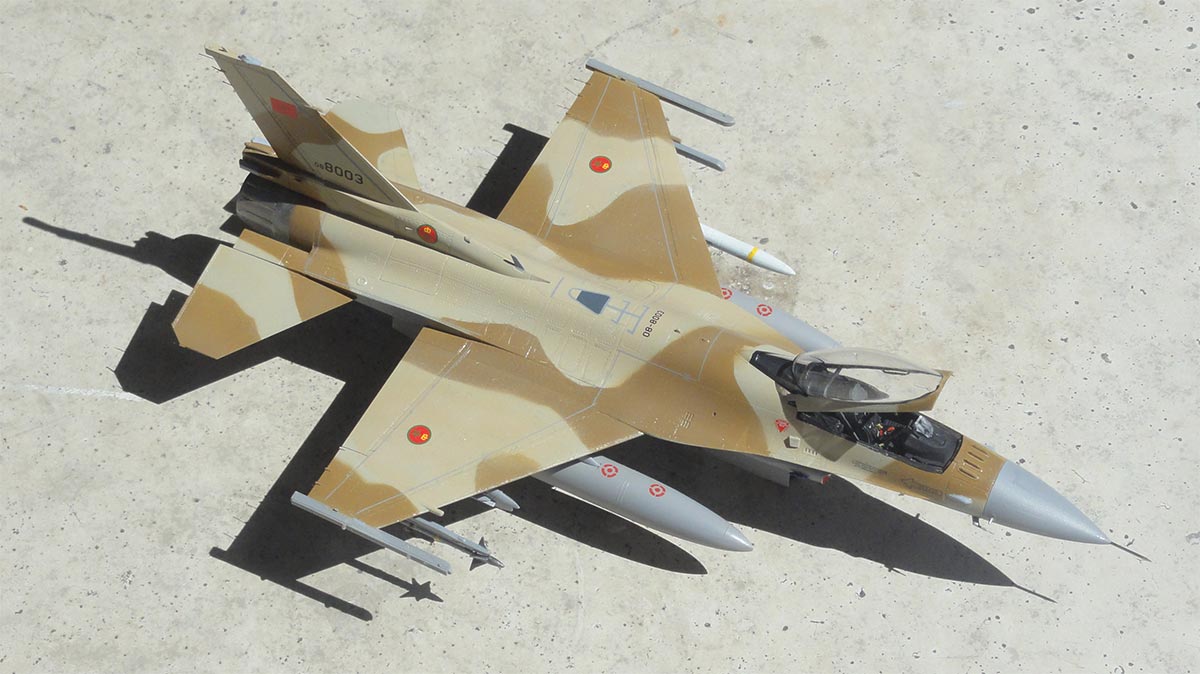
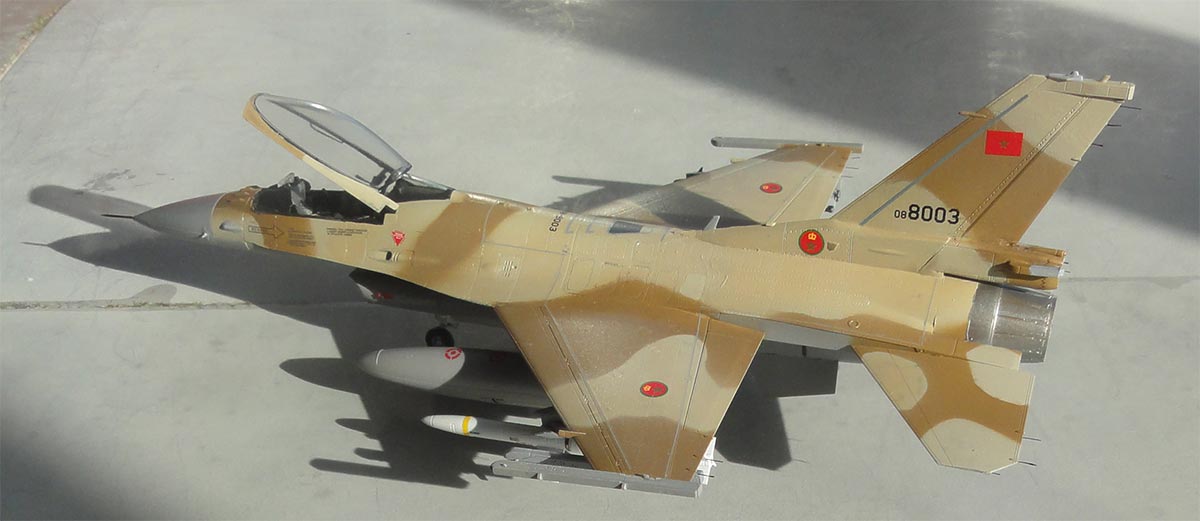
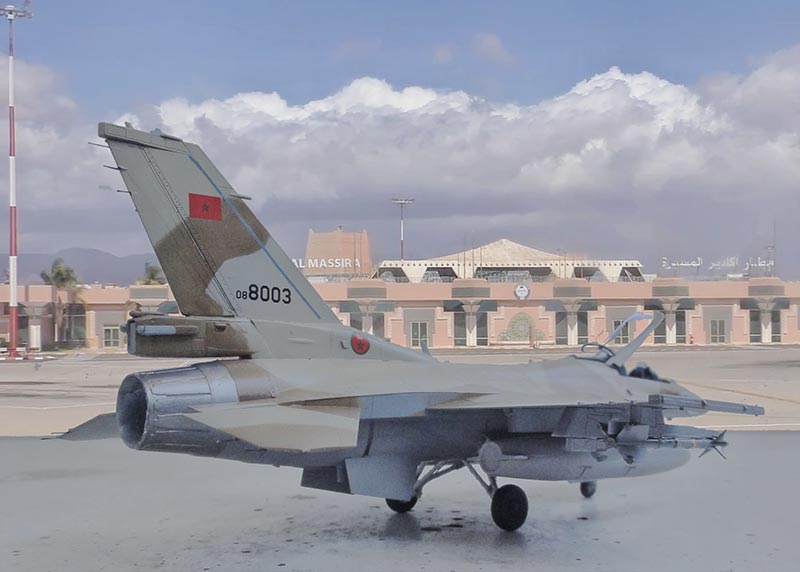
Morocco
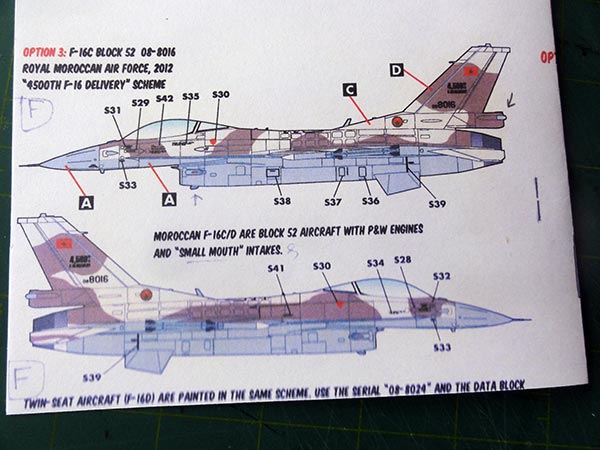
For the next F-16C Block 50 Tamiya kit it was decided to do a conversion to a Block 52 to make a model of the Moroccan Air Force so some conversion is needed. I had a nice "Caracal Vipers" decal sheet that has the appropriate decals.
[ 28 ]
![]()
First needed for this Block 52 is a "small intake" for the Pratt
and Whitney F100-229 engine with a different exhaust pipe as well. No
conformal fuel tanks (CFT) will be fitted on the fuselage spine.
The kit was assembled as per Tamiya instruction STEPs 1, 2, 3. Fit the standard IFF antennas "bird slicers" (as part #A11).
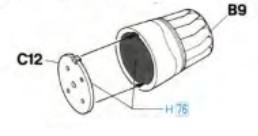
In STEP 4 another exhaust pipe is needed for the engine. I retrieved a F100-229 exhaust from a Revell F-16C kit or use from a Hasegawa F-16 kit part #B9.
STEPs 5, 6, 9, 10
The
undercarriage needs a bit planning. The V-shaped leg pat #B6 will not
yet be fitted, that can be done later by cutting it. The central
beam #B13, frame #B12 and #A18+A19 can be fitted at this stage.
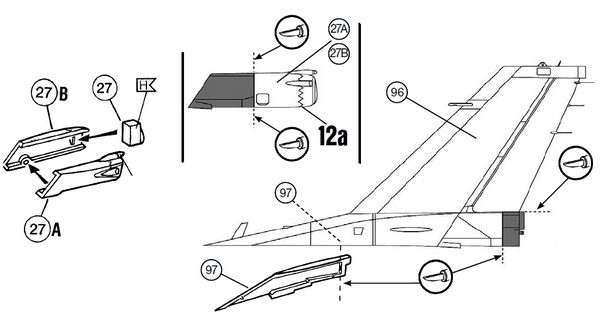
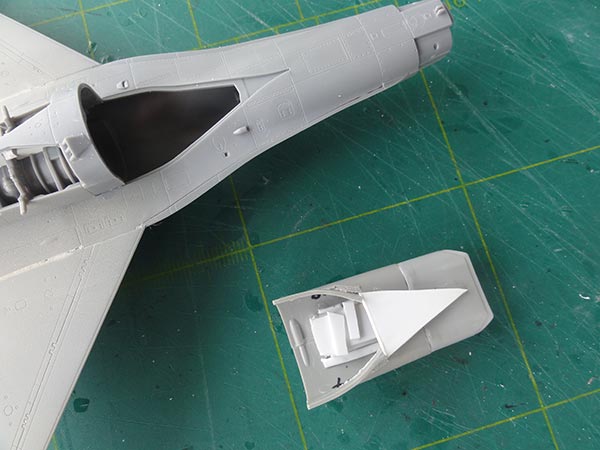
In STEP 12 the vertical tail should be given for the Morocco F-16 a long parachute housing with the thick tail base. So do not use kit parts #A25 and #A26. Fortunately I had spare parts for the long parachute housing from a Revell F-16A MLU kit. This was crafted onto the Tamiya vertical tail base end.
On the parachute housing also some ECM antennas are seen, these were found as spare parts in the Revell F-16C kit but can also be made from thick plastic rod. (these are not yet installed in the photo below).
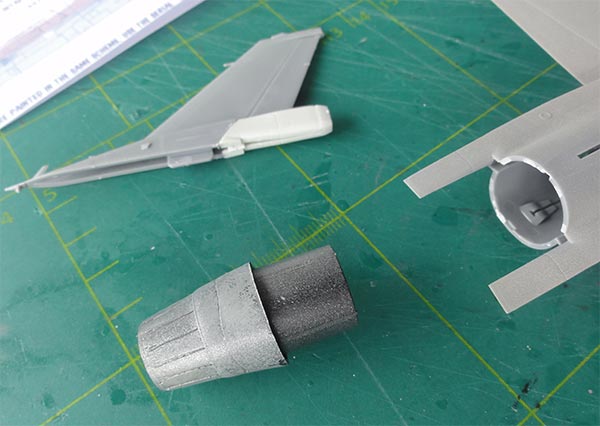
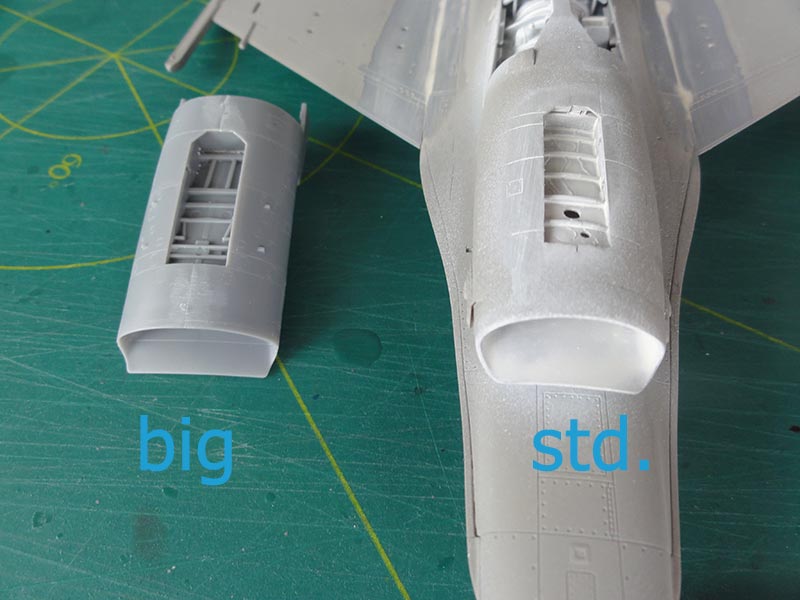
As noted, for an F-16 Block 52 a small intake is needed. So do NOT use the Tamiya kit wider MCID intake parts here. The small intake width is about 17 mm in 1/72 scale. I had a number of standard "small intake" spare parts from a Revell F-16C kit or get one from a Hasegawa F-16A. This will be crafted onto this model.....
First a thick piece of "V shaped" card was needed to fill the gap with a fairing.
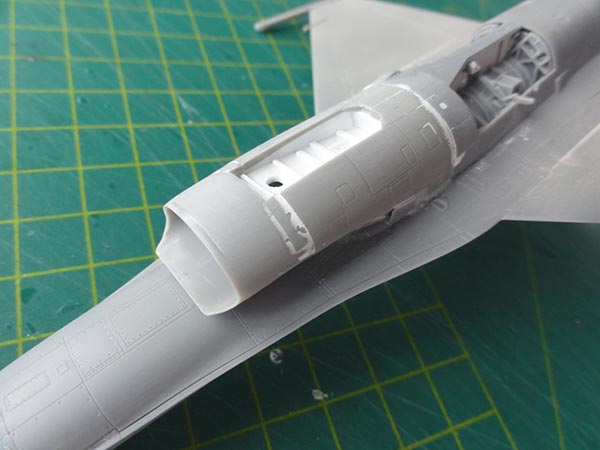
The F100-229 exhaust was also fitted as well and only needed a bit of sanding to fit well. 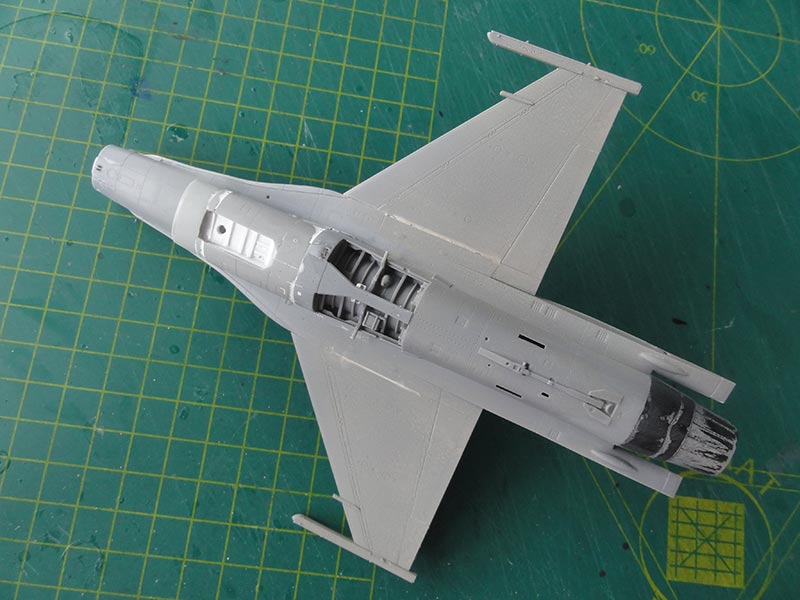
The model was given a base grey coat now airbrushing Revell Aqua 75 steingrau. This reveals any small gaps and irregularities. Some small gaps still needed a bit putty so this was taken care of.

As per Tamiya kit the "bulged" gear doors related to the heavier landing gear were also used that are common for later Block F-16's (as also found in the Kinetic F-16D Block 52 kit).
Before installing the smaller parts, the model and some major parts would
get their desired camouflage scheme. The excellent Caracal decal
scheme drawing can be used to show the camouflage pattern.
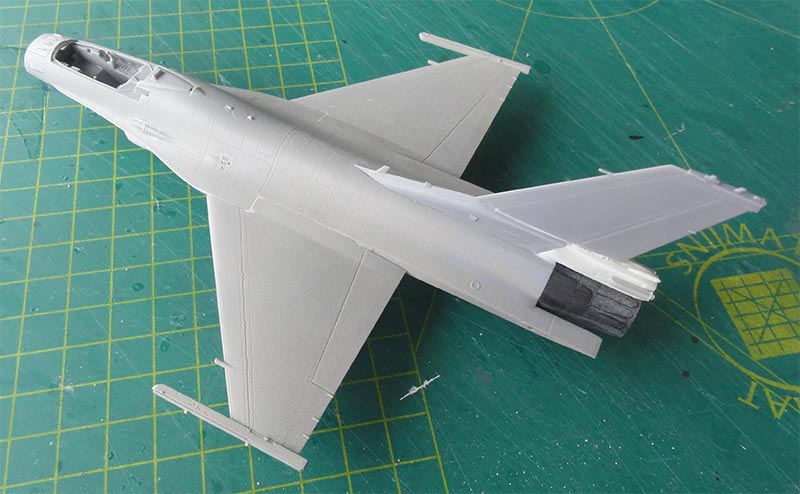
For this Moroccan air force F-16C Block 52 these colours were airbrushed using Gunze Sangyo acrylic paints in this order:
-1- lower surfaces and radar nose: lighter ghost grey FS36270 Gunze Sangyo H306;mask the lower surfaces and than...
-2- sand/ tan FS33613 for which Gunze Sangyo H313 seemed a good enough match;
mask the camouflage pattern...
-3- brown FS30219 airbrushing Gunze Sangyo H310.
For masking Revell masking film was used.
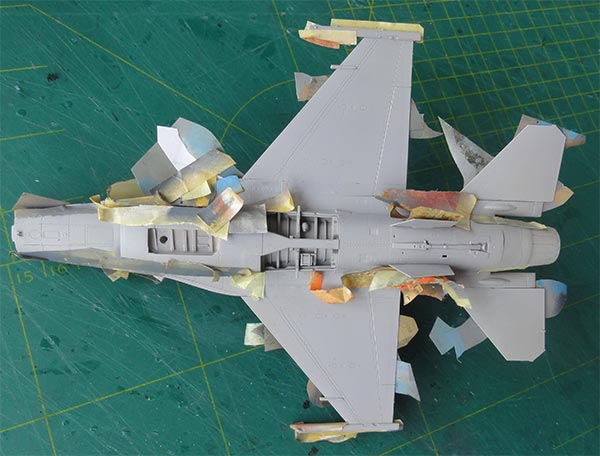
It takes some time but the result is worth it. The canopy frames were also masked and airbrushed as well as the gear doors etc.
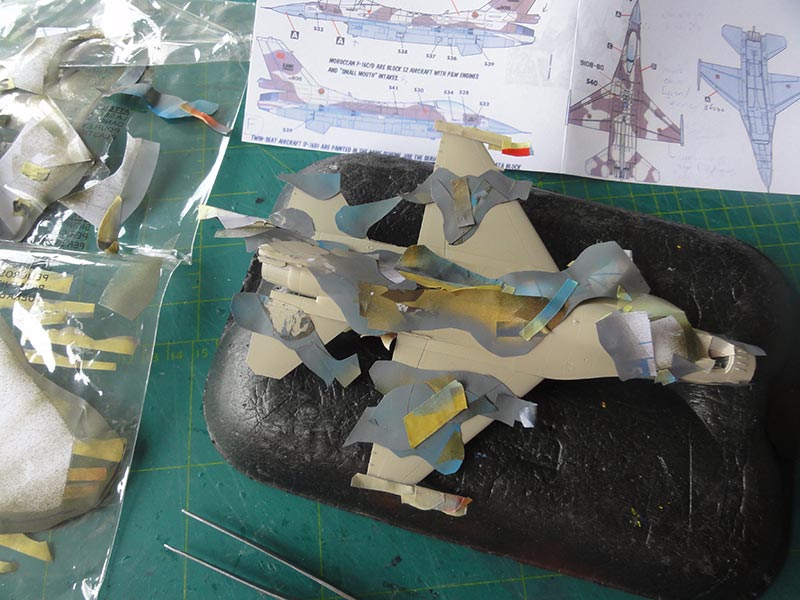
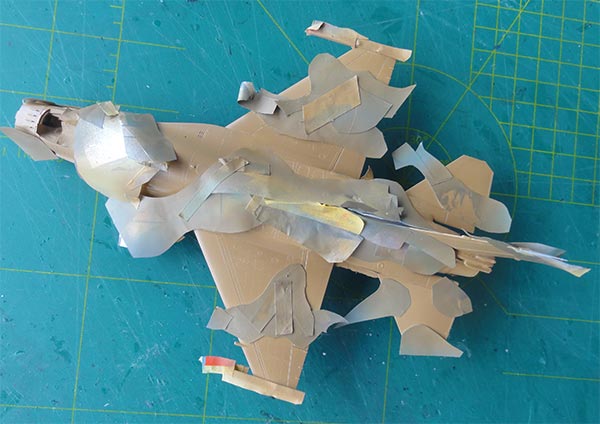
The result is seen here. Note that the nose is not yet set in place.

The decals as per Caracal set would follow next, but first a layer of gloss varnish was airbrushed over the entire model. I used Johnson Future/Pledge thinned with Iso Propyl Alcohol (IPA and a few drops of glycerine to improve flowing.
TAMIYA unfortunately provides NO walkway line decals in their F-16C kits. (these were not applied on more recent USAF F-16C aircraft). The thin walkway lines were thus sourced from other decal sets: they are of the very light grey variety which I found in a Revell F-16A MLU kit.
STEPs 5,6 and 11
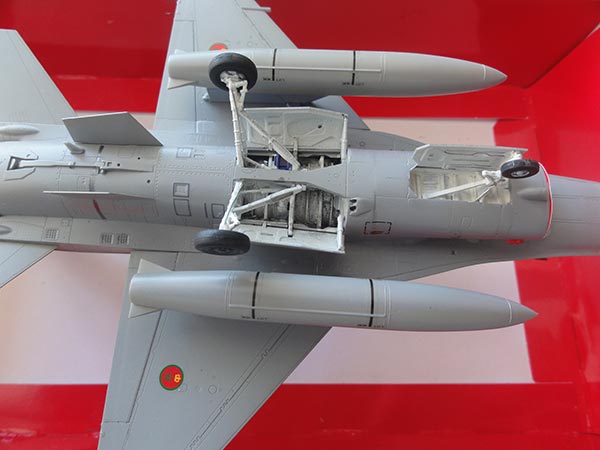
The single piece main undercarriage strut center section with the "V- shape" was cut and the two legs could now be fitted. Mean gear colour is white. Note that the main gear wheels are to be set at a small tilt angle. Than fit the main gear doors seen in STEP 11.
Added were a few "hydraulics" using thin metal wires. The nose undercarriage seen in STEPs 8,9 fits well but I added a very tiny retraction actuator as the leg base. The front nose wheel door also has the later Block landing lights package (part #E4).
A bit wash was added inside the gear bays and on gear legs.
STEPs 14,15
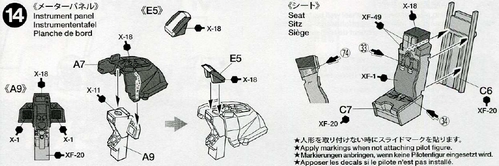
The cockpit looks good and even the pilot figure does fit if you wish to install him. The main base cockpit interior colour is medium grey but with many black areas inside (see my F-16 walk around page here...). The ACES seat and HUD were installed.
STEPs 19-22
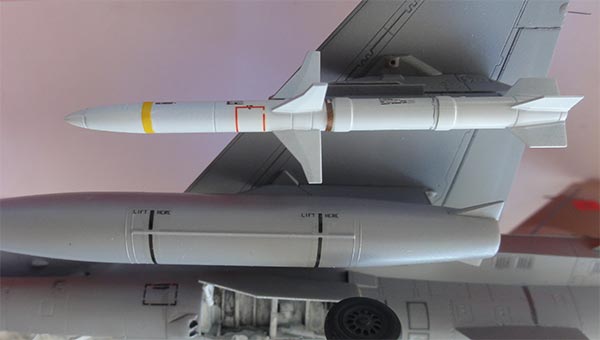
Stores/ weaponry fitted were first two 370 gallon standard wing tanks in lighter grey FS36270. The standard AMRAAM wing tip LAU-129 launch rails were fitted as well.
An AIM-9M Sidewinder and an AGM-88 HARM missile were fitted on pylons below the wing. The needed adapter pylons are found in the Tamiya kit release "with full equipment".

Final details are the nose pitot, on each wing tip and the stabilizers 2x2x3 static dischargers and 3 on the vertical tail made from fishing wire (and painted black), so a total of 15.
The canopy got its 2 missing inside handles that were made from black stretched sprue.
I could not really see on photos if the canopy glass was tinted so kept it as is. The canopy was installed open and.... the model was ready!
MOROCCO
> check out info about the Morocco air force on the Alphajet page here...
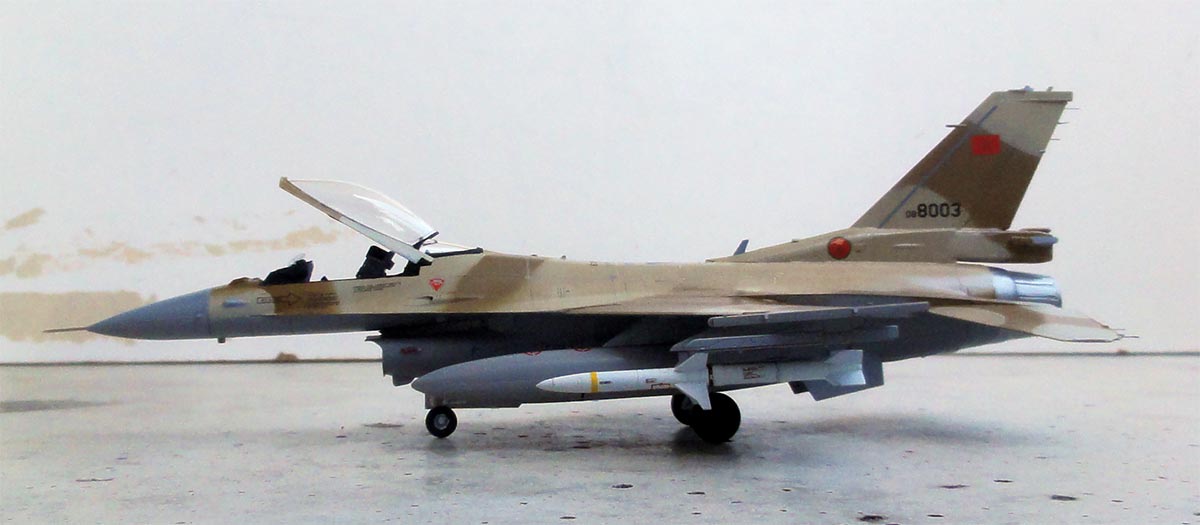

Note here the ECM fairing on the parachute housing
On to next F-16 [ Page 17.... ]
..

(c) Copyright "designer"/ All rights reserved. Your comments are welcomed by webmaster
Created this page March 6, 2019