[ page 3 ]
F-15 Eagle model in 1/72 scale
... continued from page 2....
page 1
page 2
page 3
page 4
page 5
page 6
page 7
page 8
page 9
page 10
page 11
page 14
...
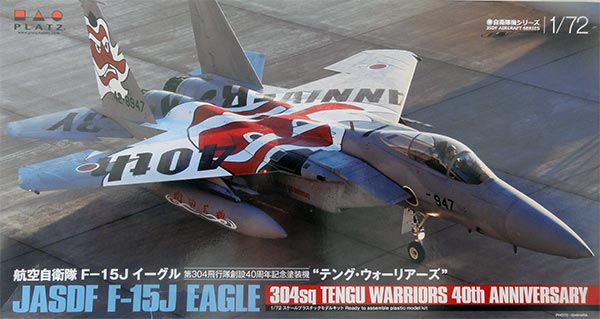
PLATZ from Japan released a good 1/72 F-15J kit in 2015. Soon followed a whole series of these kits with the same mould but with different attractive decals.
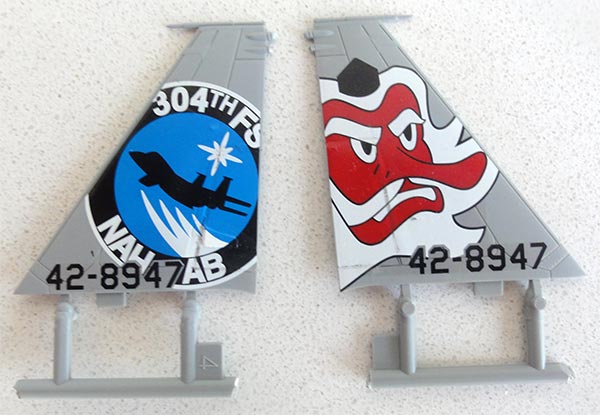
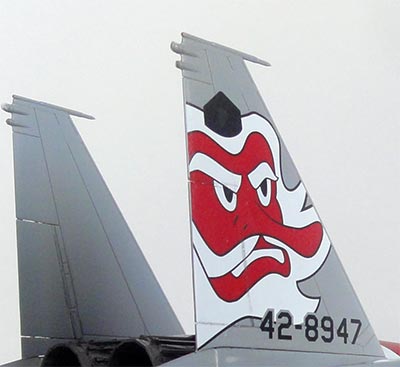
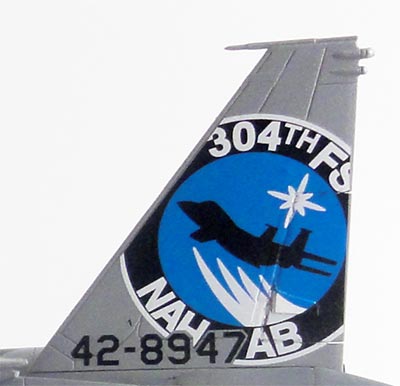
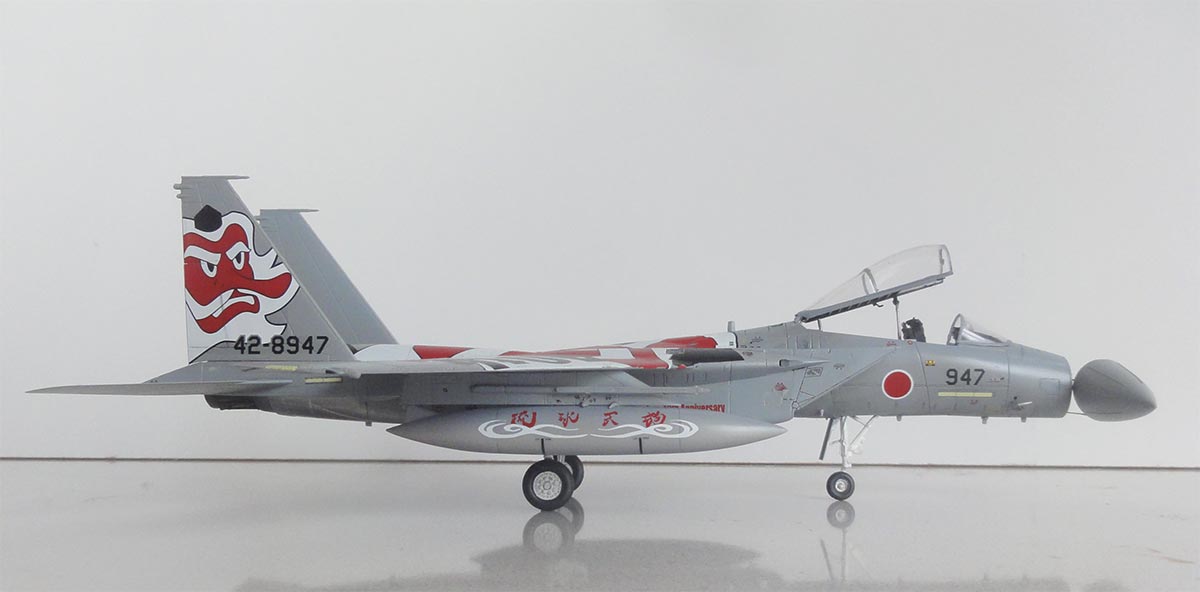
Here kit #AC-24 will be made with attractive markings for a F-15J of the "Tengu Warriors" of JASDF no. 304 squadron because of their 40th anniversary. This squadron flies from Naha AB at Okinawa island and protects the South West and sea region of Japan.
The Platz kit has the common six sprues normally found in any Platz F-15 kit with about 90 grey parts and a clear sprue.
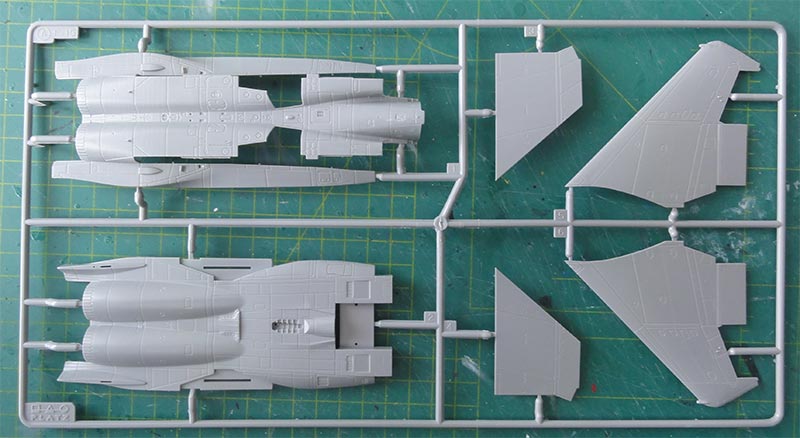
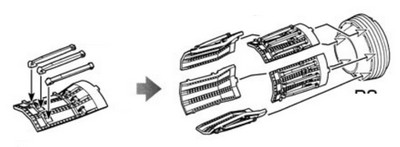
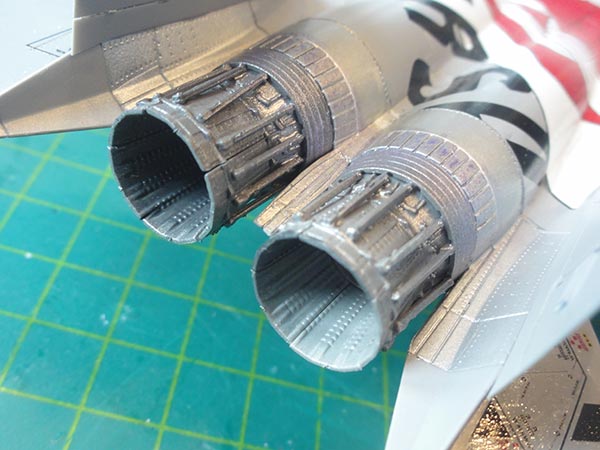
There are nicely deep engine air flow ducts included in this kit.

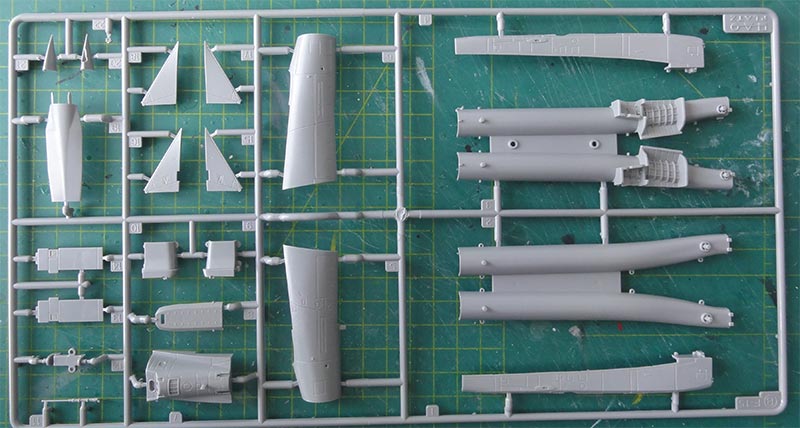
2X: with correctly symmetrical vertical and horizontal tails...
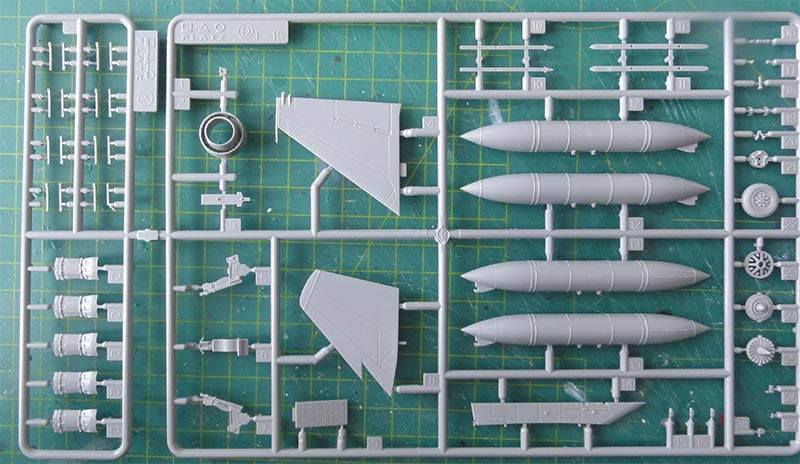
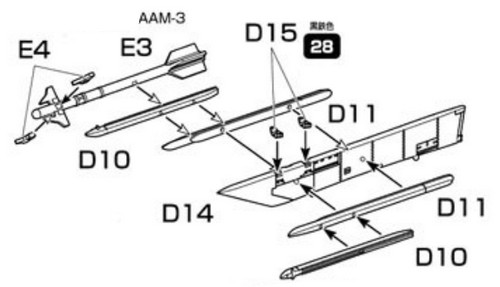
... and the missiles sprue that includes the Japanese missile types very nicely:
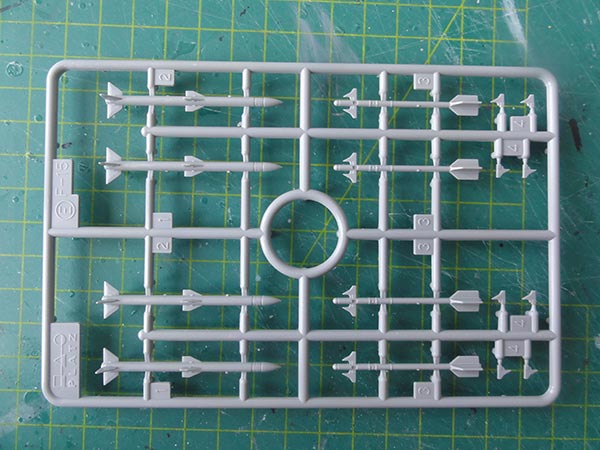
... with 4 AAM-4 AMRAAM missiles as well as 4 AAM-3 Japanese missiles including their pylons, launchers and rails.
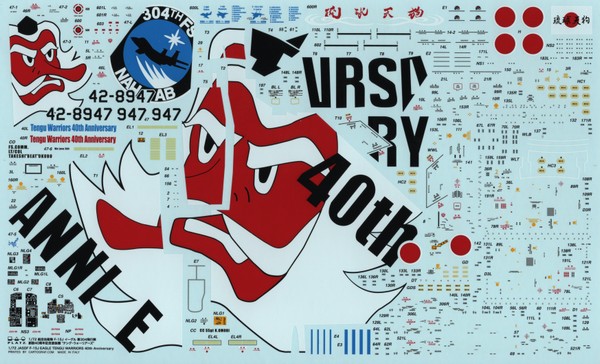
In this #AC-24 kit only one decals scheme for this "Tengu Warriors" scheme are provided. The decals are very good and printed by Cartograf in Italy. They include all the tiny stencilling, but I wish they had printed these on a larger size sheet.
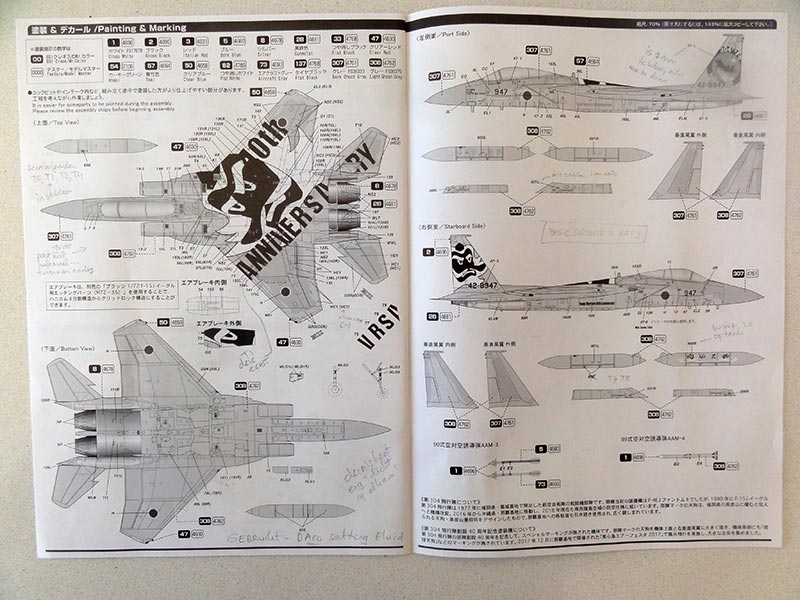
The kit instructions with explanations in Japanese and English are good with also paint numbers in Gunze Sangyo acrylic or Testor/ Modelmaster paints.
NOTE: I later found sometimes Platz suggests to install parts that are not seen on a particular (earlier) JASDF F-15J; this may concern the tail hook fairing (parts #C26+C27) that often was removed to save weight and the various J-MSIP and ECM updates (parts #C48, #C49, #C50, #D28). So it is a good idea to look at real photos that are easily found on internet).
Regarding the MSIP:
Many JASDF F-15J were upgraded through the J-MSIP, the "Japan Multi Stage Improvement Program", often called MSIP. Internal wiring and provisions were installed for (gradual) equipment upgrades. It started with cockpit panel for weapon selection. AN/ALE-45J chaff and flare dispensers were installed. The ECM J/ALQ-8 system was installed and sometimes the J/APQ-1 rear warning system with a changed starboard rear fuselage end fairing installed but not on all MSIP jets as the systems also make the F-15 more easily detected by the enemy. Some engine upgrade were done to F-100-IHI-220E standard. The MSIP jets enabled the pilot to use the HMCS "helmet mounded cueing system". Some upgrades were also done at the ejection seat harnesses.
Another introduction was the AAM-5 missile system that was also retrofitted on many older JASDF F-15's combined. It seems also some MSIP jets are able to fire the AN/AGM-158 stand off missile (as well as the JASDF F-35A).
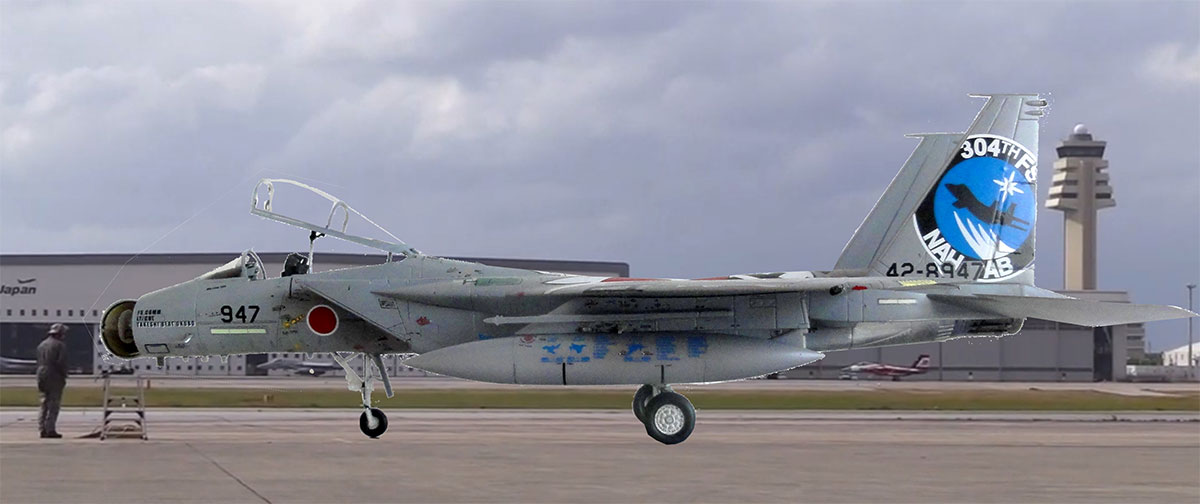
It is not clear if this Platz scheme F-15J coded "42-8947" had the MSIP upgrade which is difficult to see. The decals for the rear low visibility lights seem to suggest these are standard and this suggest the F-15J is not a MSIP. (the MSIP has a small split in these rear lights. Some F-15J had the J/ALQ-8 ECM system fitted which is externally visible with 2 antennas below each air intake. These are provided in the kit as 2 parts #D28).
The general advice is to study real photos to see if MSIP is applicable for a particular F-15J.
Back to the kit....
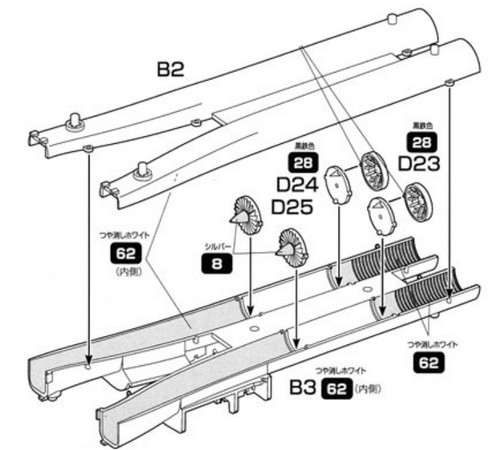
Full intake ducts and jet pipes are provided and Pratt and Whitney F100 engine exhausts look good without the "turkey feathers".
The canopy has a good cross section but as a result a mould seam runs along the center, so this needs to be removed with sanding and polishing. This is not a lot of work.
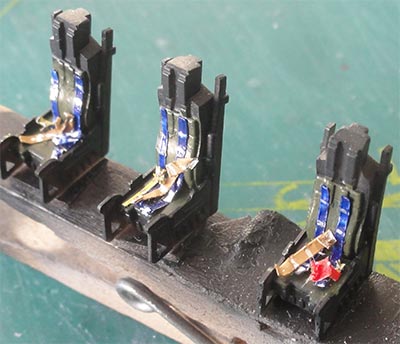
The ACES seat looks good just like the cockpit interior details.
On the horizontal stabilizers there are raised ridges which are a bit too thick.
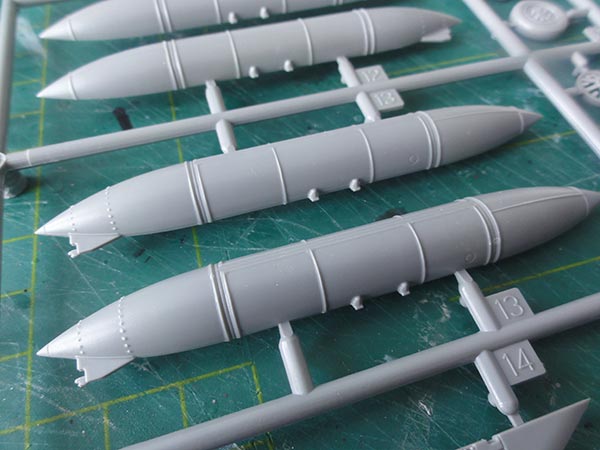
The stringers on the fuel tanks tare far too thick. Sanding is easily done to improve these but often I will use spare Hasegawa tanks.
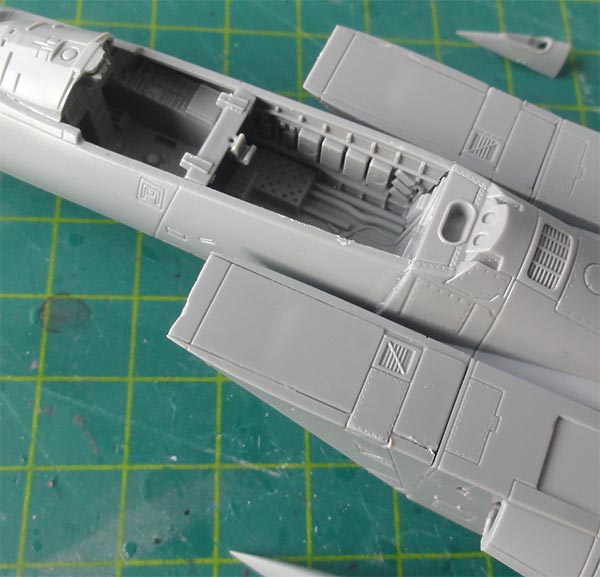
The Platz kit is very detailed but has a complex arrangement of parts. With the break down in the kit with separate fuselage sides Platz lets you get details in these and after a bit squeezing they do fit.
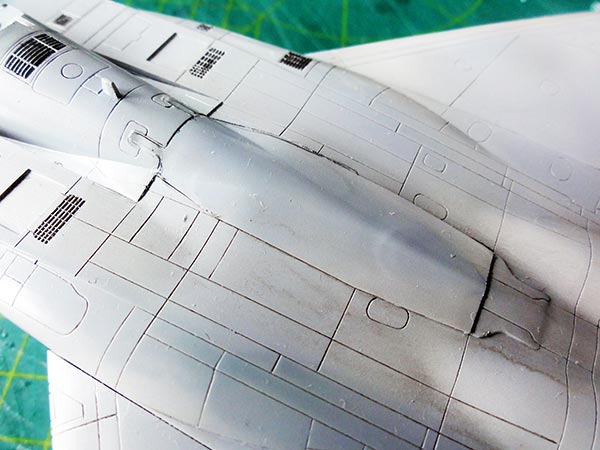
The kit' panel lines are recessed, but I feel they are really TOO DEEP for this scale. This is the only significant issue with this kit that needs more effort to resolve.
You get a choice to set the intakes tilted down but this feature is only possible "with engines running"; if desired than fit a pilot (not in the kit) and close the canopy. All silently parked F-15's have the intakes up / horizontal. So these parts are not often used on a model.
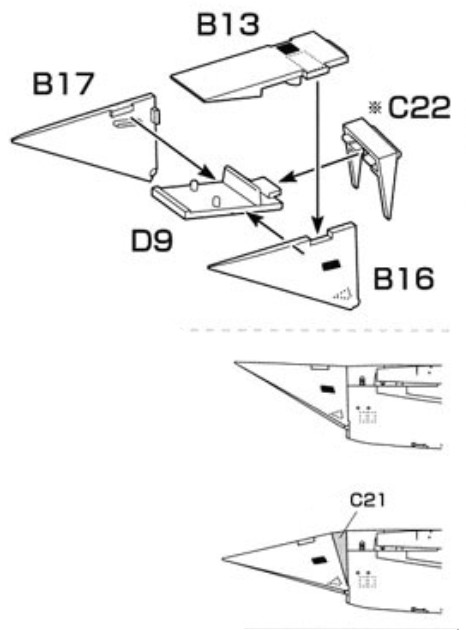
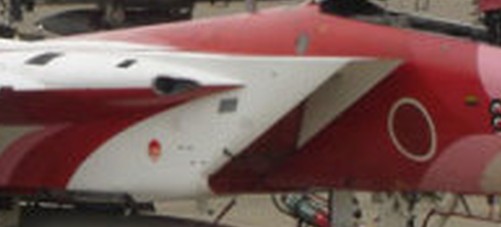
The "horizontal" intake standard position should be very carefully set aligining at the intake edge #B13. The tiny triangular section of the part #C22 is needed. Note the intake lip should not be perfectly horizontal but just very slightly up "near horizontal" as seen in the real photo here of a parked F-15J:
ASSEMBLY PLATZ F-15
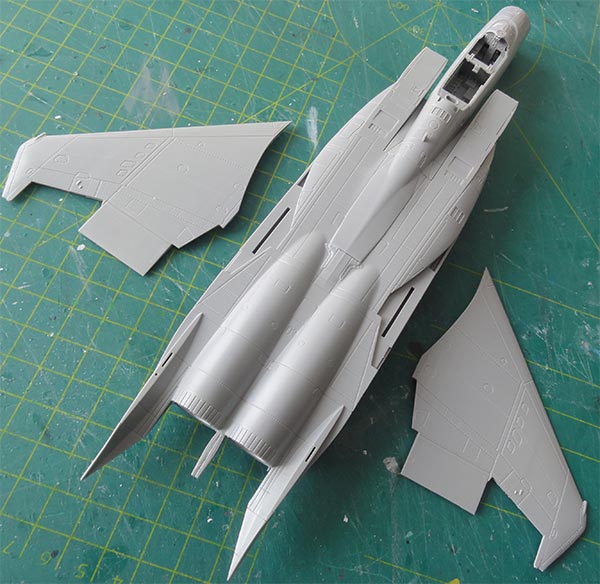
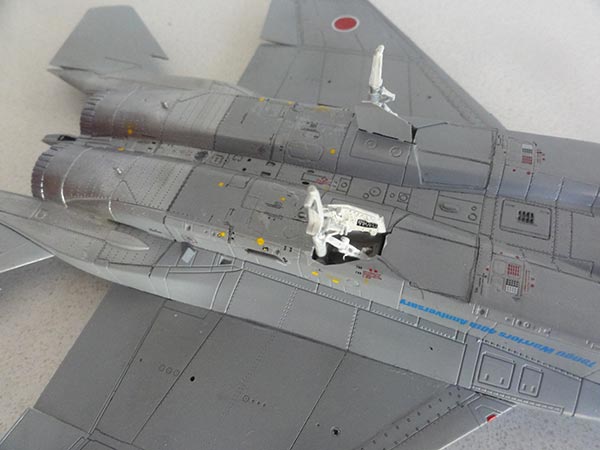
The overall fit of this PLATZ kit turns out to be very good, just a bit putty and sanding is needed.
Inside the intake parts #B15-B17 you may find small ejector pin marks, sand these.
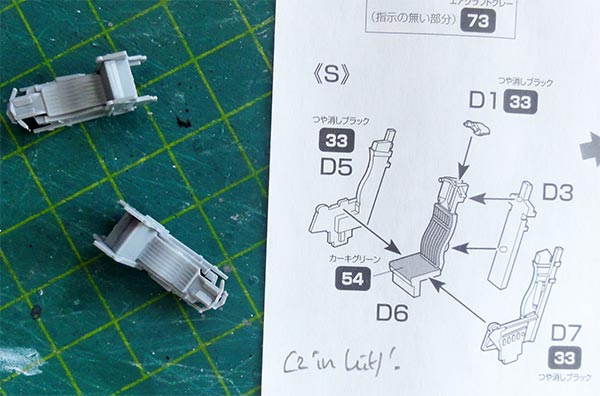
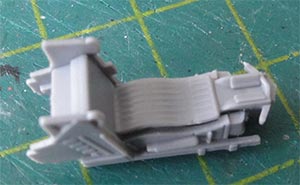
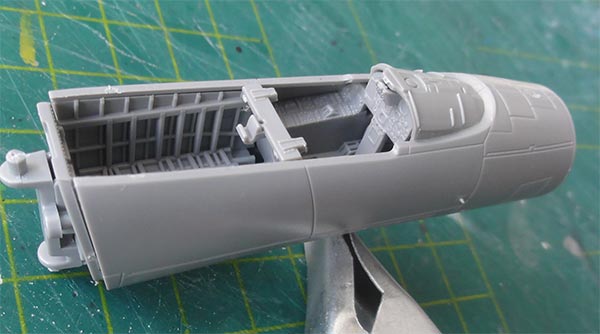
The assembly starts with the cockpit with nice ejection ACES II seat (you get a spare one in the doub sprues). I removed the lower seat locating lugs. It is always good to add more details such as the straps after painting.
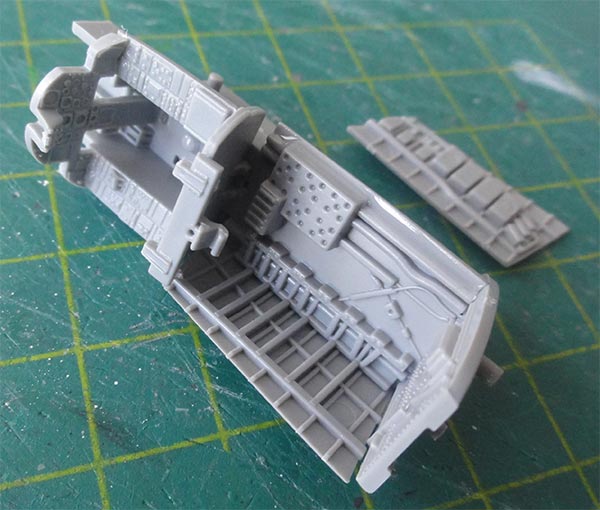
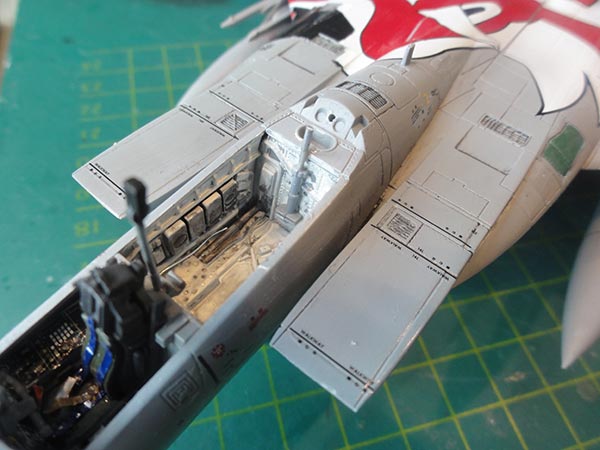
The avionics and systems bay aft of the seat looks great. The various boxes are also moulded. Painting with some wash will make it look good. The colours in the rear bay seems to vary but often mostly white floor with grey boxes and black wiring.
The radar nose (with moulded lightning protection strips for later upgraded F-15J jets) is a separate part. It is supposedly to be set closed but it would be nice to scratch build a radar here. I did not yet fit the nose.
The deep intake ducts with jet pipes are fine in this kit. These should be white inside but it is hardly seen. At the rear paint burned metal.
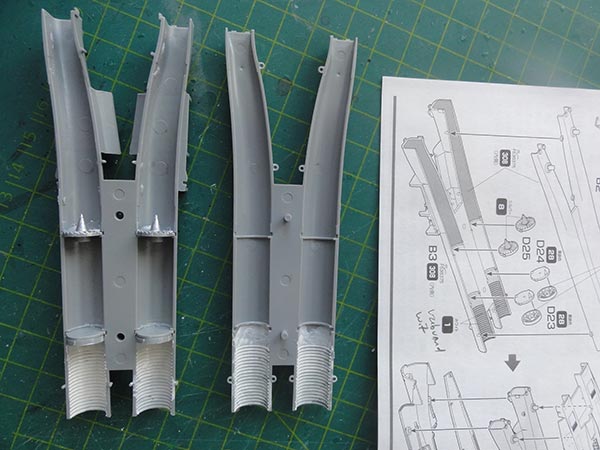
These fit very well.
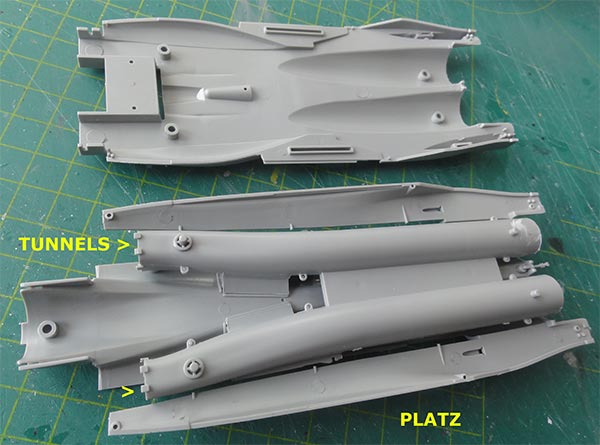
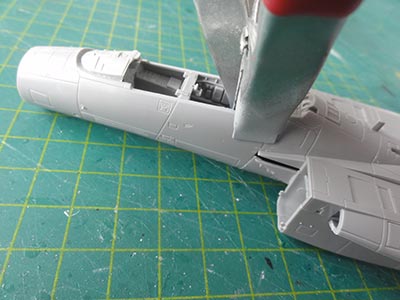
The nose section fits OK as well. Make sure to align the sides when joining with the rear fuselage. Sand the ridges and make flat particularly on the insides' of the intakes. Some small gaps needed putty and sanding.
The wing halves are well engineered and give strong joints following a panel line. On parked F-15's the flaperons droop slightly (though not noted in the instructions) and this is easily done as these are separate parts. Well done Platz!
This particular Tengu Warriors jet "42-8947" had the tail hook fairing and the smaller ECM updates. The Platz instructions are OK here.
Each vertical tail has the later re-enforcement strip at top. On some F-15J jets I saw triangular actuator fairings. These can be easily added with some thin plastic card:
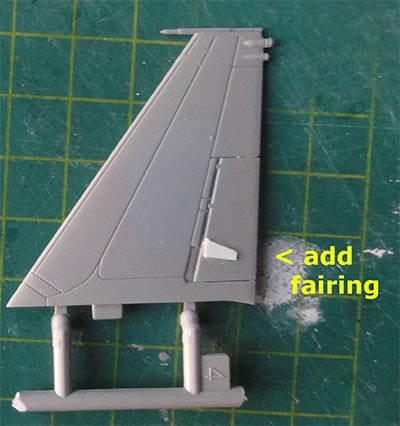
Horizontal rudder lines / openings were opened with a fine TIGER razor saw.
NOTE: I recommend not to yet fit the vertical tails! They fit well and is better done after airbrushing the desired paint scheme, metal areas and decalling. The gaps at the tail bases are very tiny and can be closed later on with white glue.
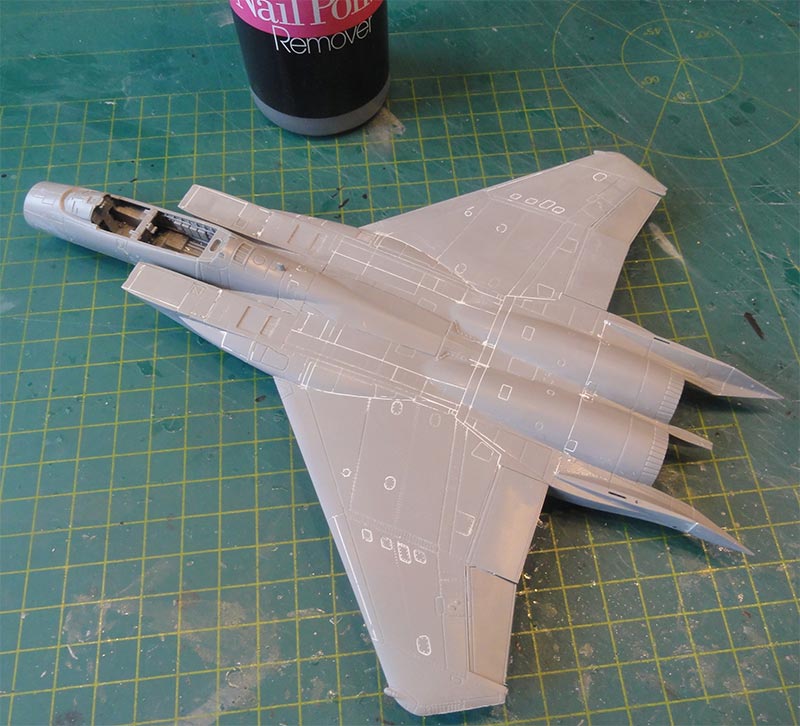
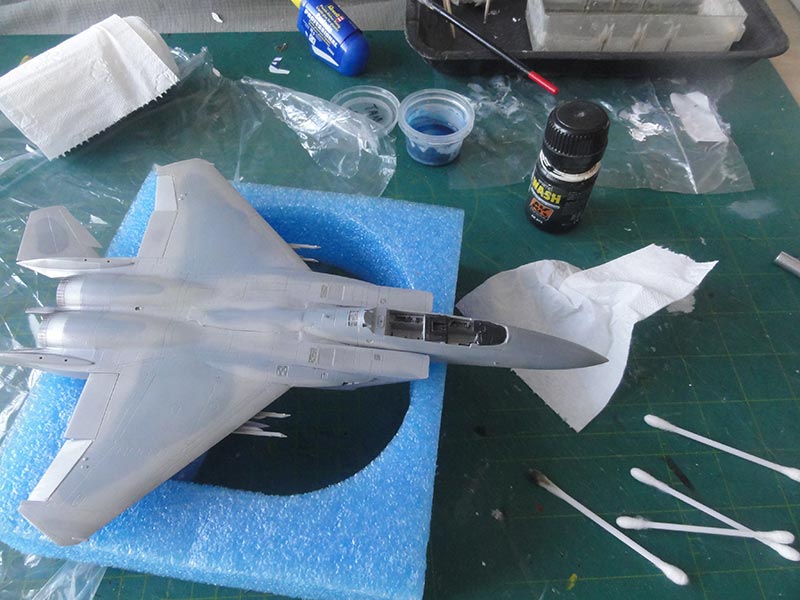
FILLING DEEP PANEL LINES PLATZ F-15
When the overall assembly was done of the fuselage and wing, do not yet fit the landing gear and smaller bits.
The TOO DEEP panel lines were now tackled. Most of these were filled with thin Vallejo plastic putty (or use fine Tamiya putty or your own favourite filler like Mr.Surfacer). Make sure not to fill any gaps of the moving surfaces like flaps and ailerons.
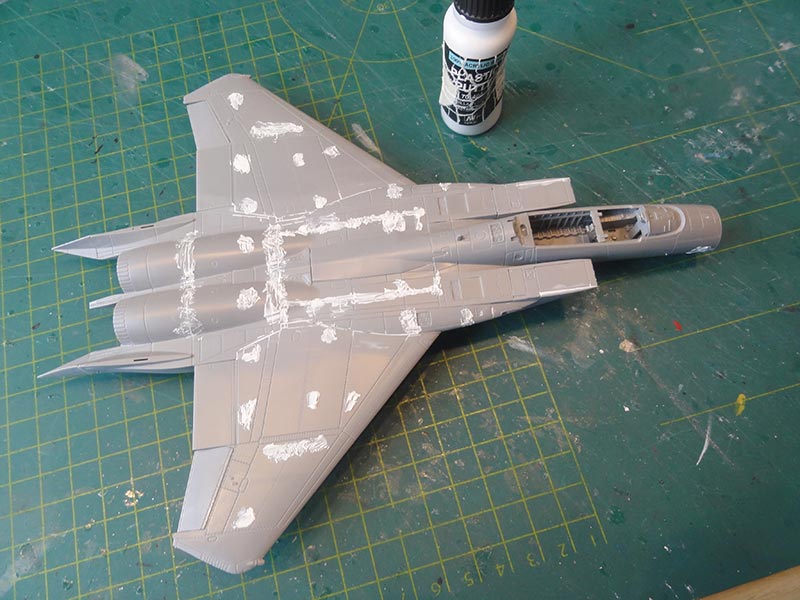
Also at the lower areas..

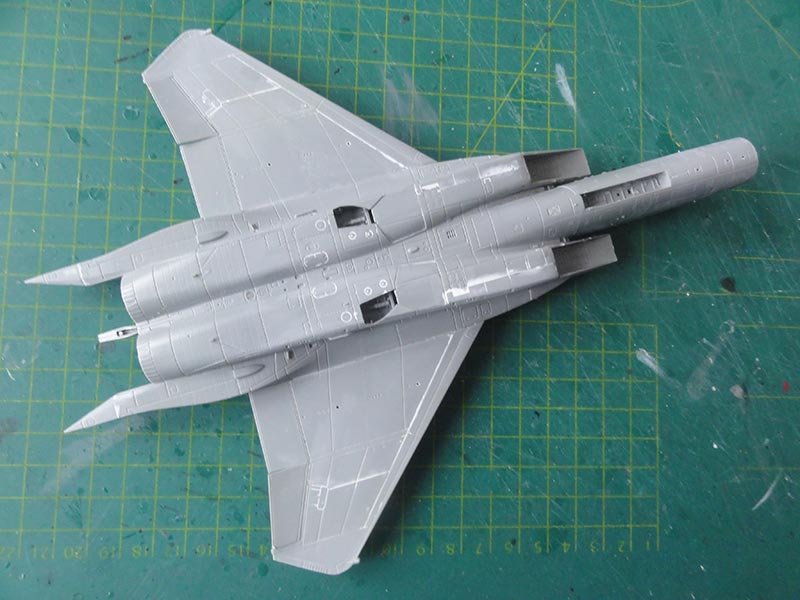
Let dry, and rub, clear and swap the puttied lines with nail polish remover or acetone with a cloth and cotton swab. This will not damage the surfaces and gives no scratches.

The panel lines are now less deep.
... and the result...
The main gear doors are closed on most parked F-15's with only the smaller doors beside the legs are set open. The bigger nose door is mostly seen closed as well.
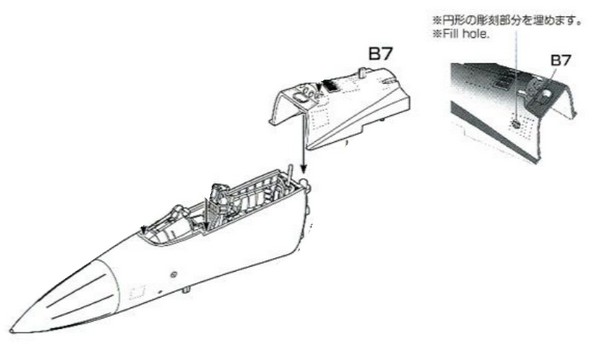
For the airconditioning gap/ grill at the right rear cockpit side it is indicated that it needs filler/ closure. This is appropriate for upgraded JASDF F-15J aircraft.
NEXT STEPS
The pair of fuel tanks have thick ridges, remove these through sanding or use a few spare tanks from a Hasegawa F-15 kit as I did.
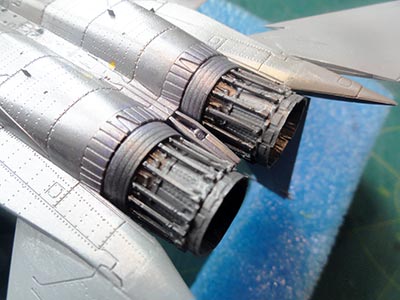
The exhaust nozzles have no "turkey feathers". Assemble and than were airbrushed ALCLAD metal "burned exhaust metal". Ventilate and do not forget to wear a protective face mask! An alternative is to use acrylic metal paints like from Vallejo which are also fine.


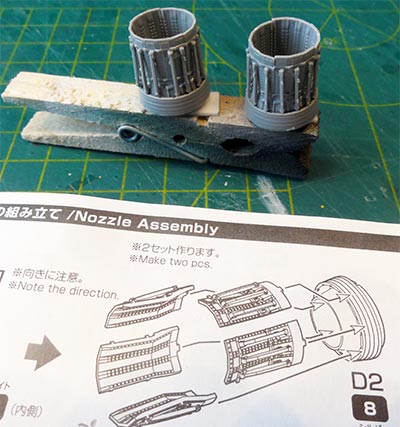
Leave the exhausts for later installment.
To check for any flaws, tiny gaps and irregular surfaces, the model got now an airbrushed base grey coat using Revell aqua 75 "Steingrau". It all seemed OK to get the desired colour scheme.

PAINT SCHEME
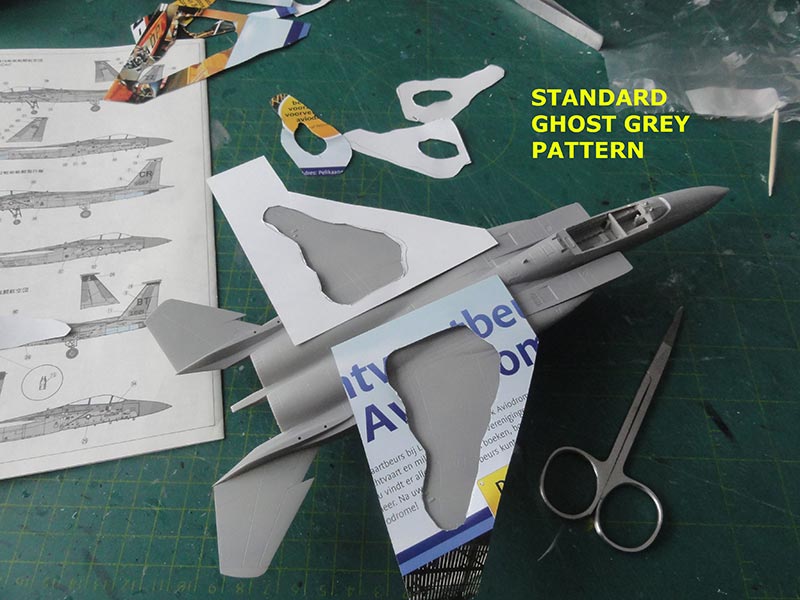
Most JASDF F-15 aircraft have first the standard "ghost" camouflage scheme of Fed.Std FS36375 with a FS36320 pattern. Over this, any special markings are applied. For the TENGU WARRIORS of JASDF no. 304 squadron because of their 40th anniversary decals are supplied in this kit #AC-24.

For the "ghost gray" scheme, airbrushed first was Fed.Std FS36375 with Gunze Sangyo H308 acrylic. Than the pattern of FS36320 with Gunze Sangyo H307 was airbrushed "loosely" with some paper masks hand held over the surfaces. (seen here for another F-15 kit):
The metal rear fuselage areas near the exhausts needed masking before airbrushing. Various techniques can be used, I airbrushed first Revell Aqua silver #90 acrylic. Some burned panels were airbrushed with a mix of silver and a few drops of "blue".
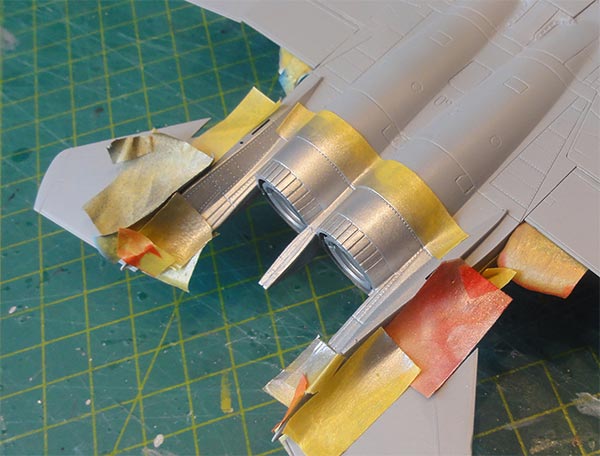
When dry, apply with a simple brush AK "True Metal" aluminium paste on top and polish this with a cloth / old T-shirt. This gives a metal sheen.

The gear legs and insides of bays and open doors were painted white. The gear legs and struts were installed.
Now first prepare a bit further with pre-weathering... (not always applicable though for aircraft flying in "dry conditions").
PRE-WEATHERING
Some pre-weathering is done prior to decalling. On many JASDF F-15's in "ghost grey" schemes, so you can distinguish different panels on real photos. Any pre-weathering should be done before any decal work as otherwise the many decals will also be affected.
Steps taken:
-1- first apply the basic (ghost camouflage) colours as described above.
-2- some panels were airbrushed in a slightly darker (add a few drops of black to the basic paint) or lighter colour (add a few drops of white) of the ghost greys. This gives a first variation in hues.
-3- when done, apply a couple of thin coats of gloss acrylic varnish to protect the paint: I used a mix of thinned varnish (80% Johnson Future/ Pledge with 20% IsoPropylAlcohol (IPA).
Next, the "oil technique" was used:
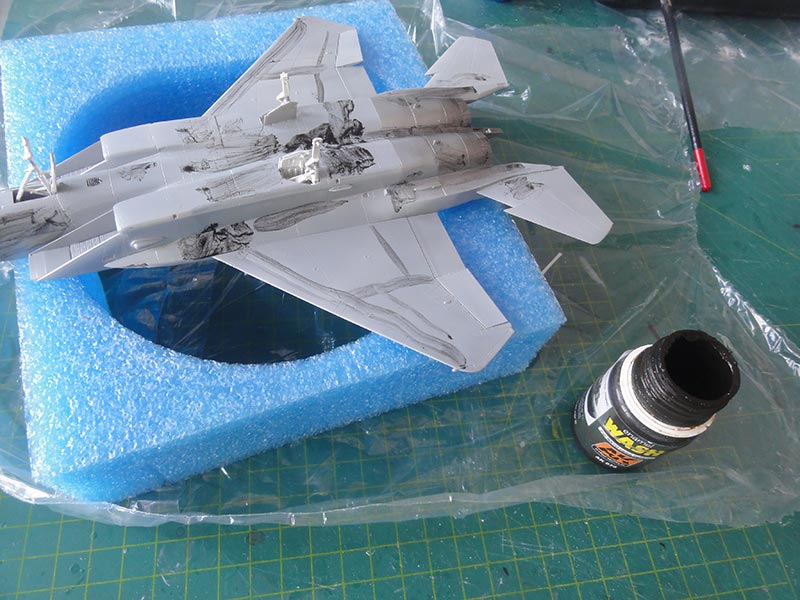
-4- first roughly add some dark "oil enamel based" wash from AK interactive enamel wash, I used no.075 but any darker one can be used; Another option is to use Abteilung 502 oil in stead of AK wash.
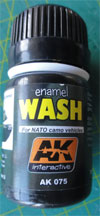
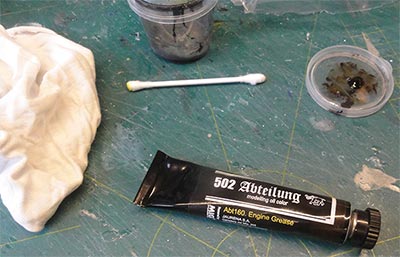
Please note that the purpose of the acrylic varnish (-3-) is to protect the underlying paint against oild blurs. Apply the wash with a brush or cotton swab. (shown here on a Hasegawa F-15 model).
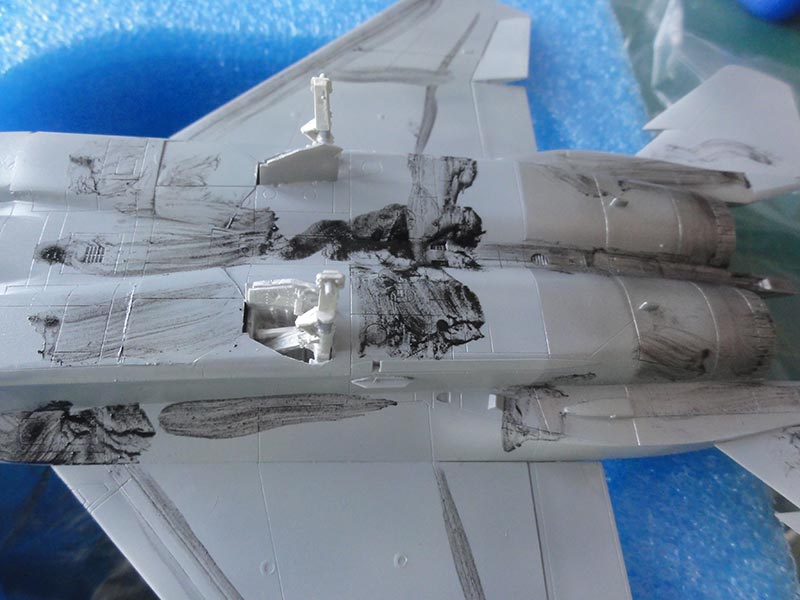
-5- after about 20 minutes drying, swop off the wash with tissue paper and use cotton swabs at corners. The panel lines will retain some darker wash and that is what we want. Use also tiny amounts of turpentine/ white spirit with the tissue paper; clean up when to much wash is still there:
(shown here on a Hasegawa F-15 model).
-6- now let all dry for at least 48 hours as enamel / oil based paints take this time to dry.
-7- when dry, airbrush a few thin varnish coats as this will give an even sheen and more importantly: a good undercoat before decalling. Again the Johnson Future/ Pledge gloss varnish was applied as described above;
DECALLING
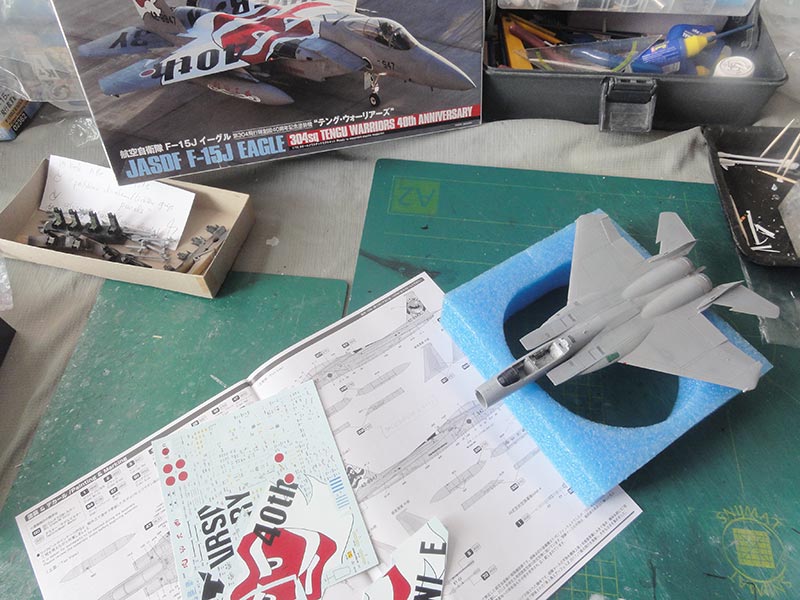
Now decalling the model can be done. For F-15's a lot of markings and stencilling is usually to be set and that also applies to JASF aircraft. Take your time here.
The Platz kit decals are very tightly printed on a very cramped sheet. Blink the decal sheet in light to see where to cut the decals with fine scissors as many decals are grouped on a single carrier film. I wish that the decals had been printed on larger sheet.
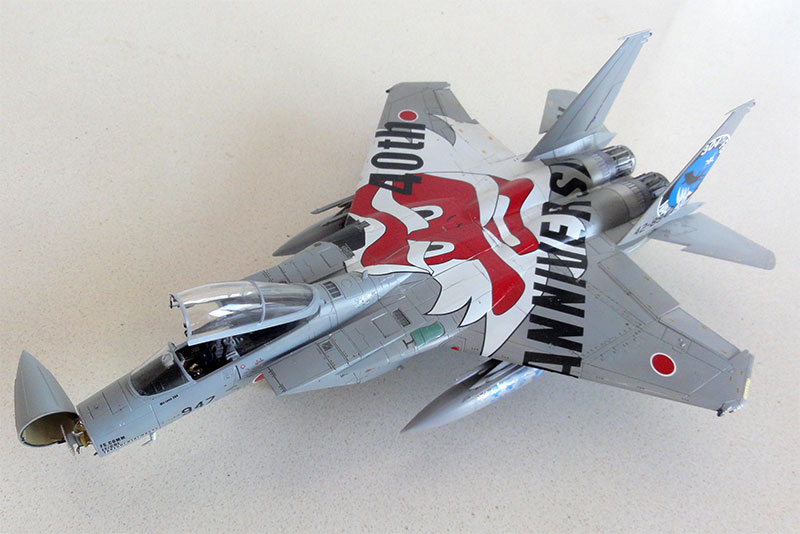
For this kit, the "TENGU WARRIORS" decals as such are great. Many stencilling decals should also be set on the model but start with the large decals on top.
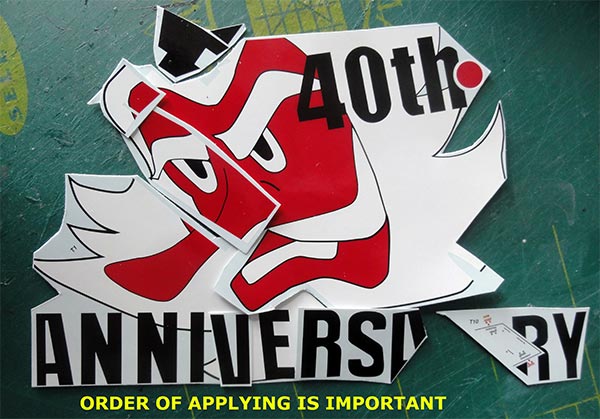
IMPORTANT: it is crucial for this scheme to apply the decals in a particular order: start with the decal #T5 for the air brake. This will help alignment of others. Than decal #T1, #T2, #T4. The separate letters follow with #T6, #T9, #T7, #T8.
I also cut the bigger decals in some sections.
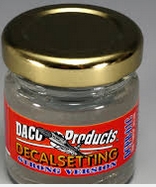
The larger decals require decal softening fluid to follow all panels and bulges, I used DACO decal fluid. Note the small white gap at the flap that I need to repair later on. And that the vertical tails are NOT yet installed.
Take your time. Any small remaining wrinkles and air traps were stabbed with a very sharp knife.

Apply again softening fluid on top again and the decal will set better.
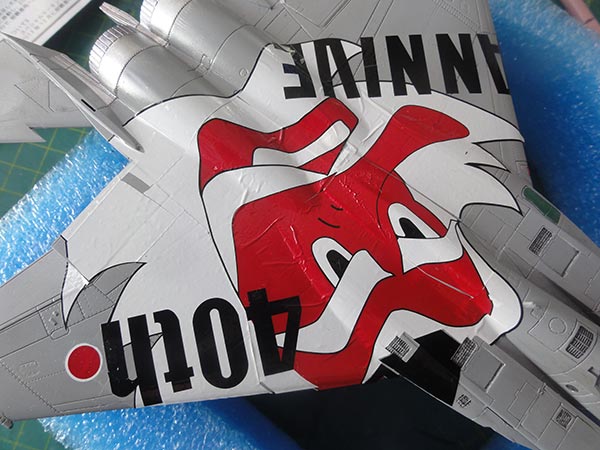
I found that I could not get all decals to meet perfectly at the wing leading edges. May be it was my fault. At the wing leading edges some decal strips were shaved off when dried with a very sharp knife. Some small repair work was needed. Unfortunately Platz does not provide some spare red and whites stripes for any repairs. So I had to repair some tiny panels with decals from my spares box.
The wing roundel was repositioned a bit and the gap in the "h" painted though not 100% correct.
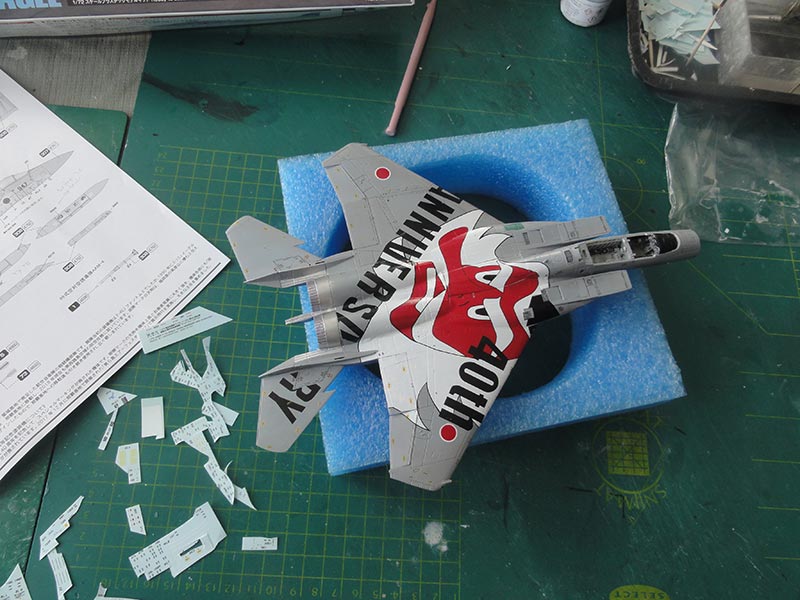
When all done, all the smaller stencilling decals can be added. This again takes a day to set onto the model. (Some decals were left overs and could not be located, may be these are decals used for other Platz kit releases' schemes).
A lot of decalling but with some touch up work the end result is fine!

Some touch up work was done now at some grills and panels with black paint.
The bigger "warrior" tail markings are just a bit too small (about 1 mm at the leading edge), but it is not really an issue. Note here that tails are still not fitted onto the model. (the added fairing is seen below the decal on the left tail).
When decalling was done, next step was the landing gear.
Paint landing gear bay interiors and undercarriage legs white.
Add the wheels and I also added a few hydraulic lines from thin metal wire. Here, the "wash" is well visible.
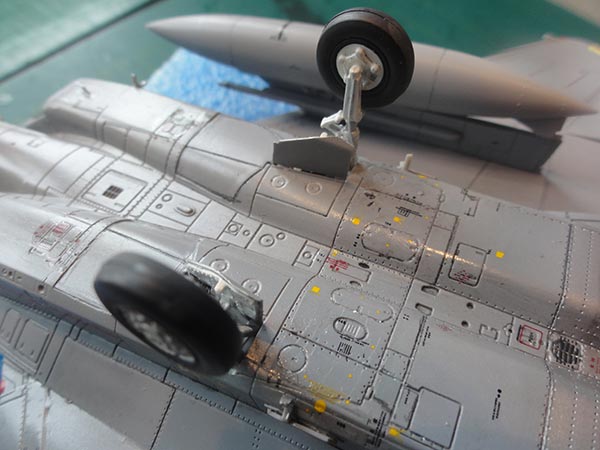
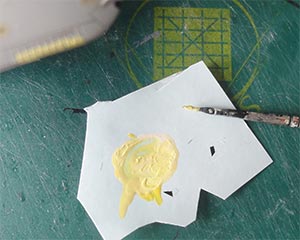
The low-visibility light panels on the wing tips were painted very light yellow (so not using the decals). Some tiny red and blue anti-collision light were painted on wing tips and inboard wing leading edges.
The exhausts were set in place, they needed a bit persuasion. This particular Tengu Warriors jet "42-8947" also had the tail hook fairing.
When done, the vertical tails were set, the gaps at the base are very tiny and they fit OK at 90 degrees angles and in parallel. (if your model has some tiny gaps, fill with white glue and paint with fine brush when dry).
Here are also well seen the opened cut in with razor saw the rudder gaps.
NOTE: it was discovered that I forgot about a small change to the kit. As this seems to be an upgraded F-15J, the airco grill on the right aft cockpit side should be hidden/ removed. Platz indicates this in built step 5. I added white glue on the grill and painted the spot FS36320 when dried.
COMPLETING THE MODEL
Next, all detail parts were installed as needed like pitots etc as per kit. Platz provides 2 J/ALQ-8 ECM system antennas below each air intake. These are indeed installed on this particular Tengu Warriors jet "42-8947" and provided in the kit as 2 parts #D28. Also set the 2 probes #D27 aft of the nose gear bay and the small bits on the lower nose.
ACES II seat parts got straps made with a particular technique from painted metal tape that was painted in various colours.
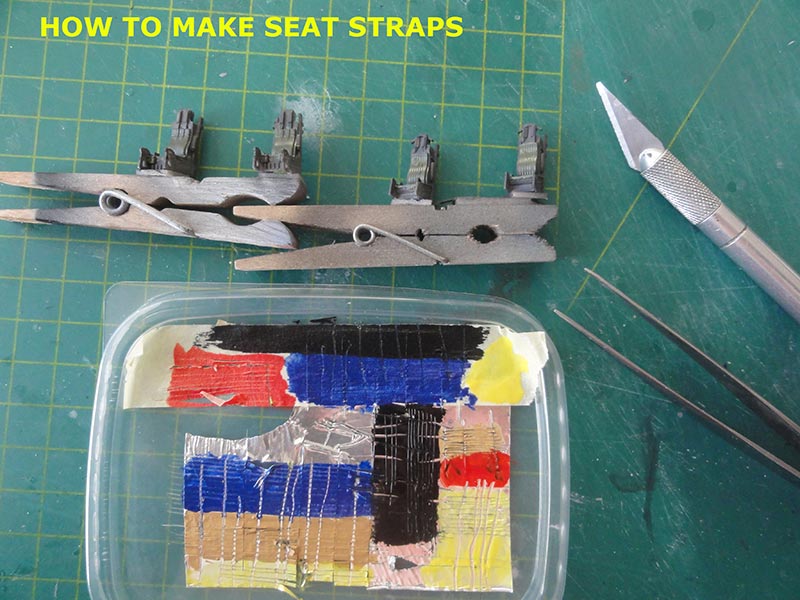
Rub off tiny bits revealing the metal to suggest the buckles.
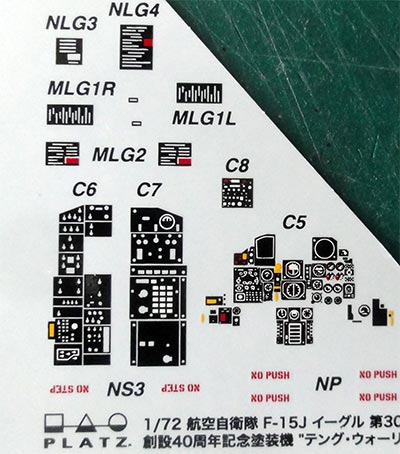
For the cockpit, nice instrument decals are provided.
Some wash was applied inside the open rear bay and some extra electrical "wiring".
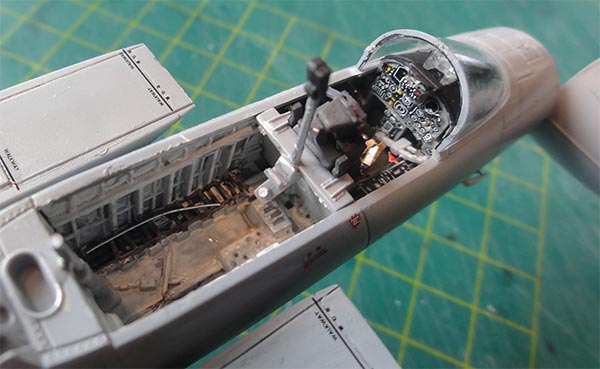
The ACES II seat was installed and the canopy bar.
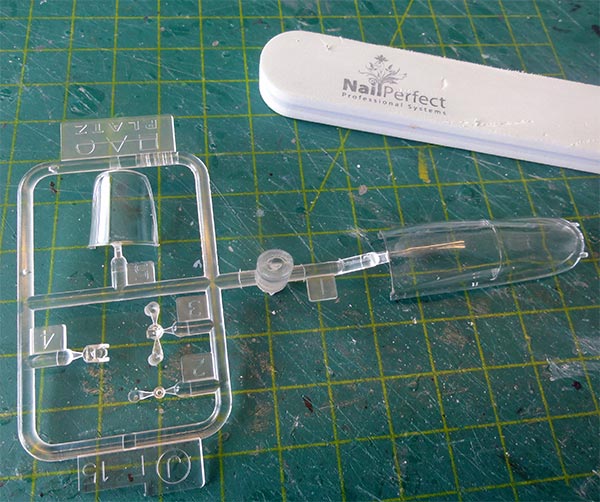
The clear canopy needs polishing to remove the central moulded seam. I use a fine nail polish stick. It took no more than 5 minutes to do.
The canopy cross section looks good and the frames were hand painted. Inside it got 2 mirrors (for a F-15J 2 so not 1 as in F-15E version)and a few handles at the front frame as well as some locks.
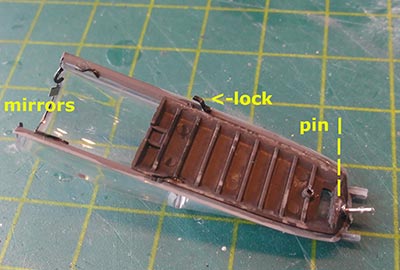
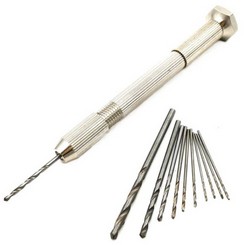
I drilled a small hole at the rear base into the fuselage to have a removable canopy as an added pin for the holes fixes it in position.
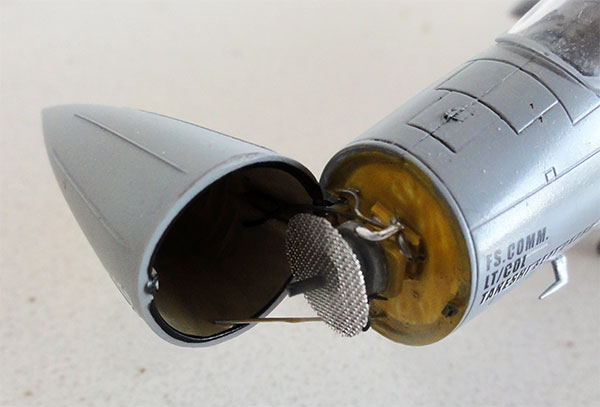
I opted to set open the radar nose which is a separate part and make some details from scratch and card.

For the F-15J radar to be shown I made a disk with mesh. I was not sure how it looked on this particular F-15J though.
A pair of fuel tanks was installed but not (yet) any missiles though these are nicely provided in the Platz kit. The decals need a bit decal softener to conform to the circular tanks.

The final step was airbrushing a protecting semi-matt varnish coat to get an even sheen and protect the decals. In this case a coat of Johnson Future/ Pledge with 5% Tamiya X-21 "flat base" with the usual technique. (mask a bit the metallic exhaust areas and obviously any clear areas).
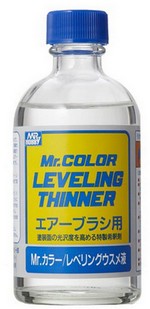
It is a good idea to add some 10% Gunze Mr.Color Levelling Thinner in the varnish mix. This really helps airbrushing a nice varnish layer. (it seems the leveling thinner is lacquer! but a few drops really help levelling).

The canopy was positioned (without glue) open and the model was ready for display!
 JAPAN
JAPAN 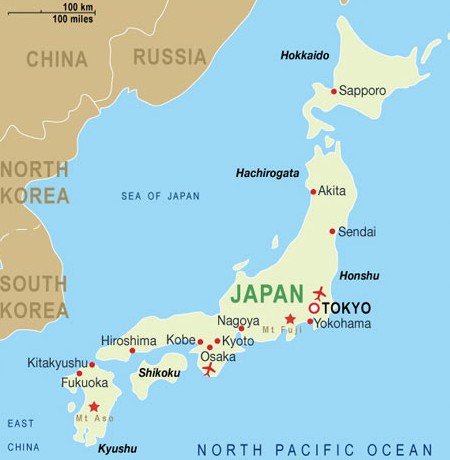
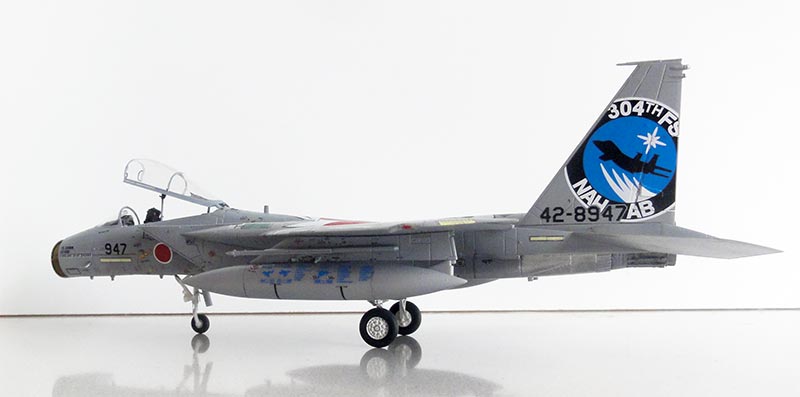
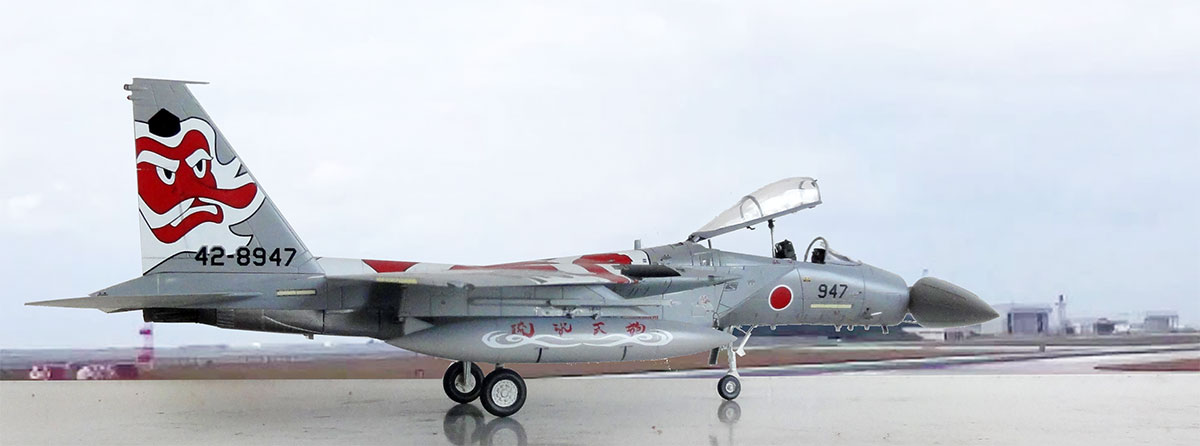
F-15J JASDF, coded "42-8947", no. 304 squadron at 40th anniversary of "Tengu Warriors", Naha air base, Okinawa. Nansei Koku Konseidan - 9 Kokudan - 304 Hikotai
See notes on intake angle here...

...set at Naha air force base at Okinawa...
On to next [ Page 4... ]
(c) Copyright "designer"/ All rights reserved. Your comments are welcomed by webmaster
Created this page April 4, 2021