conversion
[ Page 2 ]
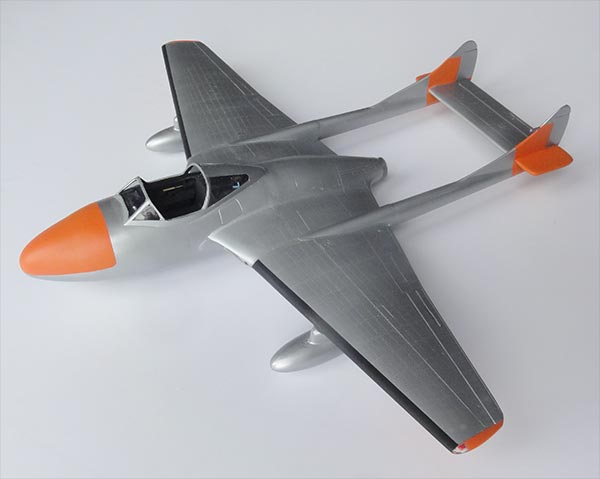
1/32 scale De Havilland Vampire trainer conversion
page 2
The main assembly for the Vampire two seater/ trainer had been done as seen on page 1.
White glue closed up any tiny gaps in the wing gear bays.
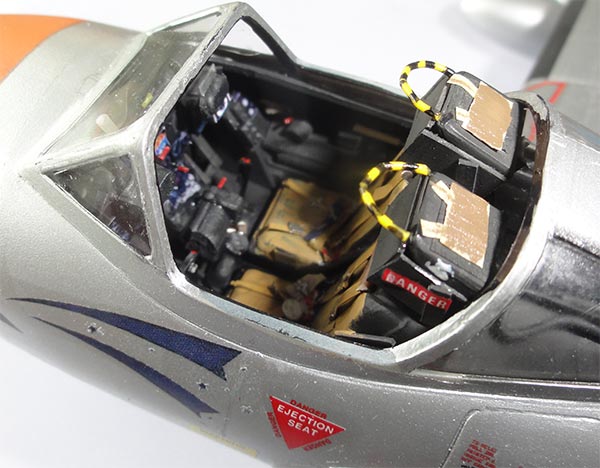
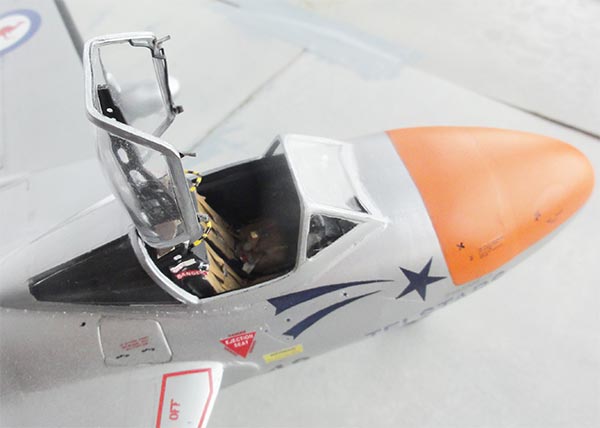
The cockpit was now tackled using photos of T.11 cockpits found on the internet including cut away drawings, see the references.

The first Vampire trainers had no ejector seats. Efforts were made to have these but the tried Martin Baker seats at the time still posed problems. Later, a 3-year modification program eventually had new canopies installed and in most variants Martin Baker mk.3B seats.
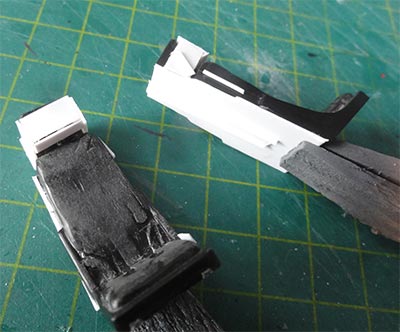
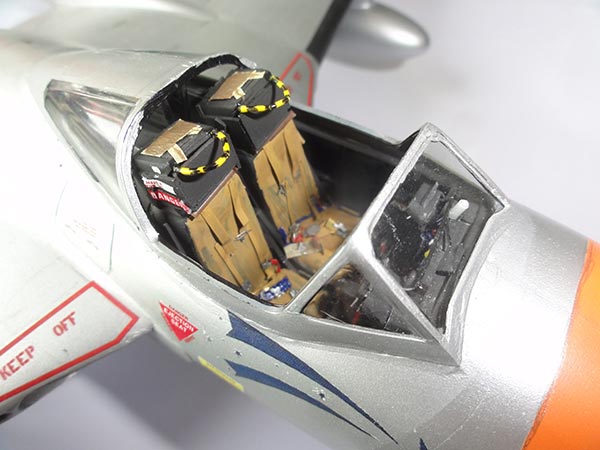
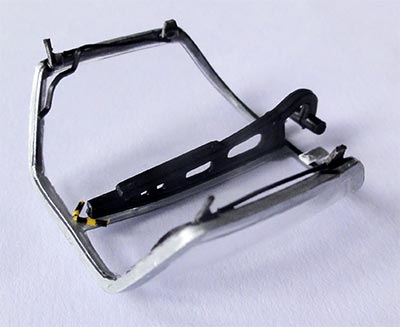
There are no after market sets for these Martin Baker mk.3B seats so the Matchbox/Revell Sea Venom kit parts were used to start with.

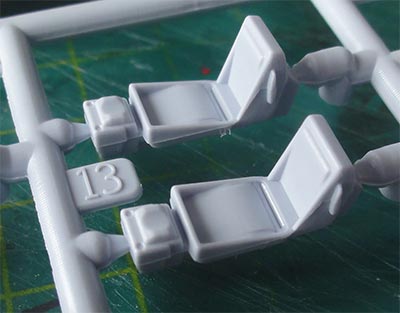
I looked at the 1/72 Airfix Vampire T.11 seat parts (see photo) and Martin Baker mk.3B drawings and concluded that the rudimentary seat parts of the Matchbox kit can be used as basis. Their head rests were boxed in and at the rear card and seat rails added.
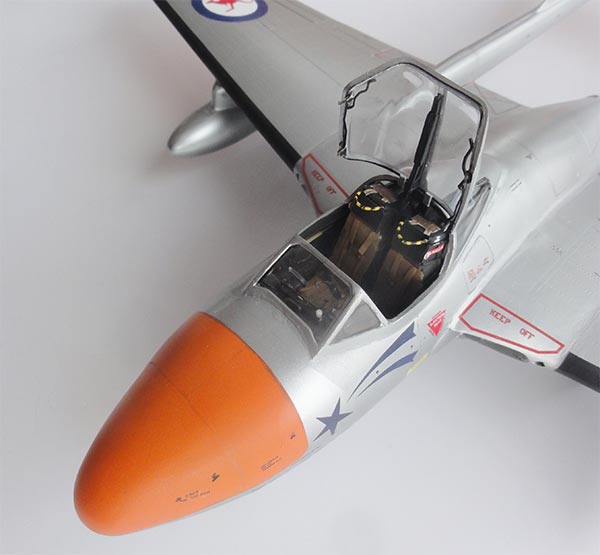
Vampire trainers had seats positioned next to each other for instruction purposes (so not staggered as in Vampire NF Night Fighters or Sea Venoms for the radar operator/ navigator).

To check further, the 1/72 Airfix Vampire T.11 floor is seen here. There is not a lot of room to spare in the office!
To detail the cockpit, photos were used found on the internet and cockpit layout photos from the "Vampire, The Complete Story" book (see references).
Note that the transparant cockpit fairing part #98 was still not yet set to avoid damage.
The main instrument panel for the Vampire two seater/ trainer was made from scrap. Bits from a spare Infinity Vampire panel #71 were used in the center consoles that were similar. The food pedal controls were made from rod and a circular nose wheel fairing was added on the cockpit floor below the central pedestral.
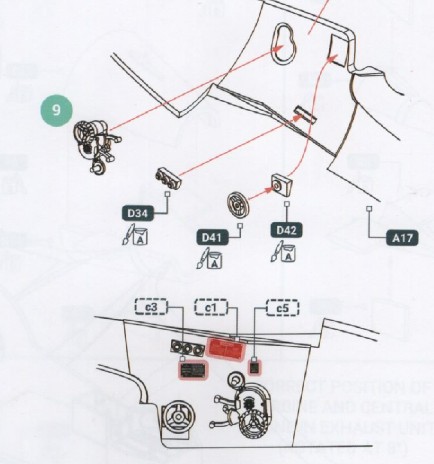
The 2 throttle quadrants were made from scrap using the Infinity parts as example for both pilot and instructor. One is at the central pedestral and one on the left inside fuselage.
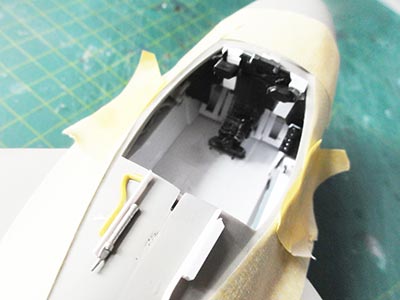
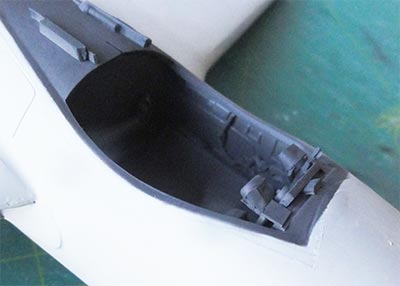
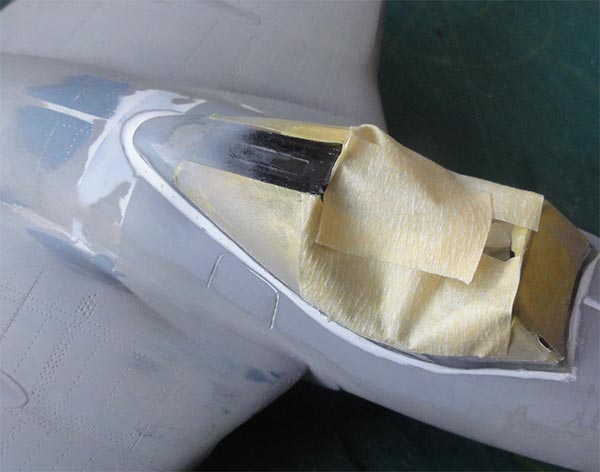
The cockpit interior is black but I airbrushed after masking a slightly lighter mix by adding some white in the black paint to avoid "a very dark coal hole".
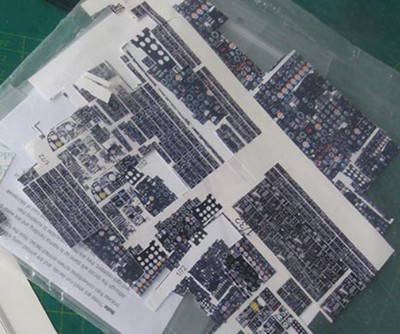
For the instrument faces I had in the past made a large printed sheet with instruments and side consoles for general use and these came in handy now. Other detailing was done with bits of rod, stretched sprue in the T.11 cockpit.
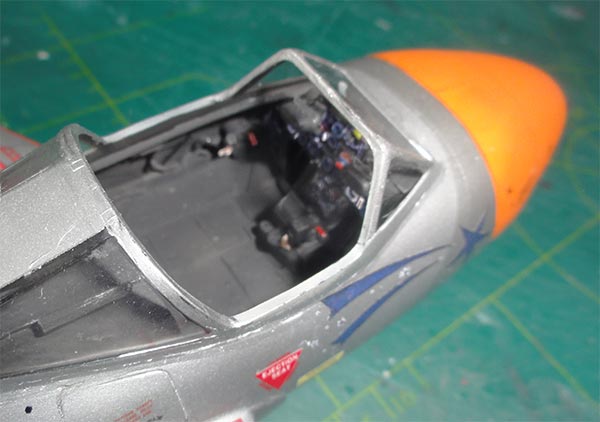
The transparant glass cockpit section from the Matchbox/ Revell Venom kit was now set after their frames were painted black inside. Central frame part #70 was not used. I reduced the inside part #64 in length and added from scrap details on the rear deck behind the seats. The section could now be set with some putty needed to close the small gaps and all was masked.
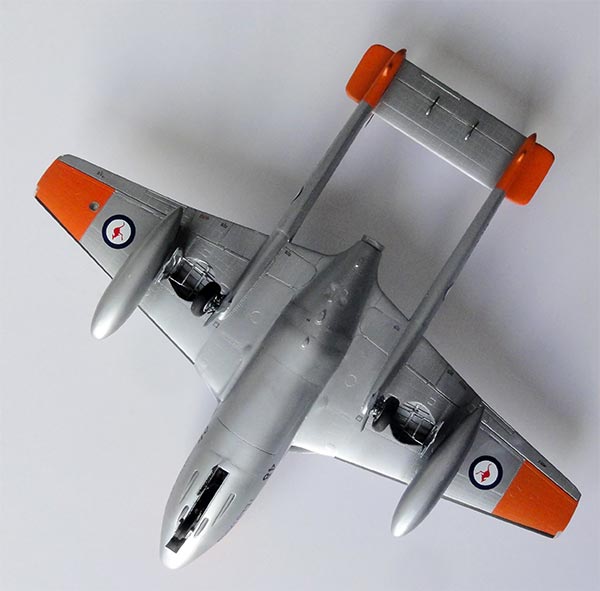
For this Vampire, the wings had been "clipped" earlier. Indicated in the Infinity instructions STEP 41, the transparant wing tip parts #C2, C4 were set but inside their fronts a bit of red (left) and blue (right) plastic were glued to suggest anti-collision light bulbs. The clipped wing tips needed a bit putty and sanding.
NOTE: it was decided to retain the small engraved rivet details as per used Infinity kit parts. Large portions of the real Vampire fuselage were from wood and these sections of the model mainly from the Sea Venom parts are smooth.

After sanding, all was masked off and another grey base coat airbrushed with Revell Aqua 75 steingrau. When it looked good, it was ready for the first paint coats of the desired scheme.
Finally after all this effort, the colour scheme is to be tackled. There are many World Air Forces that used the two seat Vampire trainer for decades.

I had made in 1/32 an Australian Sea Venom earlier and A-4 Skyhawk so a nice companion would be an Australian Vampire trainer. The T.33 trainer used in Australia had a Goblin engine and many were built by De Havilland Australia in Sydney in the 1950s. Upgraded these were designated T.35 and were used by the Royal Australian Air Force (RAAF) and as T.33W by the Royal Australian Navy until 1970/1971.
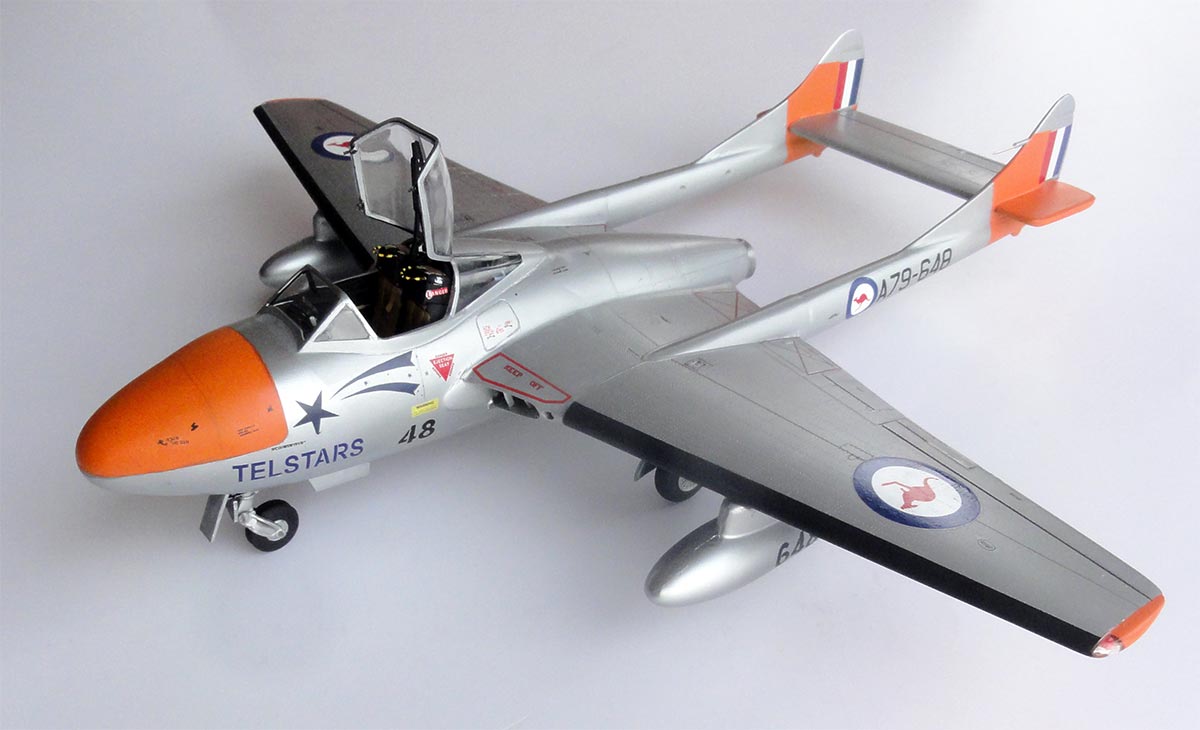
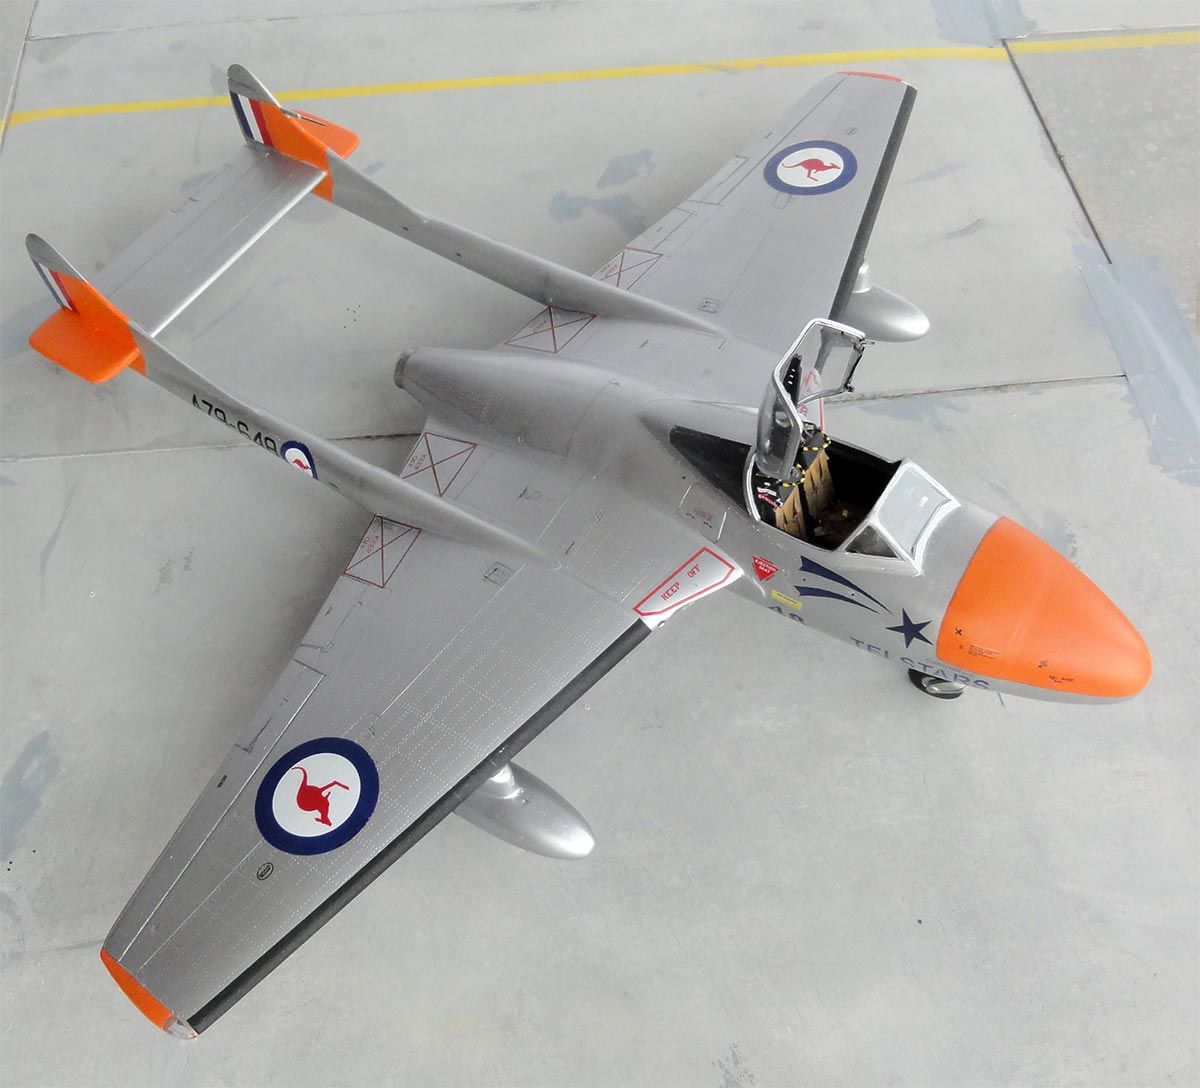
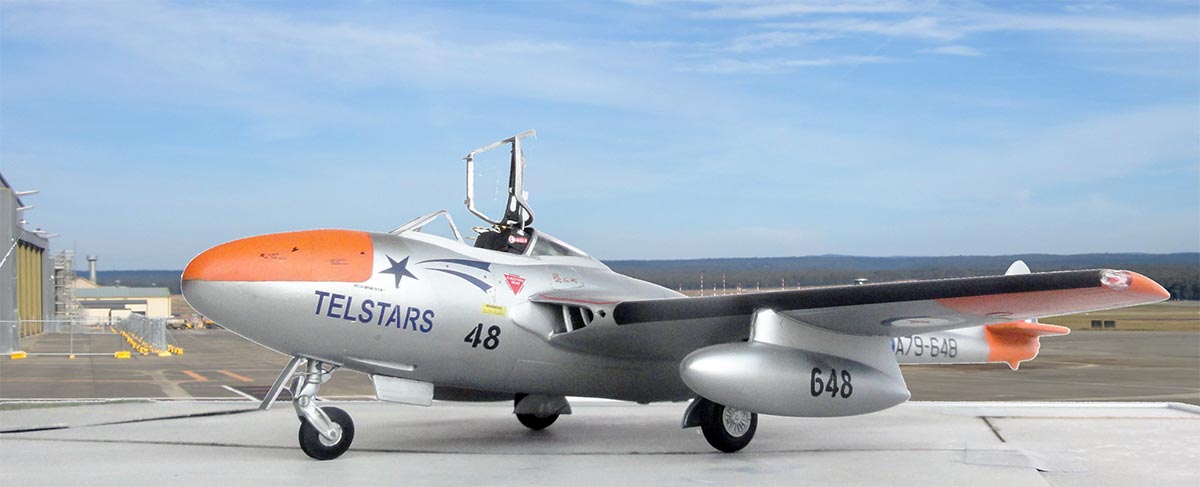
As member of the SIG Aerobatic and Display teams of the IPMS U.K, it would be nice to make a Vampire T.35 as flown by the RAAF aerobatic display team "TELSTARS" in the mid 1960s. These Vampires sported a high speed silver finish with red/orange panels at wing, nose and tail fins.
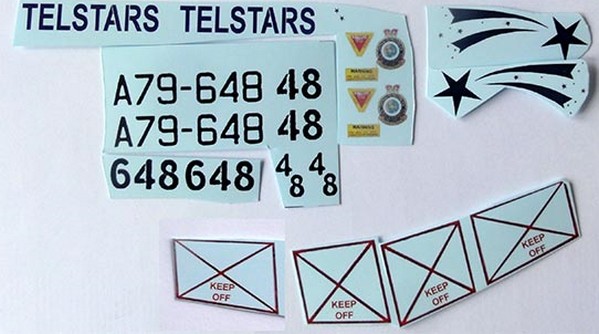
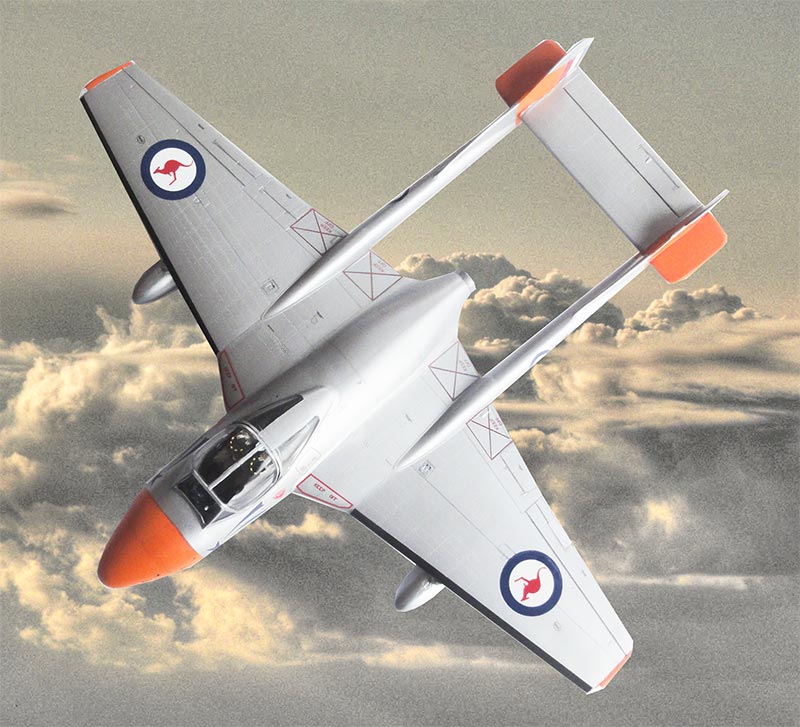
Their jets had variations in scheme in the display years they were flown. In the beginning with large nose codes with standard Commonwealth RAF style wing roundels. Later the "shooting star" and TELSTARS title on the nose and even these varied as seen on old photos of the same aircraft such as A79-648. The Australian type wing "kangaroo" roundels were also applied on the wing and often a squadron badge.
The later scheme TELSTARS markings are not available in 1/32 so I designed the specific markings with a graphics program looking at the various old photos. The decals were designed and custom printed on an OKI laser printer that also could print "white. If you need a set of these decals, send me an email as indicated on my decals page here...
TELSTARS Vampires often flew with fuel tanks. So the wing fuel tank parts #11-14 were assembled as found in the Infinity kit sprues. They are not shown in the instructions but are provided. Some putty was needed. Note that their pylon fronts extend a bit to the wing leading edge as on the real Vampire; some white glue was needed to close the gaps.
The colour coats were airbrushed with Revell Aqua acrylics. For airbrushing the thick Aqua paints make a mix of 50% paint, 25% IsoPropylAlkohol (IPA) and 25% distilled water.
(1) The orange panels were masked and airbrushed with Revell Aqua 30 orange. Several layers are needed. Allow to dry.


Than orange panels were masked off.
(2) For the "high speed silver" Revell Aqua 90 silber was airbrushed.
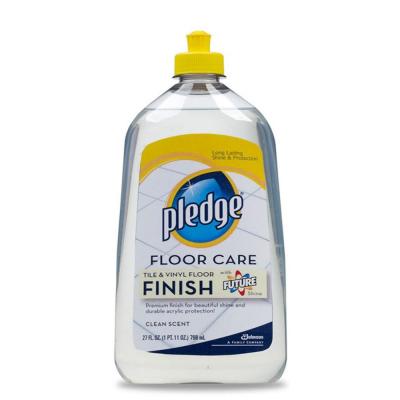
On top of the silver coat, several varnish layers were airbrushed with Johnson Future/ Pledge. This was thinned 30% with IPA and a drop of glycerine as flow improver. This will also enhance the gloss "high speed silver" effect.
(3) The TELSTARS Vampire had a black leading edge at only the wing. This was masked and than airbrushed with Revell Aqua 09 Schwartz.
Some paint repair work was done with a fine brush. The wind screen and rear canopy fairing frames were painted Silber as well.
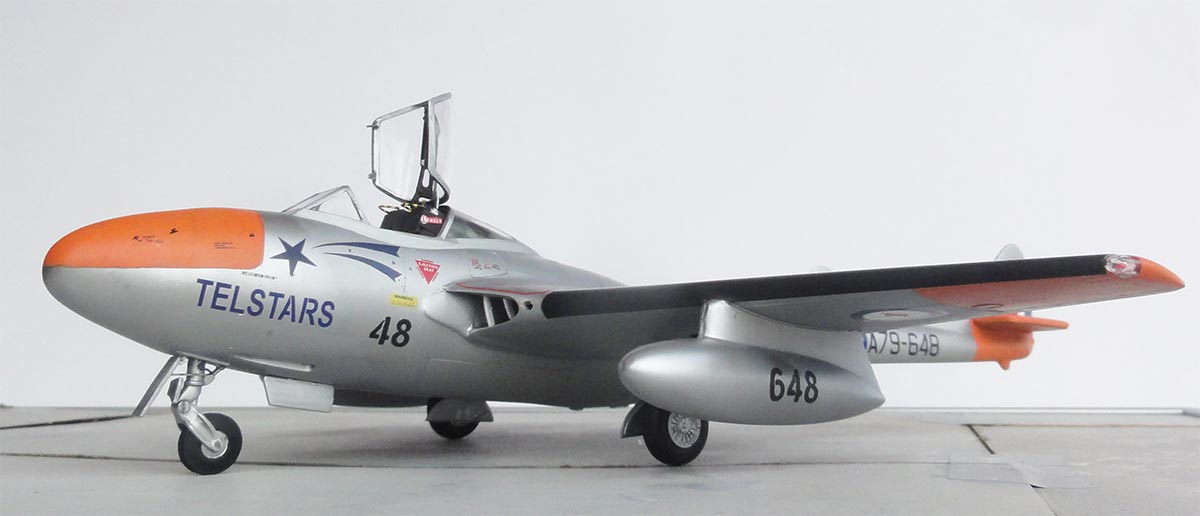
Well here she is....
The model now had its glossy paints and was ready for the any specific markings.

A check was made regarding the conversion of particularly the Vampire trainer forward fuselage. So side photographs were made.
Two approaches were used:
[1] compare the nose shape with the 1/72 Airfix Vampire T.11 kit as described earlier. Photos were scaled with the Airfix kit made in the past and below the 1/32 converted model nose. (Do not compare the orange areas as these are different paint schemes).
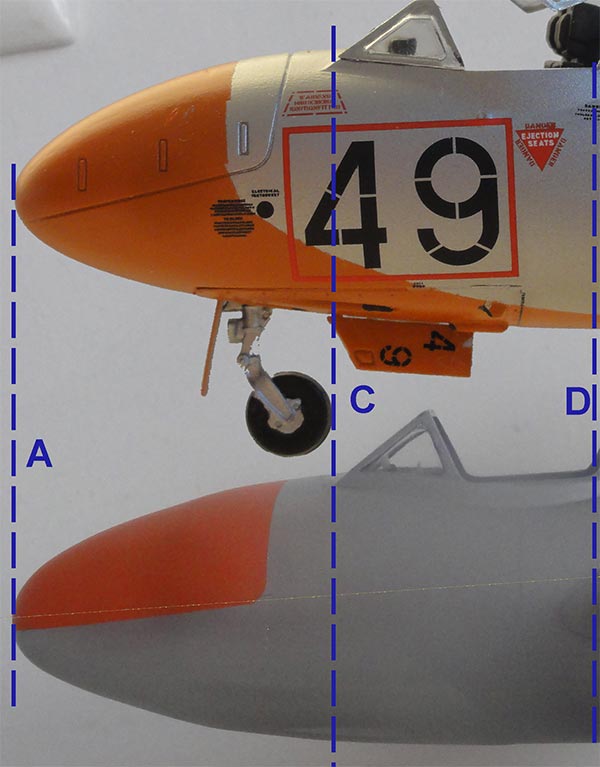
Note that only small sections can be compared due to photo camera parallax lens effects.
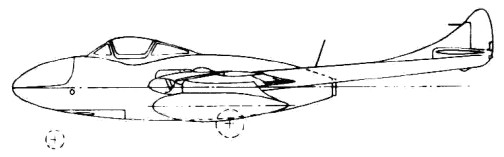
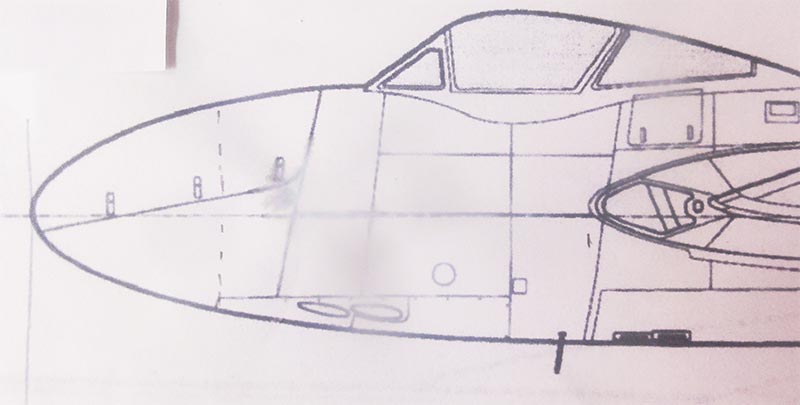
[2] with a 1/32 drawing was super imposed on the model nose. Yes, drawings are not always good but nevertheless...
....
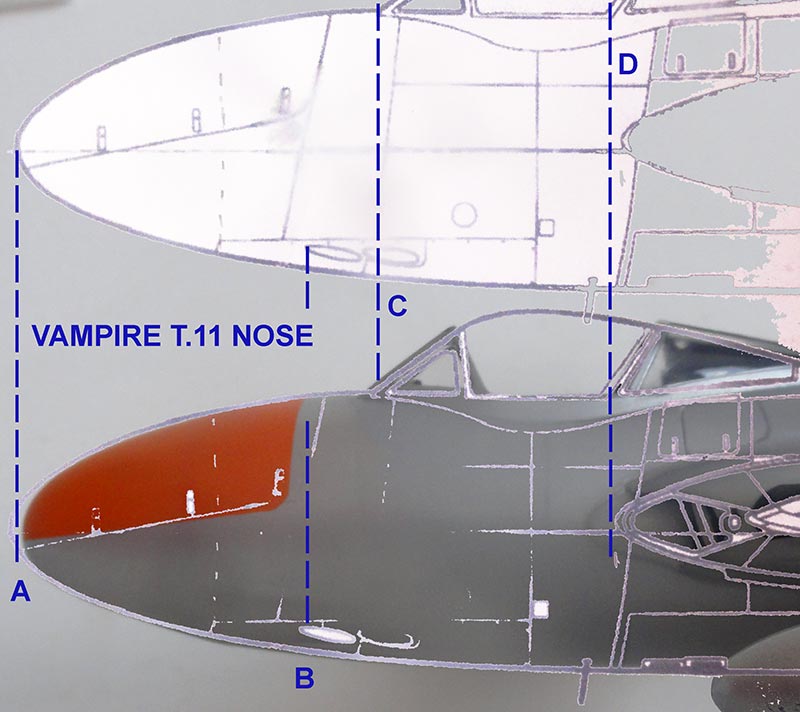
- line A at the nose tip shows the shape curvatures to be quite good running to the rear line C to be within +/- 0,5 mm;
- line B shows that the gun nozzle positions are adequate;
- line C shows that that was the wind screen reference shows that its position and shape are OK too; the canopy mid section is also fine in length and height. NOTE: the angle of the wind screen rear drawn is not correctly, it has an angle as on the model;
- line D shows the intake lip location which is not perfect but at an acceptable station.
Made measurements suggested the Vampire trainer nose conversion looks good.
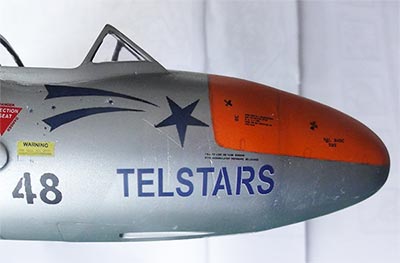
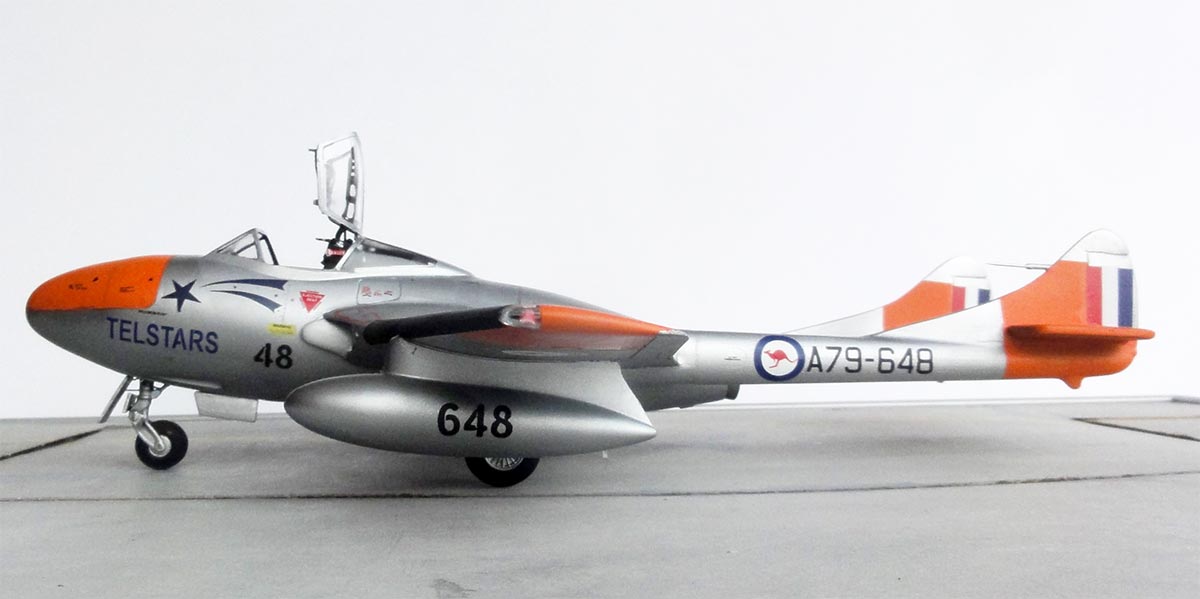
The later paint scheme with the "shooting star" and TELSTARS title on the nose was made and may vary as seen on old photos of the same aircraft such as Vampire coded A79-648. The Australian type wing "kangaroo" roundels were now applied on the wing and often a squadron badge. The fin flashes were seen on both outsides and insides of the rudders.
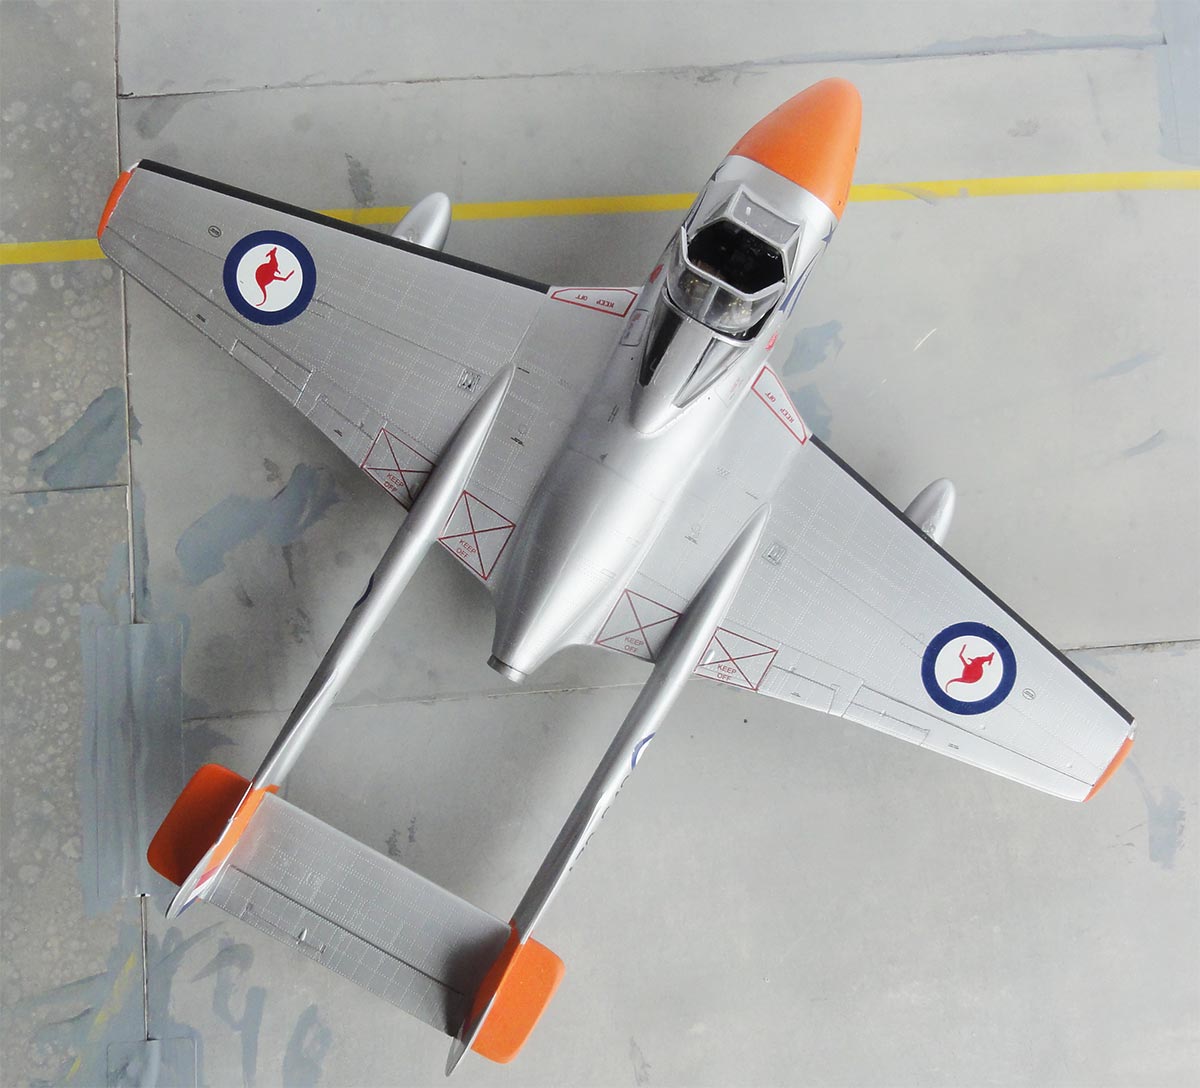
The roundels and some decals can be used from the Revell Sea Venom kit release decal sheet. Roundels positions on the wing may varied during the operational use of the Vampire.
NOTE: when these Matchbox/Revell decals are old, they will break up so apply a gloss varnish coat or a decal film (like from MicroScale). Some smaller stencils particularly on the wing will be used from the Infinity kit but the red crossed panels used that were custom printed.
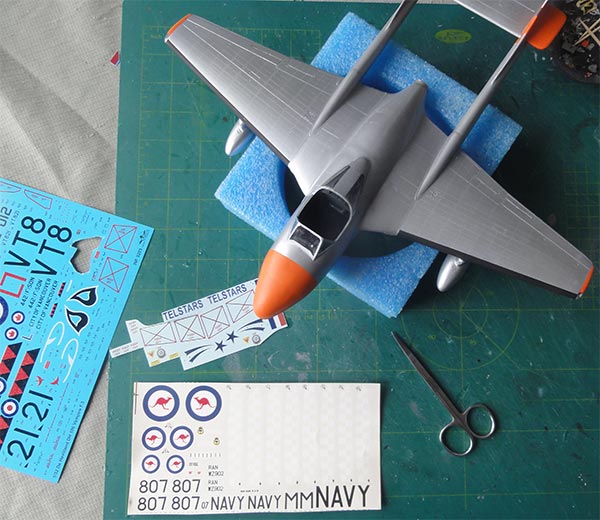
The home designed decals were applied. Each custom printed decal needed to be cut out with fine scissors and was set. If you need a set of these decals, send me an email as indicated on my decals page here...
After the decals had been applied, the model can now be further completed with details like landing gear etc.
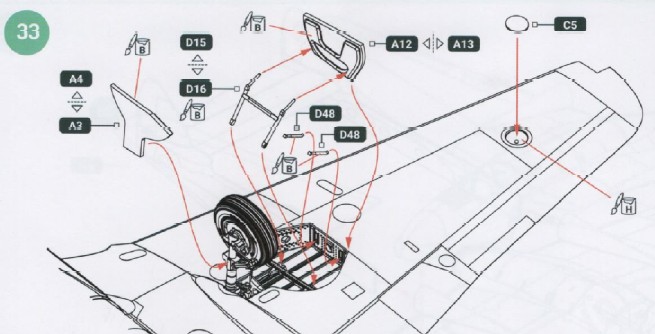
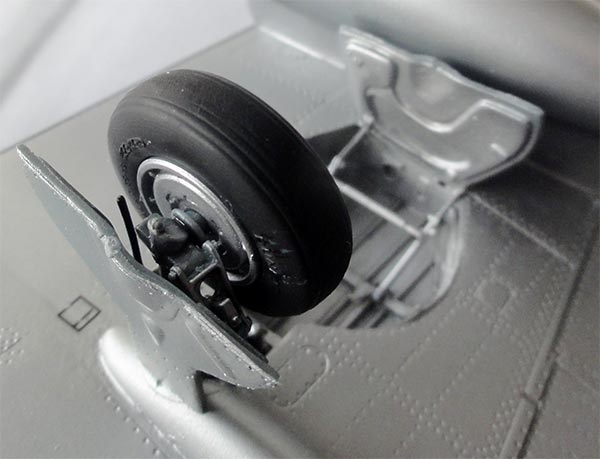
This two seater Vampire has the common wing as the Vampire single seat fighter. I assumed the same with the main landing gear. So parts of the Infinity Vampire kit were used. The Infinity kit gear and their bays look good. But installing the main gear may need some trimming at their attachment lugs to fit as described on Infinity Vampire page here...
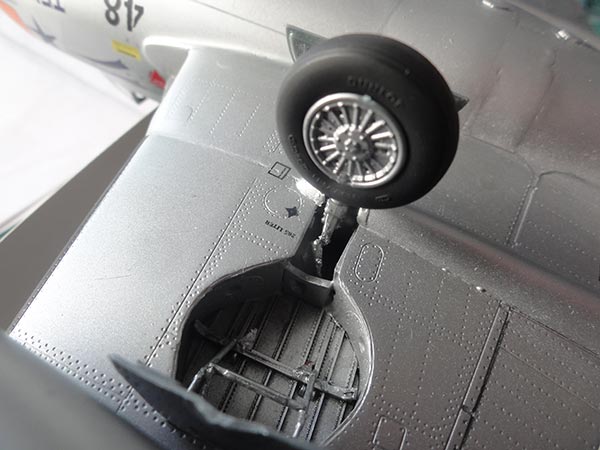
The main wheel hubs #7 were used after looking at photos. Only a single brake line was set on each leg made from wire.
For the nose gear parts were used from the Matchbox/Revell Sea Venom kit as it has a quite different configuration. The nose shimmy tyre parts of the Sea Venom kit and Infinity Vampire kit are thankfully the same size. The rear section of the closed Sea Venom bay had been removed earlier to get a deeper nose gear bay but the front area retained to install the gear. The front nose gear door #25 was bended a bit and set reversed with connecting small rods. The side nose gear door #60 was installed but got a retracting rod and on the gear leg a small door #26 was set at well.
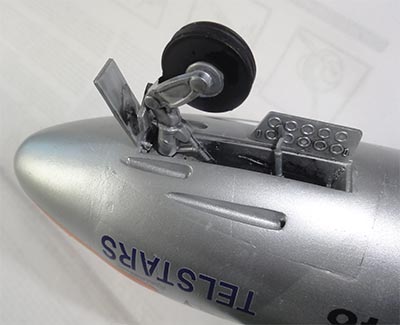
AFTER THOUGHT: to have a more horizontal "sit", the nose gear leg could have been shortened about 2mm at the attachment lug.
The Vampire model is a tail sitter. To avoid putting to much nose weight that may cause the plastic gear to collapse a stick made from stretched transparant sprue. A small hole was drilled below the jet tail pipe and the stick installed.
The cockpit interior got some extra bits and decals for the various instruments and some touches with different colours. Aft on the instrument some electrical wiring was suggested and the 2 gun sights set in place.
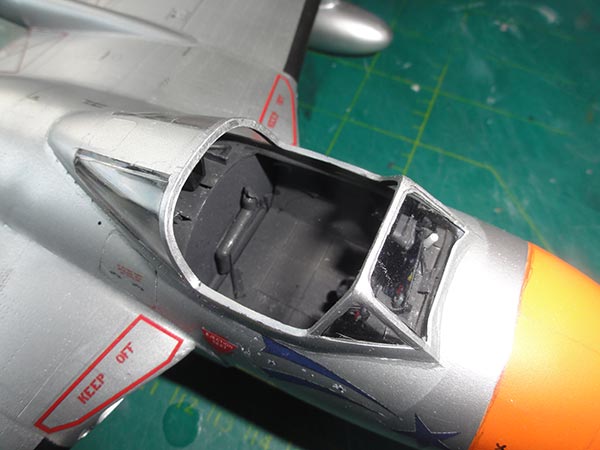
The improved ejection seats got tan brown straps and buckles and were set in the cockpit as were a few black painted controls sticks made from thick rod. Also a black-yellow striped face curtain pull and firing handle was set made from yellow stretched sprue was set on each head rest. (note: ejection seats were manufactured in several sub-variants and modifications for a particular aircraft and customer by the Martin Baker company. For example, South African Vampires seats had a top handle that was curled up).
A metal pitot tube was superglued on a tail fin made from a thick needle.
The Vampire trainer nose cap panel with locks was suggested with a dark pencil line to avoid damaging the puttied nose areas. The gaps and edges of control surfaces got a wash for added realism. I used a mix of varnish and black paint applied with a fine brush in the recesses.
Another few gloss varnish coats with IPA thinned Johnson Future/ Pledge were airbrushed with usual technique.. This will give an even sheen and protect the decals. Shield off the wind shield and rear canopy section while airbrushing.
The big canopy was to be set open at near vertical pose. The Matchbox kit NF.3 part #100 canopy was used and frames painted.
The big central canopy beam #70 was seen in Vampire trainer canopies as well and installed along with a few locks from card and de-misting tubing from black stretched sprue. Part #64 was not used, the small hinges at the rear were made from strip. The canopy was set open in place and the model was ready!
AUSTRALIA

[ area: 7,700,000 km2 | population: 26 million | capital: Canberra | GDP per capita nominal 68,000 USD ]
After the Second World war, De Havilland Vampire jets were ordered with some delivered but particularly most of some 80 Vampire F.30 and FB.31 license manufactured by CAC. And at the island of Malta, Vampires were stationed during the Cold War. Two seat trainers were also used. The T.33 trainer used in Australia and many were built by De Havilland Australia in Sydney in the 1950s. Upgraded these were designated T.35 and were used by the Royal Australian Air Force (RAAF) and as T.33W by the Royal Australian Navy until 1970/1971.For more historical info, look at my Mirage page here..
1/32 scale conversion

AFTER THOUGHT: to have a more horizontal "sit", the nose gear leg could have been shortened about 2mm


Vampire T.35, A79-648 as used by the TELSTARS. The team was formed at the Central Flying School in 1963 and flew with 4 Vampires until 1968. They did display flying and use coloured smoke.
... at Nowra
1/32 conversion
See an old video at https://www.youtube.com/watch?v=3sehVX3FQHk
and visit aerobaticteams.net [external links]
Back to 1/32 Models.......

(c) Copyright Meindert "designer"/ All rights reserved. Your comments are welcomed by webmaster
Created this page
December 7, 2022