Improving the 1/32 Revell kit
[ page 3 ]
... continued from page 2...
COCKPIT DETAILING
The kit cockpit parts are unusable, Revell did not have the information as the Gripen was still highly secret. A few decades later, it is surprising that still no full 360 degree cockpit photos can be found in various books and internet. Many still show mock-up photos.
A few good photos were found in a Czech book showing Czech Gripen details including some cockpit photos. The overall impression is that the Gripen has a rather clean cockpit layout.
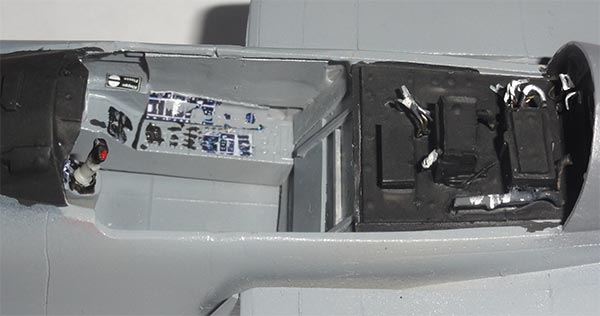
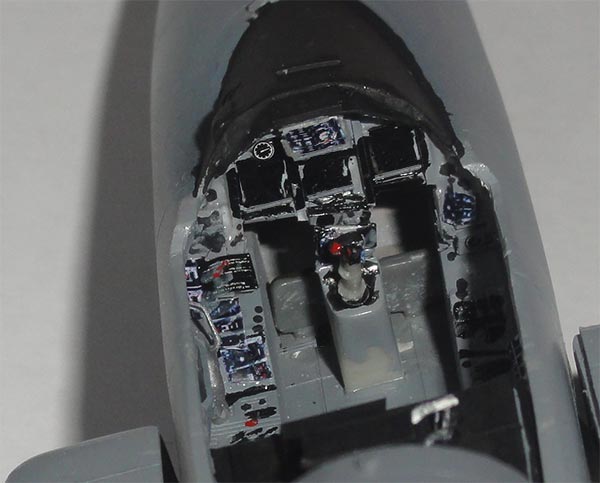
The main instrument panel has 3 large CRT displays and a few “clocks” only. The panel was made from scrap.
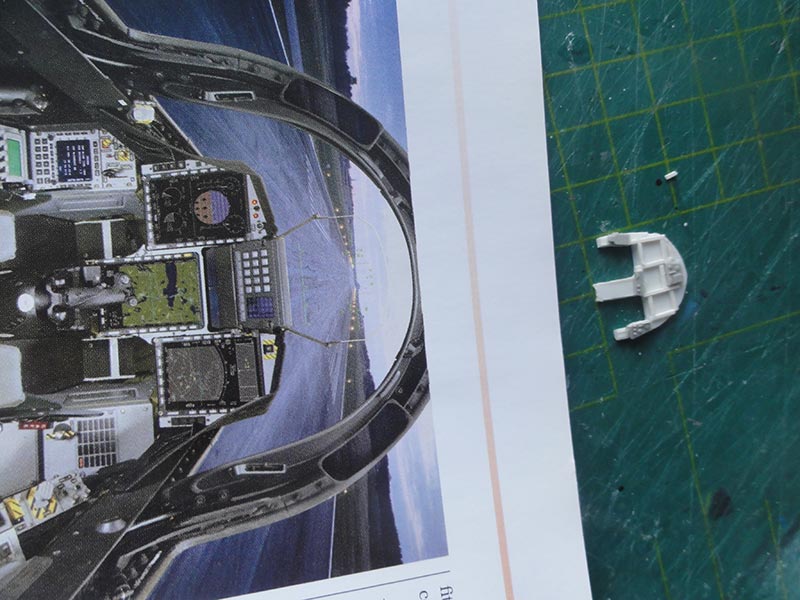
The panel is pretty small even in 1/32!
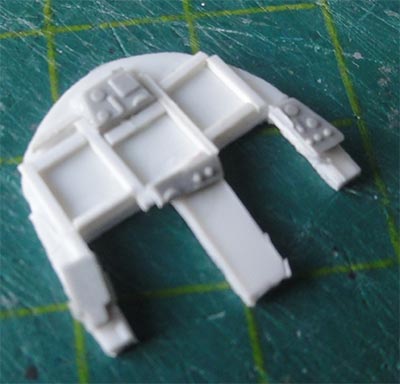
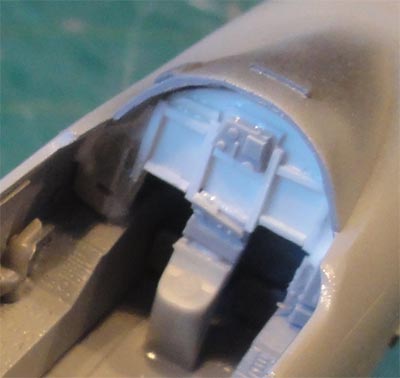
The smaller side panels and details were made from bits found in the spares box and decals. At the front of the instrument coaming a sort of angled extension plate was made from card.
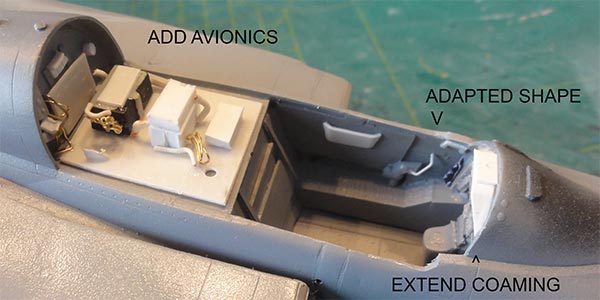
The basic interior colour is probably FS36320 with black details and black internal canopy frames.
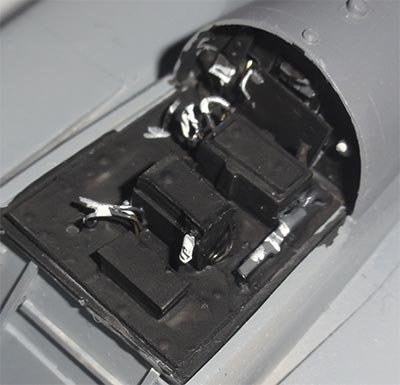
The rear avionics boxes need a new scratch replacement. Card, stretched sprue and metal wires were used with main colours in black.
EJECTION SEAT
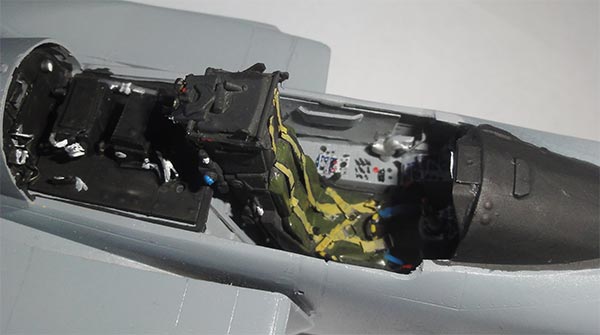
As noted earlier a 1/32 Kitty Hawk Mirage 2000 Mk.10 seat will be used for the Gripen Mk.10 SL seat. A seat harness was added made from tape, etched metal buckles from the spares box. The main colour was black with olive green parapack and details in some other colours. Some etched metal seat buckles were added found in the spares box. Some final detail to be added at the later stage when setting in the cockpit.
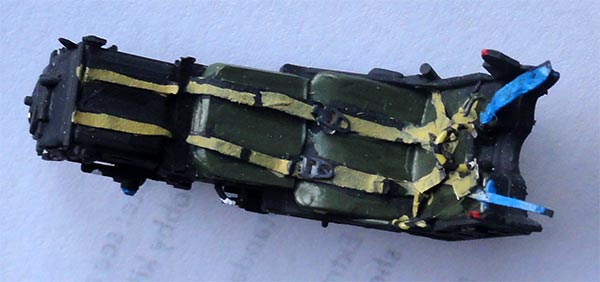
Here it is loosely set in the cockpit…
FINAL WINDSCREEN FITTING
A big task now is fitting the windscreen. It had been changed earlier, see previous remarks. Now it needed gap closing. The clear screen was protected with tape. Next, surrounding surfaces protected with masking tape and gaps filled with putty and sanded.
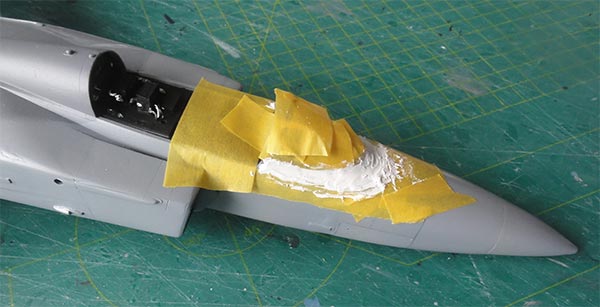
Sanding was done and than another few passes of the grey colour FS36320 coats were airbrushed. Note that the pitot with small flow vanes is not yet installed as to avoid damage.
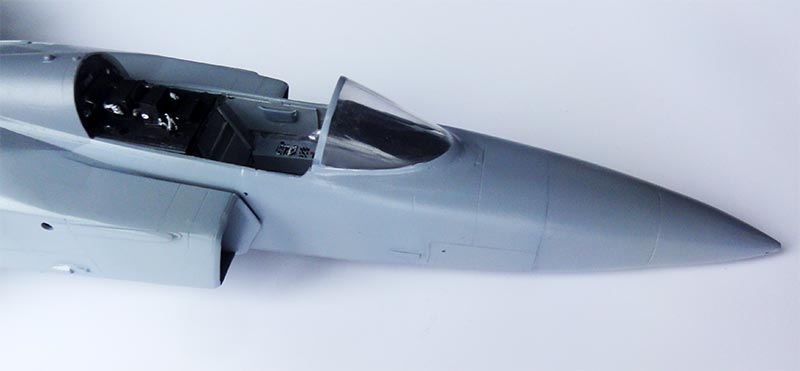
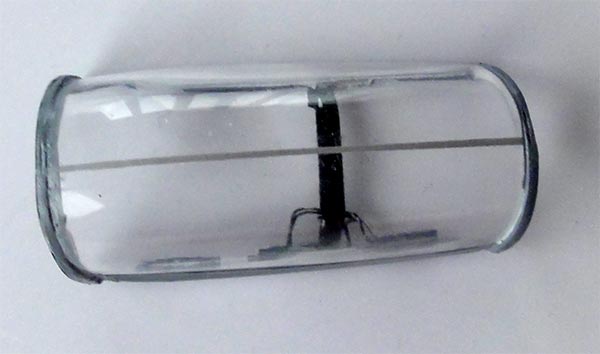
At the same time, a central thin frame was to be painted onto the improved main canopy. After very careful masking, this narrow frame was airbrushed as well (in the FS36320).
page 2
page 3
![]()
UNDERCARRIAGE
The
undercarriage takes some rework. The too small diameter kit wheels
were replaced by new ARMORY resin wheels from their set AR AW32503. 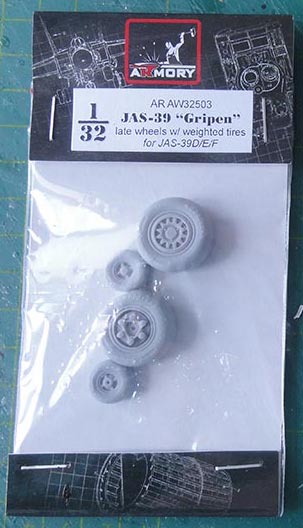
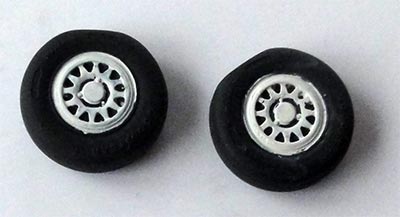
The main gear struts from the kit were measured and checked with photos. Those from the kit are not that bad at all and have the correct angles and dimensions! I checked the track of 2,4 meter (or 7,7 cm in 1/32) and the height of the legs without the legs set fixed. After it was clear how to set these, the main legs were installed.
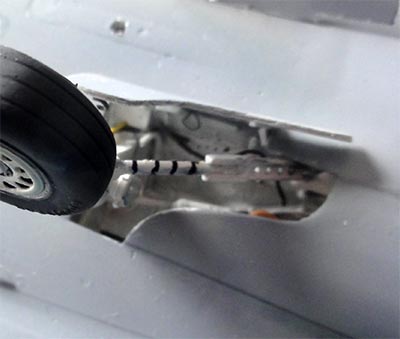
In the main bays, some details were added like the hydraulic lines using “JMC lead wire” that can be bended and twisted easily. Detailing the main gear is not a lot of work.
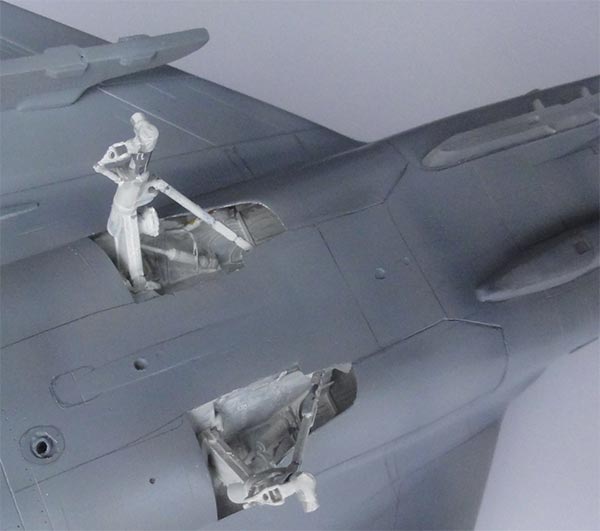
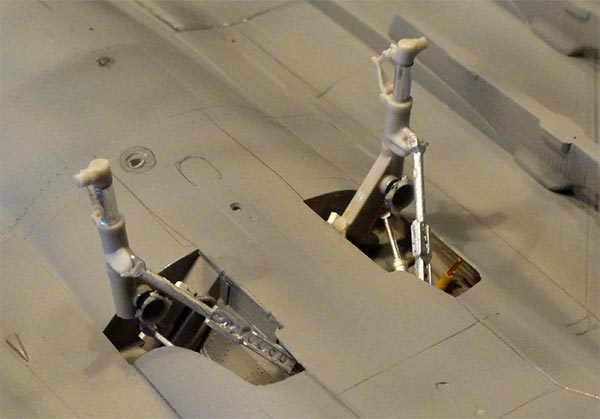
Note that the big main gear doors are in the “closed” position as seen on most parked Gripens. A few small curved gear doors were made from card (not seen here).
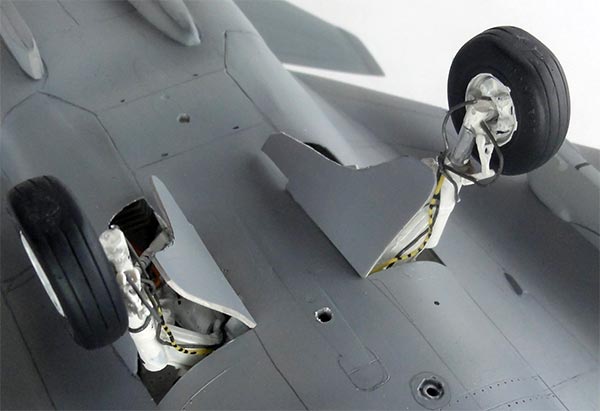
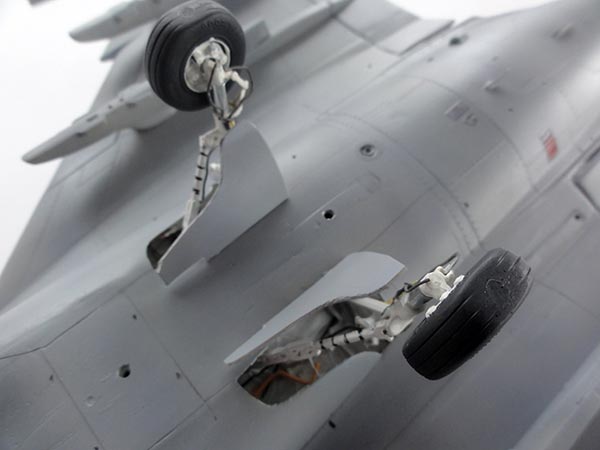
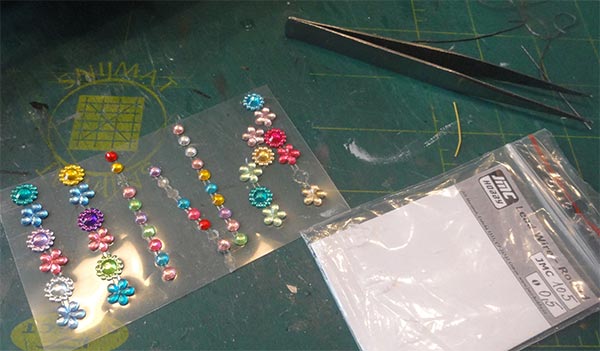
The large landing light was set on each strut was made using a set with shiny bits found in the hobby shop.
NOSE UNDERCARRIAGE
The kit nose wheel strut parts can be used as well. Again, to my surprise. Detailing was done with wire and sprue.
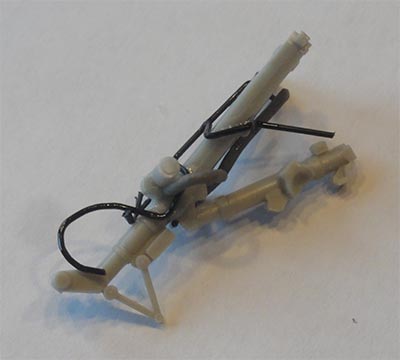
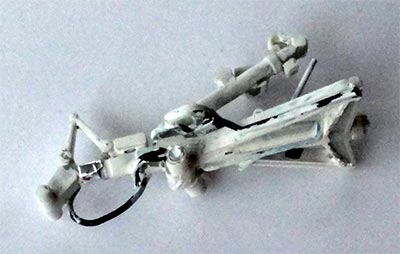
Setting the strut in the nose bay was checked with the real Gripen wheel base of 5,20 m for the single seater Gripen which is 16,2 cm in 1/32.
Inside the repositioned bay, smaller bits were added to have the extra detail.
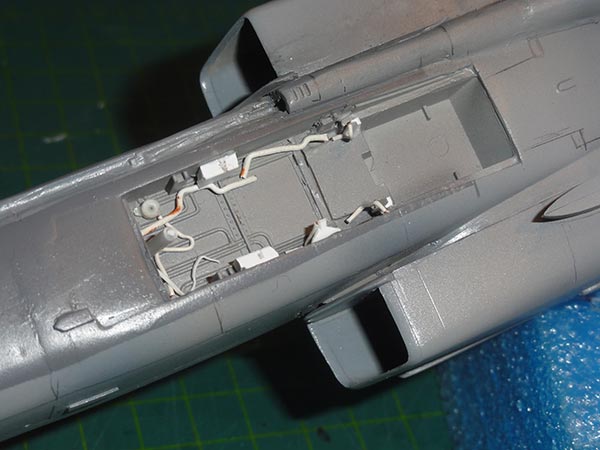
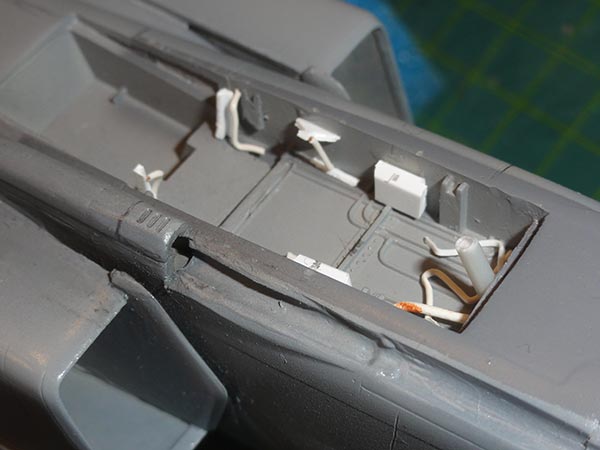
The nose gear bay was painted white.
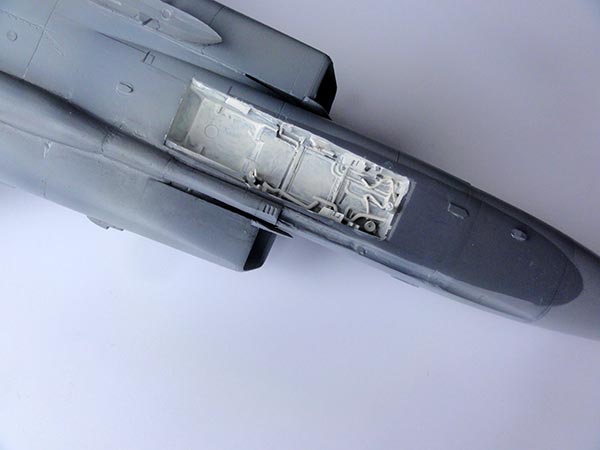
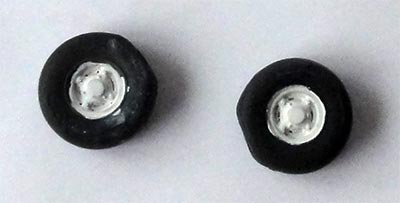
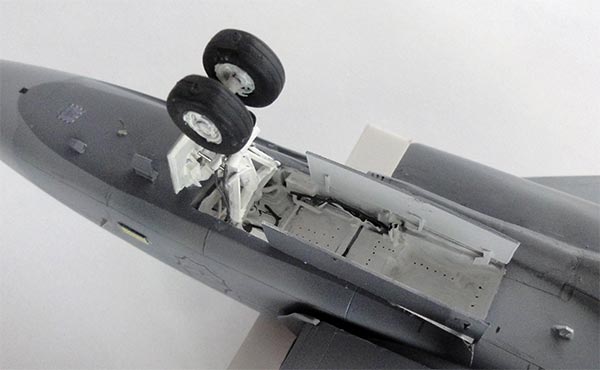
The resin Armory nose wheels were set and the pair of new long nose doors of 56 mm made from card. Again hydraulics and wires were set using “JMC lead wire” that can be bended and twisted easily.
The front gear door was set and the large hole in it should correspond with the location of the strut landing light made.
DECALLING AND SCHEME
Decalling was now done before installing other bits as the model is easier to handle. But first the model got several gloss varnish layers using my favourite Johnson Future thinned with IsoPropylAlkohol (IPA).

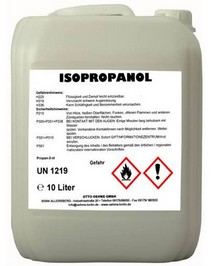
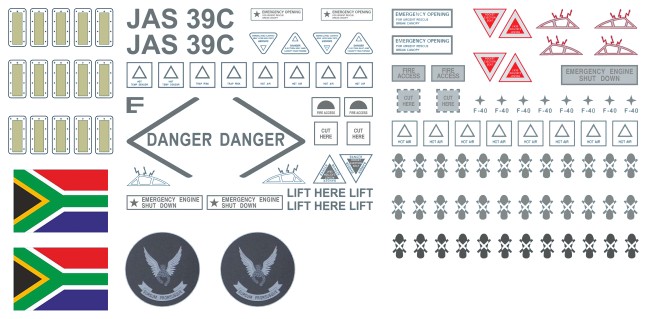
The home designer decals were now set on the model.
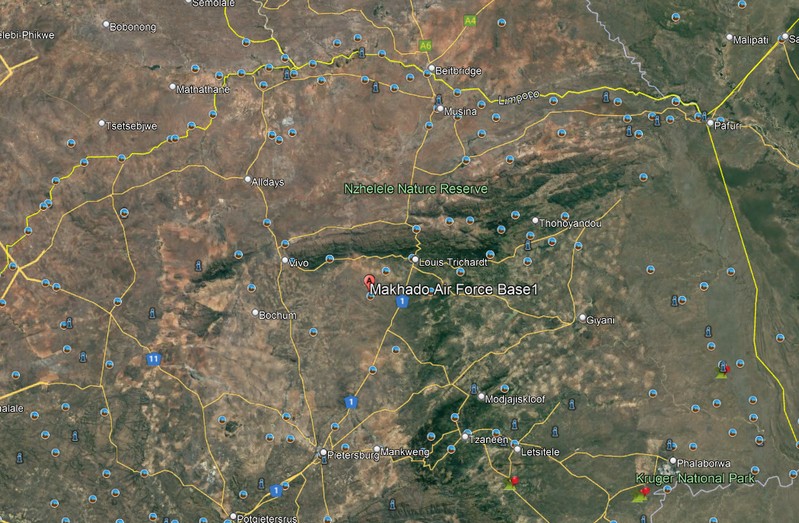
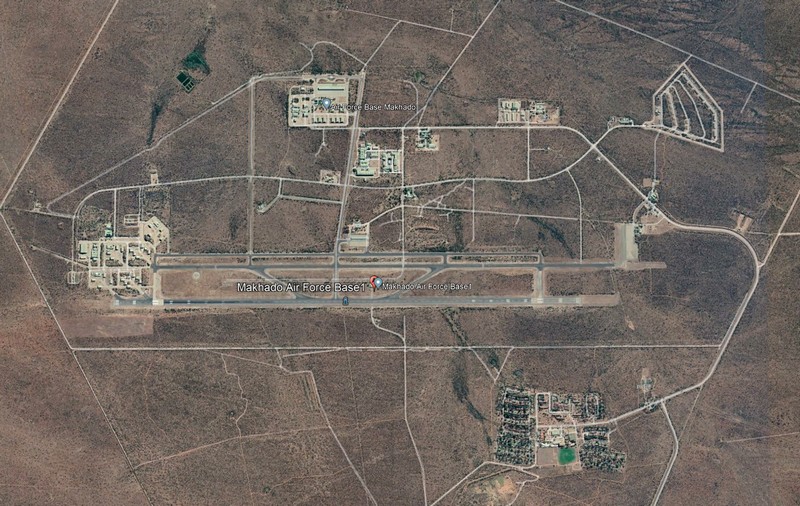
As noted earlier, SAAF Gripen JAS39C tail code “12” cn 39-2103 coded 3912 of no. 2 squadron based at Makhado AFB near the town of Louis Trichardt in the North of South Africa was picked.
Photos were studied obviously were the decals should go. Each decal had to be separated from the printed sheet and with gloss varnish set on the model to avoid tiny air bubbles (“silvering”). Decalling took a whole day.
Studying photos was needed to determine what decals are needed. The new style “roundels” were added on the wing and fuselage but none are present on the lower surfaces. I had printed quite some in different greys and only 4 were needed.

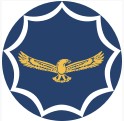
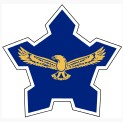
Note that the roundel Eagle head looks inside and forward, so these are not symmetrical.
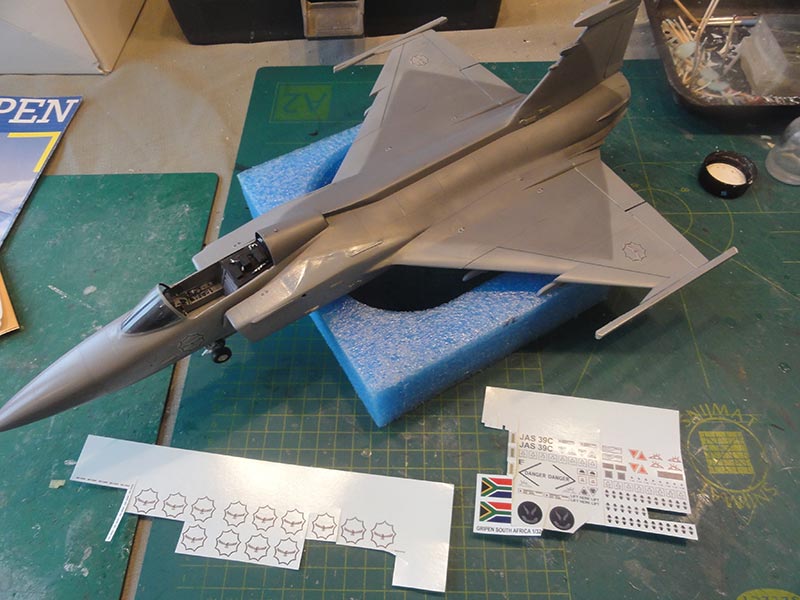
On the SAAF Gripens a few no step “feets” were added on the mid fuselage and intakes. A few hot air markings were also set and a few white warning panels.
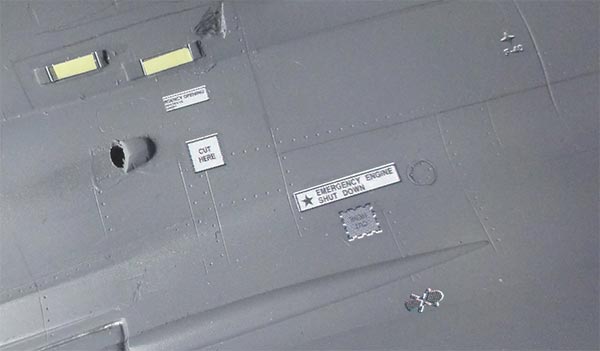
The lower fuselage appears to have hardly any markings. Above the intake anti-collision lights the SAAF Gripen code “3912” was set with numbers found in the decal spare box.
PITOT
On the Gripen I saw at the pitot a few small side flow vanes. Though the kit part has these, they have a slightly different shape so these were made from thin card and blended in with white glue and painted ghost grey.
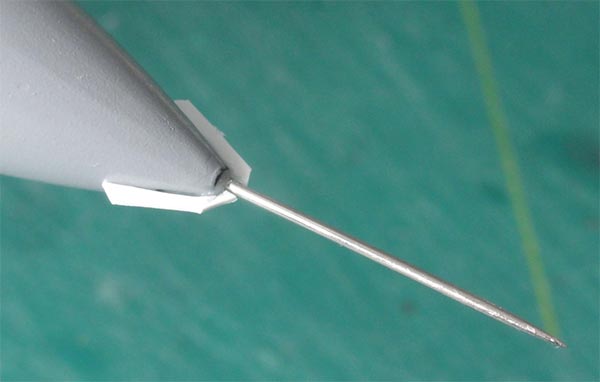
A few self made NO GRIP stencils were set on the nose pitot vanes. The pitot itself was replaced and was made from a thick metal needle.
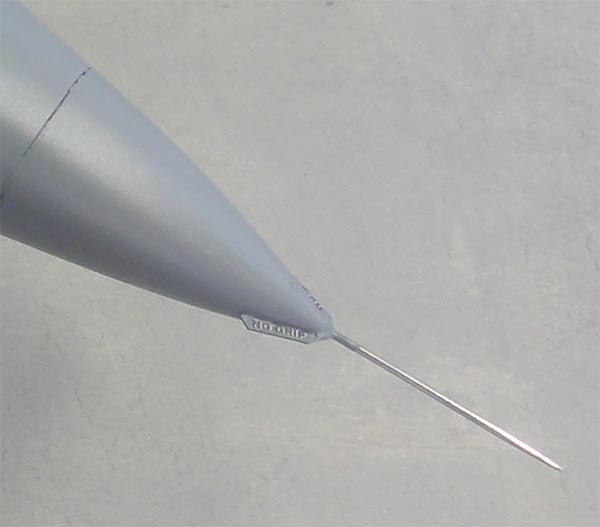
On the vertical tail, also a leading edge pitot was set made from a metal needle.
FINAL COCKPIT WORK
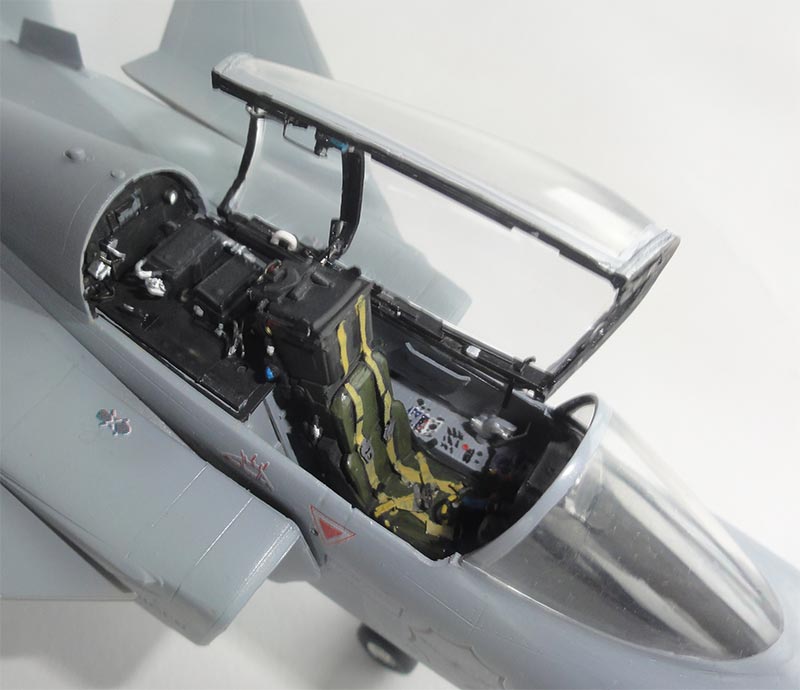
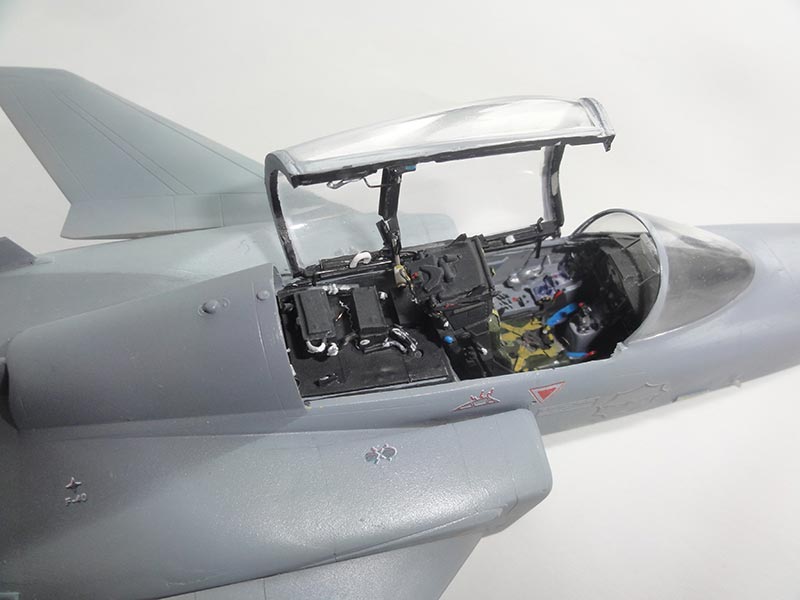
In the cockpit, the large HUD was set as per kit but with a few support rods. The prepared ejection seat was fixed in place after it got another few very tiny details:
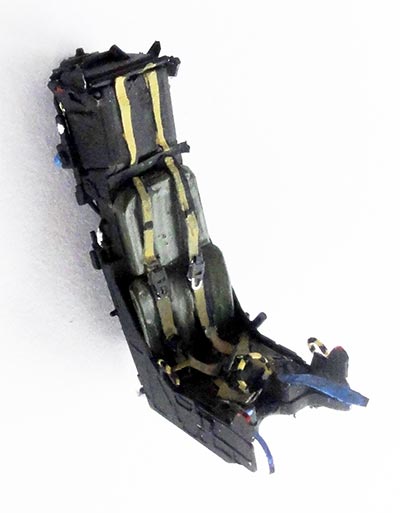
The canopy rear bar aft of the seat needed a slightly more rear position than I first thought and after it was detached it was repositioned. Some wiring was set along with an actuatormade from electrical wire. The canopy is detachable as I used very tiny metal wires to hold the canopy that correspond with holes in the sill/ edge.
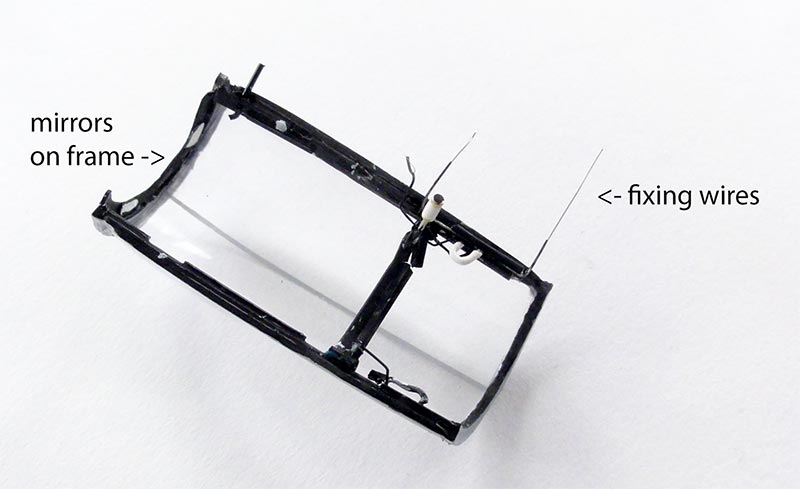
The canopy can be positioned open.
VARIOUS LIGHTS, ANTENNAS AND OTHER BITS
The landing lights was set on the gear struts were made from shiny bits of a hobby set. The white anti-collision lights on the rear fuselage next to the exhaust were made from clear plastic just like the tri-angular light above the rudder. The anti-collision lights on the intakes were set on the previously re-shaped fairings and painted a tiny bit of clear green and clear red with Tamiya clear paints.
The large antenna on the spine was made with card as were the tinier antennas. Below the cockpit nose, an additional antenna was was and one below the rear fuselage. Small vanes were set made from metal bits on the cockpit sides and in front of the nose gear.
On the missile wing tip rails, the black recesses were suggested with black paint. These will be mostly hidden when the IRIS-T missiles will be installed but a small portion can still be seen.
EXHAUST
The kit exhaust part can be used but it is moulded in the closed setting. I wanted an open exhaust and had found something earlier in the spares box that could be used. This part has the correct 30 mm diameter and is from probably the F404 engine found in the Academy F/A-18 kit. (in fact: the real Gripen RB12 engine is derived from the F404 engine I believe). I also found an afterburner flame holder to be set inside.
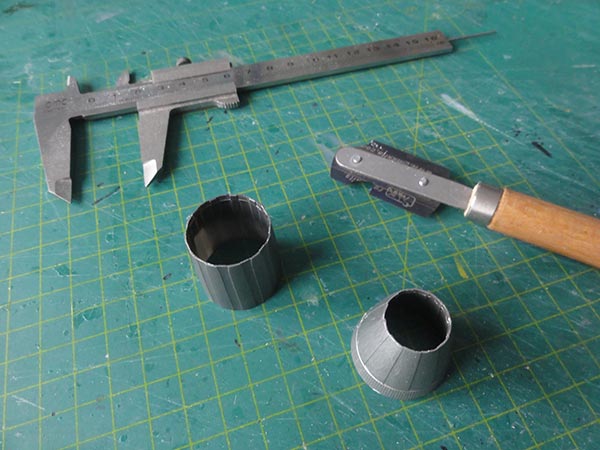
A few slots were cut and with some twisting extra detail suggested.
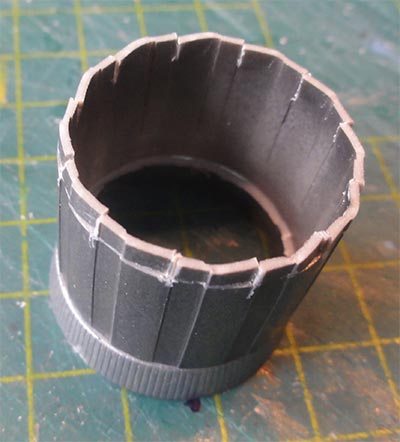
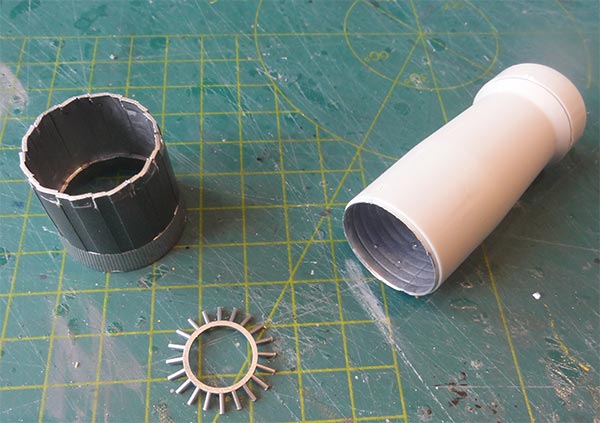
The exhaust was airbrushed in a few coats of ALCLAD burned metal.
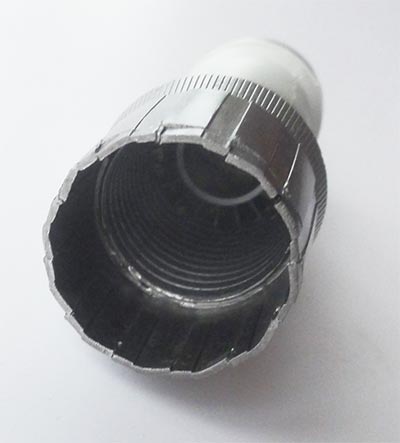
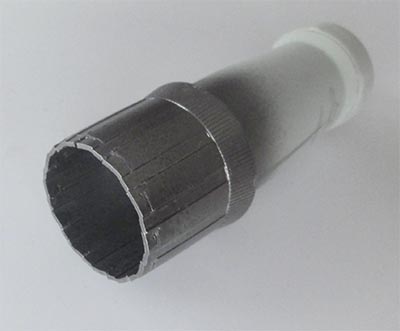
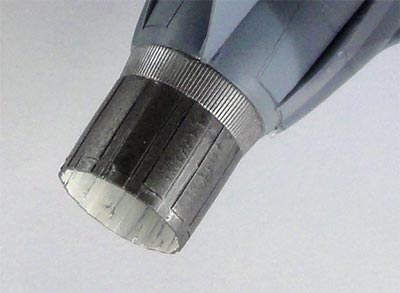
(Note that I had prepared most of this work earlier).
Now the exhaust was set in place with super glue. Any tiny reamining gaps filled with white glue but after drying this was not painted but suggests the exhaust to be perfectly set.
CANARDS
The pair of canards, that were improved earlier, were set in place. They have a bit angle upwards and were set at slight rotated tilt. On parked Gripens, their orientation varies.
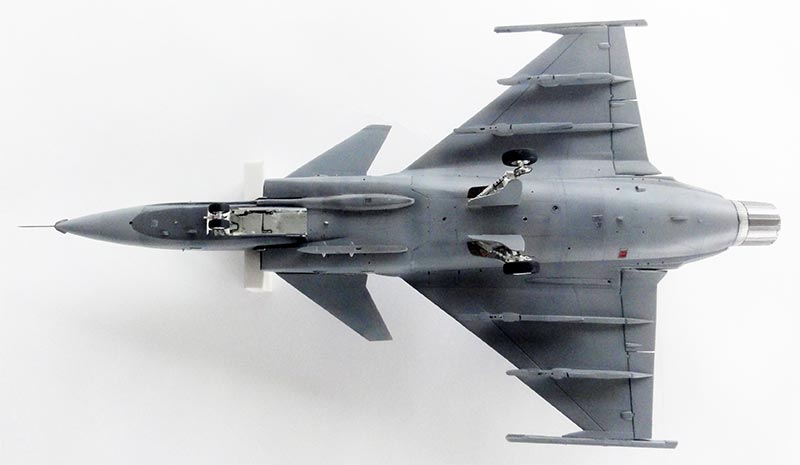
STORES
I wanted to add a few stores onto the Gripen. Some nice photos on the internet and in books showed that the SAAF Gripens can carry in theory a large variety of stores. It is unclear if these were all delivered due to high costs.
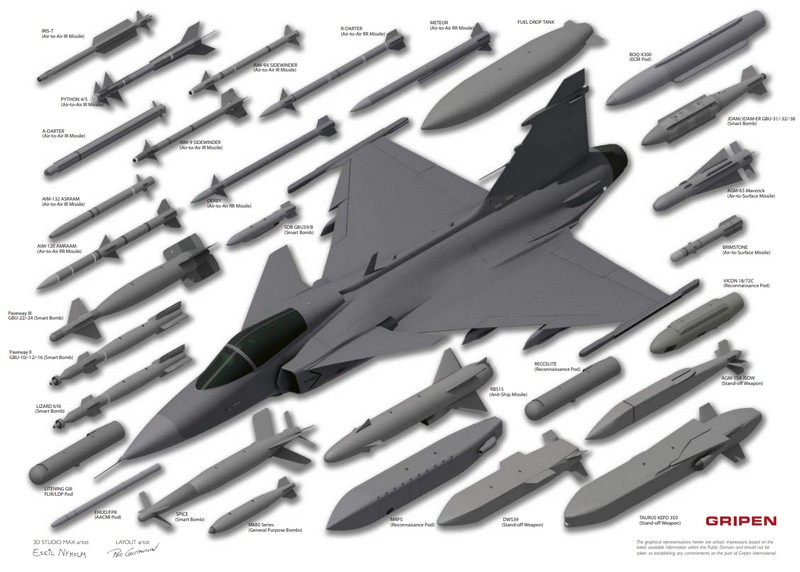
I saw on photos IRIS-T missiles though on the wing tip rails. These missiles were luckily found in the spares box coming from the 1/32 Revell Eurofighter kit. I had to shave off a few raised stubs on the missile part in order to get a fit without too large gaps with the rail. The missiles were airbrushed ghost grey FS36320 with a few painted stripes and metallic seeker head.
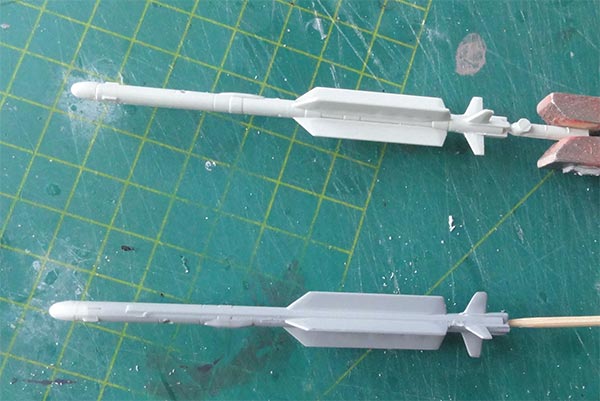
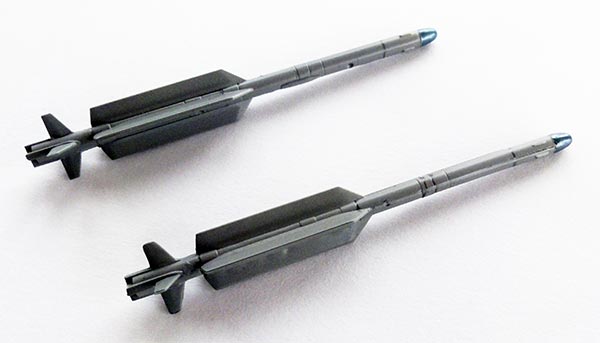
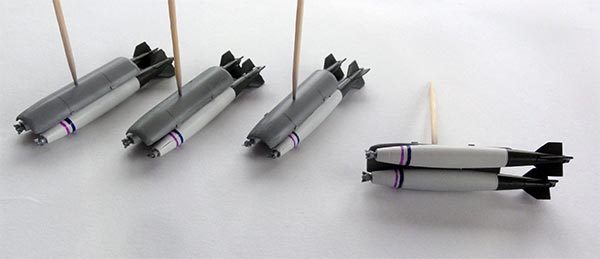
I saw a few nice photos with SAAF Gripens flying with probably sort of mk.80 series bombs with short fuse. These are probably mk.82 “dumb training bombs”. The bombs were found in the 1/32 Trumpeter A-7 Corsair II. Each bomb had a white body and the rear bomb section with fins is about FS34079 green. After that, a few stripes were added with decal and a shortened fuse head that was painted metal.
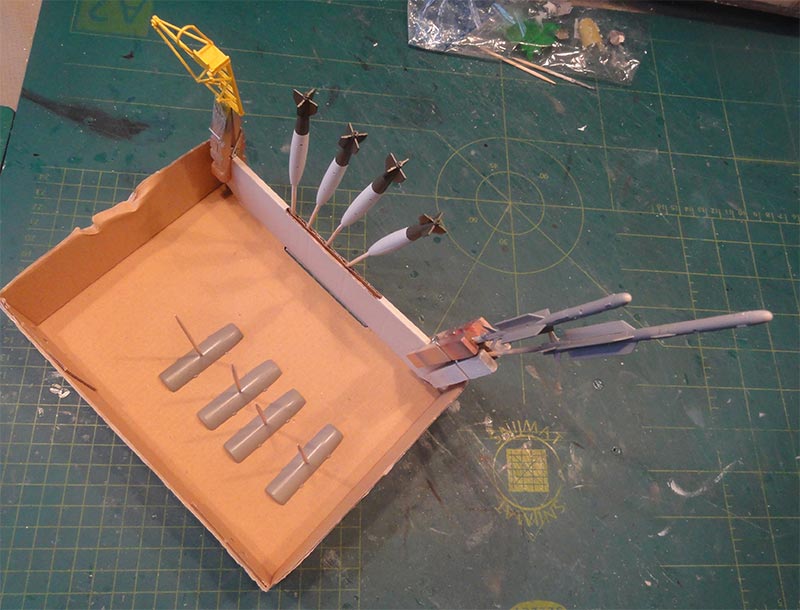
All was airbrushed.
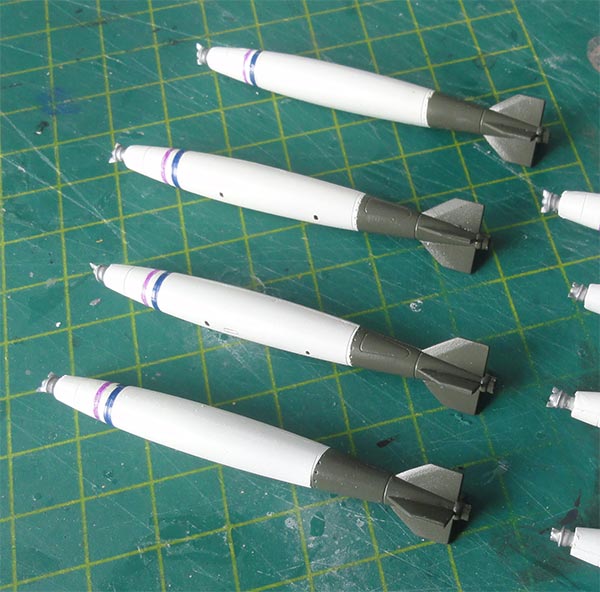
From a few bits from the spares box, the needed bomb carrying Alkan twin store carriers were crafted.
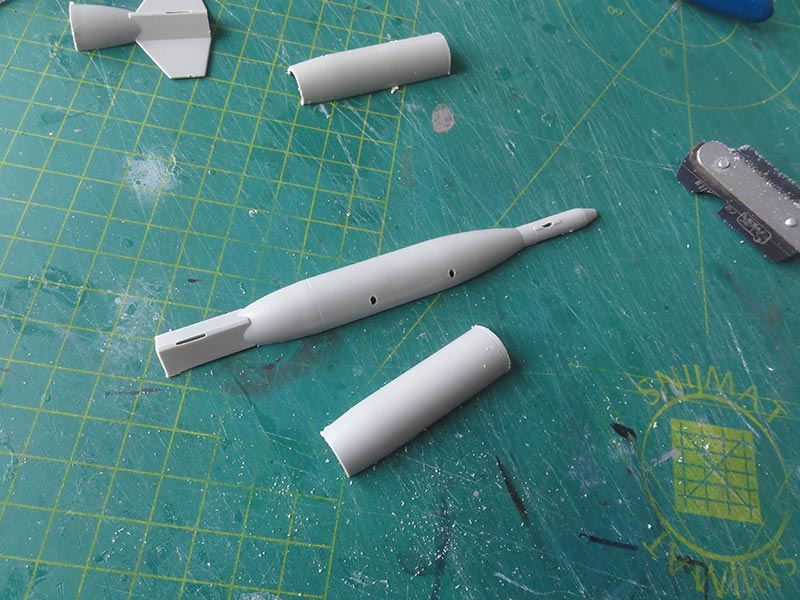
Some guessing was needed. They are about 48 mm long in 1/32.
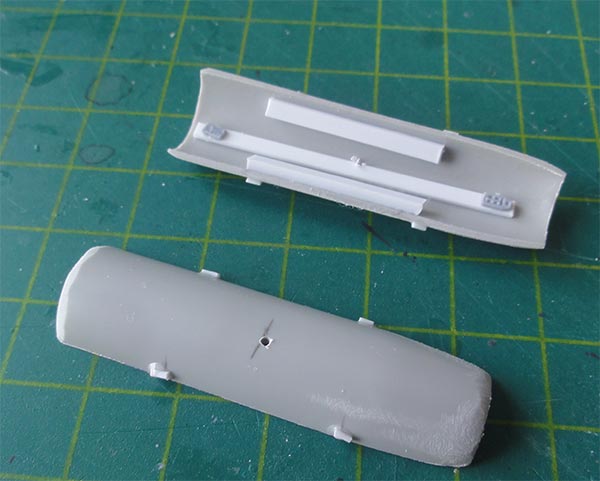
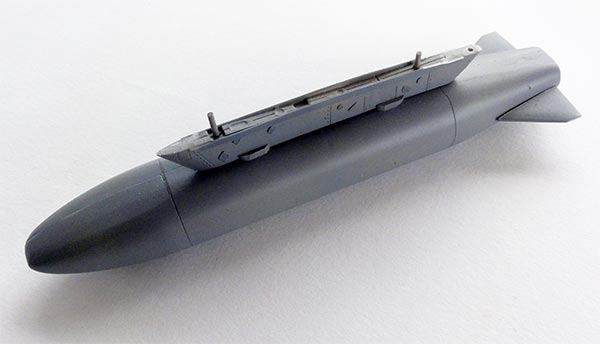
The central station corrected fuel drop tank was already made and seen here.
A Litening targeting pod was seen on SAAF Gripens as well below the starboard intake. I have seen on internet that though these pods are available, the smart bombs are not ?? I only saw dumb bombs when the pod was installed during training missions.
Wel, anyway, a spare pod found in the spares box, left over from a 1/32 Tamiya F-15E kit.
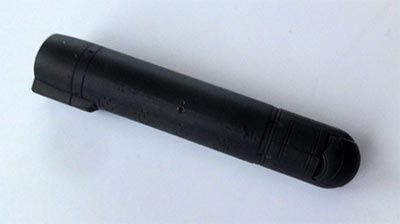
The pod was airbrushed dark gunship grey and a few stencils added with decals.
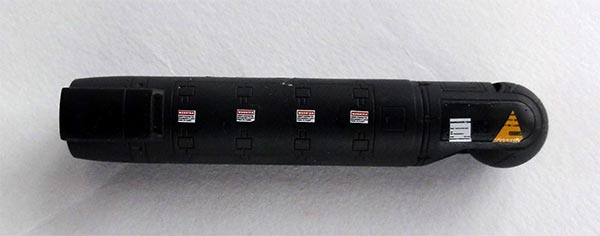
A lower pylon for the pod was previously made from scrap card of about 6 mm height and 60 mm long.
FINAL COAT
I always airbrush a final varnish coat on a model, in this case a semi-gloss coat. This to give the model an even sheen and to protect the decals.


I airbrushed a mix of my favourite Johnson Future acrylic floor varnish thinned 20% with IsoPropylAlkohol (IPA) and some drops of Tamiya X-21 Flat Base, this will dull the varnish a bit giving a semi-gloss sheen. The stores were not forgotten and also got a coat and all was set aside to dry.
LADDER
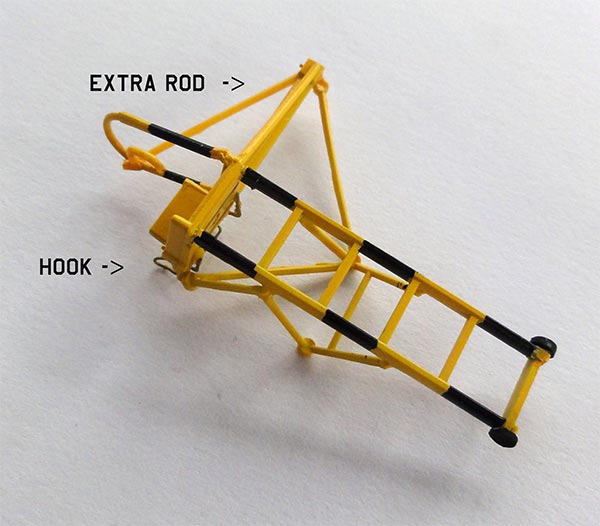
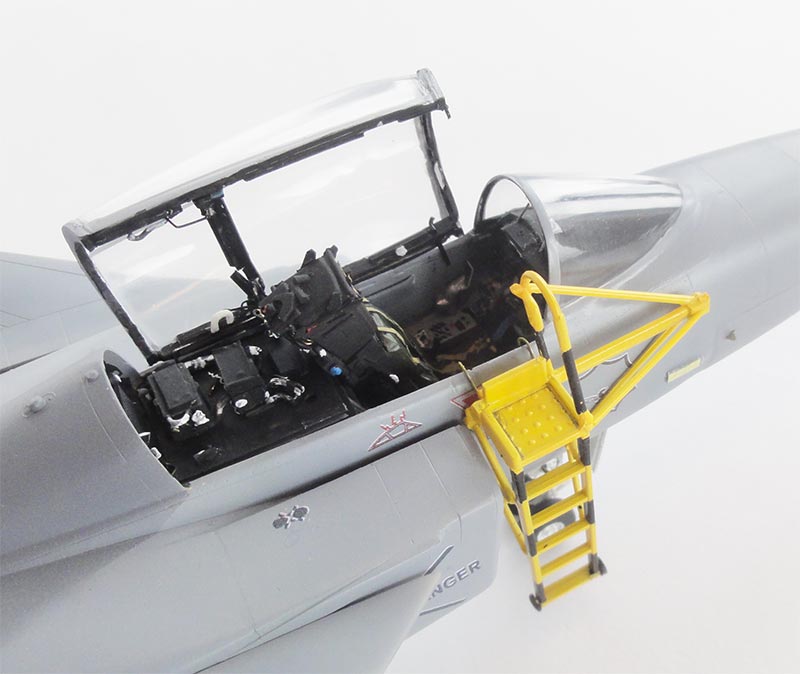
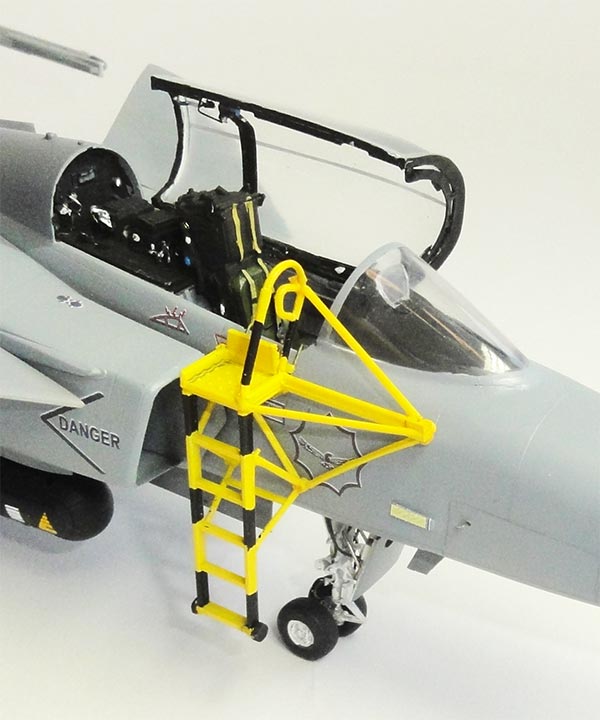
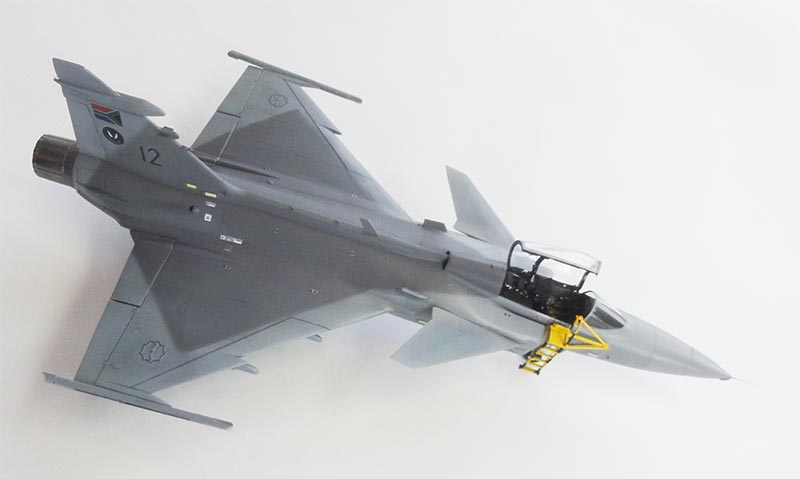
As the canopy would be set open, it would be nice to use the entry ladder with the model as well. The kit parts proved to be quite good in shape so the kit parts were used. I only added an extra cross bar and that was it. The ladder got a yellow FS13538 coat (with Gunze Sangyo H329) and hand painted black sections. I did not want to fix the ladder, so from tiny metal rod a sort of hook was made to hung it in place. (strictly, this is not seen on the real ladder).
It fits well with the correct proportions as very early the cockpit section of the fuselage had been lengthened and the windscreen was also corrected.
ON FINALS
A few final steps to go but before installing the stores, a few photos were made of a “clean model” as the Gripen is often seen flying. The canopy was temporarily positioned on the cockpit closed; photos are presented at the end of this article.
After the photos were made, the stores were set in place with super glue, everytime just a tiny glue dot is needed. This took an afternoon to set all stores aligned and symmetrical. Note that there are still tiny gaps seen on the real Gripen at the pylons and thus also on the model. Stores set are:
- IRIS-T wing tip missiles
- central fuel drop tank
- designator pod
- 4 pairs with mk.80 series bombs.
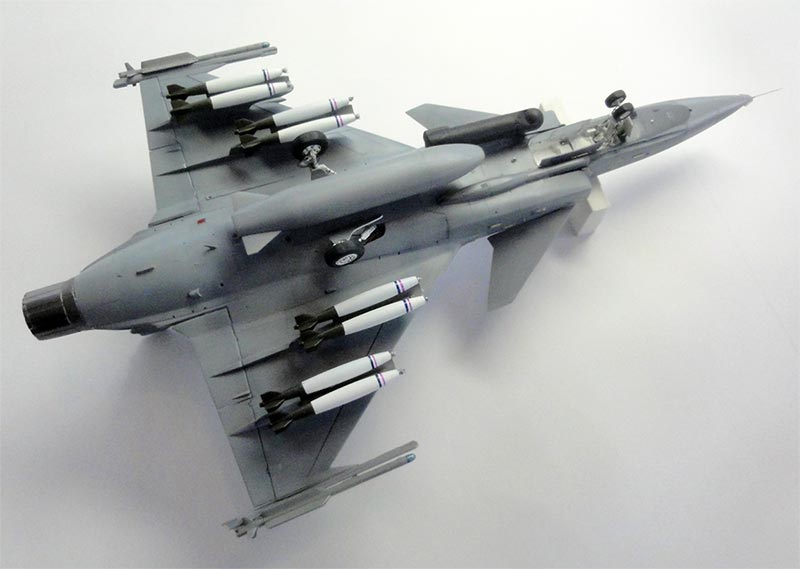
That’s it after a 4 month and a 150 hours effort!
This old 1/32 Revell Gripen “after waiting for 30 years in the loft” has turned out to be a nice model in the collection after all!
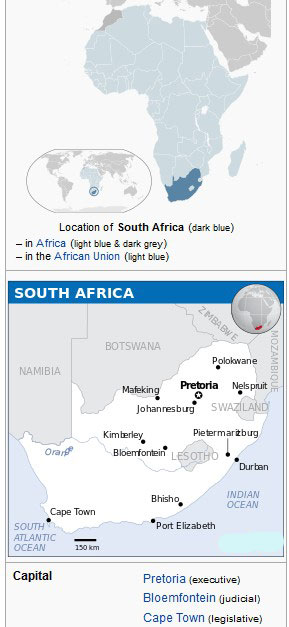
[area: 1,221,000 sq.km | population: 60 million | capital: Pretoria | GDP 6,500 USD per capita nominal ]
Some 17 SAAB JAS 39C and 9 dual -D Gripen fighters were acquired and delivered from 2009 but usage is limited due to lack of pilots and finances. Autumn 2022 it was announced that a Saab support contract was signed to get some 12 Gripens (of the 25 remaining) back in the air, the other jets will remain in storage.
For more information about the SAAF, look at the Mirage page here...
Photos of the 1/32 Gripen in the “clean configuration”: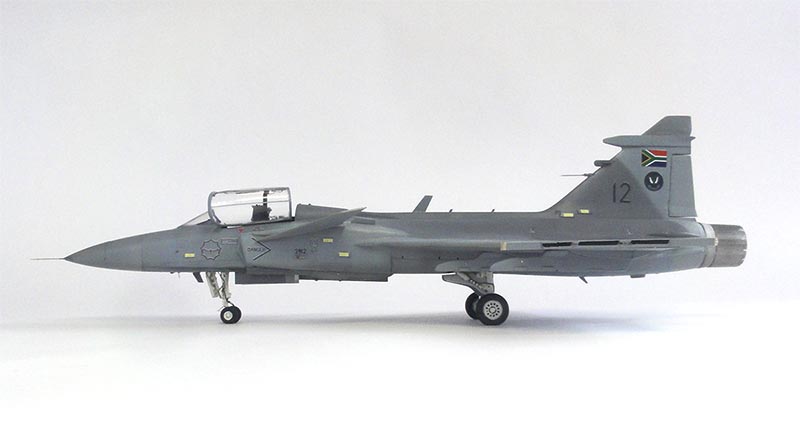 .. with canopy closed...
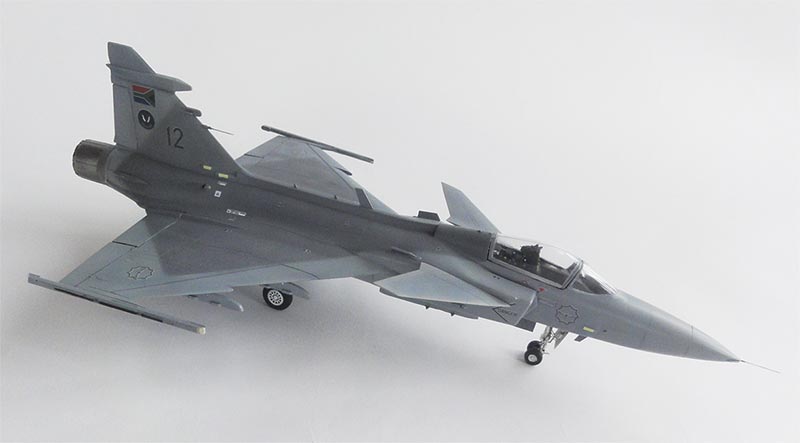

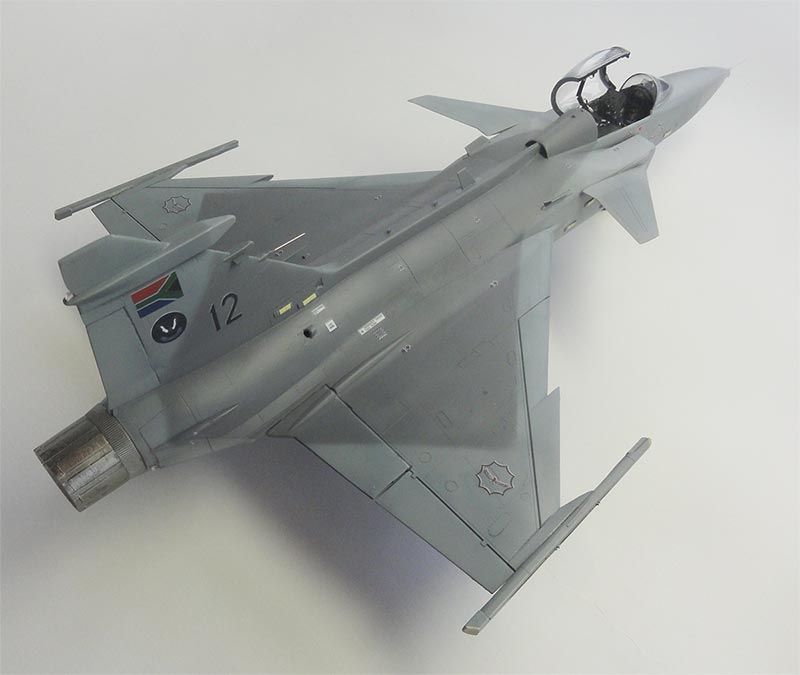
... cockpit canopy open....

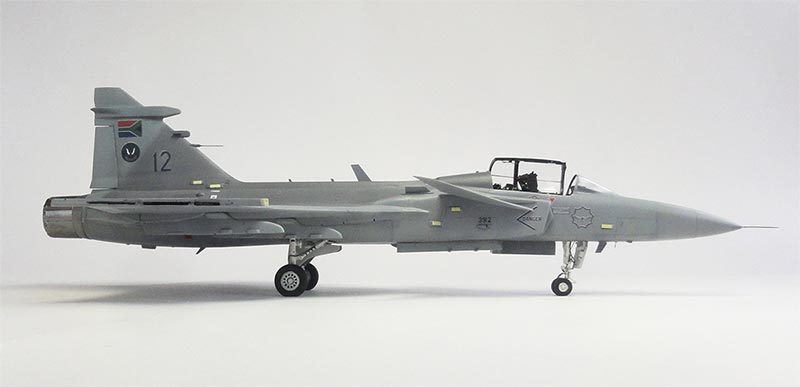
… and with the stores installed…
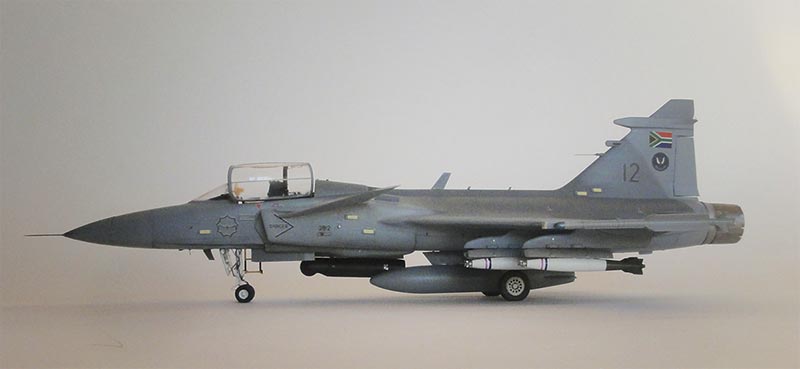
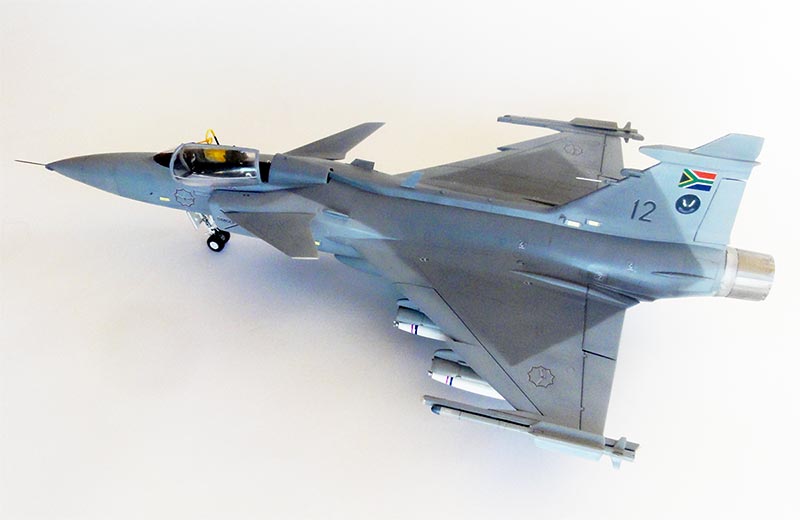
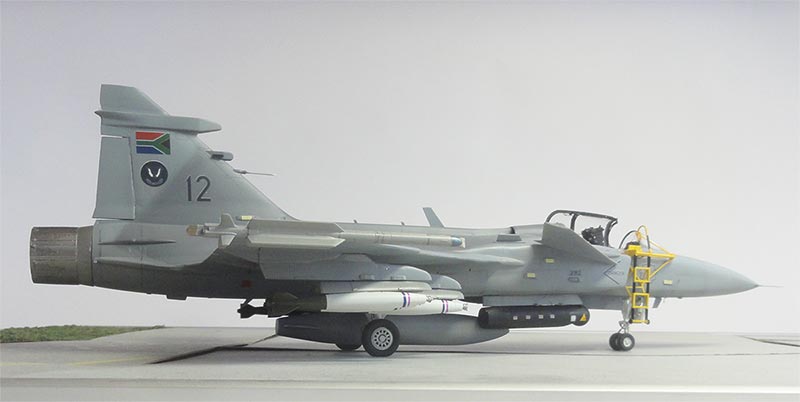
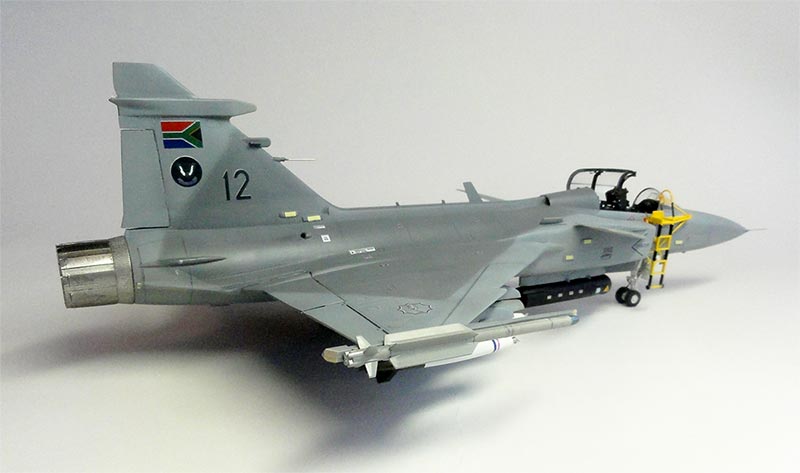
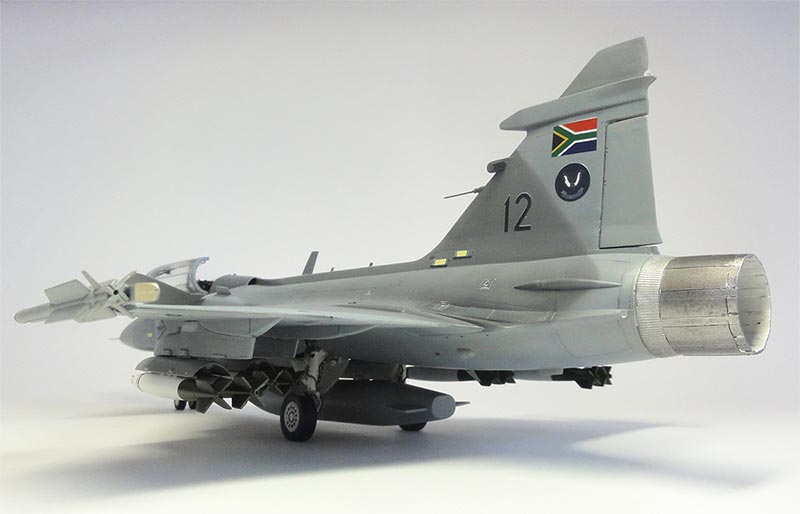
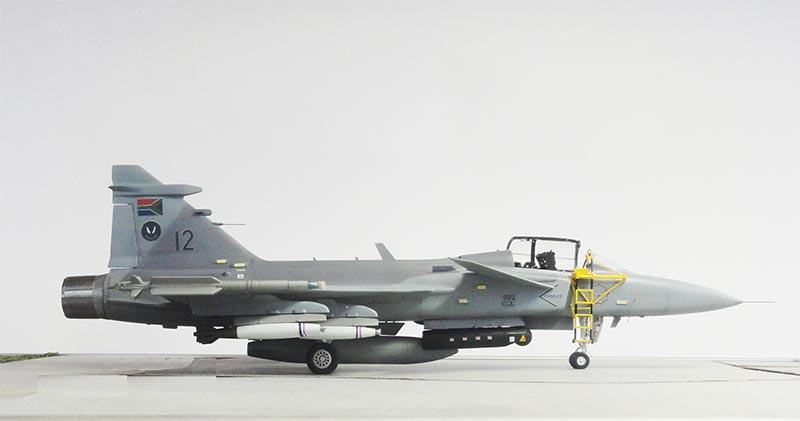
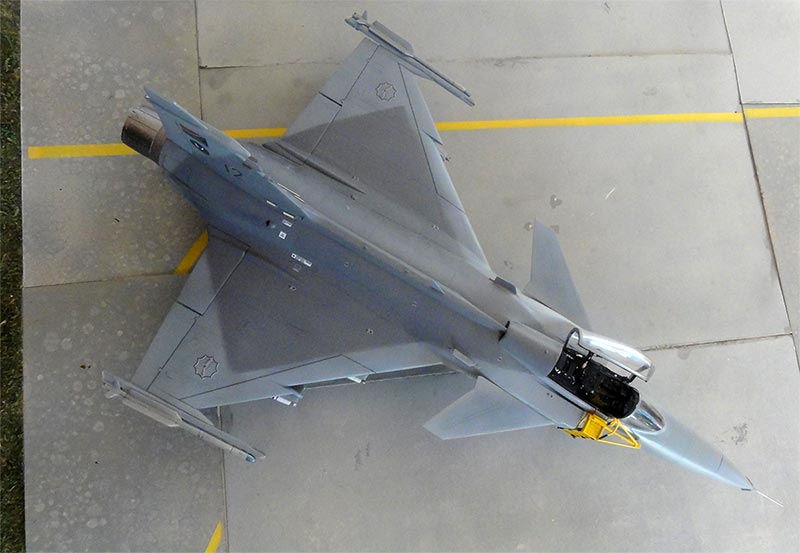
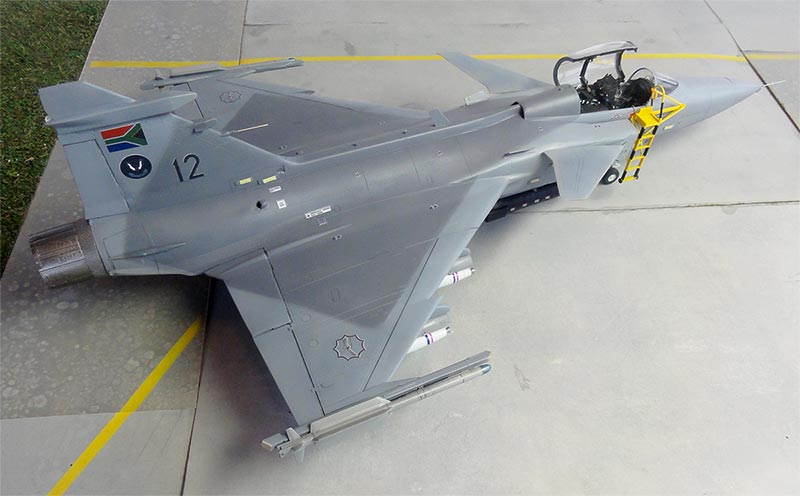
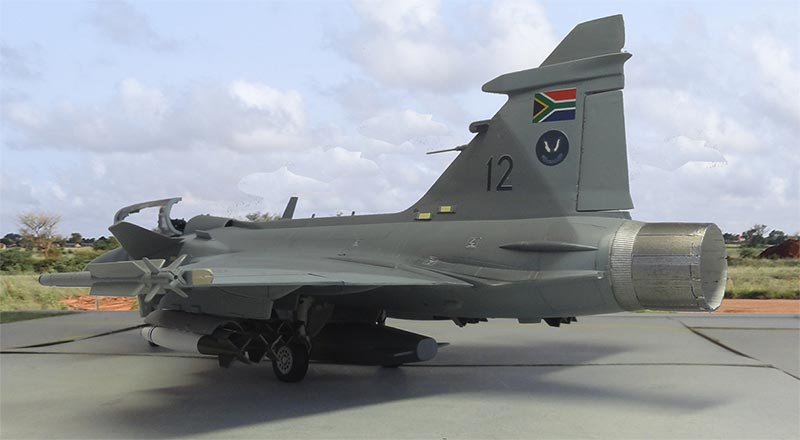

… "model located" on a visit to the SAAF base at Waterkloof…
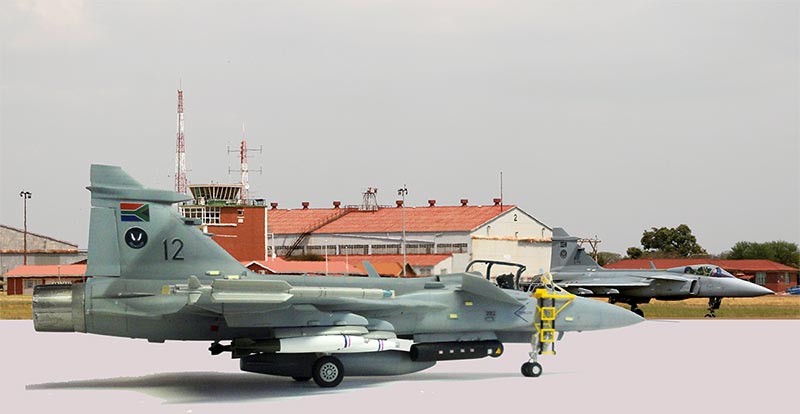
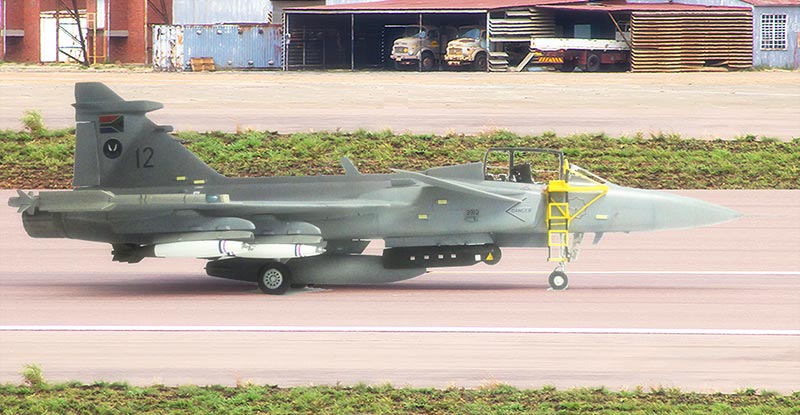
According to "wikipedia":
SAAF No. 2 squadron moved to Louis Trichardt (now AFB Makhado) in January 1993. This air base is very modern and is located in the North of South Africa in the Limpopo province near the Zimbabwe border. No. 2 Squadron became the sole front line combat jet squadron in the SAAF. Till 2 April 2008 the squadron operated the Cheetah C/D fighter aircraft. The last of the Cheetahs were retired on April 2008 and the first new JAS 39 Gripen arrived. The SAAF accepted its first Gripen D in April 2008 and the final two Gripen D aircraft arrived in South Africa in July 2009. The first two Gripen C single seat fighters arrived February 2010 with deliveries ongoing to October 2011. The squadron operates all the SAAF's Gripens except for a few Gripen D jets, which are assigned to the Test Flight and Development Centre at AFB Overberg.
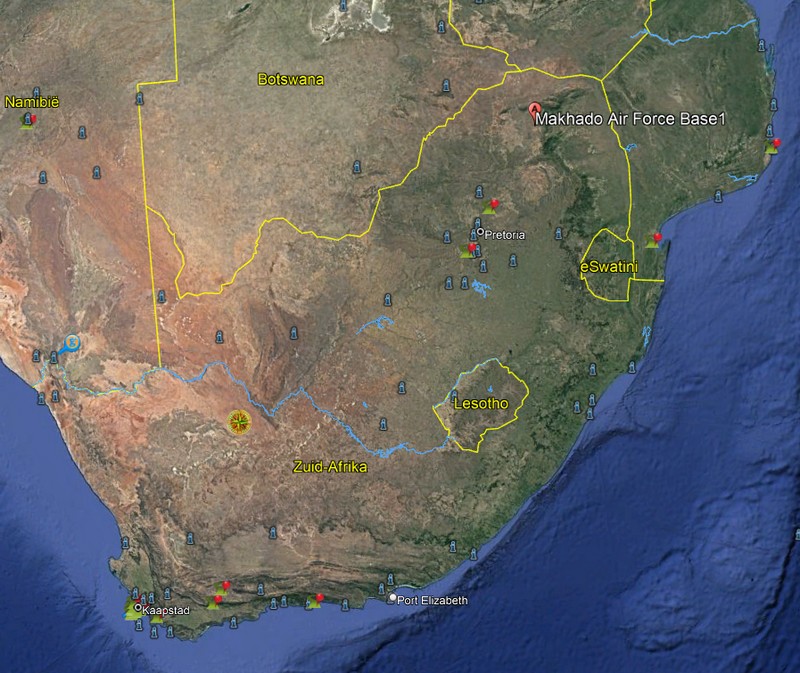
Google Earth views
- SAAF Gripen official info [external link]
>> download a 100 page booklet of this
Modelling Report report in PDF


https://www.youtube.com/watch?v=y3u33op3kUY
Back to 1/32 models.......

(c) Copyright Meindert "designer"/ All rights reserved. Your comments are welcomed by webmaster
Created
February 24, 2022
