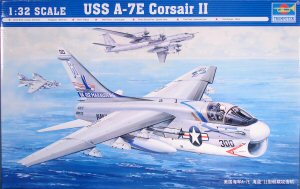
A-7E Corsair II US Navy
[ page 1 ]
Trumpeter A-7E Corsair II in 1/32 scale ;
US Navy, modelling report by Meindert de Vreeze
Page 1
Page 2
Page 3
Page 4
In 1/32
scale the first injection moulded kit of the A-7 Corsair was issued by
Trumpeter
in 2008, and what a welcome kit it was for US Navy fans.
 .....
.....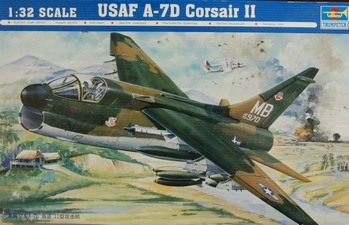
Kit #2231 is designed for the US Navy variant of the A-7E, as indicated
by the odd text "USS A-7E". Additionally, a slightly different kit was
issued for the USAF A-7D.
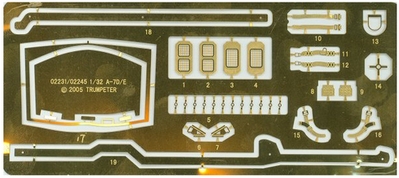
The A-7E kit is comprehensive,
containing numerous parts and ordnance/stores. This includes 30
photo-etched parts, rubber tyres, white metal gear struts, and over 600
plastic injection-molded parts in light grey. The kit instructions are
clear and concise, adhering to the usual Trumpeter style and spanning
27 logical steps.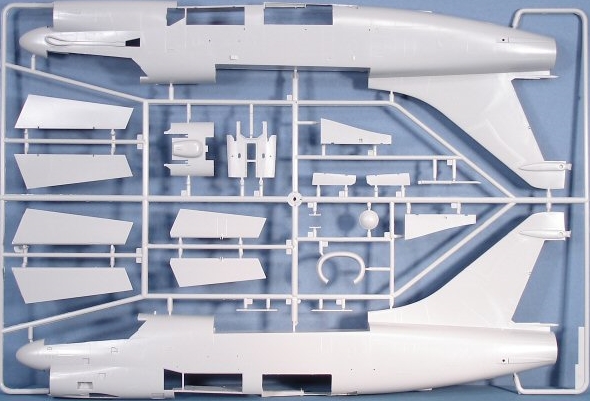
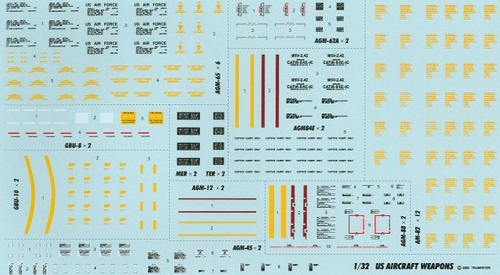
Lots of stores are included with
6 pylons and for example 2 external fueltanks and a LANA pod.
Stores are besides various bombs
and missiles like later generation AIM-9D/G/H Sidewinders also including
AGM-88 HARM and AGM-84 SLAM.

Notes:
- The wing fuel tanks are a bit inaccurate
and are better replaced by a couple from a Hasegawa A-4 Skyhawk;
- FLIR can be used on later planes;
- Bombs are a bit inaccurate and
many bombs (common with the A-7D USAF kit) were I think not used by the
US NAVY;
- AGM-45 missiles needs some launch
rails that are missing and the fins on the missile is too far aft mounted;
- AIM-9B Sidewinders are best replaced;
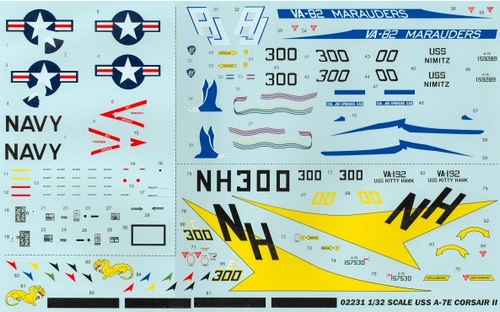
Decals are OK with large sheet with
stencilling and US NAVY schemes in the Gull grey FS16440--White FS17875
schemes for:
1- A-7E, BuNo 159289, VA-82
Marauders , AJ/300, USS Nimitz, 1978
2- A-7E, BuNo 157530, VA-192
Golden Dragons, NH/300, USS Kitty Hawk, 1972
Some small errors are in the decals,
e.g it should read CDR Joe Springer. For the stores, also decals are included.
Wing sprue:
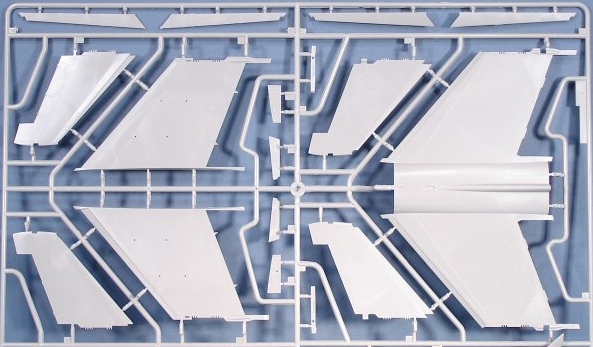
You also get a nice wing with separate
flaps and slats. The wing tips are separate to be folded. When you want
to have a nortmal straight wing, some filler and work is needed.
 .
.
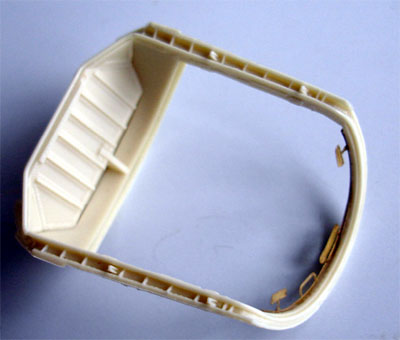
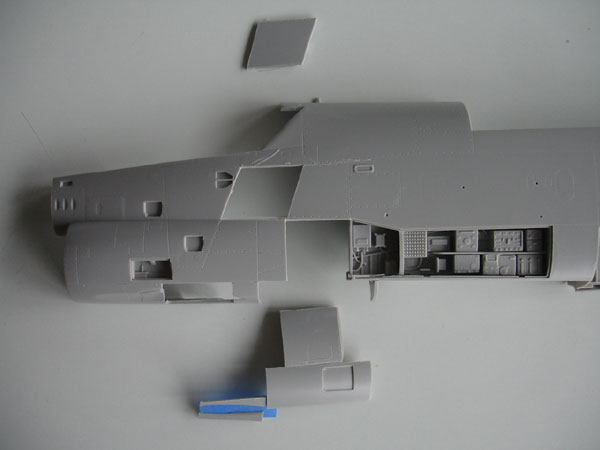
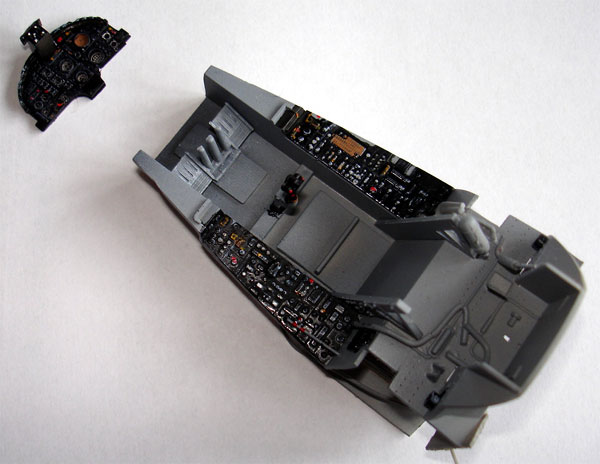
Moving to the cockpit, the tub and SJU-8 seat look good, while an older style ESCAPAC seat is also included in the sprues. The kit provides a "film" for the instrument panel and clear parts with instrument faces, which, when painted up, give a fine finish. Adding further details to this area is possible.
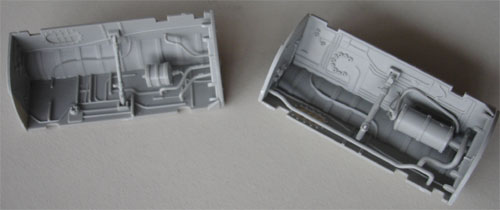
The main wheel wells are decent, but adding some extra plumbing using rod and sprue will elevate their appearance. It is recommended to firmly fix the wheel bays in the fuselage halves with some strips. The landing gear legs can be made of metal or plastic, and feature rubber tires.
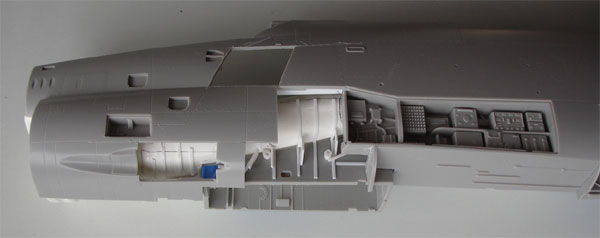
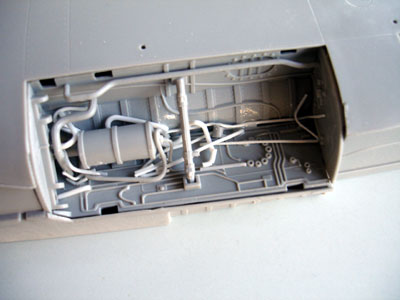
The kit also includes a couple of opened up avionics bays, which, with some added detail, can provide some nice extras to look at. It's worth noting that the boxes in these bays can vary across different A-7 versions.
![]()
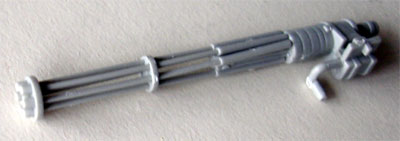
There is also some M61 Vulcan gun
detail in the kit, but not a lot is seen. I decided to open up additional
hatches and panels and add additional detail in the left forward fuselage
area.
Look here for info on 1/72 scale kits.....
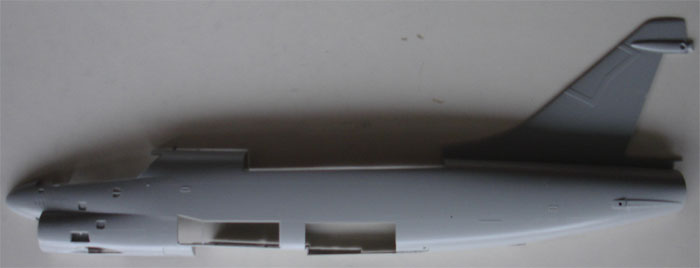
The 1/32 A-7 kit is quite nice, and when built straight from the box is OK. However, improvements can be made both in overall shape and in the details:
Correction 1: the overal
shape of the cockpit canopy is not OK, it is way too flat.
ZACTOMAN
has issued a correction set in resin for this with nicely shaped canopy
and windshield.
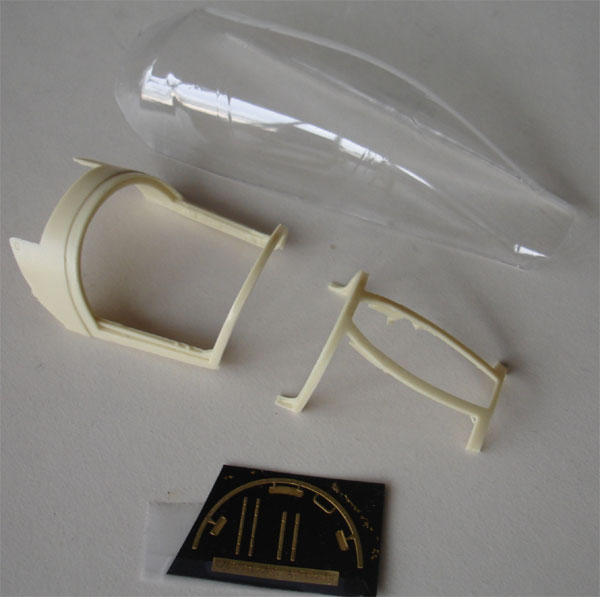
You also get a nice metal frame with
mirrors

The shape difference in cross section
of the canopy is obvious here, with the correct resin part on the right.
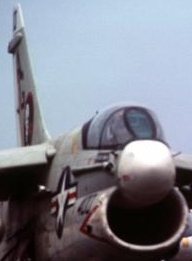
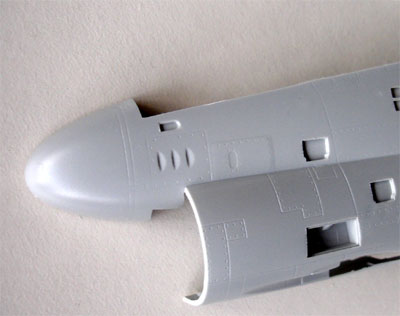
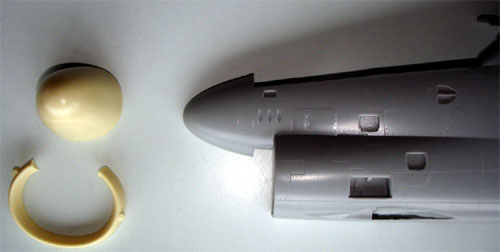
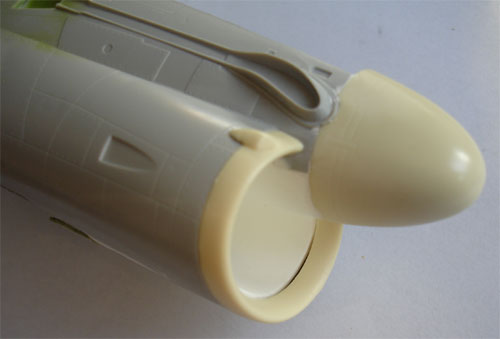
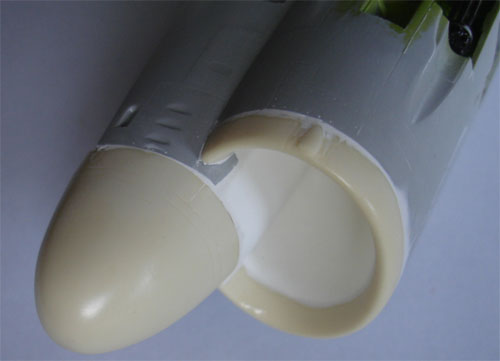
Correction 2: the nose intake
lip is too thin and likewise the shape of the bullit nose. Again, ZACTOMAN
has a conversion set for this; this set is available in 2 forms: with or
without complete intake tunnel.
Look here for info: www.zactomodels.com
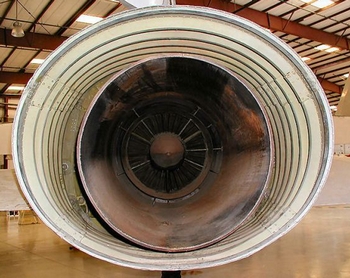
Correction 3: the engine rear exhaust is not wide enough. This can be corrected by the modeller as will be shown later on. Also, the jet exhaust pipe will benefit from making it a bit deeper/longer.
Overall, these 3 main shape issues
make a lot of difference when corrected on how the final model will look
like the real thing.
Starting the build
I started with
some work on the major parts, like sanding off the USAF type antenna panel
on the vertical fin. This is not present on a NAVY Corsair.

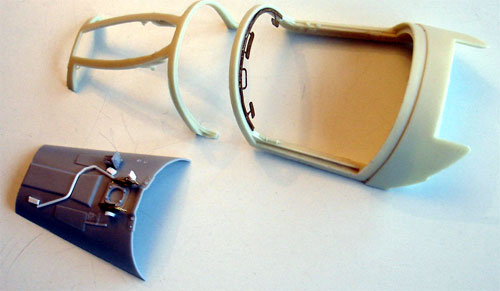
Correction 1:
The very nice ZACTOMAN canopy set
parts are seen here and assembled, ready to get a first grey base coat.
 .
.
Correction 2:
The real A-7 intake is seen below,
the ZACTOMAN correction improves the looks here a lot....
 the
real intake
the
real intake
Following the ZACTOMAN instructions
this correction to the kit is not difficult at all.
 .
.
The difference is seen here:
Some filling and putty and sanding
is needed, but only minor work is required...
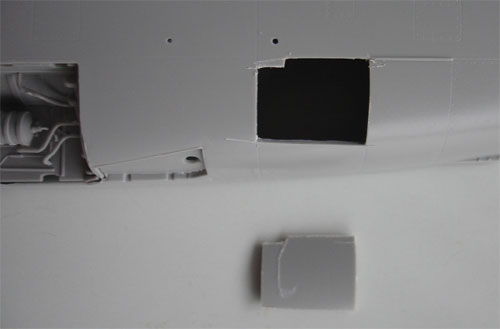
Also at the engine bay, a hatch was
cut out to add some more details
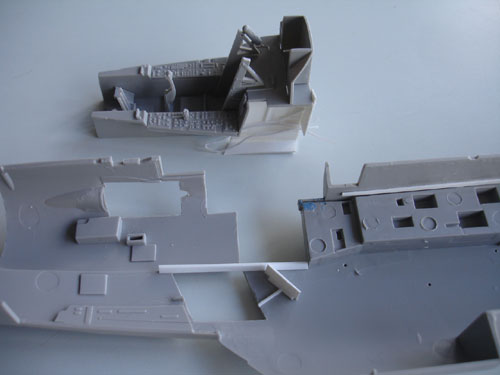
Turning to the
cockpit tub, the basis is there in the kit and very good starting point
for further detailling.
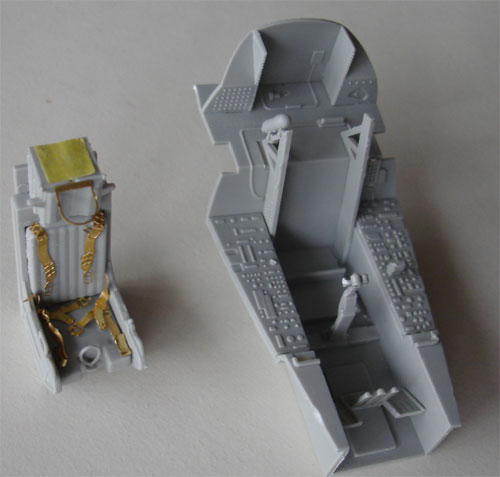
Some plumbing and details from strip
and rod were added, check your book references and/or internet with plenty
of walkarounds.... The side consoles are with nicely done raised details.
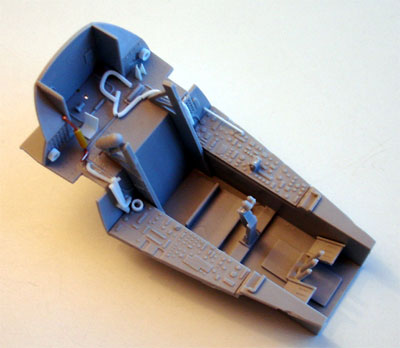
A coat of light grey forms the basic colour.
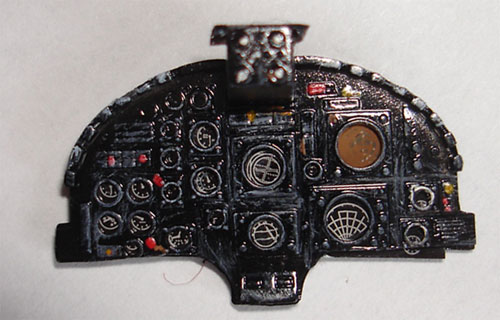
The result
on the instrument panel, using the Trumpeter parts and painting with a
fine brush and scribing with a marker.
The overall cockpit was now ready
for installment in the fuselage later on.

The Vulcan gun parts as in the kit:
The ZACTOMAN intake tunnel, with will
make the model look better. NOTE: you could leave out the complete tunnel
as a lot will not be seen and order the some waht cheaper set.
Added some details on the nose gear
sidewalls as well:
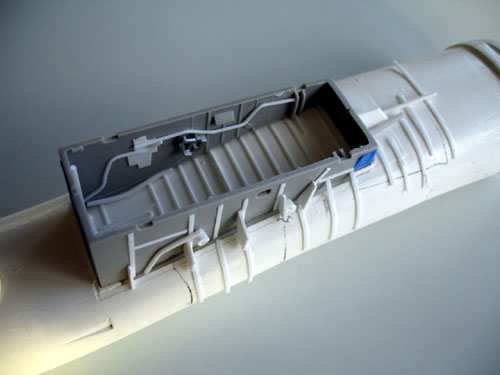
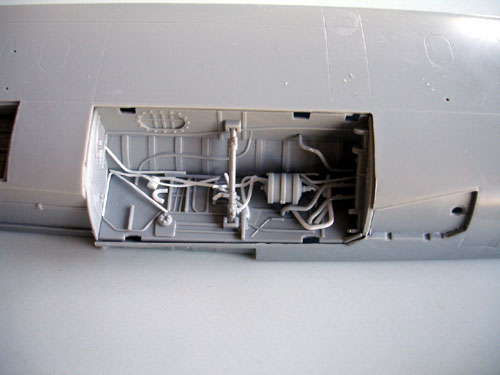
The other opened up hatches and bays
are seen here as well. Details of plastic strip for the stringers and stiffeners.
The overall fit needs checking when
adding stringer details.

A simple coat of chromate green was
added, rest to be painted later on.
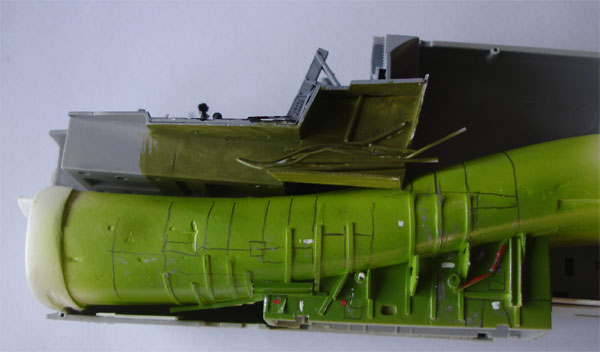
The wheel bays are nice but can use
some additional detailling obviously....
![]()
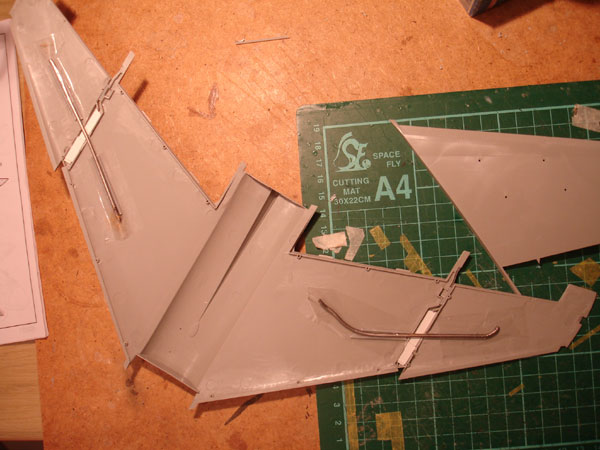
The wing fold option was not to be
used on this model. Strengthening the connection between the outboard wing-main
wing sections is needed. I used a metal bar and card just to make sure.
Filling and sanding is also needed. Start with the upper wing, make sure
this is flat and than set on the lower wing tips. See also kit STEPs 14,
22, 24, 26, 27.
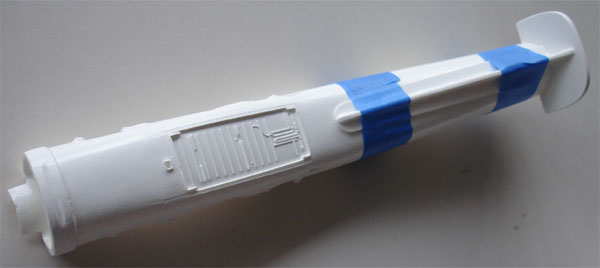
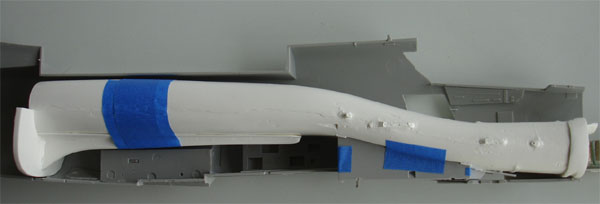
Correction 3:
I now turned to the rear fuselage
area. I believe the exhaust pipe gap is too small, it needs to be a bit
wider. This can be seen on the picture and drawings.
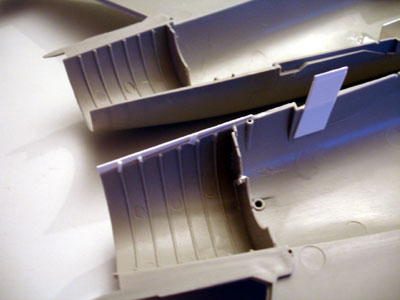
Widening can be easily done by inserting
a triangular section of plastic card of 4 mm width max and about
8 cm long. This can be "blended"
in between both lower fuselage halves:

On the inside, the kit moulded stringers
were lengthened with plastic strip.
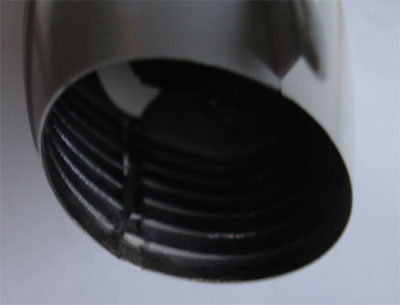
While the rear correction may appear minimal, the difference is quite noticeable upon completion. The exhaust pipe opening is now more accurately representative of the real A-7 plane, resulting in a much improved appearance overall.
On to next
[Page
2.... ]
References
Look here at the 1/72 A-7- kit page....
Back to 1/32 scale Models.......

(c) Copyright Meindert "designer"/ All rights reserved. Your comments are welcomed by webmaster