Improving the 1/32 Revell kit
[ page 1 ]
https://www.youtube.com/watch?v=y3u33op3kUY
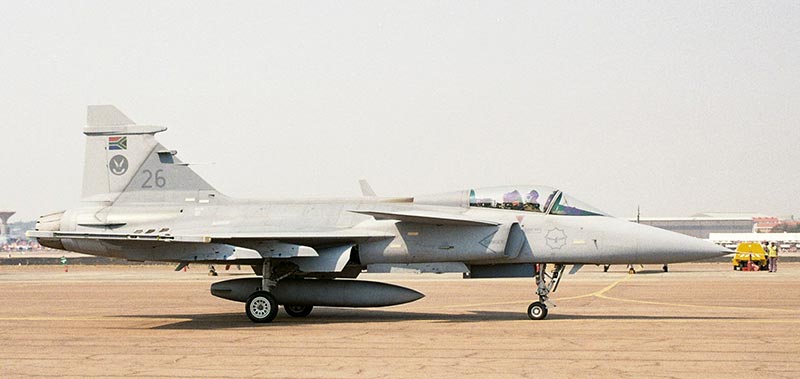
South African Gripen provided and photographed by Erwin Stam (c).
![]()
The JAS 39
Gripen is a fighter developed by Saab of Sweden as replacement of the Viggen
and Draken.
The Gripen has a single
Volvo RM12 engine, delta wing and canards and has a top speed of Mach
2.
It is relatively small but can carry many different weapons on
underwing
pylons. It is fully fly-by-wire. First flight was in 1988 and it came
into
the Swedish Air Force service in 1997 known as Gripen -A and the
unarmed twoseater -B. The Gripen -C is a NATO compatible aircraft and
can use advanced weaponry (with the two seater -D). It can also be
refuelled in flight.
Several Gripens
were also sold many years later for export to Czechia, South Africa, Hungary
en Thailand. Over 250 Gripens have been built.
page 1
page 2
page 3
download a PDF....
IMPROVING THE REVELL 1/32 GRIPEN KIT
Note: this report runs parallel with my postings on the Large Scale Planes forum Group Build "the blue box of happiness" started Sept 2021 ( >>> URL link)
In 1/32 scale Revell Germany released a kit of the SAAB JAS 39 Gripen in 1991.
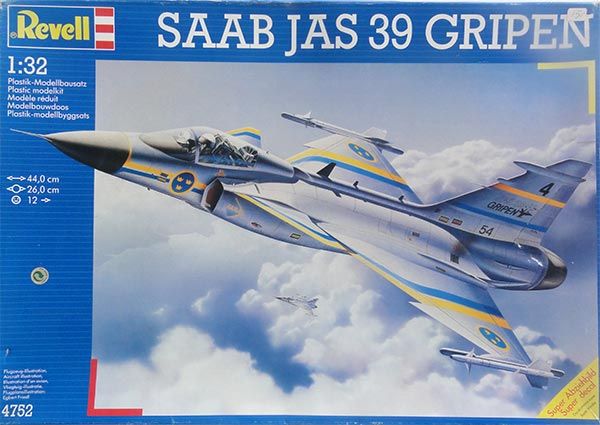
The kit #4752 has about 125 parts and contained also a sort of engine, an entry ladder and stores like missiles and fuel tanks. I bought the kit second hand quite cheap many years ago. It was sitting in the stack a long time.
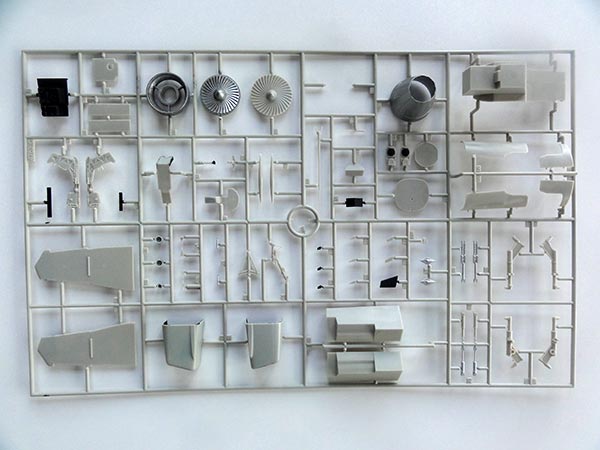
The main parts are seen here. (Note that some parts have already some paint as I bought the kit second hand).

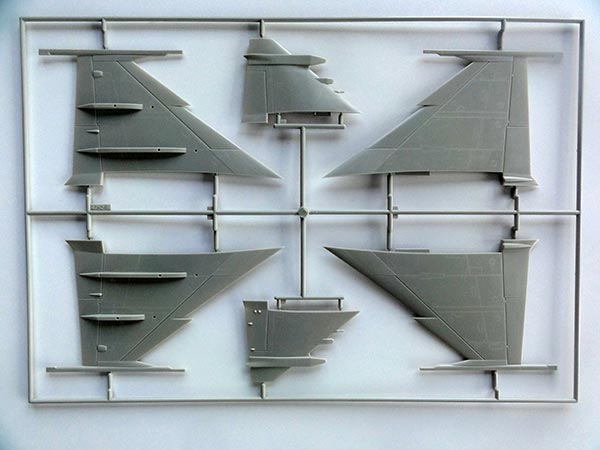
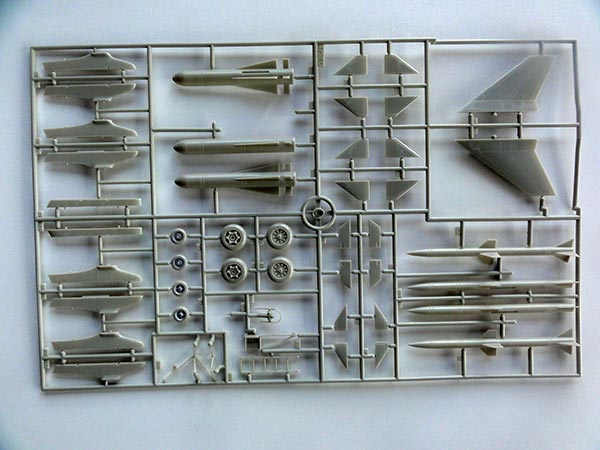
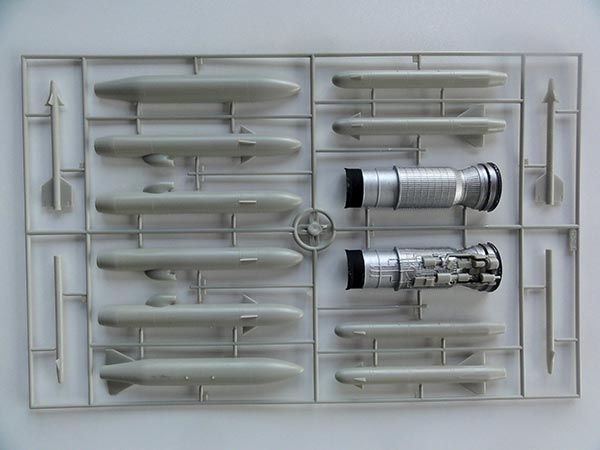
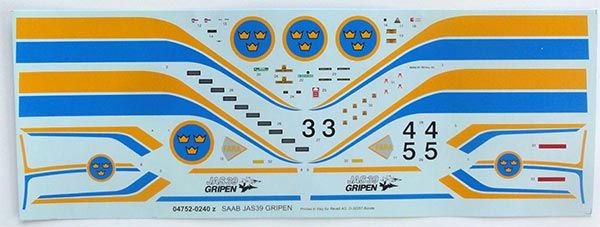
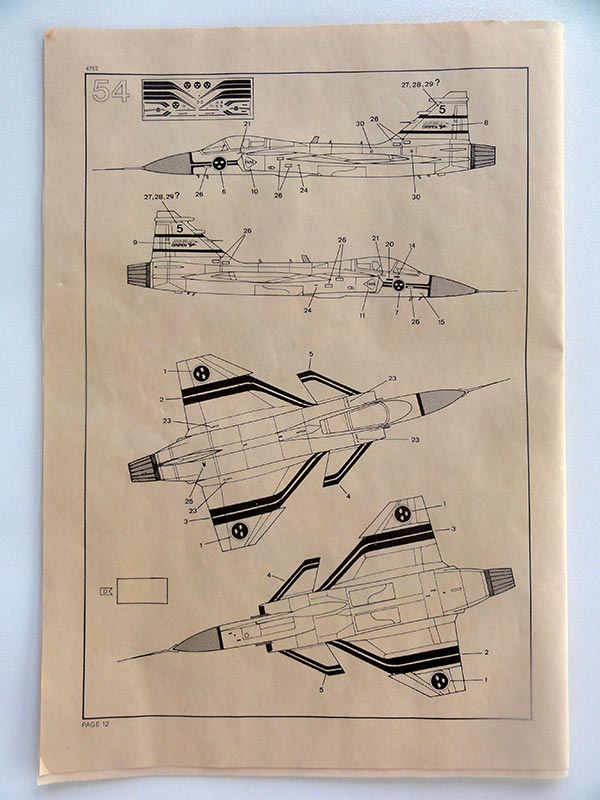
Stores are what seem to be Sidewinders, RBS-15F missile, RBS-15 anti ship missile and a single fuel tank. The kit decals are for a single aircraft coded “5” with stripes which seems to be a prototype.
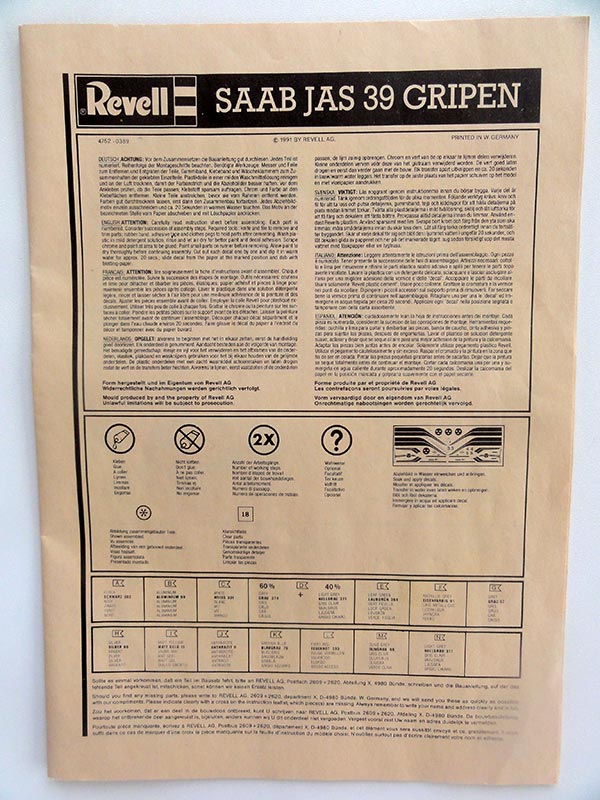
The instructions are simple but clear. (I contributed./ uploaded these to the Scalemates site).
The cockpit is basic and there is a sort of intake funnel.
As over the years it had been clear that the accuracy of this 1/32 kit was not very good. I had seen some models built over the years and the shapes simply did not look right as the model seemed to be to be too “compact”. But at that time the new Gripen was still quite secret and not a lot of the (internal) details were known. Also during these years, I did not find any accurate information.
A few decades later, I thought to examine a bit further if the model could be improved. A big trigger was that the small 1/72 Revell kit of the Gripen JAS 39C was released in 2014. This kit was made with SAAB assistance some 25 years later and the outlines of this kit seem to be quite accurate as
I made a kit. I could also measure the sections and shapes.
Yep…. I know there is a “risk” that JETMADS may come with a new 1/32 Gripen kit as they did with the SAAB Viggen and announced a SAAB Draken….
So time to look at the old 1/32 Revell Gripen kit!
A FIRST JAS 39 CHECK-UP
I had seen in the old days a critical review of the kit in Scale Models International magazine of Sept 1992 (see references).
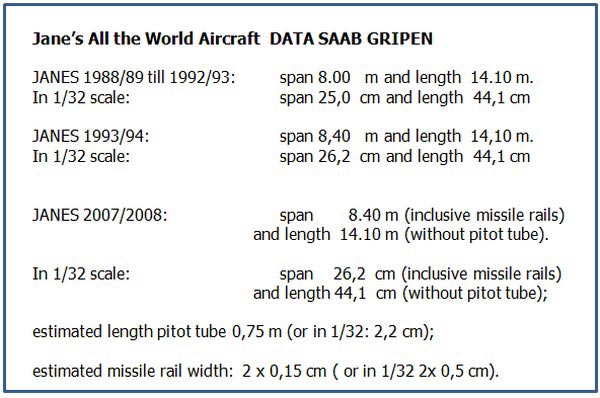
Many years later I started to gather information about the real Gripen and looked for several layout drawings though we all know one has to be careful with these. Having a few “Jane’s All the World Aircraft” books, the invaluable reference source for aviation professionals, some data was compared. This table shows the Janes data.
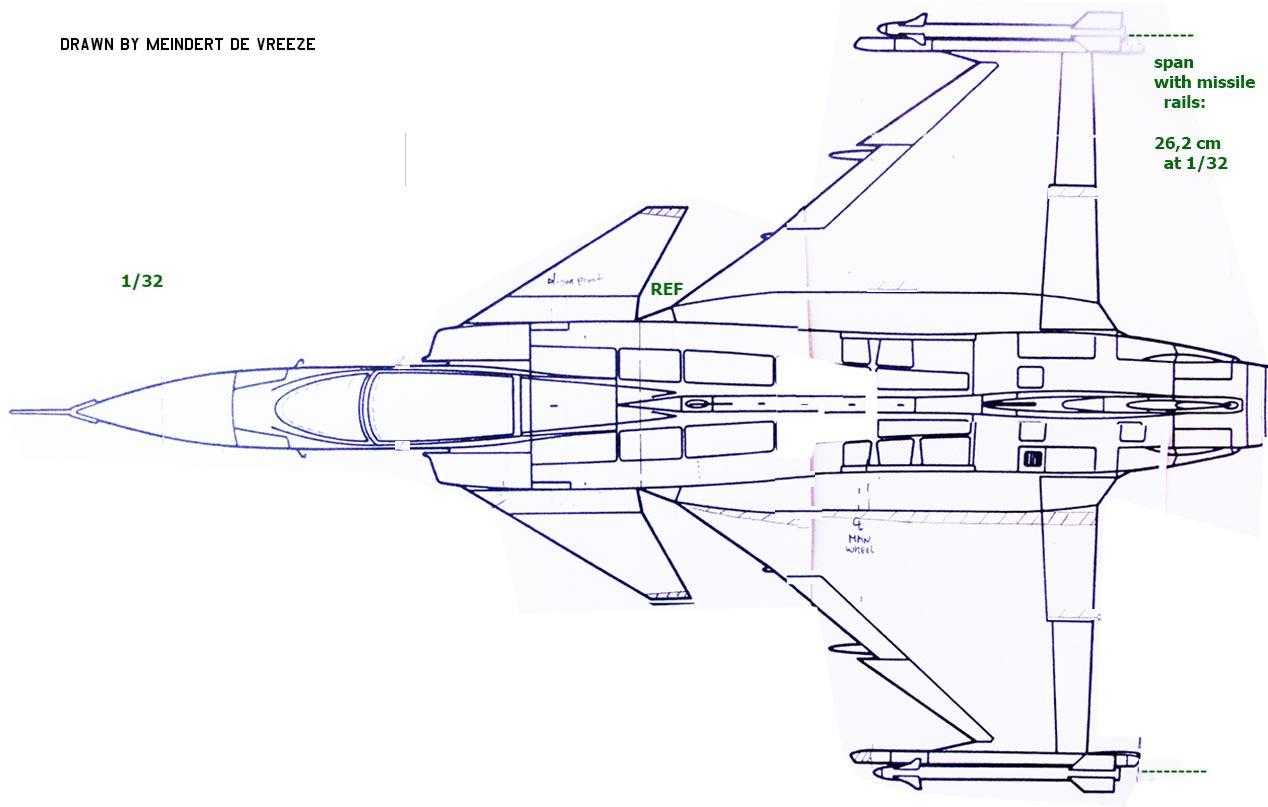
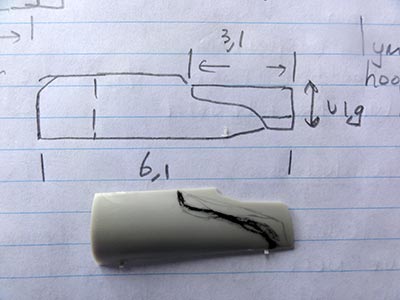
Some drawings were scaled up to 1/32, continuously also checking with the 1/72 kit and measuring the main dimensions. These are my drawings.
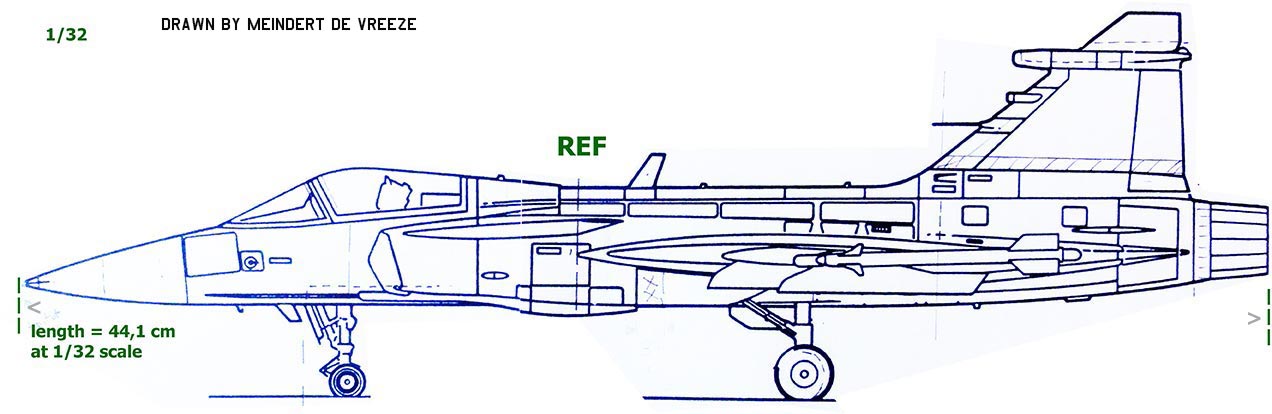
... and with pitot tube on the nose below...
Some bigger parts of the Revell kit were separated from their sprues. These were checked with the drawings.
FUSELAGE:
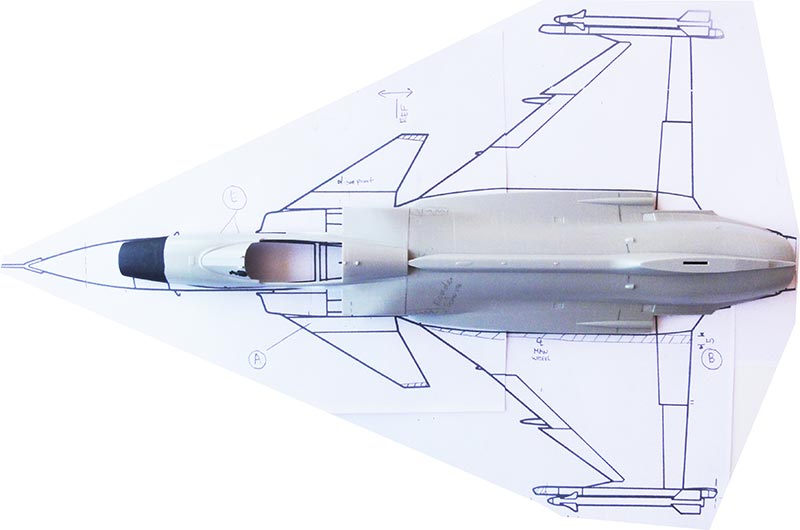
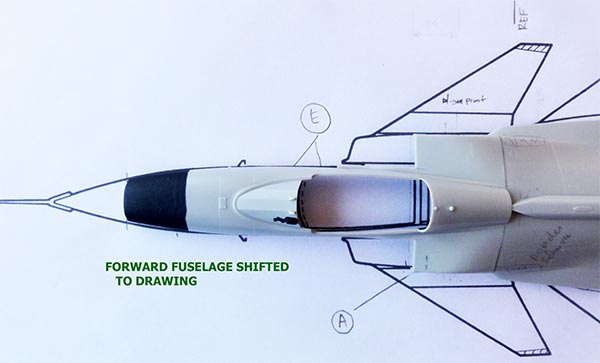
It was measured as well and it seems that the old 1/32 fuselage kit is about 21 mm too small in total length. When the forward fuselage section is set on the drawing, the nose planform does not look too bad. The air intakes seem to be pretty good but need a bit curve at their upper edges near the canards.
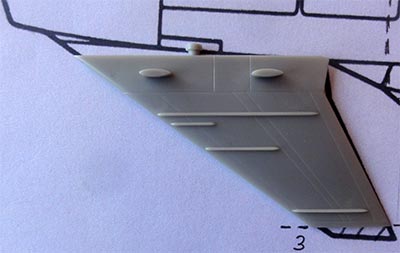
WING:
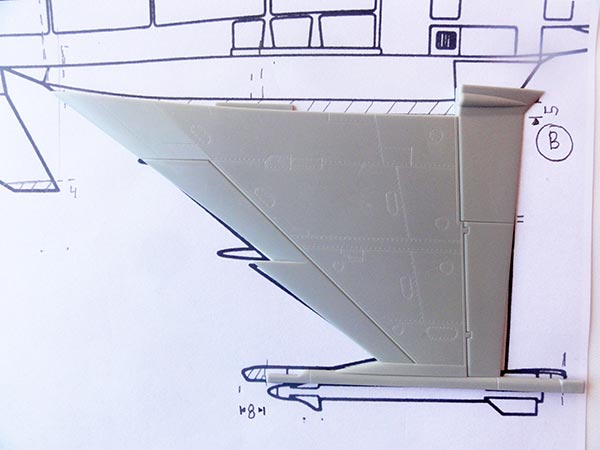
The overall wing span is about 2x 5 = 10 mm too small. Increasing the chord section seems to way to go.
VERTICAL TAIL:
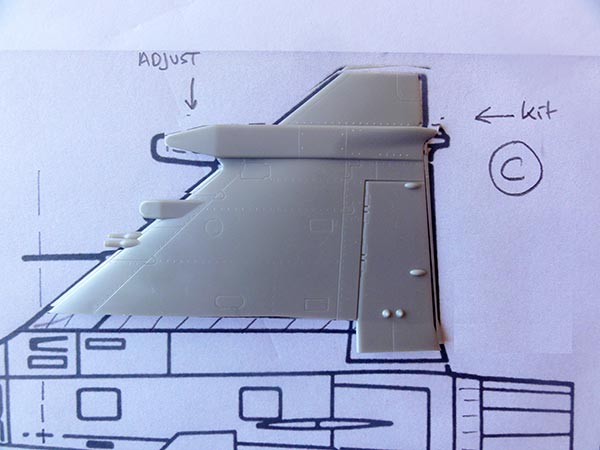
The tail fin height is about 5 mm too small. (Note that using the “total height” data of the real Gripen can not be used at it is affected by the landing gear layout). Multiple small corrections are needed here.
CANARDS:
The canards can be used after a bit reshaping with some plastic card and extenting their ends. Also the kit parts need removal of the stubs (which were probably prototype flutter weights?).
FURTHER INVESTIGATION
I tried to find out what may have caused the dimensional inaccuracies in the old Revell kit. Now I saw something interesting: the Jane’s “All the World Aircraft” data from 1988 till 1993 indicated a wing span of 8 meters and length of 14,1 m. Jane’s data from more recent date (2007/2008) showed: wing span 8,4 m inclusive wing tip missile rails and length 14,1 m without nose pitot tube. So they added info about pitot tube and missile rails effects. This was also checked a bit with the new 1/72 Revell kit that seemed to correspond with this data.
I estimated the real pitot tube to be about 0,75 m long (that is 22 mm in 1/32) and the real wing tip missile rails to be about 0,15 m each wide (that is in 1/32 about 5 mm).
This adds up to the length correction of about 21 mm and wing span correction of 2x5 mm. I concluded that the Revell kit team at the time forgot about the pitot tube length and missile rails. The team assumed this to be “included” in the overall Gripen span en length dimensions as stated by the Jane’s data (and probably in SAAB promotion documentation) when making their moulds.
I looked at a lot of photos and kept in mind these issues.
Other items for improvement are:
- some work needed on the landing gear, wheels and gear bays.
- the kit wing pylons are inaccurate and need modification;
- the main exhaust kit part #30 does look too small, it should be about 30 mm in 1/32. A replacement could be a F-18 exhaust for the RB12/ F404 engine;
- the fuel tank if desired is to be improved and seek better missiles;
It seemed that corrections could be done on the Revell Gripen model. Yes, it will not be easy and would need putty, plastic card, putty, card… and a lot of patience…
Though not perfect, at this point the only option for a better JAS 39C Gripen model in 1/32 scale. I concluded that these modification are “do able” so it was decided to improved this old kit to get a better 1/32 scale model of the current SAAB JAS-29C Gripen.
The next issue to tackle is to discover “where” to correct the fuselage, wing and vertical tail shapes. This took quite some investigation, also by measuring the 1/72 kit and looking at drawings and many many photos. Helpful was my home made 1/32 kit planform to compare with kit parts. This was done with the computer, scanner and printer by enlarging drawings from 1/72 to 1/32 by factor 2,25.
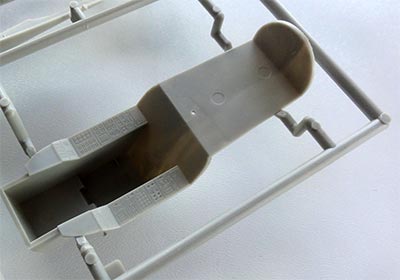
COCKPIT
A quick check was done regarding the cockpit parts like the tub. In 1/32, detailing the cockpit is worthwhile. In those days it was still a bit secret with many photos showing the “mock up” at the time. Here the basic Revell kit parts are seen.
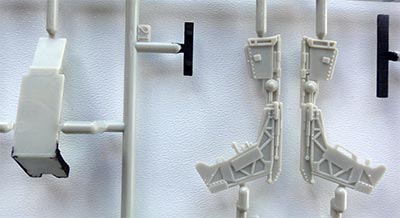
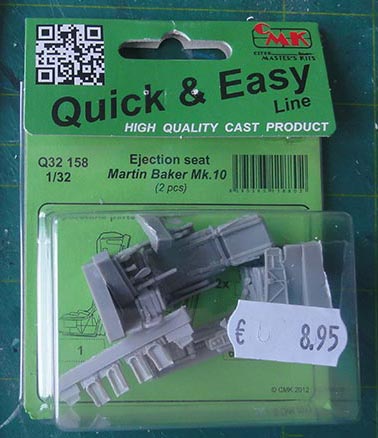
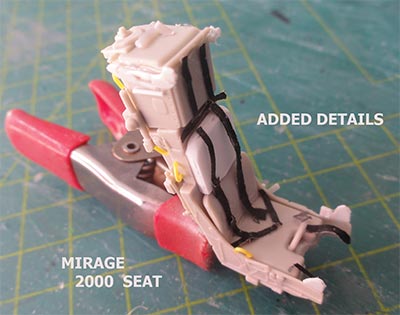
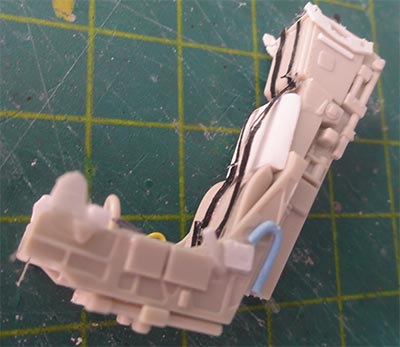
A sort of Martin Baker mk.10 is suggested. That would be close to the MB mk.10 SL seat used in the Gripen.
I found that CMK had a set for a Mk.10 but is was far to wide to fit. (note that in the photo you also see a good after market main wheel set from ARMORY that I will use, more about that later).
The basic Revell seat was taped together and checked with a 1/32 Kitty Hawk Mirage 2000 Mk.10 seat. I concluded it would be a good idea to use this KH seat and update it.
A quick check was done with the kit tub as seen here
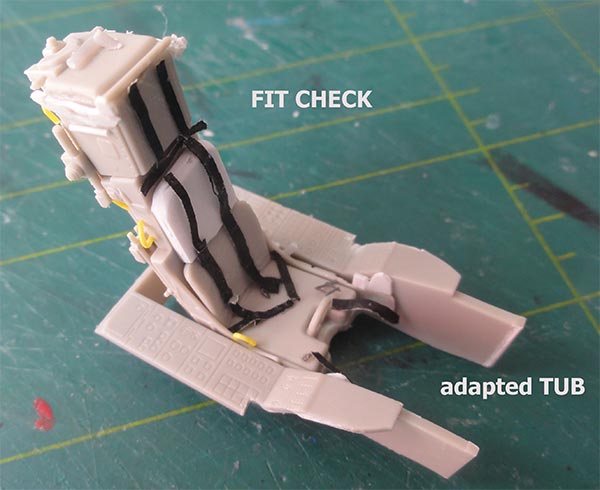
 .
.
The kit cockpit tub is very simple and at this stage only the base part will be set inside the fuselage nose. Detailing the cockpit to be done at much later stages to avoid damage due to handling. A new instrument panel with side panels are than to be made from scrap.
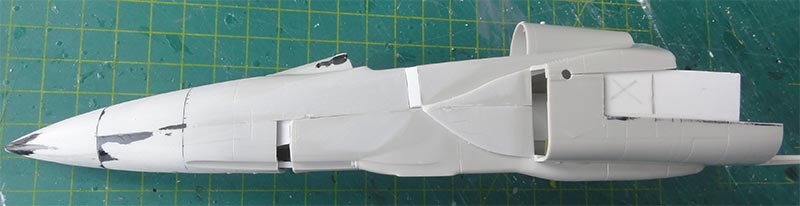
FUSELAGE
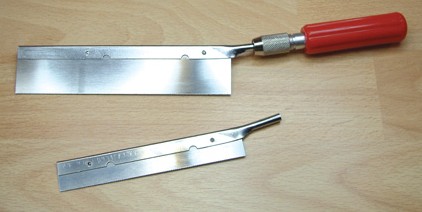
For increasing the fuselage length several cuts are required using the razor saw.
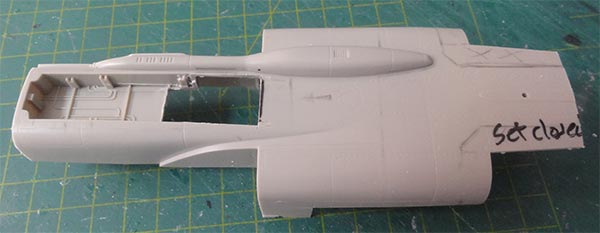
[A] increasing the upper fuselage halve length:
(1) the first large cut was made in the upper fuselage halve aft of the spine exhaust;
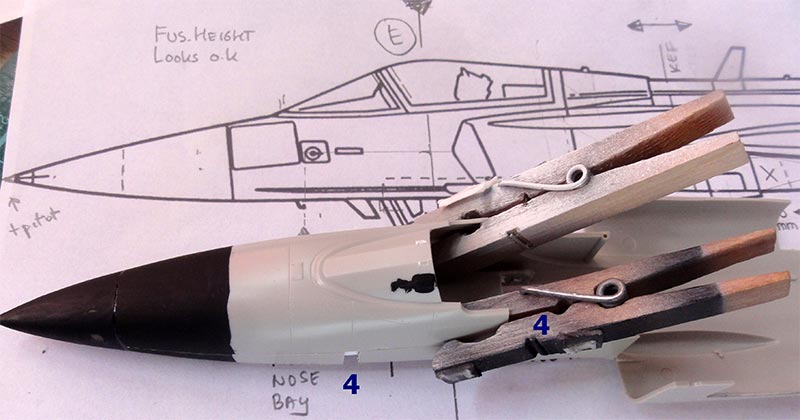
(2) at the separated nose section a vertical cut was made at both side walls at the cockpit sill.

The nose and cockpit shapes were compared with the drawing… it looks more accurate now.
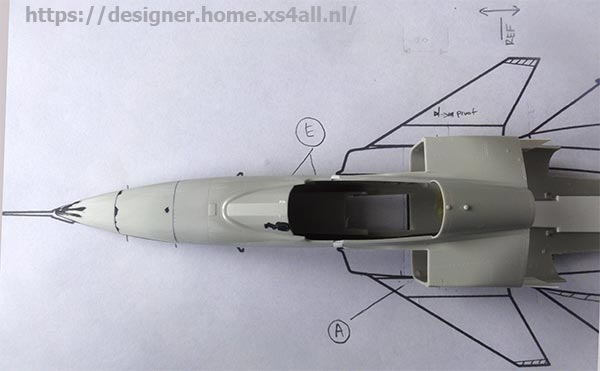
Note: as a result of the cockpit sill lengthening (with 4 mm) a 4 mm slightly longer “clear canopy” is needed; the kit part will be used: by sanding and polishing out the moulded kit frames and adding new rounded frames from card at the front edge and rear edge.
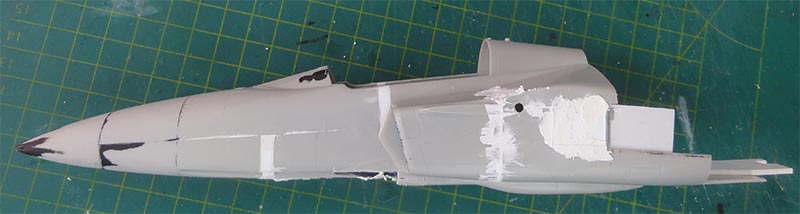
[B] increasing the lower fuselage halve length:
(3) make a cut slightly in front of the moulded nose gear bay.
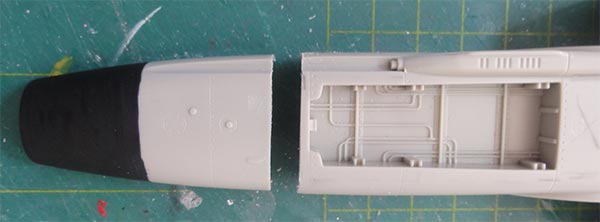
(4) make a cut in front of the main gear bay opening
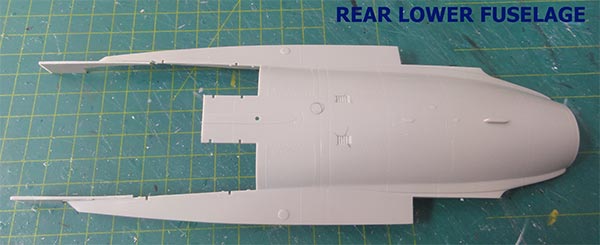
It was also decided to deepen the rear of the nose bay by removing a part of the gear bay "roof".
In order to get more strength, a small secting was repositioned of the lower fuselage aft of the canard station. This small section was moved to the rear and now sits near the wing leading edge root...
Parts can be shiften to get the 17 mm extension between nose section and rear fuselage as seen here...
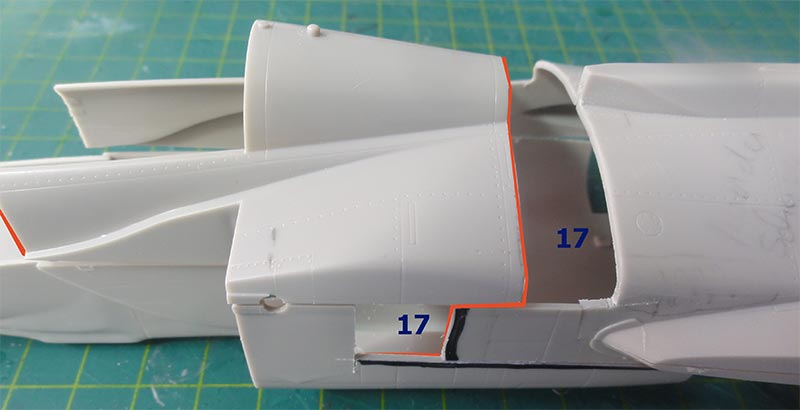
.... and seen here the lower sections shifted 17 mm...
Here the overall idea is seen, making increasing the total length 4 mm + 17 mm = 21 mm.

A CHECK WITH THE LANDING GEAR
The lengthening of the fuselage affects the landing gear obviously. First kit doors and landing gears were cross checked.
The distance between centers of nose wheels and main wheels at the real Gripen is about 5,25 m (so about 164 mm in 1/32). This number will be used to establish the location of the nose gear bay and strut and the main gear bays and struts. It was concluded looking at the made cuts and shifted parts that the struts can be appropriately set at the later stage.
The main bays can be set at per fit at the changed rear fuselage insides.
It was found that the kit main door parts are inaccurate. As the big main forward doors will be kept closed as seen on most parked Gripens and the main gear leg location will be kept, the effort is simple. The “closed forward” main doors will be “virtually” lengthened with a sort of card fairing (to be shown later).
It was also found that the main wheels of the kit are too small in diameter (2,5 mm); but the kit nose wheels can be used (only about 0,5 mm too small) though these are found also in a ARMORY resin set; more about that later on.
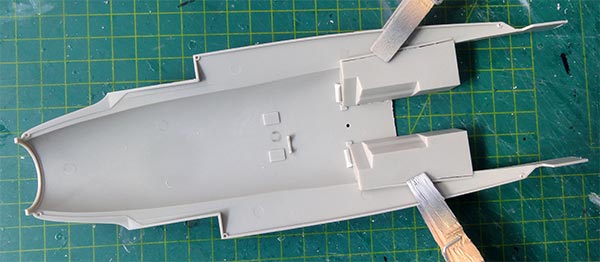
INTAKES
The intakes were not that bad and can be reatined and installed with their kit part splitter plates. Inside the fuselage it was decided to suggest a sort on engine air funnel with card with an engine fan. A bulkhead was made and set in the upper fuselage to ensure it would not interfere with any main gear bays. I suggested a fan but later found out using the kit part was also an option, well I forgot about this.
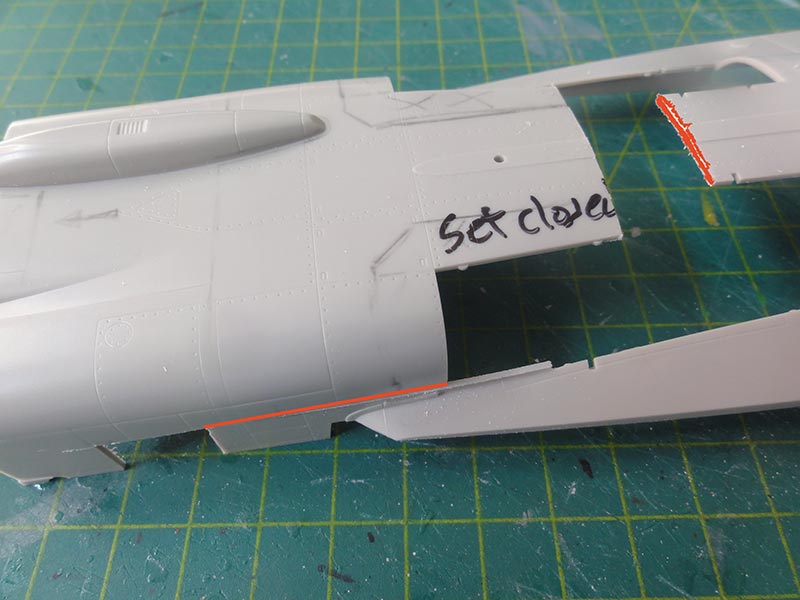
Note that the forward fuselage and aft section are not joined yet at this stage as first some work on the wing will be done.
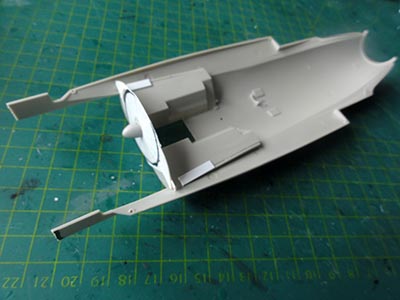
EXHAUST
A sort of jet pipe will be set at the front of the exhaust with a part found in the spares box from probably a Eurofighter. (the kit “engine” parts were thus not used).
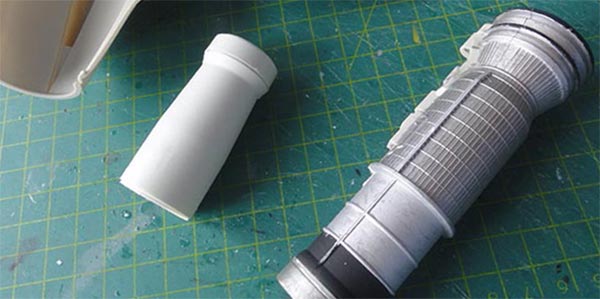
The prepared and modified forward fuselage was assembled with pieces of card to get the required plugs of appropriate length. At the mid sections also card was set also internally to get strong joints.
Card , putty / car filler and a lot of sanding was needed. When the cockpit sill was fine, the intakes were set with their kit part splitter plates. Again puttied and to be sanded.
Inside the fuselage it was decided to suggest a sort on engine air funnel with card with an engine fan. A bulkhead was made and set in the rear upper fuselage to ensure it would not interfere with any main gear bays. I suggested a fan but later found out I could have used the kit part....
Note that the forward fuselage and aft section are not joined yet at this stage as first some work on the wing will be done.
A sort of jet pipe will be set at the front of the exhaust with a part found in the spares box from probably a Eurofighter. (the kit “engine” parts were thus not used).
WING MODIFICATION
As noted earlier the wing span needs an extra about 5 mm span increase at the rear (including the inboard trailing edge flap) at each side; (total wing span increase 2x5 mm = 10 mm)
The inaccurate missile wing tip rails were separated with a razor saw. The inboard flaps were also separated.
As regarding the wing, it was found also that the wing root span extension of 5 mm at the rear should be a bit less at the leading edge. It is not 100% correct but good enough.
The wing ailerons looked OK so were not changed. The spanwise pylon stations were checked with the 1/72 Revell kit but looked good enough.
The wing root inserts will be made with card and putty. Inside, thick strips were glued.
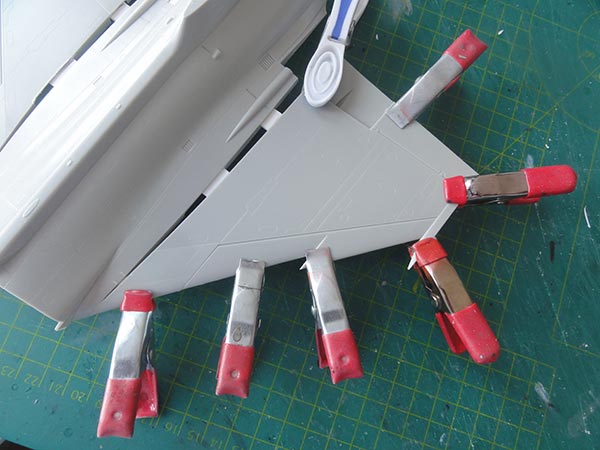
The upper and lower wing sections were joined, clamps used.
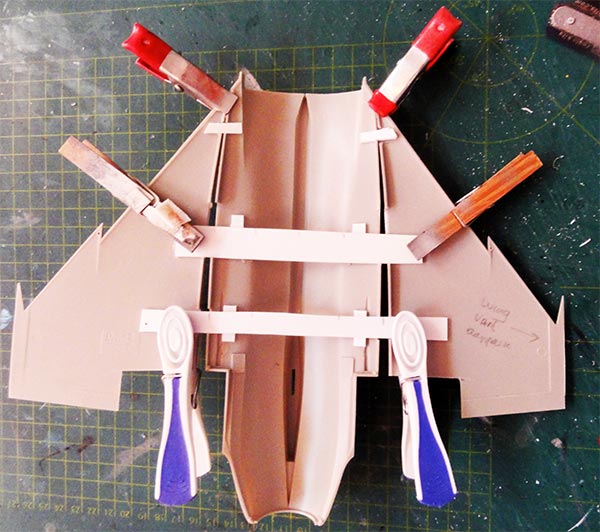
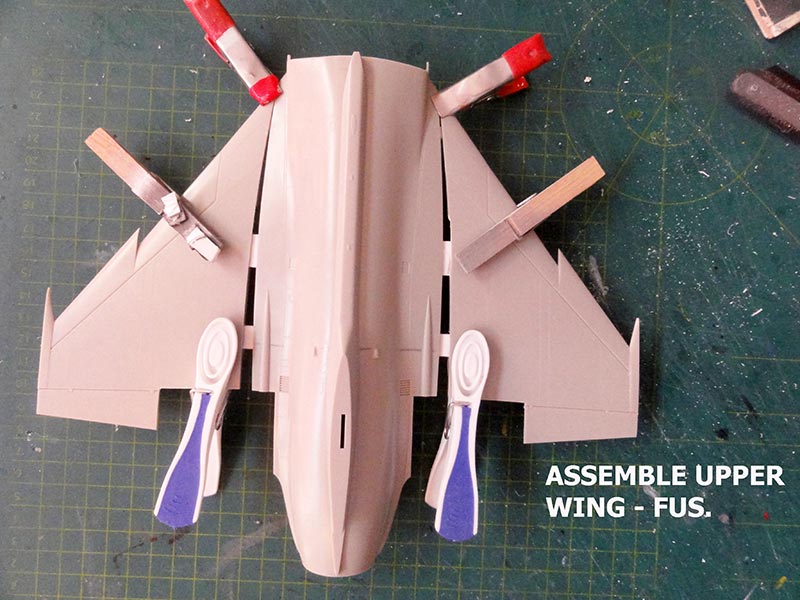
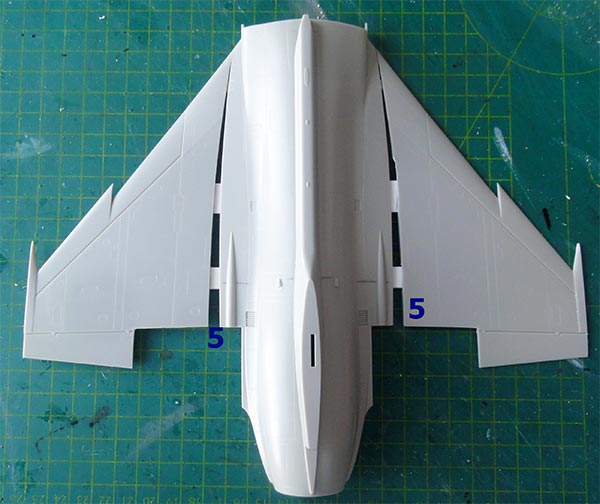
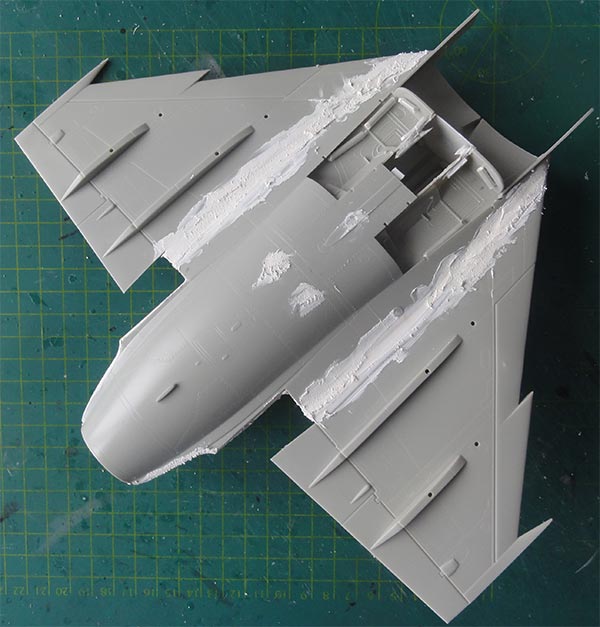
The gaps will be closed with card between wing and the rear fuselage and puttied. All was aligned with the upper fuselage to keep any ridges and curves as limited as possible.
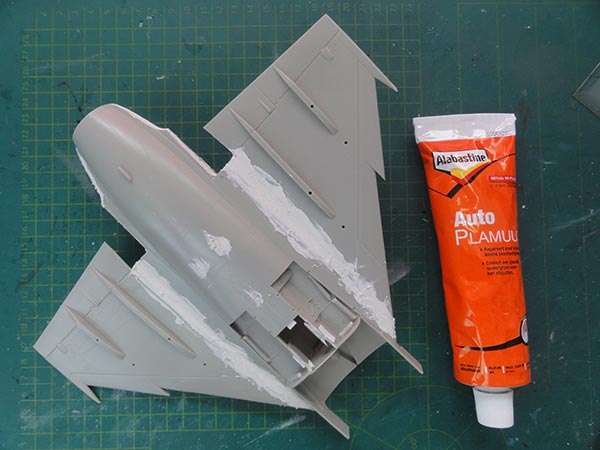
The small indented grills were also filled with putty. Some new engraving will done later.
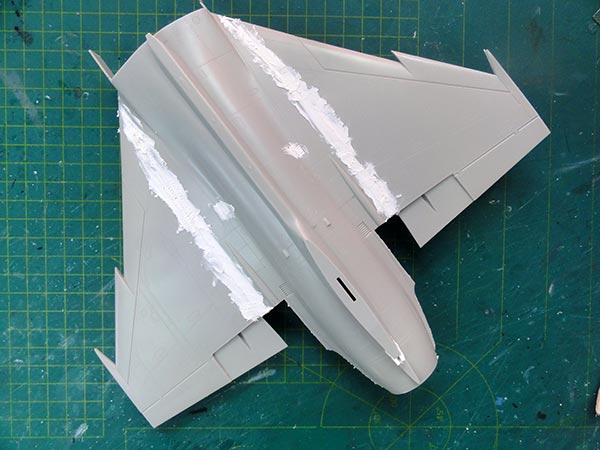
The lower areas are seen here
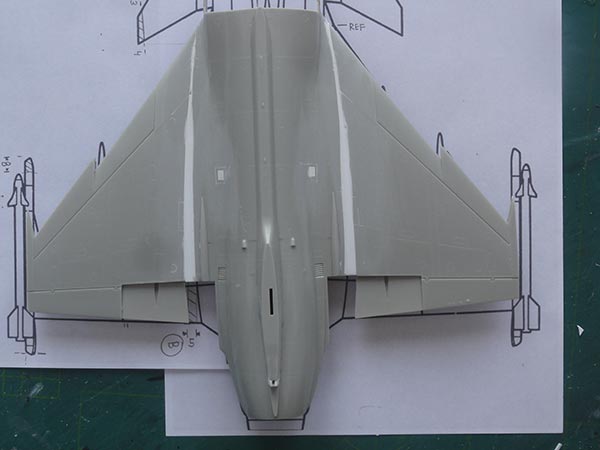
A check was done with the drawing and it looked much better now! (note: camera lens shows a bit distortion)
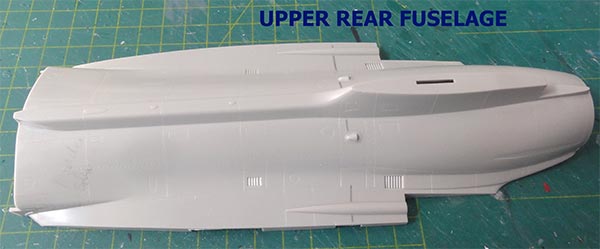
The upper rear fuselage can be kept as per kit and will be used to install the vertical tail and (changed) exhaust later on.
To next [ Page 2 .... ]
References about the Gripen:
- Review 1/32 Revell kit, Scale Models International, Sept 1992
- Air international vol 33, page 224 , Vol 44, page 072
- Air international vol 75, page? special.
- Flight international 1990, number 4232, page 90
- World Air Power Journal, volumes 20 (pages 30-50) and volume 42 (pages 60-100).
Books:
- Saab Gripen, Keijser, Aerofax, 2003
- Saab Gripen, Golabek and Barcz, Topshot series #48, 2009
- JAS 39 Gripen, Photo Hobby Manual #1003, CMK, 2007
- drawings: https://drawingdatabase.com/saab-JAS 39-gripen/

(c) Copyright "designer"/ All rights reserved. Your comments are welcomed by webmaster
Created
December 2, 2021