[ page 1 ]

Eurofighter model in 1/32 scale of Revell Germany made and improved by Meindert de Vreeze
page 2
page 3
Nederlandse lezers kunnen kijken voor een Nederlandse versie hier....

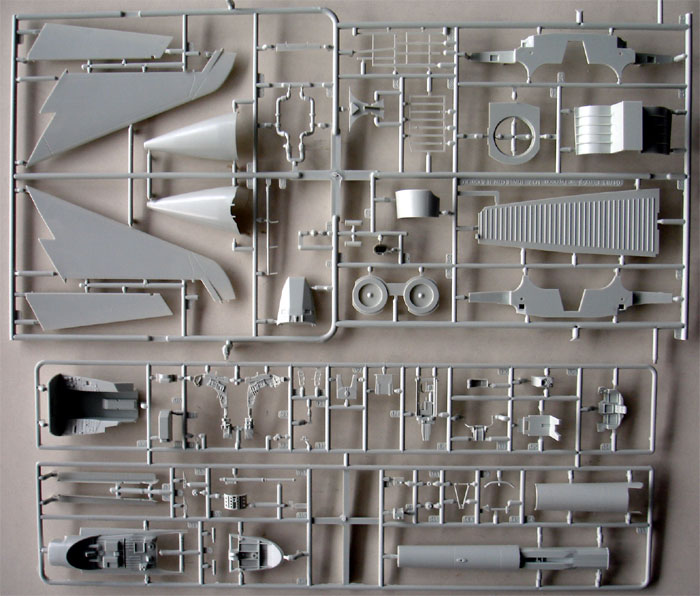
The Revell kit (no. 04783) was issued
December 2009 and should not be confused with the very old 1/32 EFA model issued
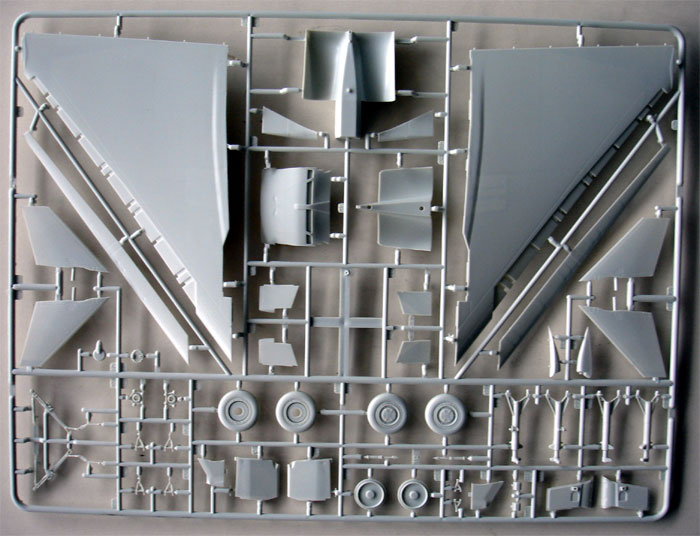
nineteen eighties. This kit has more than 370 plastic
parts including nice transparant ones including tiny lights. Parts breakdown
is clever to capture the shape of the real Eurofighter Typhoon.
 .
.
 .
.
 .
.
 .
.
 .
.
 .
.
 .
.
(transparant parts not shown)
 .
.
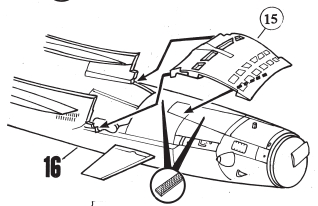
The parts are OK with minor flash only. There is some shrinkage in parts that need filling, like in the separate wing slats, nose cone and the intake guiding plate part 15 below the nose. The last one is difficult to sand without removing panellines.
Number of
versions: 2, for English RAF variant and German Luftwaffe
variant. Some specific parts are included like the PIRATE sensor. Well
done Revell.
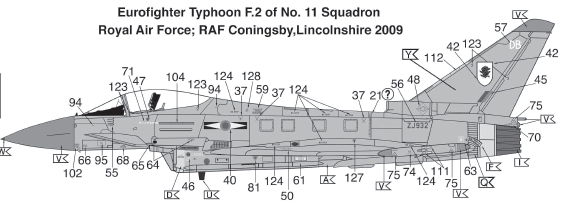
(I will make the RAF version as companion
to my 1/32 Tornado
ADV F3 which the Typhoon will replace)
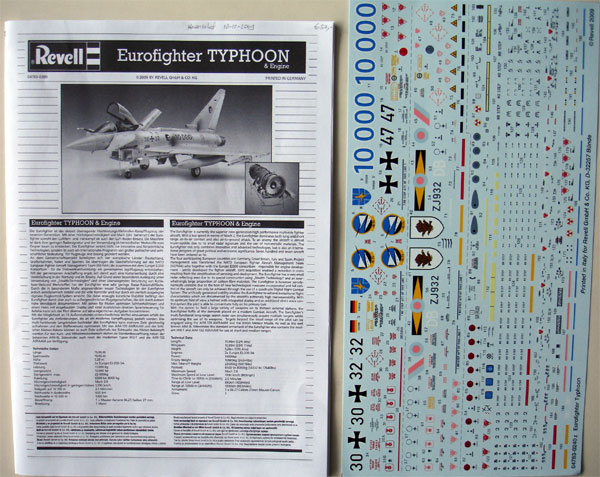
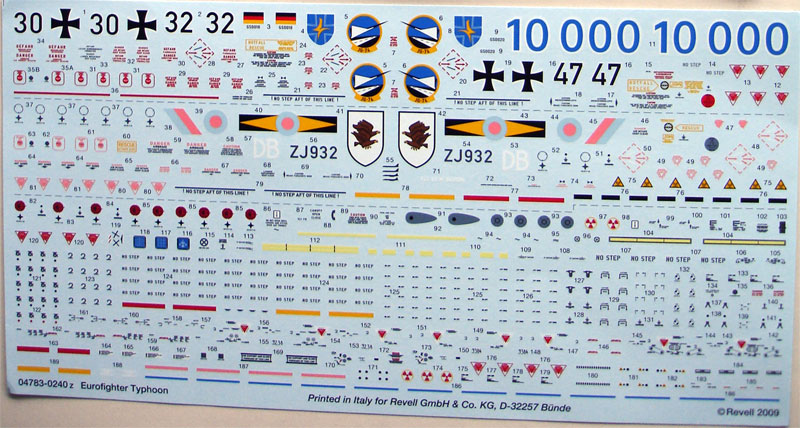
Decals: well
done with lots of stencilling included as well. For 2 schemes
Scale accuracy: OK, Span 3 mm to large, length 5 mm too long.
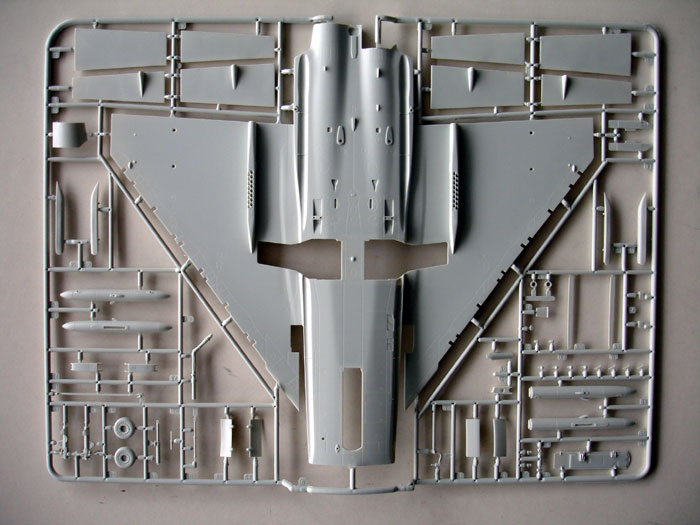
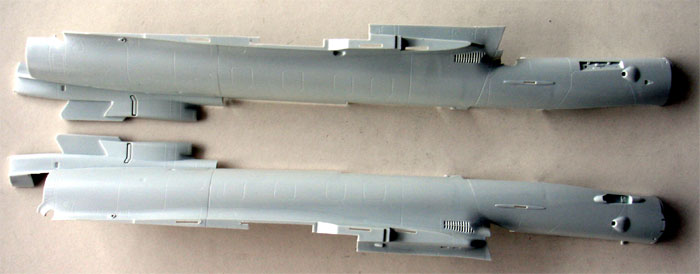
Looks: this kit captures the external shape of the Eurofighter very well. The shape is better than the competitor kits in 1/32 of Trumpeter Eurofighter (single and twin seater) which have e.g. some strange shapes at the fuselage end and exhaust pipes. The Revell kit is well build up with clever part break down. The intake external shape is well done. Panel lines are subtle as can be expected as the plane is largely made of composite materials with small gaps between panels. The intake tunnel inside the fuselage is a bit too short, this can be corrected in various ways if you want. The exhausts are also a bit too simple for this scale.
Unfortunately I found 1 error in the external shape: in the cockpit / nose area. The wind shield sits 3 mm too far aft, the canopy is 3 mm too short. Also the canopy cross section here can be improved. This can be corrected for the perfectionists. Look here how...
 ..
..
Parts fit:
OK when you take some time when glueing and joining parts, particularly
at the wing-fuselage joint and the upper cockpit tub cover. You also need
to fill some shrinkage and At the intake, sidepanels fit good but there
is a small gap between the lower fuselage and intake vane. This can be
filled with white glue.
Figures: no pilot included
Instructions: OK in the usual Revell style but again with some colour mixes and no FS number indication.
Details: fine, considering the cheap price of the kit well done. Part break down is OK, cockpit may justify some extra details although modern planes have clean tidy cockpit interiors. Undoubtly, after market resin parts will fill become available. Revell even included a separate engine with dolly. Nice to set next to the model on the shelf or in a diorama.
- also option for closed or open refuelling probe on nose
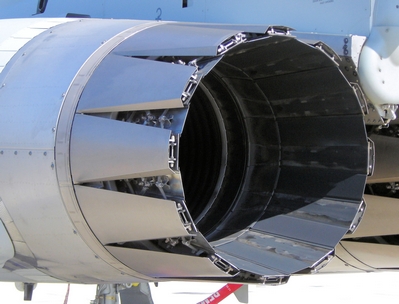
- option for closed or open afterburner exhaust pipes, although the open ones are very simple; in reality you can see lots of details when open.
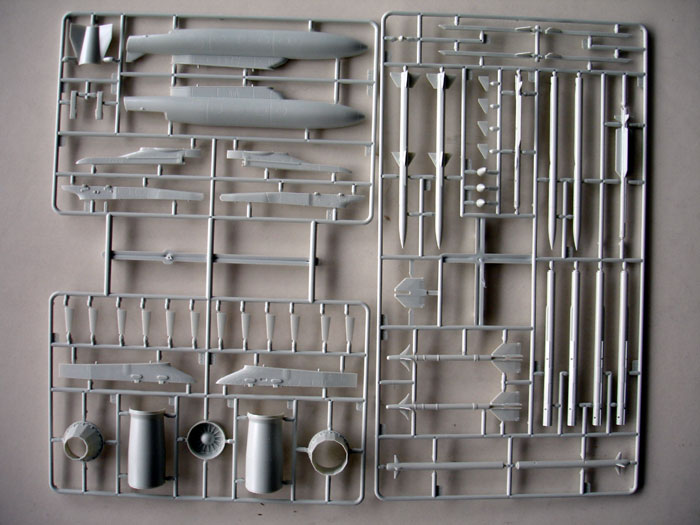
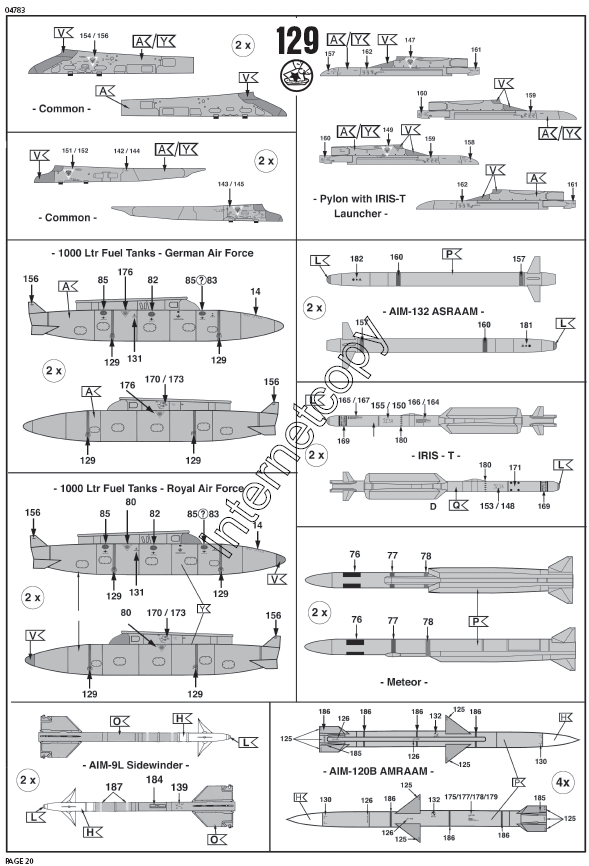
- loads of stores and armament, including for me some "first ones in 1/32 scale". In the kit are
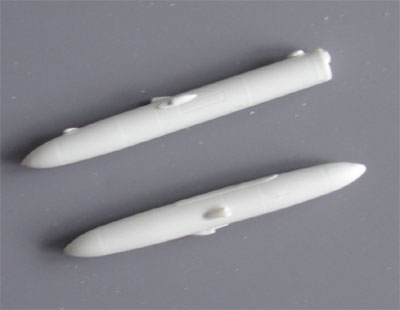
- two 1000 L tanks,
- ECM tippods,
- a pair of a bit rudimentary AIM-9L Sidewinders (replace if you have other ones and want to install Sidewinders),
- a pair of AIM-132 ASRAAM missiles,
- a pair of IRIS-T missiles,
- a pair of AIM-120B AMRAAM missiles,
- a pair of METEOR missiles.
- airbrake on top of fuselage can be set open or closed. When set closed you will need filler and rescribe the lines (sand the inner surfaces on parts 152 and 153 flat when closing for a better fit).
- wing and slat leading edges seems a bit strange with curves but are in fact very good. It accurately portraits the wing shape of the real Eurofighter.
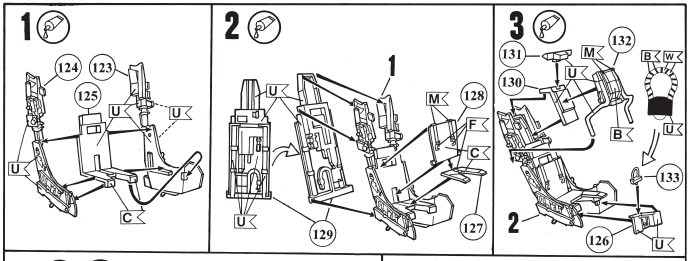
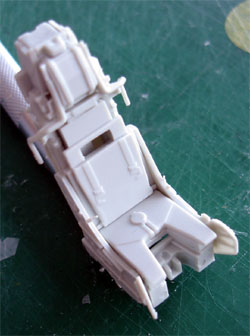
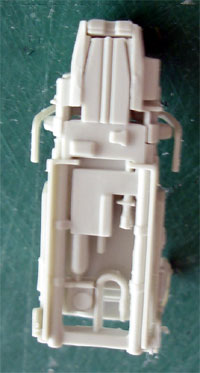
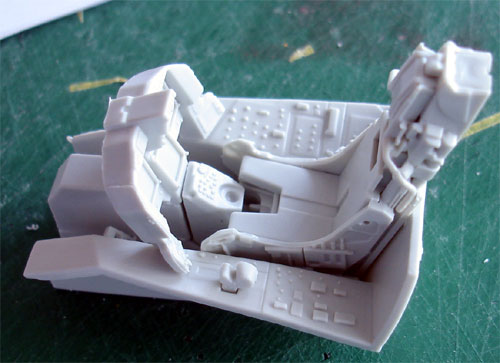
- The Martin Baker Mk.16A kit
seat is not too bad and has about 10 parts. It needs white glue to close
some gaps and can be detailed with various lines, seatstraps and so on.
 .
. .
.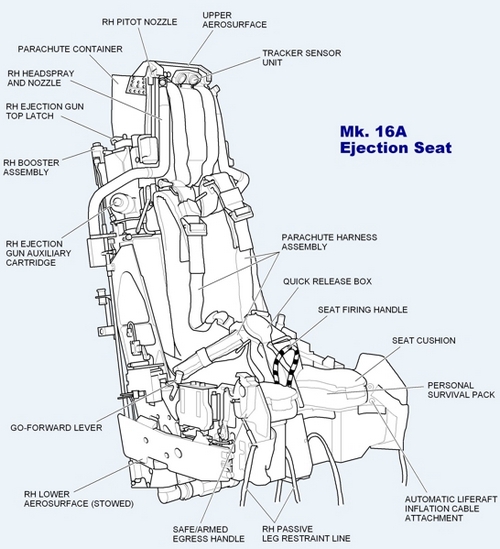
(sketch courtesy Martin Baker leaflet)
The seat has some gaps, can be filled with white glue.
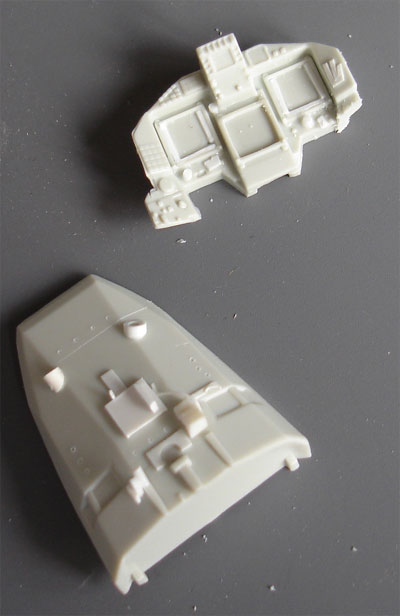
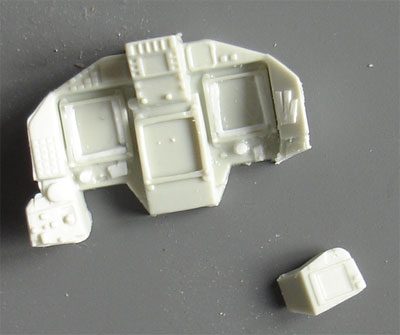
The instrument panel part #134 misses some details, like the various push button switches. You can add these with thin plastic strip. The sidewalls would benefit from adding some details as well. The kit's cockpit is a good basis for further detailling.
 ..
..
 .
. .
.
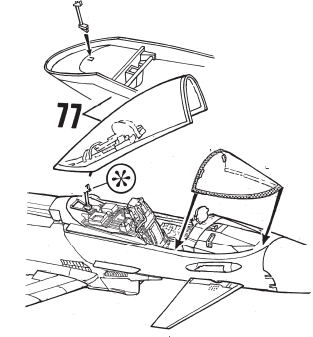
Aft of the seat and in the canopy
Revell provides quite some nice detail.
I do not like detailling cockpit
in early build stages as this may damage your work. The cockpit tub is
accessible later on, so it was decided to detail the cockpit at a later
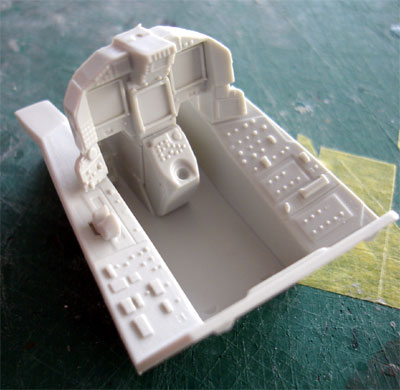
stage. In order to be able to fit the instrument panel, the right corner
section was cut off to get two parts. This will enable later installment.

..some details added on the instrument cover hood.
 .
.
- The kit undercarriage is nicely
done and in all plastic (so no rubber tyres).
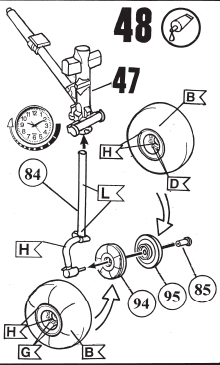
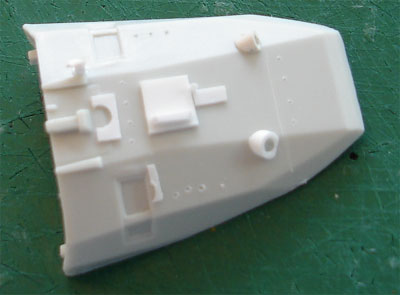
- wheel bays contains good sidewall details but adding some piping and stringers will improve realism. The main wheel bays have an open sidewall gap at the main leg attachment point, I closed this with plastic card. The nose wheel bay is very nicely done, but especially the nose gear leg is vulnerable with a very thin wheel aixle.
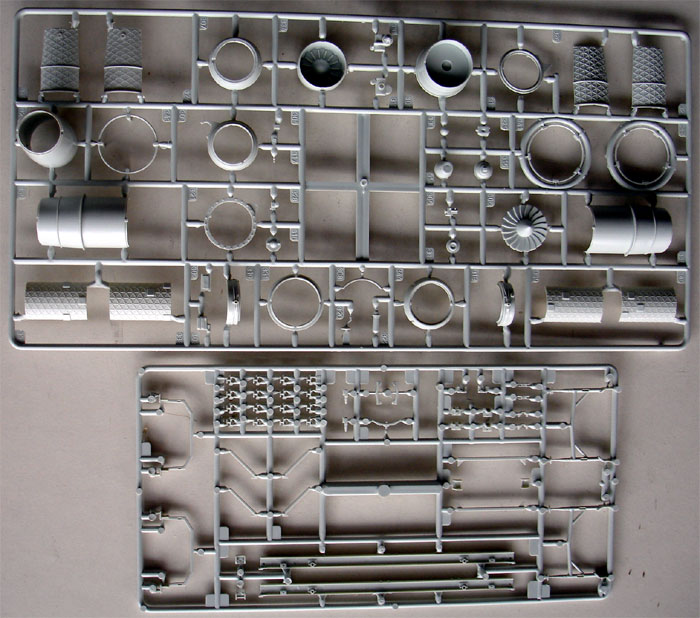
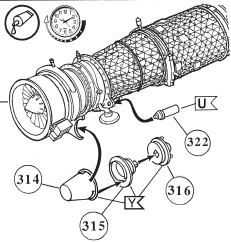
- the engine jetpipes are deep and fine, although in two halves each. This will give a tiny edge/gap.
- jet exhausts have 2 options: open with large opening or closed with small opening. The open one is very simple as on the real plane you will see actuators. Add some details in this case. Parts 83 could be replaced yourself bij cut out metal sheets cover plates. If you choose the closed exhaust option, less is seen. (Hopefully a resin exhaust set will be issued for these bits)
 .
. .
.
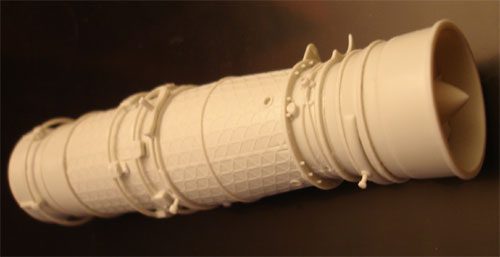
- in the Revell kit an Eurojet EJ200
engine with a nice dolly is included. The engine is OK but could use some
extra detail. You are supposed to mount it in the model rear engine bay,
but I opted to keep it separate. In that case do not open the panel in
the lower fuselage as shown in kit instructions step 15. Engine fit is
not very good and parts look very similar, so maybe I made assembly mistakes
here. I used white glue to close gaps.
- the operational combat capable Typhoons will get the MAUSER Bk27 gun in the right wing root. But for cost reduction measures, the gun is not yet installed! So you will see that also on this model nog gunport is present, which at this time is correct for most flying jets.
- the small transparant parts for lights and so on are nice touches on this model.
- recommended is to sand flat the inner surfaces of the rudder halves 5+6 to have a better fit. Do not fit the vertical tail at an early stage, but only after major fuselage and wing assembly.
![]()
Remarks:
Revell gives
some "colour mixes" in their instructions and no real colour references.
> RAF Typhoon is overall BSC381C 626 BARLEY grey (marked Y), colours from Gunze H334 or HUMBROL 167 could be used; Intakes ducts are very light grey, nearly white (about FS 26492). Colour "V" I also sprayed after masking on the leading edges of wings and tail. Radarnose is "Flint grey", about FS36314. I used XTRACOLOUR X027 with a little brown mixed in;
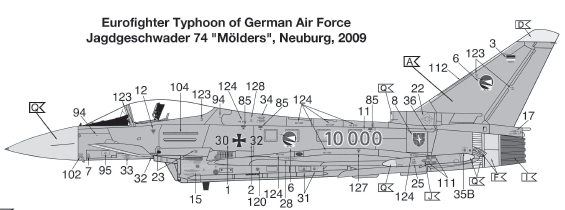
> LUFTWAFFE plane is overall FS35237 (marked A), Gunze H337 can be used. Radar nose is slightly different light grey.
For both schemes some panels are metallic, e.g. at the exhausts. Undercarriages are very light grey.
OK, lets' get on with modelling this
kit.....
On to next [ Page 2... ]
References:
Books and magazines:
Flight International, Supplement, 16-22 June 1999, Reed publishing;
Eurofighter profile, Scale Aircraft Modelling, February 2007;
Eurofighter Typhoon Special, Special, Air International, Key publishing U.K. ;
Air International, Volume 85 nr. 5 , November 2013 (with Typhoon special);
------------
Internet:
http://www.eurofighter.com/
,
official site
IPMS NL Eurofighter walk around
http://typhoon.starstreak.net/
http://www.airforce-technology.com/projects/ef2000/ef20006.html
A later discussion on Britmodeller Forum about the Typhoon, its details and colours: > look here...
Back to 1/32 scale Models.......

(c) Copyright "designer"/ All rights reserved. Your comments are welcomed by webmaster
Originally published
February 2010