[ page 2 ]
Eurofighter model in 1/32 scale of Revell Germany
page 2
page 3
.. continued from page 1....
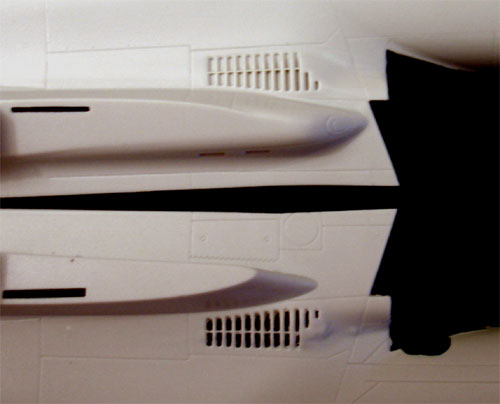
- In the real Eurofighter the intake grills above the leading wing-fuselage junction are clearly seen with even the intake tunnel visible behind the grill. Revell has these engraved but a much better look is to carefully open them up prior to assembly. Do this starting from inside out, thus from the inner fuselage with a drilling tool, but be very very carefull.
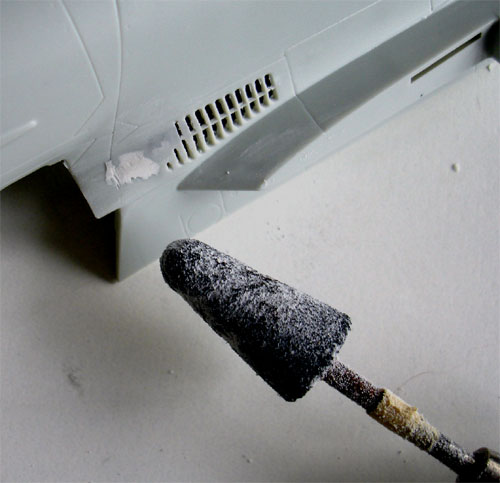 .
.
- below the canard, a small exhaust
can be seen, open up.
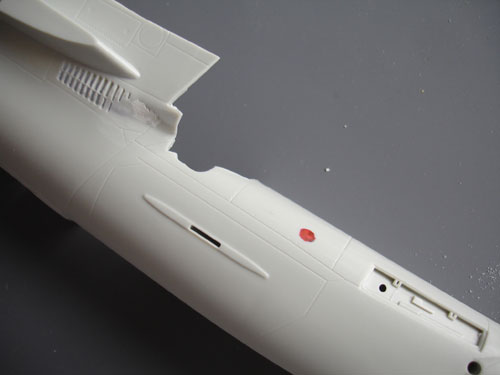
- at the rudder assembly with parts
5+6, it is suggested to sand these on their inner surfaces for a better
fit.
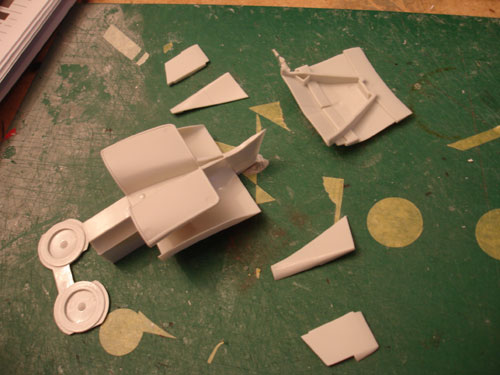
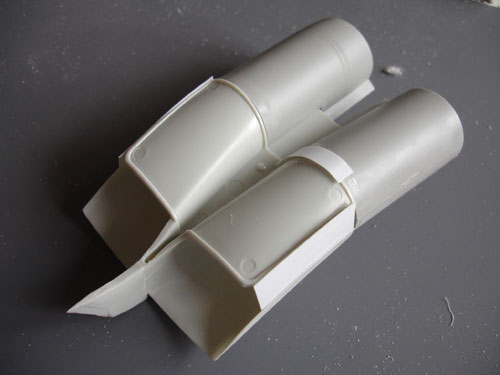
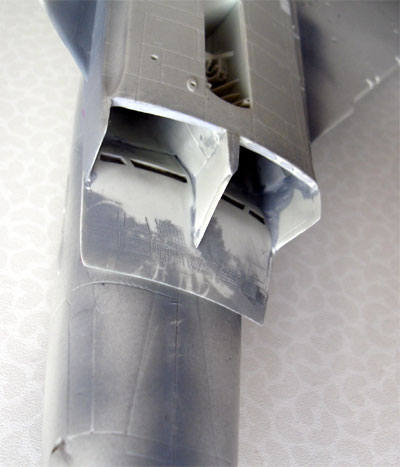
- the air intake tunnels are not that long and Revell provides a part #26 for the "engine faces". This is a bit disturbing, an option is to leave this part out. I opted to lengthen the intake tunnels. As I opened up the grills as well, this tunnel is visible so I have to close the side gaps in the tunnel with card as well.
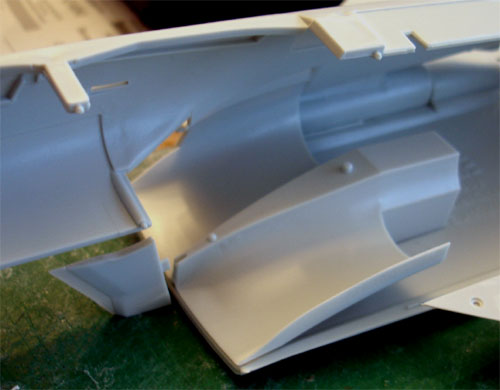
.
 ..
..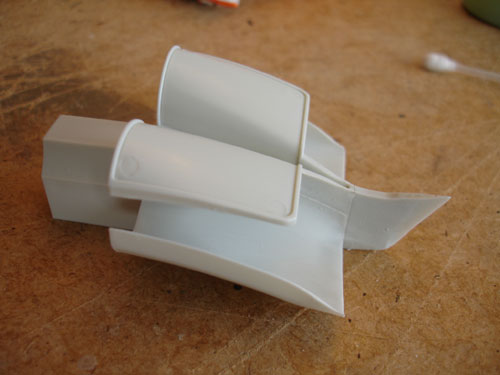
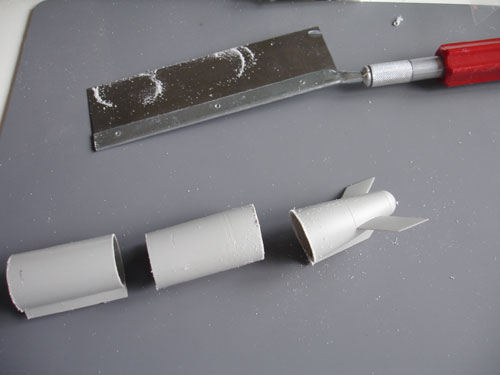
For lengthening the intake tunnel
itself, I found an old 1/32 scale Trumpeter F-105 main belly external fuel
tank that had a good diameter. Two sections were cut out from this tank
and added to the rear of the kit's tunnel. Some filling is needed here
to close gaps, also at the forward splitter plate. The internal intake
areas were sprayed very light grey-white.
 .
.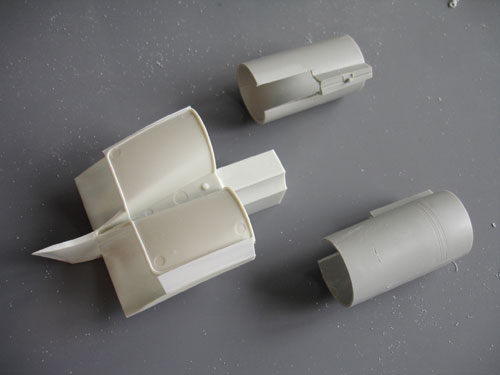
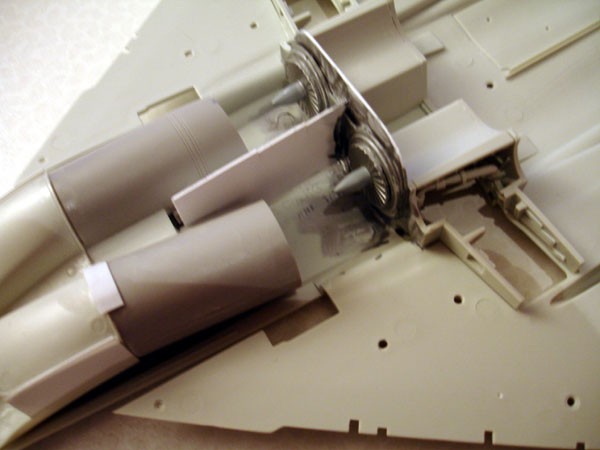
I also added an couple a engine "faces"
/ fans retrieved from the spares box. These were set far inside the fuselage.
 ..
..
A very visible and dirty area is
seen on real aircraft at the APU exhaust at the left center fuselage above the wing-fuselage
junction. Open up this large APU exhaust and add a small pipe inside to
prevent a "see through".
The canards attachment stubs are very vulnerable. I removed them, drilled a hole in each canard and pushed in a metal rod.
OK,
back to the shape issues in the cockpit/ canopy area.
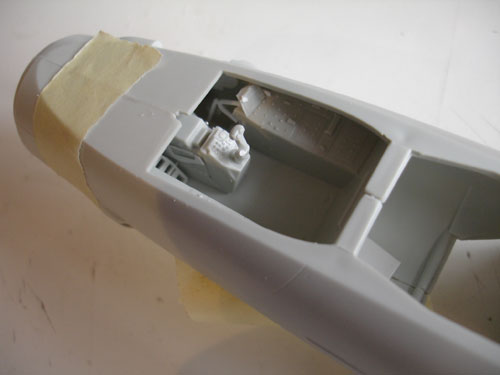
(1) First, the wind screen seems to
be 3 mm (0,12 inch) too long. This may not seem a lot, but is visible as
the rear wind screen edge, sitting to far aft, limits the pilot entry "step
into the cockpit" quite significantly. That the wind screen rear edge is
too far aft can also be seen when looking at its relative position to the
canard trailing edge. I checked with various side by side photos of the
real Eurofighter where the "error was". Fortunately, it can be simply solved,
see below for suggestions.
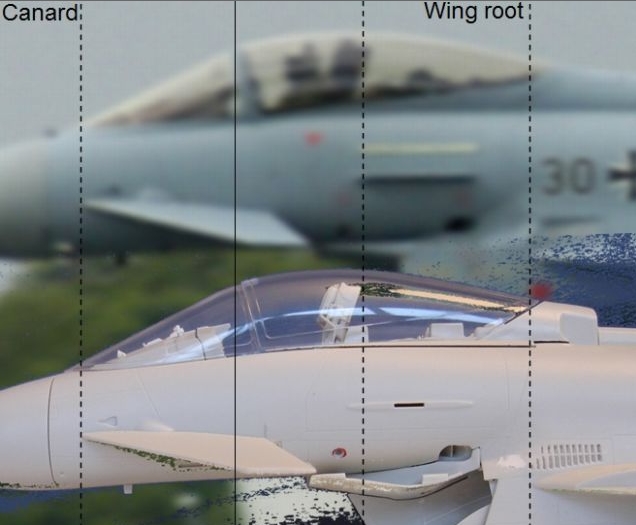
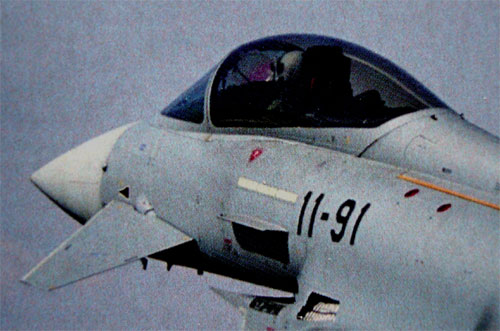
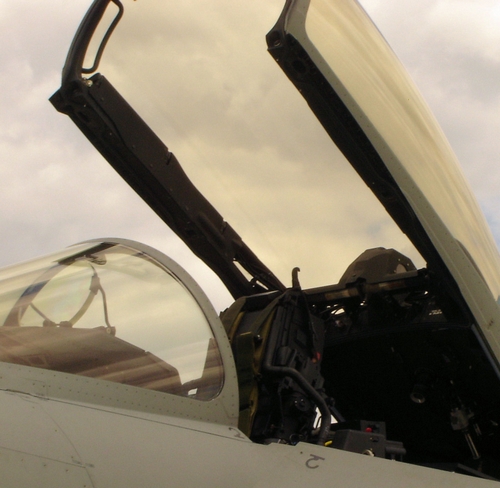
(2) Another issue is the cross section of the wind screen and the cockpit canopy, not being entirely correct. If you look at the base of the wind screen and upward opening canopy on a real plane, you can see a "kink" is present; this is missing in the kit shape in that area. This can be partly solved, see below for suggestions.
NOTE: if you build the kit straight from the box, the results are not that bad. But I decided to do these 2 corrections.
We start with correction of issue (1), correcting the length.
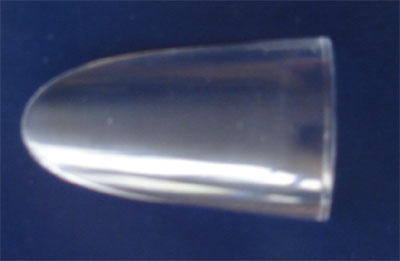
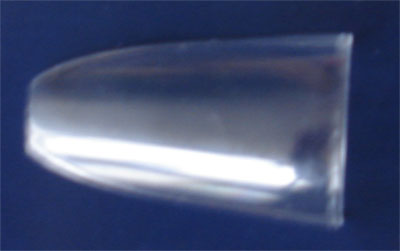
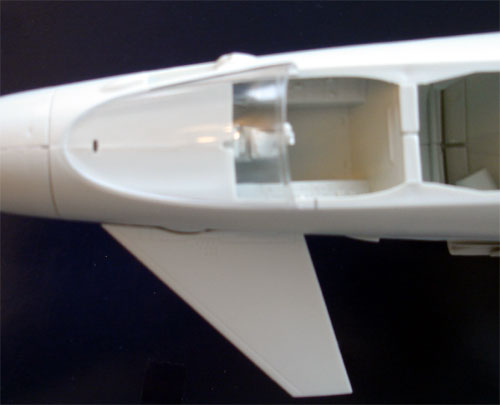
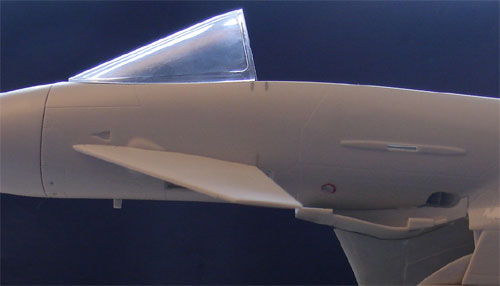
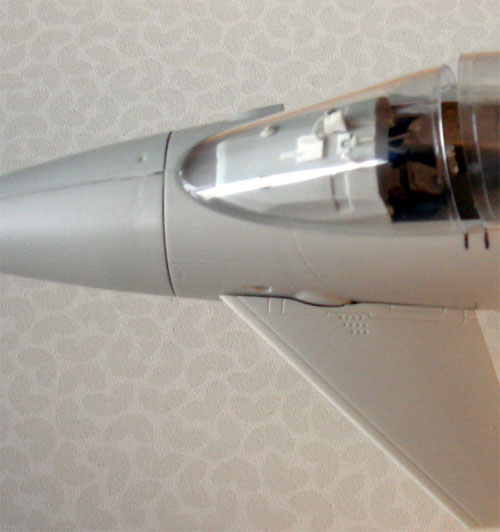
A. when looking at wind screen part #136 you will notice that on the real plane the front edge looking from above is more curved. By carefully sanding the front of the wind screen, its total length can be reduced with 3 mm. This will enable you to set the wind screen on the model with some tidying up of the lower mating edges. Only very subtle sanding is needed here! As a result, the rear wind screen edge is now set 3 mm more forward, enlarging the pilot cockpit step-in area. This looks much better.
 ....
....  .
.
(original wind screen, and the sanded corrected one)
 .
. .
.
(the 3 mm difference correction, note pencilled lines)
B. as a result, when closing the rear
opening canopy part #137, there is a 3 mm gap.
Looking at real photos and measuring
the canopy, I found it to be a little bit too small in length. This and
the gap can be solved by doing some things. First is by setting the canopy
3 mm more forward to meet the wind screen. Then by adding 3 mm of length
at the rear by using plastic card at the canopy rear edge. Fortunately,
Revell wants you to paint the rear frame as well, which is also a couple
of millimeters. But by NOT doing that, you can suggest a longer clear canopy.
The canopy framing than first must be sanded off and the canopy clearness
restored by polishing it with various grades of sanding and polishing paper,
but there remains a tiny engraved clear canopy frame line at the rear.
There is nothing you can do about this engraved remaining panelline in
the clear glass.
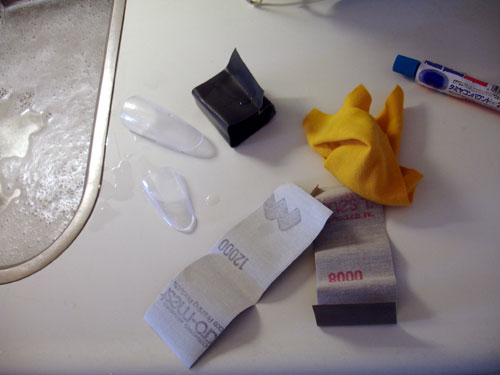
I simply dipped the whole canopy
in clear varnish of Johnson Future/Pledge, making this ingraved frame
line nearly invisible and giving the canopy a good overall shine.
(NOTE: you can also add a little smoke tinted transparant colour to the
canopy as well but mixing in a bit of TAMIYA Smoke acrylic paint in the
Future).

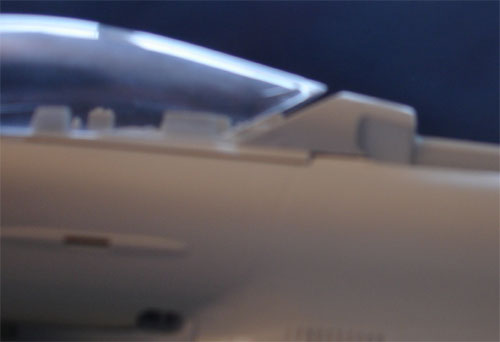
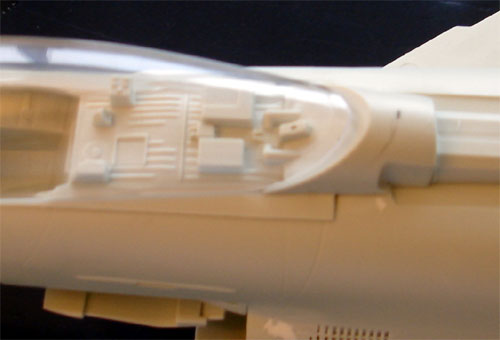
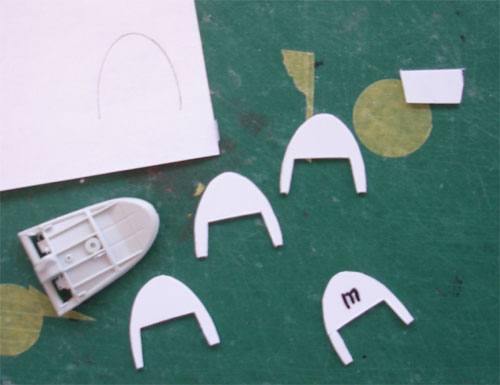
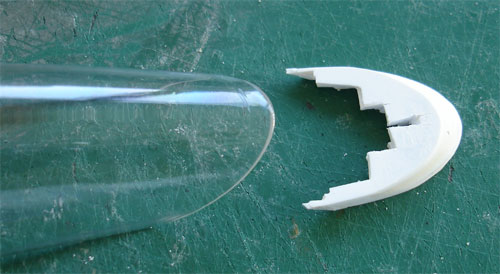
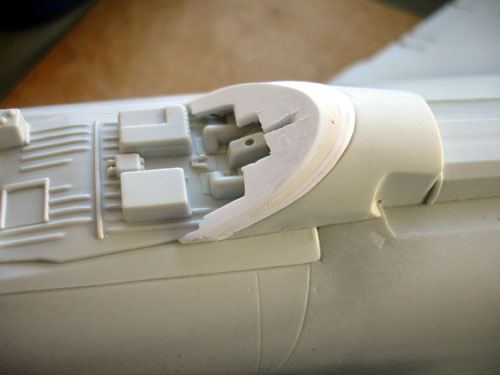
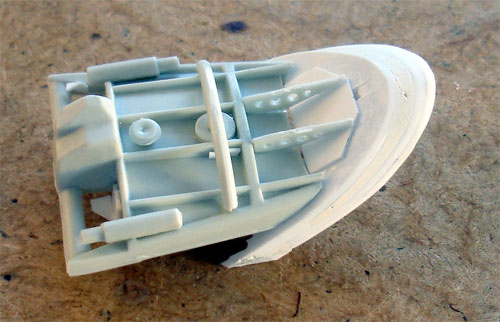
C. The remaining gap of 3 mm aft of the canopy is now closed with plastic card, this is thus in fact the new rear canopy frame. I cut out 3 round card sections of each 1 mm thick, sanding these and made shure they matched the canopy cross section shape as well. This will give a very nice result, closing the gap of 3 mm at the rear. Although I will set the canopy hinged up and open, this will improve the overall model look.
 .
.
 .
. .
.
the
new part that will be set at the rear of the canopy, acting as "frame"
 .
.
We now continue with issue (2), correcting the canopy and wind screen cross sections.
On the accompanying photo of the
real Eurofighter you can see what tiny shape error was made on the kit.
The cross section is a bit more curved inwards again and at the bottom
edges, there is a kink seen in both the rear wind screen base and the front
canopy base. Looking more closely at the canopy itself, you indeed also
see that same tiny kink at canopy front base (well visible when looking
at a real Eurofighter photo with an opened up canopy).
 ..
..
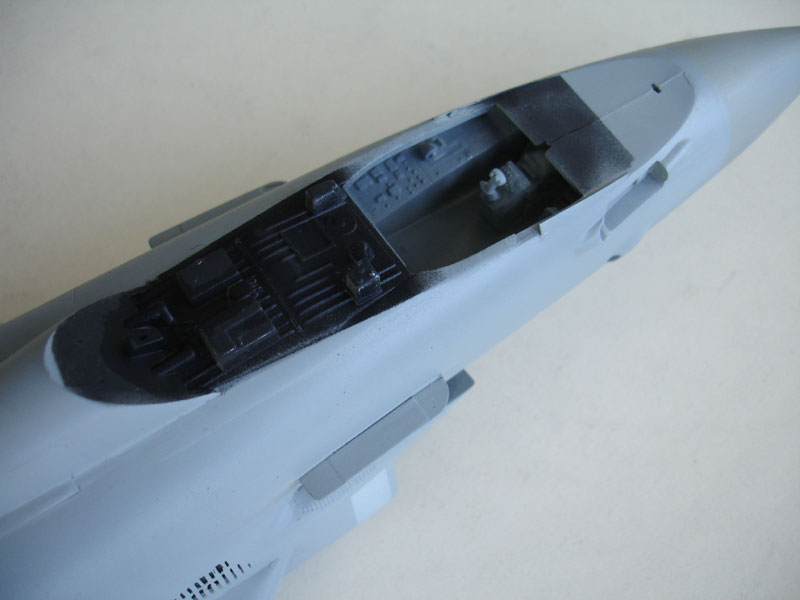
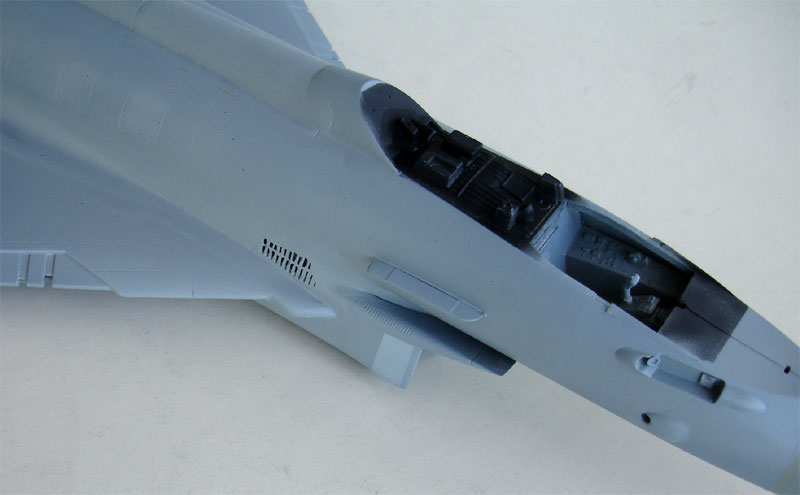
D. We start with the wind screen cross section. This can be bend a bit more in cross section, be carefull not to break it. The wind screen can be fixed in place by setting two very thin metal pins in the fuselage base edges. I drilled two holes in both edges and when the wind screen is bended inwards 2 mm at the rear lower base, it can be dropped in place and keep its shape. You can now also suggest the base kink at the wind screen with a small plastic triangle of 25 mm length (1 inch) made on both sides from plastic card and using some putty to smoothen things out.
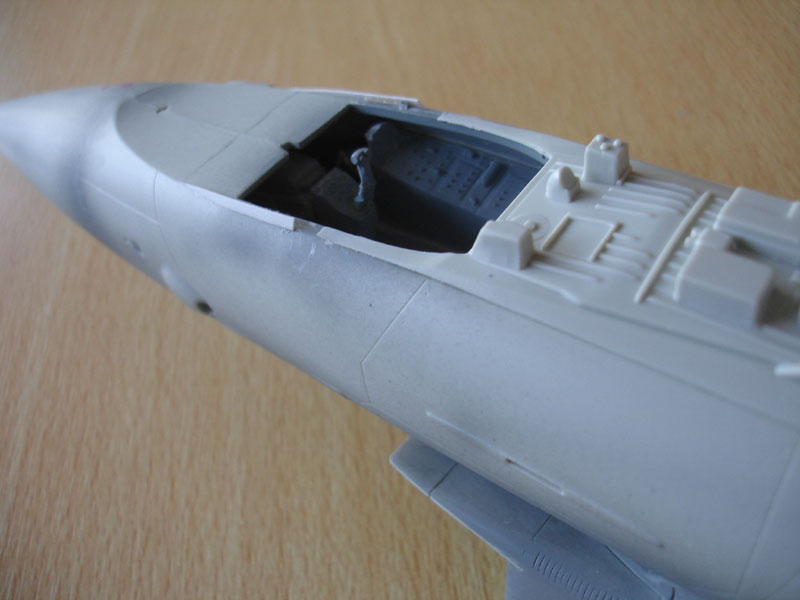
The cross section shape of the wind screen
and it's base kink looks much better now.
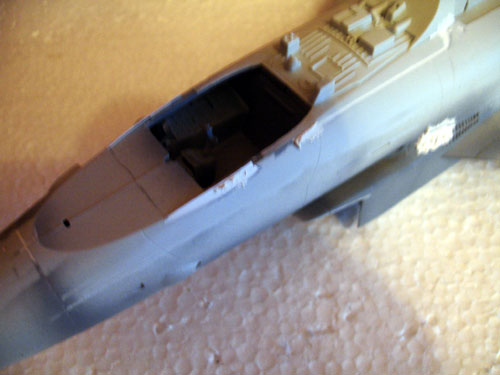 .
.
E. We continue with the opening canopy
cross section.
The cross section of the opening
canopy should obviously also match the corrected rear bended wind screen
cross section shape. However, bending the curve of the canopy can not really
be enforced, there is simply no way to keep the shape as the canopy is
firmly moulded.
Here I use "suggestion": as
I will set the canopy hinged up open to have the cockpit details with its
instruments and seat visible, the exact canopy base width can not be simple
judged by the eye. So I simply added again a simple tiny triangle of 26
mm x 2,5 mm (1,05 inch x 0,1 inch) made from card to the forward canopy
base area on both sides. (Note that the kink is not the full canopy length,
only at the forward base area.). These card triangle is than set at an
angle, suggesting the kink. Carefully trim the triangles and glue in place
on the canopy.
 ..
..
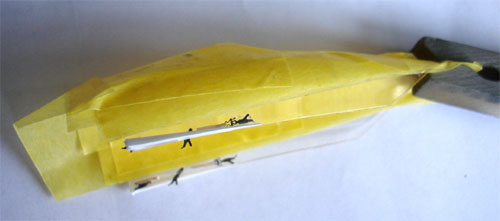
Fill the internal gap between the canopy edge and the card kink with white glue. (I also added some de-misting tubing inside the canopy itself and painted the frame and tubes medium grey after masking off with tape).
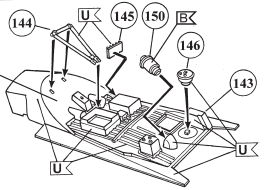
F. The kit detail parts indicated
in Steps 73-74 can be used as well.
Overall, the cockpit and canopy area
looks better on the model as both the length and cross section shape are
corrected.
--------------------------------------------------------------------------------
Some
additional suggestions
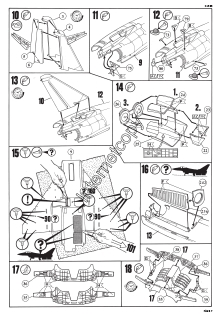
Do not strictly follow the Revell
suggested modelling sequence. Start doing work on the fuselage halves first,
such as drilling holes, opening up the grills etcetera. Remove some bits
of plastic as indicated in steps 15 and 35 as well. When you want to open
up the engine bay, open the panels on the lower fuselage part now. Do not
forget to drill open any holes for the desired pylons in the lower wing.
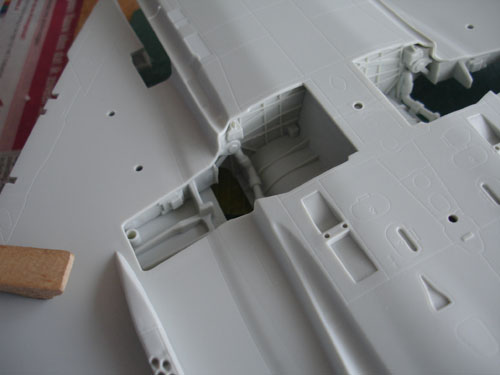
I only added the cockpit tub at the
early stage, leaving the detailling the cockpit internal details for later
on. In order to be able to fit the instrumentpanel, the right corner section
was cut off to get two parts. This will enable later installment.
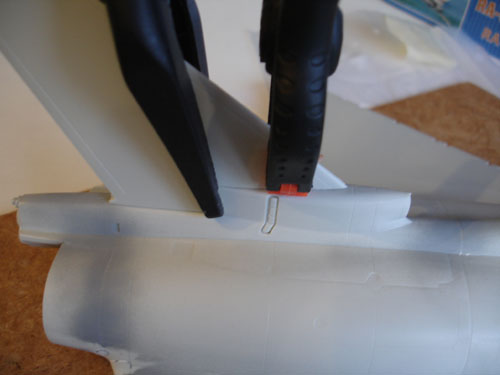
- In step 13, the vertical fin was not yet fitted, do so only after major wing-fuselage assembly. This will ease sanding and better vertical alignment later on. The fin will need filler at its base.
- Put some effort in the intake area and the intake tunnels in step 14. See above what I did.
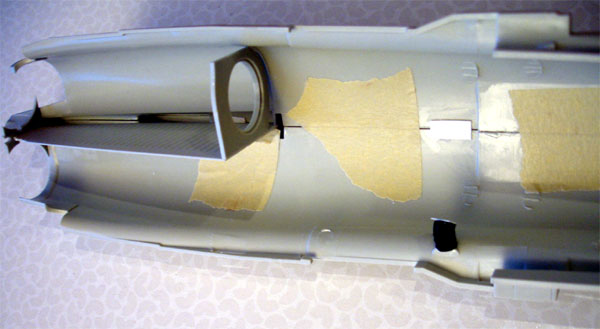
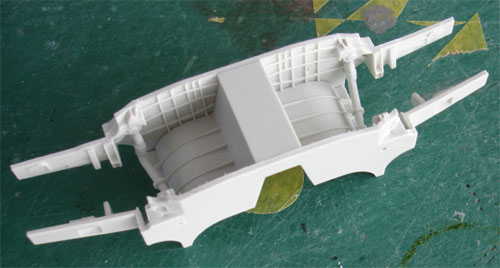
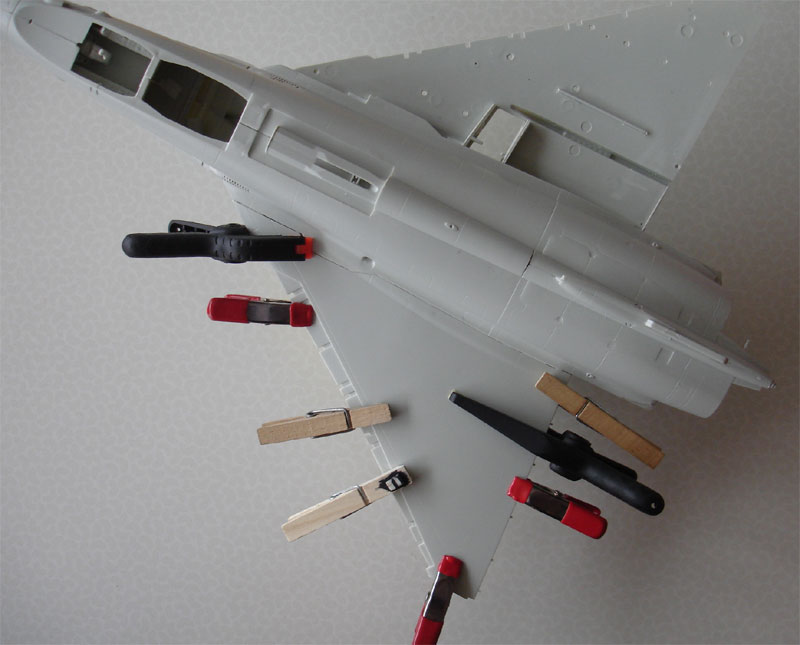
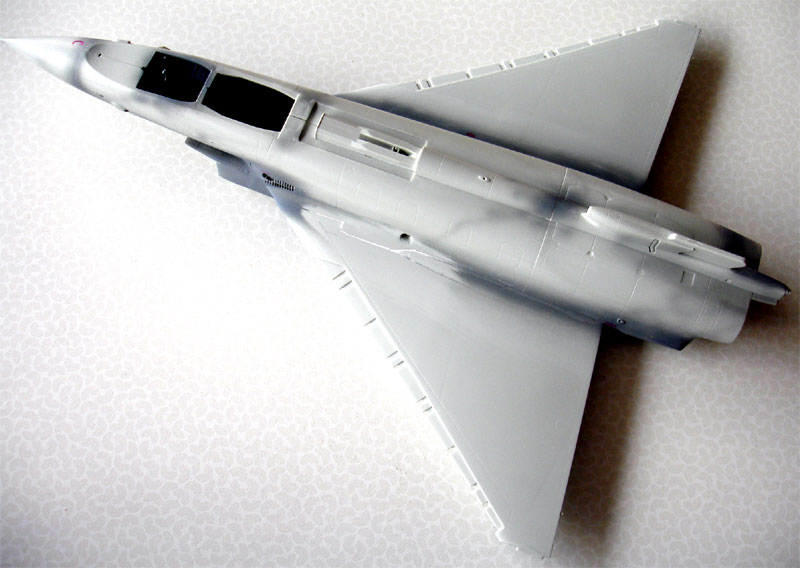
- The wing-fuselage junction fits OK when you carefully work here. Only minor filling is needed. At the rear fuselage exhaust area between the upper and lower sections, some filler is needed. Leave ample time to dry.
- Flaps and slats from step 29 are best fitted at later stages of building, after painting and decallling. Please note that sometimes on parked Eurofighters the trailing edge flaps droop up on both sides and not down!
- In step 35, some white glue is needed to fill the base gaps at the heat exchangers.
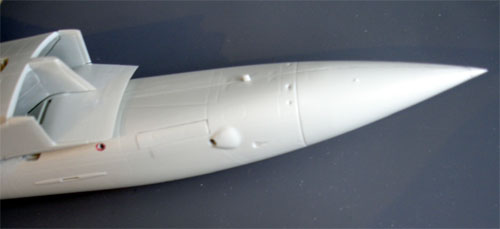
- In step 38, the radar nose fit is better at the rear where it meets the fuselage when you insert a piece of 0,3 mm plastic card between the two halves parts #57+58.
- Steps 103-117: the engine assembly was a bit confusing resulting in an engine with some gaps. These were filled with white glue. Adding some extra details will also improve the engine looks.
. .
. .
. .
.
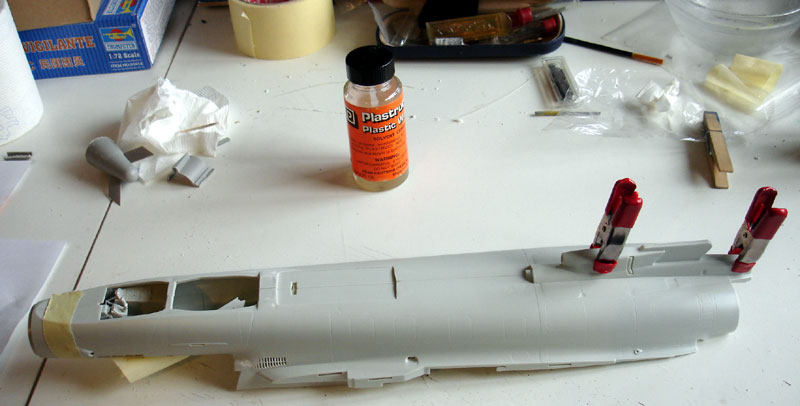
Assembly of the fuselage:
Glueing the wing:
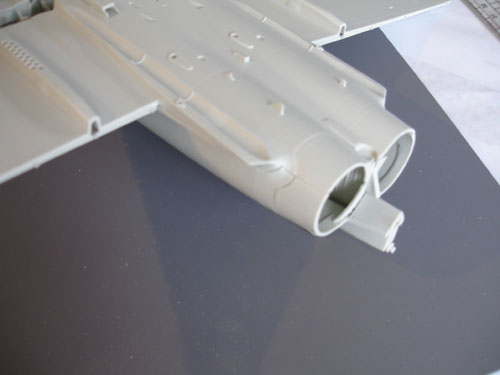 .
.
Fin base also needs some filler:
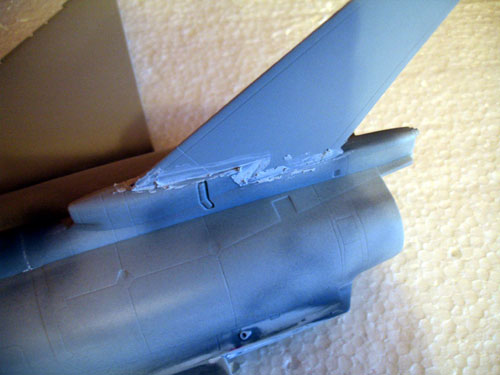 .
.
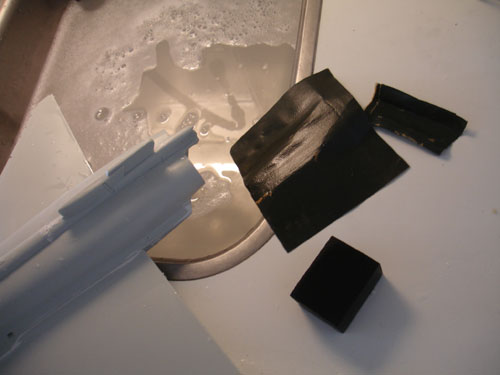 ..
.. .
.
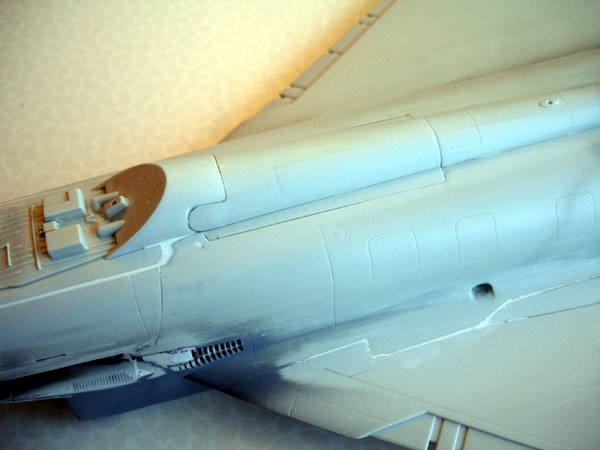
The airbrake, when set closed, fits
terrible. So keep open, or when you want the airbrake closed, fill and
sand. Re-scribe the edge lines later on:
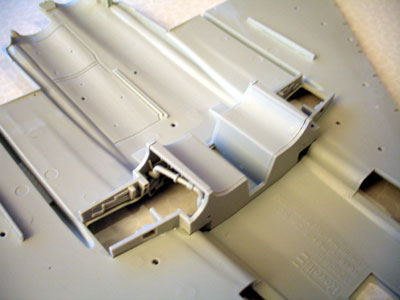
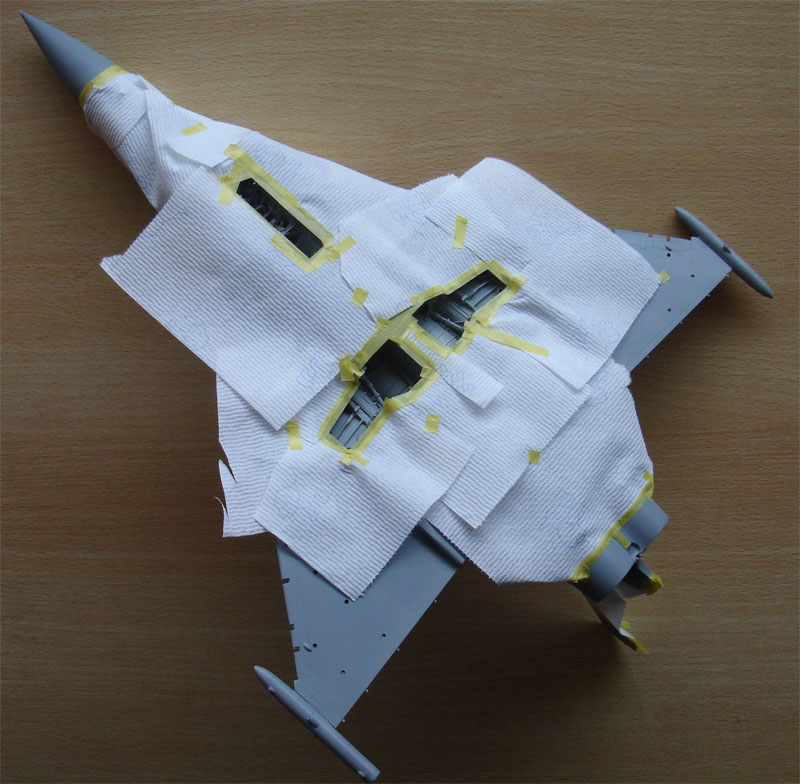
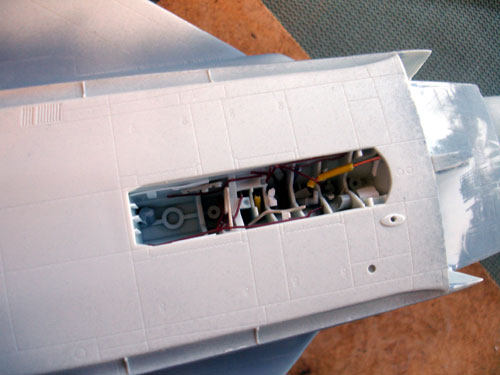
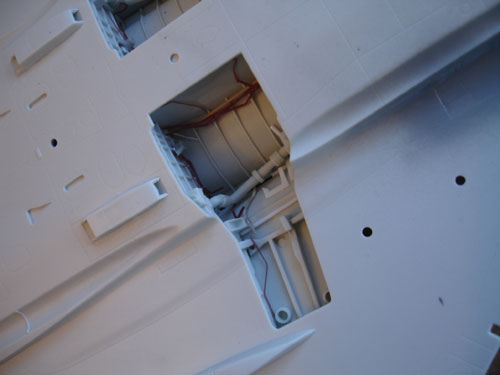
Masking the wheel bays prior to spraying
them very very light-grey white:
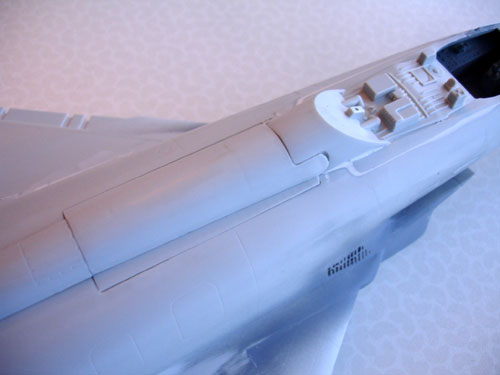
and adding details.....
 .
.
 ...
...
Back to 1/32 scale Models.......
(c) Copyright "designer"/ All rights reserved. Your comments are welcomed by webmaster
February 2010