[ page 1 ]
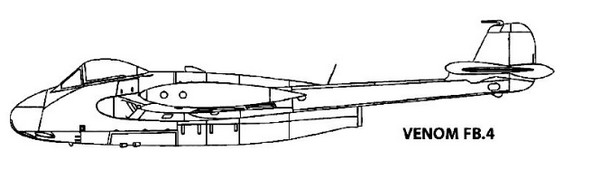
Venom FB.4: conversion report in 1/32
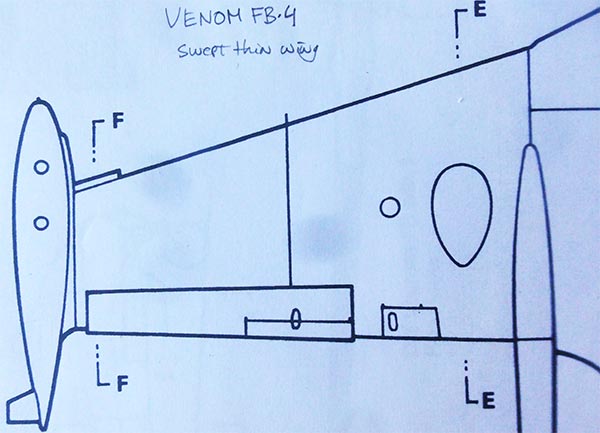
In 1948, De Havilland aircraft company proposed a development of their Vampire to serve as more capable fighter-bomber. This became the DH 112 Venom, a substantially changed design. As originally designed, it would be powered by the De Havilland Ghost engine, which was more powerful than the Goblin that had been used on the Vampire. The (first called Valkyrie) Venom got a new thin wing with a leading edge sweepback of 17.6 degrees, a lower thickness/chord ratio reduced to 10 per cent, while the wing trailing edge was straight and it got wing fences; a pair of optionally-fitted wing tip tanks were also usual with a strake and small wing slat at the inside edge. It was much faster than the Vampire.
Armament was similar as the Vampire: 4 20 mm Hispano V canons in the nose and RP-3 rockets and bombs under pylons. A drop tank could also be carried.
The first production Venom was the FB.1, being a single seater that first flew September 1949. It had no ejector seat. It entered RAF service in 1952 and flew also in West Germany with some 375 jets manufactured.
A two seat variant was developed as a night fighter, the NF.2. It got a new nose to accommodate a pilot and navigator/ radar operator in a "staggered seating". First service entry was end 1953. The NF.3 was an improved NF.2 that entered RAF service Summer 1955.
The single seat fighter-bomber FB.4 would become the main production variant. It first flew December 1953, was powered by the Goblin 105 engine and now got an ejector seat, airconditioning, different tail section with acorn bodies and could be fitted with underwing fuel tanks. The FB.4 served from 1955 mainly with RAF Germany and overseas in Cyprus, Middle East, Africa and Far East. It was involved in combat mid 1995 in Malaysia and in 1956 during the Suez crisis and in Yemen and Oman.
The Venom was also used by the air forces of Switzerland (with license manufacturing), Sweden, Italy, Iraq and Venezuela.
The two seat Venom was also developed as a carrier capable jet for the Royal Navy called the Sea Venom Fighter, All weather (FAW) with AI radar in a large nose radome. It was generally similar to the NF.2, but with a strengthened structure and also an arrestor hook fitted in an “upper lip” at the aft fuselage. First flight was in 1951 and FAA service entry a few years later with several FAW version developed using it until 1970. The Royal Australian Navy also used the Sea Venom FAW 53. The French aeronavale used different Sea Venom variants called the Aquilon 201 to 204.
See references for more info.
page 1
page 2
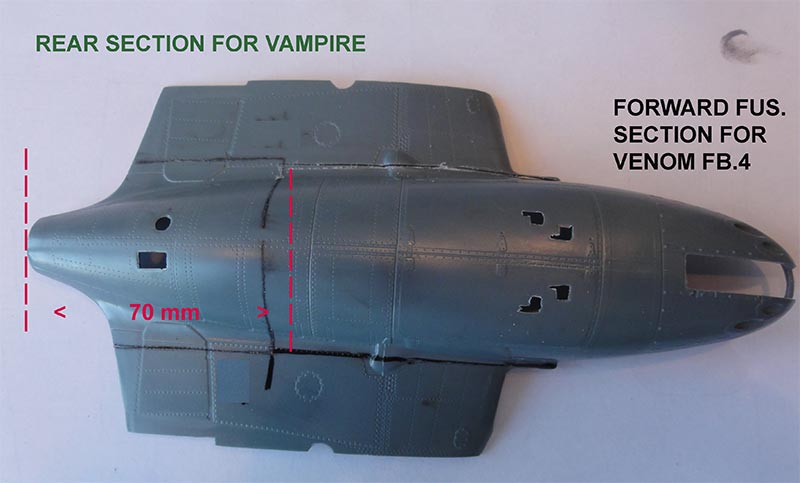
The Venom FB.4 model in 1/32 involves a big conversion combining 2 kits:
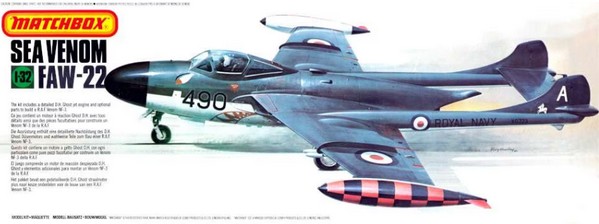
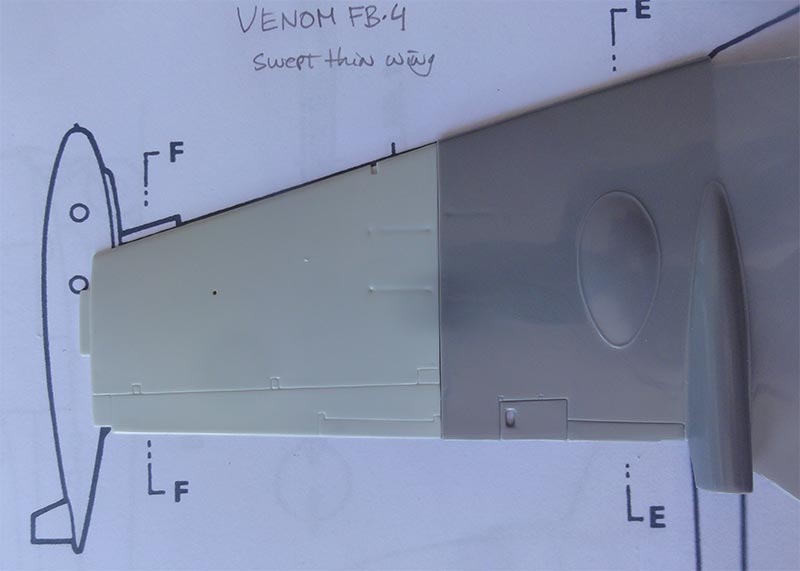
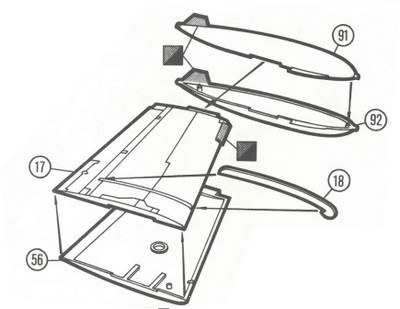
- for the Venom wing the kit of the two seat Matchbox Lesney Sea Venom FAW PK-506 kit issued 1980 (see info here...).
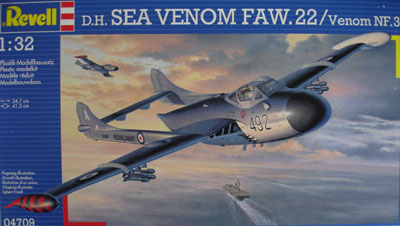
Note: you can also use the same kit in the Revell #04709 release of 2007:
+
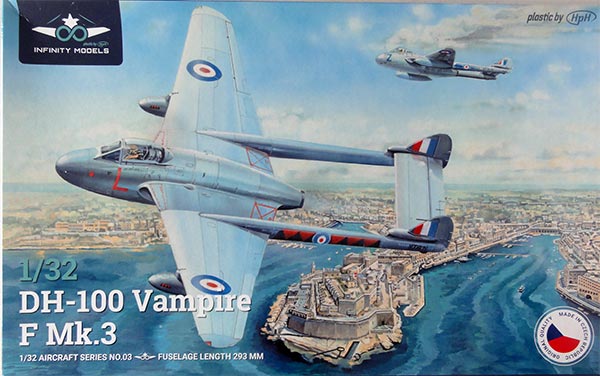
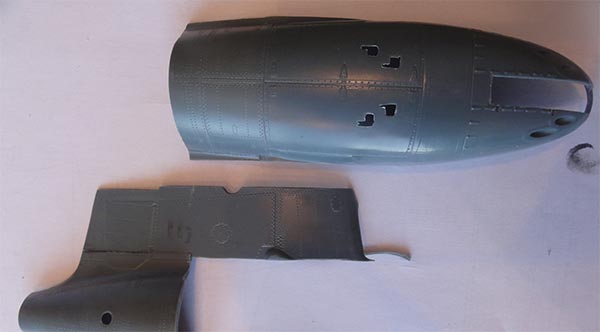
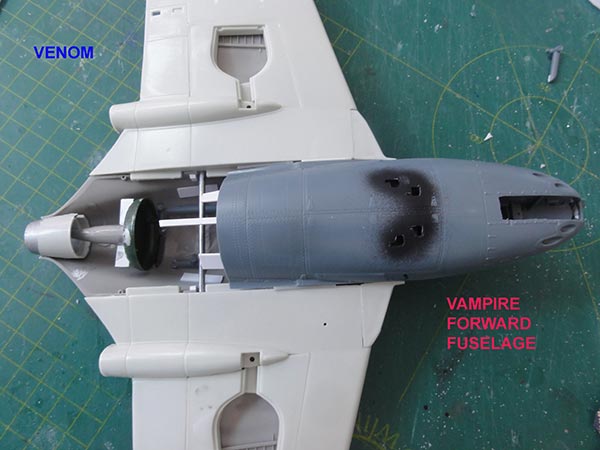
- for the single seat forward fuselage section the 1/32 Infinity Vampire FB.3 kit (or use the FB.5 with similar parts).
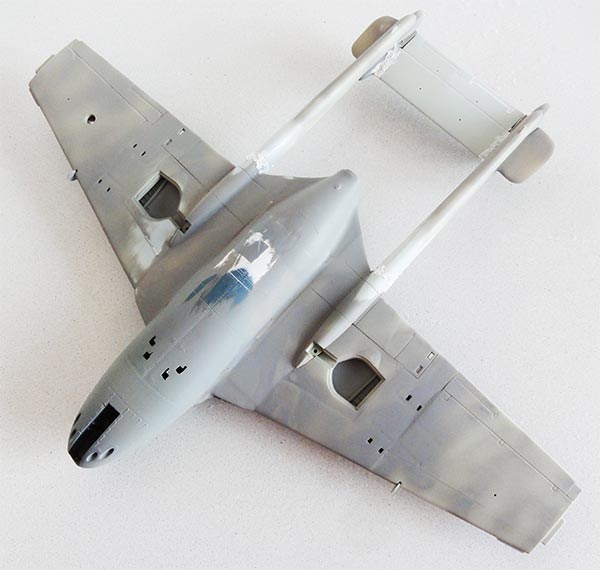
From the Sea Venom kit will come the rear of the fuselage, the whole wing, landing gear, tail fins and tail booms with modifications. The single seat forward fuselage section and nose gear will come from the Infinity Vampire kit.
(note: the remainder of the kit parts will be used to make a 1/32 Vampire T.11 trainer with twin seat nose and Vampire wing that also needs some extra modifications. This is another big conversion to be done later).
![]()
First the accuracy of both kits were assessed. I had various books, articles and copies as seen in the references list.
About the 1/32 Matchbox Sea Venom accuracy, I had seen on the internet that various modellers reported the kit to be quite accurate but basic in details. I had made the kit earlier as well.
Finding reliable scale drawings is a common problem that modellers will recognize. Some drawings were enlarged from 1/72 to 1/32 by 225% and I used the actual span and length data. The scaled up drawings confirmed that the shapes and sizes of the Matchbox Sea Venom kit is quite good. This is no surprise as the Matchbox pattern designers probably measured real Sea Venoms in the U.K when making the kit moulds way back in 1980. I also found a few basic drawings of the single seat Venom FB.4 that I wanted to build and these drawings could be used.
It confirmed the common thin and swept wing used on the Venom FB.4 looked good. The tailbooms with fins and tailplane have horizontal outboard stabilizer extensions and bullet fairings that need modification.
For the second kit Infinity Vampire (modelling report read here) the accuracy was checked up as well. I again found it was difficult to find good drawings. When I enlarged a few drawings I had to 1/32, most drawings seemed inaccurate in places. But the Infinity kit looked quite good looking at photos. Another way was that I checked the Infinity "Vampire wing" with the excellent 1/72 Airfix Vampire T.11 kit released in 2012. Airfix used scan technology for the kit. Length were scaled up from 1/72 to 1/32 by 225%. It turned out that the Infinity wing and gear parts looked accurate. I think they measured up or maybe scanned as expected a real Vampire.
Looking
at various
photos, the forward Infinity kit fuselage side profile looked OK. But in top
planform
view looking at photos the nose tip looked a slightly too blunt.
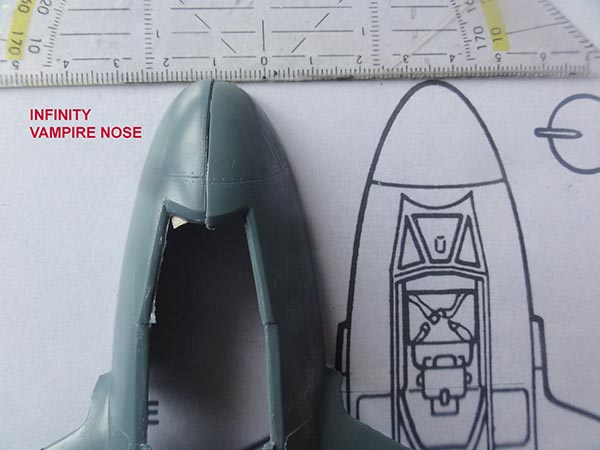
Doing a small nose planform correction can be done by removing a
section at both upper fuselage halves
of 1 mm at the nose tip... so 2 millimeters in total, gradually running to the windscreen area and bending the
nose a bit.
VENOM FB.4 BUILD PREPARATIONS
First, on the 1/32 Matchbox/Revell Sea Venom main wing parts and tail parts a few raised lines were re-scribed in some areas with an Olfa P-cutter and than sanded off.
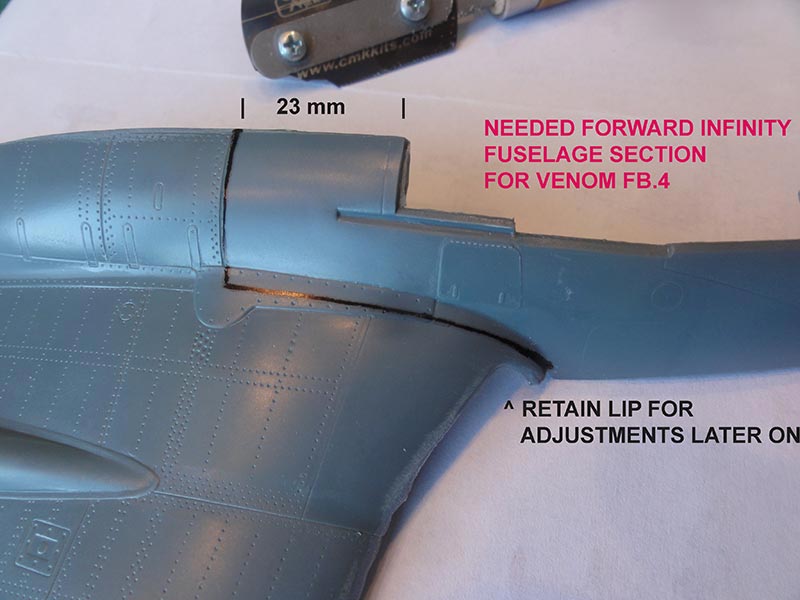
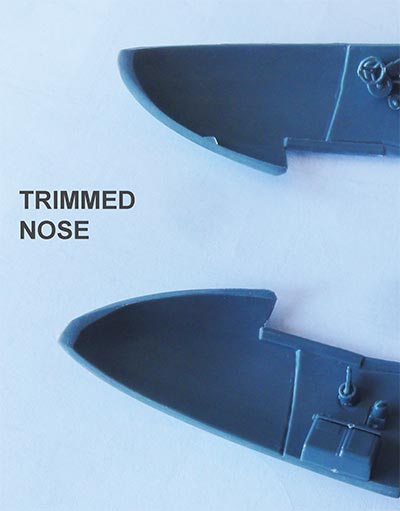
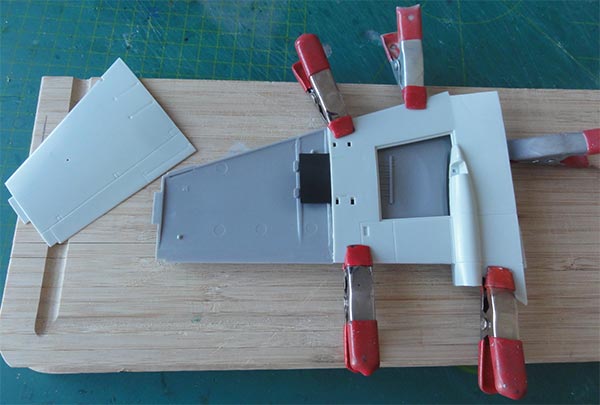
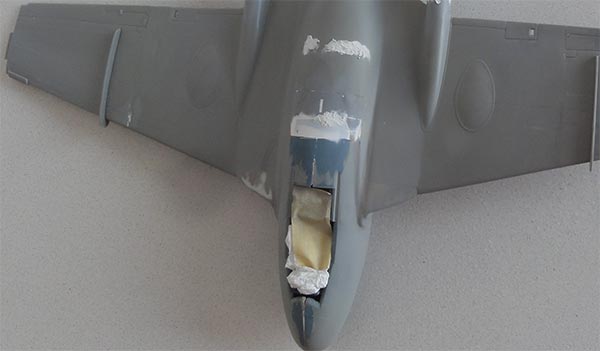
The Infinity Vampire forward fuselage section seen here will be used on the Venom FB.4 conversion. Where to separate the forward fuselage from the main Vampire parts needed a lot of measuring and photo checking.
Separation was done with the razor saw (or use TIGER saw) along the black lines.
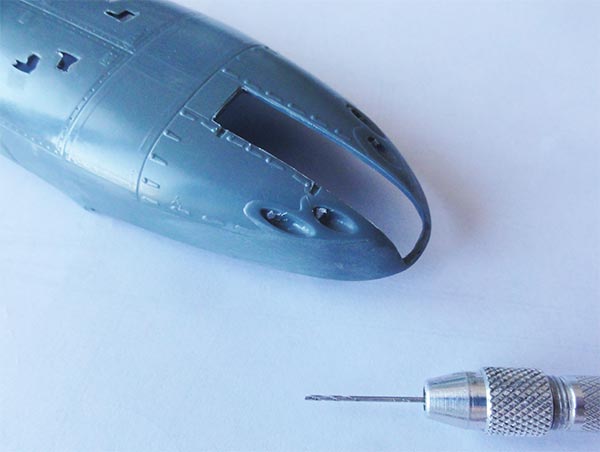
The intake lip was kept to allow further trimming later on.
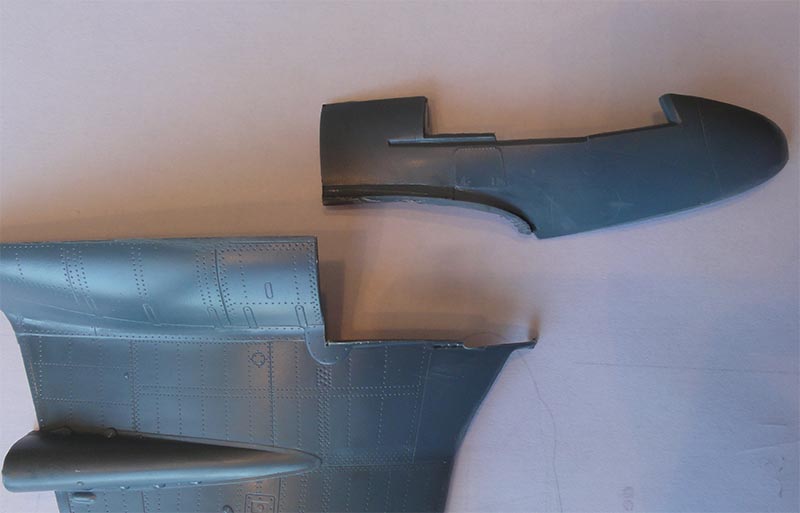
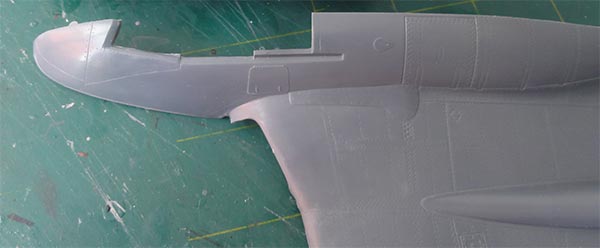
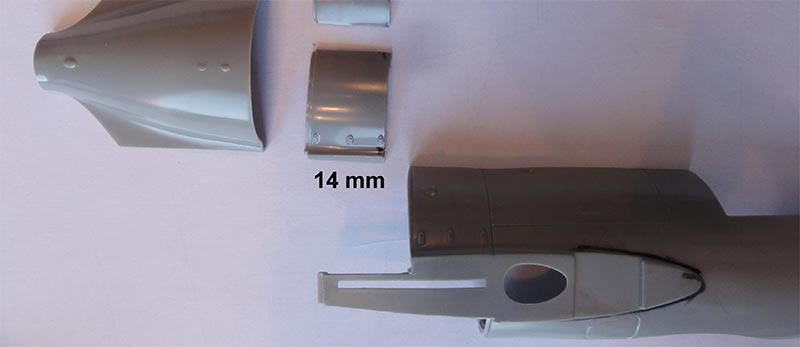
Next, to improve nose shape the forward nose was trimmed by sanding off 1 mm at the nose tip and gradually running to the windscreen area. It will improve a bit the upper planform nose shape.
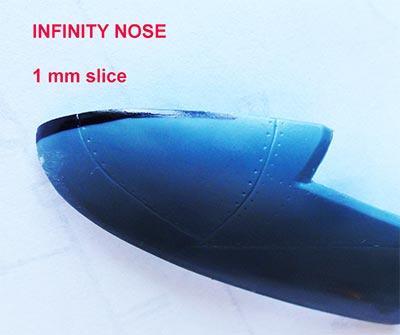
Here the adapted nose side view is seen, the nose looks OK.
At the lower fuselage also a separation is needed for the conversion.
Note that later even when working accurately a lot of putty and sanding is needed to get a new joint Venom assembly.
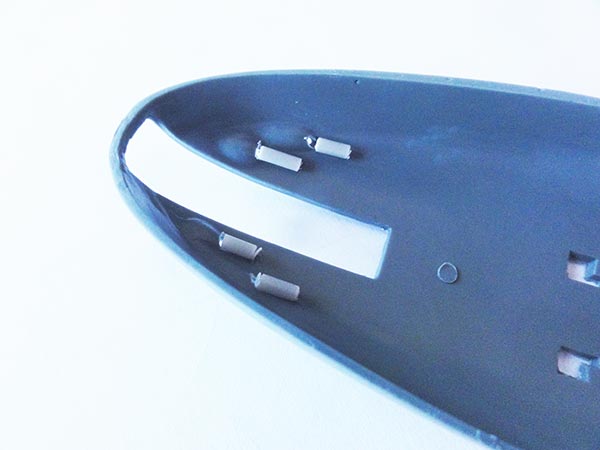
The lower fuselage part with nose gear bay was retained (with drilled open canon nozzles). Later on, the inside front bulkhead #B6 will be trimmed a bit. The trimmed upper forward fuselage sections will be bended a bit to meet each other and the lower part. The were set 1/2 mm inside the lower fuselage part at the top edge. This was also sanded at the sides to get a less blunt nose. The lower forward canons looked OK as compared to drawings but the canon nozzles were drilled open en a few plastic tubes were cemented inside.
(NOTE: I later found that the Venom had canon shutes' stubs so the 4 rear holes could better be closed up).
VENOM FB.4 ASSEMBLY
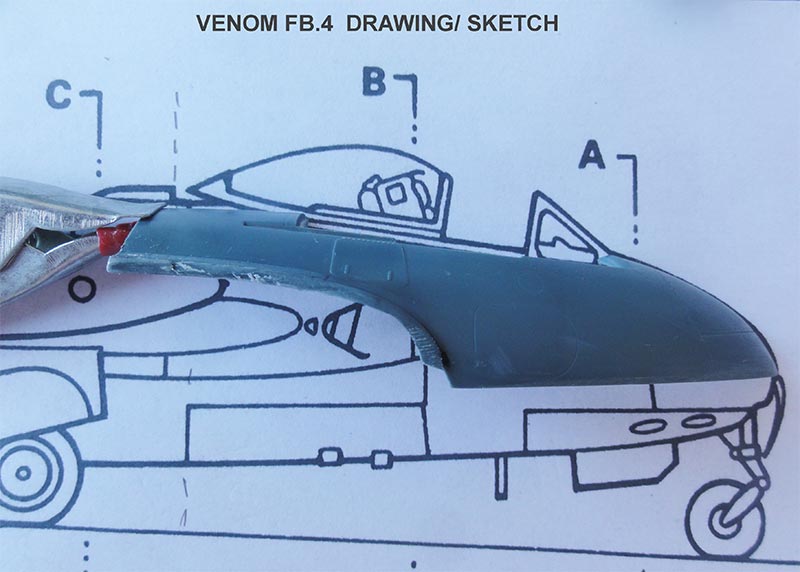
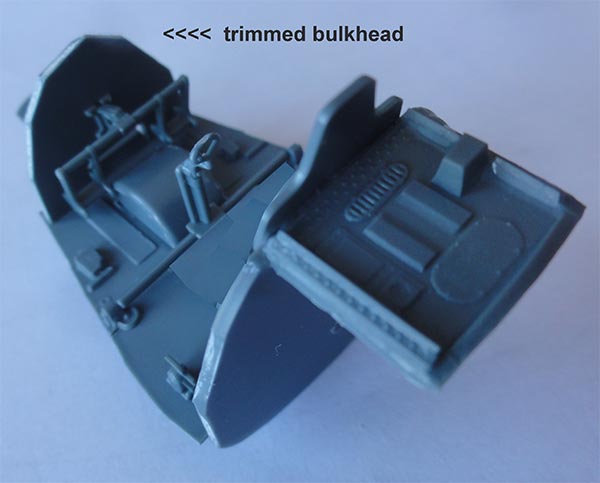
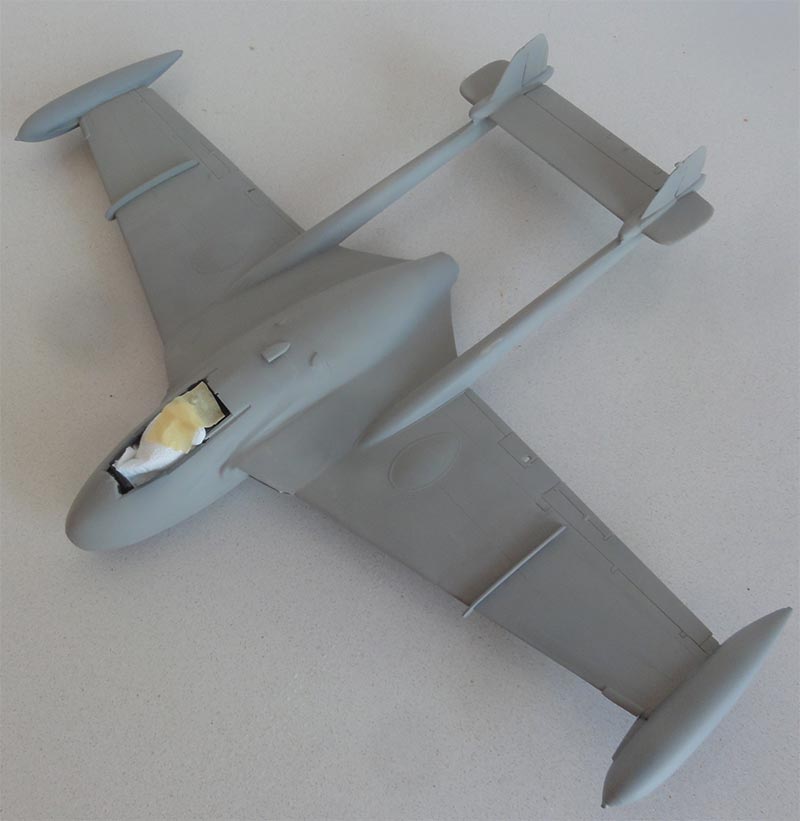
About the tiny Venom FB.4 cockpit interior I had not a lot of FB.4 information. I simply used some parts of the Infinity Vampire such as the panel #D69 and the kit decal. Do not install the simple plain Vampire seat as the Venom FB.4 had one of the first ejection seats. It appears that the rear bulkhead had a sort of rectangular shaped box to accommodate the thicker bigger seat; this will be suggested with a scratch built ejection seat.
The forward bulkhead was trimmed as the nose upper profile was improved a bit as described above.
The cockpit overall interior colour was airbrushed a mix of black with some white to avoid a "coal hole".
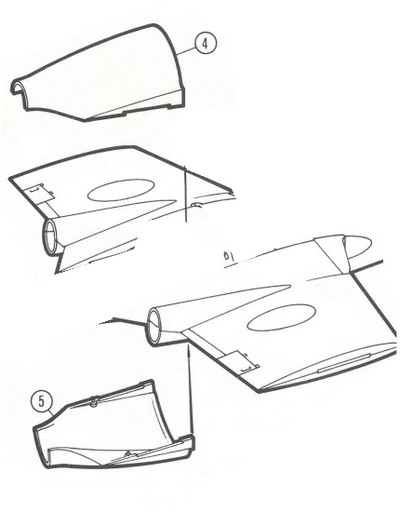
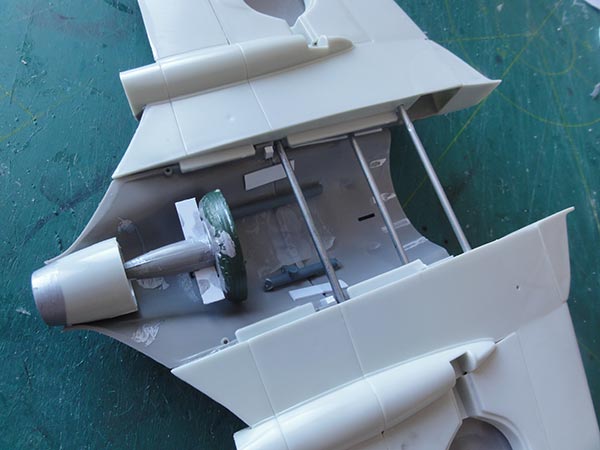
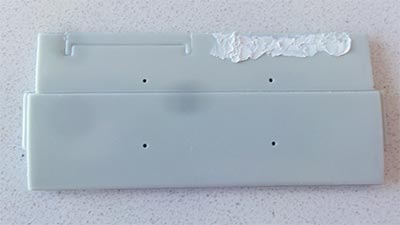
A section of the Matchbox Sea Venom rear fuselage is need as well with the engine jet pipe inside. With a razor saw cuts were made in both upper and lower parts #1. The NF.3 part #4 is also used.
A section of the engine jet pipe was cut off and a new jet fan suggested to be set inside.

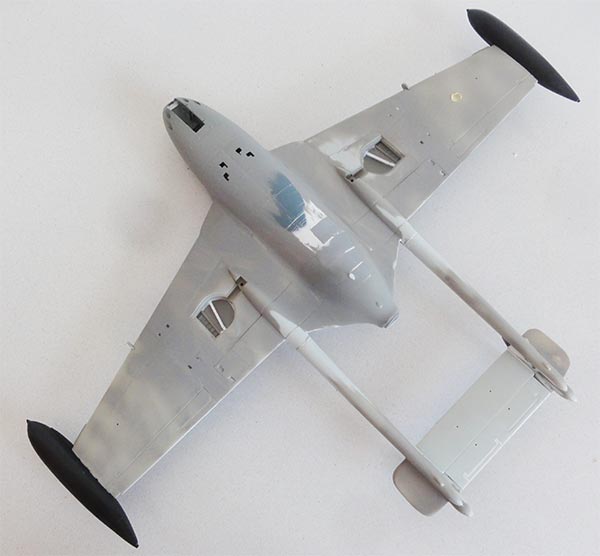
The main idea of the conversion is seen here.....

The Venom FB.4 wing will come from the Matchbox/ Revell Sea Venom kit.
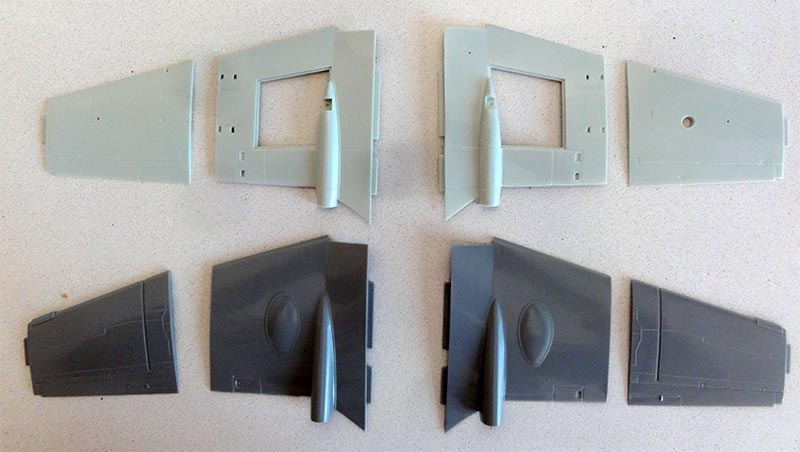
The size and shape accuracy was compared with a drawing scaled to 1/32. The Venom has a thinner, bigger and slightly swept wing as compared to a Vampire wing for reduced high subsonic drag.
It is seen here that the Sea Venom kit wing planform is quite good.
Wing assembly was done, ensure a horizontal flat wing.
The Venom FB.4 has no wing fold so the fold panel was closed up. Note the plastic shrinkage that needs to puttied as well.
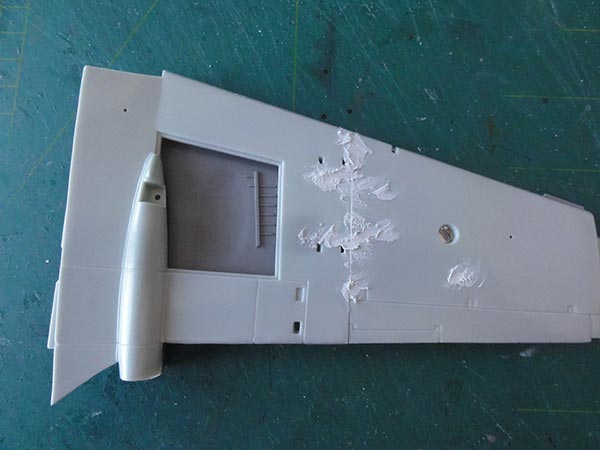
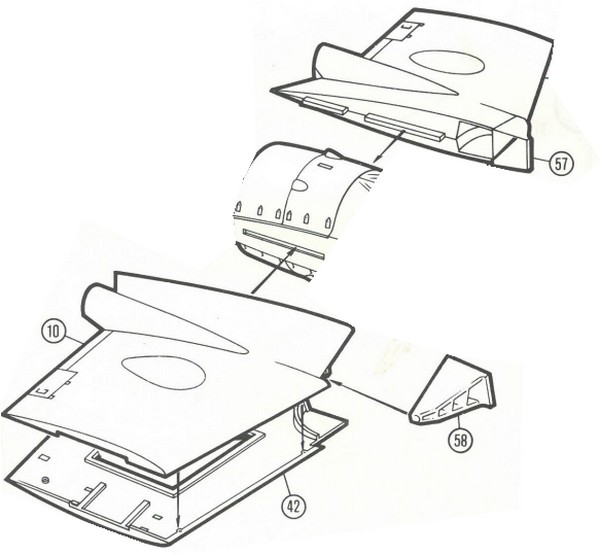
The Sea Venom kit has different parts for RAF and FAA operated jets. The main gear bay #23 and #24 inserts were used for the Venom FB.4. The intake parts #57 and #58 can also be used as per kit for the Venom FB.4.
Here the mating of the rear upper fuselage and wing is seen. I used metal rods to get more strength that could be inserted in drilled open holes. (the kit bulkhead #E5 could not be used). The wing has no dihedral/ anhedral.
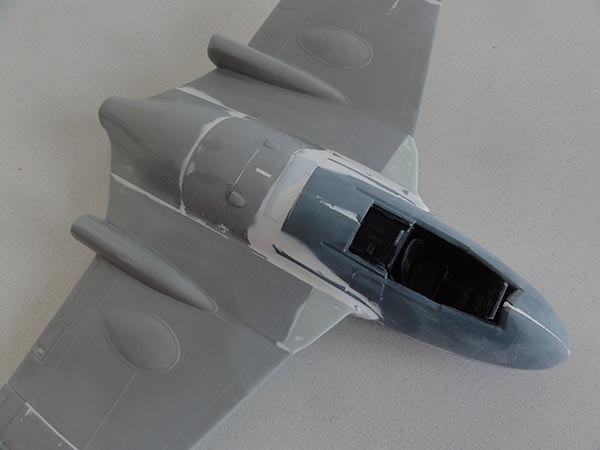
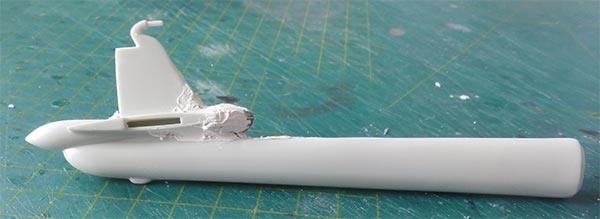
The forward fuselage was set now. Note that there are considerable gaps and "steps" that all need to be closed up with card, putty and requires several passes with sanding.
The single seat forward fuselage was assembled and bended a bit to correct the nose as described above. The gaps were puttied. The forward section was inserted and set ensuring a good positioning. Check, double check alignment.
Allow ample time for glue drying and hardening.
The rear lower fuselage needed a few slice cuts made from the kit parts to avoid stress and get a reasonable fuselage shape. Close up larger gaps with strip.
Loads of putty were applied.
Sanding... sanding... sanding....
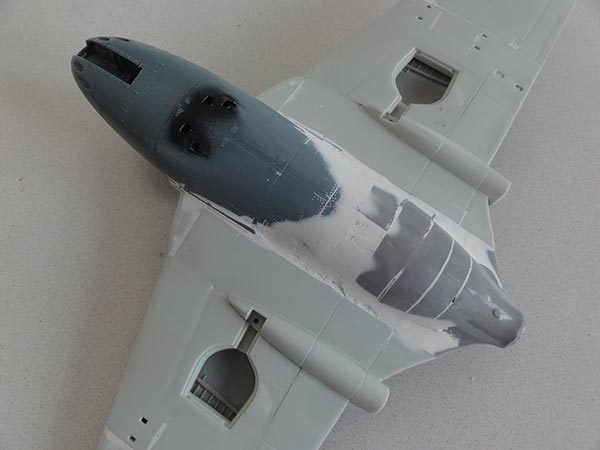
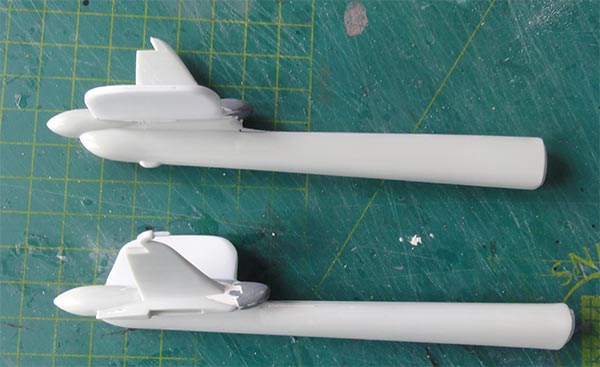
It is a lot of puttying and sanding but indeed the Venom FB.4 starts to appear...
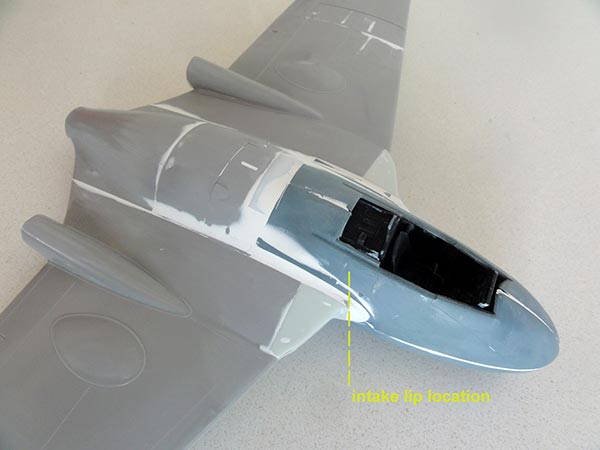
Here the reference line is seen at the intake.
The Matchbox Sea Venom wing tip tanks can be used for the Venom FB.4 as per kit but had their fins removed; to be installed later. The 2 wing fences parts #18 were sanded thinner and than set on the wing. The gaps at the main gear bays side walls were closed up with card and white glue.
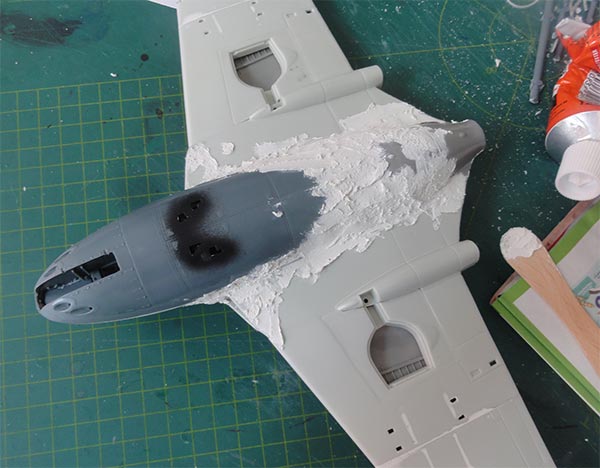
The main wing and fuselage were now ready get a coat of grey primer coat to check for any flaws. My favourite grey primer is Revell Aqua 75 steingrau acrylic applied with the airbrush.

It is clear that another few passes of putting and sanding were needed. Take your time here and use sanding blocks.
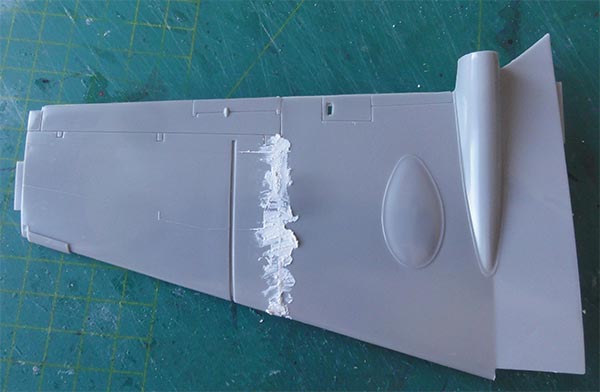
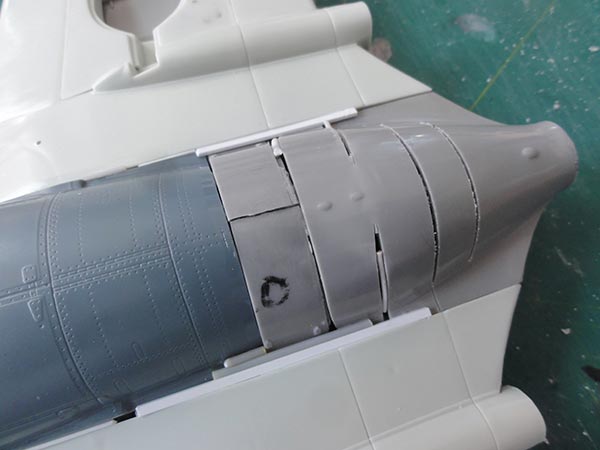
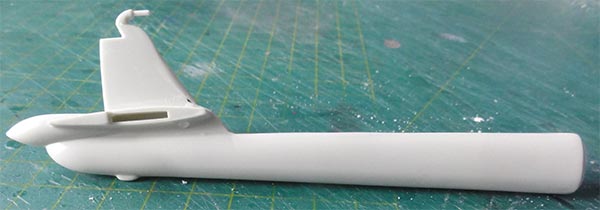
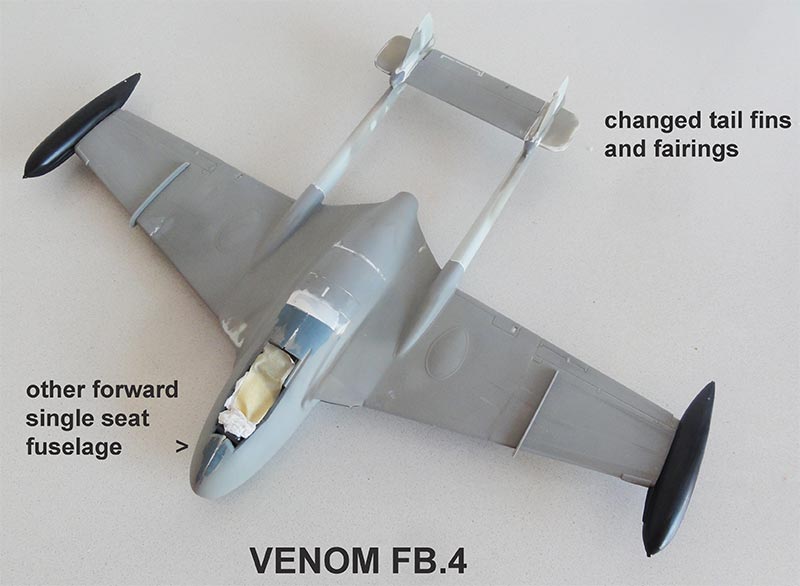
The Venom FB.4 has tail fins that are different as compared to the Matchbox Sea Venom. Also, stabilizer extensions were used and bullet fairings. All was made with card and putty as well as the Matchbox parts as basis. The stabilizer extensions were made from thick card. The stabilizer extension chord is same as the stabilizer.
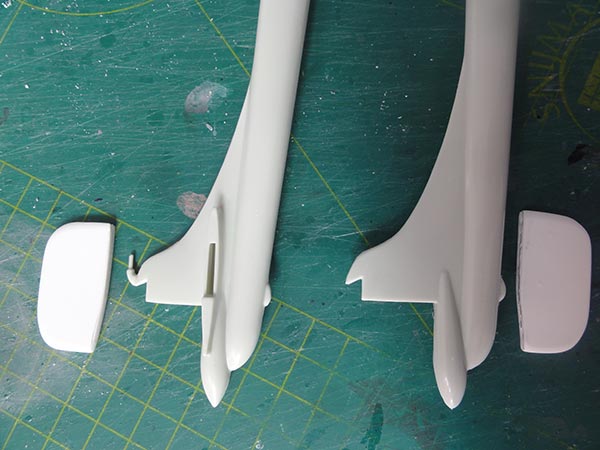
The forward fin leading edge was sanded next.
A forward bullet was made from a bit from a fuel tank found in the spares box. Putty, sand, putty, sand....
The result is seen here. The kit rudder parts #32 needed putty as well to fill shrinkage.
The stabilizer of the Venom FB.4 had only 1 trim tab at port, so the the engraved starboard tab was puttied and sanded.
All was joined and aligned using improvised jigs...
At the tail boom joints, putty and sanding was needed.
The wing tip fuel tanks (in black Matchbox plastic!) of the kit were now installed but had their fins removed. Sand and close up the small gaps. Note also an extra structural beam from thick strip set in each main gear bay.
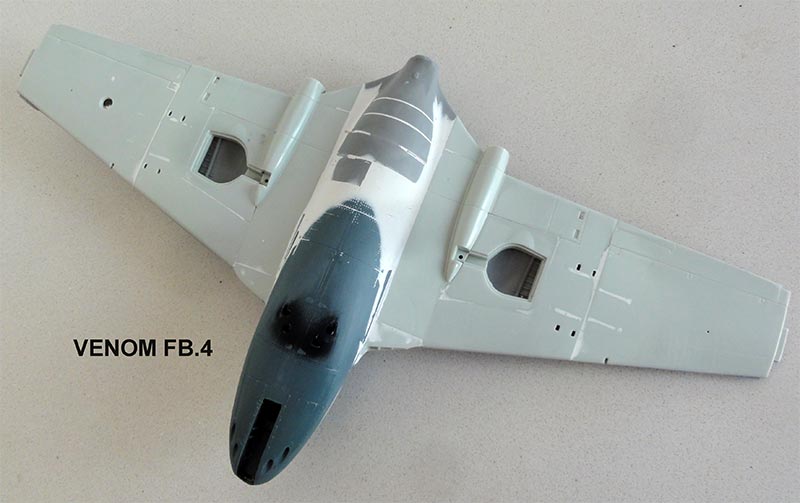
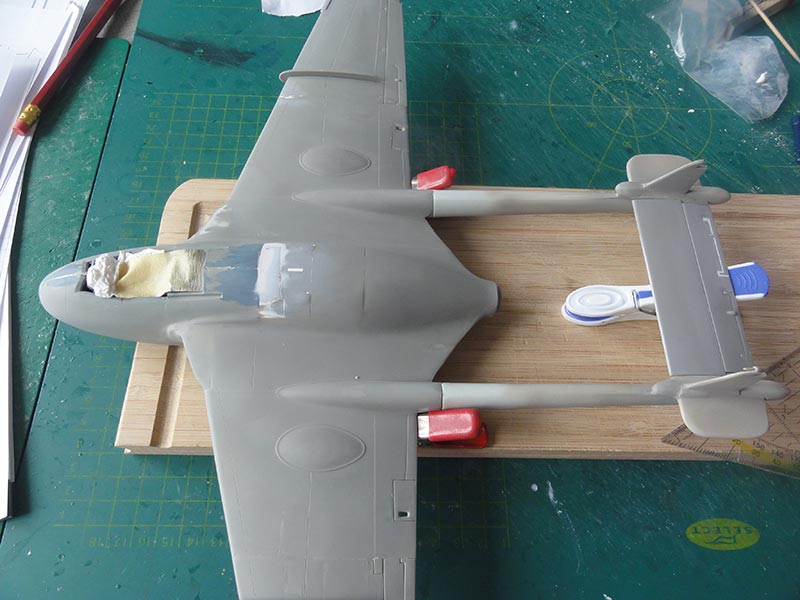
Here an overall summary.. a 1/32 Venom FB.4
Again, another base grey coat was airbrushed, again some putty and sanding needed!

Sanding and another grey base coat was airbrushed. The Venom' top intake scoop #13 was installed.
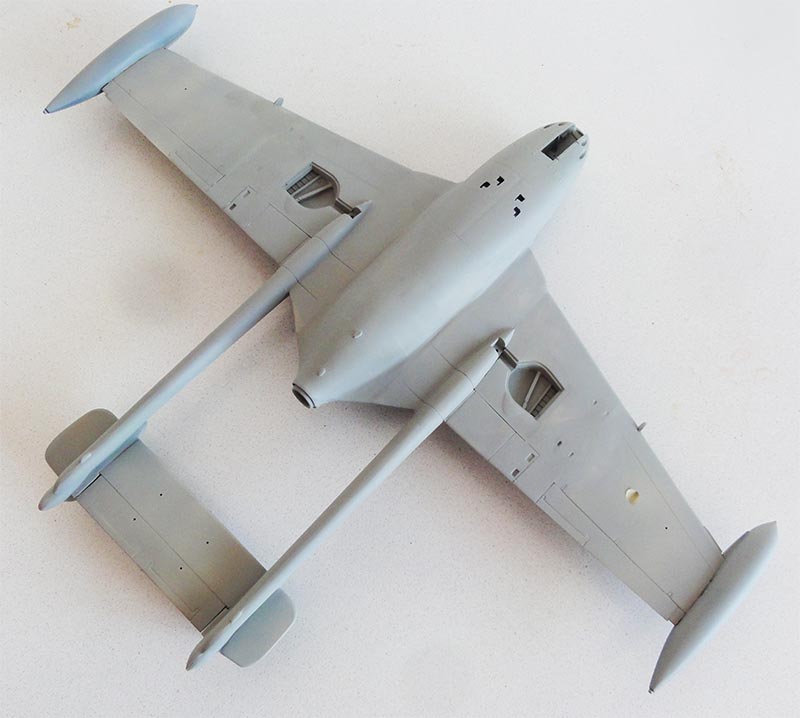
A milestone was reached as most major conversion work had been done.
On to next [ Page 2... ]
References
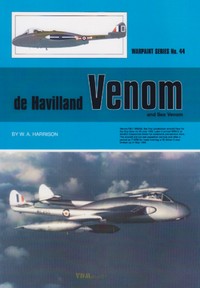
- De Havilland DH112 Venom and Sea
Venom, Warpaint series, no 44
- Air International Vol.39, page
81 (with history and drawings)
- Aeroplane Monthly, 1978, page 300
- Venom drawing, Aviation Archive, Volume 1 post war jets, Argus books, 1988
- old article by Peter Doyle, conversion topic Vampire to Venom (1/72), Scale Aircraft Modelling magazine, 1980s
- excellent conversion article Jim Howard, nose job for Venom conversion to a FB.4 in 1/32, Scale Aircraft Modelling magazine, Volume 44/06, August 2022
===========
Internet:https://www.baesystems.com/en-uk/heritage/dh112-venom-sea-venom
Wikipedia Venom page
Back to 1/32 models...

(c) Copyright Meindert "designer"/ All rights reserved. Your comments are welcomed by webmaster
Created this page October 26, 2022