Dutch naval air service
[ page 7 ]
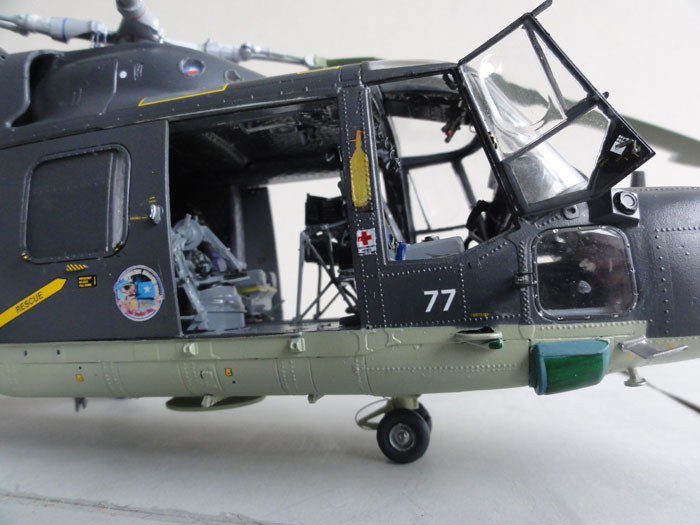
Conversion of Lynx model in 1/32 scale
The interior parts were now finally completed in the forward cockpit:
- the prepared pilot and observer seat were added.
- the modified main instrument panel and mid-console
- a bit of detail was added in front of the main instrument panel (the back of...)
- some detail was added on the side near the seats such as ventilation piping
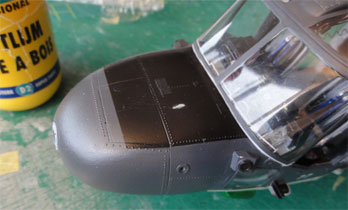
- a thin white line was hand painted on the windscreen inside (probably an de-icing electrical wire).
- some additional wiring and piping at the roof of the windscreen
- ice indicators, made from metal mesh wire

![]()
Next, was the exciting moment of
fitting the windscreen......
The transparant parts fit looks good
on the new resin made nose, the smaller gaps were closed with white glue,
seen here...
 .....
..... ....
....
The closed gaps were painted when
the white glue was dry.
Also seen here are the typical icing
warning indicators, the black strips made fom metal mesh painted black.
They are fitted on both sides.
Note that STEPS 69-86 were skipped for the "un-armed" Dutch SH-14D model.
STEPS 87-88
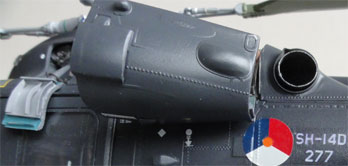
Fitting the various antennas on the tailboom requires some work for a Dutch Lynx. Depending on the version, antenna layout may vary. For the SH-14D, antenna part #33 is not needed. Part #34 is a slightly different position.
Next, the tailboom was fitted to the rear fuselage. The gap was NOT filled with putty, in reality a gap is seen in various locations and panels on the real Lynx.
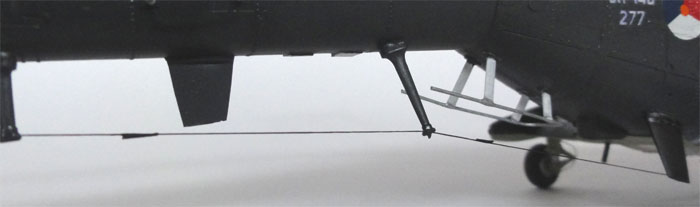
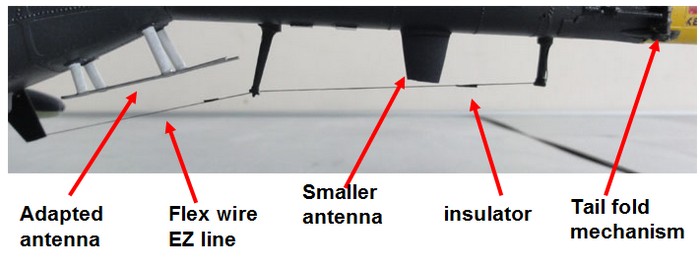
The Dutch Lynx SH-14D has also the
longer-range antenna. I used flexible wire from EZ line. Note also
the 2 insulators added from sprue and the smaller antenna as in the kit.
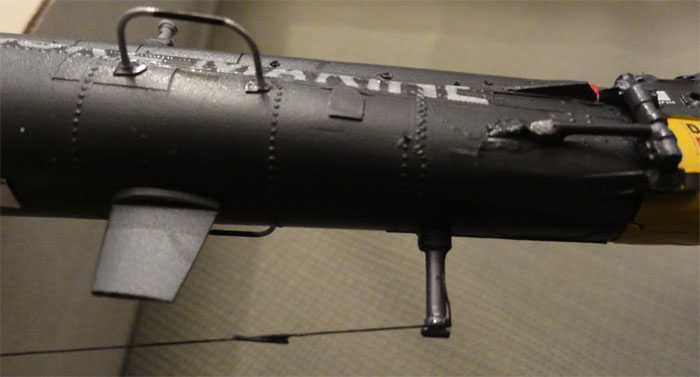
For the Dutch SH-14D another type
of antenna was to be added made from sprue.
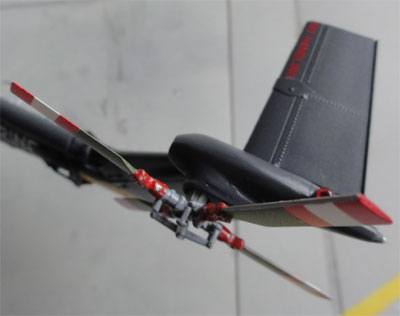
STEP 87 TAIL ROTOR
As noted before, the converted tail
rotor of STEP 66 should be fitted. Note
that the bulged fairing nex to the adjusted horizontal stabilizer had been
removed (see notes at STEP 48) .
For a Dutch Lynx like a SH-14D, the
clear anti-collision light part #222 looks a bit different, but the part
is on the transparant sprue! (part #24?).
The NO HANDLING decal (#118) letter
space is a bit too large, cut the decal between NO and HANDLING and set
to the model.
 ....
....
The horizontal stabilizer (reduced
in length as noted before on page 5) was simply
fitted. There is a gap between the stabilizer and tailrotor fairing.
EZ line flex
wire....
![]()
STEPS 90-92
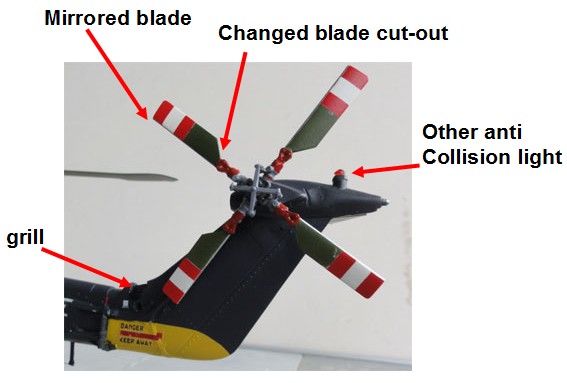
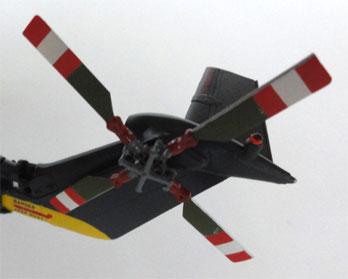
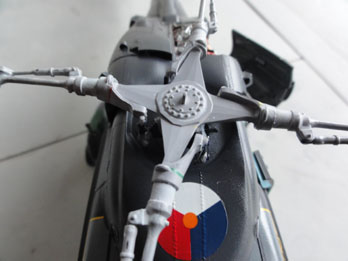
The rotor head and system is rather
simple on the real Lynx so on this model only some details can be added.
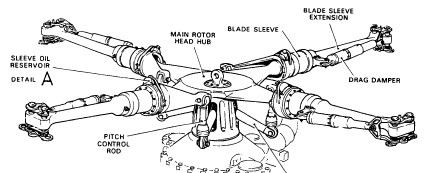
The kit has the later modern composite BERP mainrotor parts. These look great with even the tiny but very accurate kink moulded by Revell in the trailing edge at about three quarter semi-span. Well done by Revell! For the Dutch SH-14D, these later BERP main rotorblades were indeed used as the metal blades were not longer produced by Westland helicopters. (NOTE: for older Lynx versions, the older style metal rotor blades are not in the kit).
The main blades were already given a coat of green using GUNZE SANGYO #340 (FS34079) and got, after masking, a metal leading edge as well applied with the airbrush.
All blades have an individual colourcodes
(red, yellow, green, white) at their roots to avoid mixing them up when
removed during Lynx maintenance as they are carefully balanced. Also, tiny
rods were added made from metal wire.
 ..
..
Small tiny rotor blade decals are
also provided on the decal sheet. I noticed them at a later stage, so these
were fitted as almost the last modelling step!
STEP 93
The main rotor was NOT fixed onto
the model but kept detachable for ease of transport and avoid damage.
This was about it for the major assembly.
Now going through various Walk around photos (see references
on page 1...), various final details and painting was done.
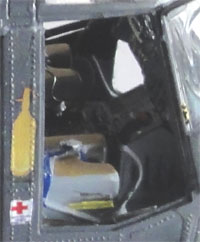
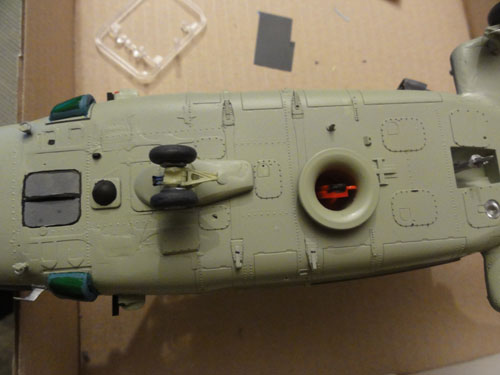
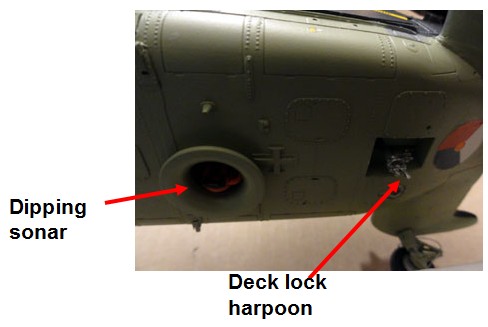
(1) The gap for the dipping sonar is seen. It is empty on the kit, I had no photo, so suggested a "red" device inside with plastic. (NOTE: it was informed it is a yellow sonar end... will be changed later on).
To the right the deck lock "harpoon"
as in the kit is seen (part #21).
 ..
..
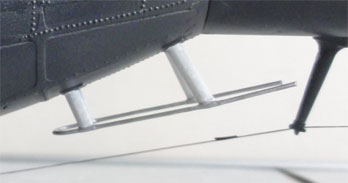
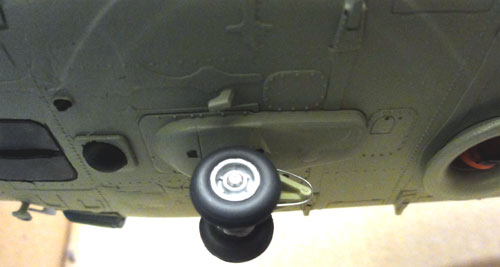
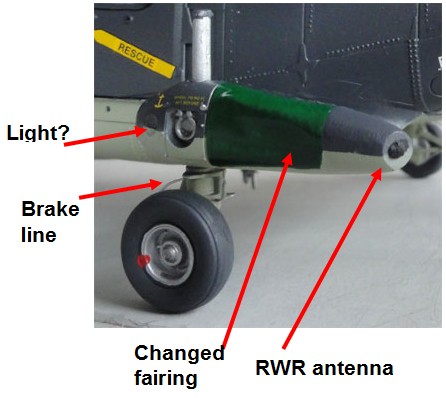
(2) On the nose wheel leg add a brake
wire and also 2 pins with stearing gear.
 ...
...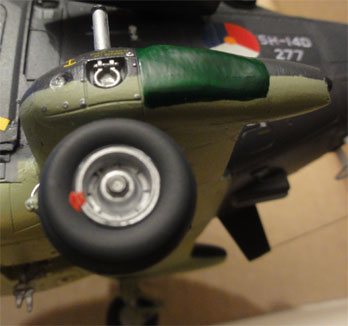
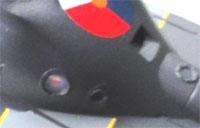
(3) Also I found that the small hole on the LEFT main gear fairing, it looks a "light"?. On the RIGHT fairing it is not seen.
(4) On each gear leg, a brake wire (?) was seen. Note the left and right the gear is similar, not mirrored.
These wires were made from metal wire
and bended.
Note also the Rear Radar Warning
receiver (RWR) fitted on some SH-14D's later on. Note the red balance marking
on the wheel.
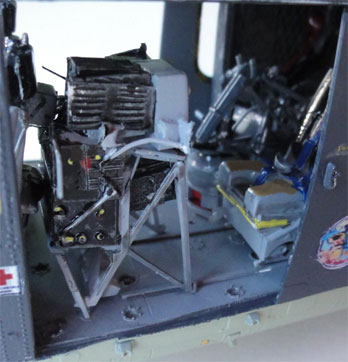
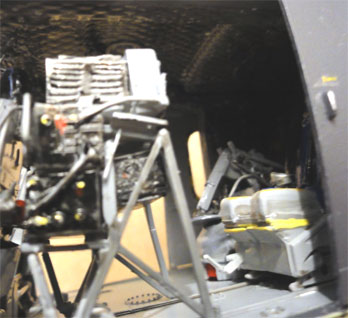
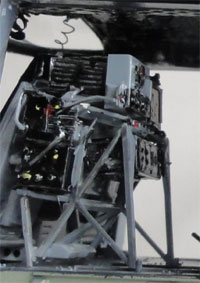
(5) the converted detail parts for the interior were fitted now:
- sonar installation
- sonar operator seat/station
- operator panel/console
The sliding doors (14A and 203) were set open and fitted now. Note that the warning yellow-black markings are provided through decals #2 & 3 but need a slight change for a Dutch SH-14D. The outside markings were painted, not using the decals #170
 .....
..... .....
..... ..
..
..
..
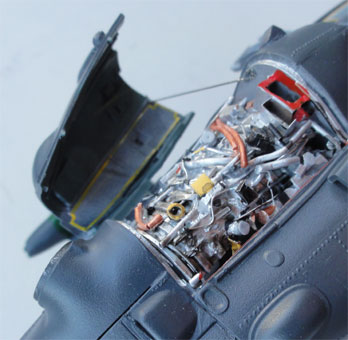
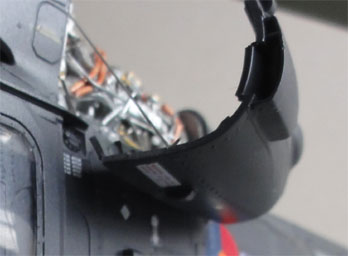
The pilot doors were also set on:
one closed on the left and one open on the right. The closed door (#14)
on the left showed a slight gap, this was closed with white glue and painted
extra dark sea gray once dried. On the opened door on the right, the handles
were added as they are seen. Also note the nice REVELL decals that are
on the sheet (I did not see them on the instructions marked...)
![]()
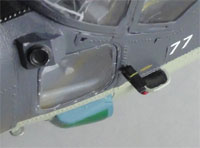
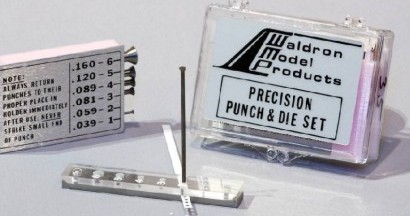
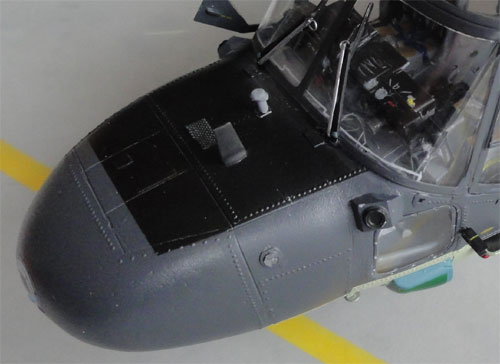
(6) There are glass inspection panels
in the forward upper fairing. These were already drilled out.
With a WALDRON
Punch & Die set, transparant discs were punched and added,
fixing them with White Glue.
 ......
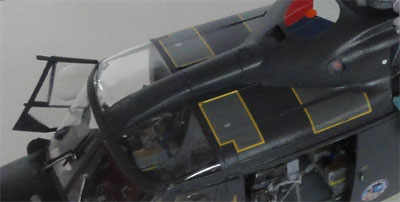
On the left, one glass panel is seen,
on the right 2 panels. Also, in the nose a panel is seen.
 ....
....
The Dutch SH-14D has a typical antenna
VESTA (GPS ??) on the nose as well, this was made from rod on the nose.
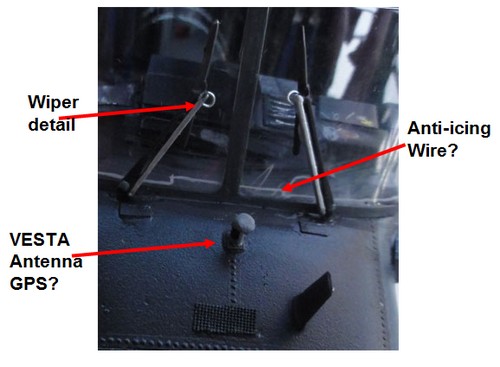
(6) The windscreen wipers are in
the kit but were detailed. The added Micromark Rivets are also well
seen. The Vesta GPS is also seen.
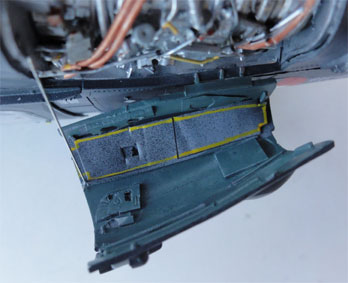
(7) The opened engine bay hatch was
further painted.
 .....
.....
The extra opened panel is also seen
at the gearbox compartment. Se also page 2 for
the slightly adapted fairing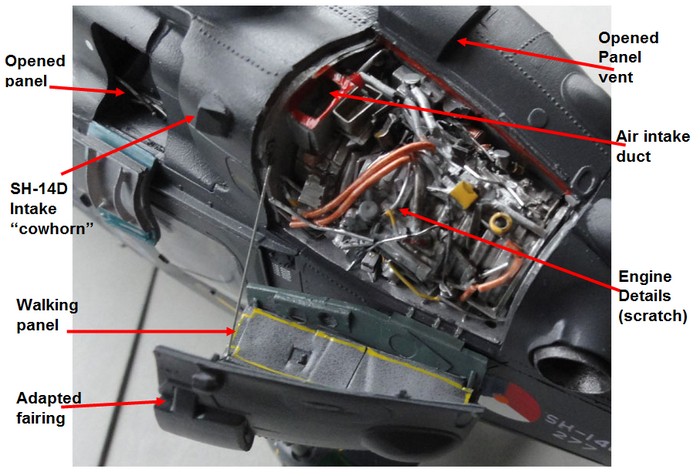 ...
...
 .
. .
.
A holding bar was added from metal
guitar string wire.
(8) On top of the tailboom, an antenna was seen again, similar to the one on the nose was added. (is it a GPS receiver?)
![]()
Finally, the overall model got a coat of gloss varnish, also to protect the decals. I used the Harder Steinbeck airbrush to apply the Gunze Sangyo Gloss Clear #H30 acrylic. Mask with a piece of board the clear windows while spraying.
That completed the 1/32 SH-14D.....
Go to next [Page 8 /end-result..... ]
Back to 1/32 scale Models.......
(c) Copyright Meindert "designer"/ All rights reserved. Your comments are welcomed by webmaster
Created this page
February 1, 2013