Dutch naval air service
[ page 4 ]
Conversion of Lynx model in 1/32 scale of Revell
... continued from page 3...
STEPS 54-60
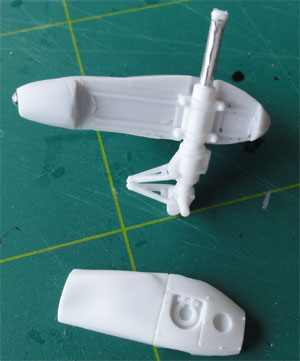
The main gear legs are fine in the kit.
For the Dutch Lynx, new resin stubwings were made (see here...) with no large ECM fairings. The parts #47,48,49,50 are not required when using these.

The cover parts #53+54 will fit after some sanding.
Sometimes parked Dutch Lynxes have their main wheel at a 45 degree angle turned. If you want this, as indicated in STEP 56, cut off the tiny fitting lugs to enable turning the leg with the main wheel to 45 degrees. I kept the gear in a straight position.
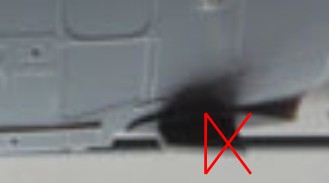
Note that Dutch Lynx SH-14D had a
Radar Warning Receiver fitted at the end of the stubwing fairing. Sand
flat each resin stubwing end and fit a small circular piece of card for
the RWR. (for a very early Lynx stubwing, simply use the resin casted stubwing).
 .......
STEPS 61-63
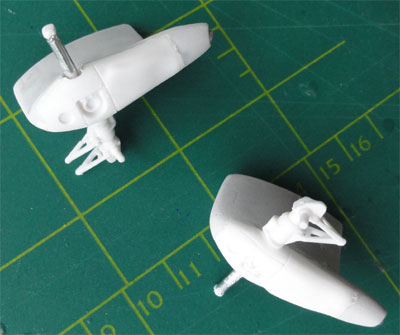
The nose gear is fine and accurate.
It will be fitted at a later stage.
STEP 64
The fitting of some parts to the
bottom fuselage is well indicated in the instructions, fit some tiny parts
later on to prevent damage.....
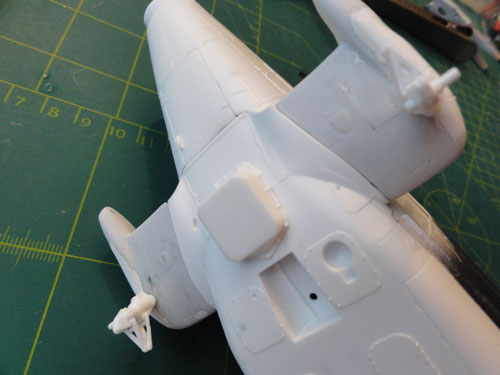
To fit each new resin stubwing, it
is required to remove the rear section of each fitting lug to get a good
fit. In the resin stubwing parts, the lug gap was partly moulded in to
help with alignment and to get a stronger joint.
Use superglue to fit the new stubwings,
fill any gaps with filler and sand smooth.
 ..
..
STEP 65
When the sonar is fitted, do not
use the cover plate part #138.
Part #213 is not needed for a Dutch
SH-14D.
![]()
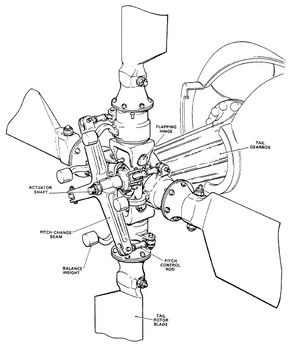
STEP 66
The tailrotor as in the kit is fine
for later Lynx versions like the Mk.88A. However, even modernized Dutch
Lynxes like the SH-14D retained their initial old tailrotor. The older
tailrotor retained the original rotating direction and retained the smaller
diameter of 2,21 meters (or 69 mm in 1/32 scale).
SH-14D: 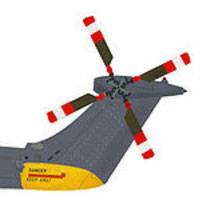
1/ remove each tailrotor blade with
a razorsaw at the inner joint near the shaft.
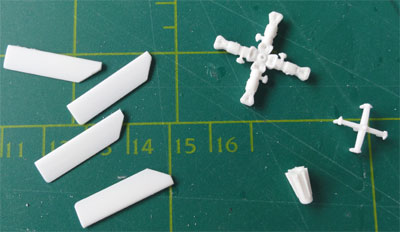
2/ remove 2 millimeter on the
blade directly next to the blade attachment casting; this will reduce the
overall diameter as needed.
3/ sand of each tail rotor blade the
"cut-out" area a bit more accurate for the older style blade.

Note that the blades are mirrored on an old style tailrotor (so fit it the other way round)
4/ reduce the lengths of the aisle part #234 and #235 by about 3 mm each. This because there is a tailrotopr fairing on the top of the rotorfin fitted previously.
5/ fit the shortened aisle parts #234 + 235 thus at the OTHER side of the adapted tail rotor!
6/ fit the lever collective part #88
The result is seen here:
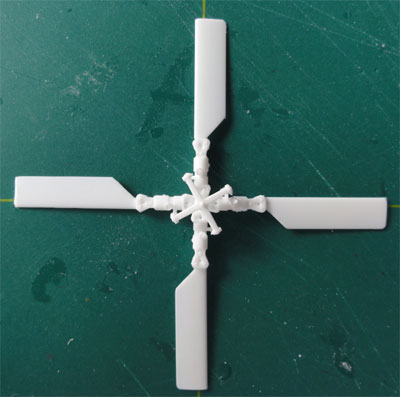
The tailrotor is not yet fitted on
the model, first painting is needed.
STEP 67
Fit additional bottom detail parts
are per instructions. For a Dutch SH-14D antenna #216 and #26 are not needed.
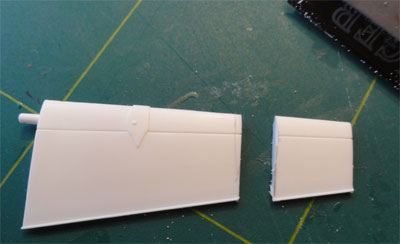
STEP 68
The horizontal stabilizer with Gurney
flap (a "raised trailing edge") is fine but has a too large span for later
Lynx version, including the Mk.88A and the Dutch SH-14D. Remove 14
millimeter at the end of kit part #58. The stabilizer is now fine.
NOTE: for old Lynx variants the kit
part can be used as older Lynxes had a larger span stabilizer but without
Gurney flap ("raised trailing edge"). Simply sand off the tiny raised trailing
edge and you have an old style stabilizer.
STEPS 69-76
For the Dutch Lynxes, the side gun
is hardly used in operations, so skip all these steps for a Dutch SH-14D
Lynx.
STEP 77
The torpedo's mk.46 look fine, and
they were also used by the Dutch navy Lynxes. Assemble if desired. I did
not use these kit parts.
STEPS 78-86
The Sea Skua missiles are not used
by the Dutch Lynxes, so skip.
![]()
On to next [ Page 5.... ]
Back to 1/32 scale Models.......
(c) Copyright Meindert "designer"/ All rights reserved. Your comments are welcomed by webmaster
Created this page November 29, 2012