[ page 2 ]
Sukhoi SU-17/20/22 "Fitter" plastic scale model in 1/32 scale
modelling report
... continued from page 1.....
The SU-17 M4 model in 1/32 had obtained its main colours for an UKRAINE air force aircraft as described on page 1.
So the details were now further tackled, starting with the cockpit.
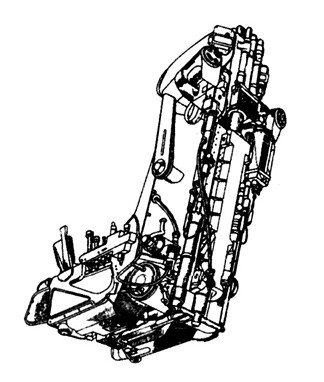
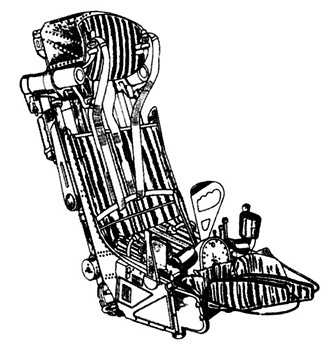
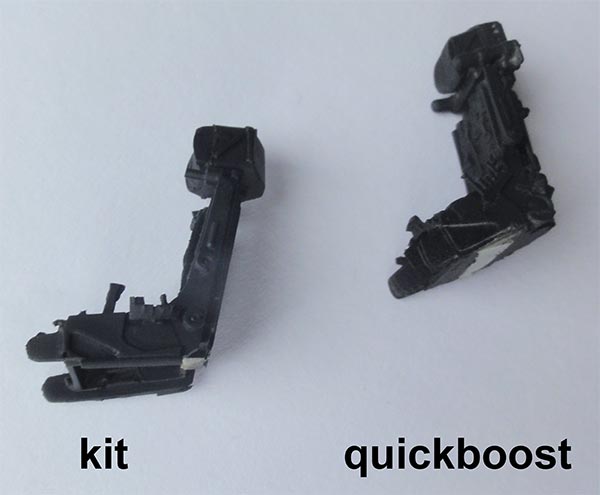
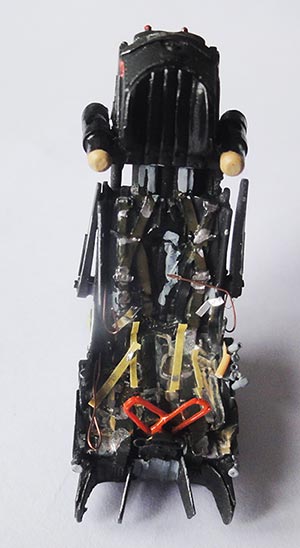
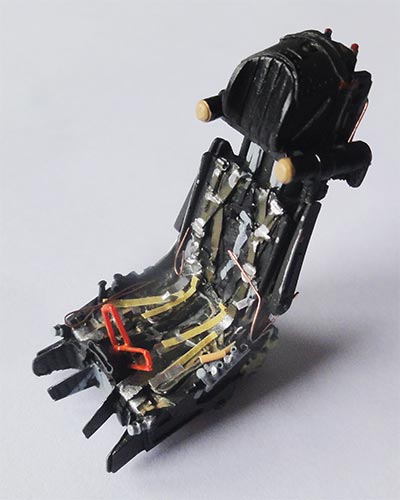
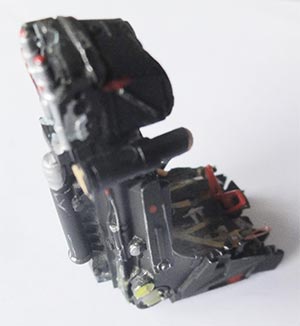
The K36 seat was detailed and it was an aftermarket Quickboost item. It had been dry fitted earlier in the tub and that was OK.
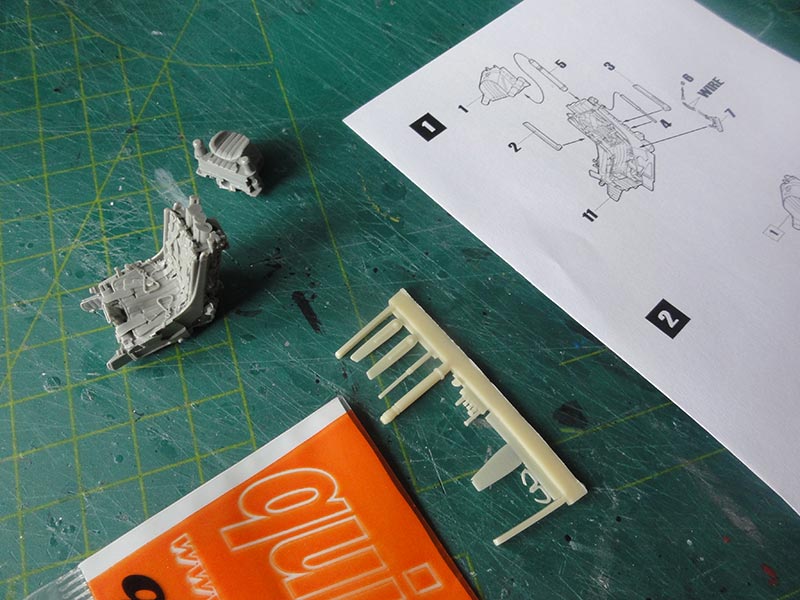
I also detailed the supplied kit seat, for the spares box. The base colour is black that was airbrushed.
Photos were studied of the real seat and various bits painted. Harness was made with tape and metal etched buckles.
The main instrument panel was made from thick card with holes drilled for the instruments/ clocks. Photos were studied. The kit provides a sort of photo negative for the main instruments but this is useles.
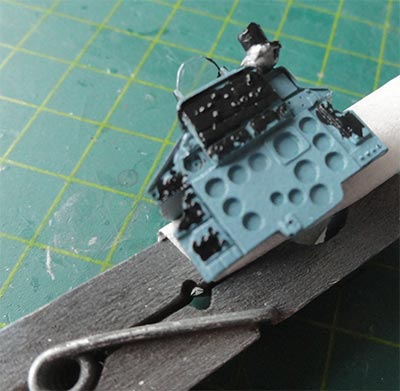
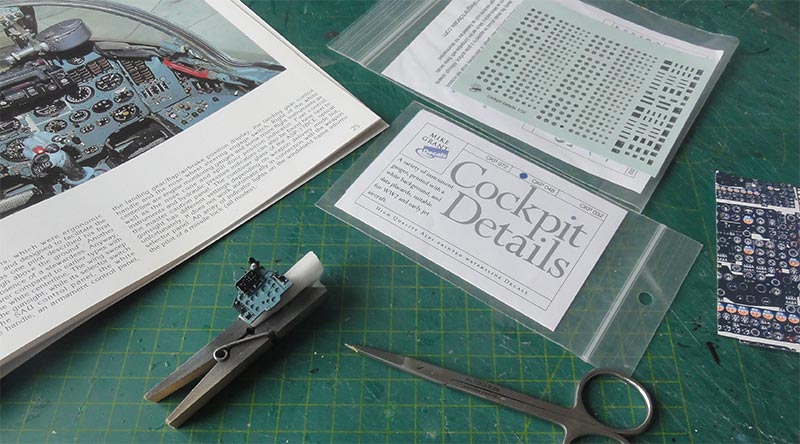
The instruments/ clocks were made with 1/32 decals from a "Mike Grant" cockpit details decals set.
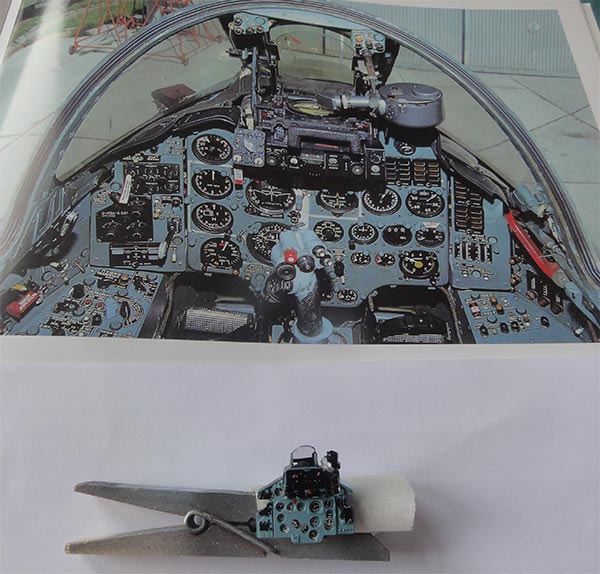
The weapons aiming sight was also installed.
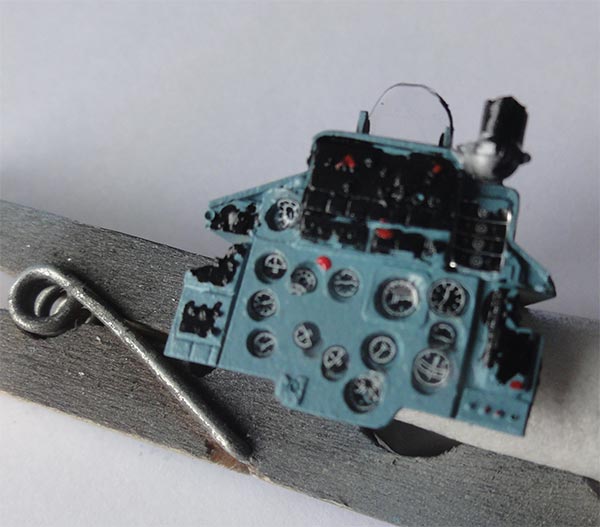
The instrument panel was not yet installed. Note how small the panel actually is, even in 1/32.
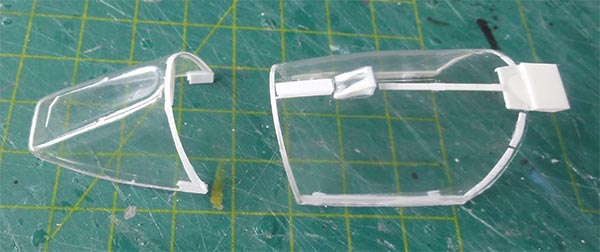
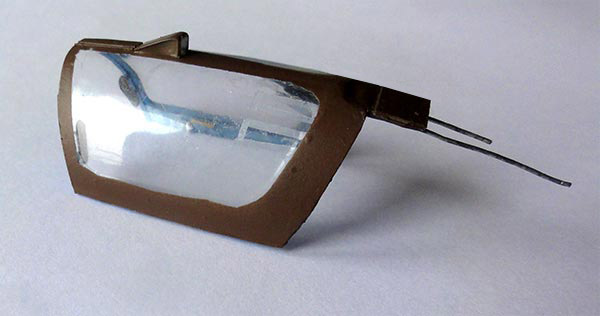
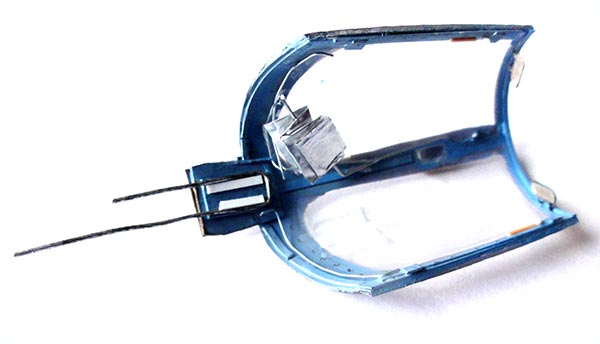
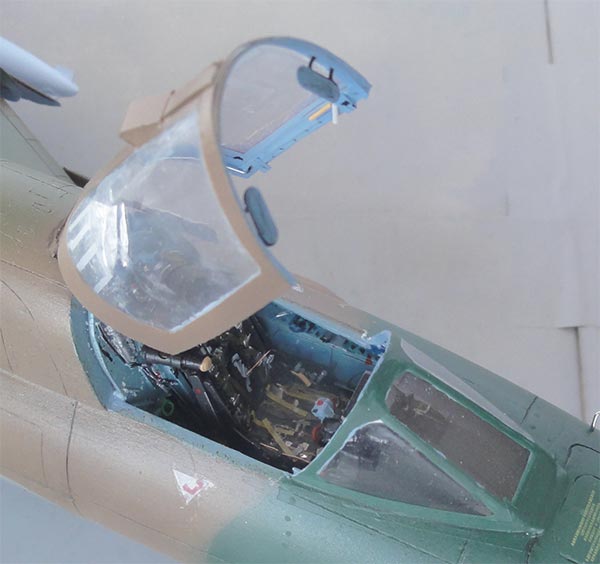
The cockpit transparancies were now tackled. The kit provides 2 vacuform pieces. The idea is to use one for making the frames and set it inside the other one. Glueing may be risky as pressure is needed so I opted to make the frames with plastic strip instead. Many photos were studied from the references.
The windscreen and canopy glass sections were cut and separated with scissors. This needs careful preparations.
Dry fitting showed the windscreen will fit and tiny gaps at the base need to be filled.
There is a rear view mirror at the central frame. I tried to keep this transparant with white glue.
The insides of windscreen and canopy were hand painted russian blue.
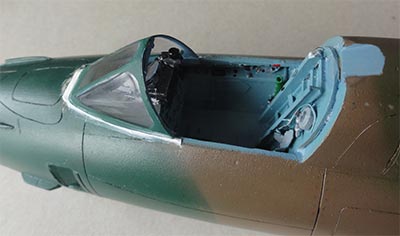
Next the windscreen and canopy were masked and the outsides airbrushed in the surrounding camouflage colours.
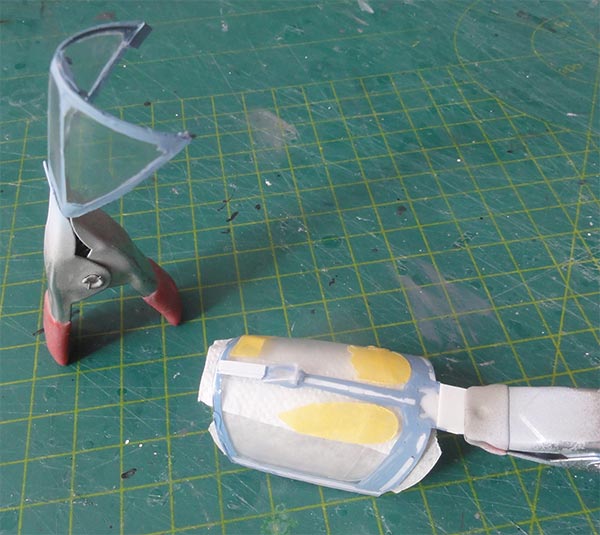
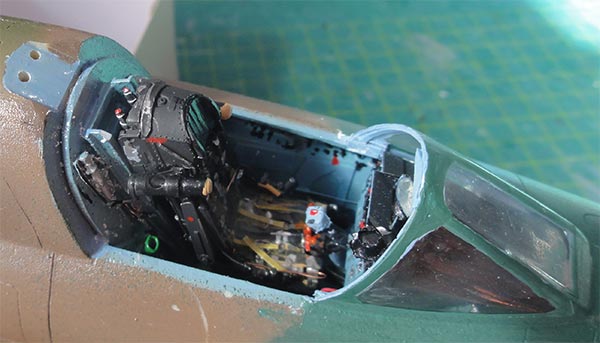
On the insides' additional details were added. A sort of foldable sun curtain is seen the pilot can use in case the sun makes reading the instruments difficult. Anti-mist wires were set made from thin transparant tape slices.
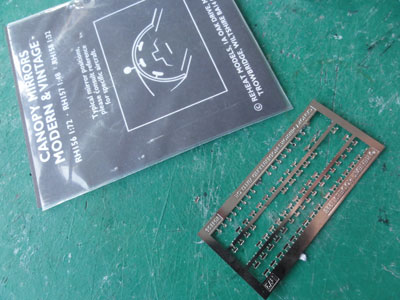
Two mirrors were installed from an Reheat Models etched metal set.
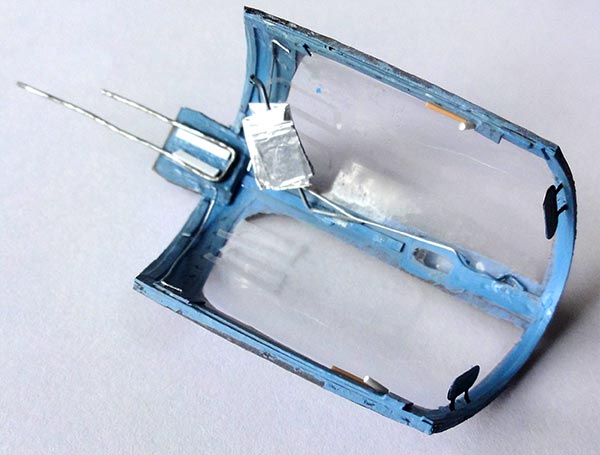
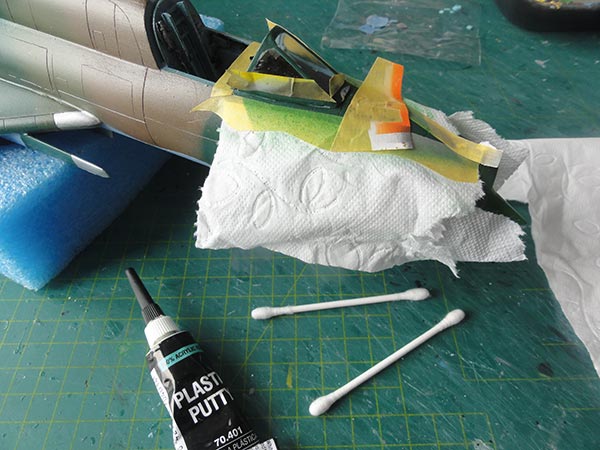
The prepared instrument panel was set as were the pilot foot control pedals. I found a few in the spares box. The windscreen was installed and small base gaps filled with Vallejo Plastic Putty. Mask the surrounding areas and immediately trim smooth with cotton swabs.
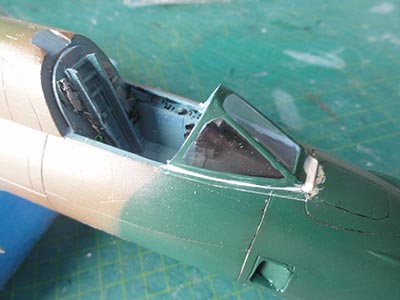
Mask again and airbrush, in this case [c] dark green. Ensure the glass sections are not damaged or fogged with glue.
The pilot control stick as provided in the kit was painted and set. Check out with the prepared Quickboost seat and it was a tight fit. The seat still was not yet fixed. Inside the windscreen frame some tiny details were added and painted.
In the photos the extra rear hinge openings are seen to set the canopy. An important modelling step was now ready. On to the next...
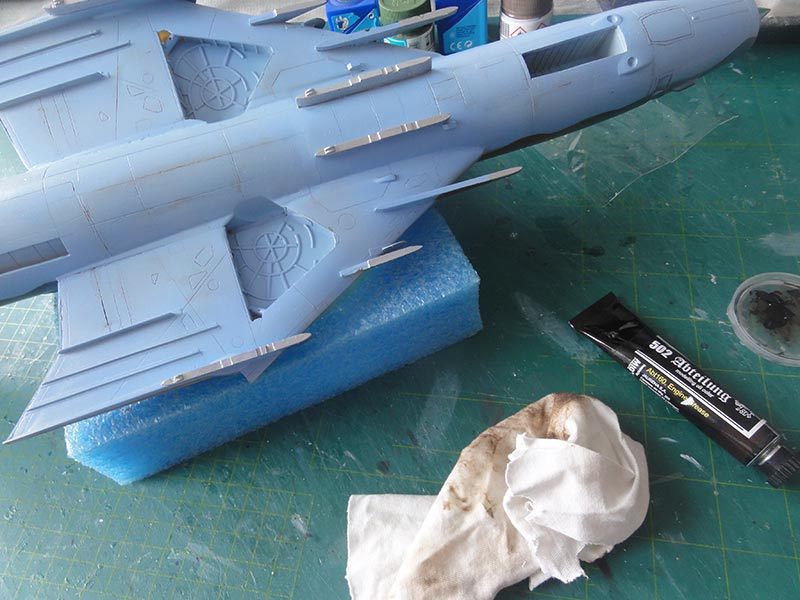
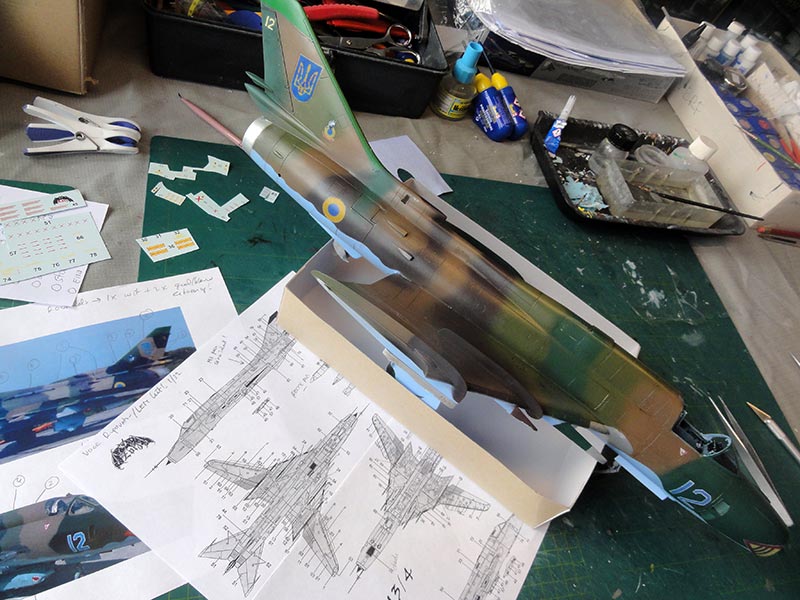
The UKRAINE Sukhoi jets showed they were used and show wear! So the model would need quite some weathering and slightly different panel effects through wash, slightly retouched colours and even pastel/ powders.
As first step, all the model surfaces got now a gloss varnish layer as preparation for a first wash for the recesses panel lines.
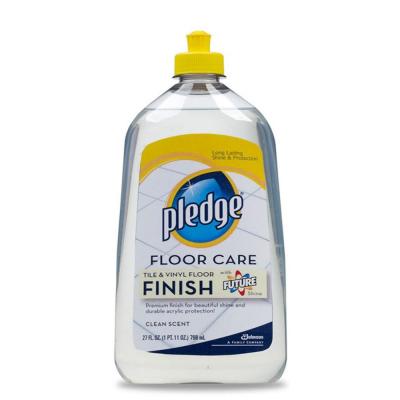
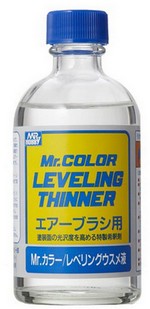
A few gloss varnish coats were airbrushed of acrylic Johnson Future/ Pledge thinned with 10% Gunze Sangyo Mr.Color Leveling Thinner for a better flow. This gives a good gloss surface.
Let dry for an hour. Than with a cotton swab oil from ABTEILING X 502 artist oil was dabbed in many recesses. Let dry for a few minutes or so and than wrub the surfaces with on piece of cloth to remove most oil, the oil wash will remain in the recess. The many panels stand out a bit more now.
Let dry for 48 hours as artist oil takes this long to completely dry.
The gloss surfaces are also a good base for the decals application which was to be done next.

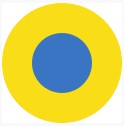
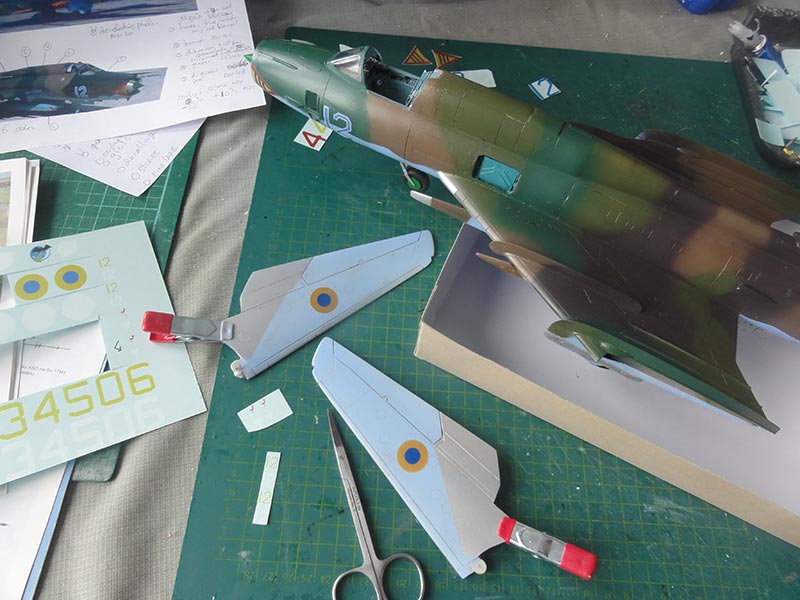
The UKRAINE decals for the SU-17 M4 model were home designed and laser printed. I studied various references and internet and designed the decals in 1/32.
Some extra spare decals are also on the sheet. Note the white printed underlying decals for the roundels and badges. These white base decals are needed to get a good coverage over dark camouflaged colours. If you want a laser printed decals sheet for your LEM Sukhoi model, let me know as described on my decals page... (please no commercial requests, only for you as modeller).

Printing of white is also possible with the special OKI printer and indeed is needed for some markings.
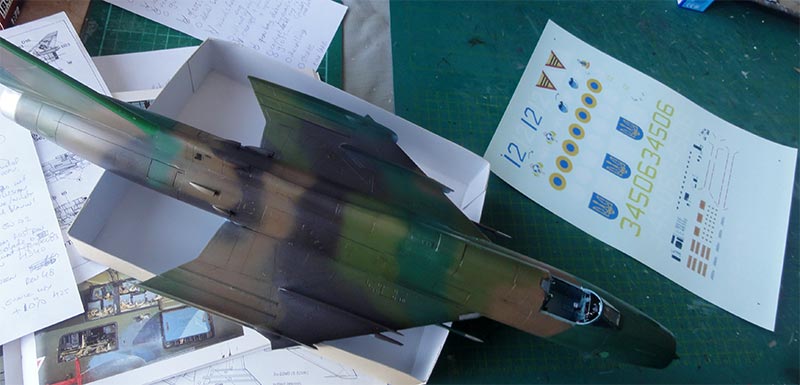
Decalling started with the UKRAINE nationals markings. A white printed underlaying section was set first and than 2 coloured decals as the yellow bits as a laser printed decal may be a bit translucent.
It worked out fine.
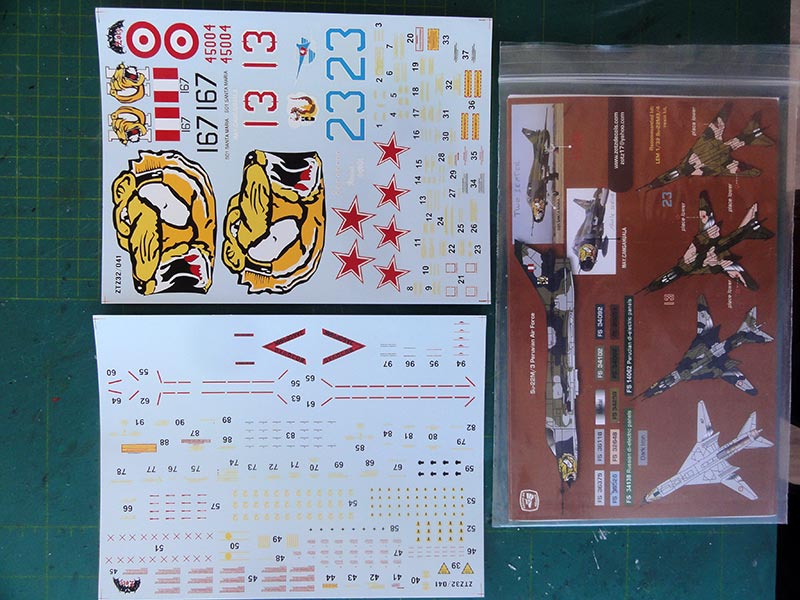
Some smaller stencils and markings were used from the only 1/32 available ZOTZ SU-17/22 decals sheet #32041. Some others came from the spares decals box.
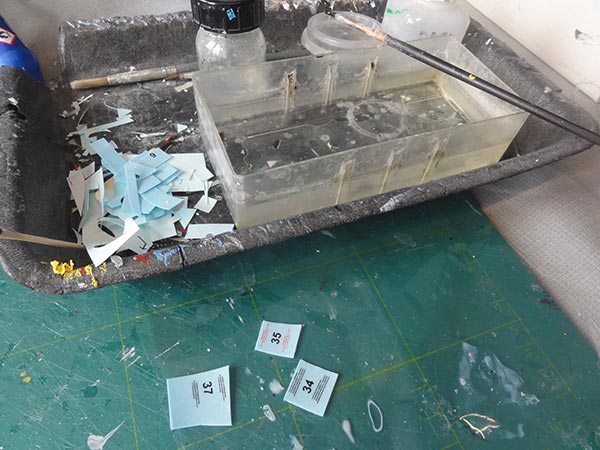
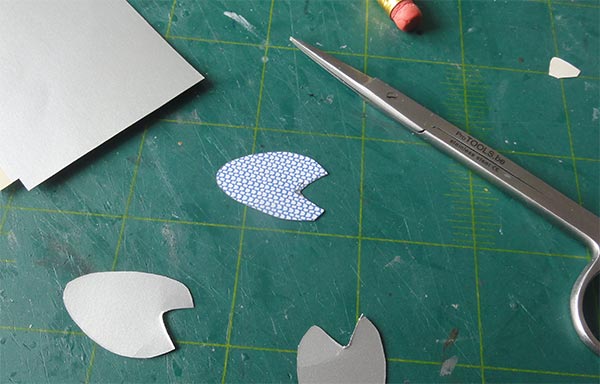
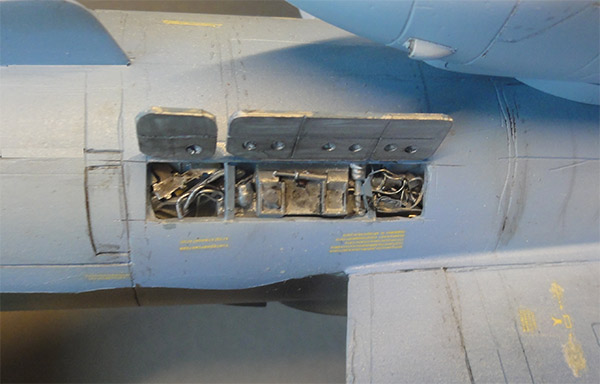
The two gun blast panels were made with decals. A pattern was made from paper, their fit checked with the model and than the decals cut from an after market aluminium decals sheet.
All decals setting took some 2 days.
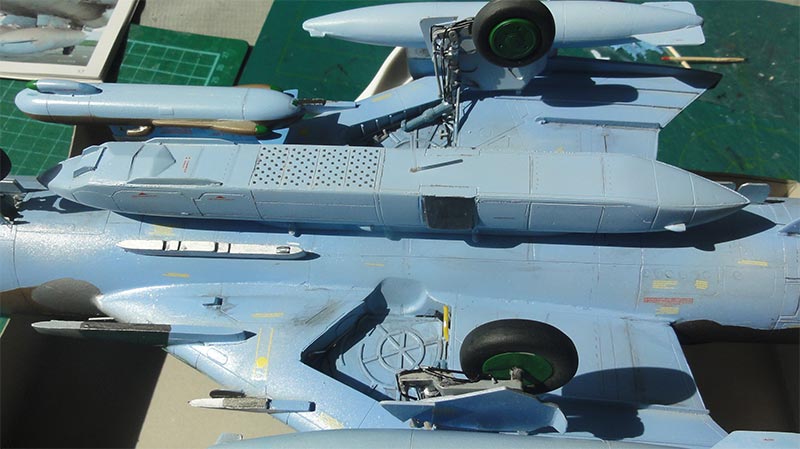
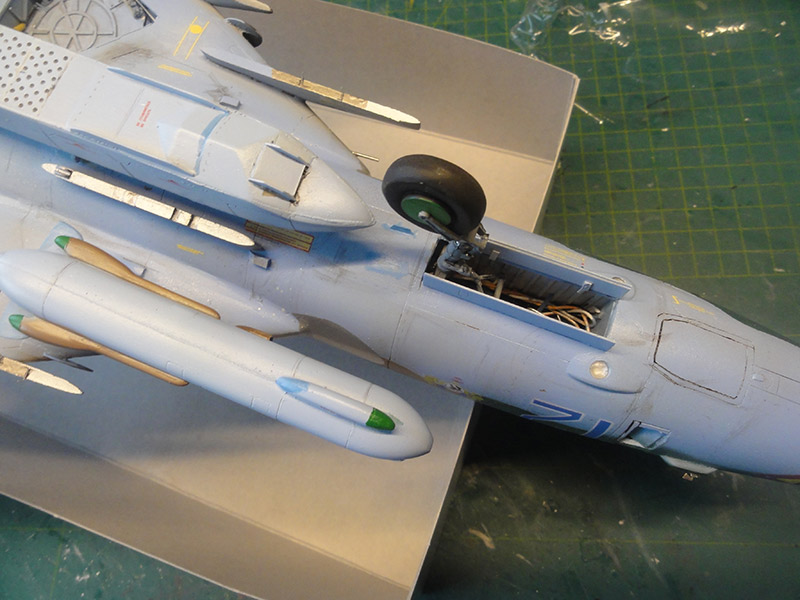
The model was now ready to get the details such as landing gears and other prepared parts.
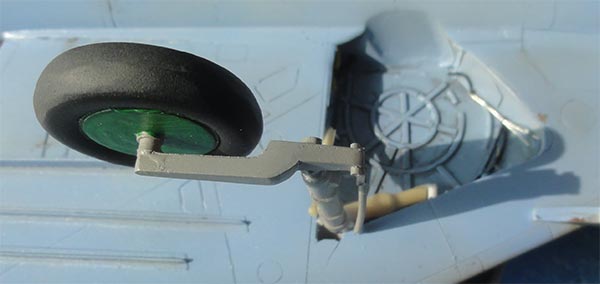
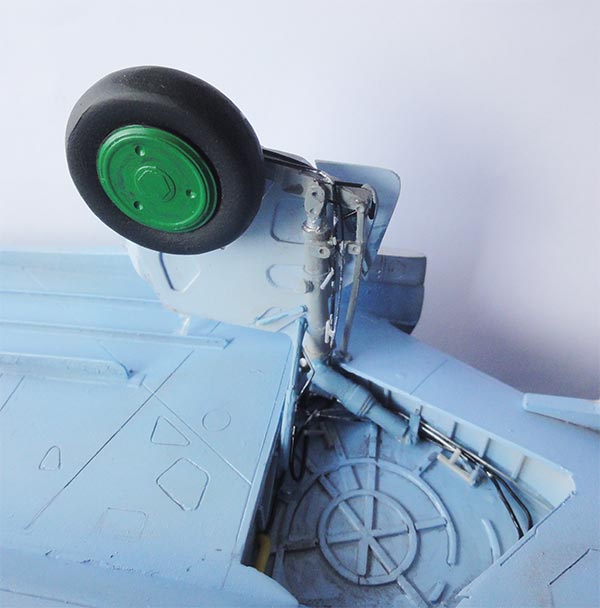
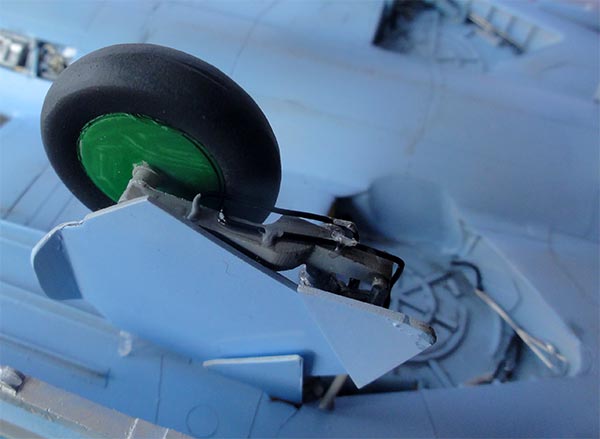
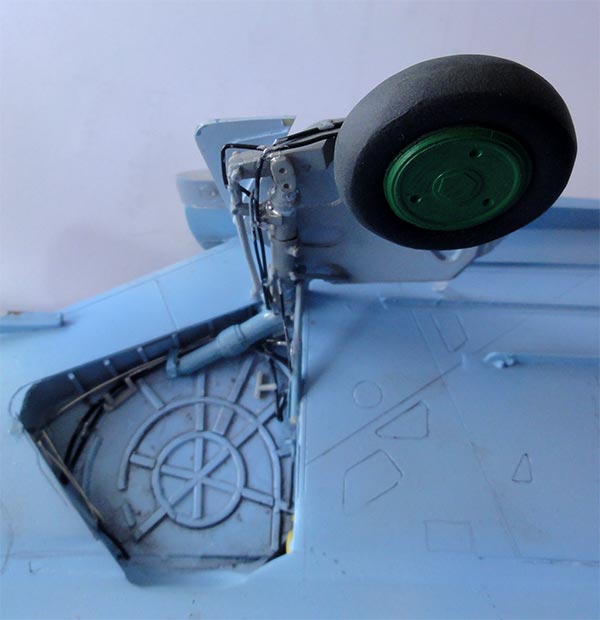
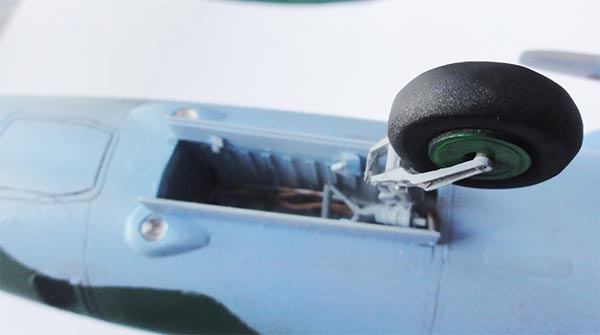
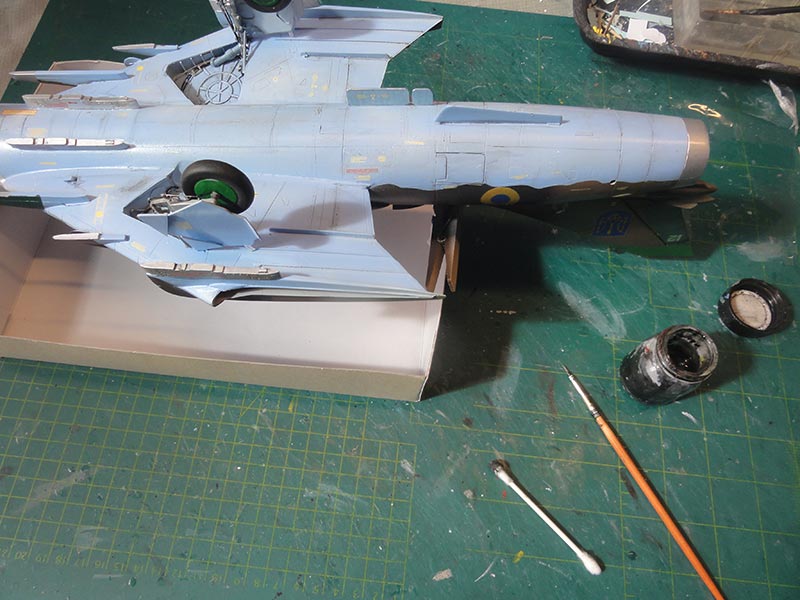
The main gear was set as per kit but I needed to drill wider the holes in the wing bay for the metal peg. Than had to extend the leg base with 2 millimeter plastic tube to get a 90 degrees angle and strong joints.
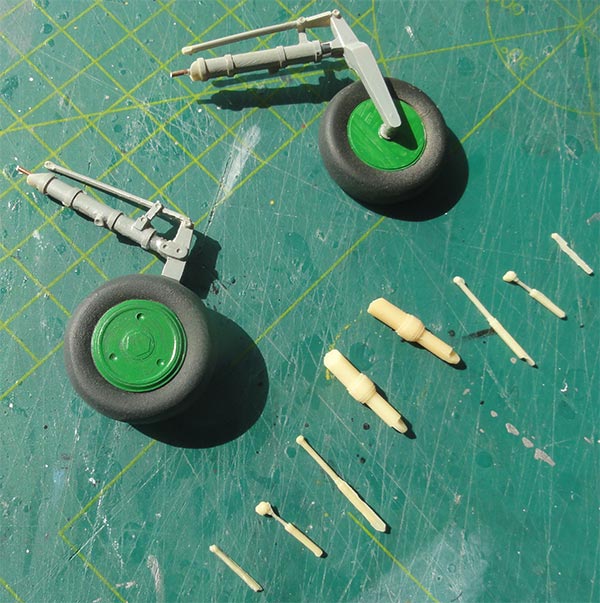
Note that the gear struts were painted light grey. On many Sukhois this varies as many also are painted light blue. The hubs are were painted Revell laubgrun #364 acrylic.
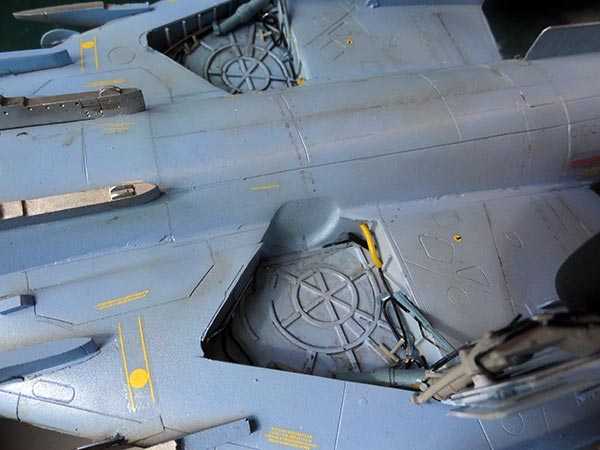
In the bays extra hydraulics were added with wires and bits looking at the references. It takes time but worth the effort for a 1/32 kit. I used flexible lead wire as well from JMC Hobby lead wire.
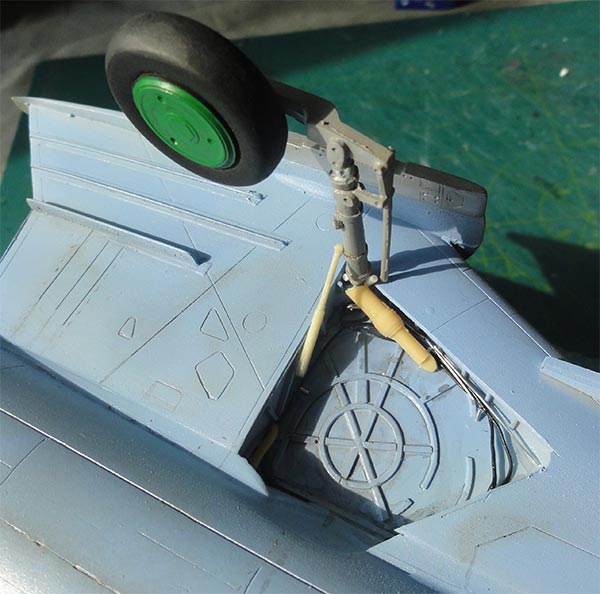
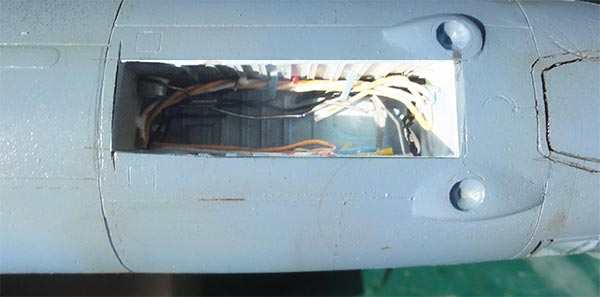
Inside the nose gear bay wires and details were added as well.
The nose gear leg and fork parts are a bit vulnerable. Thick superglue sets the joints.
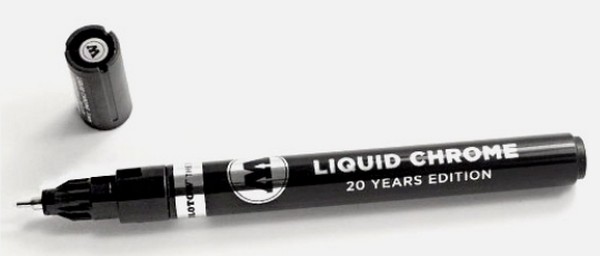
The landing lights are in the kit, very nice. Their recesses were tipped chrome with a MOLOTOW liquid chrome marker and than the lights installed. The oleos of the gear struts also got tipped this chrome.
The small opened up engine hatch was detailed with scrap looking at photos. A pair of hatch doors made from plastic card, painted and installed.
Now, the next round of weathering was done. Real Sukhois really show their usage, certainly in the 1990s in UKRAINE.
A wash mix was prepared with 5% mat dark (black) acrylic paint and also dark grey paint with 95% mat varnish. Off course there are also other ways to do this. Apply at the various panels with a brush and than wipe with a cotton swab and tissue "in air flow direction".
The outboard wing halves got their anti collision lights. Their notches had been carved out earlier. These light covers were made from transparant bits and faired in with Microscale Kristal Klear.
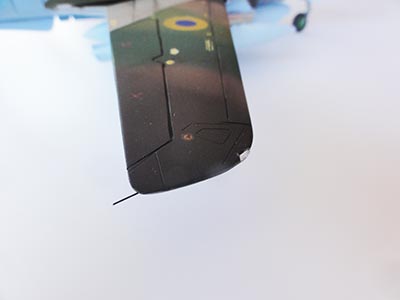
A few static discharger wires were set made from thin black stretched sprue. One at each wing tip, inside each wing fence, stabilizer tip and vertical tail.
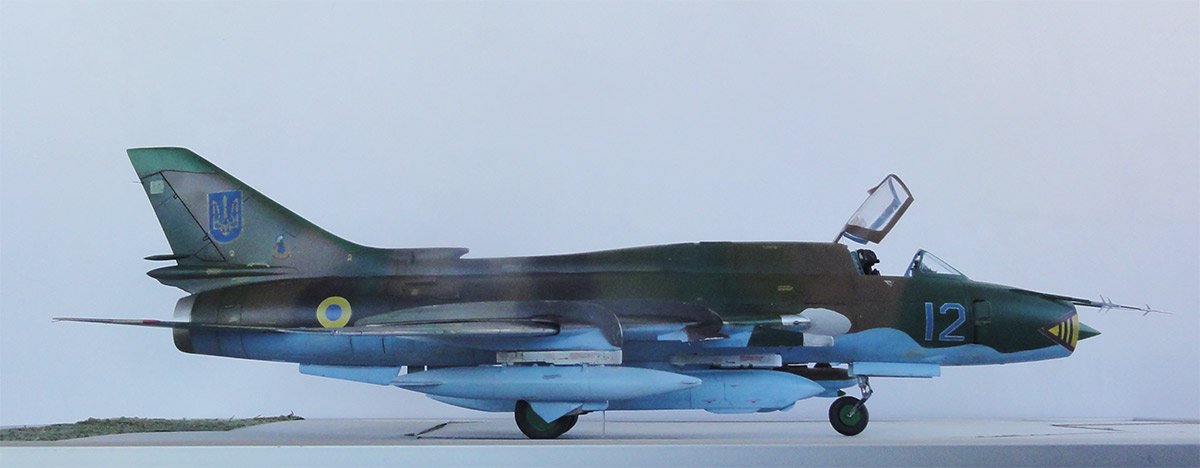
The wing halves were set in the wing gloves. It is a tight fit and a little pressure persuation was needed to get these in place. They were fixed with thick superglue. The wing is swept forward on parked aircraft.
The prepared horizontal stabilizers were set fixed with thick superglue. Their anti flutter stabs have red tips.
The model would be nice when fitted with some "stores".
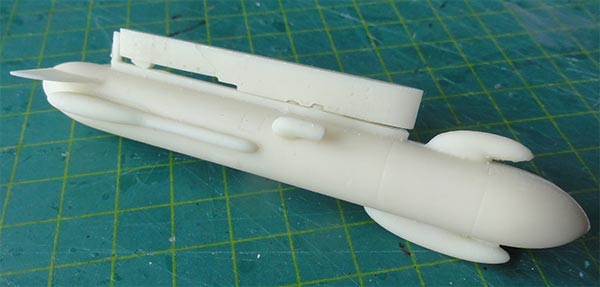
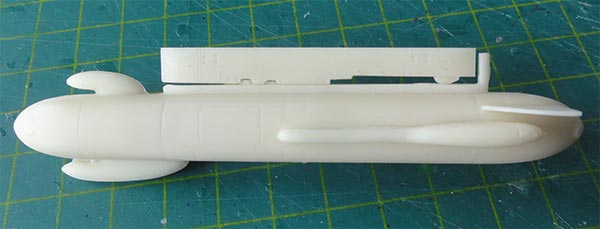
The kit has quite some stores/ armament with their pylons and racks in the kit package but I wanted to have some additional options. So the purchased aftermarket LEM kits set was now tackled. The castings are nice and these resin parts have no large mould blocks. Just a little assembly is needed with superglue.
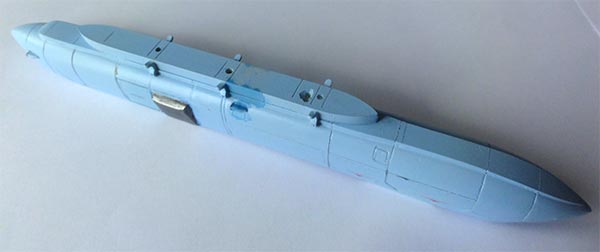
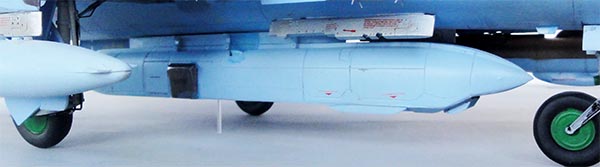
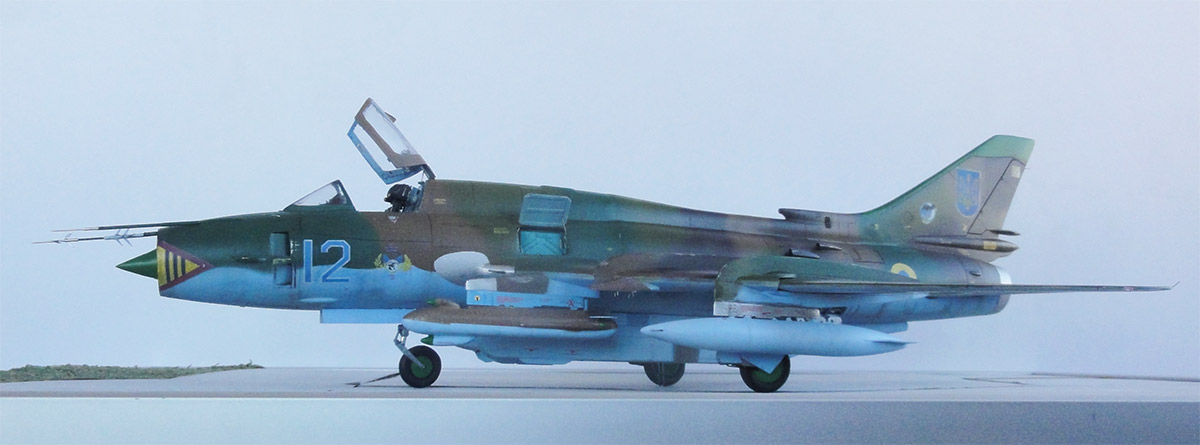
Here the 1/32 resin KKR-1TE reconnaissance pod is seen assembled. The large central pylon is included and this is a large pod!
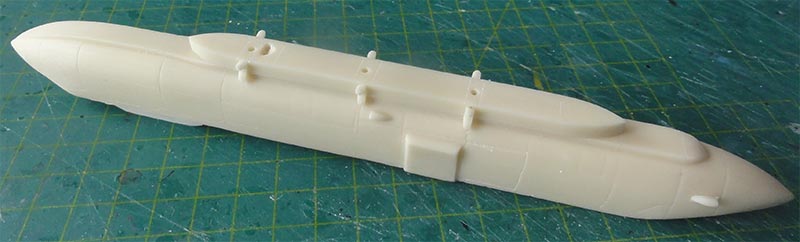
I saw on photos that before take off a protecting cover is set at the large camera front window, this was installed.
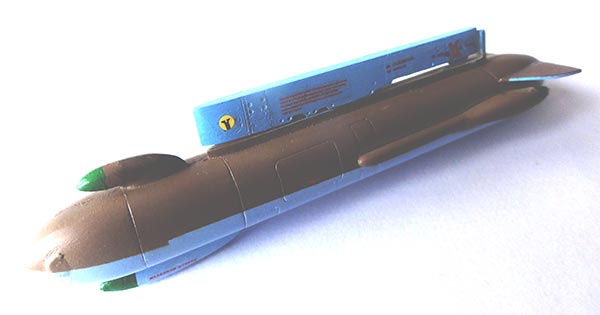
It got the light blue finish and a few hatches suggested with aluminium decal. The smaller stencils had also been home designed and added.
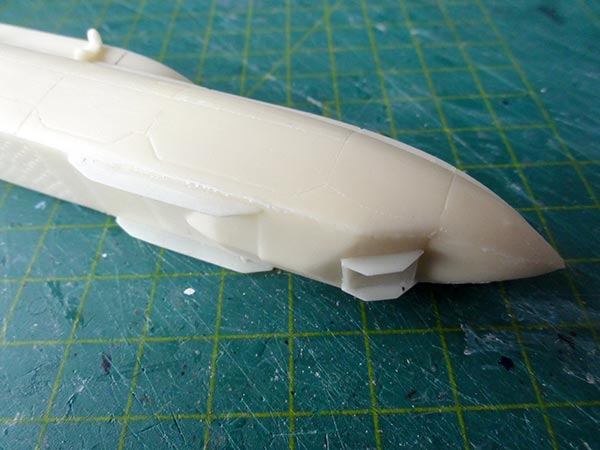
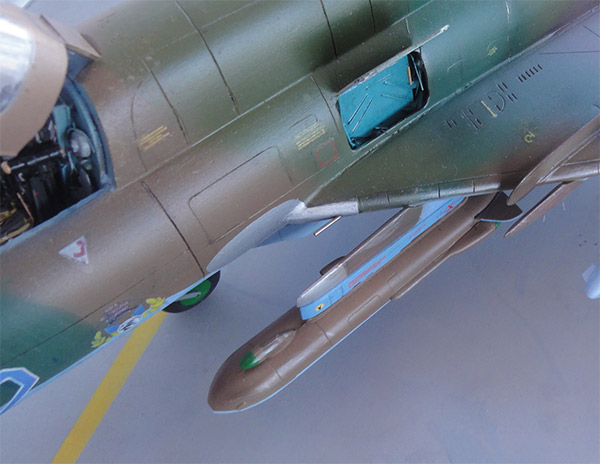
The set also have a nice SPS / V-141 MVGKE ECM pod with its pylon:
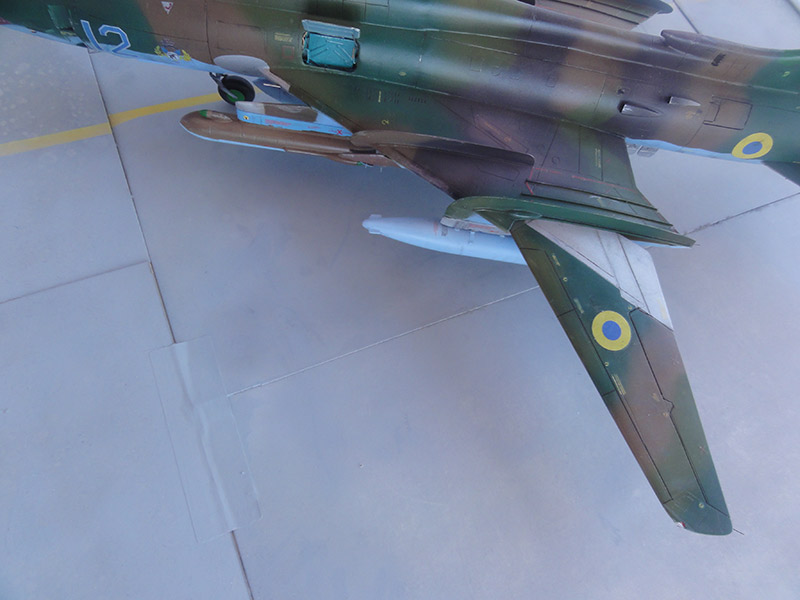
The colours of these pods varied depending on the air force. The lower surfaces here light blue and upper surfaces brown/ dark earth.
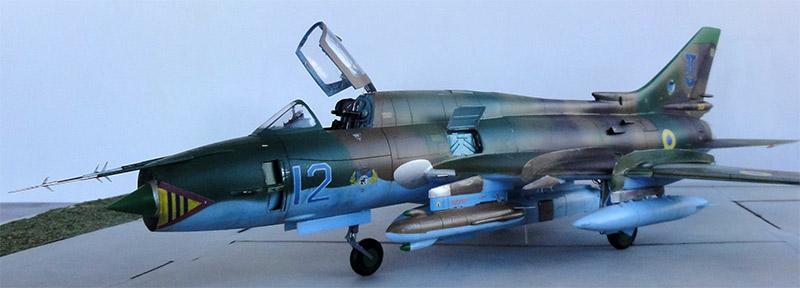
The stores are seen here installed. The pylons without any stores are also seen and got a few fixation bolts.
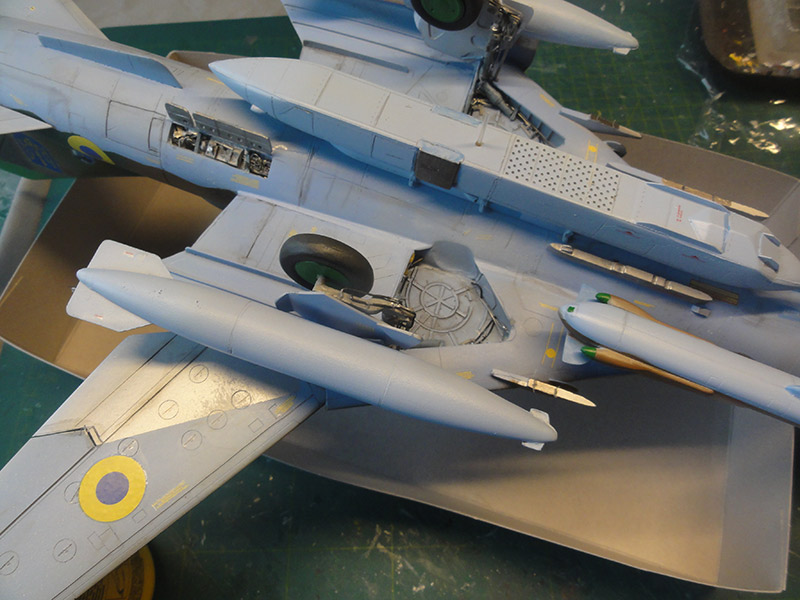
The gun nozzles were made from metal hollow pipe bits. The two bits were set at the inboard wing leading edge next to the blast panels.
I concluded now that the total weight of the model with stores is probable too large for the landing gear to hold in the long run. Although the kit gear legs have metal rods for strength I decided to take no chances here. So in the central recon pod a whole was drilled to get a transparant rod. The pod was installed. The rod takes about 50% of the weight and relieves the gears.
The fuel tanks are seen here was well with their pylons.
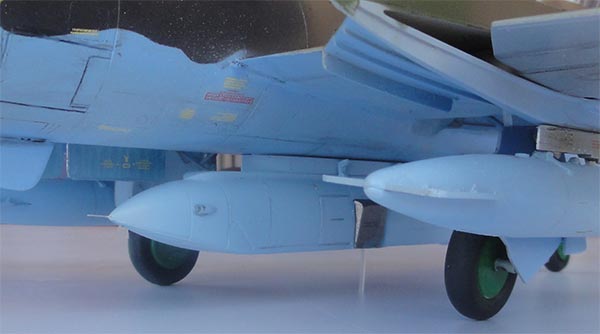
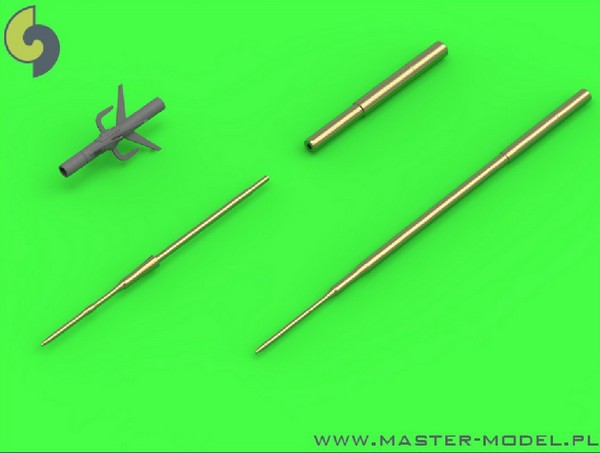
For the 2 nose pitot tubes I adapted a 1/32 MASTER-MODEL set #AM32-091 for the SU-25. The very delicate set includes the vanes. It needs to be changed though as on the SU-17 the pitot needed is longer and needs to be extended. The long pitot tube was installed on the nose. The pitot tube next it was installed as well.
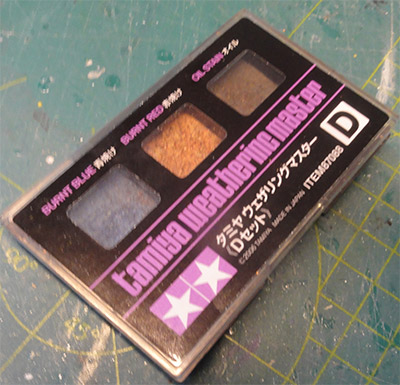
A third round of weathering was applied with a pencil, some rivets were also suggested on the airframe. To get a few different colour effects, powders were used from a Tamiya weathering set to at a few spots for a well used look. This was done with the set' supplied sponges.
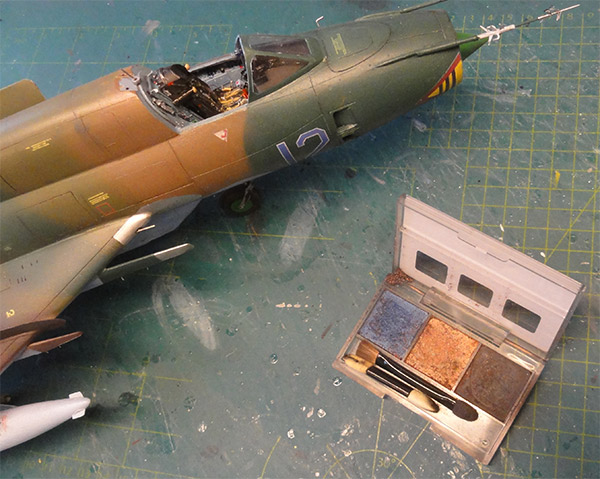
It looked a well used and weathered jet now.
A semi-gloss varnish was airbrushed over the entire model to get an even sheen.

Johnson Future/ Pledge gloss floor care varnish with 5% Tamiya X-21 "flat base" with the usual technique. Add a few drops of Mr.Color Leveling Thinner (acrylic). Shield of the windscreen and cockpit when airbrushing this clear coat.
The prepared ejection seat was installed in the cockpit.
The canopy can be set and can be removed if needed as 2 thin metal were can be pushed into 2 drilled holes. At the raised canopy rear a hydraulic pin was set made from a needle piece.
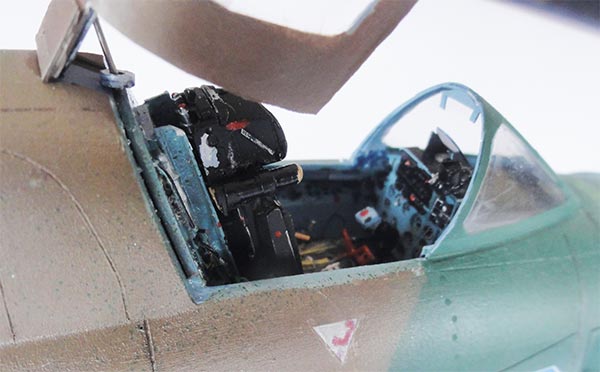
Note the mirrors and bit inside the canopy.
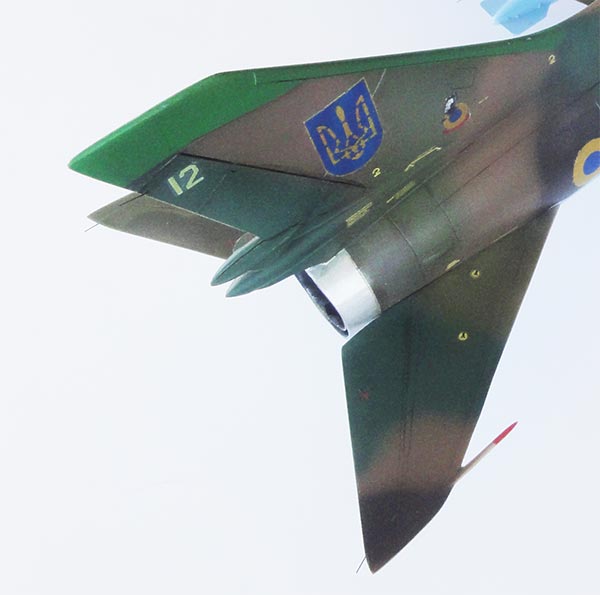
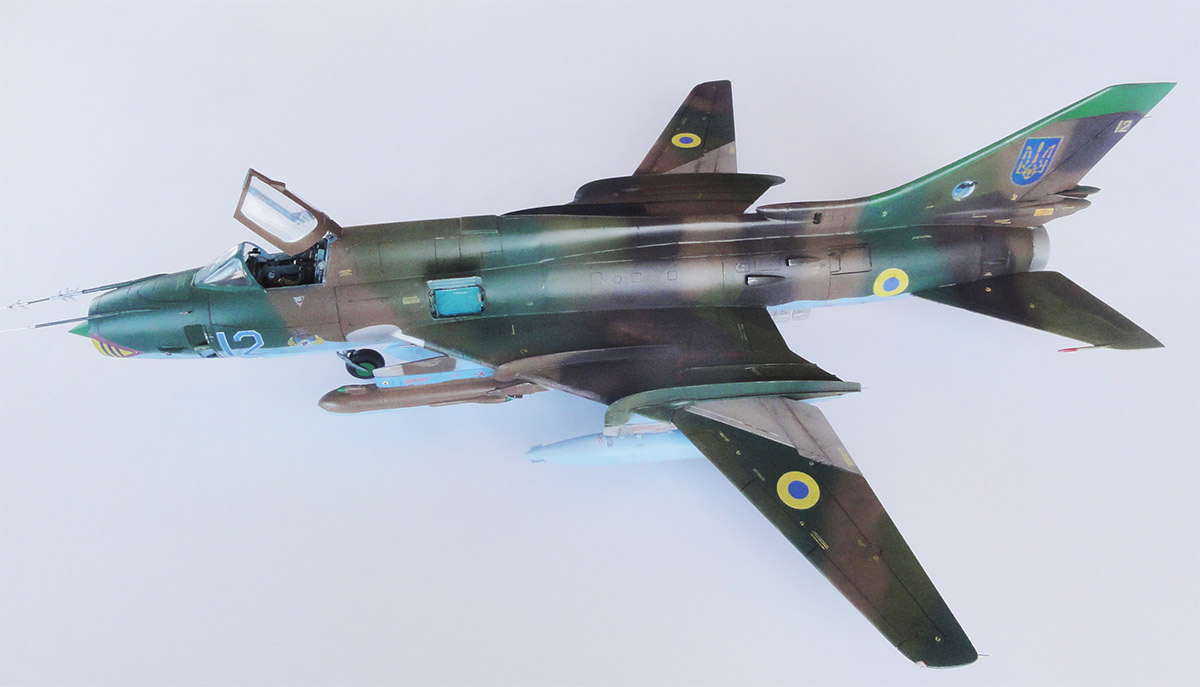
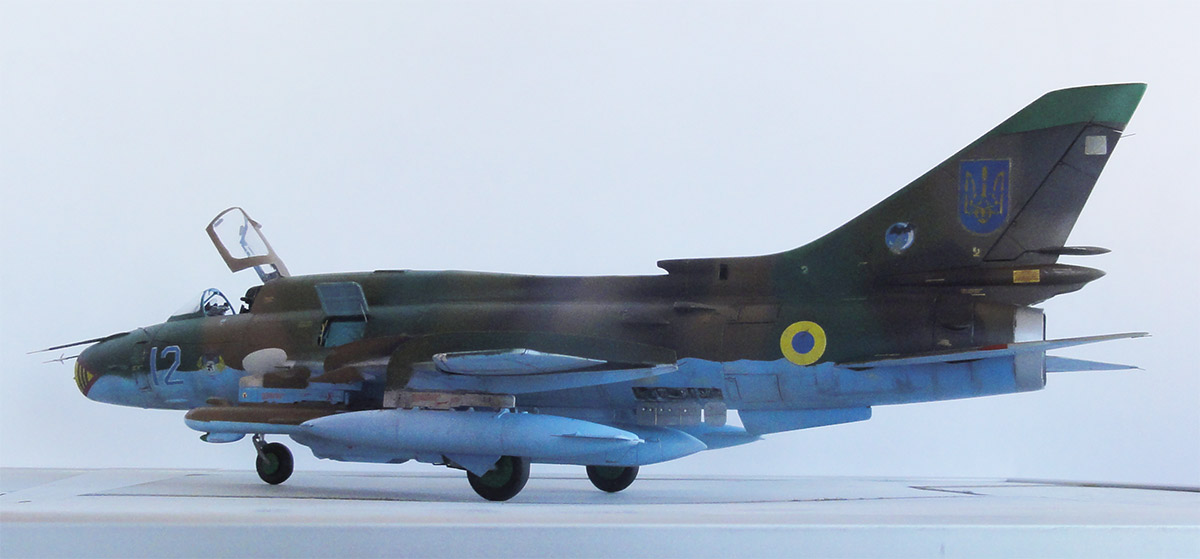
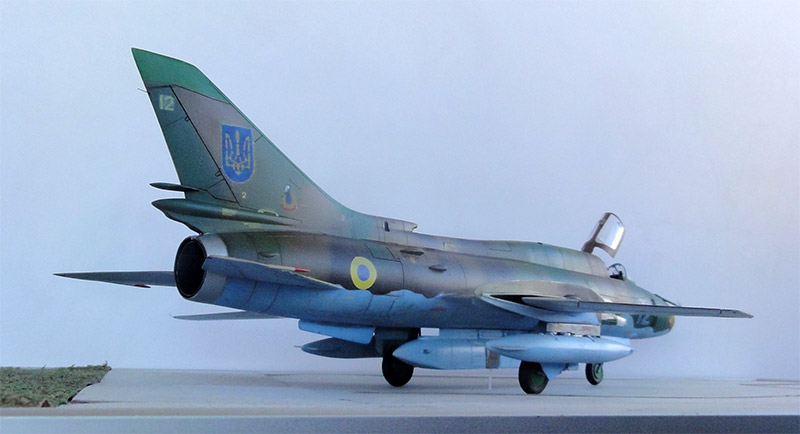
That completed this large and unique 1/32 SU-17 M4 model of a very special air force: UKRAINE
UKRAINE
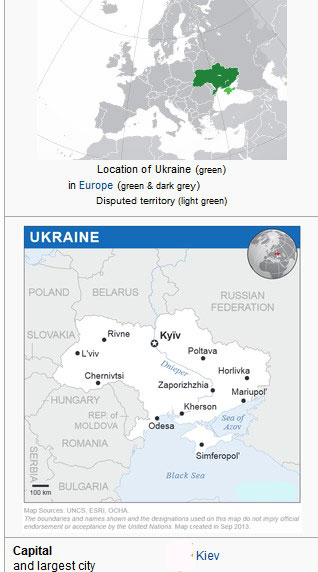
[area: 603,000 sq.km|population: 41,4 million|capital: Kiev ] figures before the attack by Russia and fierce war.
The UKRAINE air force had after independence in 1991 a mixed fleet of aircraft including some 50 SU-17 M3, M4R and UM3. All SU-17 were retired from active UKRAINE service by 2004. Some were scrapped and others put in storage. In 2005–2007, 24 SU-17 underwent overhaul and were sold to Yemen and Vietnam. A few aircraft were still operated a few years by the Zaporizhia technical plant to train pilots and to test equipment for follow-up aircraft.
(unfortunately the situation has changed since than because of the agressive Russian invasion of the Ukraine and still as of today the biggest war since 1945 in Europe).

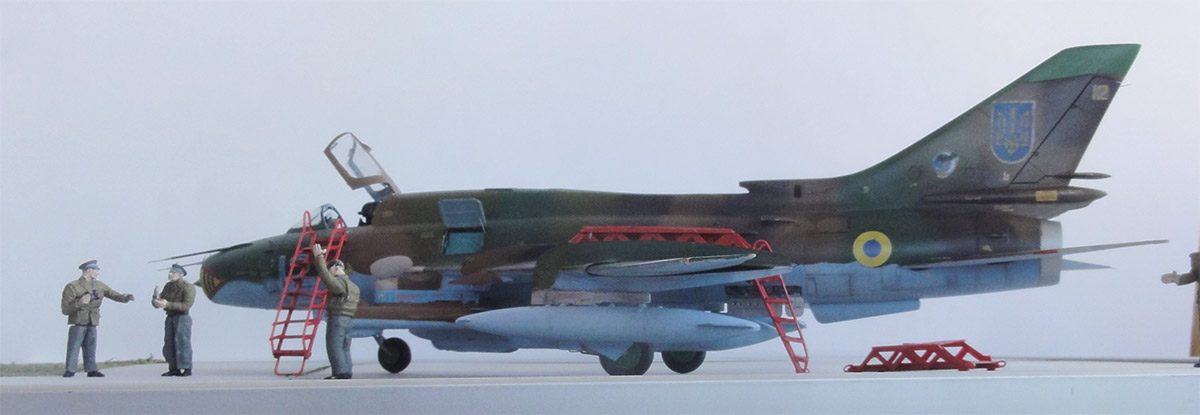
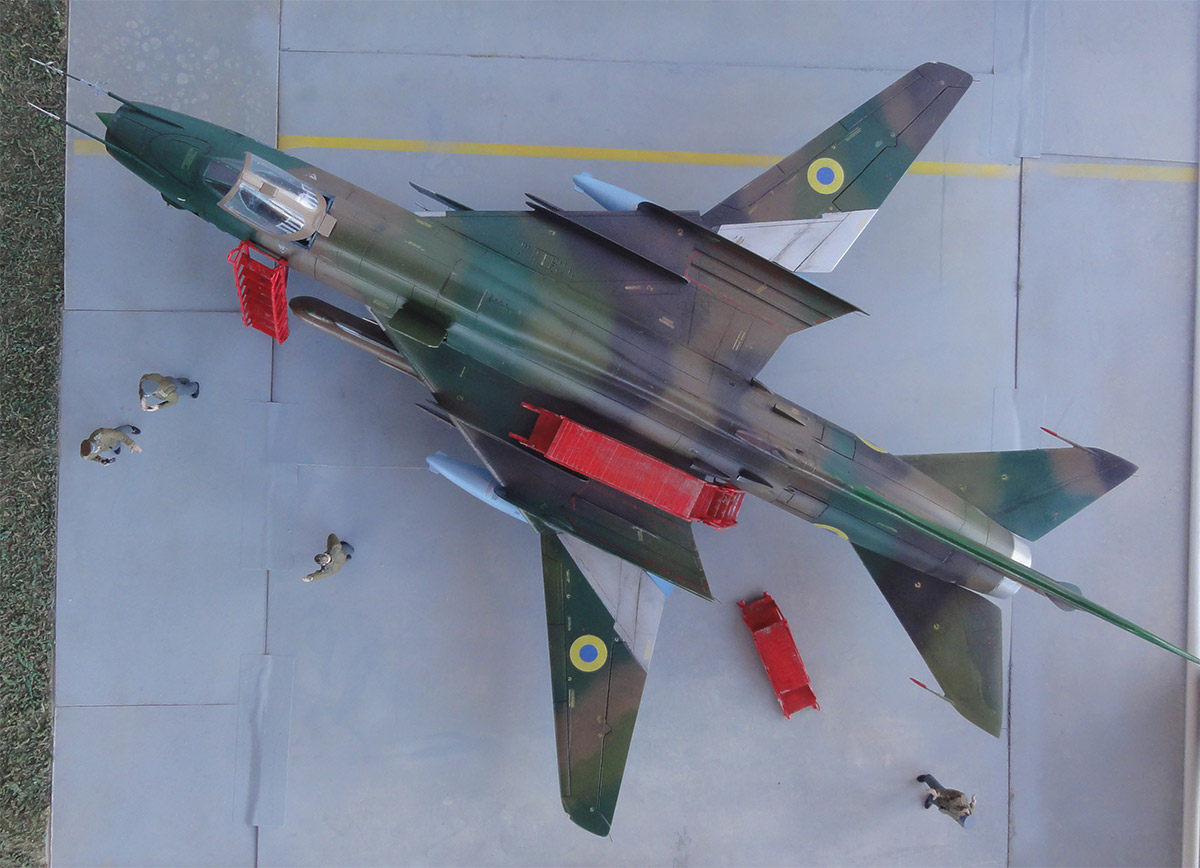
SU-17 M4, UKRAINE air force, "blue 12", as seen in 1995. Probable serial 6712 and flown until 1998.

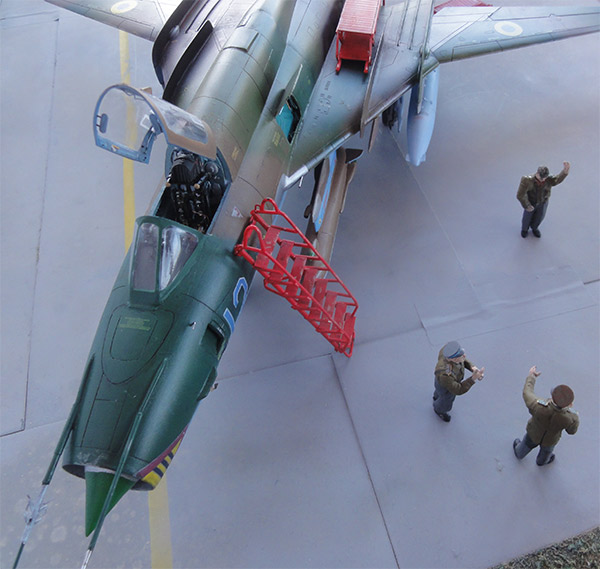
For a simple diorama some ladders and platforms were scratch made from plastic rod and sheet. Looking at photos, some typically used items were made as seen on base SU-17 platform maintenance.
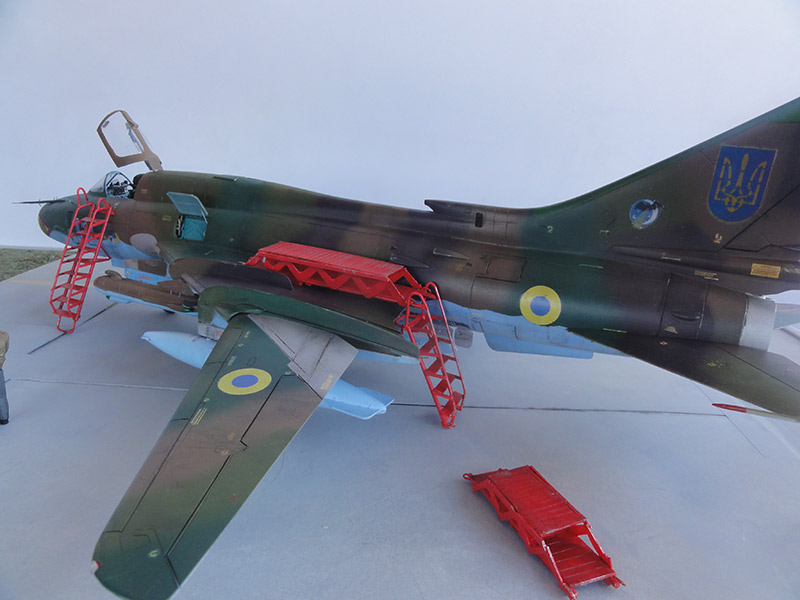
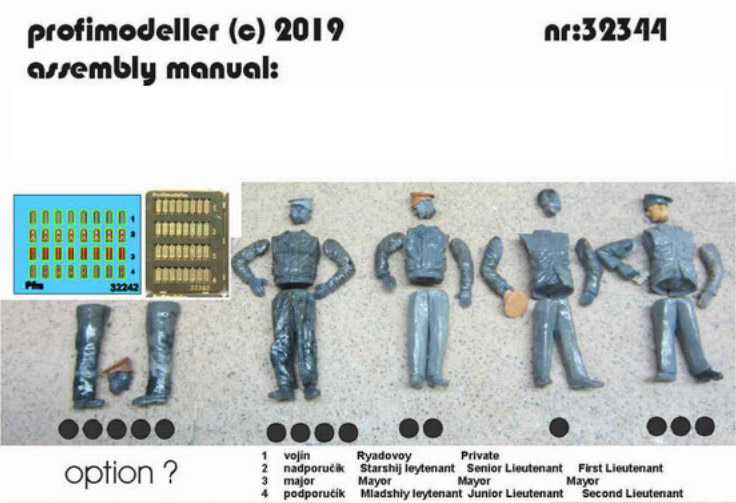
A 1/32 scale crew was made and painted from Profimodeller set 32344.
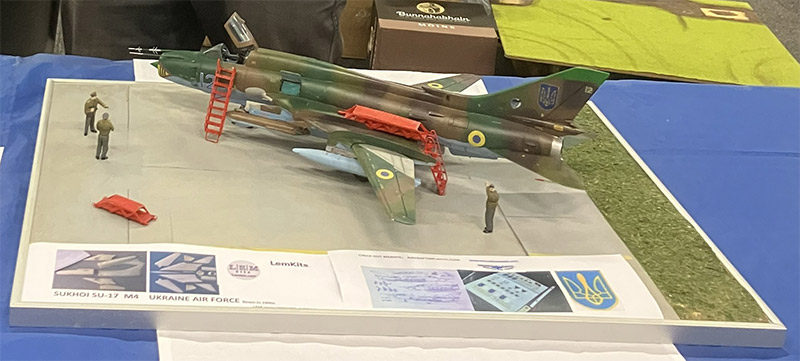
The diorama was kept simple and is not permanent as I have no room in the hobby display cabinets. Only set for display at local model shows.
A unique 1/32 model of the SU-17 M4 UKRAINE is now in the collection.

The model was awarded "BEST OF SHOW" at the IPMS Nederland Euro Scale Modelling 2025 of November 29, 2025.
Please consider this as tribute to all Ukraine modellers in these difficult times for Ukraine.

"Long live Ukraine" / "Slava Ukraini!"
Back to 1/32 plastic scale models.......
(c) Copyright "designer"/ All rights reserved. Your comments are welcomed by webmaster
Created this page November 28, 2025