in 1/32 scale
[ page 4 ]
F-86D (called "Sabre dog") 1/32 scale Kitty Hawk kit
... continued from page 3....
DECALLING AND MARKINGS
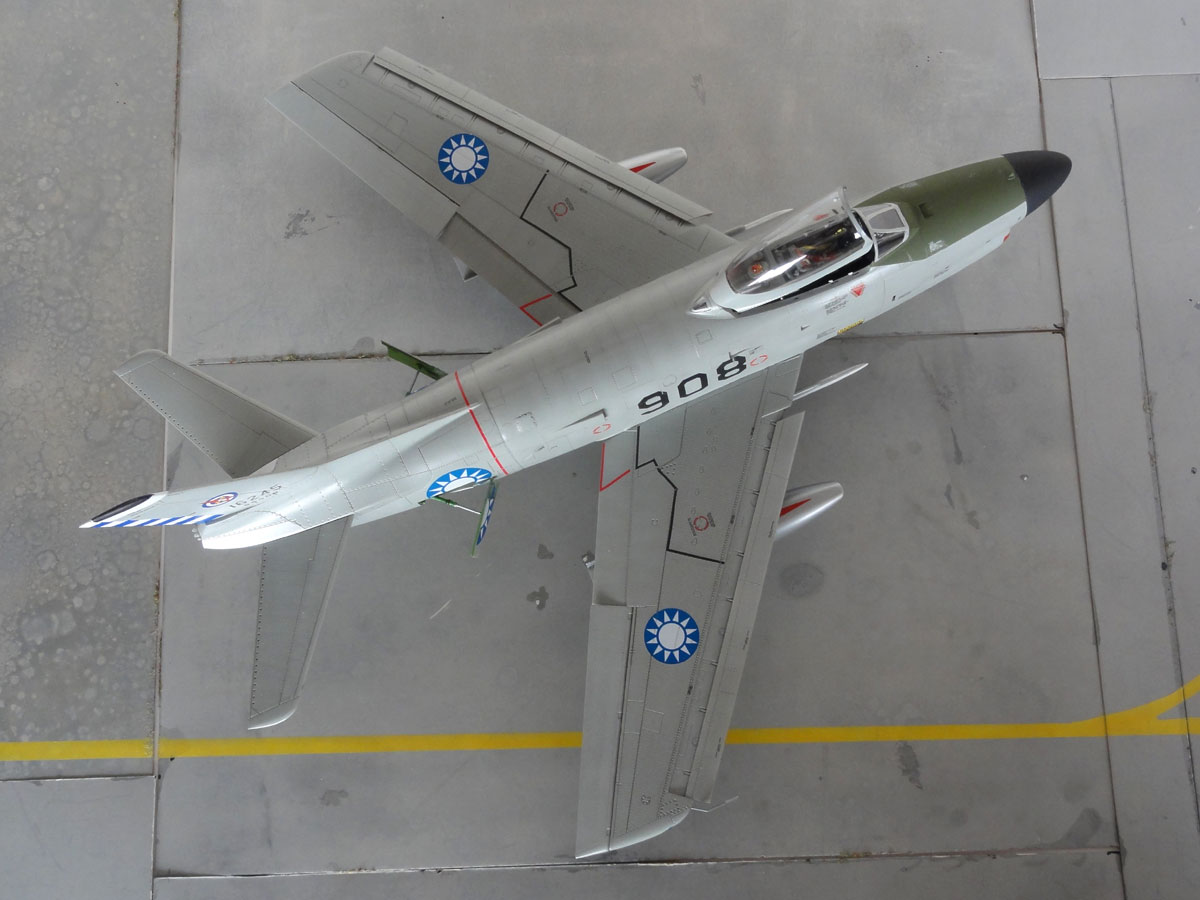
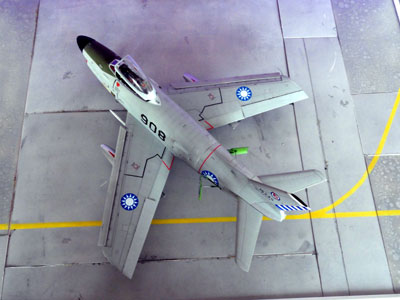
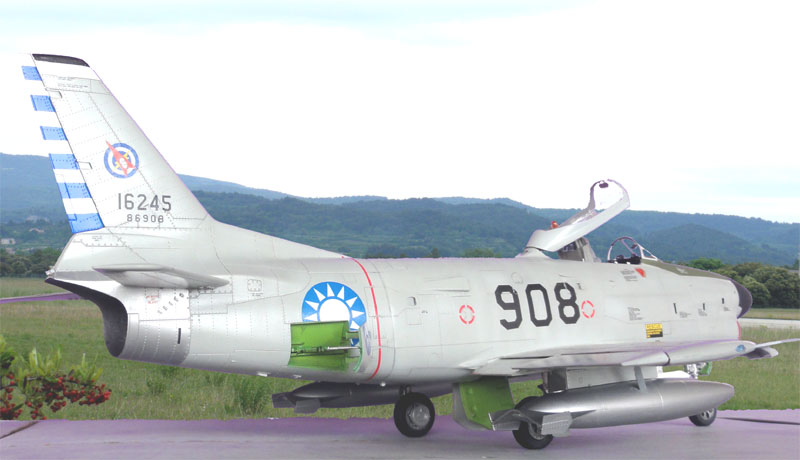
The model was now ready to get the TAIWAN markings through the many and excellent decals as supplied in the kit. Very nice stencilling is also included and it takes a whole afternoon to apply the decals.
The Kitty Hawk decals in this kit are extremely thin. The insides of the numbers like the "0" is not a decal film and this means it is almost mandatory to slide the decal off its backing paper into position on the model. As the base surfaces are still gloss, the decals show not "silvering".
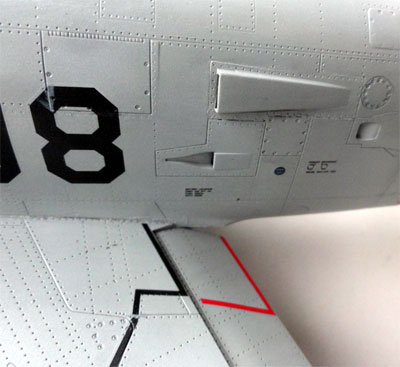
The decal drawing is a bit inaccurate:
The red "turbine" warning stripes
in front of the large fuselage roundels should be positioned 3 mm MORE
aft (so NOT at the joint!);
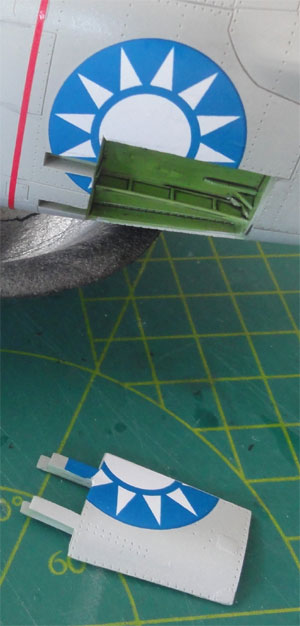
the same applies for the large TAIWAN
roundels 67. These should be cut in sections in order to cope with the
opened set air brakes. Draw the brake panel outline at the back of the
roundel and cut in pieces. Take your time here, no margin for errors!
 ..
..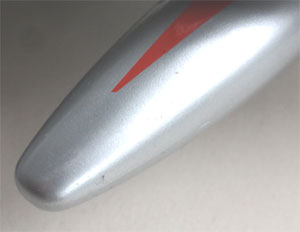
On top of the metallic looking external
fuel tanks there seem to be a RED forward facing triangle on some Taiwanese
Sabredogs. Two were made of spare red decal.
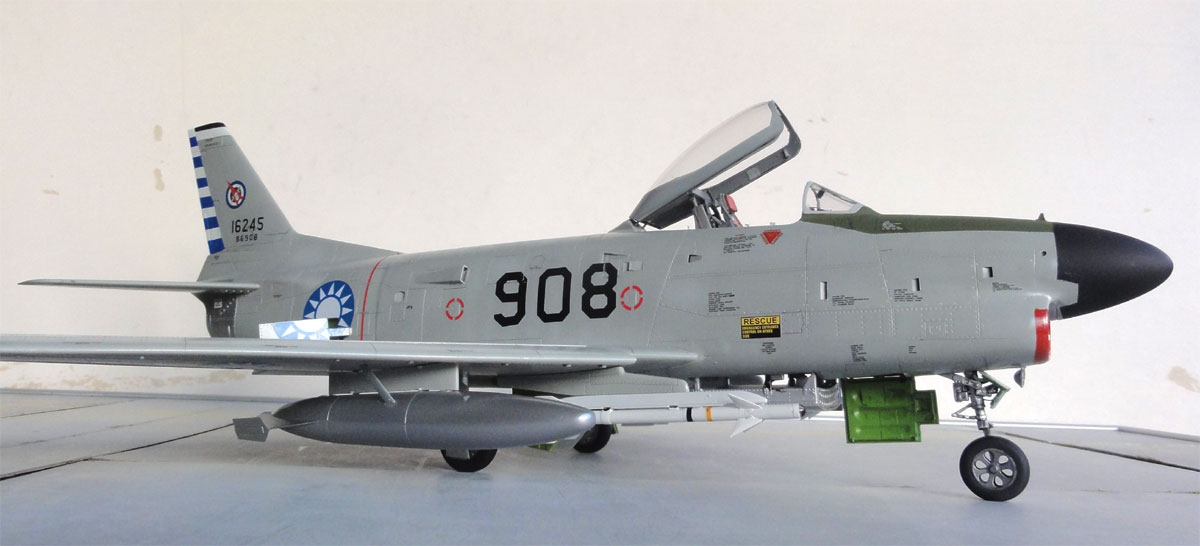
The aircraft number was made as "908" to have a slight variation as to the kit "918". This was done with some decals from the spares box and the serialnumber on the tail was changed with some handpainting. Note that the same aircraft number should also be shown on the large nose wheel door. This decal is missing in the kit. The number was made with 3 spare decals.
The red warning triangles 64 were
set more forward on both port and starboard sides below the cockpit sides.
Decal 23 was adjusted, cutting away the " US AIR FORCE" top line.
The position of the RESCUE arrow
55 and panel 112 was also slightly changed to match the actual panel location.
I added a yellow panel decal as well.
.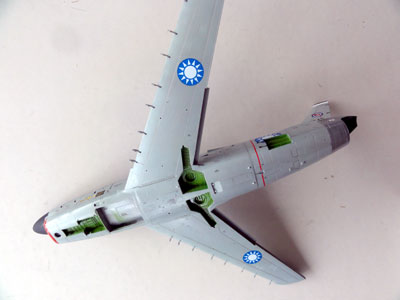
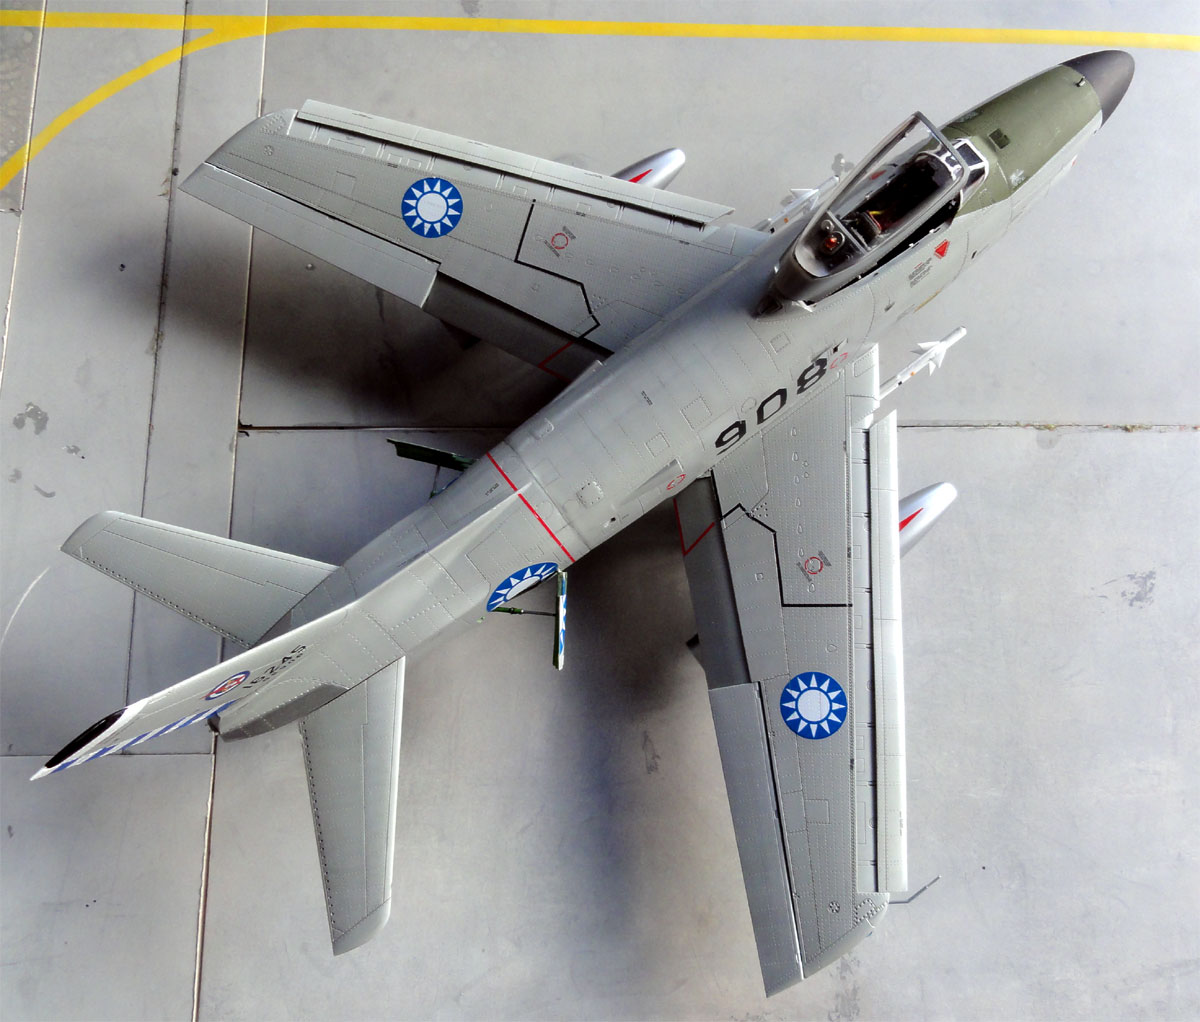
The wing walkway lines and decals
in the kit are fortunately accurate.
Overall, a nice result when the markings
are all set on the model.

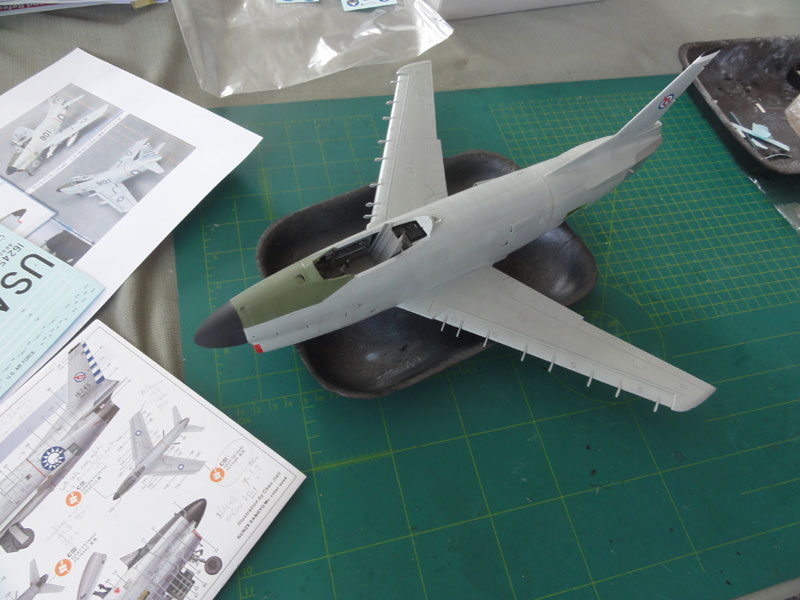
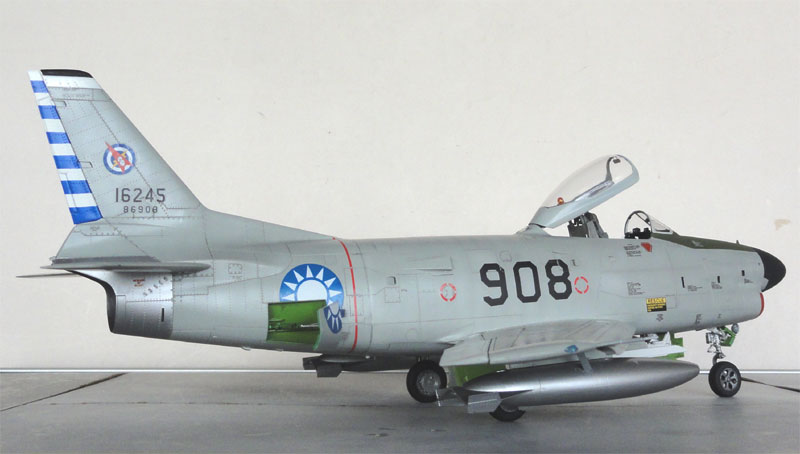
FINAL ASSEMBLY
The already airbrushed stabilizers from STEP 14 were set in place as shown in STEP 18. I needed to remove about 0.2 mm from the stub to fit it into each slot. Note that on the Sabredogs the arrangement of the small vortex generators may vary between even individual aircraft. As made by Kitty Hawk is most often seen and fine.
The rear anti-collision lights E53 and GP14+ GP14 are very nicely done and were fitted at the base of the drag chute fairing.
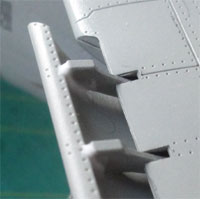
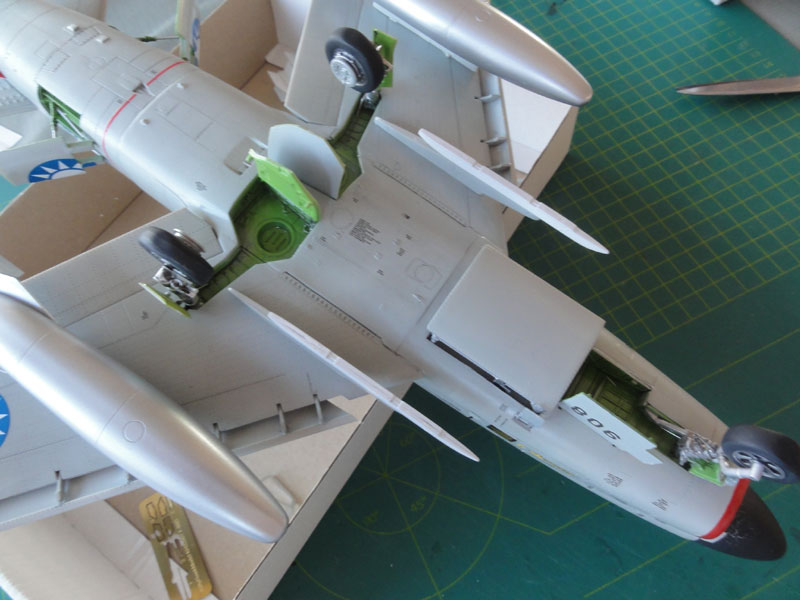
LANDING GEAR
The gear was now set in place. As
noted before, during dry-fitting I found that the location lugs are way
too thick. It had to remove them quite a bit in order to slide the struts
into the wing wheel bay. I now noticed that each large actuator at the
strut base is missing in the kit. Needs to be made from plastic rod.
I also added on each strut an hydraulic tube (not seen in the photo yet).
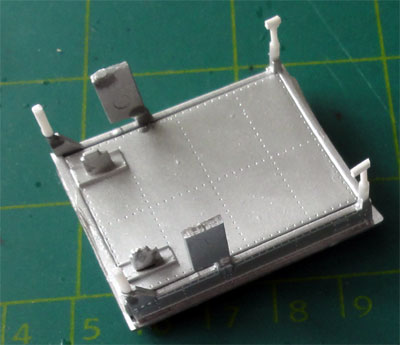
The main gear door G9+G10 hinge stubs were made a bit shorter to look better.
Inside the doors I also made small actuator rods as I lost the kit parts
G52.
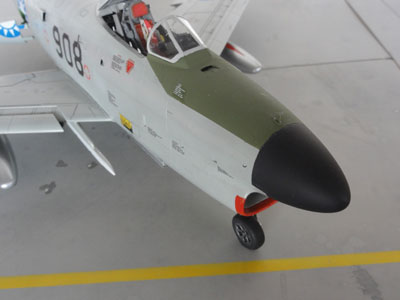
The nose gear is OK and has no hydraulics,
its pose is a bit tilted forward. Also here I had to make thinner the locating
stubs on the gear strut D5 otherwise it does not slice into the nose gear
bay. Between the two part nose door E35+D15 seen in STEP 13 and the
strut a small rod was added from scrap.
 ...
...
The 3 big wheels were set in place.
Take care to ensure that the moulded flat tyre areas are completely horizontal
when posed on the table. (for the Taiwanese Sabredog I believe the nose
tyre D10+D12 is to be used). The bay interiors and door interiors got a
black "wash" of thinner and black paint and also some "hydraulics" using
metal wire. Note that still each main gear strut needs a single hydarulic
brake wire.
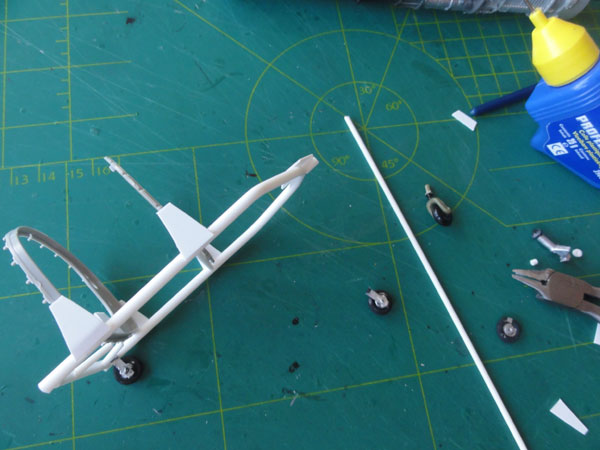
ROCKET TRAY
The FFAR rocket tray was now to be
set in position, I opted an extended deployed look. Maybe I made an error
during STEP 10, but I found the vertical rods a 4 mm too short and the
stubs on parts C10 and C14 4 mm too long. I cut off these stubs and
at the same time extended the rods with plastic rod so that there is a
gap of about 4 mm. The rocket holes and recesses got also a black wash.
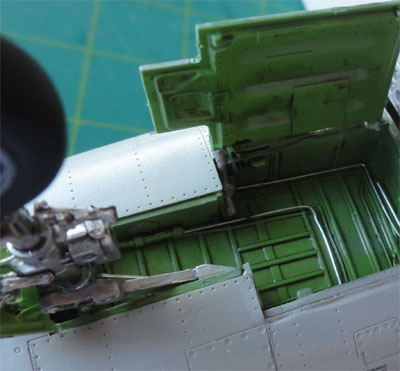
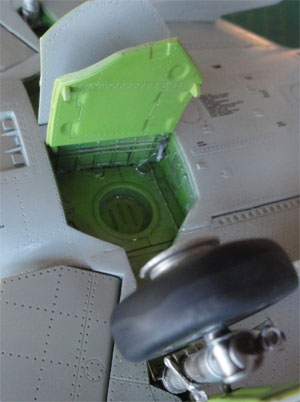
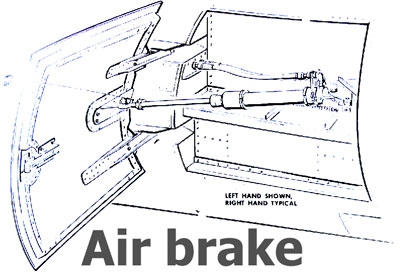
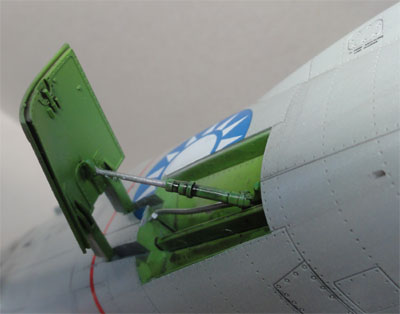
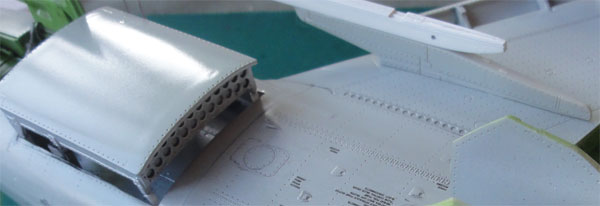
AIR BRAKES
The airbrushed rear air brakes as
seen in STEP 19 were set opened up. I did not use the etched PE parts PE5+PE6
as I did not see them on real aircraft photos. The hydraulic line moulded
on the parts D7+D8 is a bit too short and was extended with bits of rod.
The interiors of the brake bays look accurate.
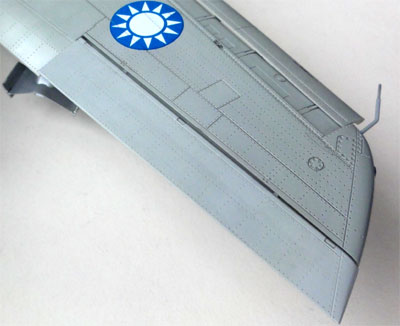
FLAPS, AILERONS and SLATS
These parts were prepared but I found
I needed to remove some plastic from thye locating stubs of the ailerons.
Otherwise they do not fit flush. The inboard flaps were set slightly drooped
down.
Fitted the slats showed that there
are tiny gaps between the lower slat edge and their rails. Drops of white
glue were set in place and when dried painted ADC grey.
The cranked wing tip pitot tube of
the old type Sabre wing was also added.
 ./........
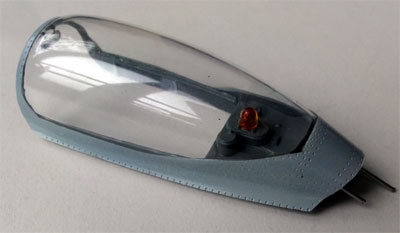
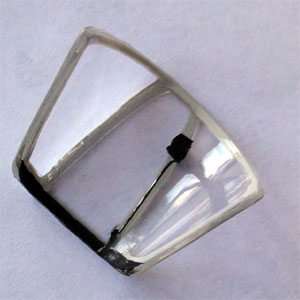
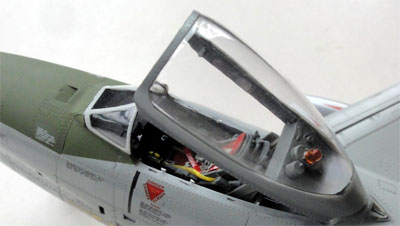
CANOPY
The canopy will be set open. I drilled
2 holes in the flat fuselage spine to receive 2 metal rods installed inside
the canopy. These will make it loose and detachable for transporting the
model. The very nice canopy rear interior as seen in STEP 20 looks fine.
 ..
..
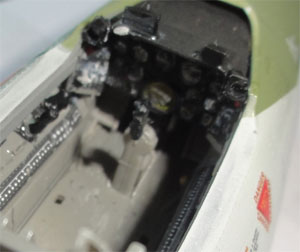
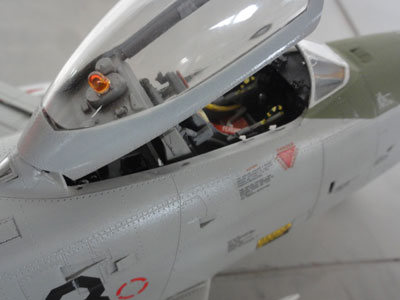
COCKPIT
Moving to the cockpit:
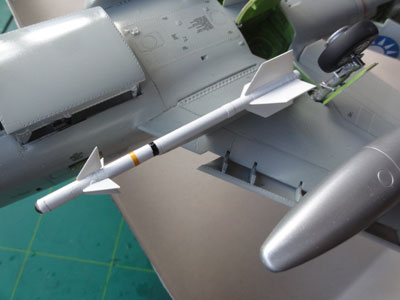
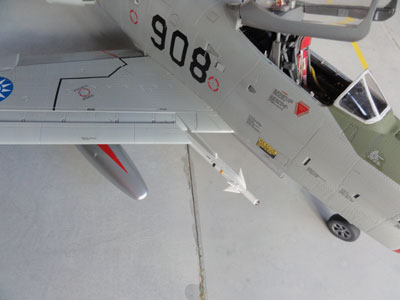
The GAR-8 Sidewinders parts are nice
and were used as I opted to make the TAIWAN Air Force F-86D with these
fitted as they had this capability.
The pylons, the pylon adapter and launcher are all there and look fine.
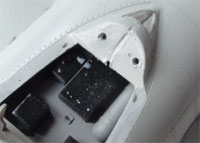
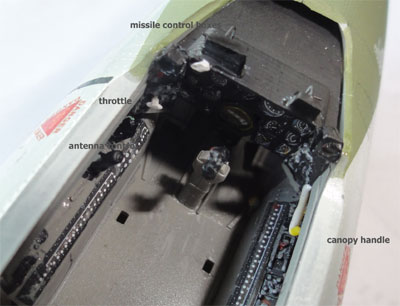
When installing these, the model needs some add-ons in the cockpit:
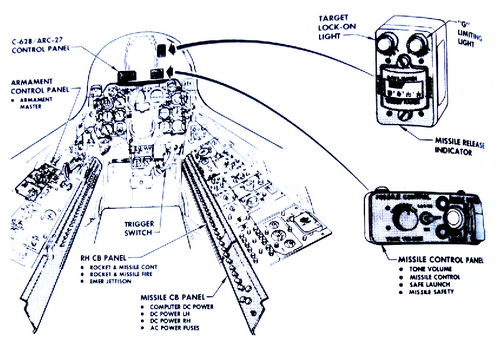
On top of the instruming coaming
C7 2 small control boxes should be installed (the C628/ARC-27 panel and
the missile control panel.)
These small boxes were made from thick
rod and painted black with some white knobs. I also installed to the port
side a box for the accelerometer and on starboard a box for the standby
compass. These are always seen in Sabredog cockpits and made from small
bits and painted black with a white dial. Inside the windscreen also a
box was added.
 ...
...
At the spine there is also light
panel ( GP3 ). It needed a bit of white glue to close the tiny gaps and
these were painted when dried.
 ..
..
Above the starboard side console
I also added inside the cockpit an extended canopy lock handle as the canopy
will be set open. Also the antenna controller E16 (painted black)
and throttle E17 (painted mid grey) were set in place on the port console
as indicated in STEP 2.
The small subpanels E43 and E44 are in the kit but needed some cutting. They are almost 80 degrees opposed to the main panel, facing sidewards.
The radar "cover" for the pilot to look in in bright day light is often seen in Sabredog photos. It is not in this kit but I did not fit one as I think these were optional.
Also, I made 2 latches/ hooks from thin card that are seen extending from the cockpit edges. I could not see if there are more though. These were painted mid-grey.
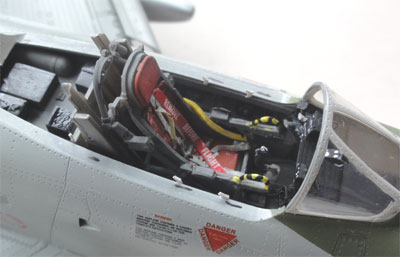
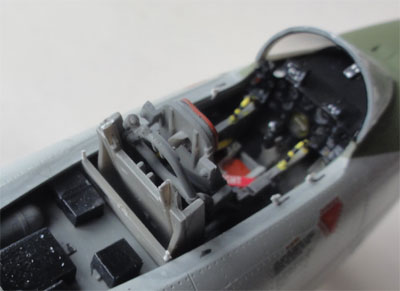
The ejection seat was painted before
and I also added a "REMOVE BEFORE FLIGHT" ribbon from the spares box.
The small pilot entry ladder C6 is
a nice touch on this model but obviously not used for an "in flight" posed
model. For my model I used it.
The fueldump pipe D51 was painted
red and set in place.
ARMAMENT AND STORES
The Rocket tray was already set in
place. The large external fueltanks are fine and their pylons look nice.
They were simply installed including the sway braces. As noted above
the Taiwanese Sabredog could fire the Sidewinder missiles.
That almost completed this model! The anti-collision wingtip lights GP11 were set in place. They needed a bit trimming as in the kit and were painted transparant red and blue.

Finally, a gloss coat was applied
overall to the grey areas using Johnson
Pledge / Future with the airbrush. This gives an even sheen and protects
the decals for many years.
 ...
...
The GAR-8 Sidewinder missiles were
painted with and their heads transparant "smoke" Tamiya X-19 to suggest
their seekers. The missiles were set on the pylons in place.
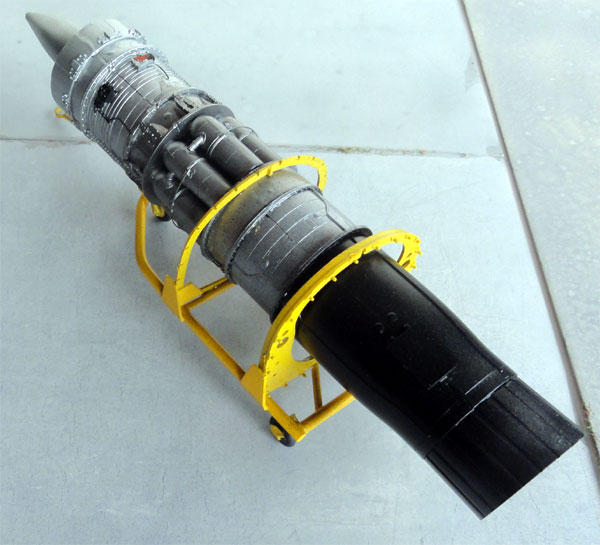
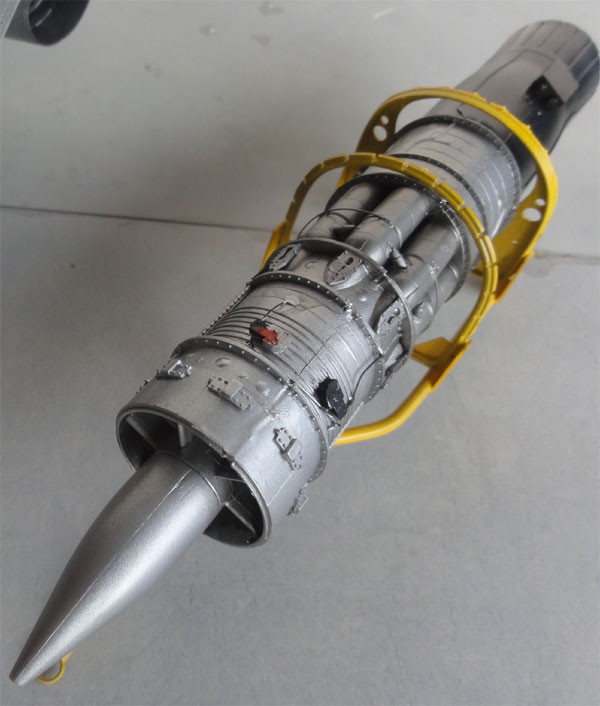
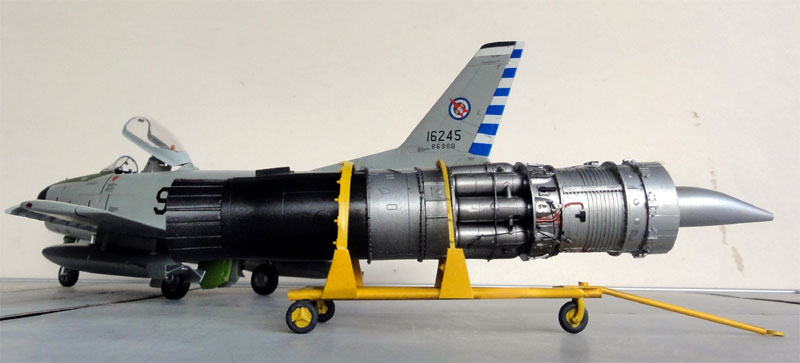
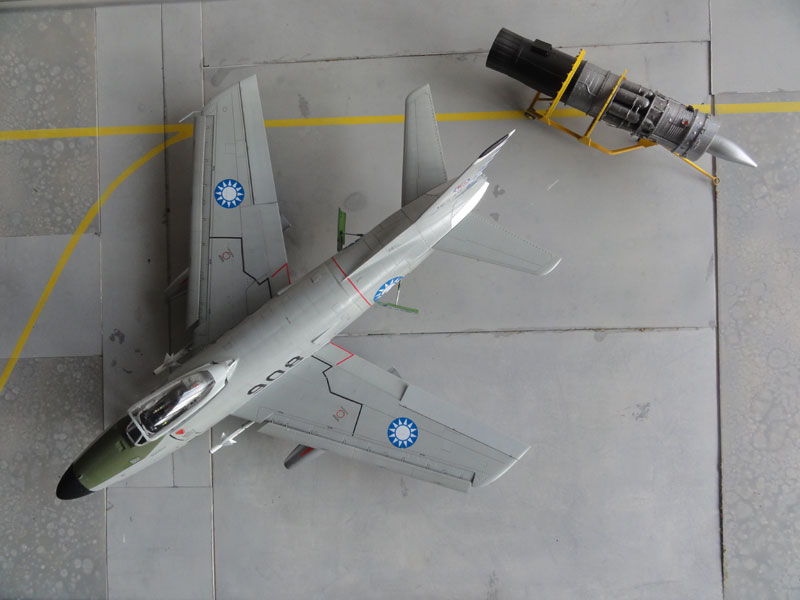
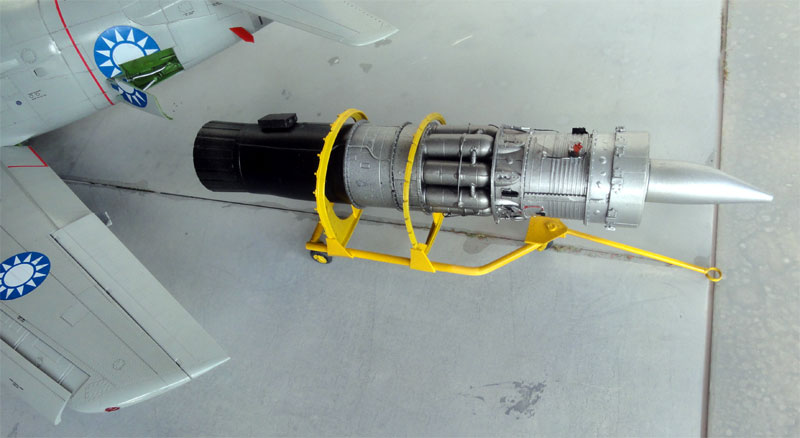
In the kit are parts for an engine,
the idea is that it can be shown on the model with aft fuselage detached.
But no internal details are in the aft fuselage with this kit, so it was
decided to display the engine separately. So an engine transport dolly
is needed to show it.
The dolly was made using photos
from reference [1] from
thick pastic rod and cart. Wheels and vertical frames were found in the
parts spare box. It was airbrushed yellow and wheel tyres painted black.

The J47-GE engine in the kit (as
seen on page 1...) is nice but it got
some extra details with wires, stretched sprue and bit and pieces. Again
using photos. Basic colours are ALCLAD II airframe metal, exhaust metal
and steel applied with the airbrush. It looks nice on its dolly.
The Sabredog's windscreen was
set in place and the loose canopy positioned....
 .
.
Completed the Sabredog! A very nice
1/32 scale Sabredog is now in the model collection and sits nicely along
the Royal Netherlands AF F-86K.
More F-86 Sabres in 1/32 scale to follow in the future!
 ....
....
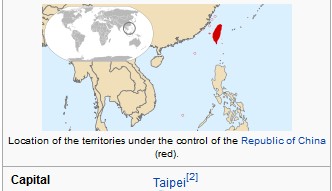
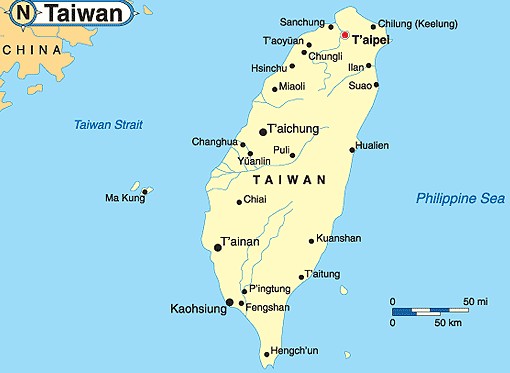
"Republic of China" , island of Taiwan of the coast of China's mainland.
More info about this air force on my Mirage 2000 page here....
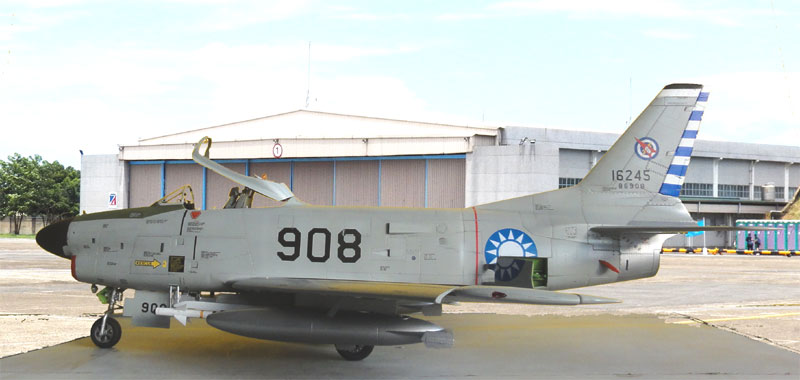
F-86D Sabredog ROCAF "Taiwan Air Force" in the nineteen-sixties.

 ..
..
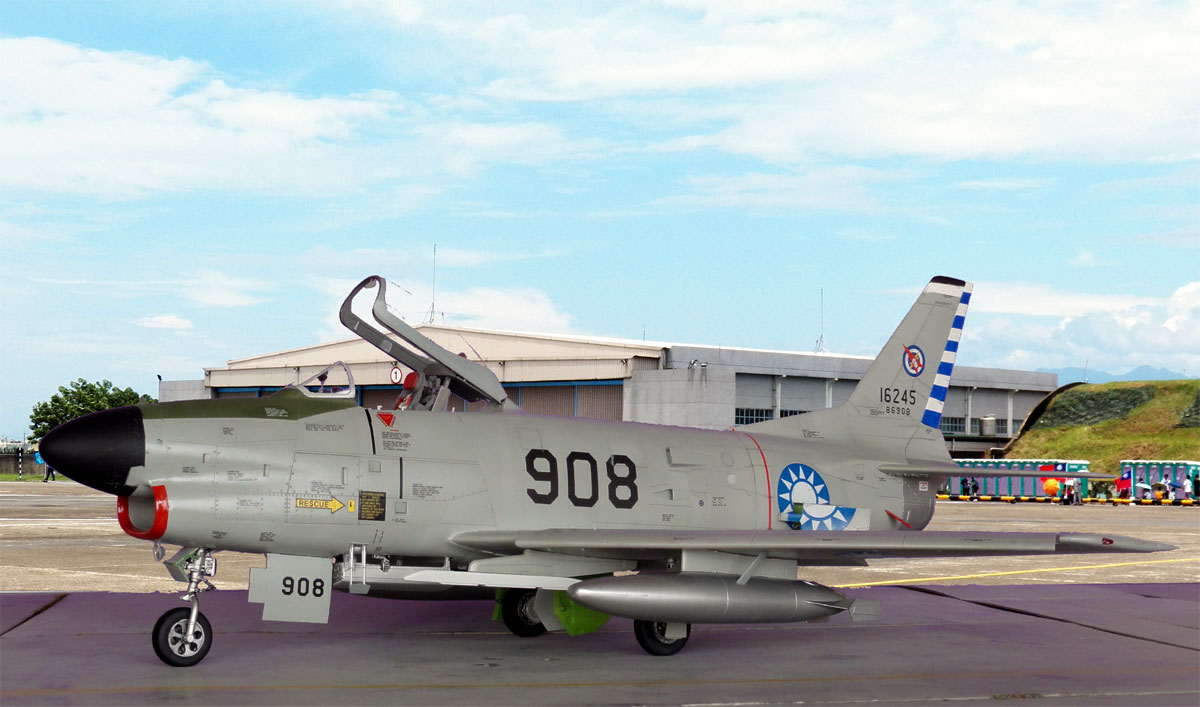
at Chiayi
Air Base, Taiwan
and with the missiles installed...
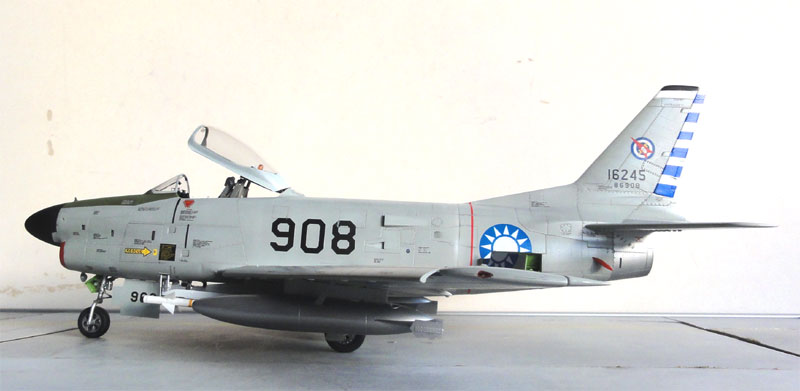
A nice companion next to the Royal Netherlands Air Force F-86K "kaasjager" 1/32 model conversion made a few months earlier.
Back to 1/32 Models
(c) Copyright "designer"/ All rights reserved. Your comments are welcomed by webmaster
Created November 22, 2015
Updated November 30, 2015