[ page 1 ]
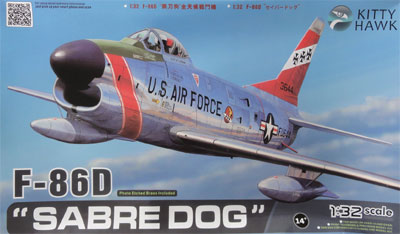
F-86D (called "Sabre dog") 1/32 scale Kitty Hawk kit
The F-86D Sabre Dog had a bigger fuselage and radarnose than the initial F-86 Sabres used in Korea. Its sole armament was a retractable unguided rocket tray in the lower fuselage and the idea was to fire FFAR rockets towards an enemy bomber. The F-86D first flew end 1949 and for several years many problems were in the firing systems E3/E4 and the AN/APG-37 radar. These systems were classified so only the USAF used first the Sabredog. After 1958 exports were allowed and the F-86D Dog was also exported to some American Allies like Japan and Taiwan and some upgrades were also done. Over 2,000 aircraft were manufactured.
Also check out the F-86 Walkaround, see references on previous F-86 pages.....
For many years, Hasegawa was the only kit supplier for a 1/32 scale F-86 Sabre. In 2011, Kinetic also issued a F-86E kit in 1/32 (with the original older wing).
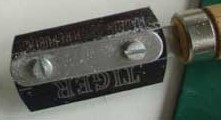
Regarding the later F-86D Sabre dog, which was quite different, there was no 1/32 injection moulded model. Only a very rudimentary vacuform from ID models was available a very long time ago, and later brought to the modelling community by enthusiast TIGGER from the UK. Look for details here...
But the brand new kit manufacturer Kitty Hawk from China came to the rescue with a 1/32 F-86D kit! This kit is really impressive with load of details and is accurate.
modelling this kit is much easier as compared to my earlier F-86K model in 1/32 with the AEROPOXY conversion set, as a Royal Netherlands Air Force "Kaasjager". Look for the F-86K modelling report here..... ( Kitty Hawk has also promised a F-86K in 1/32 end 2015, let's us wait and see....)
The Kitty
Hawk F-86D kit KH32007 was released June 2015 and is very impressive.
It is for the F-86D interceptor called the "Sabre Dog".
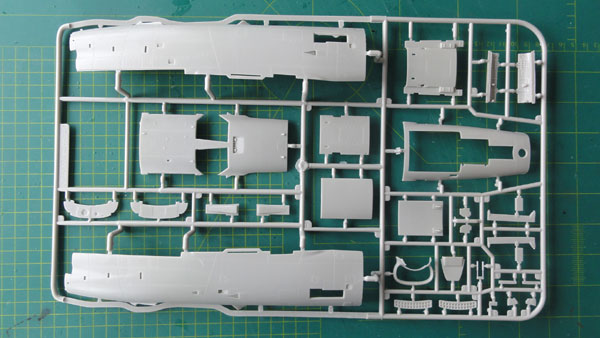
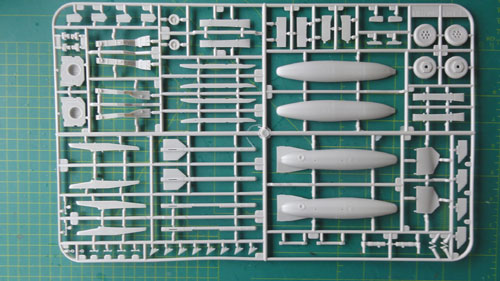
The details on this kit are very
good. Plastic parts are in 8 sprues, and a small etched metal fret for
the seat straps and fins and a very good decal sheet (1 big and 1 smaller
sheet) are included. All sprues are individually packed in a plastic bag
and the clear parts in a separate cardbox.
All panellines and rivets are finely engraved and not overdone.


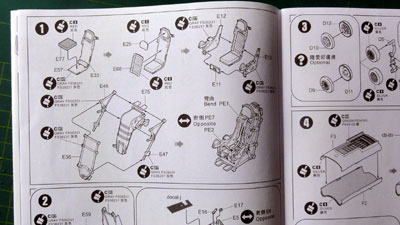
The instructions are very good with also colour indications with Federal std. numbers. Paints numbers indicated are Gunze Sangyo acrylic.
Highlights:
- The kit has a very nice cockpit, a 10 part seat and very nice raised instruments and consoles.
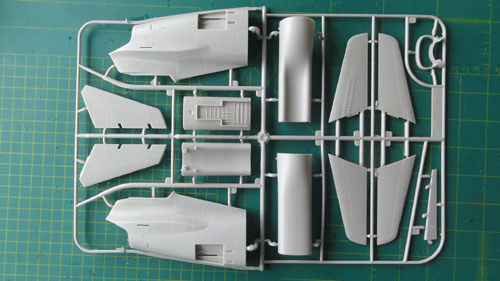
- The intake duct is there and in full length and also a deep exhaust pipe.
- Flaps, ailerons and slats are separate parts, nice as most parked aircraft show them drooped down.
- Separate rudder and speed brakes.
- Rocket ventral tray is fully there and can be set extended.
- Wheel bays are nicely detailed with also two different types of nose wheel.
- Nice clear clamshell canopy with internal details.
- Radar disk with detail (but no provision to show it open).
- Stores comprise fueltanks and pylons.
- Early style GAR-8 Sidewinders, probably these Sidewinders were only I think deployed by a few export (non-USAF) aircraft.
- Surface details are nice with also the NACA inlets etc.
The rear fuselage is separate although only a few internal details are provided. But a bulkhead is there but no engine dolly. Kitty Hawk assumes you to set the engine internally and in order to show it keep the rear fuselage "loose".

(note
Etched Metal fret also shown)
Decals are really impressive with
full stencilling and markings for no less than 6 ! aircraft:
(1) USAF 82 FIS in metal scheme and
red-white tail;
(2) USAF 325 FIS of Sabre Knights
aerobatic team in metal scheme;
(3) USAF 181 FIS Texas Air National
Guard in metal scheme with red markings;
(4) JASDF Japan in metal scheme;
(5) ROKAF South Korea in metal scheme;
(6) ROCAF Taiwan air force in probably
ADC grey scheme (not Gull Grey);
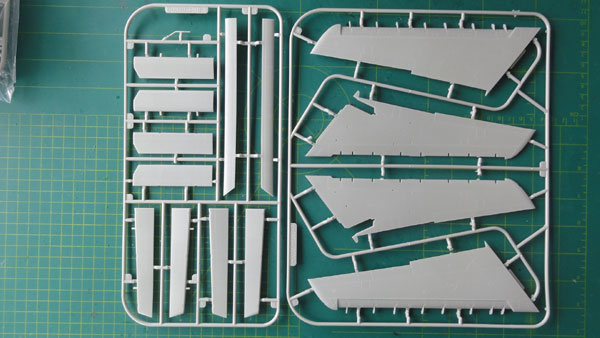
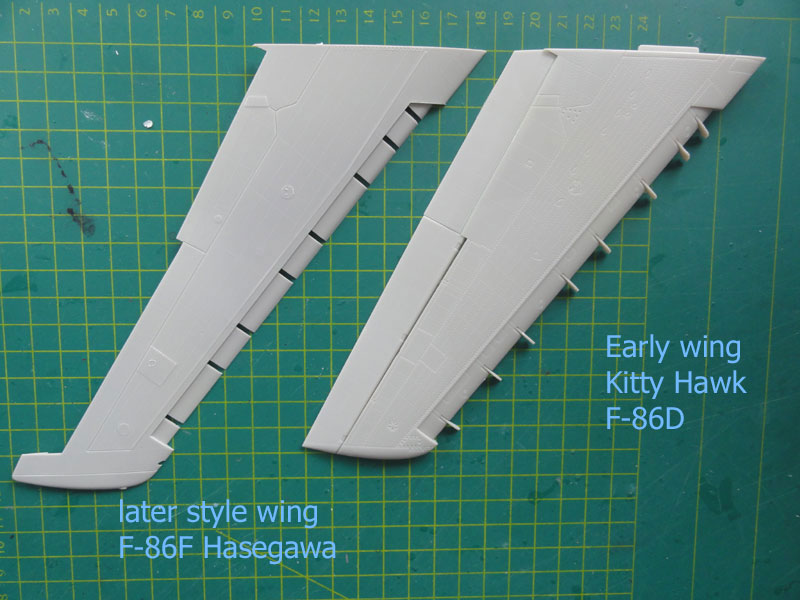
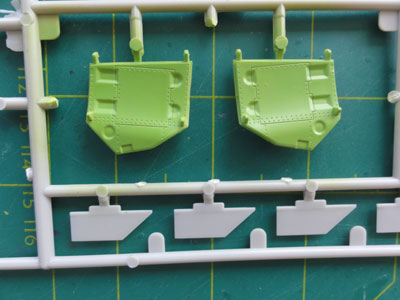
The kit's wing is of the early type
with original span and chords. The early style wing is easily recognized
as it has the old cranked pitot tube. Probably the Kitty Hawk F-86D kit
is for a early F-86D-35. (note that later on many F-86 Sabres including
the F-86F-40, the F-86L and retrofitted F-86K later on got a larger "6-3"
wing similar to the F-86F-40). The F-86D Kiity Hawk kit wing is shown here
with a part from the 1/32 Hasegawa F-86F-40 kit.
The plastic surface texture of the kit is great for also finishing a model when desired in a high gloss metal scheme using possibly the ALCLAD system.
NOTE that a few parts are to remain unused. These are probably for a later to be issued F-86K that was promised by Kitty Hawk; they do not indicate these left-over parts like an extra nose intake ring.
![]()
Page 1
The medium grey plastic parts of the
Kitty Hawk kit are fine. The only thing is that the sprue gates are often
also moulded on the mating surfaces, so a lot of clean-up is needed before
joining parts. So, use a razor saw to separate the parts and sand flat.
Take care not to damage the parts however. It is quite some tidious work
though.
Also, there are many pin stubs, but
mostly on inner surfaces; they only need to be cut away. Only in the innner
intake duct parts F2 and F3 there are annoying, so cut away, fill
these and sand flat.
Some ejector pin marks are there but often at invisible places.
During assembly I found that the big sprues marked E and G were mixed up! But the assembly is no problem whatsoever.
Although not yet decided which colour scheme to pick for the F-86D....
Let us start assembly, step by step.
STEP 1
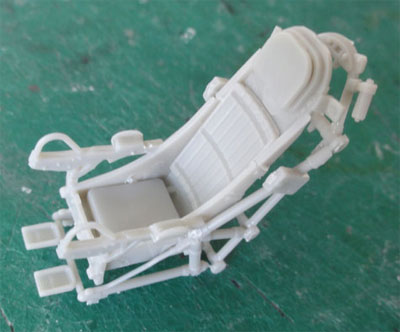
First the 10 piece ejection seat. The kit seat is pretty nice so was assembled. Colours are well indicated with overal FS 36231 with red head rest and so on. The P.E set in the kit has the seat harness, this will be checked later. The pilot pedestral control stick E42 is nice.
Obviously, do not fix the seat yet
in place.
 ...
...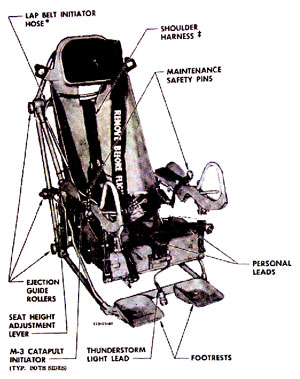 seat
drawing
seat
drawing
STEP 2
Cockpit detailling shows the instrument
consoles parts E6 and E6 . They have nice raised details, seem accurate
and also decals are provided to be applied over them. That would need decal
softener.
But I here painted the black instruments
and switch panels. The circuit breaker detail was cut from the decals and
set in place on to the sidewalls. The throttle on the port console is not
yet set in place. The small subpanels E43 and E44 are in the kit but needed
some cutting. They are almost 80 degrees opposed to the main panel, facing
sidewards. (Note that are also some unused parts for differently shaped
subpanels in the kit, probably for the to be released F-86K ?)
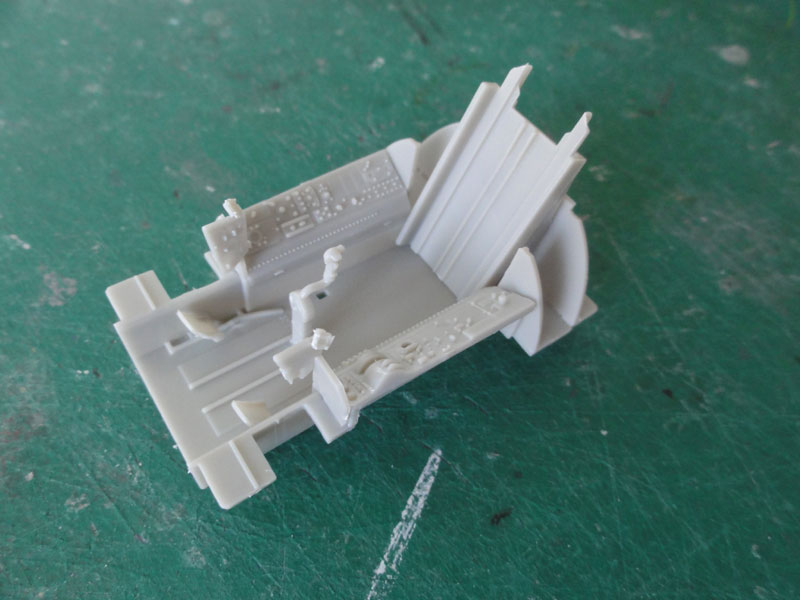
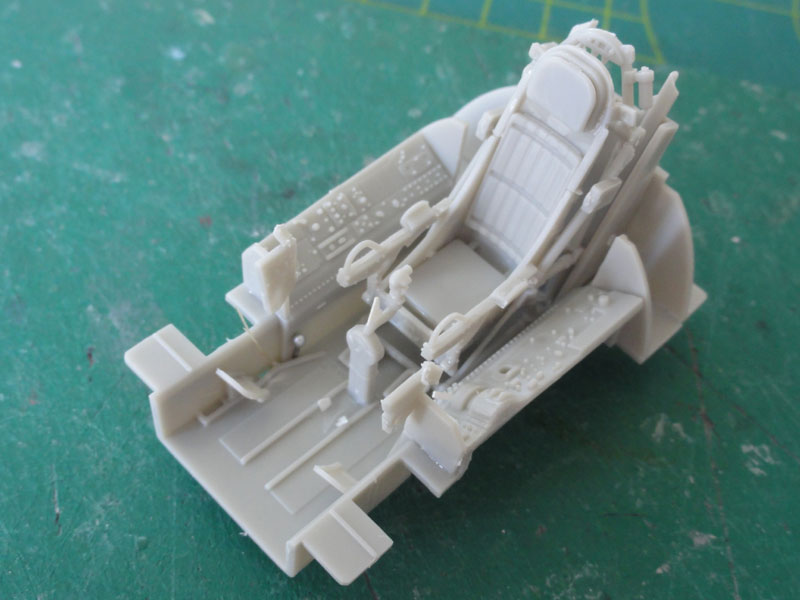
Bare tub with below the seat set
dry fitted: the ejection seat has location stubs at the bottom. First,
I removed the lower stubs to fit easier. I also removed a bit of plastic
on the side bar part E36 in order to get it fit inside the ejection guidance
rails E60.
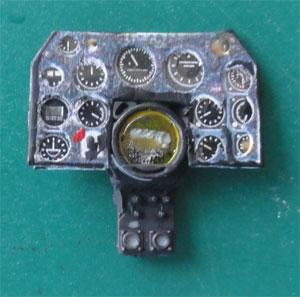
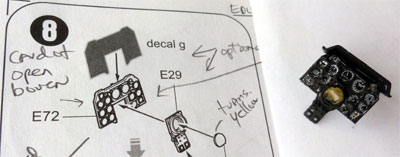
STEP 8
Note that STEP 8 shows the main instrument
panel and the idea is to use decals over the raised detail part E72. Instrument
panels varied a bit at real Sabredogs. I opted to make a main instrument
panel with holes made from card and using my Waldron Punch & Die
set. I ensured the decal "g" would correspond with the holes and
also used a thin clear plastic sheet to represent the glass instrument
covers.

and the result... Main colours are
I believe black (not blue-ish as in the kit decal). The panel still needs
some black details.
 ..
..
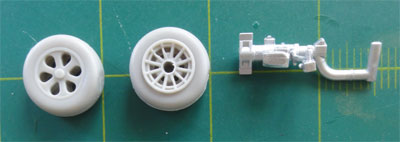
STEP 3
This deals with the nose wheel and
2 types are provided. It is not indicated in the instructions which one
should go with a particular scheme option but I see that the "teardrop
holes" nosewheel D10+D12 is often used on JASDF and Asian Sabredogs. I
had to drill out the center hole in order to make it fit later on to the
leg. Do not yet fit the nose wheel and strut, leave for later to avoid
damage.
STEP 4 shows the forward intake duct
and nose gear bay. Removal of pin stubs on parts F2 and F3 is needed and
holes need to be filled and sanded as they are well visible. For the aft
duct, this is not needed as they are hardly seen.
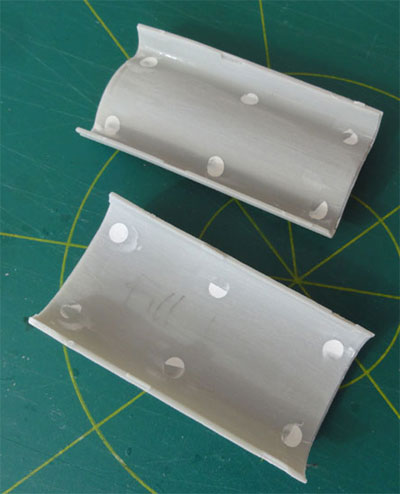
Join the forward duct and set on
top the nose gear bay side walls as seen below....
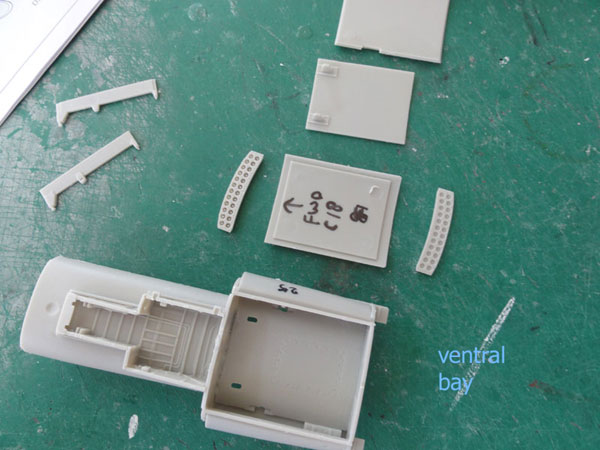
The ventral rocket pod recess is
also there but it was unclear what part C28 is (as shown in step 10). I
installed part C28 onto part C26. I presume that this unused part is to
cope for the announced F-86K.
I suggest here to align the recess,
nose gear bay and ducts combined with the lower fuselage part C17 shown
in step 9. Please note that the forward intake lip is separate and not
joined at the forward area as the nose intake part C12 (shown in step 12)
is fitted later on. However, I suggest to paint the duct interiors "silver".
Later on, the nose gear bay was airbrushed
interior green (FS34102 but with some yellow mixed in). This applies also
for the main gear bays in fuselage, wing, insides of doors, the air brakes
and their recesses. This was done for some parts while still on their sprues.
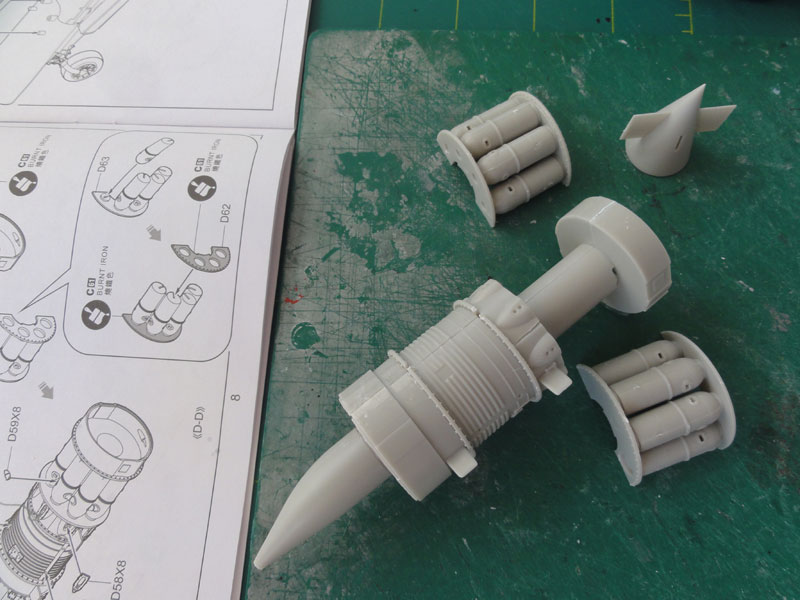
STEP 5
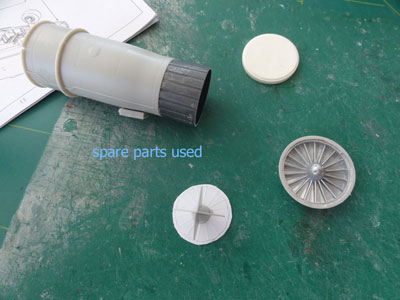
The kit comes with a very nice J47-GE
engine modelled. I opted to keep it separate from the model, so not to
install it inside. For that reason I found a spare engine intake fan (for
part E2) in the spoare box. I also cut the nose of a fueltank found in
the spares box to suggest the compressor fairing bullit E63+E64. The rear
section was from the spares box replacing part D44 that is needed in the
fsuelage.
The kit parts for the J47-GE engine
were assembled, some extra detail still be added with hydraulics piping
and so on.
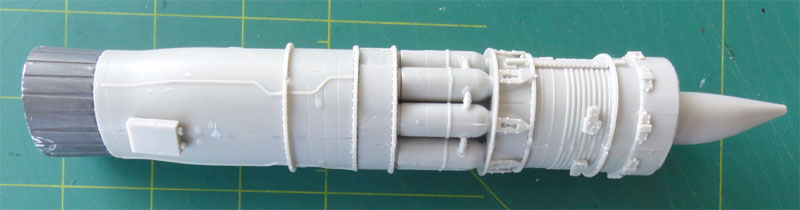
General engine colours are metallic,
silver and burned metal. This will applied later on with the airbrush.
I closed the small gaps with white glue, this is easier than using filler
/ putty.
STEP 6
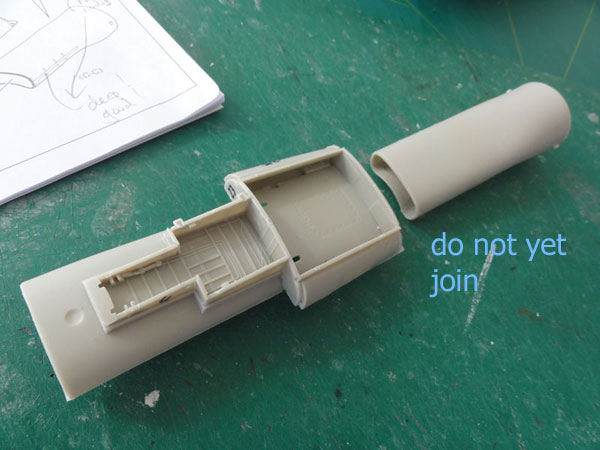
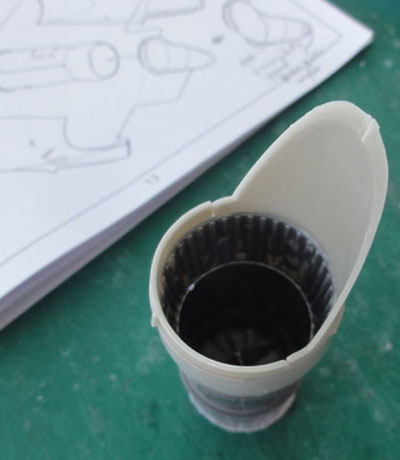
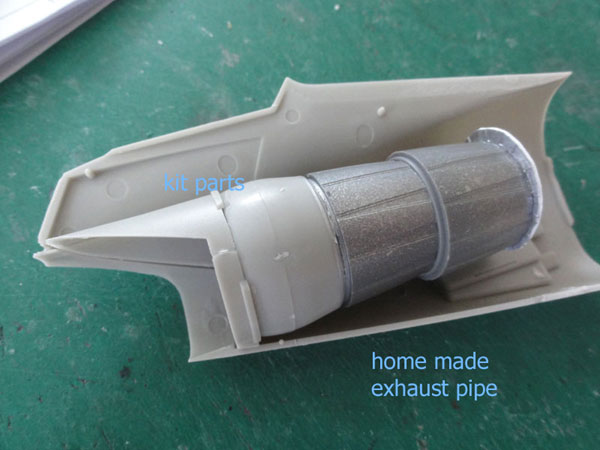
The exhaust pipe was to be partly
to be set onto the separate engine. I wanted to display the engine next
to model later. So, from the spares box, I got parts to make a deep pipe
and diffuser (to suggest part D54+D55+D1+D2).
But rear exhaust pipe part D44 will
be set into the rear fuselage, so a similar looking part was used from
the spares box as well.
 .
. 
On to next
[ Page 2... ]
IPMS NL F-86 walk arounds
Back to 1/32 Models
(c) Copyright "designer"/ All rights reserved. Your comments are welcomed by webmaster
Created August 25, 2015