[ page 2 ]

F-84G Thunderjet in 1/32 scale: kit review & building the Hobbyboss kit
... continued from page 1...
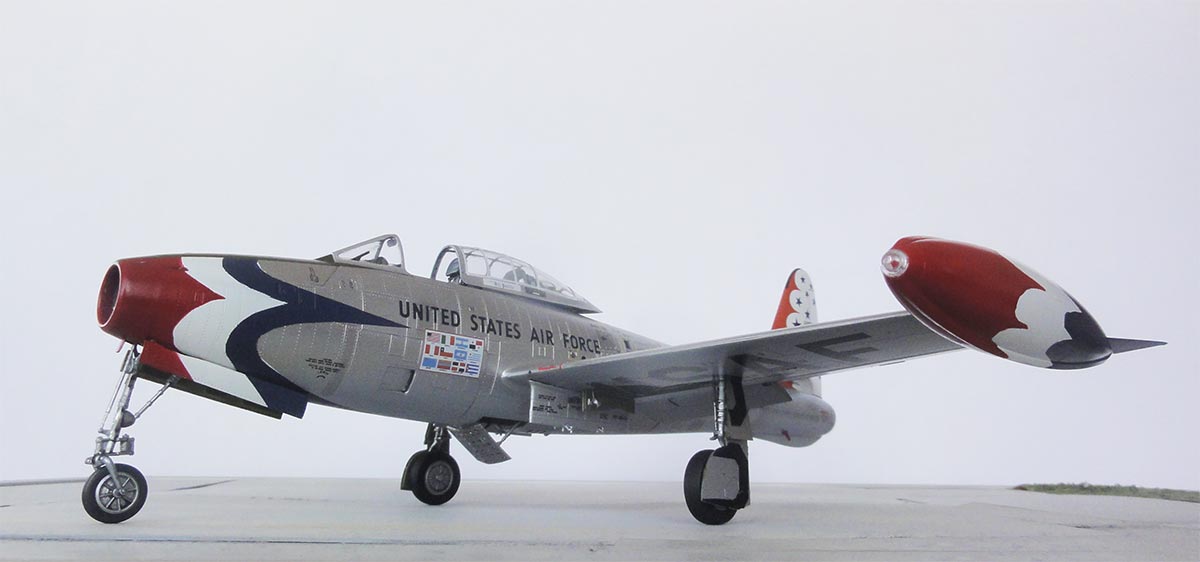
As seen on the page 1 the model had now the great Thunderbirds Thunderjet paint scheme.
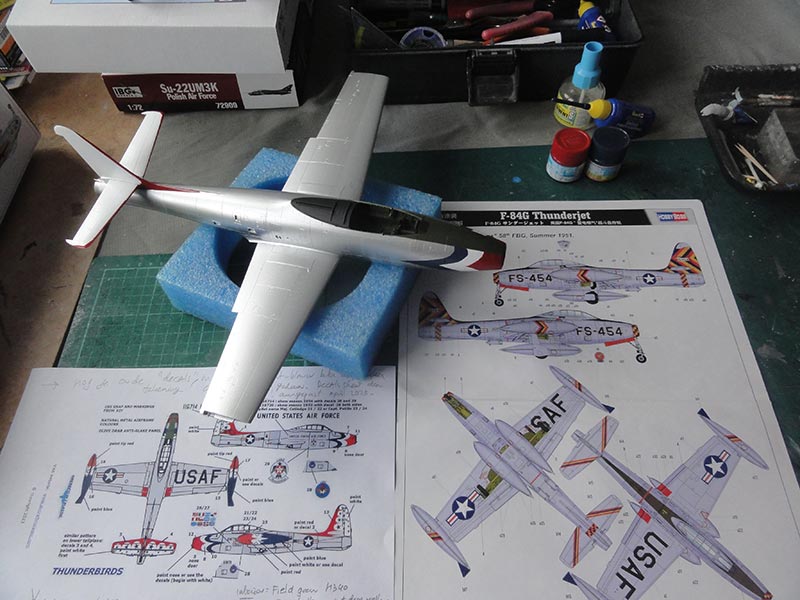
The model paint surfaces are glossy so the model is ready to be decalled. (when not glossy the risk "of silvering" is there). I assumed that the large USAF titles were black and the star-and-bars as usual for the Thunderbirds as standard so these were to be used from the kit decals. Some smaller stencils from the kit will also be set.
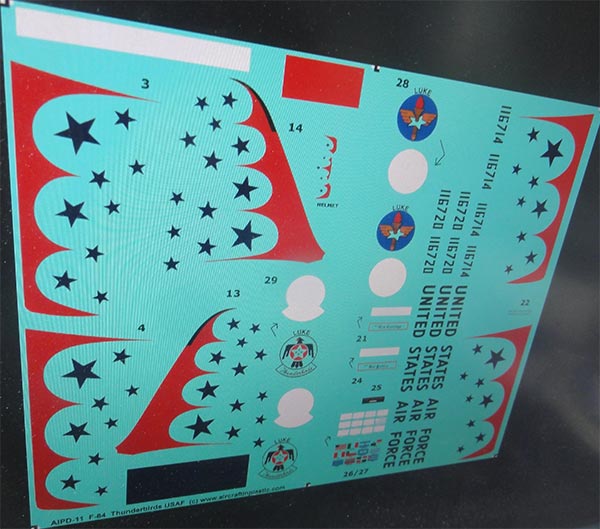
The specific Thunderbird decals were from my own designed and custom laser printed decals. The are on 1 print decalfilm so all has to be cut out seperately. The laser printed AIPD-11 decals (also with PDF manual) need no varnish coat but they are very thin so, after soaking only 10 seconds in water, slide off each decal on the backing paper straight on the model.
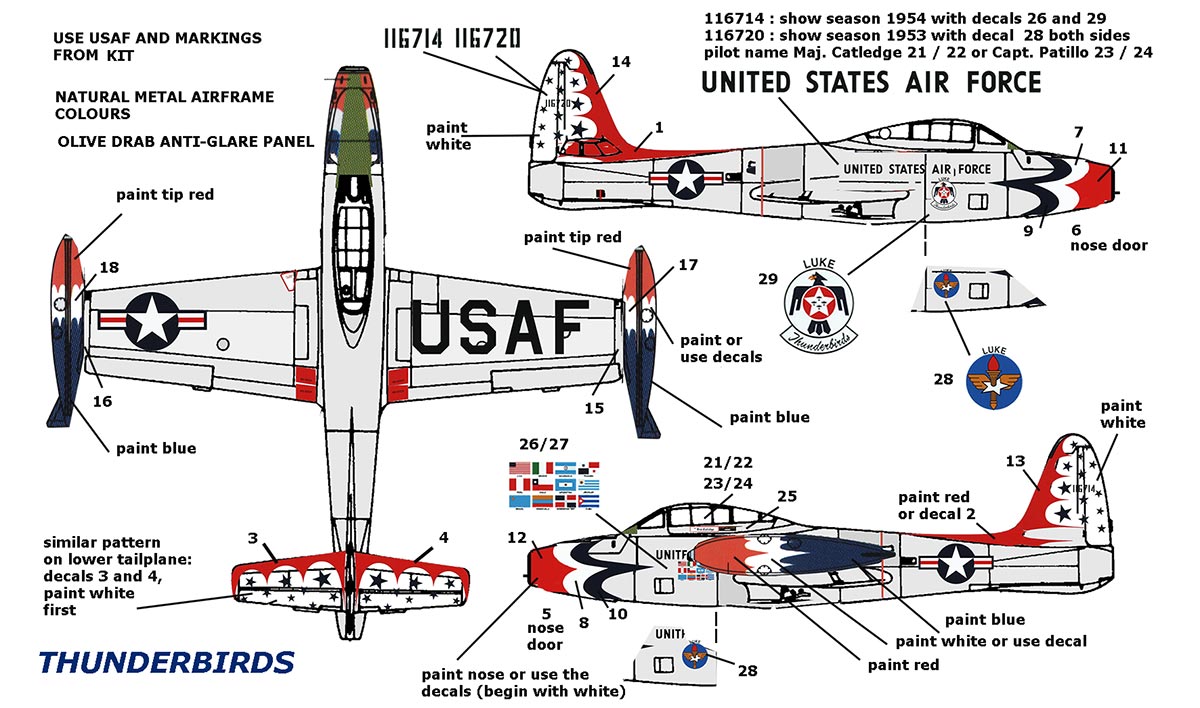
My own drawn Thunderbirds scheme drawing was also used as well as looking at many photos in books and internet. I designed a few scheme options for the Thunderbirds but selected the one with the many World Flags at port and starboard Thunderbirds logo. If you want an AIPD-11 sheet for your model, see the decals page how to get one...
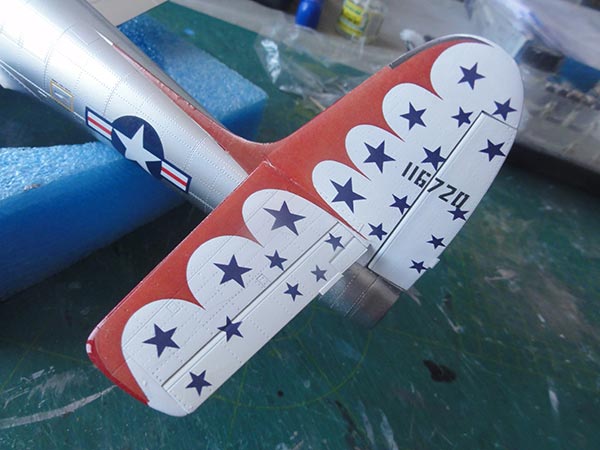
Decalling starts at the vertical tail. Than the stabilizers were installed and their decals came next. Try to align them and have no gaps. At the leading edges and the thin dorsal spine bits of the spare red decals were set to get the same red colour tint.
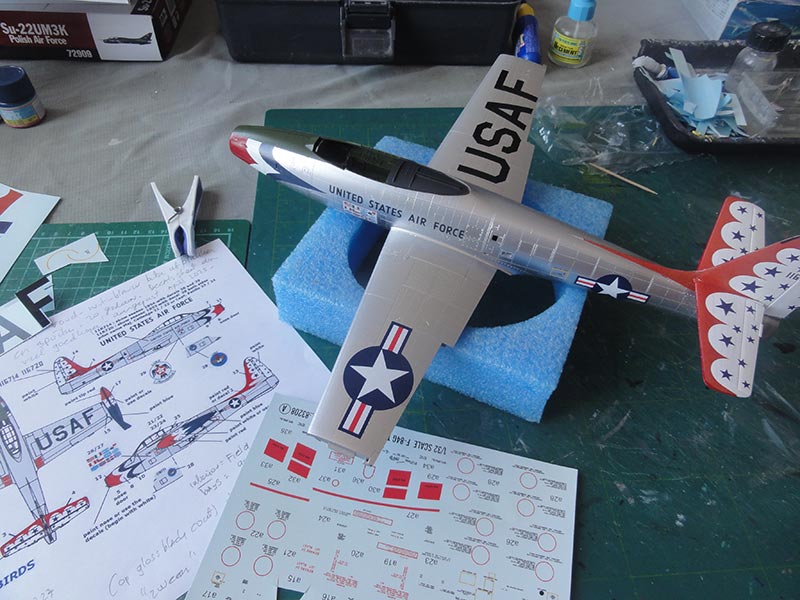
On the wingtip tanks I did not set the red circle stencils. For the port gear doors Hobbyboss supplies seperate USAF decals, very nice.
Decalling took some 6 hours. An important milestone reached for the model. Now the remainder of parts like gears and in the cockpit are to be set.
![]()
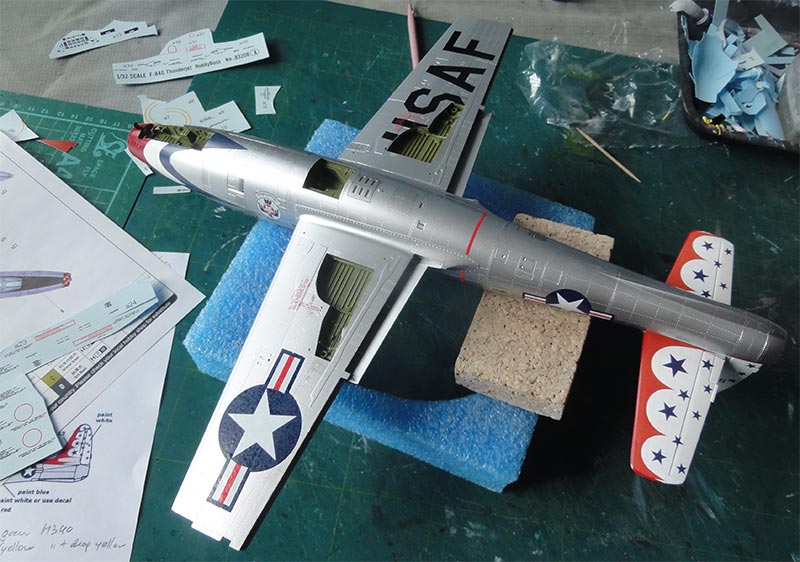
The details were investigated with the good Detail & Scale F-84 book/ volume 59 of Bert Kinzey. Colour and black and white photos are found in that book. Also, the IPMS NL Walk around of my modelling friend Cees Hendriks was used (though that shows a slightly different Dutch F-84G).
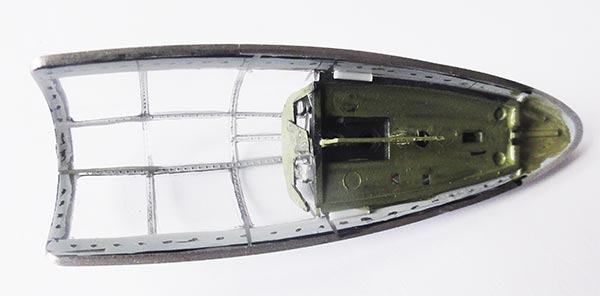
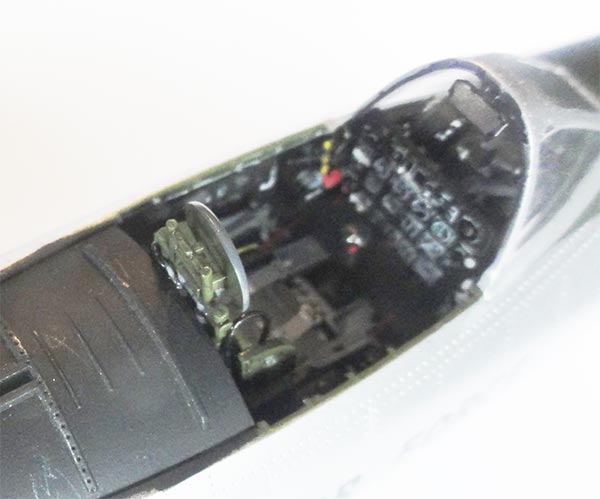
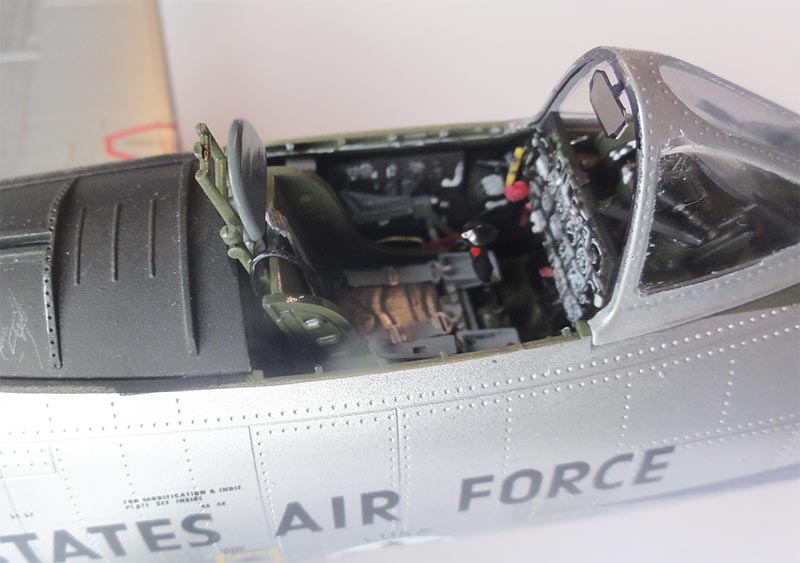
First the cockpit:
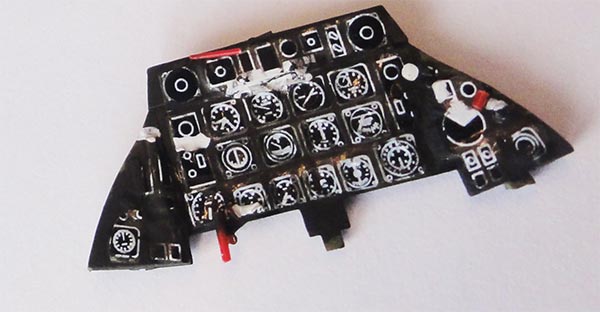
The
F-84G main instrument panel looks pretty good with the kit decal but I
overpainted black the thin white instrument bezels/ edges of the decal with a fine brush.
Some extra detail was added made from scrap plastic bits.
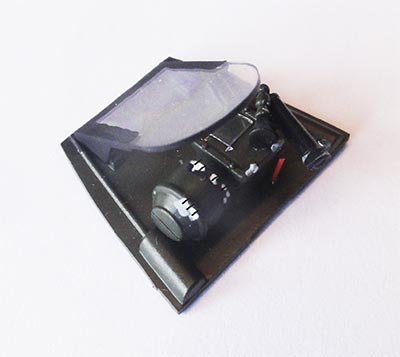
The A-1CM gun sight got a bit more detail as well. I assumed it was installed in the Thunderbirds jet, some photos suggest this though not sure. (NOTE: later NATO and USAF F-84G had different gun sights).
The cockpit side consoles were handpainted with black details with white and dark grey knobs and switches. (other bits of red with stretched sprue will be set later on in the cockpit tub).
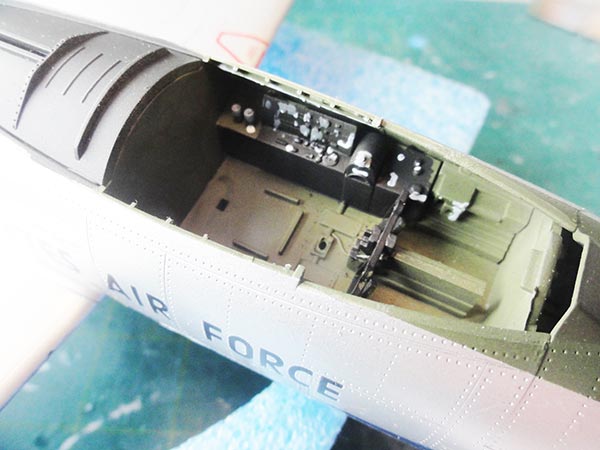
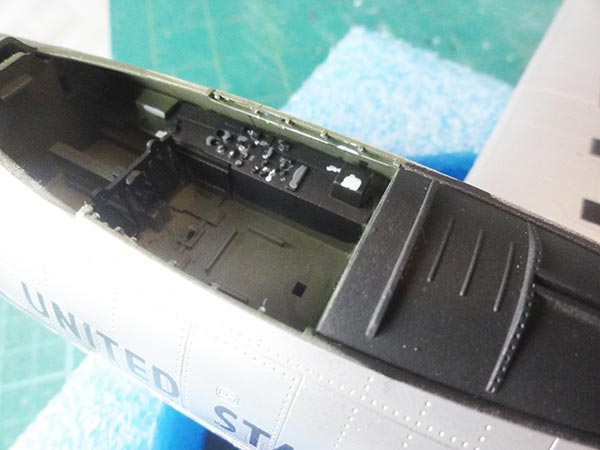
The main instrument panel is still to be installed with gun sight panel.
For the Thunderbirds jet I opted for the ejector kit seat style "1" as shown in the kit instructions. Probable the type was an "ejector" seat (so without rocket engine as usual in later developed ejection seats).
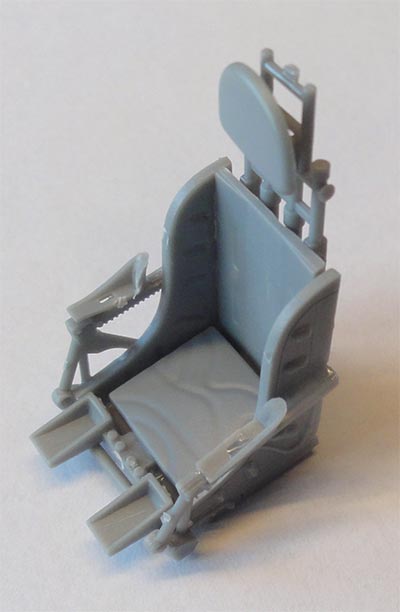
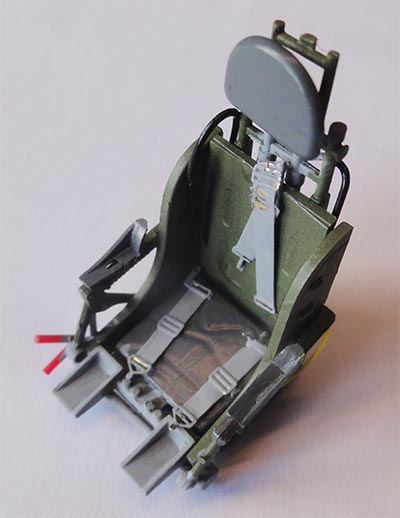
It was painted a base coat with Gunze Sangyo acrylic green H340 (about FS34097). The head rest, arm support and lower cushion medium grey. A few details were added from scrap like the red activation handle. The straps were found in the spares box and painted. The seat will be installed as a last step.
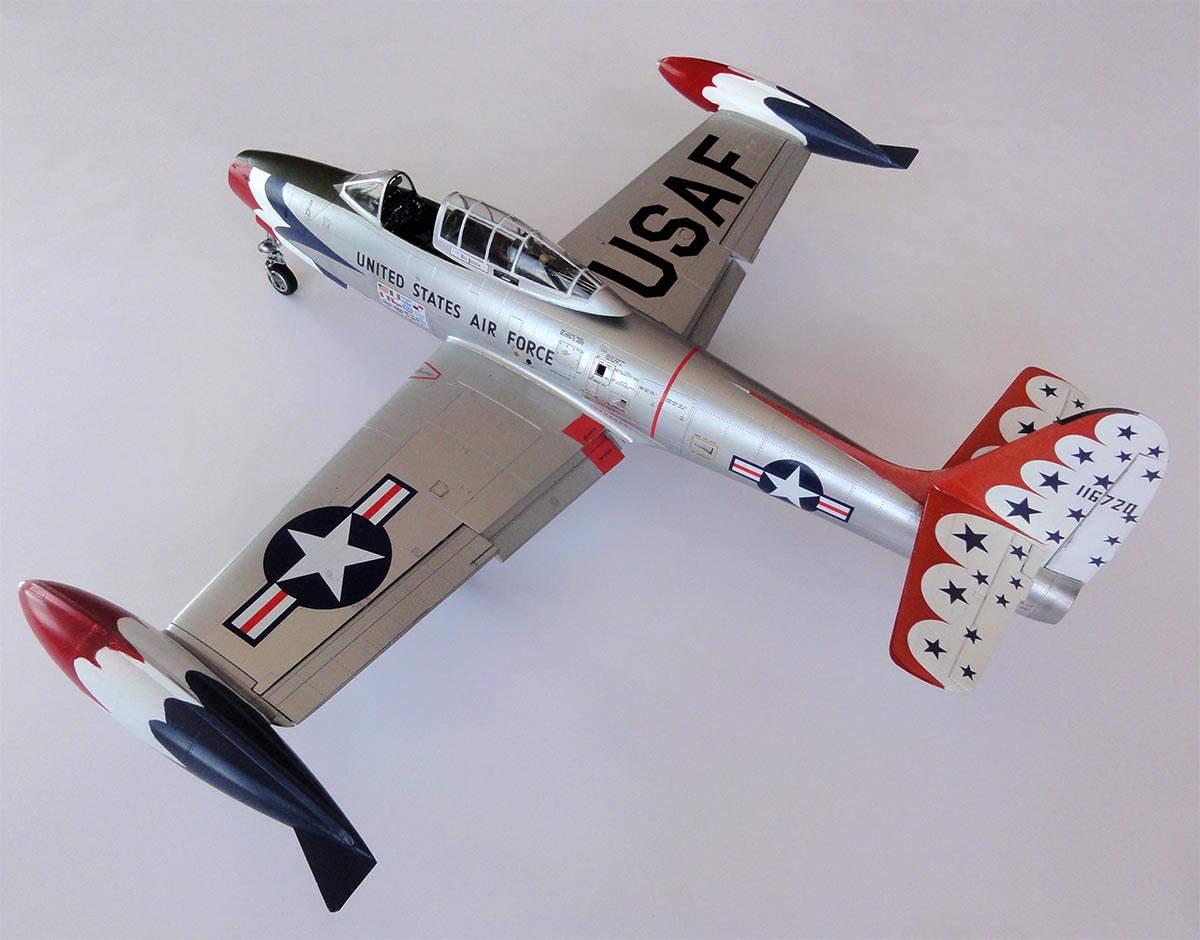
At the wing, the corrected ailerons and trailing edge flaps slightly drooped were installed easily. They look great.
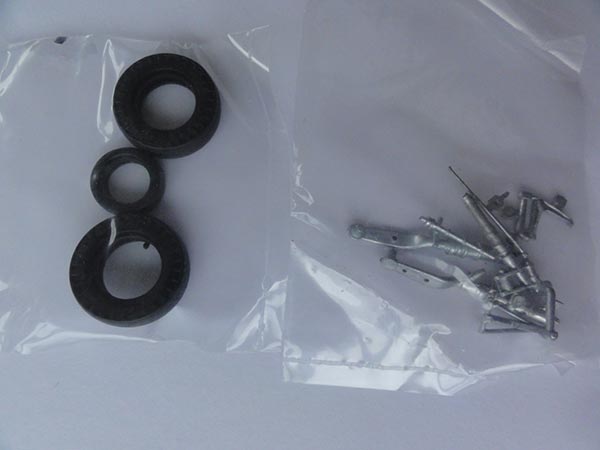
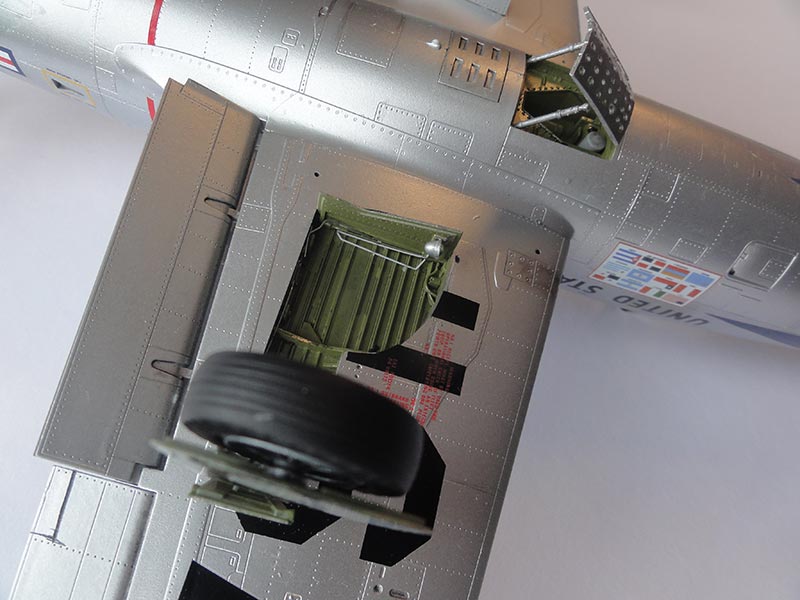
The undercarriage gears were installed next as per instructions STEPs 4,5,6 and 11. I had in the Hobbyboss kit package the metal strut parts and these were used as they look pretty good and detailed.
I sealed the kit rubber tyre edges with thick paint to block the "weakener" to creep into the plastic hubs and airbrushed the rubber types "tyre black". Their hubs were metal airbrushed, pressed in and glued with superglue. These wheels fitted on the legs and gear forks.
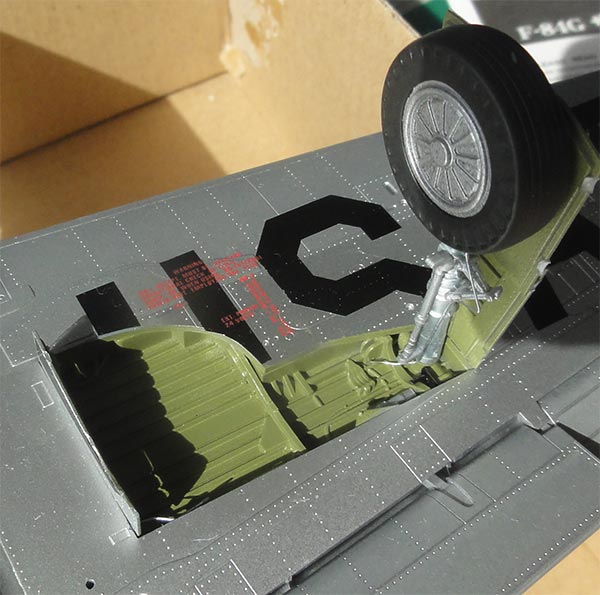
There
were no side struts seen on a real F-84 on the main gears. In the
gear bays just a few extra details were added from scrap like from thin
metal wire some hydraulic lines and set on the gear legs and
in the bays.
Some
light wash would be appropriate in the bays and on the gears. A mix of
some gloss acrylic varnish with a drop of black was applied
loosely with the
paint brush. Or use your favourite wash technique. The remainder of the
airframe was kept clean as the Thunderbirds' crew kept their jets
shiny and clean.
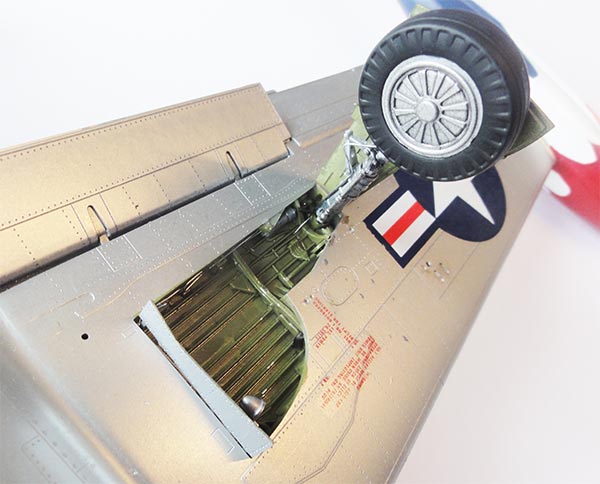
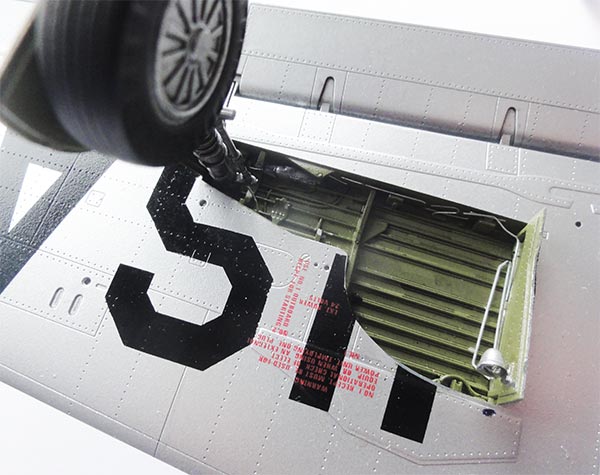
The landing lights in the inner doors as per kit were installed with some extra hydraulic brake lines made from thin metal wire.
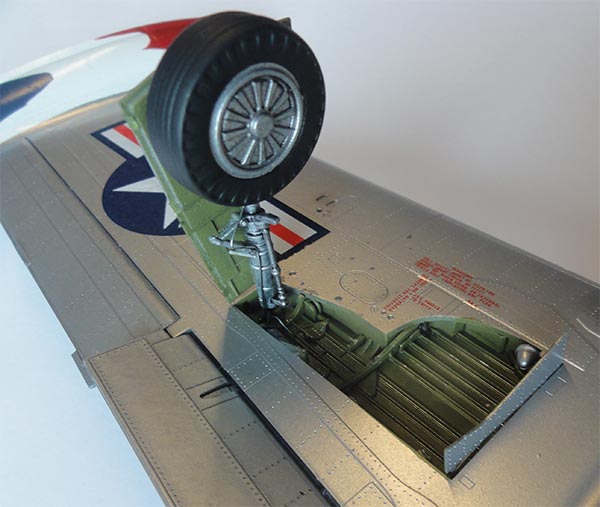
The nose gear got a similar wash applied.
![]()
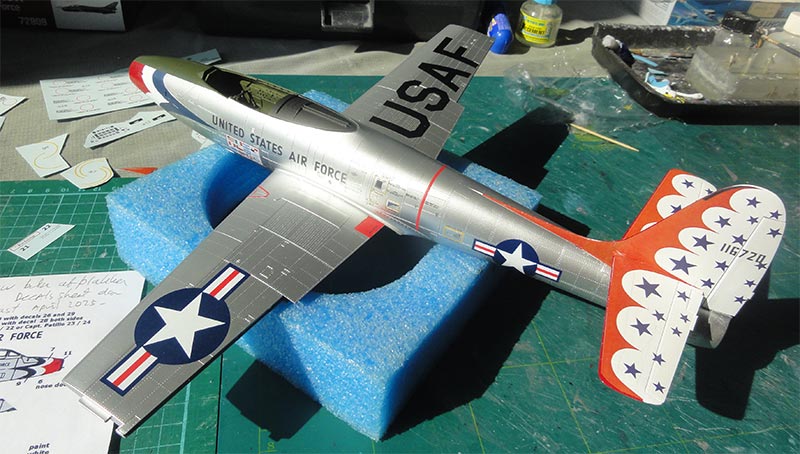
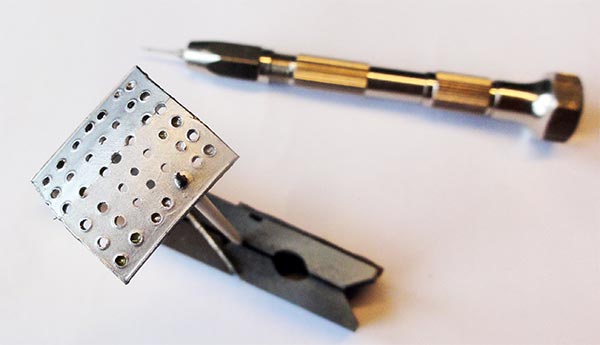
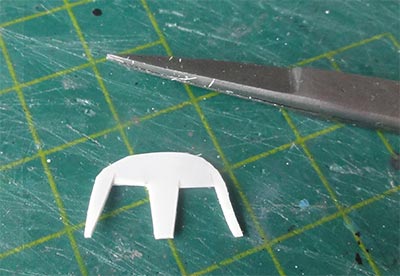
As noted earlier, the air brake part in the kit does not have the perforations as later F-84G had as well as the Thunderbirds jets. From 1 millimeter thick plastic card a new brake was made from scrap. The size is the same as the kit part. The number of perforations is 6x7 and these were all hand drilled with a drill. The brake insides' were painded green-chromate mix and outsides' natural metal.
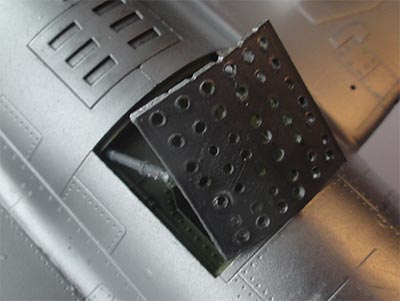
The new air brake was installed open.
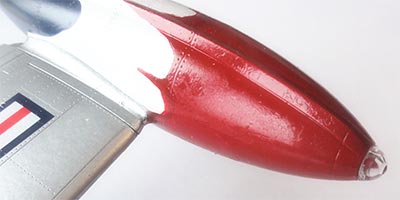
The colourful wingtip tanks were installed easily after their front lights #GP4 got a red and green bulb inside from a scrap bit.

The Thunderbirds often flew their demonstration flights with the inner fuel tank pylons still installed (but not the tanks). The kit pylon parts had been metal airbrushed earlier and now easily installed as shown in instructions STEP 13.
The lower fuel dumps at the lower tail pipe are installed as shown in the STEP 12. On the Thunderbirds jets 2 were seen on both port and starboard (so not 4). They were painted red (on many F-84 they are metal).
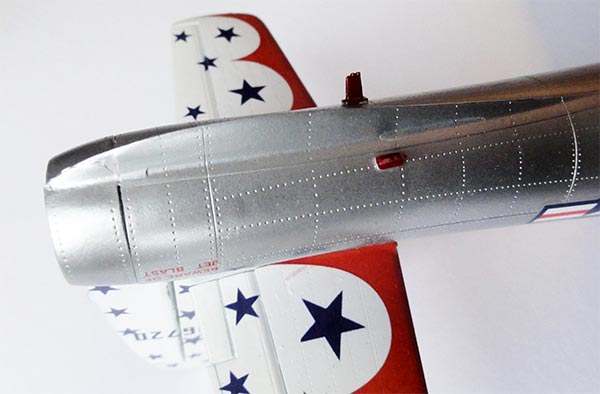
![]()
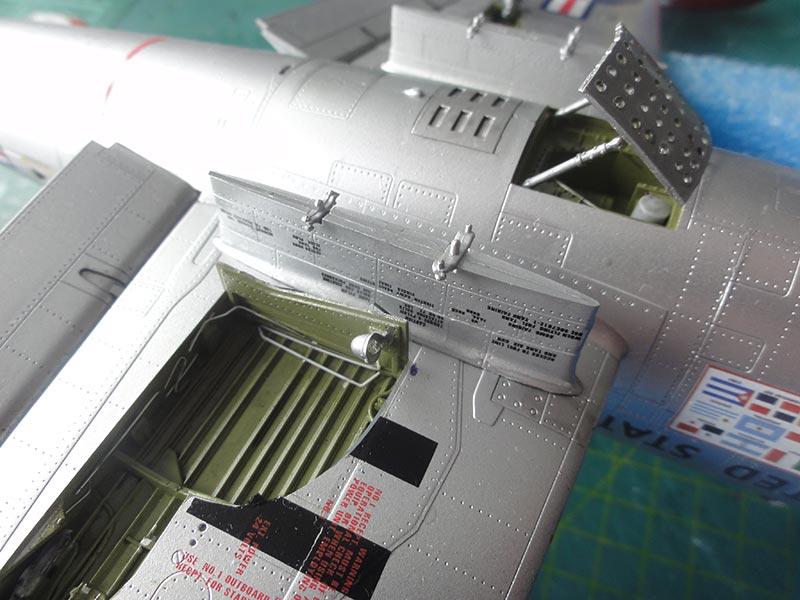
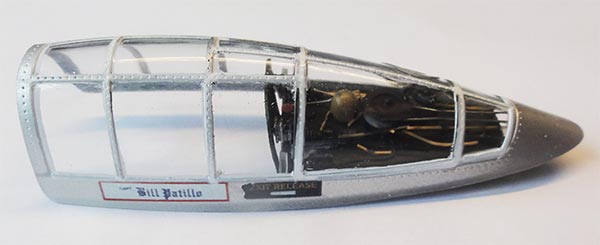
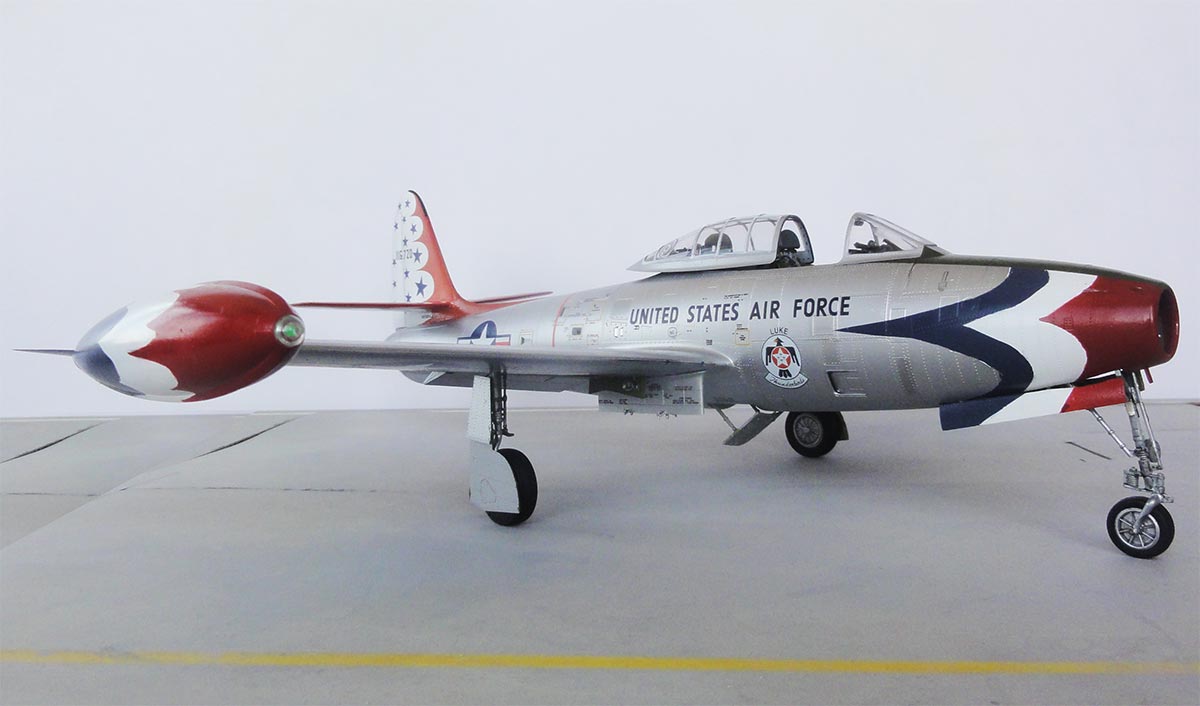
The characteristic transparancies like canopy and windscreen were next. The kit parts are excellent.
The lower edge of the main canopy #GP9 was masked and also the frames of the windscreen #GP5. These were again airbrushed Vallejo 77.701 aluminium metal. The raised detailed main canopy frames as per kit part #GP3 were hand painted on the outsides metal followed by thin white frames.

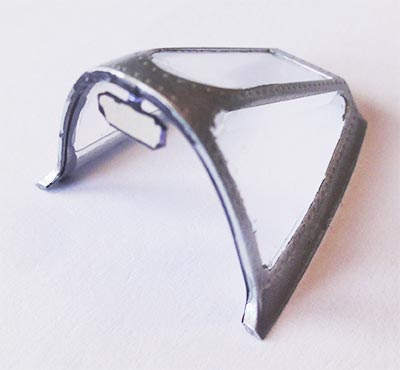
Inside the windscreen a (foldable) mirror was made from scrap from a piece of etched metal plate and set with superglue. Some inside edges got a black lining with a permanent marker to suggest rubber seals.
The kit windscreen has an excellent fit and fixed with a few drops of white glue. Note that there should be gap between the kit nose fairing and the kit gun sight part in order to get it fitted.
The panel #G5 for the canopy sliding mechanism has nice details provided as per kit as seen in STEP 10. The part for the radio compass I did not see shown but is in the sprues. Some electric wires and the steel cables on the pulley #D58+D59 was added from scrap.
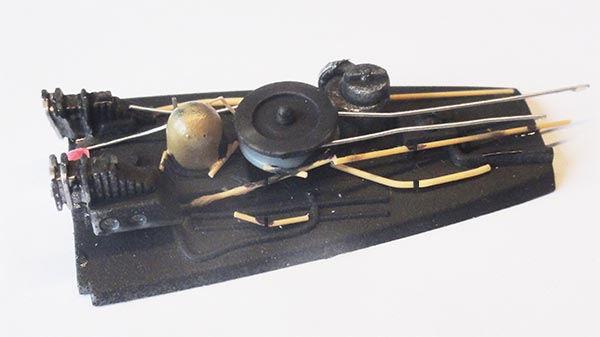
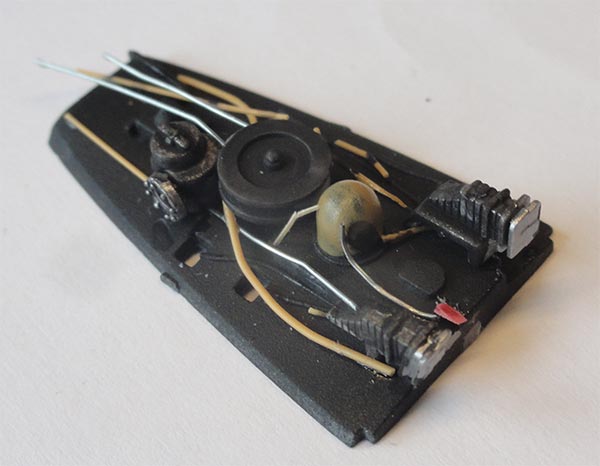
Some F-84G had an extra vertical plate at the front of this panel and no kit part is provided. Looking at photos it was probably fitted also on a Thunderbirds jet. So it was made with some plastic card and painted green H340.
The installation in the main canopy was easy. The lower surfaces and plate were painted green H340.
For the Thunderbirds jet a pilot name panel custom decal was also set. The model was now almost complete.

Back to the cockpit. The pilot control stick # D31 and prepared ejector seat were installed. Some smaller knobs in red and pull handles in yellow made from stretched sprue were added as well.
Note the rear view mirror.
![]()
The final thing to do was airbrushing a final clear gloss acrylic varnish with the usual technique: 90% Johnson Future/Pledge
thinned with 10% Gunze Sangyo Mr.Color Levelling Thinner acrylic. This
gives an overall sheen and protects the decals. Shield off the windscreen and rubber tyres when airbrushing.


The canopy was set slided aft and that completed a very nice USAF Thunderbirds aerial demonstration team Thunderjet model in 1/32 scale!
![]()
Time breakdown:
- airbrushing base coat and white 1 hour
- masking and red airbrushing 3 hours
- masking and blue airbrushing 2 hours
- masking and natural metal airbrushing 3 hours
- masking and airbrushing bays 2 hours
- decalling Thunderbirds and stencils 6 hours
- installing gears and other bits 3 hours
- detailling 5 hours
- final check and completion 4 hours
- varnish coat airbushing 1 hour
> total about 35 hours (excluding decal design and research)


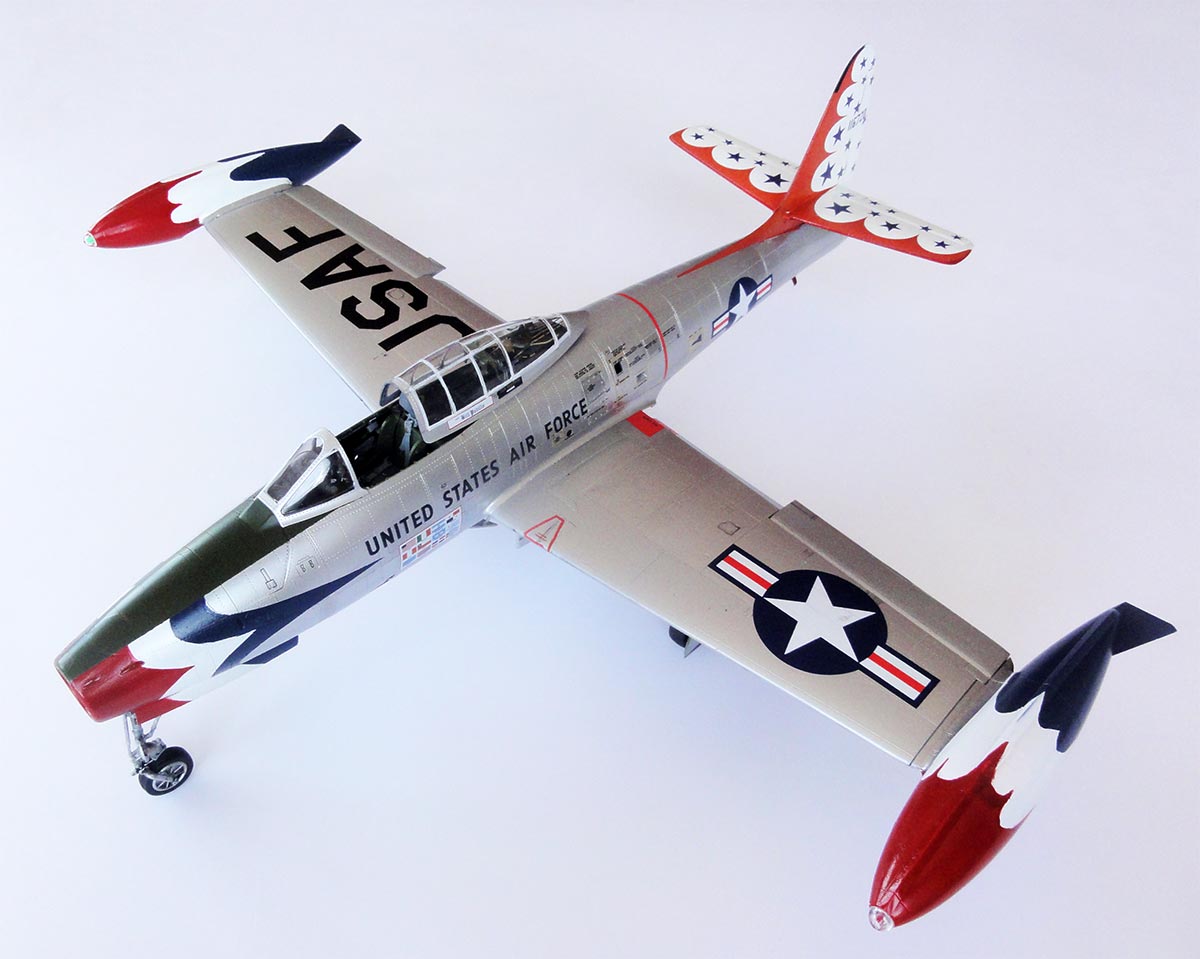
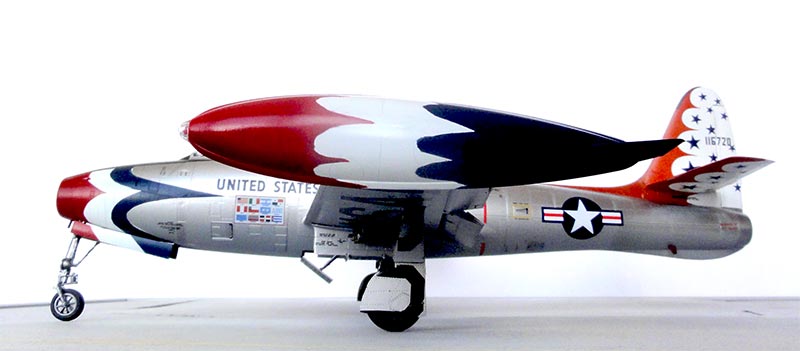
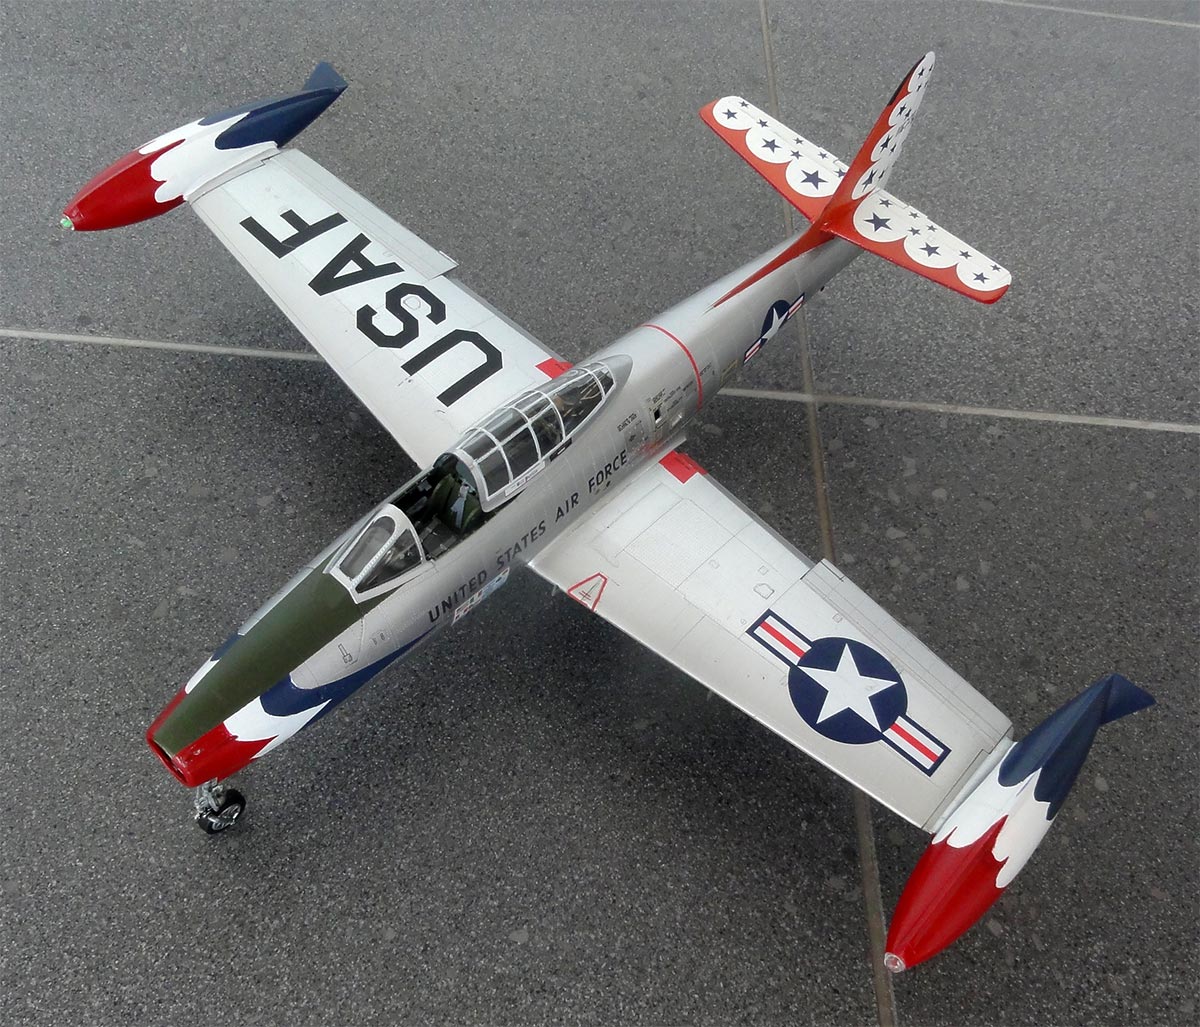
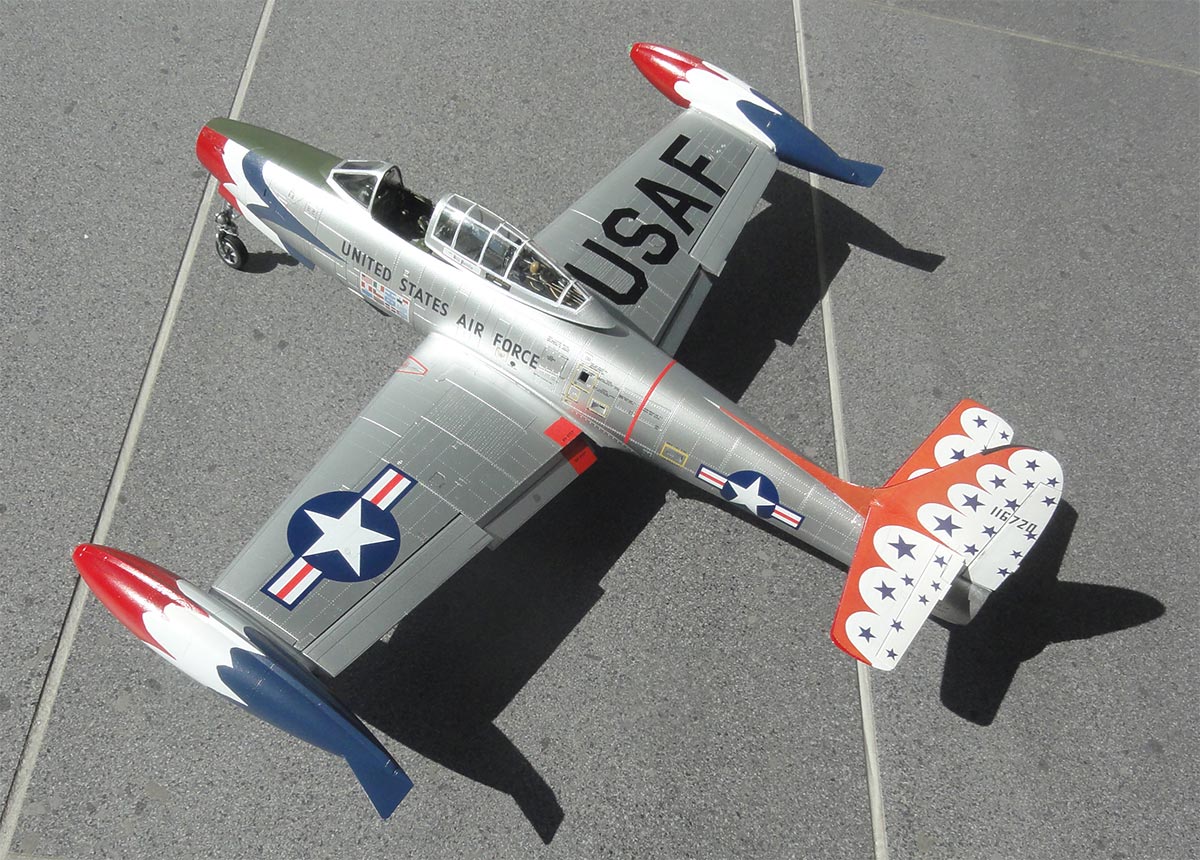
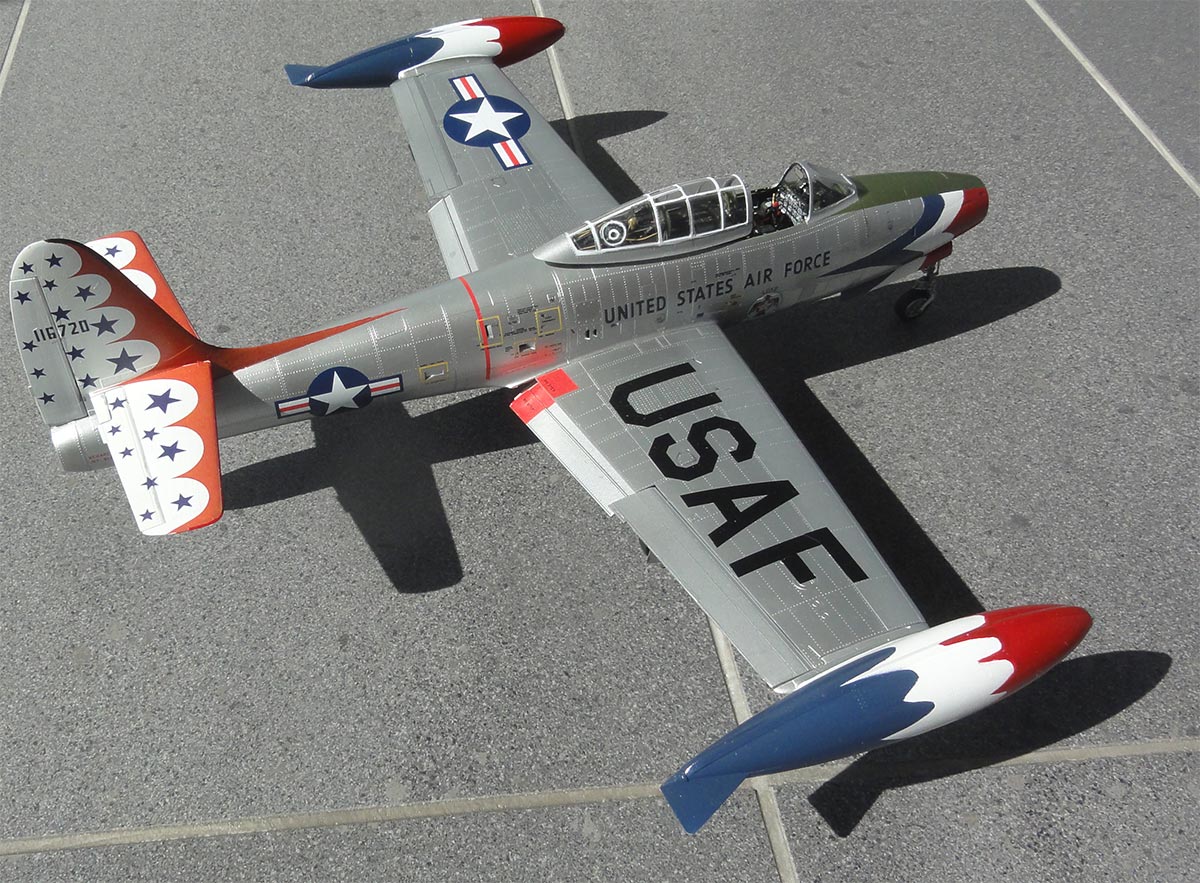
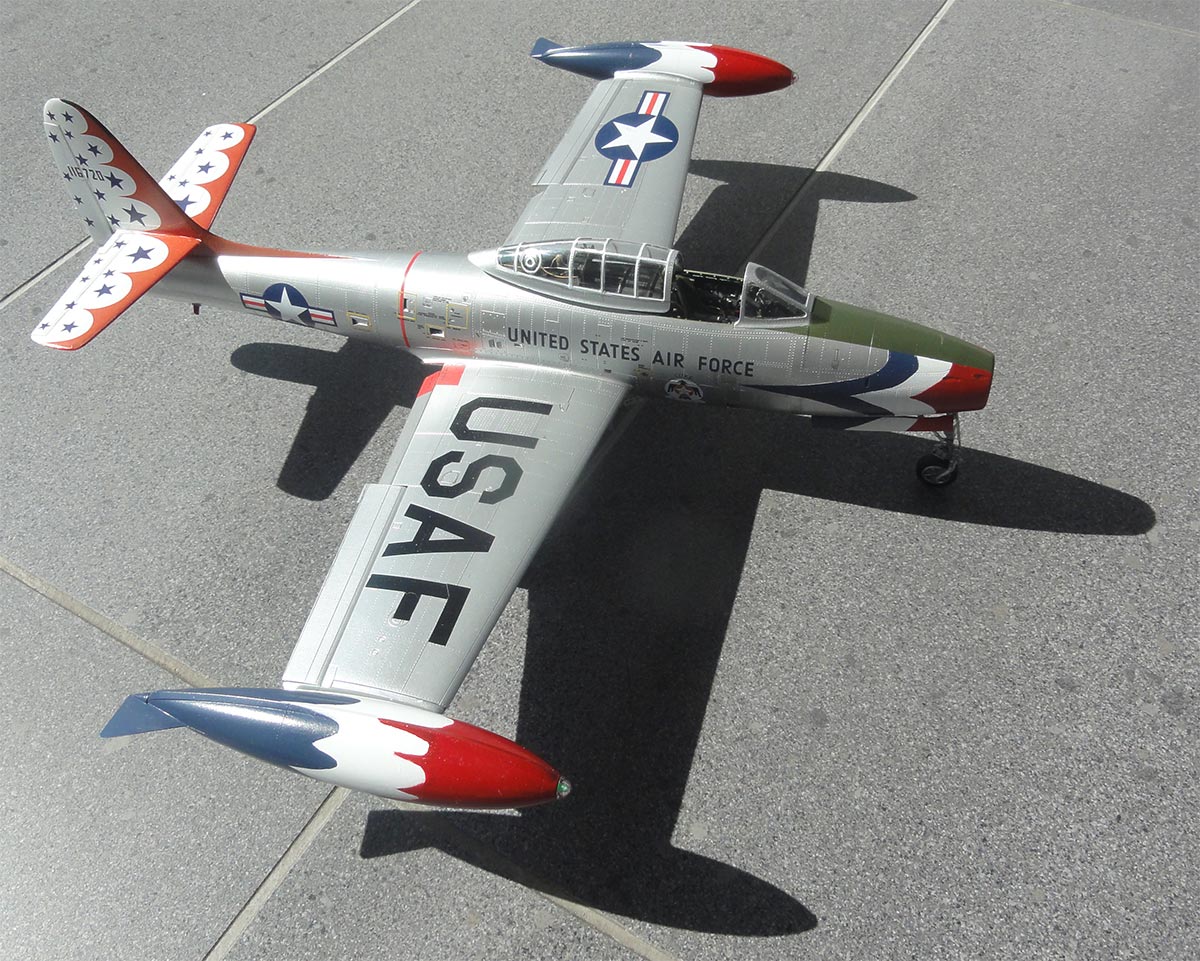
... on the tarmac....
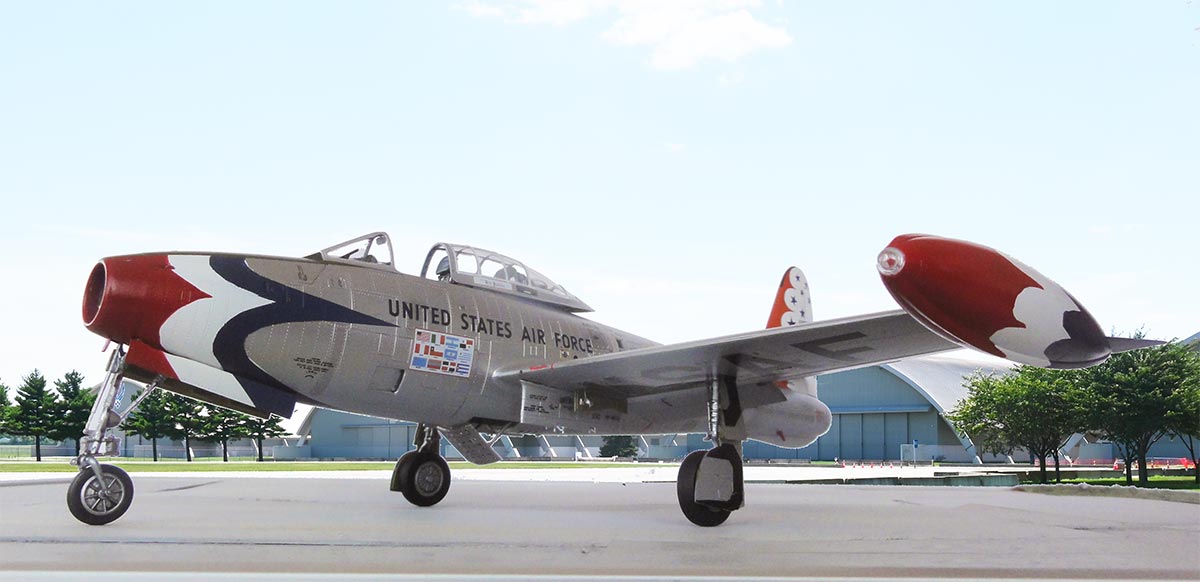
A unique F-84G in 1/32 with my own decals is now in the model collection of the USAF Thunderbirds aerial demonstration team. It sits nicely along the 1/32 Thunderbirds F-16C.
Interested in a 1/32 F-84G Thunderbirds AIPD-11 decals sheet? Look at the decal page here...
Back to 1/32 Models
(c) Copyright "designer"/ All rights reserved. Your comments are welcomed by webmaster
Created this page:
June 18, 2025