USAF Thunderbirds demonstration team
[ page 1 ]
F-16C of the USAF Thunderbirds using a Hasegawa kit with Tamiya decals!
.. back to 1/32 F-16 main page....
MAKING A THUNDERBIRDS F-16C USING THE OLD HASEGAWA F-16A "Plus"
From my modelling friend Bas I got a couple of old 1/32 Hasegawa F-16A kits. It looked nice to have Thunderbirds F-16 in the model collection so I swopped a decal sheet to get a Tamiya kit Thunderbirds decal sheet and would do a cheap simple kit build, combining an old Hasegawa kit with Tamiya decals!
This page provides information if you would like to make using an old Hasegawa kit a F-16C block 32 in USAF Thunderbird
As noted on this page, there is a very good Tamiya kit of the F-16C block 32 of the USAF Thunderbirds. If you are willing to buy it, use that kit.
(A) Block 32 F-16C
of the USAF Thunderbirds demonstration team should have:
- small early block 32 air intake
(for F100 engine)
- common larger horizontal tailplanes
(as used on all later F-16's)
- flat main undercarriage doors (with
thin wheels)
- exhaust parts (for the F100 engine)
- early block wing tip missile launchers
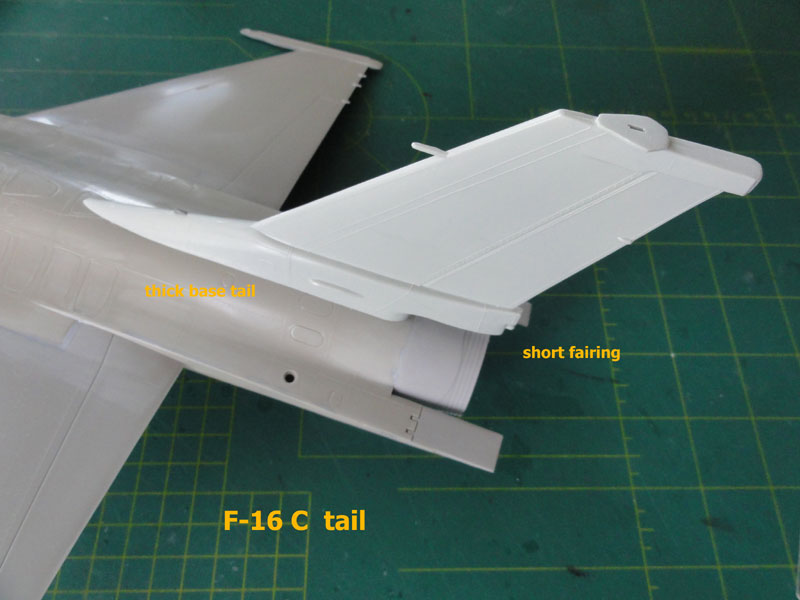
- "thick base" vertical tail with
short rear fairing (so no parachute housing)
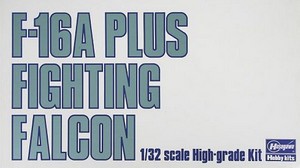
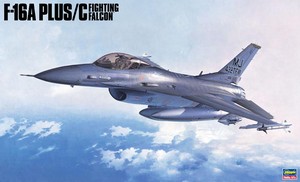
The old Hasegawa F-16A "plus"
kit #SK-005:4800 has all these, EXCEPT for the
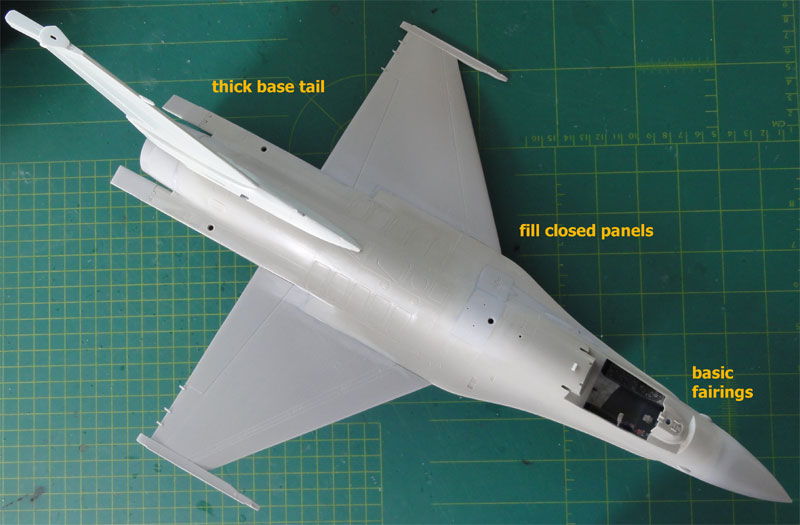
"thick base" vertical tail. The later block F-16's, like
the block 32 Thunderbirds F-16C, have a thick base vertical tail. This
area is the biggest required conversion to handle to get a F-16C Thunderbirds
model.
If you can, get your hands on a "thick
base" tail of an old Revell F-16C kit as well. Otherwise you need to scratch build
the thick base with plastic card. I had a tail in the spares box.
 ....
.... 

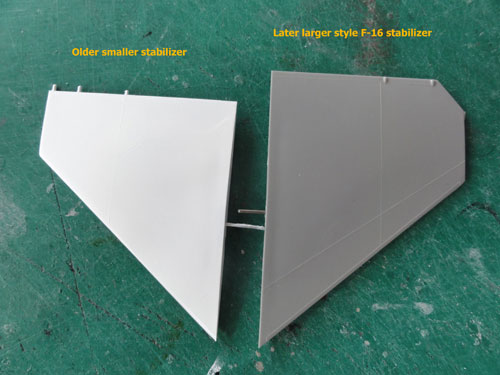
NOTE: the older Hasegawa F-16A kits #S026 and F-16A kit #S20 have the smaller stabilizers in the box; these were soon not used anymore on later block F-16's types.
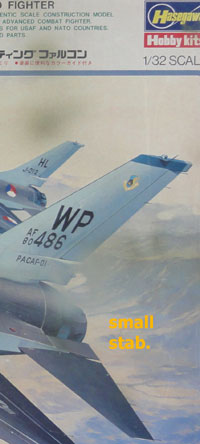
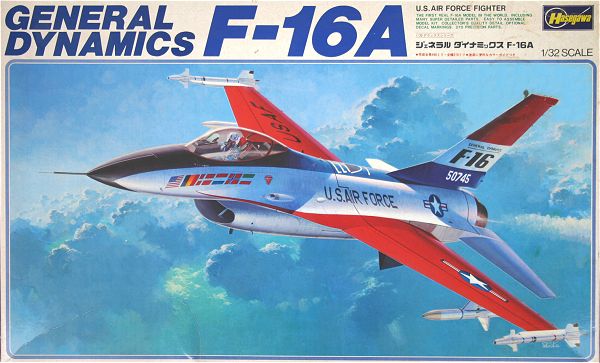
When you can, use the "plus" kit. For real F-16 info, look at the home F-16 page here....
(B) Some minor adjustments
for the Thunderbirds F-16 in addition to normal F-16's are also:
- closed gun barrel, as the team
has no armament installed;
- external smoke pipe at jet exhaust
, to enable nice smoke trails;
- some minor changes like less antennas.
![]()
Also, on these kits not only some
larger engraved panels like the upper maintenance hatches are seen, but
also mostly raised panel lines. It was decided to live with it. I did not
bother to completely re-scribed all the panels and rivets. This would remain
a relatively simple build and a colourful Thunderbirds aircraft was all
that was desired.
OK, let's start this simple build..... Steps are per Hasegawa F-16A "Plus" instructions.
STEP 1:
Cockpit assembly is as instructed.
The F-16A had main instrument console
with some clockwork and not 2 large displays like the F-16C. So, get a
spare instrument panel from another kit to replace the Hasegawa part
#D60. Alternatively, simply sand off the clockwork and make two larger
displays
from thin plastic card. This is quite easy.
A loose instruction page is in the
Hasegawa F-16A "Plus" kit. It shows the metal seat and some other details.
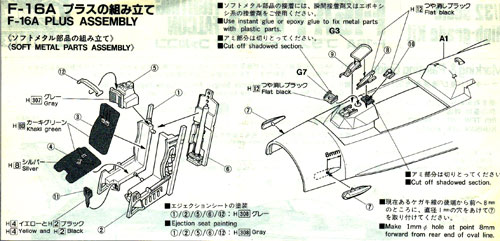
The ACES II seat shown in the instructions is a plastic assembly, but often a metal casted part is also supplied by Hasegawa. The metal one is very simple, but NOTE THAT THIS MODEL NEEDS A NOSE WEIGHT! So, the metal seat is welcome indeed. As I would install a demo pilot in the cockpit, the metal kit seat was used. Alternatively, get a replacement resin seat like from e.g Quickboost or True Details.
Use the HUD as desired, so either parts G3 or the metal parts and with G3, G7.
The Hasegawa pilot is discarded, a spare pilot from another 1/32 kit will be used (e.g. from the ACADEMY F-16 SUFA of F-18). The ladder is also not used.
STEP 2
This kit has the correct older small
intake as for the F100 engine. Assemble as shown in the instructions. The
intake cover #C32 is not used. Please note that the intake needs filler
inside to get seamless gaps. A tedious work. (Seamless suckers have an
alternative).
STEP 3
The gun is not needed and also all
panels are set closed for the Thunderbirds model. So a lot of parts like
the gun and ammodrum are discarded. The refuelling panel was also set closed.
Please note that the F-16A "plus"
and later F-16C kits have the correct larger horizontal stabilizers, parts
#B3 + B4 have the same numbering I believe but have been changed.
(F-16A kits S20 + S026 have only the smaller stabilizers).
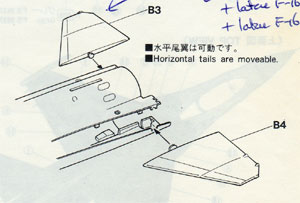
If you only have the small stabilizers,
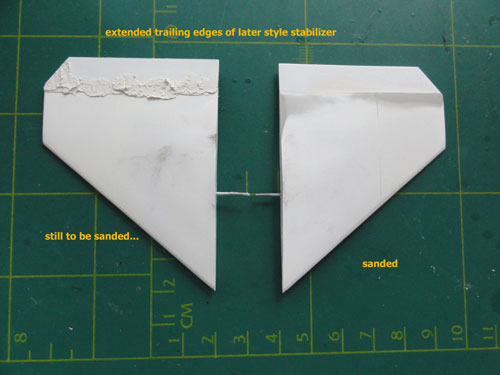
extended the trailing edge using card is necessary. This is a task that
can be done but it is difficult to get a completely hided extension. This
shows the idea:
and...
The stabilizers were NOT YET installed. They would easily brake off otherwise. Small holes were drilled at the hinge points and metal pins used. This will enable a later and stronger assembly later on. Also, the rather vulnerable static dischargers were cut off.
STEP 4
As noted, the panels were closed.
Note that the bulges and grill shapes differ per F-16 block. I simply used
the Hasegawa kit parts #C12 + C14. The gun gap will be closed with white
glue and painted later on as the Thunderbirds have no gun installed. (see
B).
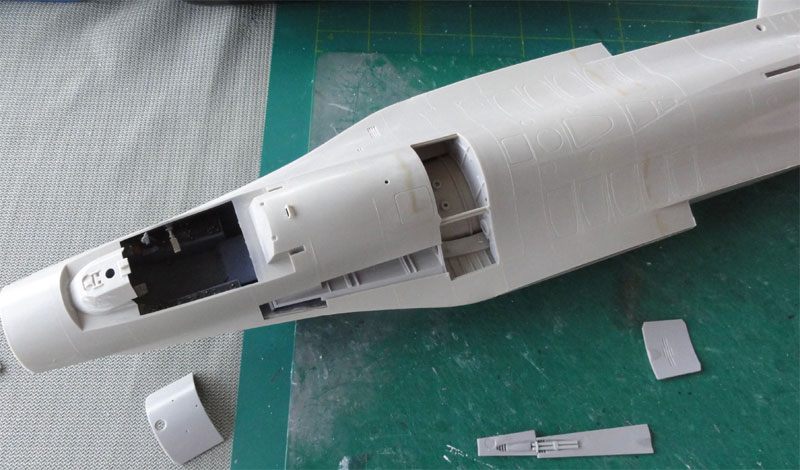
The radome will be set closed, so
radar parts were discarded.
Leave canopy installment for a later
stage. Note that the canopy colouring varied per almost each individual
F-16. Thunderbird F-16C aircraft has a smoke tinted forward canopy #G1
and a clear rear canopy part #G2. Some Hasegawa kits have a tinted smoke
glass parts, earlier kits the clear colour.
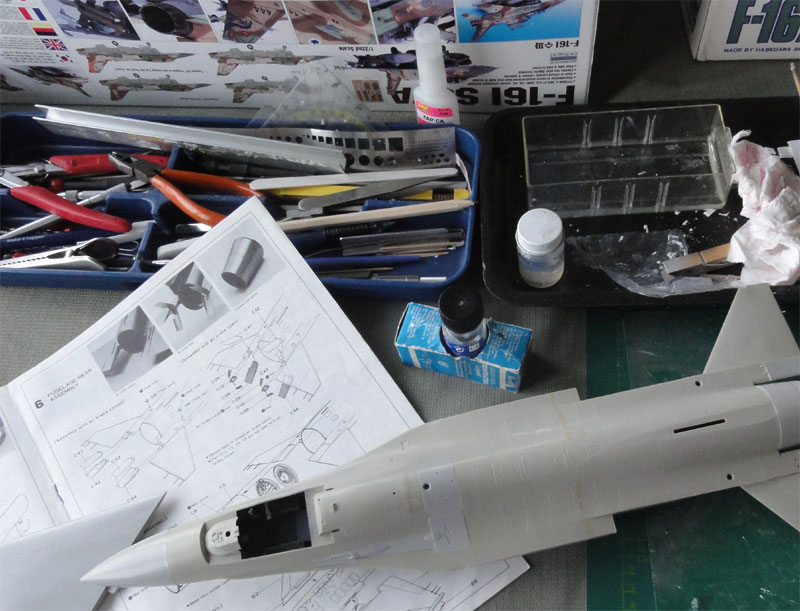
First now go to....
STEP 6
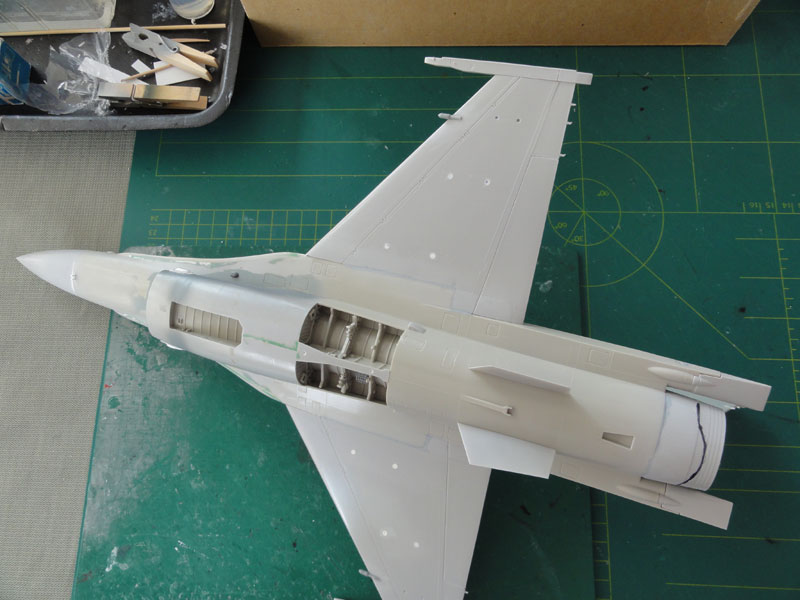
The rear airbrakes were set closed.
The tiny gaps were later closed using white glue.
The earlier F100 exhaust pipe is correct. Ensure you position the mid ring part #C8 correctly, I made an error. The exhaust pipe itself , part C24 will be installed later after metal painting.
The wing halves have not a very positive fit, ensure the right dihedral is set! Glue carefully and align. Some filler is needed later on.
The vertical tail was replaced with
a "thick base" tail, see above. I had a spare Revell F-16C 1/32 tail, that
was used. There is no parachute pack fitted on the Thunderbirds F-16C.
So the kit parts #B7 + B8 were not used.
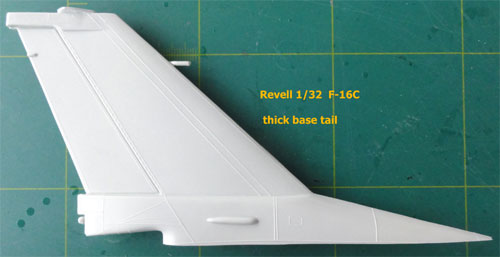
Some filler is needed to get a smooth assembly. The Revell tail also has the trapezoid on the top, also seen on the F-16C.
The kit pitot tube #D63 was not yet installed.
ADDITIONAL STUFF
Some notes:
- the later fitted F-16 upper fuselage
strengthening panels are I believe not fitted to earlier Thunderbirds aircraft.
- (the small vent under the right
cockpit sill is not there on the real early block plane; this is an error
in the Tamiya instructions).
- early F-16's
before and up to block 30 have at the slat at the inboard position only
"2" slat rotating fingers". Later versions beyond block 30 F-16 have there
"3" fingers. The old Hasegawa kit has "2 fingers"" but I did not bother
to change this.
I added the two plastic basic fairing parts #D16 + D17 on the nose. These are still on the D sprue and are better for the F-16C Thunderbirds than the two metal parts "7".
STEP 5
Nose undercarriage was assembled
as instructed, but without the wheels (these were fitted when completing
the model). The main gear has the thinner old style main wheels. I think
this is correct for the Thunderbirds F-16C. Also accordingly, the main
gear doors are also the "non-bulged" type. Assemble as shown.
The antennas #D7, probes #D8 are not needed for the Thunderbirds F-16C. On the nose gear leg, some tiny hydraulics/ brake lines were added made from stretched sprue.
The two anti-collision lights on the intake, parts #G11 and G12 , are not 100% correct for the Thunderbirds aircraft, but I used them nevertheless. They should be a bit simpler.
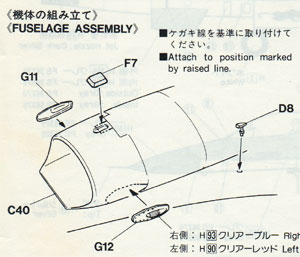
Also part #F7 is not needed. Set
#D8 later on.
STEP 7
The stores are not needed on a Thunderbirds
F-16, so discarded. Also, the mid drop tank was not needed.
![]()
Now the basic assembly is done. Now
it is time to fill all gaps and fill these with putty. This is better done
now, without the smaller details and undercarriage fitted. Sand when filler
has dried.
On the wing leading edges, the small
protruding fairings were added, made from round rod. Set in place and fill
gaps.
Some gaps were closed using White
Glue, e.g at the ventral fins.
The model is now ready to accept the first base paint coats. The base colour used is white. As the model is very large, I used a spray can. Normally I don't do that but in this instance an acrylic gloss white spray can was used from Halfords (the well known bicycle- and car- stuff supply company).
![]()
Adding the Thunderbirds Colour
Scheme
The base model had been given a white
gloss coat. I also had the swopped Tamiya decals.
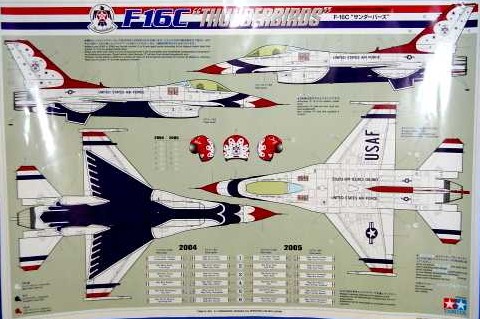
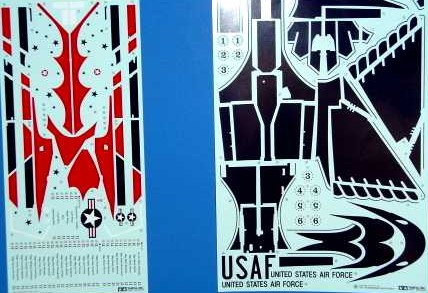
Although these decals look rather
good, I was not sure if the very curved decals would fit to the Hasegawa
F-16 kit. Still, I decided to give it a try using the very LARGE areas
of Tamiya decals.


Some coloured areas were airbrushed
however, using u Tamiya Acrylic X-7 RED, X-3 Royal Blue and in some
areas X-2 white.
NOTE: Normally I avoid Tamiya acrylic
paints, I think they are not so good are compared to Gunze Sangyo acrylics.
But in this case, I wanted to ensure a good match as possible with the
Tamiya decals.
The Harder Steenbeck airbrush was used. A paper copy of the decals was made to act a a masking pattern. Particularly the red nose and the red thick base of the tail was airbrushed red. Masking was done with low tack masking tape, cut in the pattern of the paper decal copy.
I also found that Tamiya assumes the main gear doors and the inner ventral fins to be painted X-7 blue. The X-3 blue looks slightly to be different than the decal blue colour. A pity they don't supply decals for these.
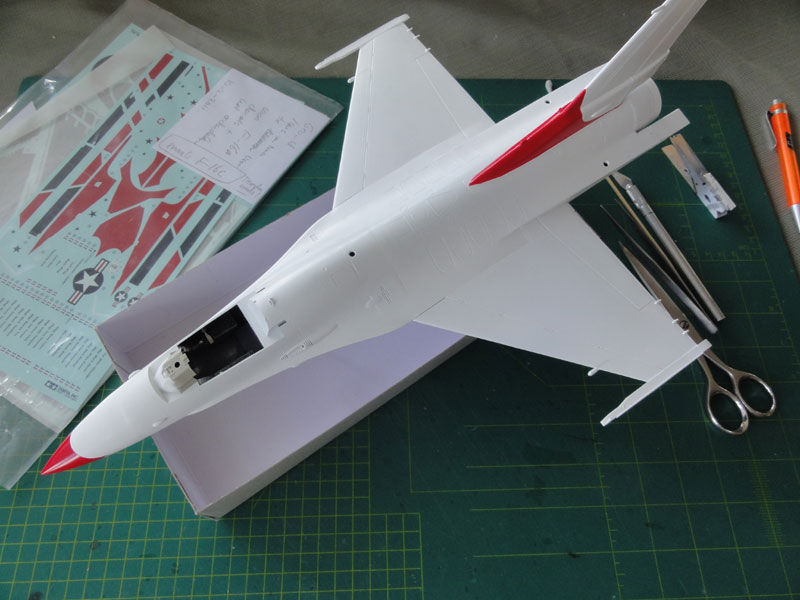
Just to make sure, also the nose
gear door was sprayed blue together with the main gear doors.
I also airbrushed a spare decals
sheet (plain white sheet from BAREMETAL FOIL DECAL PAPER) in two pieces:
Red and Blue. This would help if I would need to cover any gaps.
OK, decal application was next. Using the Tamiya instructions, it all went surprisingly well. Although the decals were designed for the Tamiya F-16C, they fitted reasonably well also on the older Hasegawa 1/32 F-16!!
Thunderbirds No. "4" of USAF Major
Steve Horton was selected which flew the rear Thunderbirds slot position.
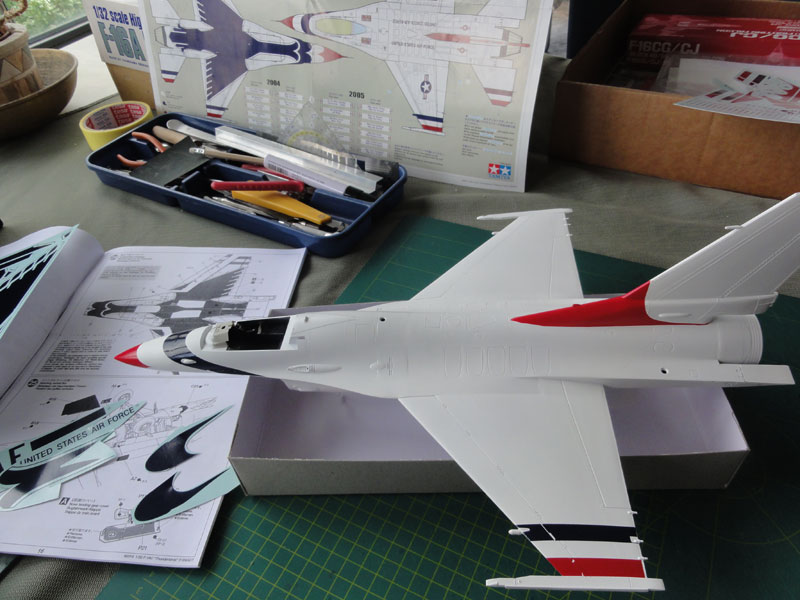
It takes quite some time to apply
the decals. The wingtip and stabilizer red-white-blue striping needed
some minor touch up with the paint brush in either Red or Blue.
I had some "curling" in places, probably the large and thick Tamiya decals in some areas have a bit to much internal stress when dried. I had to cut out some curled areas and replaced these with the spare airbrushed sheets.
The decals around the main gear bay
and nose gear bay needed minor trimming. Note that the doors themselves
have been airbrushed blue.
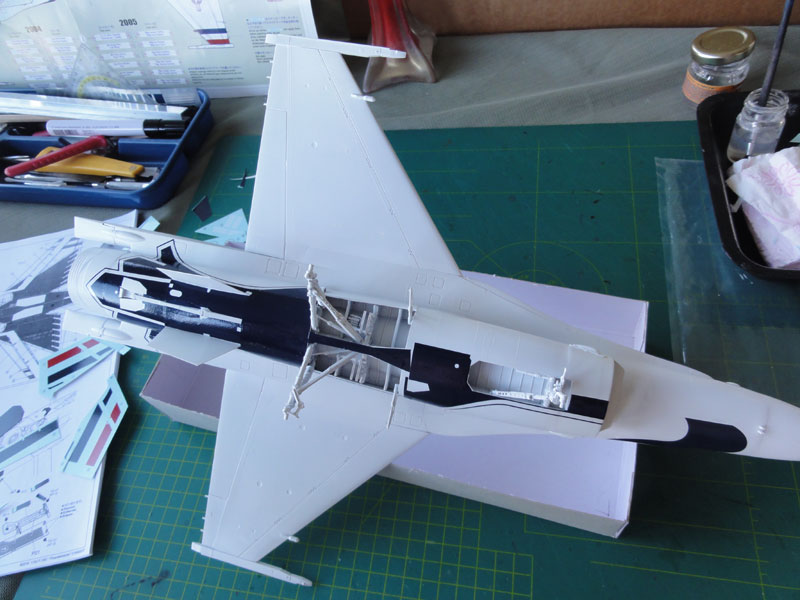
Particularly at the lower areas,
the "Blue Thunderbird" markings are impressive. The red tail leading
edge with the stars went on smooth. Note that the Thunderbirds aircraft
have almost no stencilling.
On to next
[ page 2.... ]
page 2

(c) Copyright "designer"/ All rights reserved. Your comments are welcomed by webmaster
Created this page Sept 1, 2013