conversion tips using
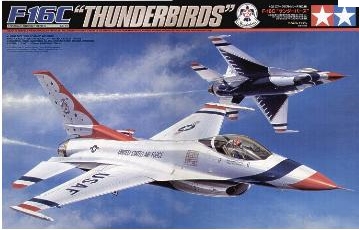
Tamiya F-16C Block 32 Thunderbirds kit
Making a F-16A using the Tamiya kit F-16C of the USAF Thunderbirds
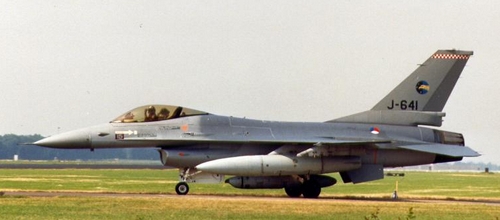
An early F-16A
of the Royal Dutch Air Force around 1985. Note the short fin base fairing
and the original "thin base" vertical tail. At the central station the
Dutch photo-recce OlDelft Orpheus pod is seen. (photo: Hans)
This page provides information if you would like to make a F-16A Fighting Falcon, using the Tamiya F-16C block 32 Thunderbird kit.
The Tamiya kit of the F-16C block 32 of the USAF Thunderbirds is a bit different kit as the Block 50 kit seen on this page with details. (this page compares it to other 1/32 F-16 kits).
 ..
..![]()
This TAMIYA F-16C Thunderbird kit
has:
- small early block air intake (for
F100 engine)
- flat main undercarriage doors
- different exhaust parts (for the
F100 engine)
- early block wing tip missile launchers
- (special pilot boarding ladder
and smoke pipe for Thunderbirds)
Some parts not used, but still in
sprues are:
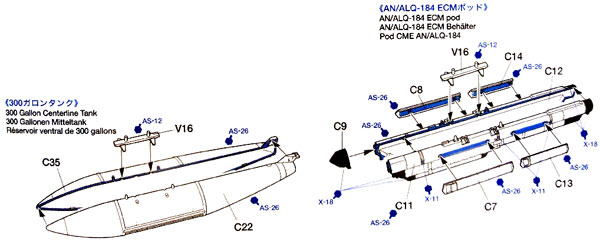
- 370 gallon fuel tanks
- MLU panel in front of canopy
- normal type boarding ladder
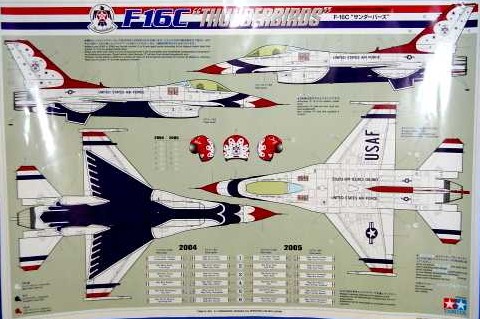
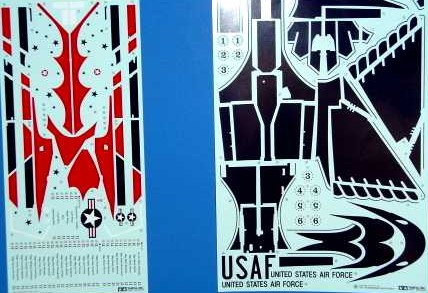
Very large decal sheets!
(look here for a Hasegawa
F-16C Thunderbirds conversion...)
![]()
MAKING A F-16A USING THE TAMIYA F-16C
If you want to make an early F-16A (F-16A before block 32), the following can be used as a guide with the TAMIYA instruction steps:
Step 1 - 13: built as per instructions. Please note that in Step 9 the main gear indeed has the landing lights on the main gear legs which is correct. Also, an early style main wheel hub is in the kit.
Step 14: cockpit is OK for early blocks. (please note that F-16A MLU Mid-Life-Update has black side panels)
Step 15: built as per instructions
Step 16: some ACES ejection seats lacked the sidebraces as seen on part #G9
Step 18: built as per instructions
Step 19:
Early block F-16 planes have the
first original "thin base" vertical tail. The later block F-16's, like
the block 32 of the TAMIYA kit, have a thick base vertical tail. This area
is the biggest required conversion to handle to get a F-16A model.
If you can, get your hands on a thin
tail of an old Hasegawa 1/32 F-16 kit. Otherwise you need to scratch build
the thin base with plastic card. ( I myself made a couple of resin tails
after I had made a master for the tail). See below the Hasegawa drawing,
using their parts #B7 and #B8
UPDATE: nowadays 3D printing bij 3d-Chute offers F-16 tail conversion sets. Look here..... [external link]
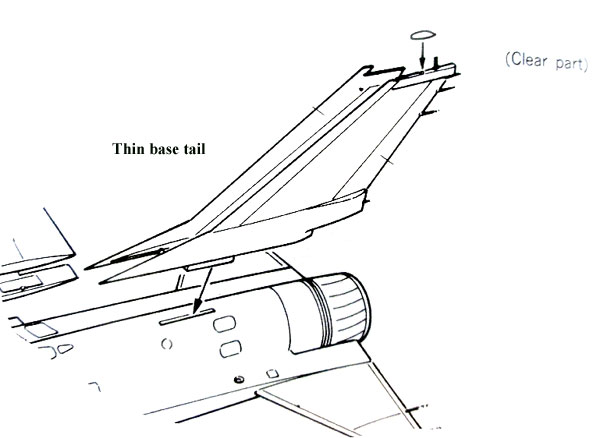
To fit another tail to the TAMIYA kit, you need to cut away some plastic in the fin base area and with putty make a smooth joint.
The panel in front of the canopy #B16 is OK for early F-16's. Please note that the part with antennas as used on later blocks and MLU's is still in the sprues (part #B17)
![]()
Step 20: built as per
instructions, but obviously do not use the fin screws etc.
Step 21: built as per
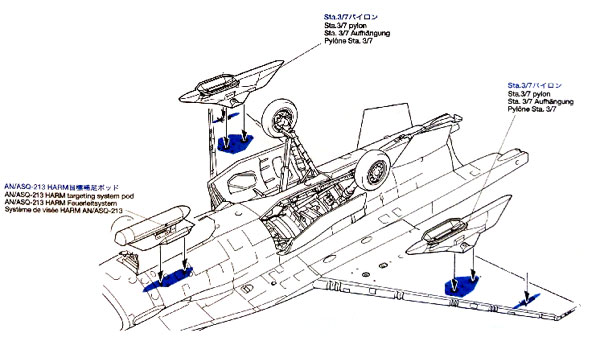
instructions, but do not use parts #E6, #E18 when you want to fit pylons
with fuel tanks.
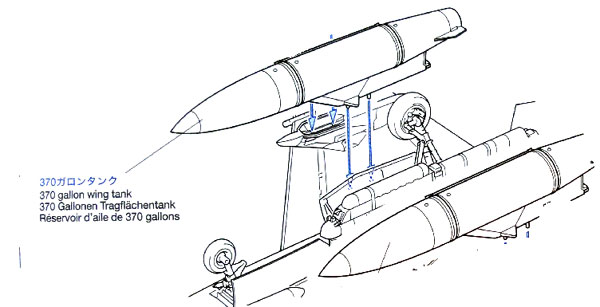
The pylons and fuel tanks are still
in the kit, see drawing below for instructions if you want to use them.
Also you need to get fuel tank markings from another kit (they are not on
the Thunderbird decal sheet).
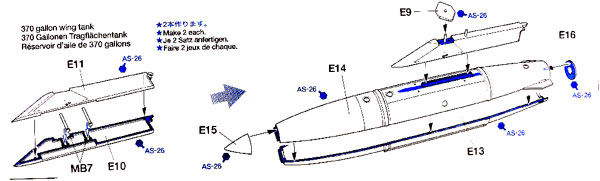
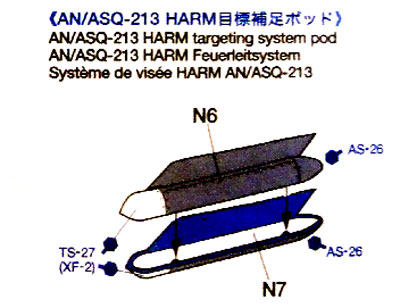
Some stores you may want to add,
such as the central fuel tank:
Step 22: F-16A has no RWR antennas on the slat leading edges. So cut off from parts A5, A16, A6, A15 and sand smooth.
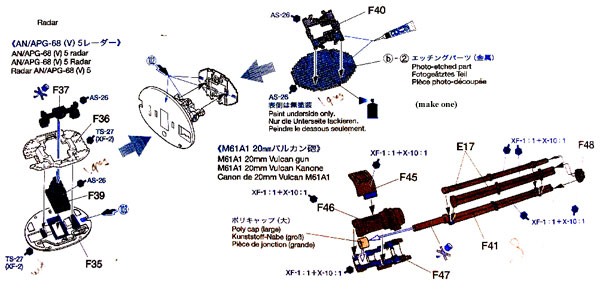
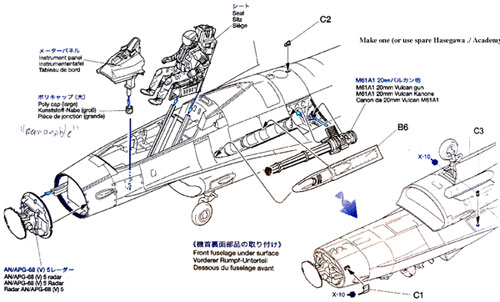
Step 23: part #Q5 is the Thunderbird opening cover as Thunderbirds have no Vulcan gun. If you want to fit a Vulcan gun and it's gun nozzle, find parts from a Hasegawa or Academy kit. Please note that almost nothing is seen of the Vulcan gun except the gun nozzle.
The kit also has no radar that can
be displayed if you want, almost all parts are still in the sprues except
for the (etched metal) flat radar disk. The flat disk can be easily made
of plastic cart. (see drawing below).
Step 24: not needed, specific for Thunderbird markings
Step 25 - 29: built as per instructions. Nice is that the correct flat main gear doors are provided (parts #P12 and #P22). Note that parts #C16 is only required 2 times, so fill behind the left wing trailing edge flap.
Step 30 - 31: do not
drill holes in the exhaust parts. Parts "Q" are only for Thunderbird planes,
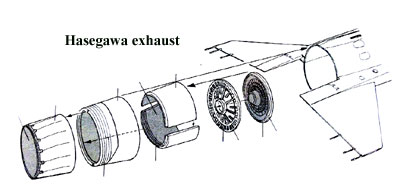
so leave out. Assemble the engine exhaust parts as per instructions.
See also here a drawing from Hasegawa kit on the exhaust area.
The Tamiya parts are OK for the early
Pratt and Whitney F100 engine used in early block F-16's, like the F-16A.
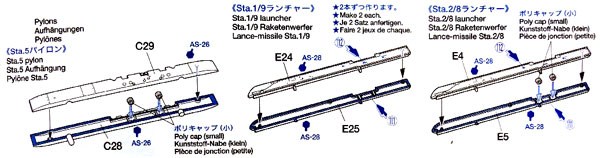
Step 32: built as per instructions.
See also the pylons info below including the central sta.5 pylon if you
want one.
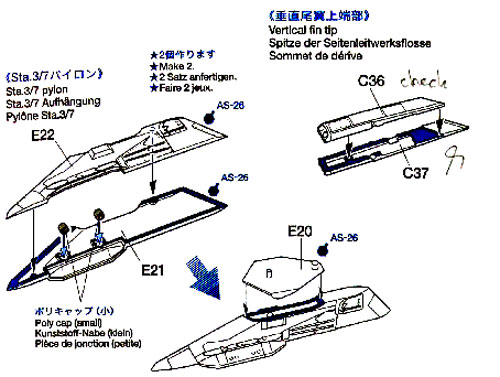
Step 33 - 34: if another vertical
tail has been made, skip. Drawing below shown only for information...
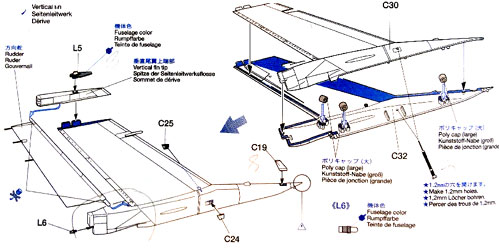
Step 35: beside the different vertical tail, assemble as per instructions.
Step 36 - 38: built as per instructions
Step 39: F-16A had main instrument
console with some clockwork and not 2 large displays. So adapt a bit part
#N3. You may also obtain the console from an early Hasegawa F-16. (their
parts # D60 + D50 for an early F-16A). 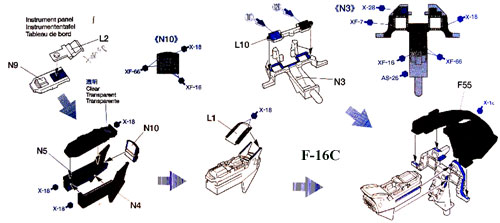
Step 40: built as per instructions,
but see notes at step 23 for the Vulcan gun.
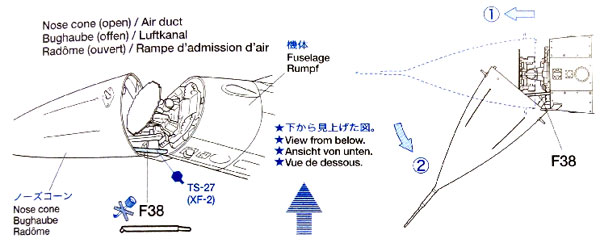
Step 41: canopy colouring varied per almost each individual F-16. Tamiya has both clear and smoke tinted parts, so check reference photos .
Step 42: built as per instructions
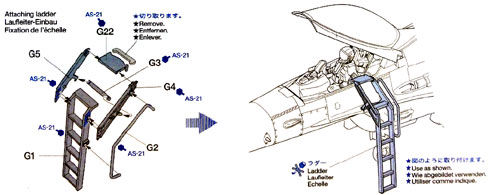
Step 43: the Thunderbird ladder
is seen here, but the conventional boarding ladder is also in the sprues.
See drawing below:
Step 44: Thunderbird wheel
blocks colours are seen here. Not really needed.
Step 45 - 46 deals with a display stand
Final touches:
- the provided strengthening panels
( the white stickers) are not needed.
- the small vent under the right
cockpit sill is not there on the real early block plane, it needs
to be filled with putty.
- early F-16's
before and up to block 30 have at the slat at the inboard position only
"2" slat rotating fingers". Later block beyond block 30 F-16 have there
"3" fingers. Probably this is modification applied later to cope with more
stress. So fill 1 finger with putty and sand flat. (See
picture on this page...)
Marking are for the Thunderbird with
almost no stencilling. So markings for a conventional F-16A you need to
get elsewhere. Particularly the walkways stripes, often light grey,
are difficult to find. These can be found e.g in the F-16 Hasegawa kit
but also Academy kit.
Also various stencilling needs to
be sourced elsewhere.
Regarding stores, if you want Sidewinders etc, get these from other 1/32 kits. Make sure to use an early AIM-9 Sidewinder and other stores appropriate for the model period.
Finish and paint the model as you want, see also the other F-16 web pages for colours and tips.
Hope this
list was a help to make a F-16A using the Tamiya F-16C Block 32 Thunderbird
kit

(c) Copyright "designer"/ All rights reserved. Your comments are welcomed by webmaster
Created this page Feb 12, 2011