[ page 1 ]
Dornier Do-228 in 1/72 scale: modelling report of Revell kit
PAGE 1
PAGE 2
PAGE 3
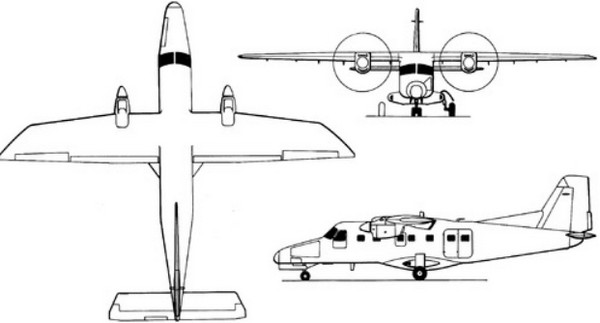 -100
-100 -200
-200The German Dornier company focussed after the Second World War on small civil utility transport aircraft. They developed and built a whole range of propeller aircraft: Do-27, Do-28A, Do-28 Skyservant and the larger Do-228. The Do-228 was an utility propeller aircraft with a 2 abreast cabin and high wing. It could take off from short run ways. The Do-228-100 has a cabin for about 15 passengers. The longer -200 series for 19 passengers.
![]()
From 1987 Revell Germany came with a 1/72 Do-228 kit #4239. It was for the Do-228-100 with fuselage with 7 cabin windows on each side. There are about 50 parts in the kit.
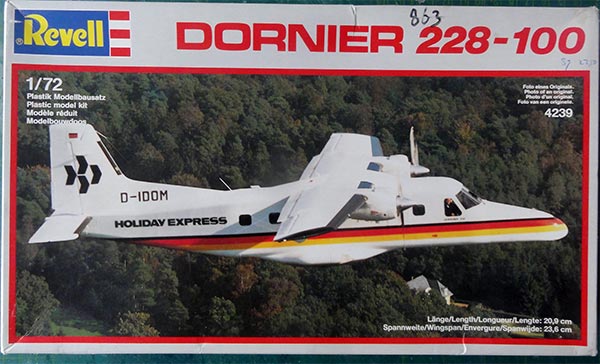
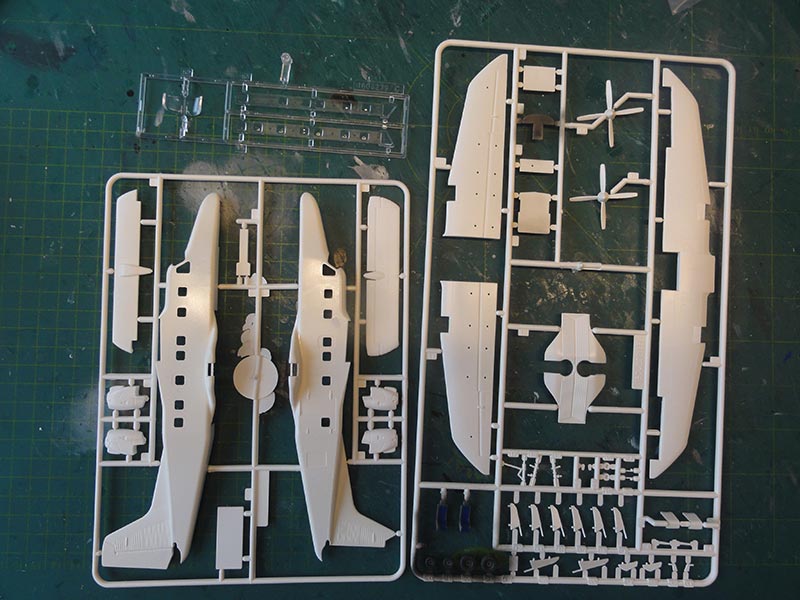
What is rather odd is that Revell did not include 2 parts for the rear ventral fins/ strakes. These are (almost) always seen on actual Do-228 aircraft to add stability.

Revell kit #4239 had decals for a West German Holiday Express D-IDOM civilian aircraft. A few other releases had different decals and in kit #4240 even snow skids were supplied for a POLAR plane.
![]()
Later from 1988 the Revell kit moulds were modified with another sprue particularly for a longer fuselage for the Do-228-212 series with at least 8 cabin windows at each side.
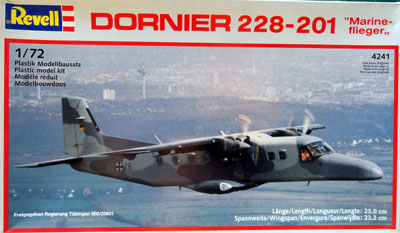
The other kit parts were unchanged and again the ventral fins/ strakes are not provided. This kit had several releases with different decals and different coloured plastic parts:
Do-228-201 kit #4241 from 1988 with decals for West German "Marineflieger";
Do-228-202 kit #04600 with another "Marineflieger Graf Zeppelin" scheme;
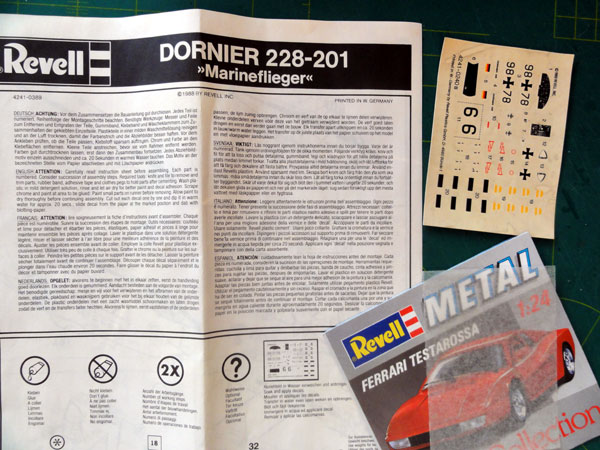
Do-228-212 kit #04287 released in 2009 with decals for [1] "Marineflieger" POLUTION CONTROL and [2] Netherlands Coast Guard "Kustwacht" aircraft.
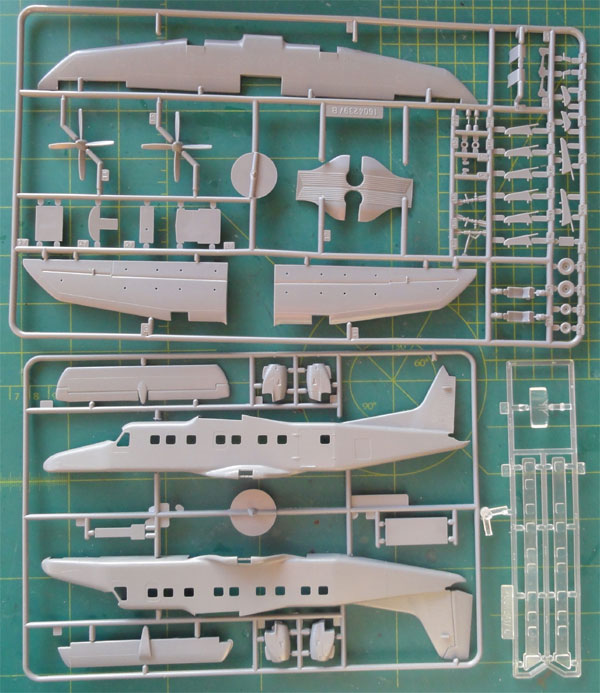
Surface detail is almost absent in the kits. They look a bit like Matchbox kits. You get a cockpit floor with pilot seats and instrument panel, but no pilot flight cabin controls. And there is no rear cabin interior and all doors are set closed.
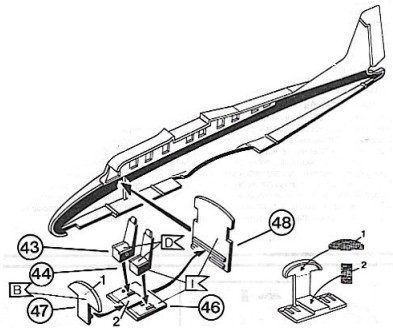
The cabin windows are clear parts in rows and are to be set from the inside. This means that later paint masking is needed for each window.
Depending on the kit's age, some shrinkage can be present that needs filling.
Several kits of different releases will be made.
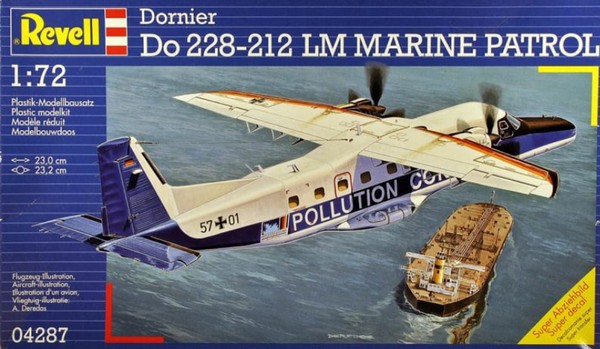
The first longer -200 series kit Revell release #04287 was made as a Dutch/ Netherlands Coast Guard "Kustwacht" scheme as supplied in the kit. A few Do-228-212 aircraft were flown with slightly different schemes. I opted for the PH-MNZ scheme which was leased and operated from 1992 (see reference IPMS.NL MIP magazine).
AND CHECK OUT my real PH-MNZ walk around here....
There are sea surveillance sensors fitted such as a SLAR radar and a rear fairing, these are also not provided in the Revell kit. So these have to be made from scrap.
The rear fuselage ventral fins/ strakes are as noted earlier missing. Another omission is that no "bubble" observation windows are supplied. Many patrol Dorniers have a few of these including this Coast Guard Dornier PH-MNZ. So the bubble windows have to be made from scrap.
The Do-228 gear fairings have a landing light in the front curved area on both port and starboard. The modeller can cut these out and make them transparant from scrap. But this is a lot of effort, I opted to suggest these with paint. (Revell provides decals).
Let's begin modelling...

In the cockpit add two control wheels on the instrument panel and few foot pedal controls. The central console sits too low, but nothing will be seen later on. What will be visible and worthwhile is adding a few seat belts made from painted tape. Seat cushions were painted yellow-orange (colours may vary per operator).
Paint the insides of cockpit and cabin medium grey. The windows strips were set and fixed with clear tape on the inside. The fuselage was closed up but first add adequate nose weight to avoid "tail sitting". The main gear bay openings have a floor/ roof but there are side gaps, these can be closed with card and white glue. But it is not that obvious.
Do not yet install the landing gear, do that after the paint scheme has been applied.
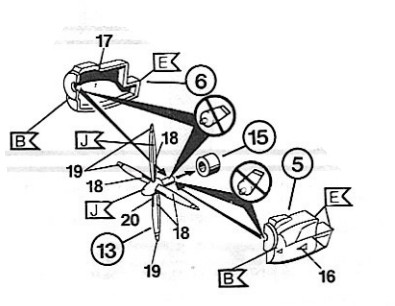
In the engine nacelles the various intakes and air vents are missing. It will take a lot of effort to open these up; I opted to suggest these later with gloss black paint.
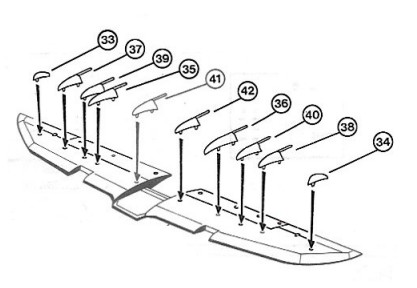
The big wing has one big upper par and seperate lower parts. This helps alignment and strength. The various flap hinges are to be set now and at the their ends Revell suggests to add rods from stretched sprue; I will install sections of plastic rod later on. I also found that flap hinge parts #38 and #41 behind the nacelle should be reduced 2 mm in length. (they often have a black colour to make smoke dirt less visible).
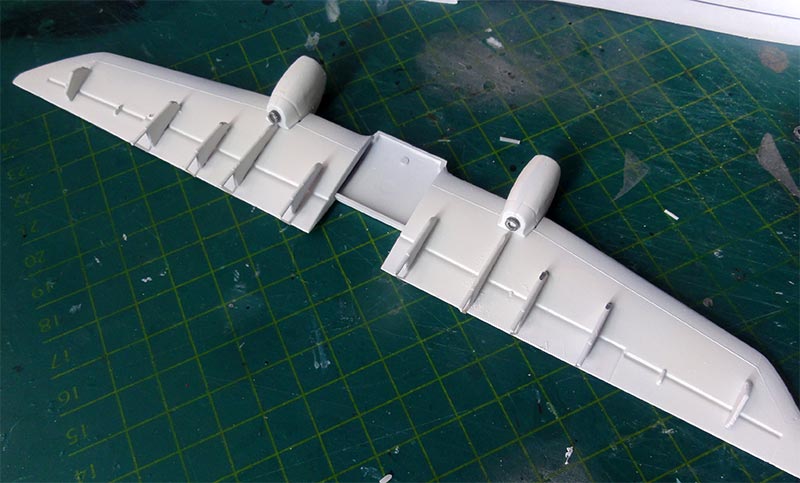
It was decided NOT to install the large wing until after painting the desired paint scheme.
The propellers are obviously not yet set in place to avoid damage.
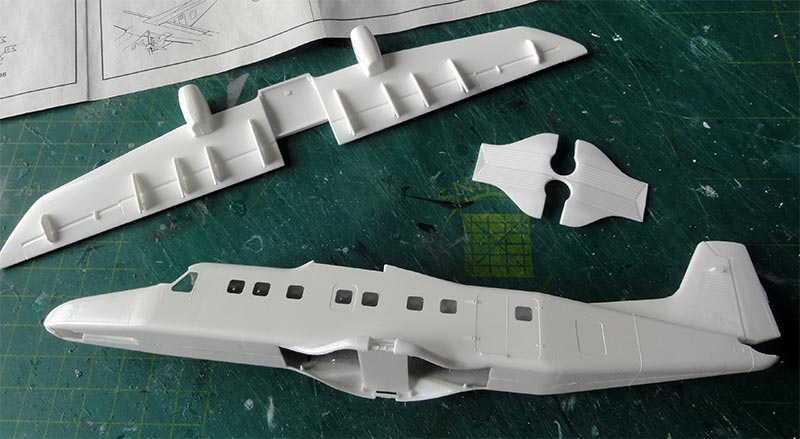
The fuselage and nacelles were sanded flush and some putty was applied. The lower base plate gaps also need filling.
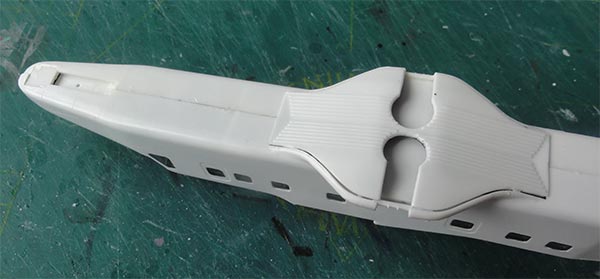

Also, shrinkage dents were filled.
When done, the single wind shield was set in place and white glue closed the gaps. All the clear sections such as cabin windows were masked with tape (or use masking fluid).
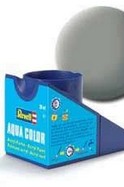
A base coat was airbrushed with Revell Aqua 75 steingrau to check for any flaws and to get an even base coat. This is essential.
The model got now get the paint scheme/ livery. So for the PH-MNZ scheme the base colour is gloss white with blue and red-orange panels and areas. Airbrush any gloss white paint, I used Gunze Sangyo Mr.Hobby H1 acrylic. For the blue Gunze Sangyo Mr.Hobby H15 was airbrushed. Masking was needed.
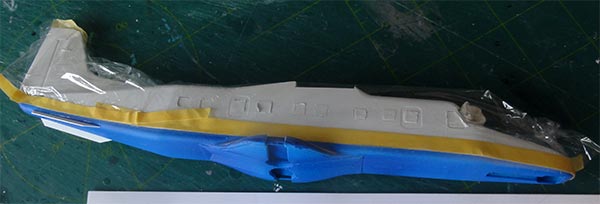
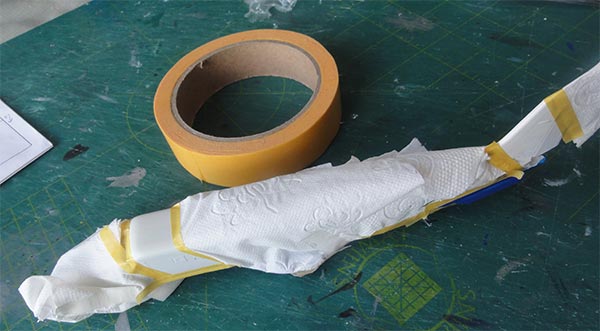
For the red-orange Revell Aqua 30 acrylic was airbrushed.
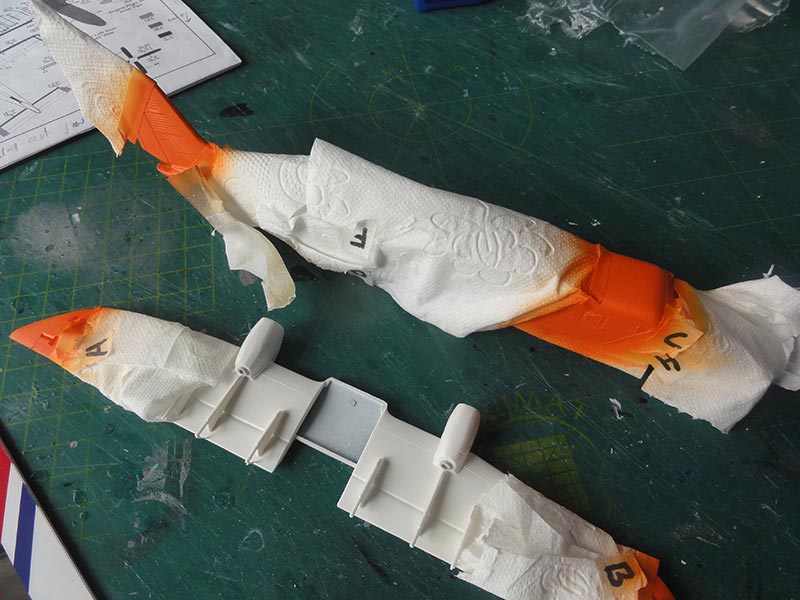
On some Dorniers the wing, stabilizers and tail have black de-icing booth on the wing leading edge but not always. Mask at this stage and airbrush black if needed.
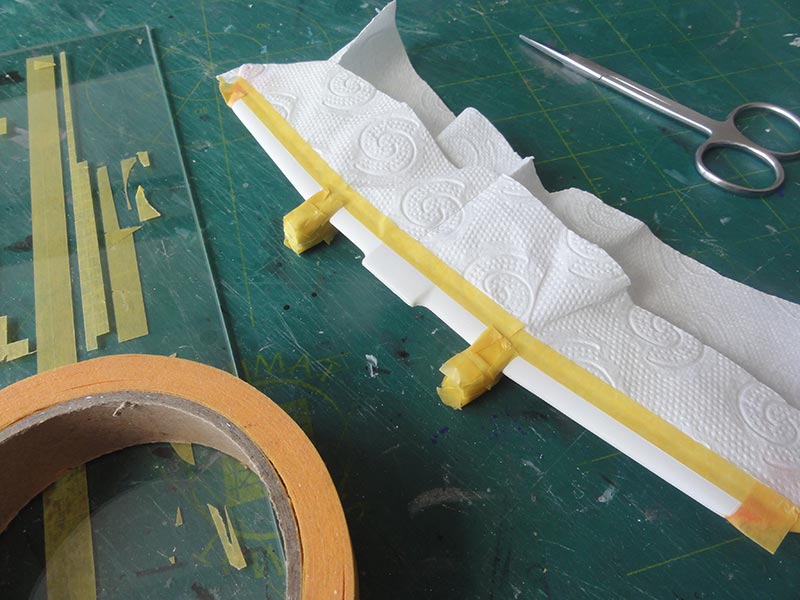
On the Kustwacht model to be made indeed these needed to be airbrushed as well. The pair of flap hinges behind each nacelle was painted black as well.
The various engine air intakes and vents on the nacelles were painted gloss black with a fine brush.
![]()
After the main paint scheme has been applied, decalling was done. The Revell kit #04287 has nice decals for the Netherlands Coast Guard/ Kustwacht scheme including the PH-MNZ.
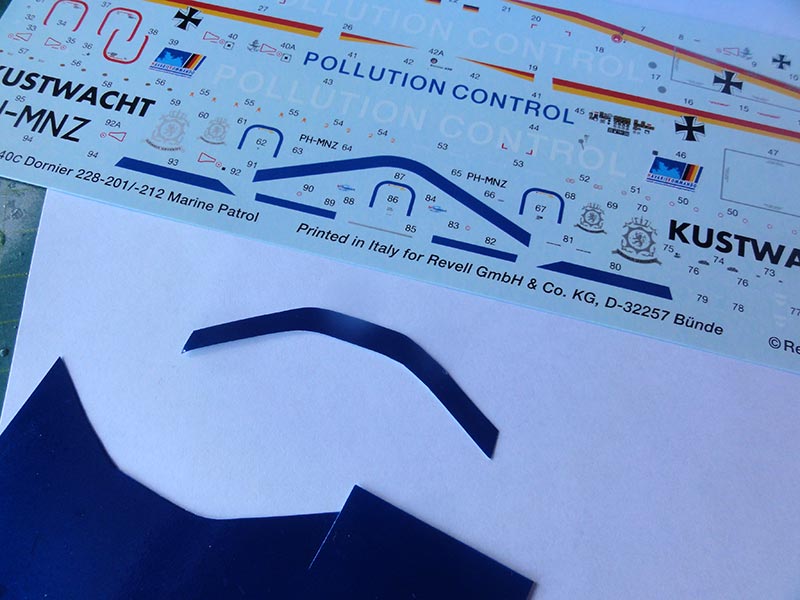
I found that the blue stripe aft of the cockpit on the real aircraft has a slightly different pattern as the Revell decals #91. I airbrushed some spare decals in blue and cut out a better stripe.
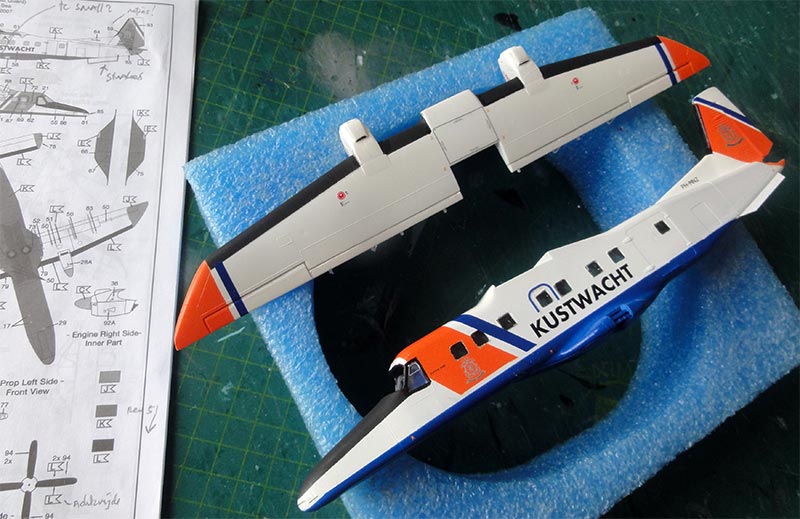
With decalling done, the completed wing can be set in place. Some sanding at the wing central edges was needed to snug it in place and than glue. I did not bother too much about the gaps between wing and fuselage as on the real Dornier these are also seen, the aircraft has a simple low cost structure. White glue was used to close gaps and painted when dried. (white thus here).
![]()
Next add the various details.
The 2x4 flap hinge rods were made from plastic rod as indicated in the Revell instructions and installed.
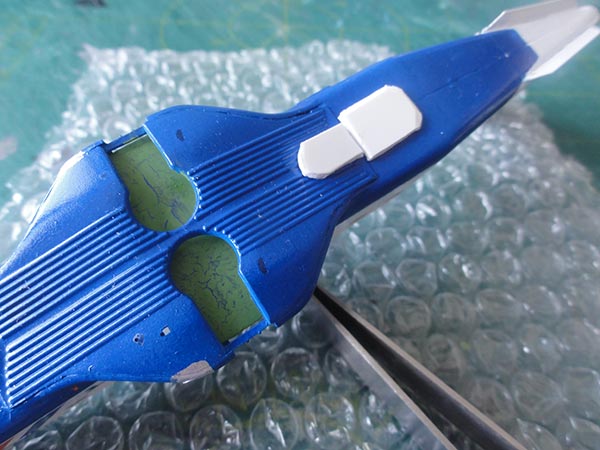
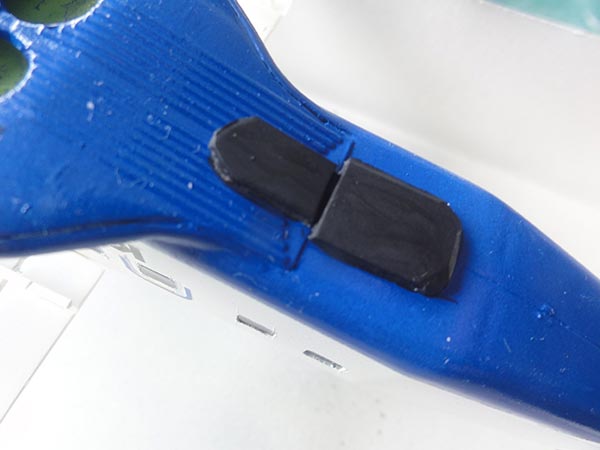
Landing lights were suggested with silver paint in front of the main gear in the stubwing. Aft of the mean gear fairing, a sort of fairing was seen of PH-MNZ. It may be a sonar buoys' fairing. It was made from 2 mm thick plastic card. Gaps with the fuselage were filled with white glue and painted all black when dried.
Below the lower forward fuselage PH-MNZ has a SLAR radar installed, it sits on stubs. This radar was made from plastic rod about 48x6x2 millimeter.
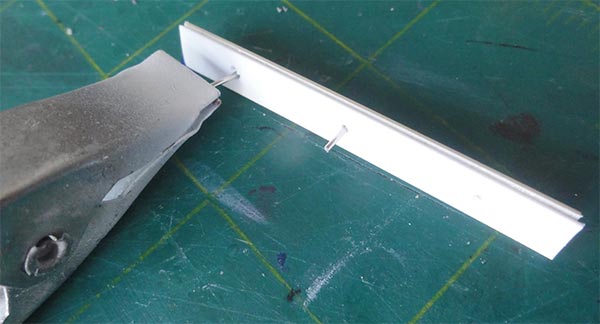
It was painted black with a long red stripe decal. It was set on 3 stubs with a clear gap between radar and fuselage.
Propeller colours may vary. For the Dutch Kustwacht aircraft, the propeller fronts of the blades are light grey (approx. Revell Aqua 374 paint) with black leading edge sections. The blades are black at the rear. For the light grey/ white propeller tip stripes, Revell provides decals.
Installment of the main landing gear struts and wheels is a bit unclear in the Revell instructions. The 2 small gear struts were set on the "bar" with glue but the structure is very vulnerable. I set a few plastic bits on their sides to get more strength. On each door, 2 retracting struts were added from thin white sprue and also bits for the hydraulic break lines.
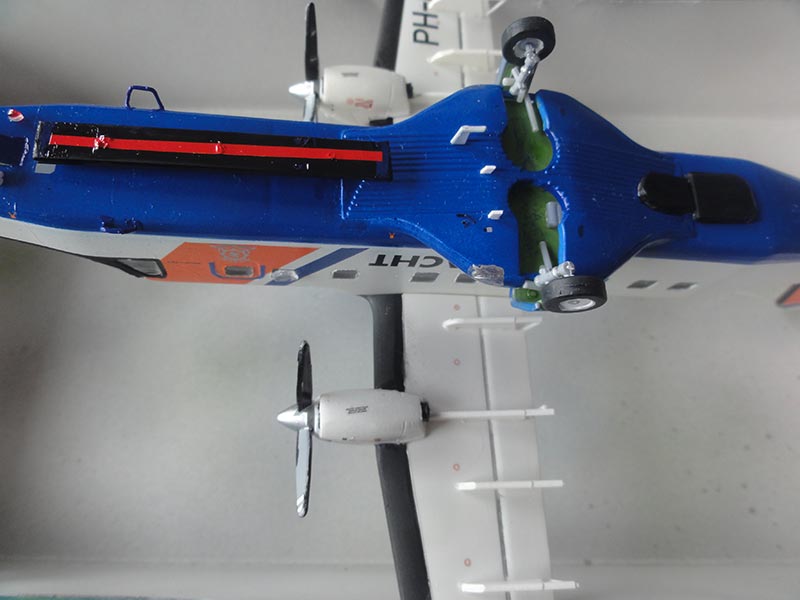
The
nose gear can be installed but I reduced the nose gear door #49 in
length. (NOTE: sometimes also mud guards are seen, but not on PH-MNZ).
Set the section of front door #51 closed after it was checked that
there is sufficient nose weight inside!
At the lower starboard side, next to the nose wheel rear strut, a sensor was installed made from a circular rod of 2 millimeter diameter and 2 millimeter high.
At the center of the main gear fairings lower areas, a few small antennas were added as well.
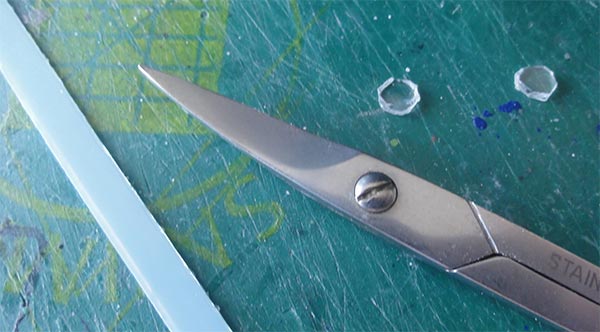
There is a "bubble" window on both port and starboard, it is the second cabin window aft of the cockpit. These are not provided in the Revell kit. The best way is to use a plug to make these from scrap but they are rather small. So I simulated these with a clear transparant disk; it was cut from clear acetate sheet with the same size as the cabin window with scissors and it was fixed with Microscale Kleer on each "second" cabin window.
Behind the nose gear a small anti-collision light is fitted off side to port. Revell provides a small part #26 but I replaced it with a clear red transparant bit. Same with the upper light #25 on the fuselage-wing section. On the wing tips, lights were painted red (left side) and blue (right side) dots.
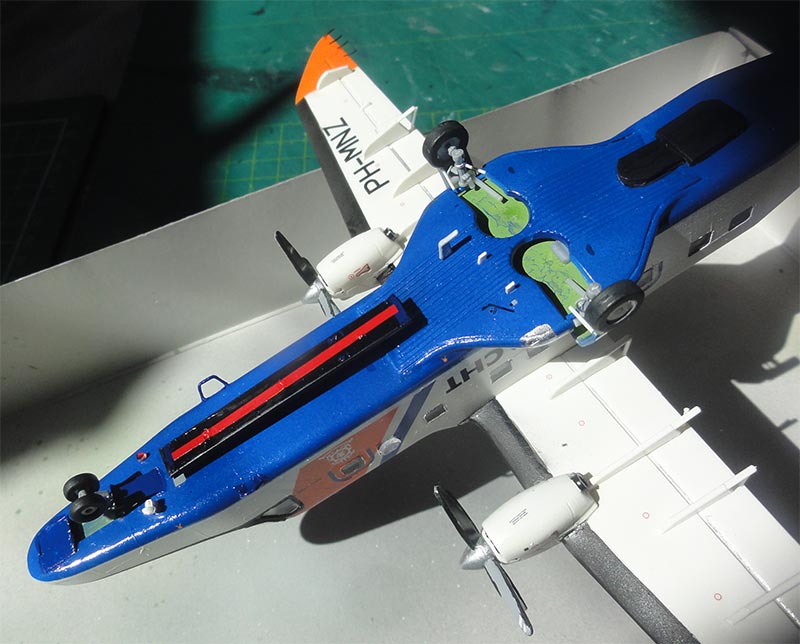
The kit nose pitots # 27, 28 were replaced with finer metal rods and installed (after any anti-glare panel has been painted).
Antenna configurations may vary on a Do-228. Study photos. Often a long wire antenna is seen; again it may vary in wire length. Most wire antennas run from tail to mid wing-fuselage section; the fixation point is often off set to port and than runs to the tail. Next to the dorsal fin also often a blade antenna is seen.
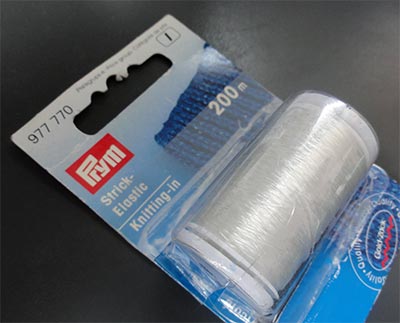
On PH-MNZ a long wire was seen and set was made from Prym "strick elastic" wire (or use fishing line), fixed with super glue.

Various static discharger wires were set: 4 at each tip of wing, stabilizer and tail. Made from flexible black EZ line wire.
Windscreen wipers were made from black stretched sprue and added as well.

The final thing to do was airbrushing a final clear gloss acrylic varnish with the usual technique: 90% Johnson Future/Pledge thinned with 10% Gunze Sangyo Mr.Color Levelling Thinner acrylic. This gives an overall sheen and protects the decals.
KUSTWACHT NEDERLAND

Do-228-212, registration PH-MNZ, Dutch Coast Guard, "Kustwacht Nederland"
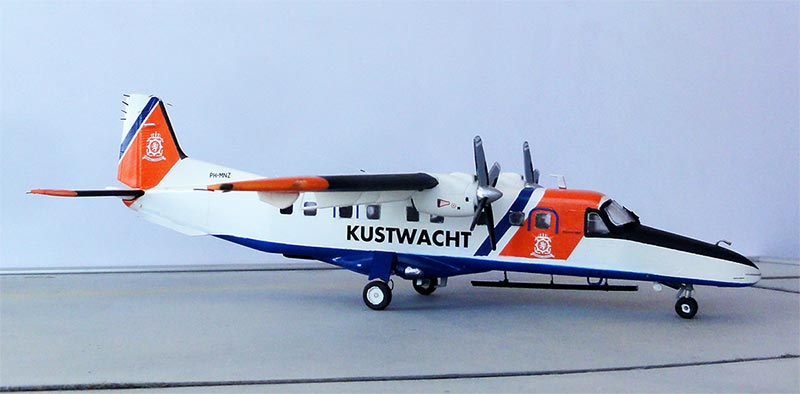
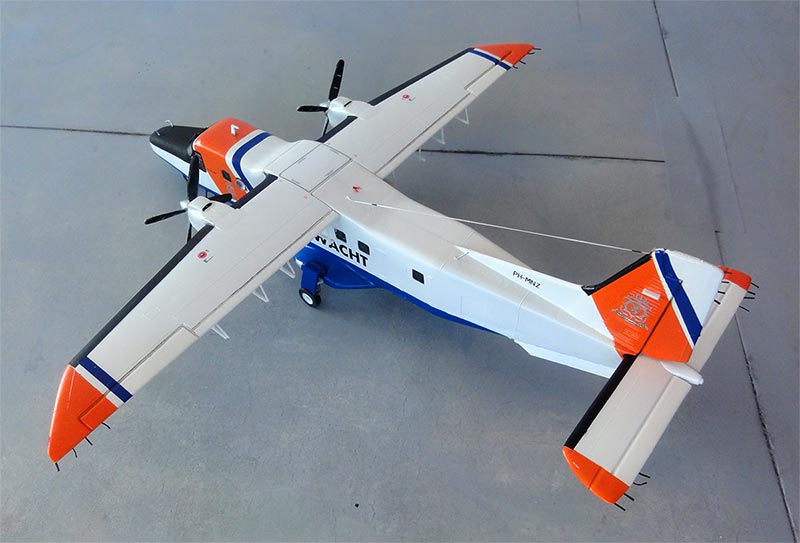
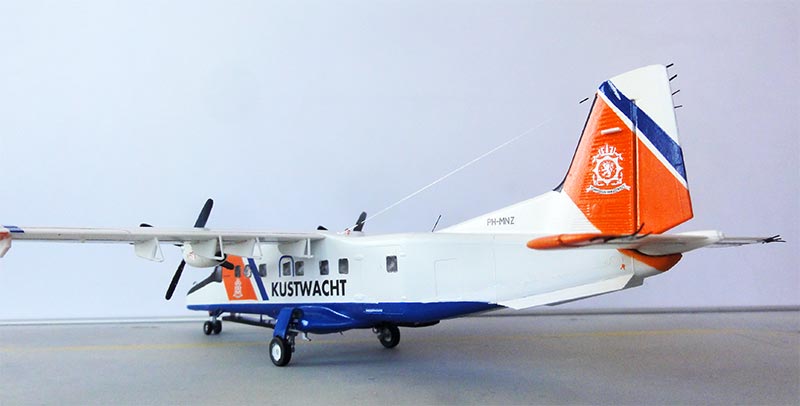
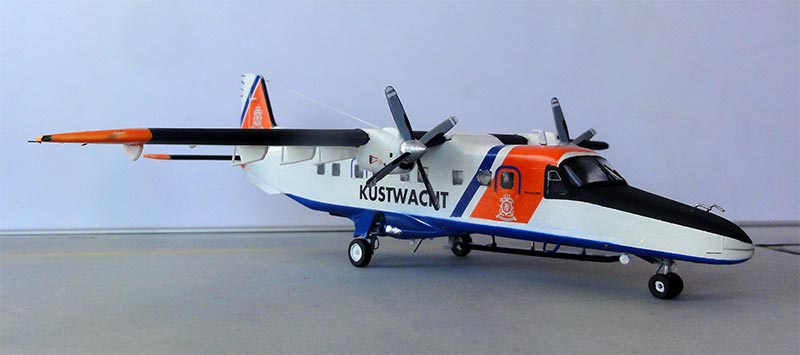
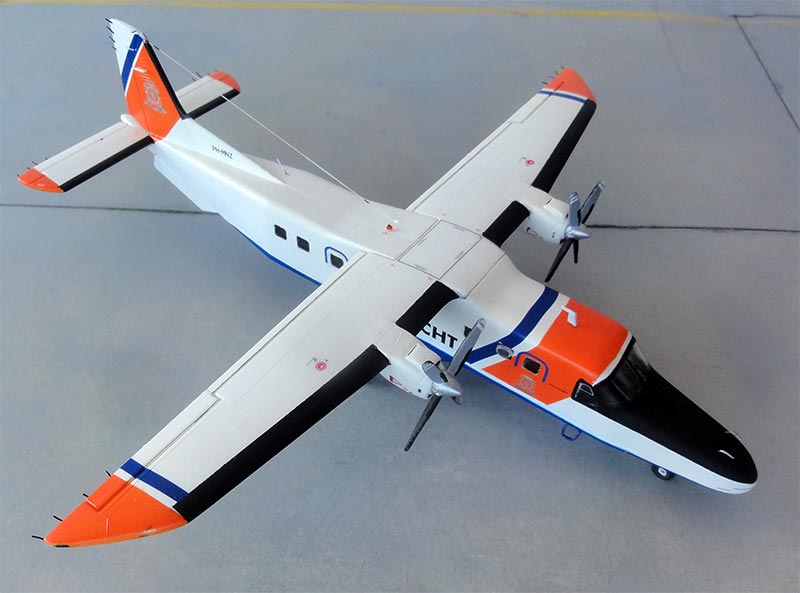
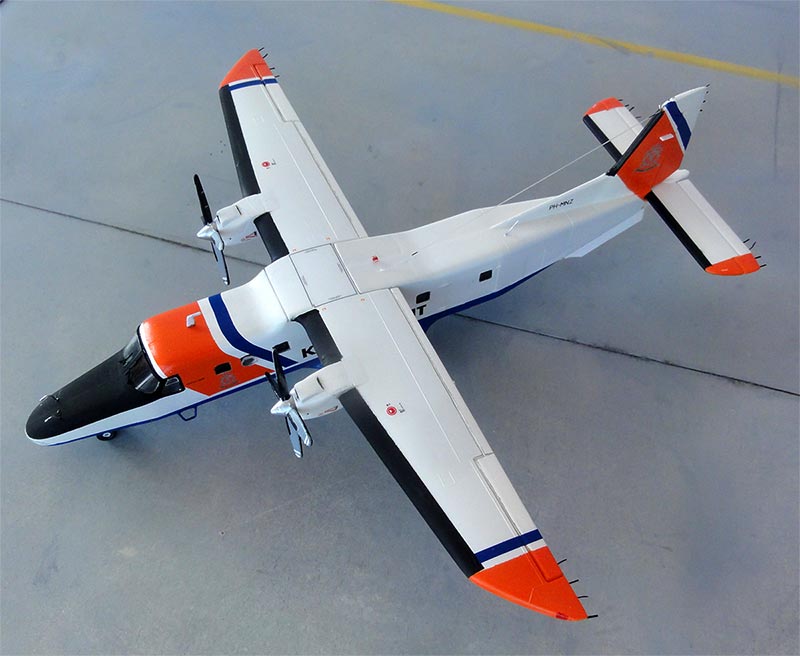
... on visit to Lelystad airport...
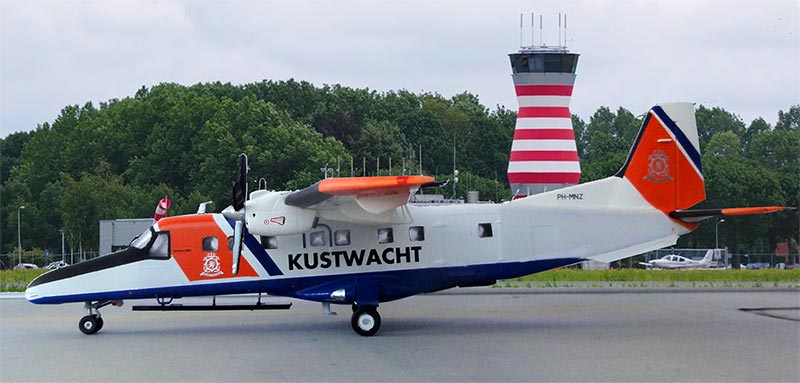
On to next [ Page 2... ]
References:
- Dornier Do-28 and Do-228, F-40 publications no.35, chefredakteur S. Wache, Pecom, 1999 (in German)
- Air international magazine, May 2010 , Volume 78 no.5
- IPMS Nederland, "Modelbouw in Plastic" magazine MIP 2011-1, Jan Brussaard about building the Kustwacht Dutch Coast Guard kit [in Dutch language]
Web:
Dornier: https://en.wikipedia.org/wiki/Dornier_228
Meindert's real Do-228-212 PH-MNZ walk around here ....
Back to 1/72 prop models
(c) Copyright "designer"/ All rights reserved. Your comments are welcomed by webmaster
Created this page Sep 30, 2024