[ page 5 ]
1/32 scale Bolkow Bo-105
... continued from page 4...
![]()
![]()
In
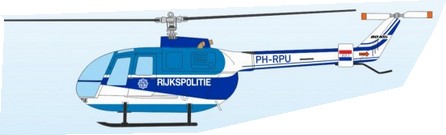
the 1970s through 1980s several Bo-105's were used by the Dutch National Police. Initially titles
RIJKSPOLITIE, later with POLITIE titles. Several colour schemes were
also seen in those years.
- PH-RPW from June 1976 to November 2008 with nick name "Henk".
-
PH-RPV from June 1976 to November 2008 with nick name "Wim". - PH-RPU
from November 1977 until just September 1982 with nick name "Barthold".
- PH-RPR from April 1979 to November 2008 with nick name "Dries".
- PH-RPS from August 1979 until November 2008 with nick name "Jacques".
Also, the longer CBS was flown with quite a different paint scheme:
- PH-RPX was a Bo-105CBS-4 that flew from february 2005 to November 2008.
- PH-RPY was a Bo-105CBS-4 from December 2004 to November 2008.
- PH-RPZ was a Bo-105CBS-4 that flew from April 2006 until November 2008.
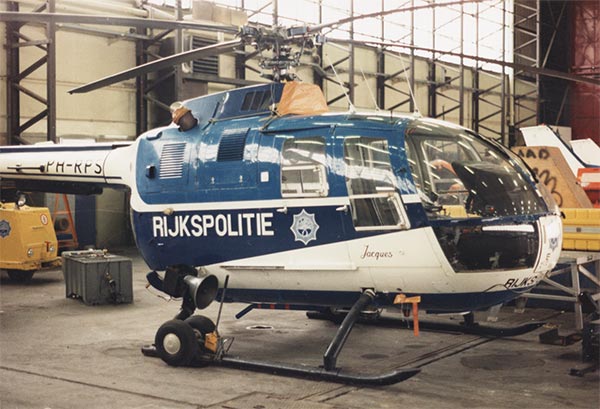

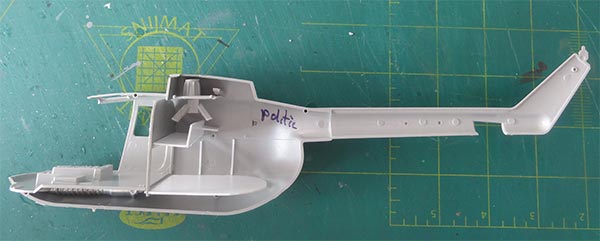
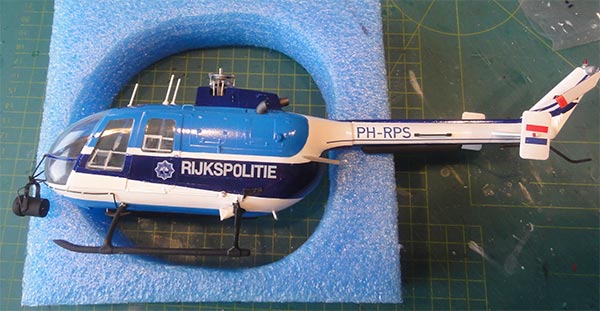
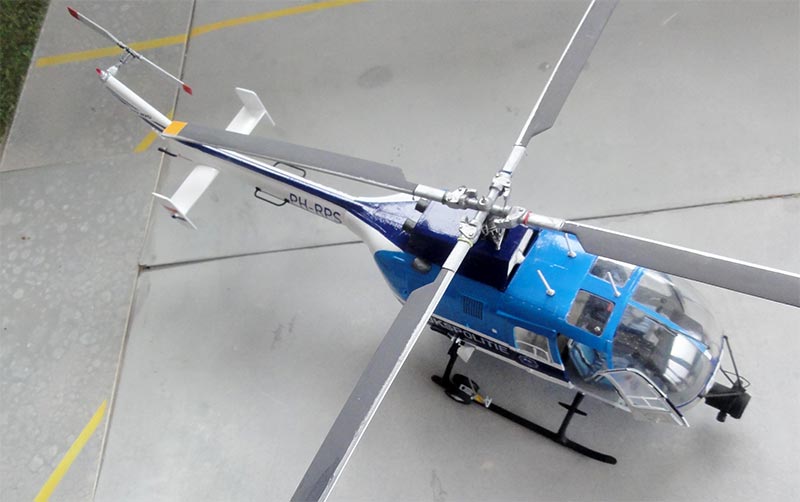
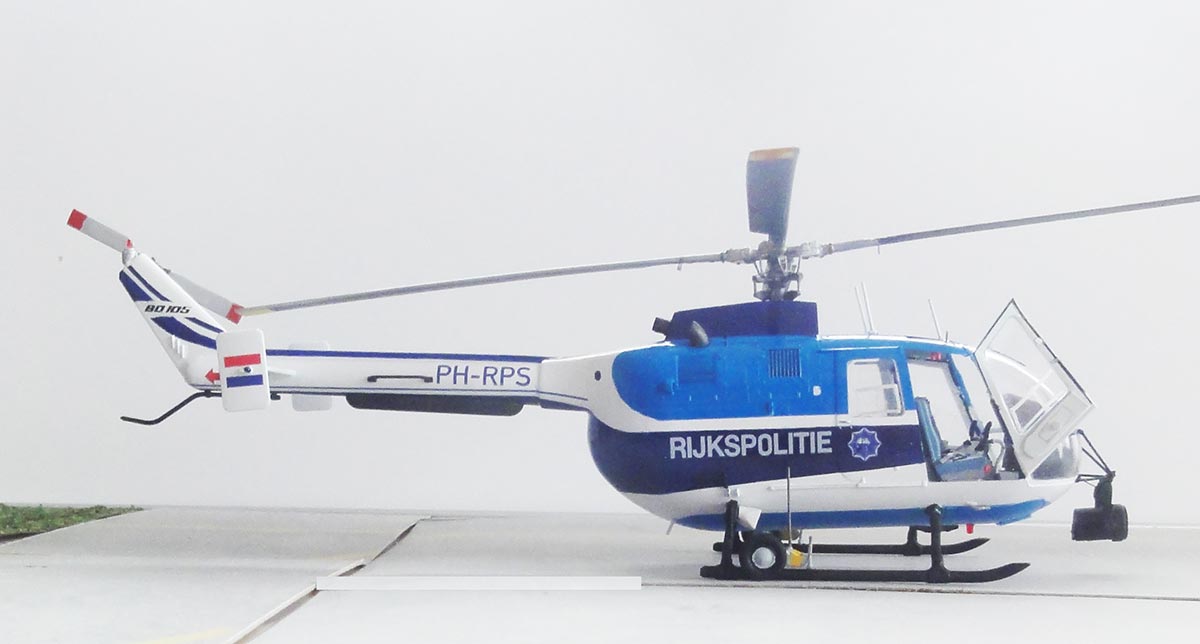
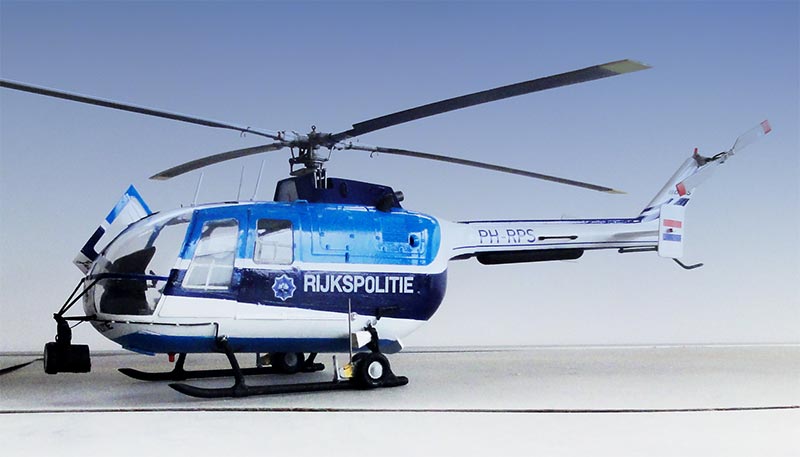
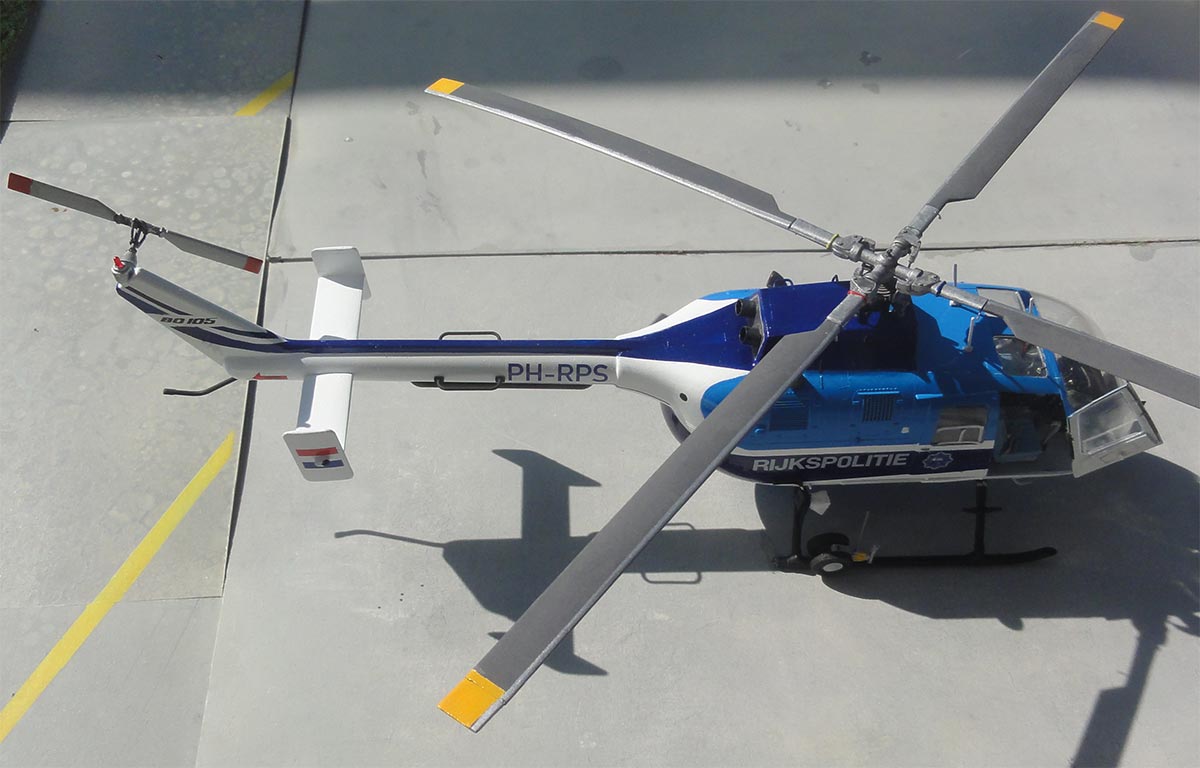
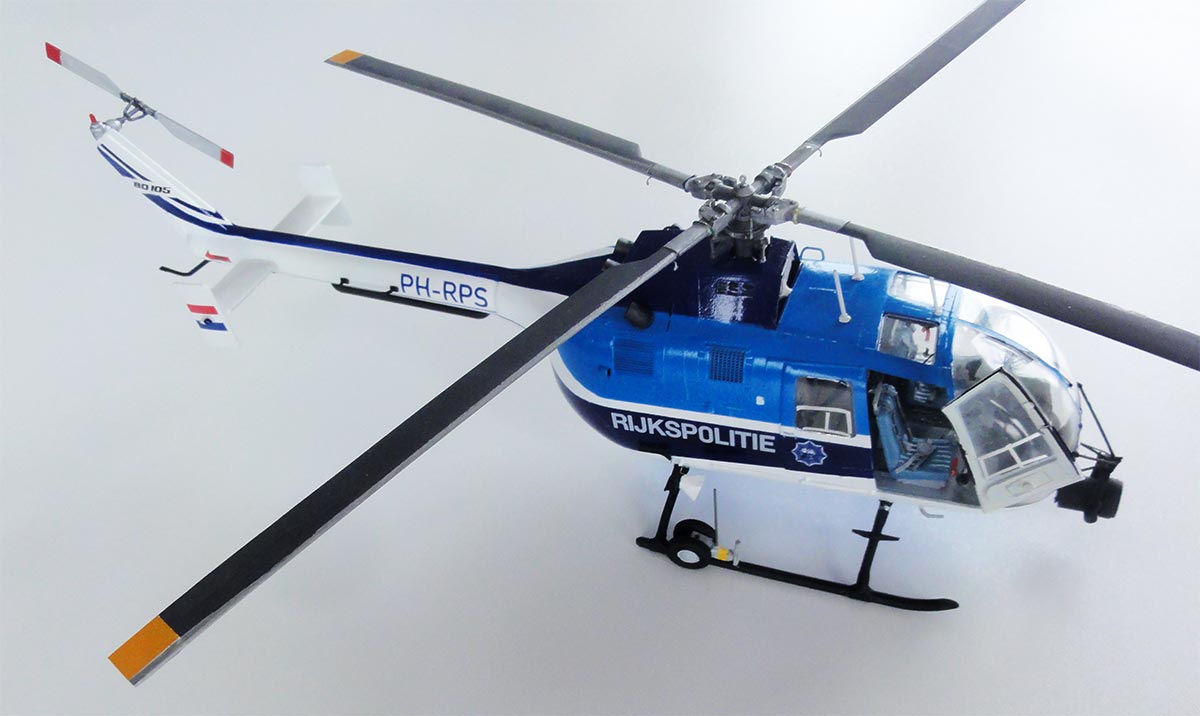
My modelling friend Almer provided me with a photo seen for the Bo-105C with registration "PH-RPS". The photo was made in the hangar at Schiphol Oost. This Bo-105 entered service August 1979 and got the nick name "Jacques" written on the pilot door. This will be made.
It is also highly recommended to study for details the WWW.IPMS.NL walk arounds for the many details, see these references...
![]()
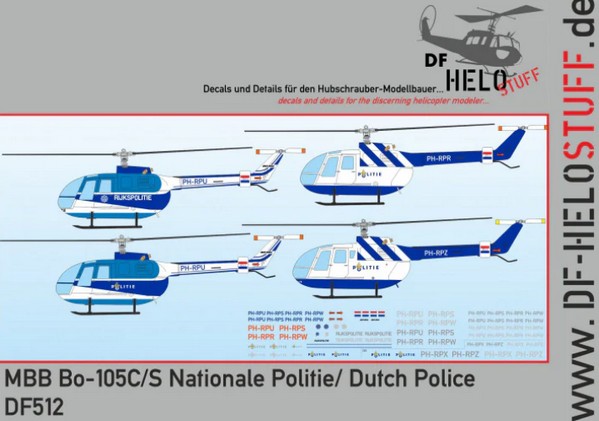
DF HELOSTUFF had issued a decal sheet #DF51232 Summer 2020 with decals for Dutch POLITIE Bo-105 helicopters. You get mainly the various titles and registrations.
Page 2
Page 3
Page 4
Page 5
![]()
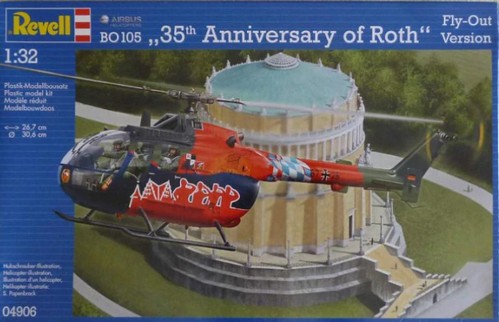
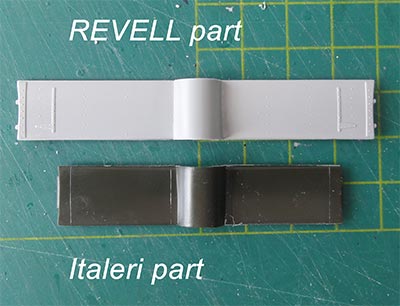
REVELL 1/32 kit #04906 released kit was built with 90% common parts with the Italeri kits.
![]()
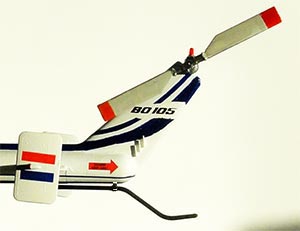
This kit has some different PAH and airframe parts, as seen on page 1.
Basic model assembly is easy but due to this Revell PAH released kit used, some "converting back" work is needed. It is easier starting from the old Italeri kit in stead if you have this kit.[1] The horizontal stabilizer of the Revell PAH had to be reduced 2x 8 mm in span. This can be done with a razor saw.
[2] The fuselage is a simple assembly. The Revell kit has also an open bulkhead. I used that and set a floor at the rear, but later this was not needed.
The open main bulkhead is also seen here, but on hind sight it is better to set the closed bulkhead that is also in the kit. Note thatrthe long canvas bench will hide the gap.
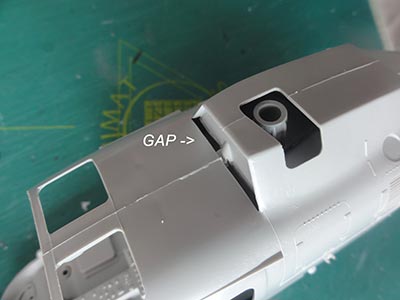
[3] Inside, at the rotor mast I added some extra detail but later discovered not a lot can be seen. At the intake, a gap was made as often seen at the Bo-105 air intake.
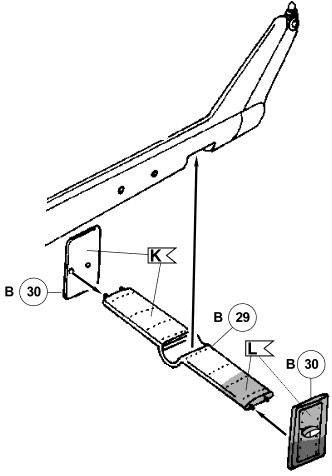
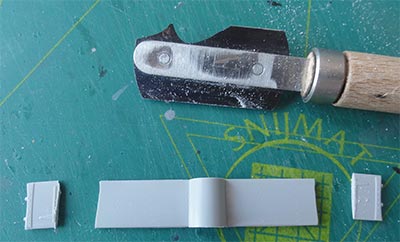
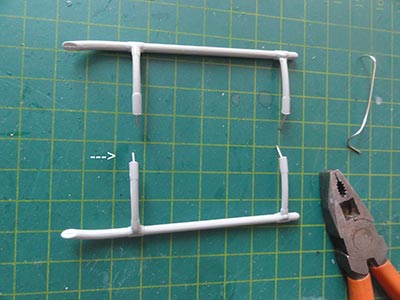
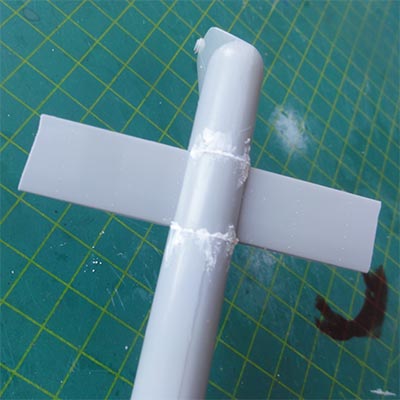
[4] The wider PAH skid has to be reduced in width to the standard 2,53 m (79 mm = in 1/32).
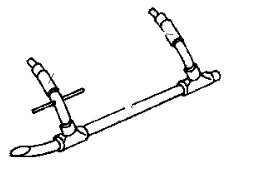
At the top ends, with a razor saw 2 x 4 mm bits were cut off.
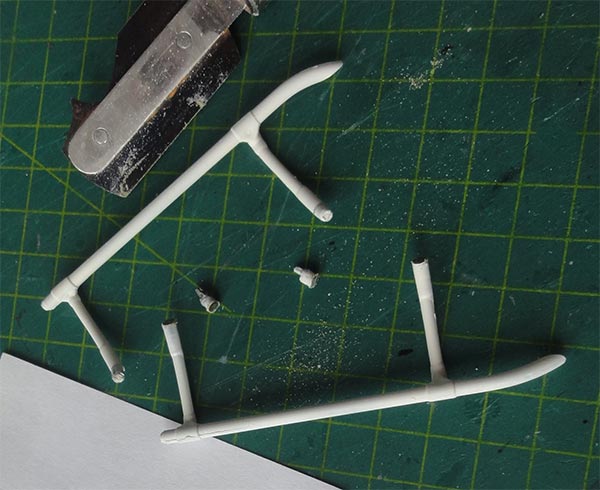
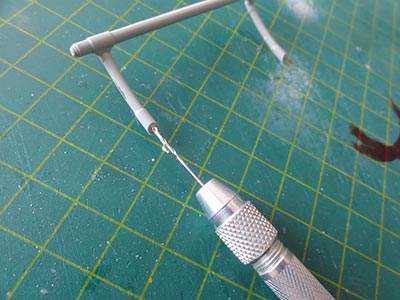
At the leg ends, holes were drilled as to later install metal pins for added strength.
 .
. 
The skid is now ready but at this stage not fitted as it would make masking with tape more difficult. (as noted: when using the older Italeri kits, the skid is as per kit OK).
![]()
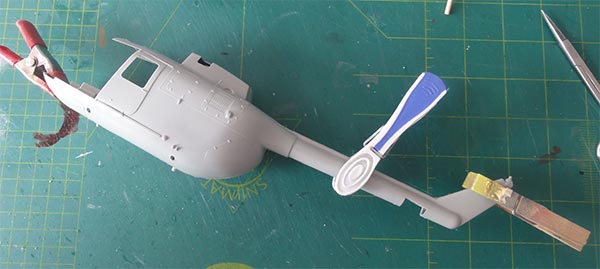

I was not sure about all the lower details on the belly of the helicopter but a small plastic card bit was installed as well as the part #D28.
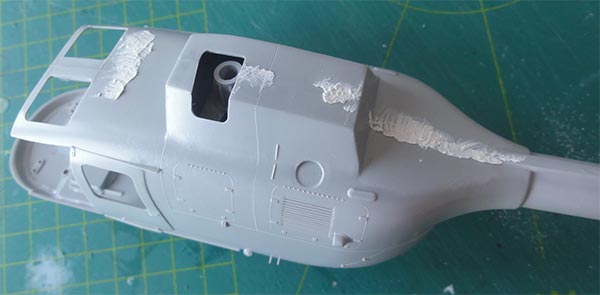
Some putty and sanding is needed.
It did not take a lot of time before the colour scheme could be airbrushed.
The colours of the complex paint scheme are a bit difficult to establish for the POLITIE helicopter. After studying photos, these acrylic colours were used:
- white with Gunze Sangyo H1;
- medium blue with Gunze Sanyo H25;
- darker blue with Gunze Sangyo H15;
(these are thus slightly different as to e.g. KLM blue colours).
As done with other models, it is good to airbrush some bits of aftermarket plain decal sheets in these colours as well; these may come in handy if repairs are needed later on.
Obviously, the first colour is overall white and than masking, masking and masking.....
Adding the complex paint scheme is the most difficult aspect for this POLITIE model. It was difficult to see the exact locations of demarcations between the white-medium blue-darker blue so studying photos was really needed. Use a good quality masking tape here!

I used the Harder and Steenbeck Infinity airbrush. As the scheme is very complex, various repairs were needed between each airbrushed colour pass. And polishing and removing overspray.
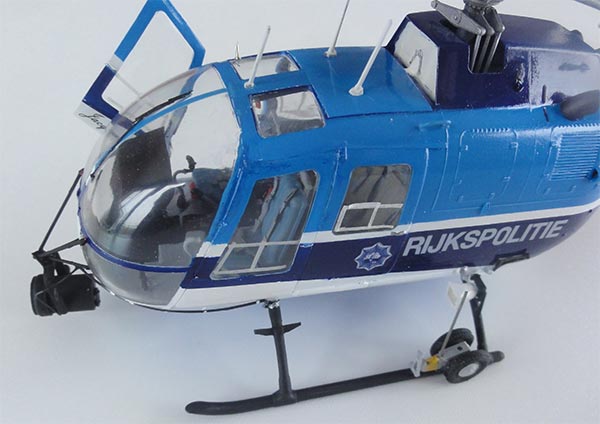
After all that, the skid was installed, it needed careful alignment to have the correct 7,9 cm width and a horizontal sit. It was painted black.
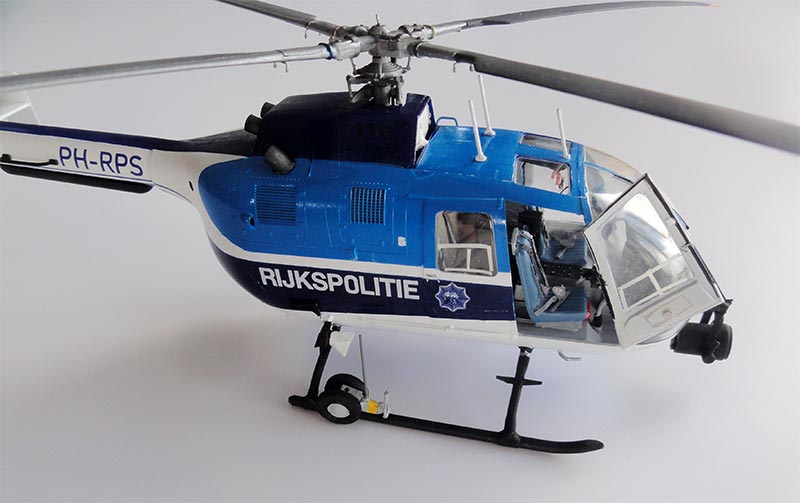
The interior was now further detailed but mostly as per kit and as for the KLM model. I believe the main interior colours on POLITIE Bo-105 helikopters were cream-white and details in grey.
The cabin windows were set in place in the cabin side walls from the inside. They fit OK, use Kristal Klear to fix them.
The standard wind shield and a single wiper configuration is the most common, so the kit part can be used. (I did not bother to shave off the integral moulded wiper, some detail later on will hide this).
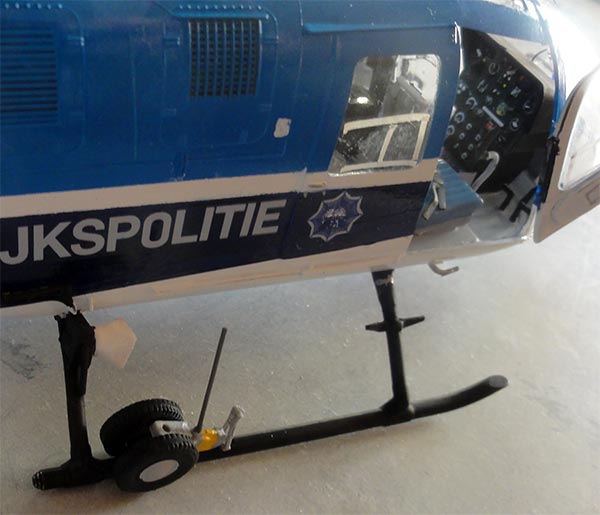
For the instrument pedestral I simply used the kit part with decals from a Revell kit. The seat cushions were painted medium blue/ grey and seat straps added from tape and bits.
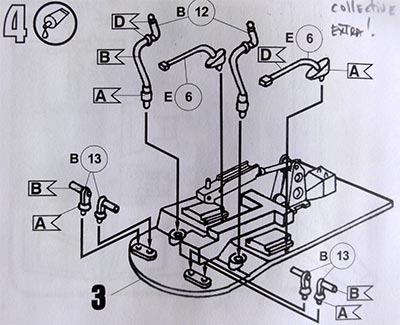
Add the pair of large collective pilot controls #E6 that are in the Revell kit.
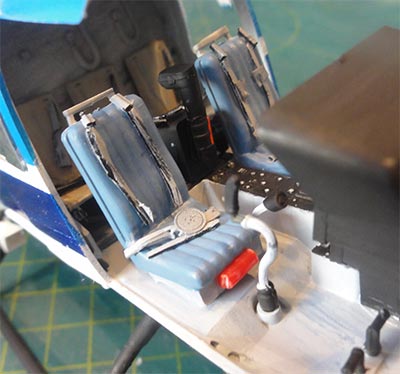
The rear canvas bench was made with a spare part. I added a sort of console between the 2 seats for the equipment operator and observer from scrap.
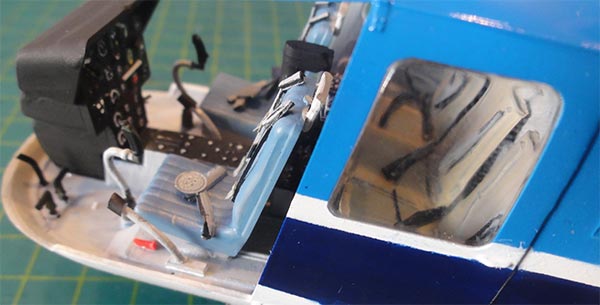
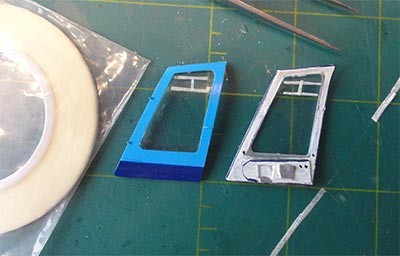
As on the other models, the insides of crew doors were painted cream-white.
The small sliding window panels in the crew doors may vary on Bo-105's and for the POLITIE are in the lower position. The kit transparant parts'engraving were shaved and sanded and polished. Polishing paste and an old T shirt used.

The small sliding panels were now suggested with thin white "circuit board" tape on the insides.
The wind shield does fit but there were still some small gaps. These gaps were filled with white glue (or use Microscale Kristal Klear). When dry, hand paint these closed gaps with a very fine brush and steady hand!
...x
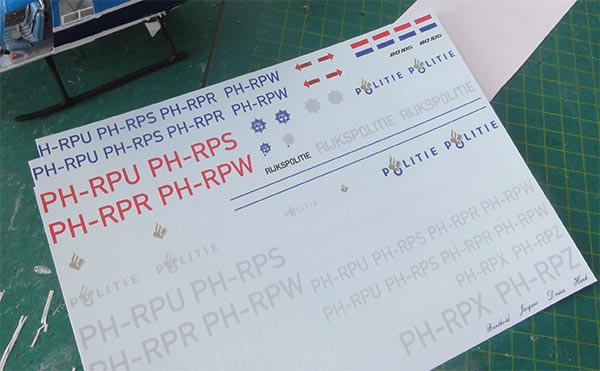
The DF HELOSTUFF DF51232 Bo-105 decals were now added for the PH-RPS. The surfaces were already glossy so it is quickly done. You get the long blue stripes for the tailboom. For the white titles, you get light grey lower decals to set first. Than the white ones. Unfortunately when done this way, still the white is not really white as the decals are very thin. (and nothing can be done here to repair this).
I also found that the old RIJKSPOLITIE logos on the decal sheet are a bit inaccurate. I repared these with blue and white paint added with a tooth pick using the real logo as seen here.
The belly has a registration as well.

The smaller details were now added:
- the exhausts #26B on the Bo-105 are a bit oval and not round. The kit parts are round and solid. With a drill, open up these up. With a plier I pressed them a bit "oval". Same with the rear exhausts #27B. The exhausts were painted dark metal/ black and set in place on a small thin plate cut from aluminium sheet.
- a pair of antennas #31 were set on the tailboom.
- a small pitot tube #E26 was set at the lower right fuselage in front of the skid.
- a search light of the correct type was installed found in a Revell kit of the EC-135 with even the rack as well as a pair of speakers with a frame. The electric wires were also made from stretched sprue. All was painted black.
- on the single moulded wiper, black tape was added on top to suggest a separate part.
- not 2 but 3 antennas were set on the cabin roof. Note that they are on the real helicopter also quite thick.
- one crew door was set open en the other closed. The tiny gaps were closed with white glue and painted with a fine brush when dried.
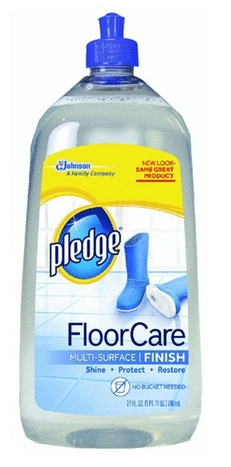
Now the model got a somewhat semi-dull varnish acrylic coat to get an even sheen and to protect the decals. I airbrushed a mix of Johnson Future / Pledge with some 10% mixed in Tamiya X-21 Flat Base and the mix thinned with 40% Iso Propyl Alkohol (IPA). Shield off the transparancies while airbrushing.

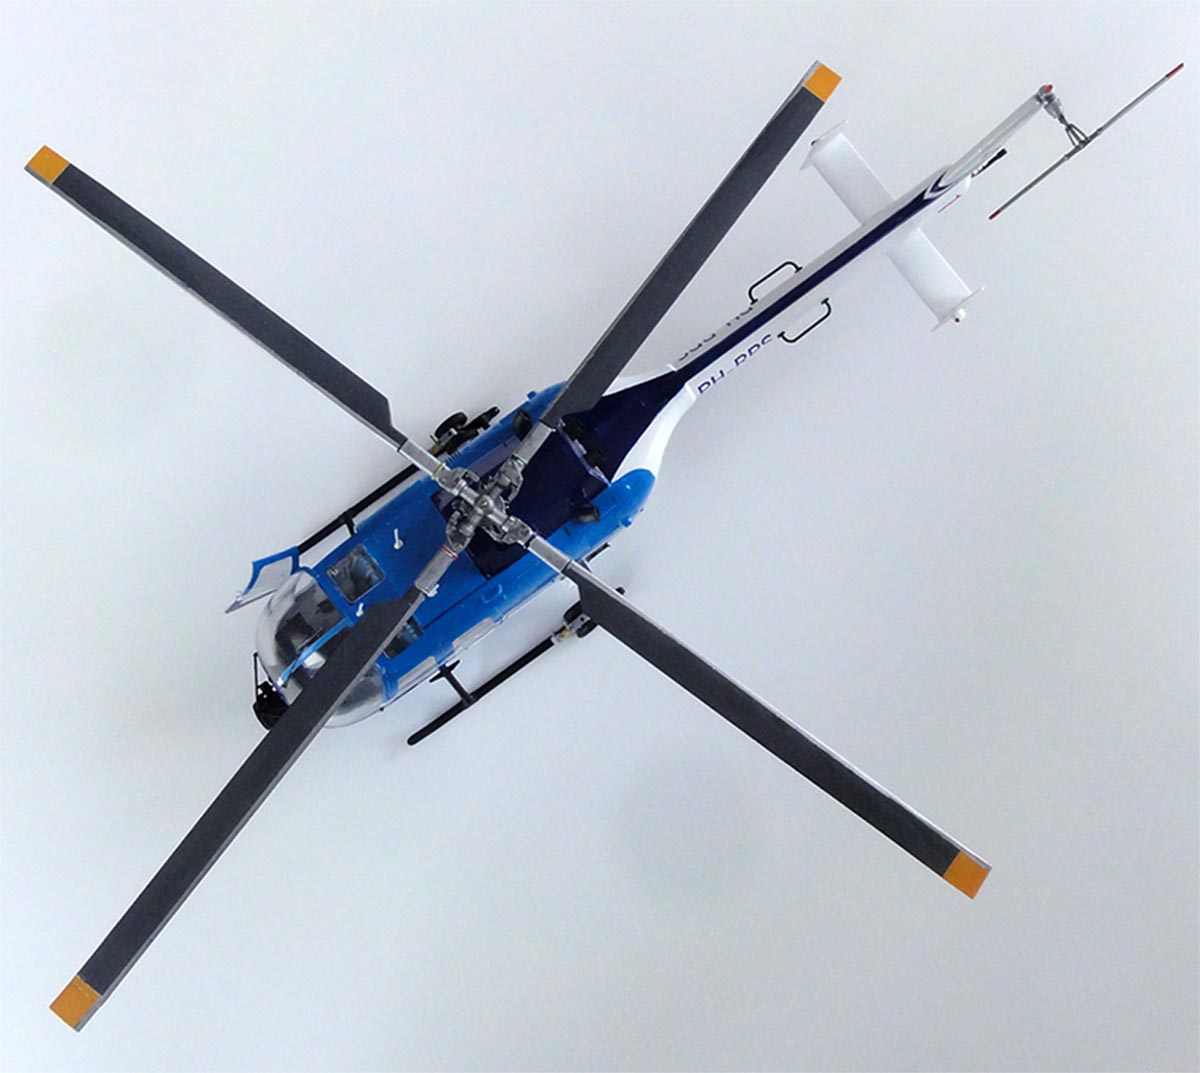
The main rotor was now tackled.
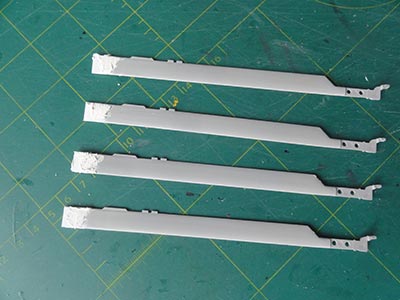
In this Revell PAH Bo-105 kit, the rotor blades are "clipped". The old style blades as seen on the POLITIE Bo-105 are not in the kit anymore. So, I had to repair these with wide plastic strip to fill the "missing area" as they have a constant chord and the same length. (so again using the old Italeri kit is much more easier).
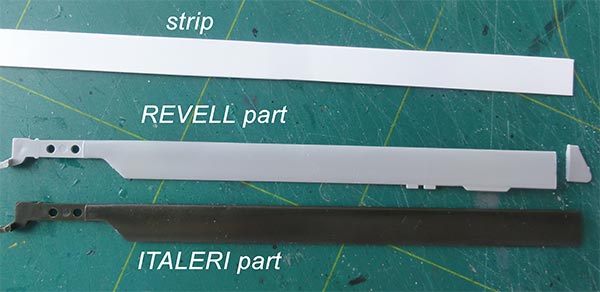
This required putty, sanding and good alignment.
Also, I removed the later blade type balance tabs at the trailing edge. (NOTE that on some more modern Bo-105 helicopters these are applicable/ seen).
The main rotor blades have a metal leading edge. So the blades and parts were airbrushed medium grey with Gunze Sangyo acrylic H317 for FS36231 with aluminium details. The leading edges were masked off and airbrushed Revell Aqua 99 aluminium. This takes time but is worthwhile. The tips were airbrushed in a yellow-orange colour (about 10 mm wide). Note that the rotor tips and blade colours may vary per individual helicopter.
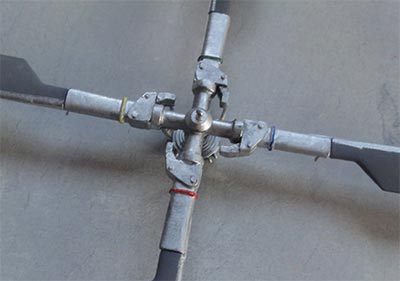
The rotor hub assembly is easy. I wanted to keep the main rotor detachable, so the upper 3 mm of part #A5 was cut off and the smaller bits #A47+A48 simply glued on top of the rotor hub. The rotor can be set on top and can rotate.
The blades were CAREFULLY bended a bit down from about 4 cm outside the rigid hub and the four rotor blades got some tiny extra anti-flutter weights made from scrap. Don't break these!
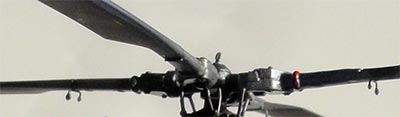
And 4 colour bands in the order of blue-green-yellow-red were painted to mark each blade with a very fine brush.
The tail rotor got a grey colour and red tips. The standard tail bumper was set and a transparant red anti-collision light.

As final gimmick, I saw that for ground handling a set of wheels can be set on the skid.
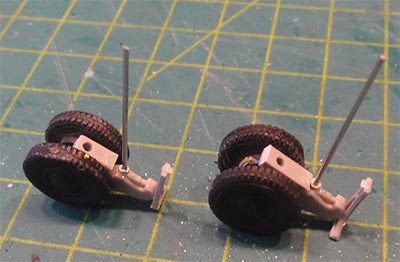
These were made with wheel parts found in the spares box. Note that these wheels are never seen fitted in flight.
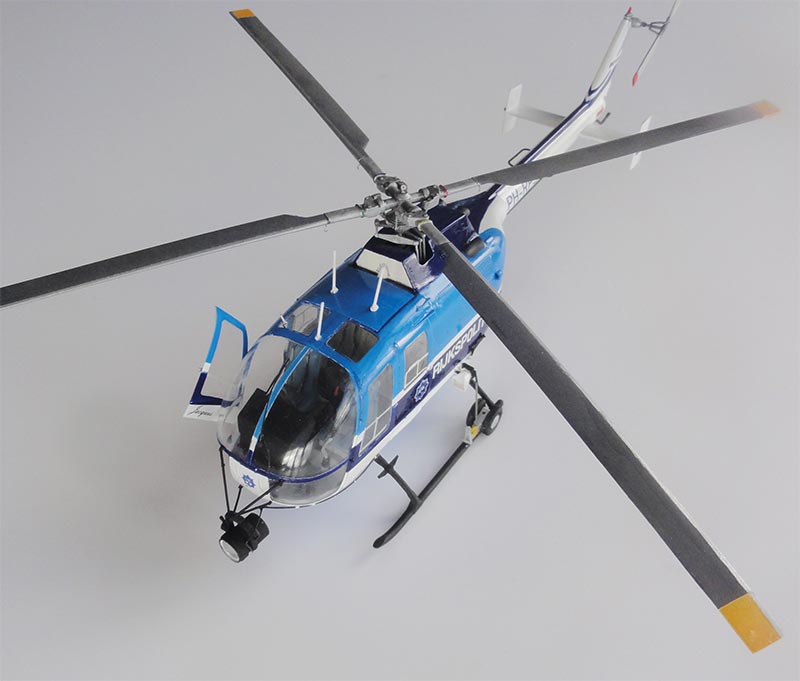
That completed this RIJKSPOLITIE Bo-105 D "PH-RPS" in 1/32 scale from the late 1970s.
Back to 1/32 Models.......
(c) Copyright "designer"/ All rights reserved. Your comments are welcomed by webmaster
February 28, 2021