[ page 2 ]
1/32 scale Bölkow Bo-105
... continued from page 1...
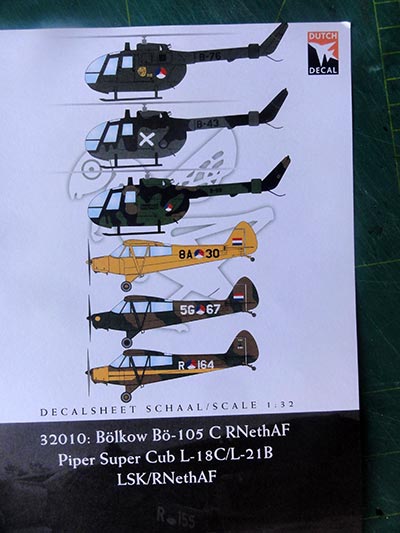
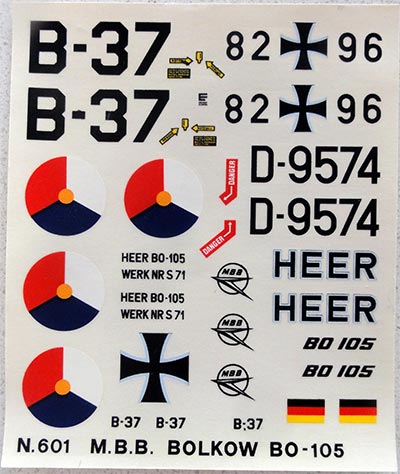
The first kit will be made as a Bo-105 CB helicopter of the Royal Netherlands Air Force helicopter group (GPLV) operated with the Army. I had an excellent 1/32 decalsheet of Dutch Decal set #32010.
 ..
..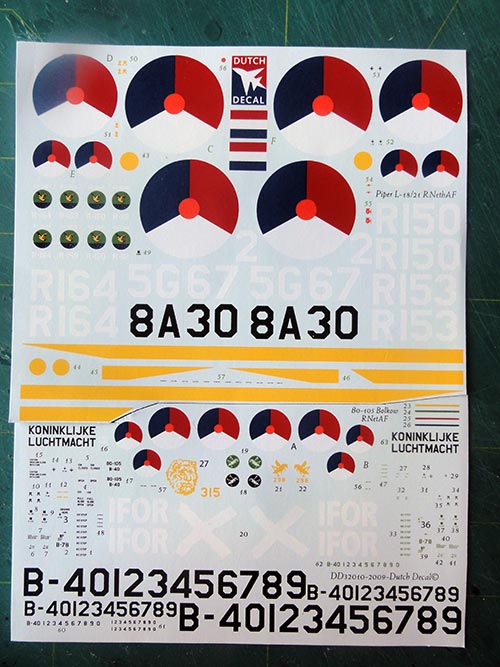
On this set various schemes are provided, I opted for a CB with a three colour camouflage and fitted with a lower nose fairing.
The old Italeri kit #601 was the starting point.
![]()
- leave out STEP 3;
- do not use the parts #E23, #E11, #E10, #E25, #E30, #E14, #D55, #E31, #E24;
- reduce the width of the stabilizer #B29 by 2 x 8 mm;
- remove 4 mm from the skid halve top notches #B24 and #B25 to get the standard skid.
Page 2
Page 3
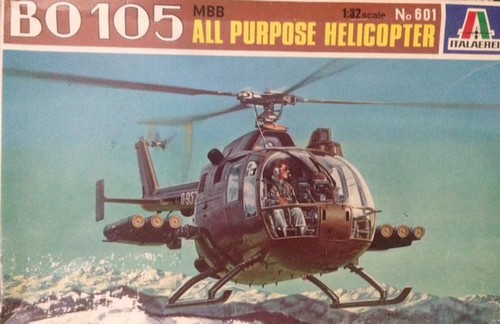
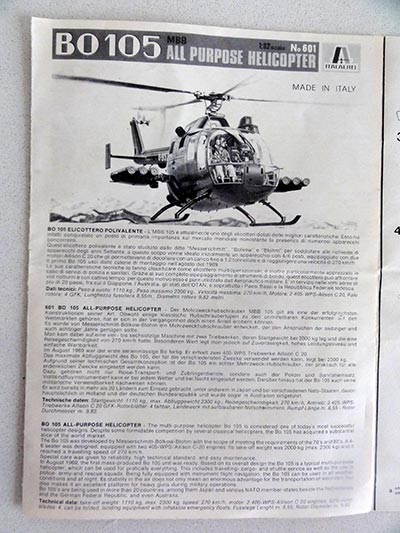
The MBB Bo-105 was released as 1/32 scale model kit in 1978 by Italaerei from Italy. (later called Italeri). It has approx. 80 parts in dark green plastic in 2 sprues with also a transparant sprue.
This kit for a KLu Bo-105 CB will be detailed a bit further.
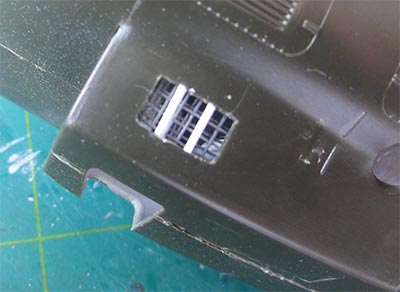
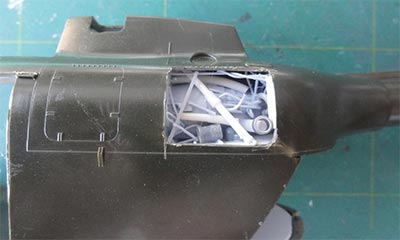
First, it was decided to open up the rotor mast fairing grill at the right top of the fairing. Often, this is well seen on photos. A razor saw was used.
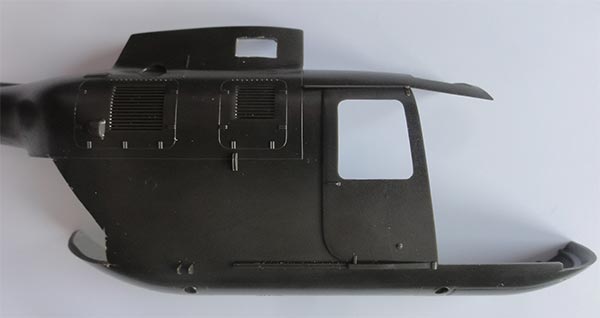
At the rear, a grill was made from flexible grid found in the spares box.
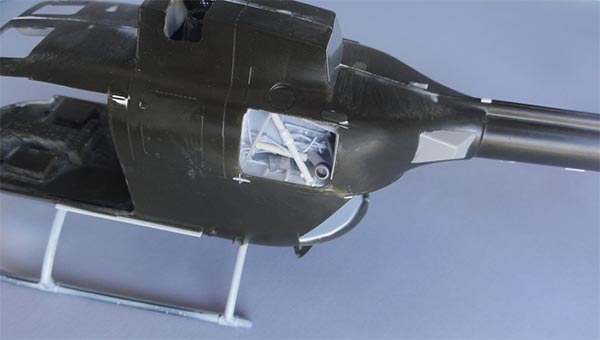
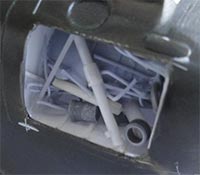
Also, the rear cabin bay will be displayed so the 2 clam doors to be set open. These were thus cut out. Also, an engine access hatch was cut out. And the left rear sliding door was also removed.
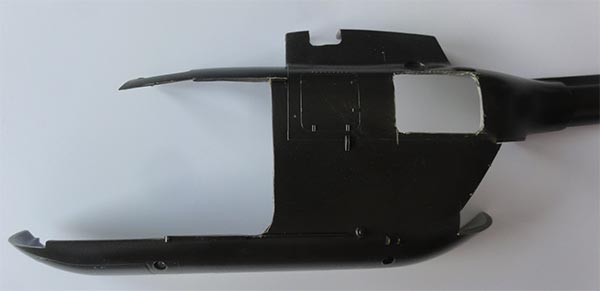
A simple base grey coat was airbrushed on the insides of the fuselage halves.
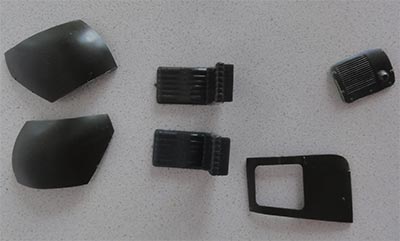
The rear floor section and a roof were made from thick plastic card. Some extra bits were also added at the rotor mast. (later I found out this is hardly seen).
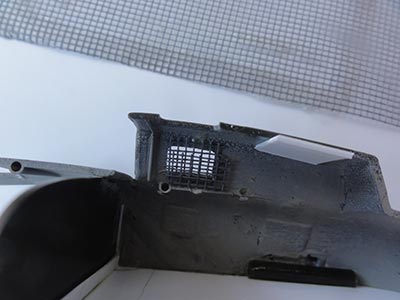
At the engine hatch, some details were added from scrap to show some engine details. I used the WWP book as photos are well provided in that book.
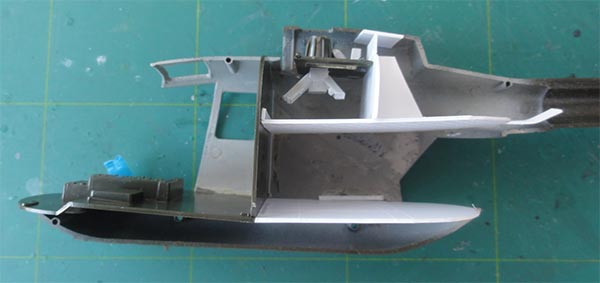
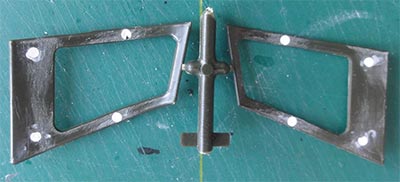
The two fuselage halves were joined together, the roto mast set and the main cabin floor. Some putty was needed and this was sanded when dried.
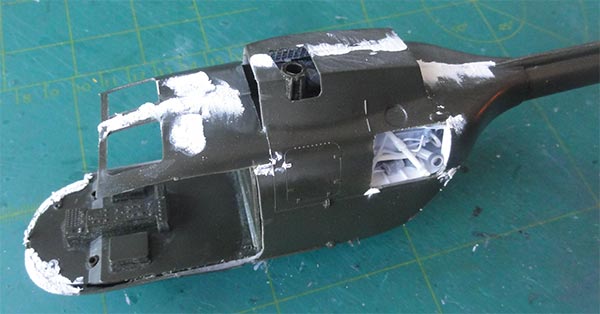
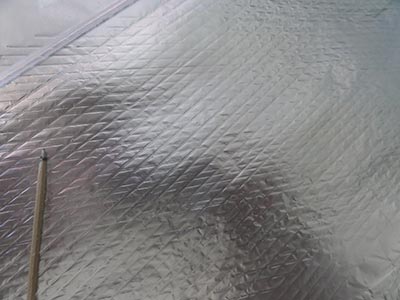
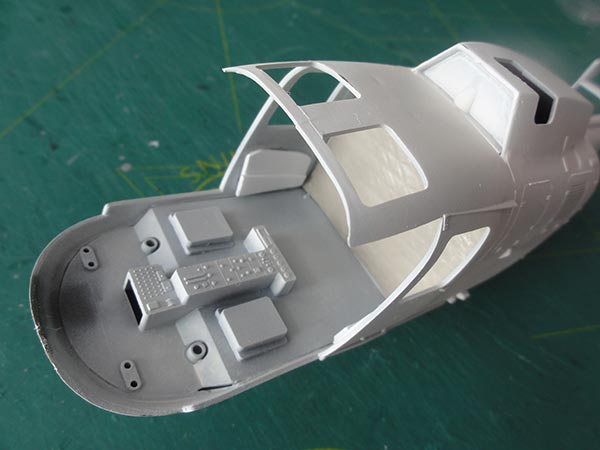
Often, isolation webbing is seen in the cabin walls. This was suggested by inscrbing thin alumnium foil and this was airbrushed medium grey. Sections were cut and fixed with super glue.
 .
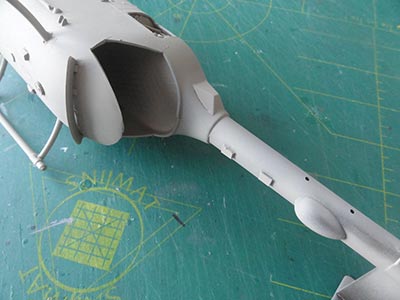
. The air intake at the rotor mast fairing may look different between helicopters. Sometimes it looks to be closed but with a small fiberglass air duct. This duct can be seen in real photos set at left, middle and it seems this was a field squadron modification. On the model this was made from card and scrap.
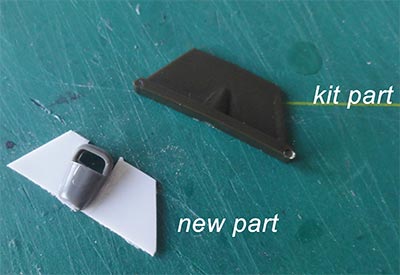
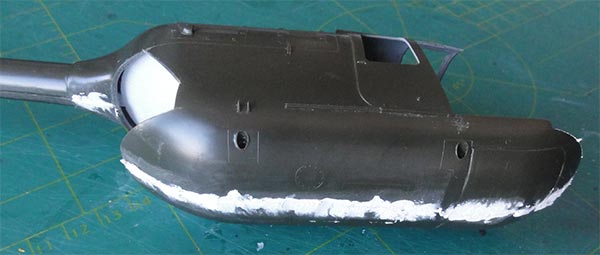
The later KLu Bo-105 CB has a Doppler LDNS fairing below the nose. This fairing of complex curved shape is not in any kit. So, it had to be made from scrap. I used card and thick metal foil cut and folded in various sections to suggest this LDNS fairing.
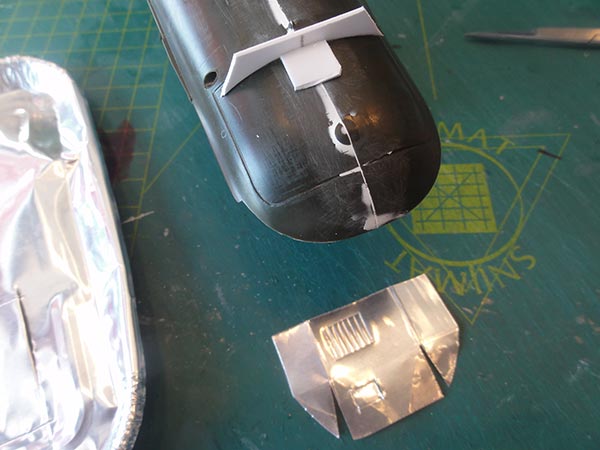
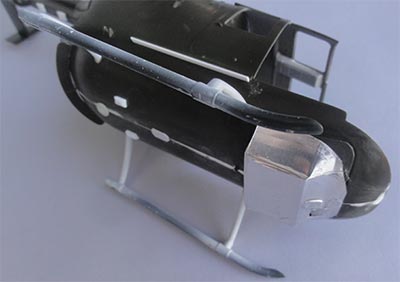
The fairing is seen here and smaller gaps were closed with white glue. The standard skid has some small horizontal steps, these are in the wrong location. These were cut off.
The pair of skids was set in place and some extra plastic rod for the two sliding door rails.
 .
. 
This particular helicopter also had the extra fairing at the left side rear; the part #58D was found in another kit.
The ejector marks on the doors were filled with putty.
Below the tail boom, various shapes of fairings can be seen on a Bo-105. In the kit, the small radio compass fairing #59B is provided. Sometimes, a larger longer fairing is seen. Also, the 2 VOR antennas #31 in the kit are not always installed on a real Bo-105 and if so can be in different tail positions. On the roof of the cabin, various radio communication antennas can also be seen. So study photos of your desired real Bo-105.

The model got now an overall base grey colour with an airbrushed Revell 75 Aqua steingrau coat to check for anny gaps and irregularities. These were filled and sanded.

On to next [ Page 3... ]
Back to 1/32 Models.......
(c) Copyright "designer"/ All rights reserved. Your comments are welcomed by webmaster
October 22, 2020