[ Page 1 ]
The Grumman A-6 Intruder was developed in the 1950s as an attack aircraft designed for use on US aircraft carriers. Its primary purpose was to replace the prop-driven Douglas A-1 Skyraider, and to increase reliability, the A-6 was equipped with two jet engines. The wing of the aircraft was subsonic, and a side-by-side cockpit layout was used to enhance communication between the crew members. Additionally, the A-6 was outfitted with an arrestor hook and a strong undercarriage, making it suitable for carrier operations.
As an attack aircraft, the A-6 did not have a cannon but instead relied on a multitude of pylons to carry ordnance. The first A-6 prototype took to the skies in April of 1960, and the aircraft was eventually employed in a variety of missions, including close air support, interdiction, and electronic warfare.
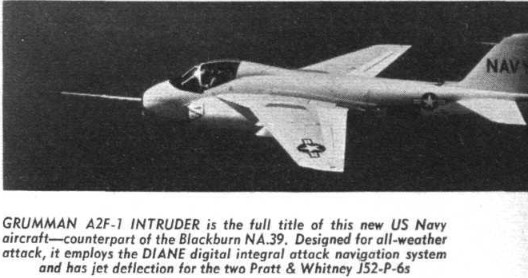
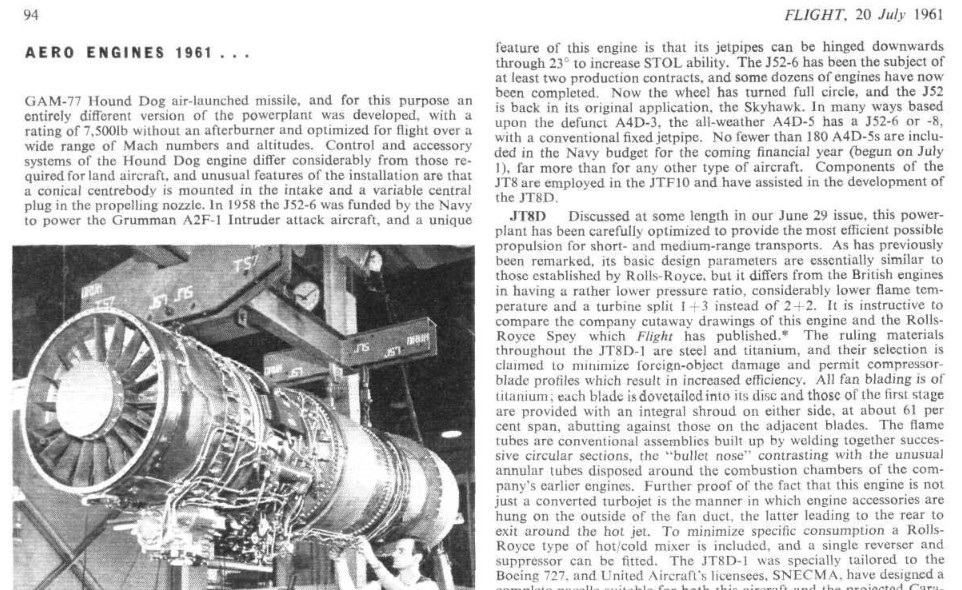
Here an announcement from an old Flight magazine 1960
---------
Several versions of the Grumman A-6 Intruder were developed, beginning with the A-6A (A2F-1), which was equipped with two Pratt and Whitney J-52-P-6 engines. The aircraft's design was completed with the inclusion of a special bomb aiming and navigation system known as DIANE, which consisted of multiple radar systems, including the Norden Systems AN/APQ-92 search radar and a smaller AN/APG-46 for tracking, as well as the AN/APN-141 radar altimeter and AN/APN-122 Doppler navigational radar for position updates to the AN/ASN-31 inertial navigation system. TACAN and ADF were also provided for navigational use. Although DIANE experienced some initial issues, it eventually proved to be effective. The A-6A was fitted with a refueling probe on the nose, and approximately 488 of these aircraft were produced until 1970, with many being upgraded thereafter.
In the early 1970s, the A-6E was developed with improved radar and avionics. The A-6E also featured a "Target Recognition and Attack Multi-Sensor" (TRAM) system mounted in a turret under the nose, as well as upgrades to the DIANE system. The A-6E had a slightly different leading edge wing root and an additional RAM intake scoop near the tail.
The EA-6 variant of the Intruder was a dedicated electronic countermeasures (ECM) version of the aircraft, with a large antenna fairing on top of the tail, a different nose, and ALQ-76 jamming pods. A KA-6 tanker was also developed, featuring external fuel tanks and a refueling station under the rear fuselage, though it did not have a DIANE system. Another specialized ECM derivative of the Intruder was the EA-6B Prowler, which featured a four-seat cockpit and a significantly different forward nose.
The Intruder was widely used in the Vietnam War and later conflicts, including in Lebanon and during Desert Storm in 1991. The last flight of the A-6E took place in 1997, as it was gradually replaced by the F-18 Hornet.
For more info, look at the references.....
1/32 A-6
Page 1
Page 2
Page 3
Page 4
Page 5
-------
Also check out the 1/72 scale A-6 models.....
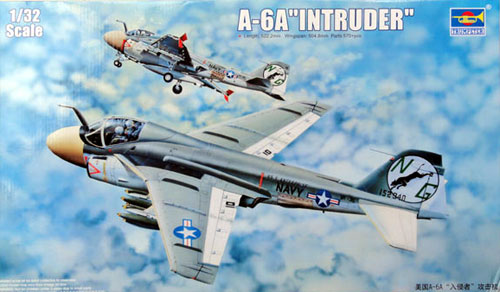
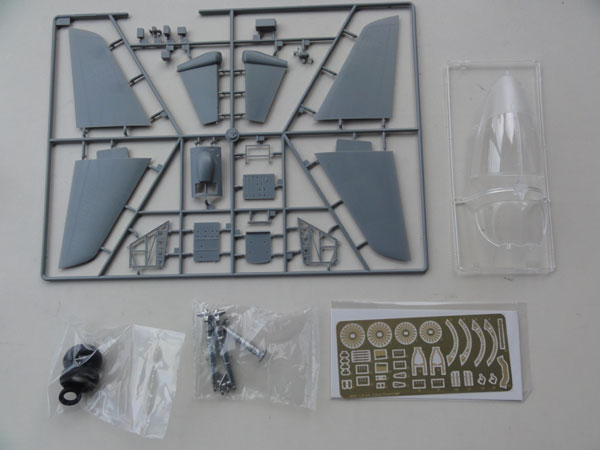
The Trumpeter kit of the A-6A (kit no 02249) was issued summer 2013 and is the first injection moulded 1/32 kit of the A-6 Intruder. (Summer 2014 the A-6E kit was also issued).
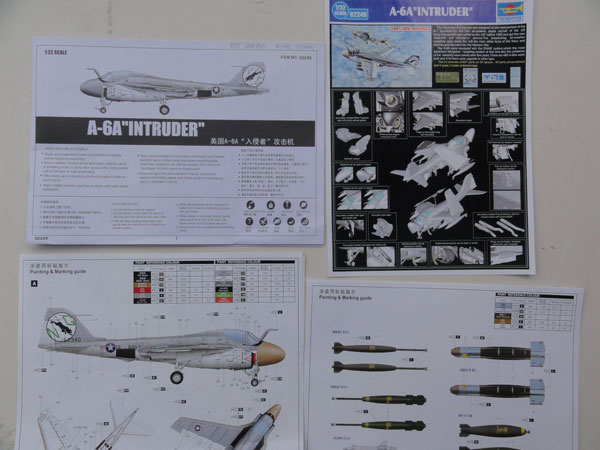
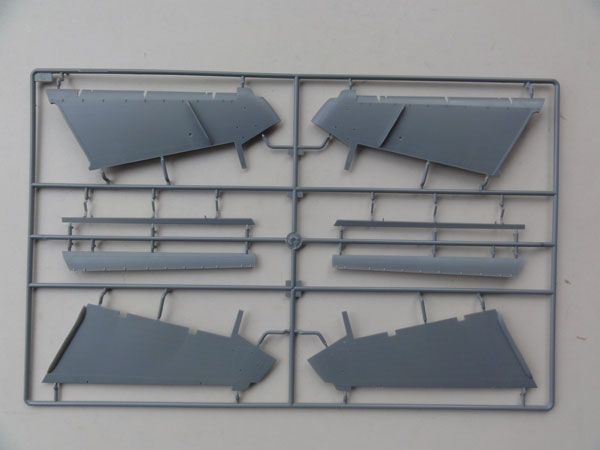
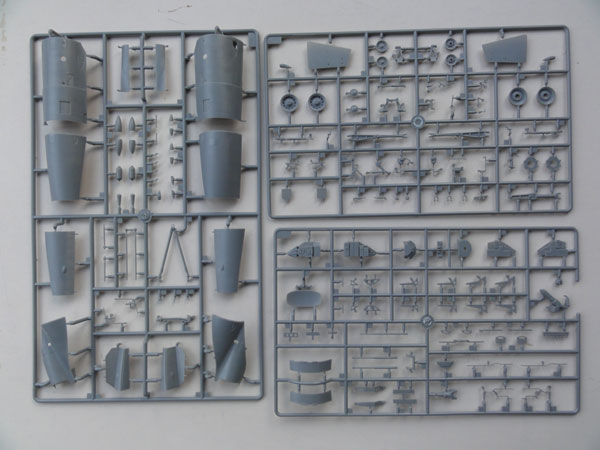
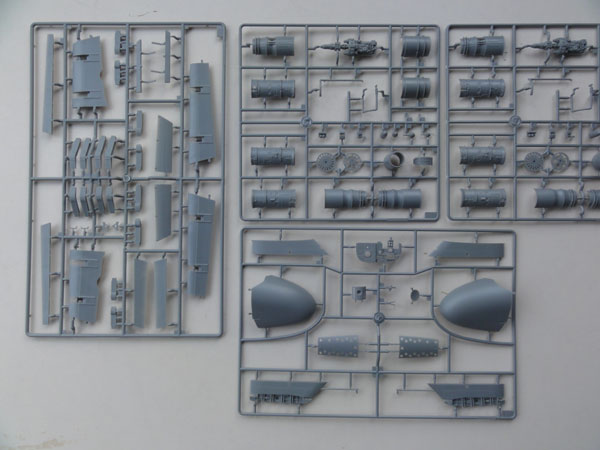
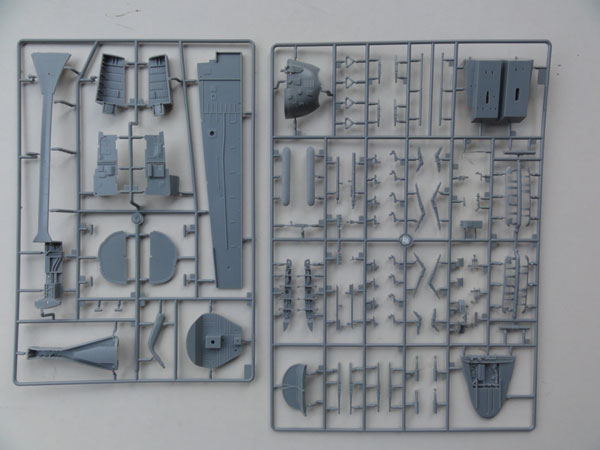
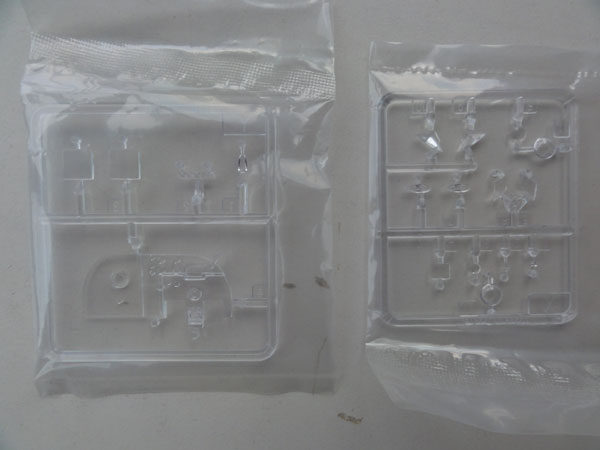
This A-6A kit is a highly detailed model with over 500 finely molded plastic parts, an etched metal fret, metal parts for the undercarriage, rubber tires, and two large decal sheets. The kit comes with many sprues containing stores, and all panels are precisely done with recessed lines and some raised details.
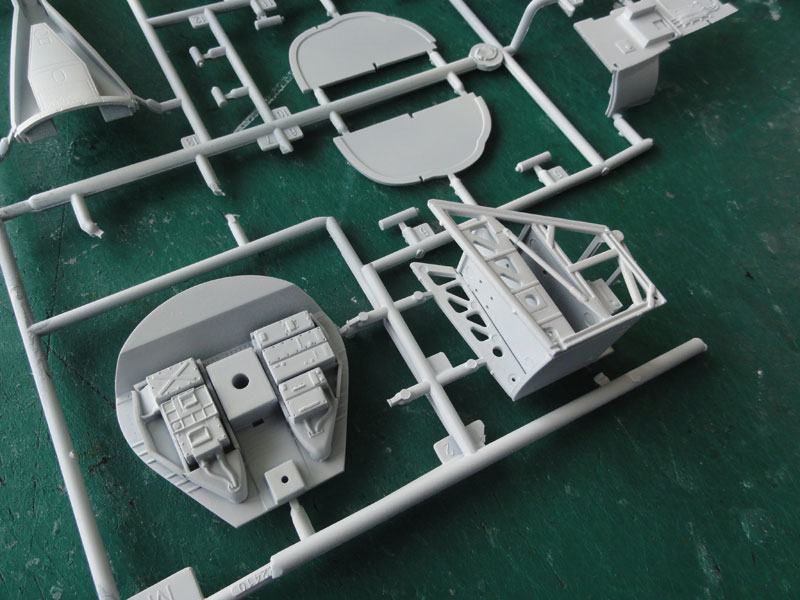
One of the standout features of this kit are the fully equipped engine bays, which include two model engines. The avionics birdcage, radar nose, and other equipment are also well-represented, and the cockpit interior features excellent instrument details. The kit seats are accurate, including the GRU-7 used on later A-6 variants, while the early A-6 Intruders had the GRU-5.
Additionally, the kit includes airspeed fuselage and wingtip brakes that can be posed open if desired, and the wing can be folded for carrier stowage. The full set of slats and trailing edge flaps are also included and can be positioned as desired. Overall, this kit is highly accurate and impressively detailed, making it an excellent addition to any collection.
.

The many armaments are in the kit like Snakeyes, BullPups, GBU-8 and Shrikes but are not really accurate. Sprue "J" is also in the kit but not indicated in the instructions. But the external fueltanks are OK. Decals and stencilling is also provided for the stores.
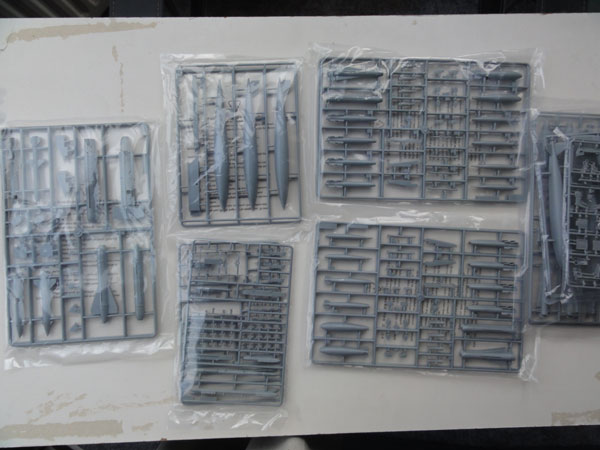
Overall, there are some 30 sprues in this impressive kit.
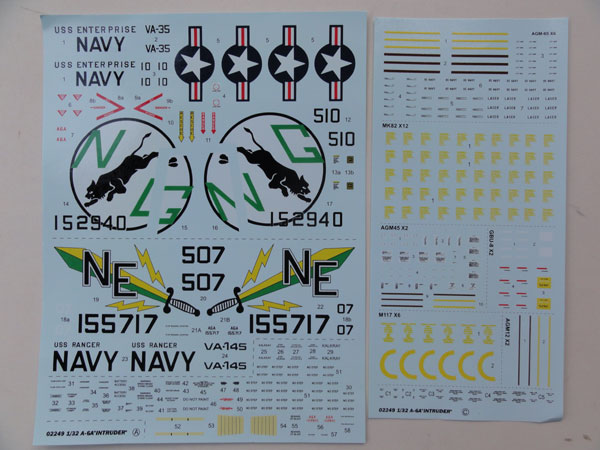
The decals for 2 US NAVY aircraft are:
- A-6A, BuNo 152940, VA-35, "NG/510", USS Enterprise; Panther shape not accurate.
- A-6A, BuNo 155717, VA-145, NE/507, USS Ranger;
The intake warining triangle looks a bit too small and the decals instructions show some errors; All NO STEPS should be on top of the wing, not some indicated below the wing! More on the decals later on......
Purchased was an aftermarket SUPERSCALE decal set 32-264 for a vey nice VA-95 Green Lizards A-6A Intruder around 1975. The sheet has only the basic markings but they are fine with good "stars and bars" and NAVY titles formats.
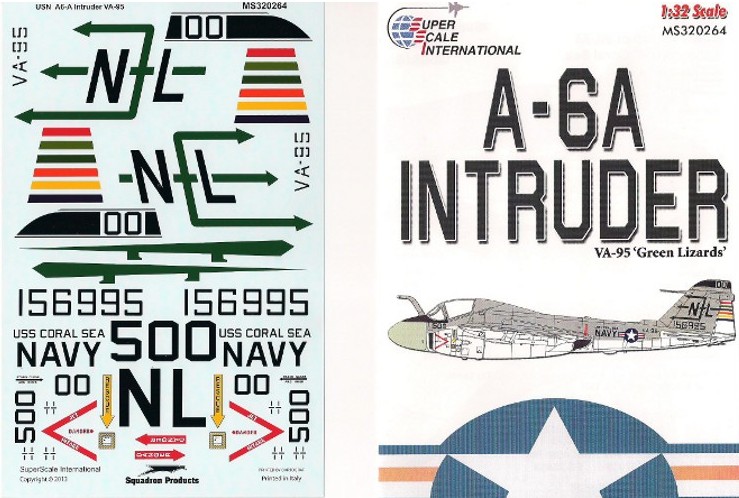
This A-6A Intruder depicted by the Superscale decalsheet has correctly no low visibility formation lights. (The photo also shows that the airbrakes have no holes so the kit parts need some adjustment).
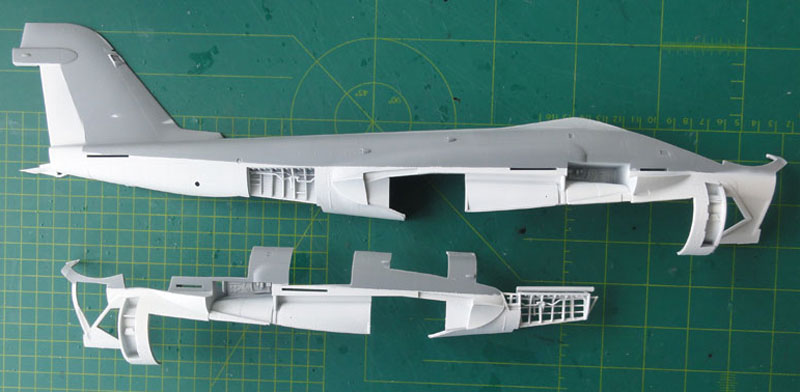
It was decided to take a unique approach with this kit and create a "cut-away" model. The left side will feature opened panels, showcasing the intricate airframe structure, while the right side will be a traditional model with all panels closed. This is a departure that promises to be a truly unique creation.
(STEP refers here to the kit instructions sequence).
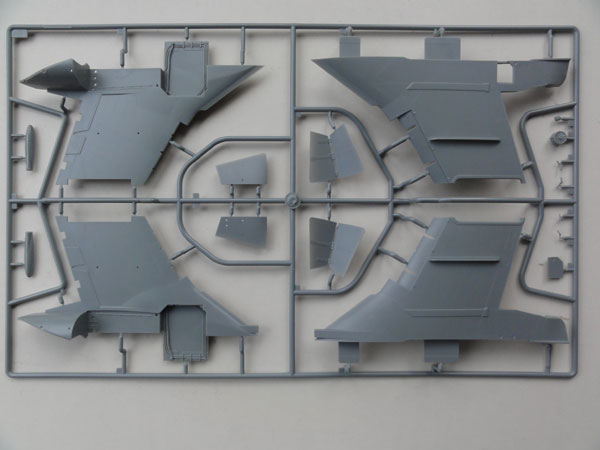
As the model would be made as a "cut-away" , the large kit parts suchs as fuselage halves, wing sections etc were first separated from their sprues. The "left side" would be opened up with various panels and hatches. Luckily the kit itself has also many open hatches such as for engine bay, airbrakes, avionics and nose.
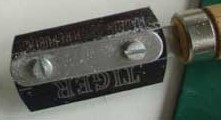
Using a TIGER razorsaw, I carefully scored along the inscribed panellines to create openings in various panels. This required me to study the cut-away drawing thoroughly to ensure that the model's structural integrity was not compromised. As a result, the major surgery was carried out early on when the model was still easy to handle.
To display the cut-away model, I will use a specially designed display stand that I have acquired. I also cut a hole in the lower belly of the model to accommodate a pin that will hold it securely in place.
To create the various airframe components, I applied sound aerospace engineering practices, paying close attention to the placement of rib structures, bulkheads, beams, and spars. I used plastic rods from EVERGREEN to build these structures.
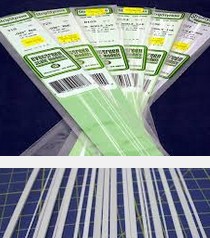

This is a lot work, particularly to match the size of each rib, spar and bulkhead to the external surfaces. The cut-away drawing is important here as well as carefull looking at the kit rivets and panellines which look accurate on the kit. Plenty of rod and glue needed here. Do a sub-section at a time to keep a good mood ;-))
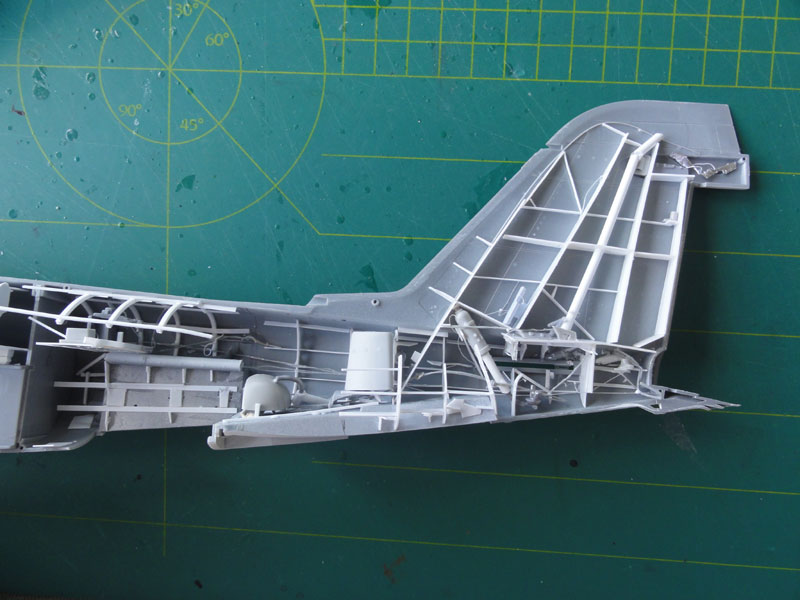
Some sub-assemblies are seen here, with in the tail the vertical spars and cooling duct:
It was now also time to PRE-PAINT some parts at this stage with the Harder Steinbeck airbrush with many parts still in the sprues. But first, many attachment "sprue gates" were removed as far as possible to reduce later retouch work. Many parts were also a bit assembled before pre-painting, an example being the "bird cage" in STEP 5.
Most common colours of the old style A-6 US NAVY scheme are white, mat black and US Navy gull grey Fed.Std FS 36440 (using Gunze Sangyo H325 acrylic). For the white FS 36875 Gunze Sangyo H1 acrylic was used and airbrushed.
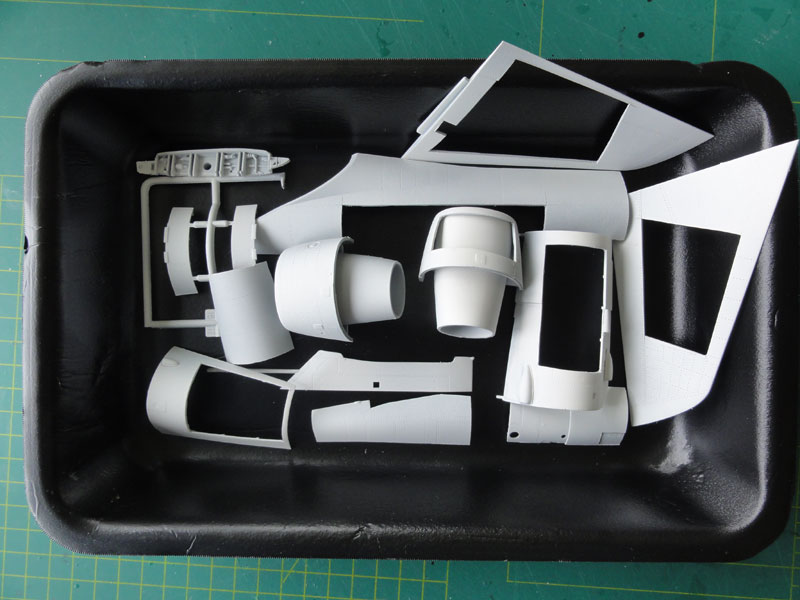
Some parts are seen here "pre-painted" with the right side and heavily cut left side!
Now proceeding with other assembly steps...
STEPs 1 - 3
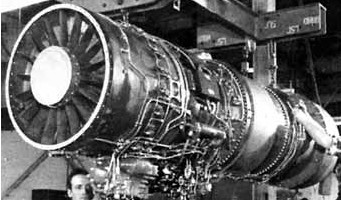
J-52 engine of the A-6 and Flight 1961 coverage
..
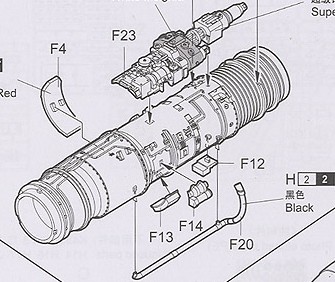
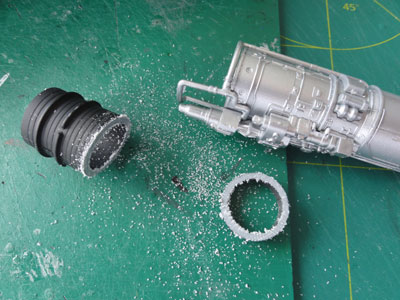
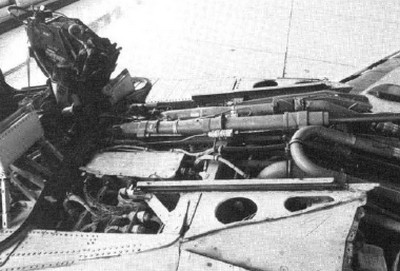
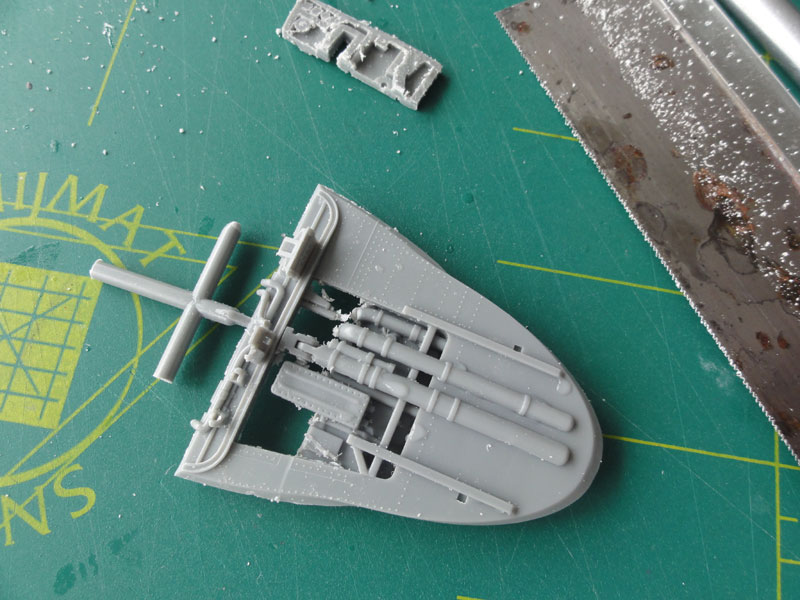
A single engine would be displayed inside the model, in the "left side" engine bay. The engine model parts in the kit are nice, but part #F19 should be set differently as shown in the instructions. I also removed a section of 5 mm of parts F18+F22 and fitted this in front of the engine fan, so setting the engine a bit more aft in the bay.
The fret parts PE1 and PE2 for the fan are a bit difficult to fit but look OK. In the right bay I only set the front fan and part of the exhaust pipe (A3+A9+F5);
 .
.
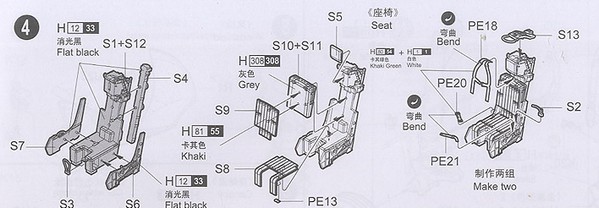
STEP 4
The cockpit interior is very nice in this kit. I simply used the Martin Baker GRU-7 kit seats which are OK for a later A-6A as well. One seat was "cut open" using some info of the MARTIN BAKER seat manufacturer. Here an old 1960 advertisement is seen:
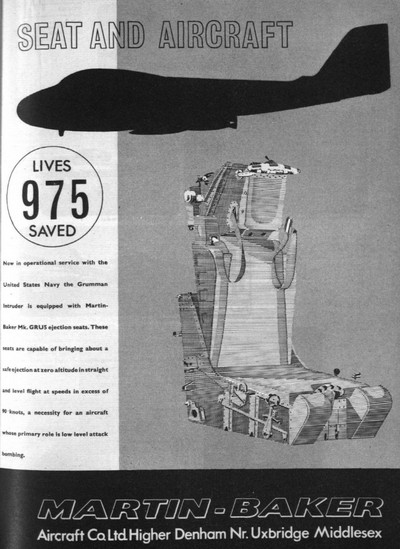 photo courtesy Martin Baker Company
 ...
... .
.
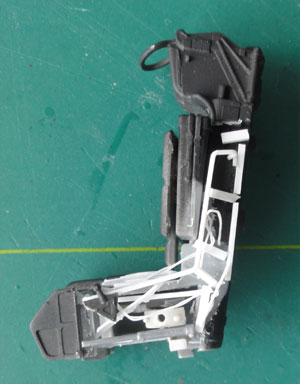
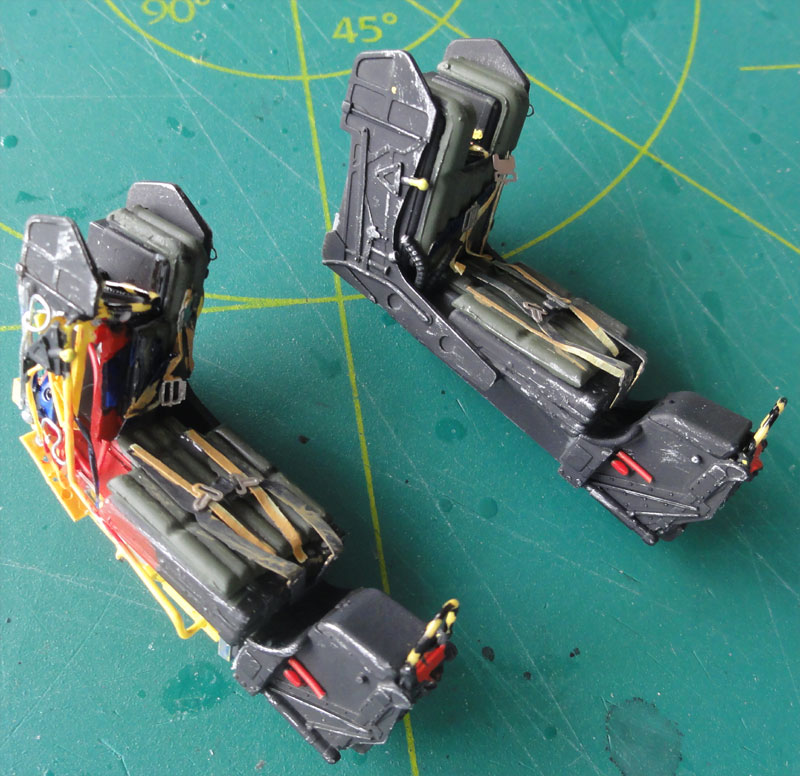
NOTE: later I replaced the thick firing wires on parts S13 with thin wire painted yellow and black.
The seats were painted black with olive drab cushions and parapack. Straps were from the PE from the kit and tape with some buckles from the spares box. Some drybrushing was done. Note one "cut away" detailed pilot seat. The seats were side aside for later installment. Some warnings signs on the head rest to be set in place as well later on.
Next, moving on to the cockpit interior....
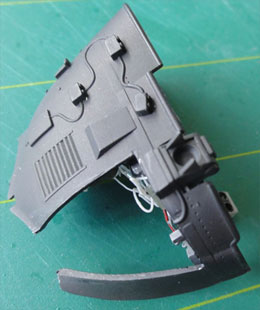
Some tub floor panels from part U1 were cut away to show later the control rods and cables below the floor. Control sticks were not yet set in place.
From the coaming U26 also a section was cut away.
 .
.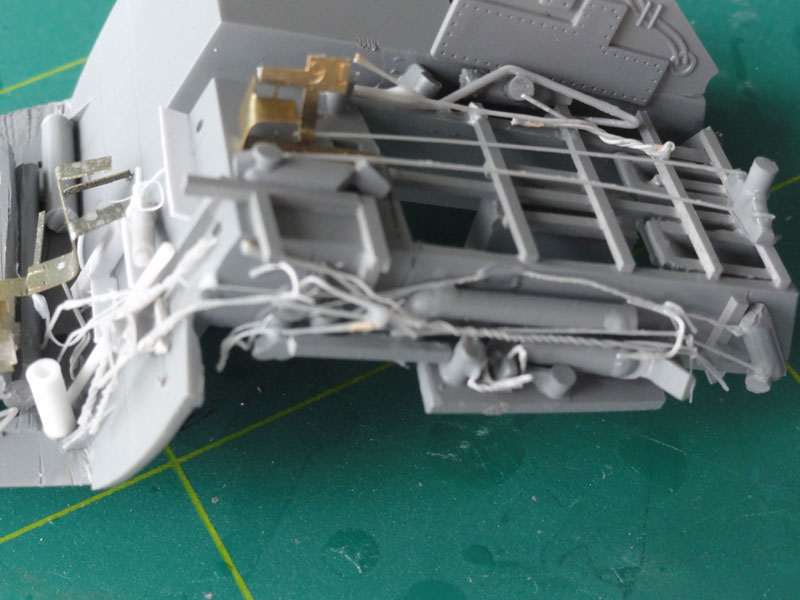
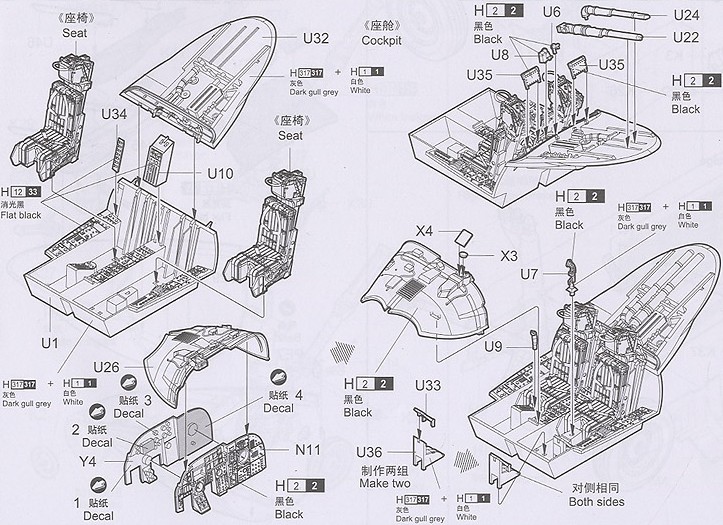
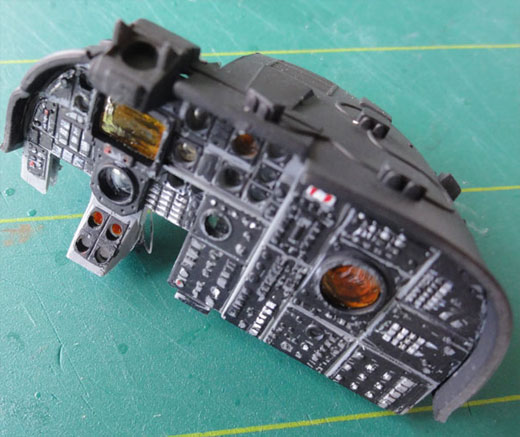
Additional details were added from stretched sprue, wire etc. To the rear of the nice instrument panel H2 + Y4 some details were added. They seem accurate with CORRECT angles and details.
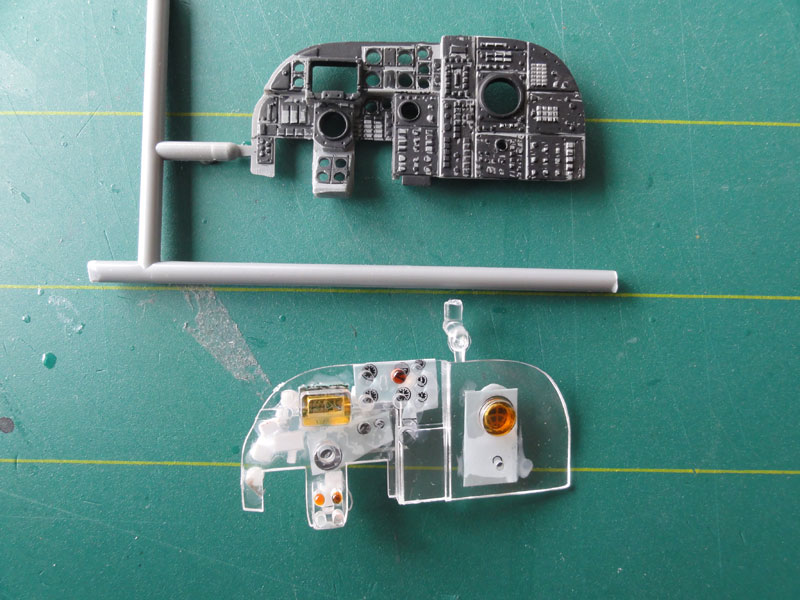
The instrument panels included in the A-6A kit are accurate and satisfactory. To enhance their appearance, medium grey acrylic paint was used with black panels and light grey knobs and switches. The orange scoops were painted with Tamiya Clear Orange acrylic. Notably, the pilot left station exhibits a large vertical display indicator on the left round scoop, while the navigator/bombardier station on the right displays a single large Direct View Indicator.
NOTE that the flight director sight is still to be added later (parts X3 and X4).
The aft coaming part U32 was also cut open, a photo used for reference. The cuts now shows a bit more depth now and parts U22 + U24 are nicely done in this kit.
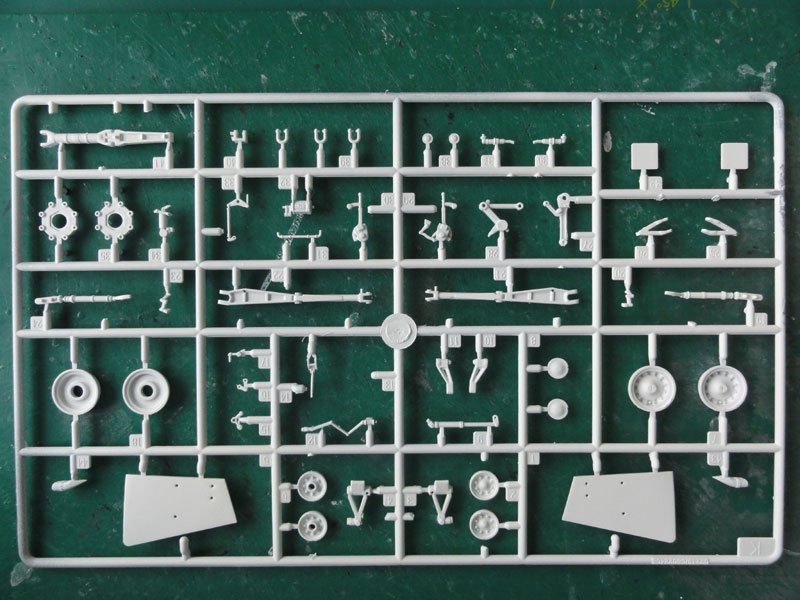
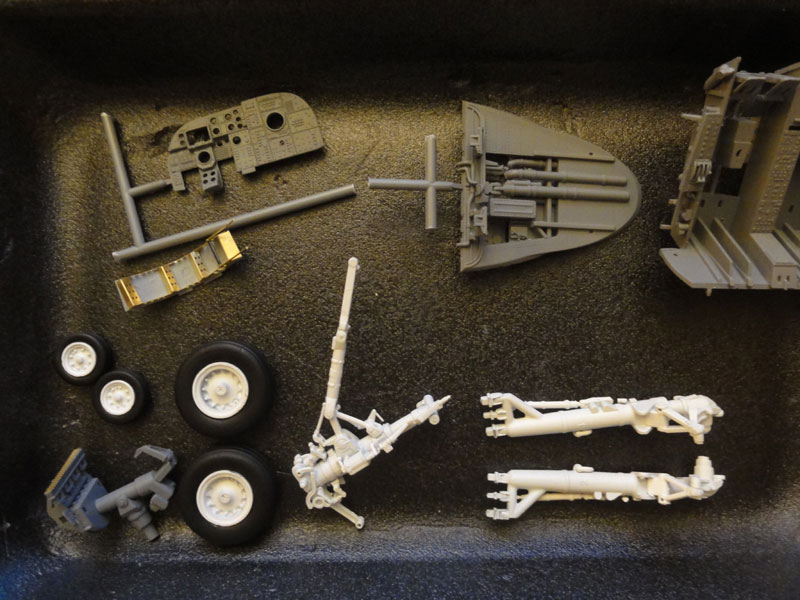
STEPs 6 - 7 and STEP 10
The landing gear of the model is impressively sturdy, thanks to the large metal parts included in the kit. However, some additional detailing is required, such as the addition of hydraulic tubing and wiring. The kit also includes rubber tires, so it's important to paint the plastic hubs (parts K7+K18) to prevent them from softening over time due to exposure to the rubber fluids. The parts K8 were not utilized in this build, and the wheels have not yet been attached to the landing gear. To add more realism, the main surfaces of the undercarriage will be painted white, with a black pre-wash to be applied later.
.
References:
- BUNRIN DO no.135, Grumman A-6 Intruder (Japanese text but nice), January 1983;
- Squadron Signal In Action no., A-6, only USD 3.95 in 1975;
- Squadron Signal A-6, Modern Military Aircraft no.5007, 1991;
- World Air Power, Volume 12, pages 34-95;
- Air International: Volume 57, pages 160-165; Volume 74 page 02-20;
- Flight International: no.4229; no.3961 .

(c) Copyright Meindert "designer"/ All rights reserved. Your comments are welcomed by webmaster
Created this page
October 27, 2014