[ page 13 ]
McDonnell Douglas (Boeing) F-15 Eagle Plastic scale models in 1/72 scale
... continued from page 12...
modelling reports

Finemolds from Japan also released a 1/72 kit for the F-15J Eagle as flown bij the JASDF. I completely was unaware of it when kit #FP51 was released in 2023. This release is for a F-15J with upgrade J-MSIP. (multi stage improvement program, see below).
The Finemolds model company is also based in Shizuoka as many other Japanese modelling firms and is a small company. They also released other 1/72 F-15 kits including a two seater F-15D.
There are some 17 sprues with an estimated 190 parts in total. You get external fuel tanks and pylons but no missiles. (On the box, Finemolds also indicates a few small aftermarket sets can be purchased for "seat belts", additional missiles and nano aviation formation lights and chaff flare dispensers).


The instructions are in black and white print in Japanese but with English texts to help during construction. There are 34 STEPS and a modelpaint table which shows Gunze Sangyo Mr.Hobby (GSI) paints. Another table also shows that Japanese modellers can buy also a sprue if an extra sprue is desired. The drawings showing all the decals and stencilling are very crampted.
The Finemolds F-15J kit is extremely fine and has very delicate recessed panel lines. Slide mould technology is used throughout enabling fine surface details in all parts. It is the best detailed F-15 in 1/72 scale.
Regarding the Japanese MSIP text, a summarized rough translation reads:
"
Many JASDF F-15J were upgraded through the J-MSIP, the "Japan Multi Stage Improvement Program". Internal wiring and provisions were installed for (gradual) equipment upgrades. It started with cockpit panel for weapon selection. AN/ALE-45J chaff and flare dispensers were installed. The ECM J/ALQ-8 system was installed and sometimes the J/APQ-1 rear warning system with a changed starboard rear fuselage end fairing installed but not on all MSIP jets as the systems also make the F-15 more easily detected by the enemy. Some engine upgrade were done to F-100-IHI-220E standard. The MSIP jets enabled the pilot to use the HMCS "helmet mounded cueing system". Some upgrades were also done at the ejection seat harnesses.
Another introduction was the AAM-5 missile system that was also retrofitted on many older JASDF F-15's combined. It seems also some MSIP jets are able to fire the AN/AGM-158 stand off missile (as well as the JASDF F-35A).
"
My general advice is to study real photos to see if MSIP is applicable for a particular F-15J.
Back to the Finemolds kit.....
The decals sheet has lots of stencilling but the JASDF squadron markings but the ghost grey schemes are a bit dull however, certainly when compared to the various Platz and Hasegawa kits. I think Finemolds decided that their main investment should focus on the fineness of the parts and kit plastic.

F-15J kit #FP51 has markings for 3 JASDF F-15J in the standard ghost grey camouflage JASDF scheme with just some small different tail badges:
[1] F-15J, coded "82-8899", JASDF 204 squadron based at Naha, Okinawa 2022;
[2] same jet "82-8899" earlier flown by JASDF 201 squadron based at Chitose, Hokkaido, 2019
[3] F-15J, coded "52-8951", JASDF 306 squadron based at Komatsu, 2021
NOTE: I later found out that the kit decals tend to "silver"; it is thus essential to have really gloss model surfaces before any decal is set.

Let us look at bit more in detail to the kit...
STEPs 1-3
The cockpit is very detailed with a choice of different instrument decals, probably for standard or MSIP upgraded F-15J. The rear avionics bay has good detail. The nose gear bay has a lot of detail but I had some trouble to assemble it, may be it was my fault. The separate radar nose with external strips is probably for an MSIP jet.

STEPs 4-6
Good long intake air flow tunnels and main gear bay details are provided. The main gear doors are separate parts although on most parked F-15's these are seen closed. You have the choice here. The purpose of the separate panels #D17 and #D20 is unclear but they fit OK.

STEPs 7-9
At the lower fuselage belly, some small notches need to be cut out for the MSIP ECM J/ALQ-8 antennas #L1 (see in STEP 21). Pylons holes also need drilling out if desired.
STEPs 10-13
The ailerons are separate parts and can be set drooped down as indeed seen on most parked F-15J.
The intakes can also be set if desired drooped down when engines are running with optional parts. On parked F-15J there are (almost) horizontal. My F-15 models are made "parked" and non flying.

STEPs 14-15
The vertical tails are peculiarly integrated parts with the vertical stabilizer areas. This does provide a seamless assembly but the painting is more difficult. I did not install the vertical tails until they had gotten their paint coats and the rear engine areas their metal panels; the tails fit excellent.
STEPs 16-17
The exhausts for the F100 engines are without "turkey feathers"and look very good. The tail hook fairing can also not be set, just the tail hook; this was usual practice with the later JASDF F-15 operations where the tail hook fairing was not fitted to save weight. I did not set the tail hook fairing for the intended scheme. The (unused) tail hook fairing parts are provided though as Finemolds parts #D7+D8.
STEP 18
The horizontal stabilizers have some raised details as on the real ones. Install the stabilizers until after painting and decalling.
STEPs 19-20
The kit undercarriages are very well detailed. The instructions are a bit "busy" as it is also indicated to remove all the mould bits. The main gear doors #A40 and #A42 are usually in a closed position on parked F-15J as is the forward nose gear door #A19 and this is shown in STEP 21. Your choice here.
In STEP 20 also the parts #L1 are seen, being the ECM J/ALQ-8 antennas; these are only installed on the later MSIP jets. Leave these off when making an earlier JASDF F-15J.
STEP 21
This shows the various lower nose antennas. I think that antenna parts #K8, #K9 are only installed on later MSIP jets.

STEPs 22-23
The ACES ejection seat is fine (but harnass/ seat belts are aftermarket). The instrument coaming part #K1 is probably for an MSIP.
STEPs 24-26
The canopy can be set open and the locks are nicely seen moulded. These locks should be shaved off when the canopy is to be set closed by the modeller and this is indicated. When setting the canopy open, I suggest to add the missing 2 mirrors in the front canopy frame. The probes aft of the nose gear are also shown.

STEPs 27-28
The air brake can be set open or closed and shows nicely internal structure ribs. On most parked jets seen closed.
STEP 29
The external 600 gallon fuel tanks with their pylons are provided. Though the real tanks show raised rib details, I feel these are a bit too thick on the kit parts. Sanding these thinner is recommended. (I used on my model some spare tanks from Hasegawa F-15 kit).
STEP 30
This shows only where to set many decals on the lower fuselage and where to cut these if gear doors are open.
STEPs 31-34
This shows the various stores and pylons placement. Also the missiles "braces" to be set on the lower fuselage. The kit unfortunately does NOT provide JASDF AAM-3 or AAM-4 missiles; these should be separately purchased if desired (I have spare missiles from a Platz F-15J).
The next pages of the instructions shows the decal placement and paint schemes.....

The Finemolds #FP51 kit decals are rather standard for a ghost grey jet and a bit dull. But I had spare JASDF decals for a 203 squadron jet flown from Chitose air base in 2004 from the Hasegawa F-15J kit #00776:

The paint scheme from the Hasegawa #00776 kit is seen here:

(Note the rather peculiar mirror images at the starboard vertical tail but this is correct).
This scheme will be made with this model. The stencils will be used from the Finemolds decals sheet.
This jet "32-8825" did probably not have the JASDF F-15J MSIP upgrade so the Finemolds antenna parts #K8, K9 and 2x #L1 were NOT installed. It had the tail hook fairing fitted though; set the tail hook #D3 seen in STEP 17; do not use part #D4 but the Finemolds fairing parts #D7+D8.
The Finemolds kit would otherwise be made rather straight out of the box. It has as noted earlier subtle panel lines.
OK, let us start.
Some pre-painting was done while parts were still in the sprues. For example airbrushing the tyres tyre black, engine fans and so on aluminium and insides' of air tunnels white.

The fuselage side panels were set and the wing.

The model would be posed as parked and the air intakes were set "up" (so parts #C14 not needed) .

Just some areas needed putty and sanding. The forward main gear doors and main front gear door are seen closed as usually seen on F-15's.

Ensure good alignment of the lower nose parts. Some putty and sanding was needed. I later found that I should have fitted the radar nose as I had a small step at the lower nose edge; I think this was caused by misaligning the part #A16.
The clear canopy #X1 has a subtle mould "seam" in the middle, this can be easily polished away with a nail polishing stick.

The radar nose was installed but not yet the vertical tails or stabilizers. These will be painted and decalled later separately. Also the landing gears and smaller bits will come later. The kit wing fuel tanks were assembled with their pylons.
Note that in the kit NO missile parts are provided. I purchased a separate Finemolds JASDF missile set #FP39 as seen here:


The set has many missiles, some of these can only be fired by upgraded F-15 MSIP jets.
The basic assembly was ready and some minor putty was needed and had been wet sanded.
Now the Finemolds F-15J model got a base grey coat to check for any flaws using my favourite thinned Revell 75 steingrau acrylic. Where needed some more putty and sanding was done buit this kit has an excellent fit.

The JASDF F-15J "32-8825" paint scheme has the usual JASDF ghost gray patterns but a colourful vertical tail and a blue spine.
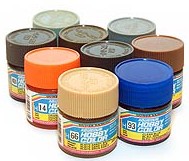
For the "ghost gray" scheme, airbrushed first was Fed.Std FS36375 with thinned Gunze Sangyo Mr.Hobby H308 acrylic paint. Than the upper patterns of FS36320 with Gunze Sangyo Mr.Hobby H307 was airbrushed "loosely" with some paper masks hand held over the surfaces.
Some blue areas for the Chitose no.203 squadron jet paint scheme are seen and airbrushed with a mix of 75% Gunze Sangyo Mr.Hobby H328 blue + 25% H25 acrylic paints. (I did not see a correct "14" paint colour as indicated by Hasegawa paint instructions).
The spine area behind the cockpit was masked and the lower canopy frames. Also a spare decal was airbrushed just in case later repairs are needed.


The rear fuselage engine areas were, after masking, airbrushed aluminium with Vallejo 77.701 acryl metal paint.

After the paints had been applied, a gloss varnish coat was airbrushed before decalling is to be done.
Decalling was done with the Hasegawa no. 203 squadron jet and tail markings decals. The smaller stencilling came from the Finemolds decals sheet.


Although I had airbrushed a gloss varnish coat, I found out that the Finemolds DECALS TEND to "silver". That spoils how the model stencils look at the model. I was not happy.
After decalling, many of these smaller decals were stabbed with a very scalpel/ sharp knife and added DACO decal setting. Some 90% of the stencils "silvering disappeared" and it ooked better now. So take care here!
The landing gears and smaller parts were now installed without any problem as per kit. But I added a few hydraulics/ lines on the gear legs made from thin black stretched sprue.


The radar nose was also installed. I had a small step at the lower nose edge. I should have fitted the radar nose earlier and align it better with the lower nose fuselage part #A16.
The cockpit details and painted ejection seat with controls and actuator were installed as per kit. They look really good, certainly with some wash. Note avionic boxes in the rear bay. The seat got some harnass/ straps made from tape slices.

The Finemolds kits exhausts look fine and are without "turkey feathers". All was airbrushed aluminium with Vallejo acrylic metal. These were installed as were the prepared vertical tails with there side panels and the horizontal stabilizers.

I painted the exhaust insides' "burned white" as seen below. On some metal fuselage engine panels a thinned mix of blue and varnish was airbrushed.
The prepared vertical tails and stabilizers were installed, they fit OK.

The canopy was to be set open on this model; The 2 small mirrors were added in the front inside canopy frame made from scrap.
Two prepared external fuel tanks and their pylons were installed. No missiles were installed and the lower fuselage edges the missile braces #C4 and #C5 set as per kit. (If you want missiles, buy the separate Finemolds set or get them from a Platz F-15J kit).

This model was not weathered a lot, only a bit wash on the gear legs, edges of movable control surfaces and the various "grills" and vents. The radar nose also got a wash. The gun opening got a metal edge painted. The small anti-collision lights as well as the wing leading edge lights were hand painted red and blue.
The final step was airbrushing a protecting semi-matt varnish coat to get an even sheen and protect the decals. In this case a coat of Johnson Future/ Pledge with 5% Tamiya X-21 "flat base" with the usual technique. (mask a bit the metallic exhaust areas and obviously any clear areas).
It is a good idea to add some 10% Gunze Mr.Hobby Levelling Thinner in the varnish mix. This really helps airbrushing a nice varnish layer.

The canopy was positioned (without glue) open and the model was ready for display!

 JAPAN
JAPAN 

The F-15J coded "32-8825" as flown by JASDF no 203 squadron based at Chitose air force base on Hokkaido. It has 50th anniversary JASDF markings as seen in 2004. (spare Hasegawa decals used).


... set in a scenery at Chitose air base...


... banking over the base...

On to next [ Page 14... ]
(c) Copyright "designer"/ All rights reserved. Your comments are welcomed by webmaster
Created this page Sept 23, 2025