[ page 12 ]
F-15 Eagle model in 1/72 scale
... continued from page 11....
Platz page 3

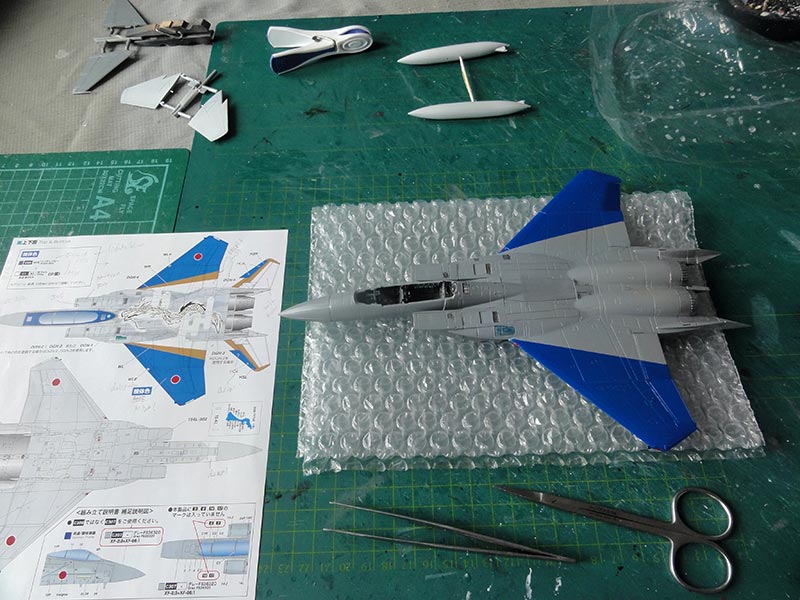
Another few 1/72 PLATZ F-15J Eagle kits were made. As described on page 3, this kit is very good but has a few areas that can be improved. Platz released a whole series of F-15J kits with attractive Japan Air Self Defense Force (JASDF) decals. They all have the same mould/ plastic parts but a different decals sheet, often though only for the attractive scheme shown on the box. I took the bite and bought quite a few of these Platz kits....
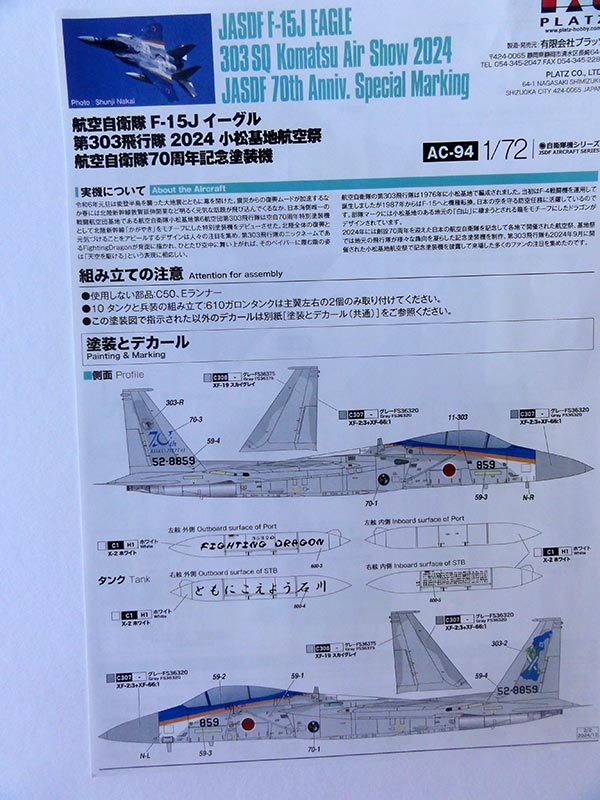
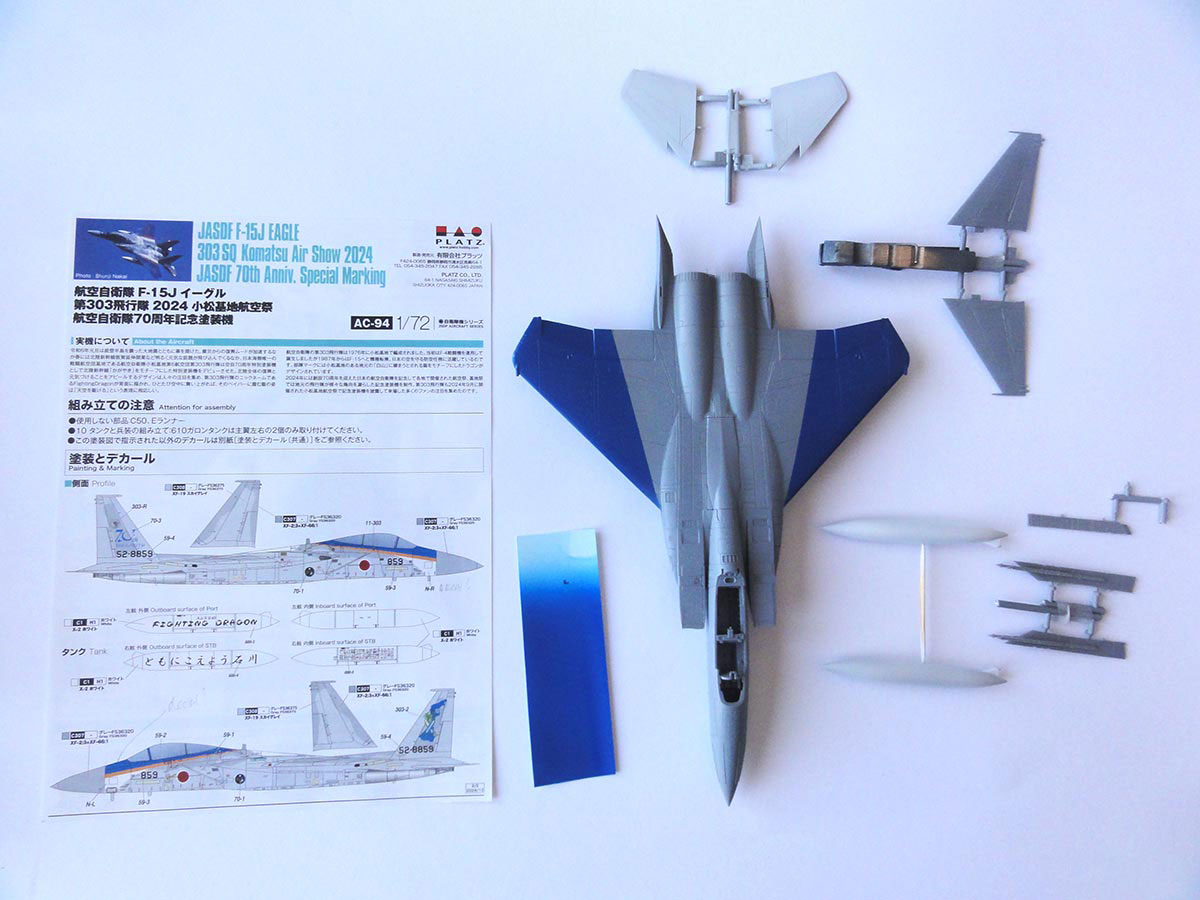
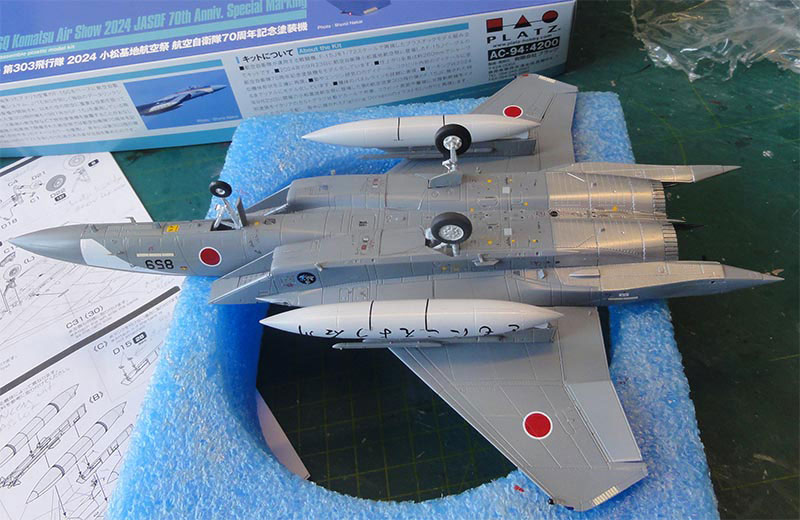
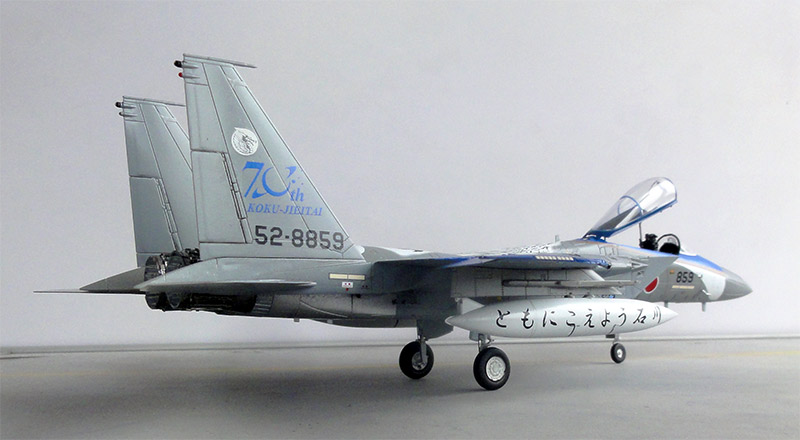
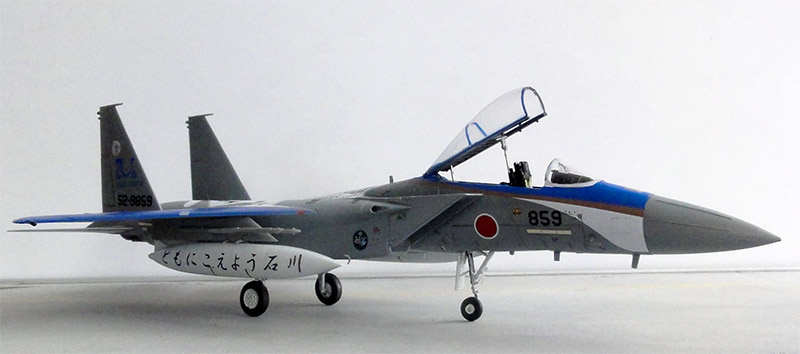
Platz kit #AC-94 has decals for a F-15J as flown bij JASDF no.303 squadron during the Komatsu Air Show 2024 with JASDF 70th anniversary marking.

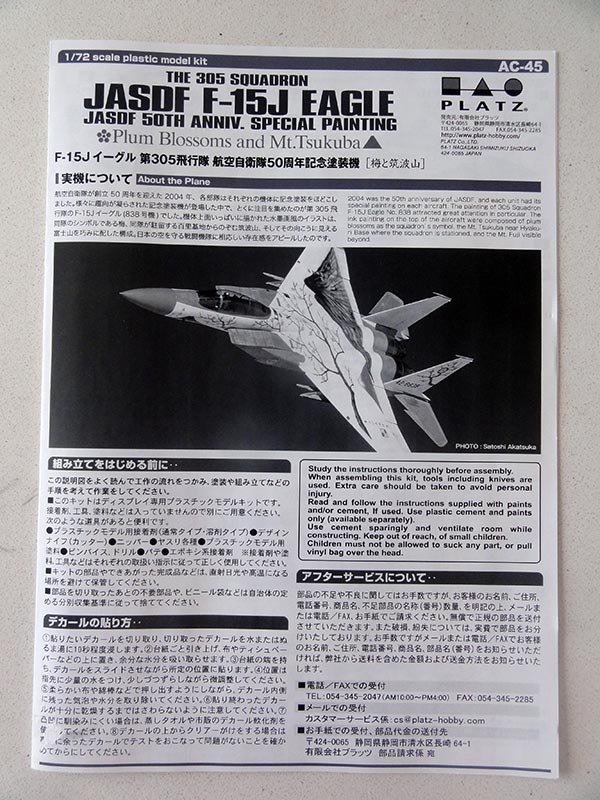
The kit instructions with explanations in Japanese and English are good with also paint numbers in Gunze Sangyo Mr.Hobby acrylic or lacquer paints. But sometimes Platz mixes up details for a particular jet so study real photos which are easily found on internet. I will try to indicate the subtle differences in the various Platz models made.
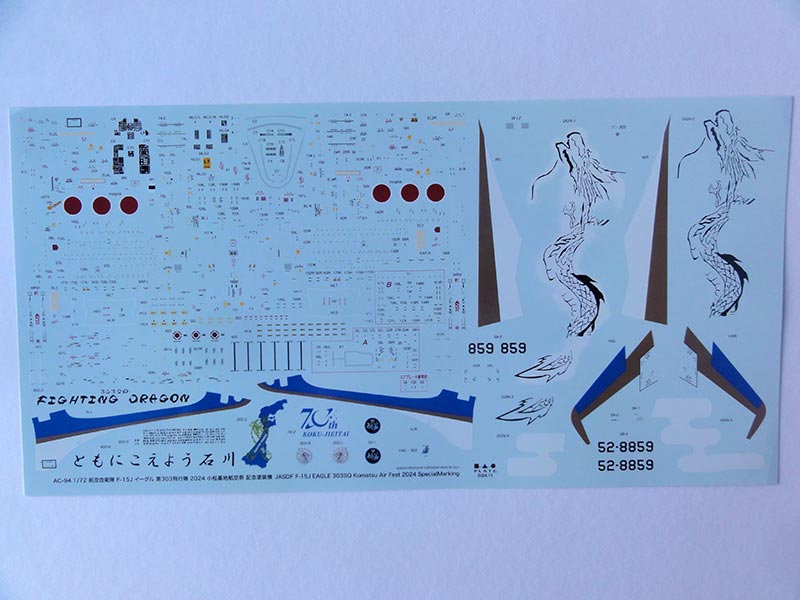
Decals sheet is for only 1 model in this scheme.
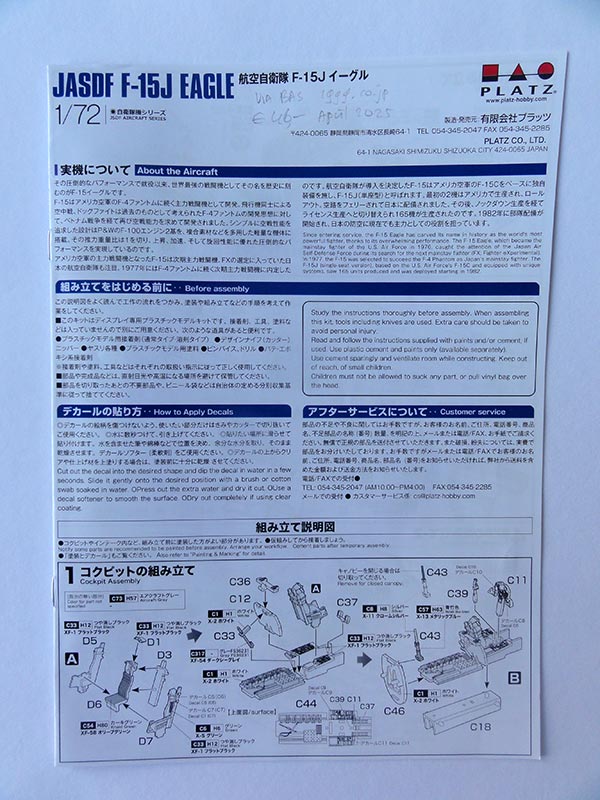
The kit has the common six sprues normally found in any Platz F-15 kit with about 90 grey parts and a clear sprue.
NOTES:
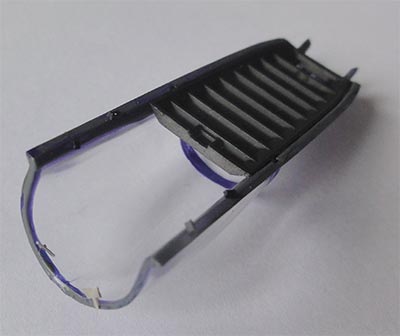
[1] Probably this particular jet "52-8859" is NOT an upgraded F-15J. Though still flown in 2024, the airco grill on the right aft cockpit side was retained as seen on real jet photos. Platz also suggests this. Also no rear fuselage end ECM was seen.
[2] Platz made an error in the instructions regarding the tail hook fairing. This particular jet "52-8859" did not have the tail hook fairing, so do not install #C26-C27, only the hook part. Many model photos here show the fairing still installed, it was later removed.
[3] Platz suggests also to install the 2 J/ALQ-8 ECM system antennas below each air intake, provided in the kit as 2 parts #D28. But I did NOT see these on photos of the real jet, so did not install these.
[4] Also the upgrade antennas #C48 and #C49 on the lower nose were not seen. Leave these off.
[5] On real photos on the vertical tails I did not seen the rudder actuator fairing so no modification here needed.
The general assembly of the kit was done as described on page 3. Do not install yet the vertical tails and stabilizers to make paint masking easier.
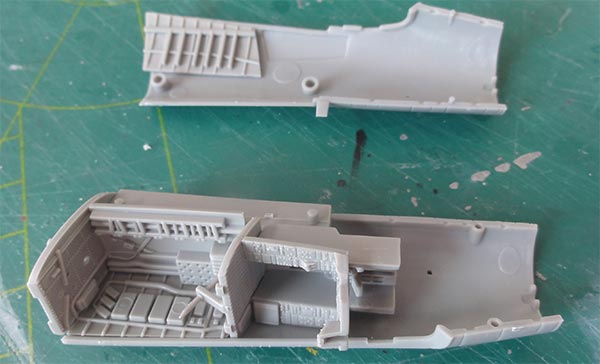
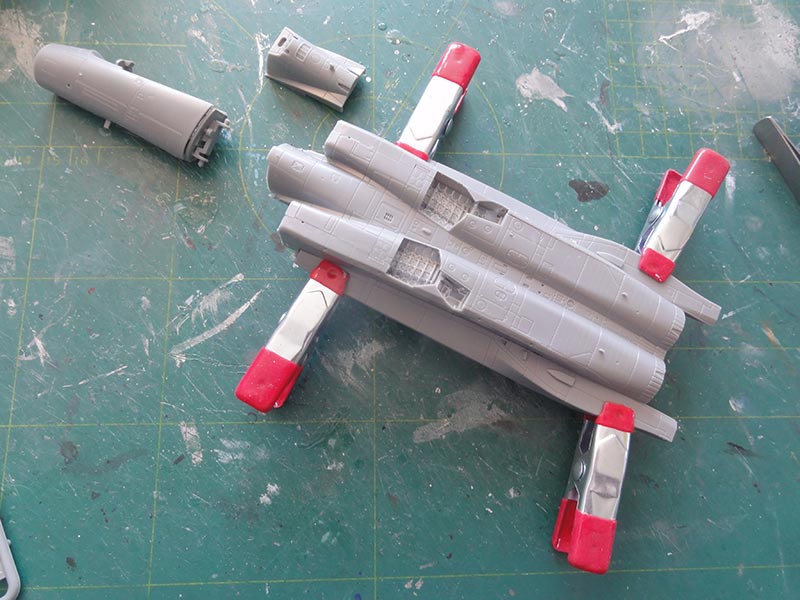
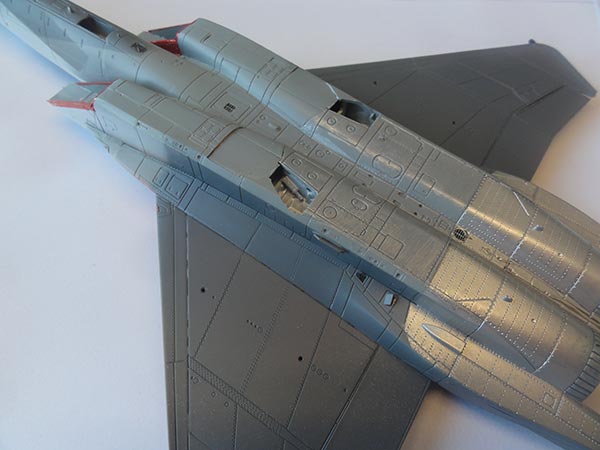
I opted to set the air brake closed. Sand flat the intake edges and the rear fuselage areas where the stabilizers will be fitted later on. The raised radar strips are a bit thick, on the real jet there are a bit more subtle. So sanding off slightly can be done.
Again, to my taste TOO DEEP panel lines of the Platz F-15 kit were filled with thin Vallejo plastic putty (or use fine Tamiya putty or your own favourite filler like Mr.Surfacer). Make sure not to fill any gaps of the moving surfaces like flaps and ailerons.
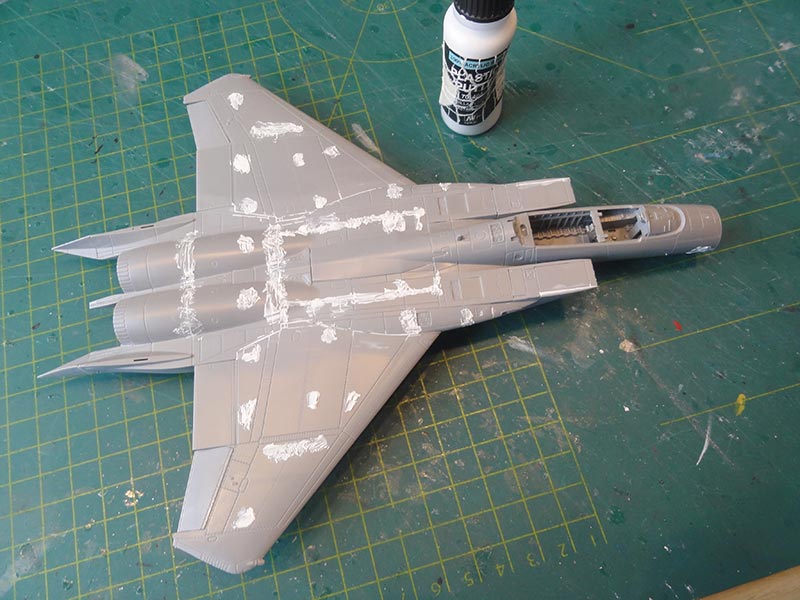
Also at the lower areas. Note the closed main doors and the main nose gear door still to be set closed as well.

Let dry, and rub, clear and swap the puttied lines with nail polish remover or acetone with a cloth and cotton swab. This will not damage the surfaces with scratches. The panel lines are now less deep and will look better under a paint coat.
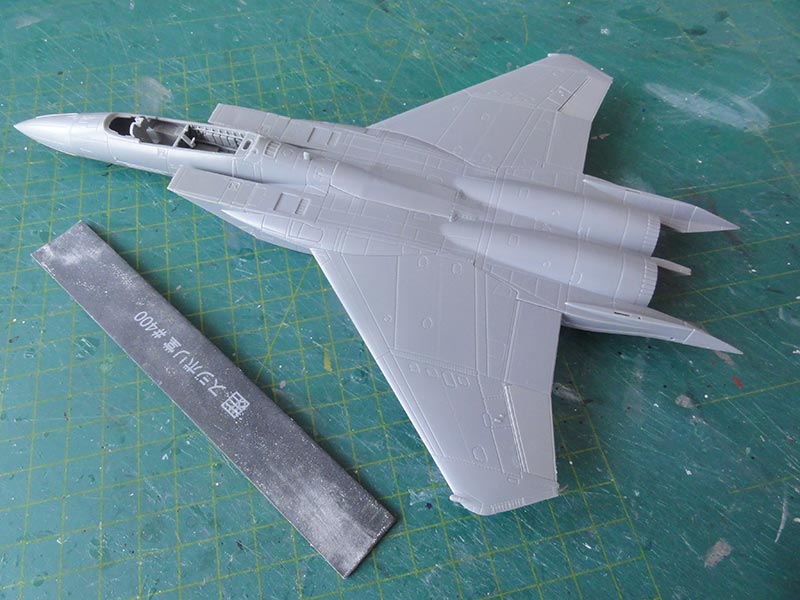
To check for any flaws, tiny gaps and irregular surfaces, the model got now an airbrushed base grey coat using Revell aqua 75 "Steingrau" acrylic that was thinned a lot. Model assembly all seemed OK to proceed applying the desired colour scheme.

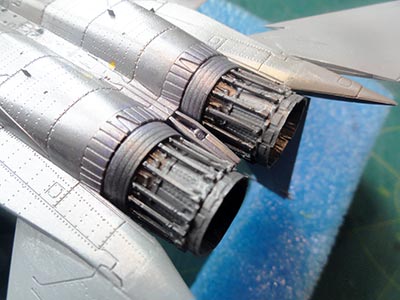
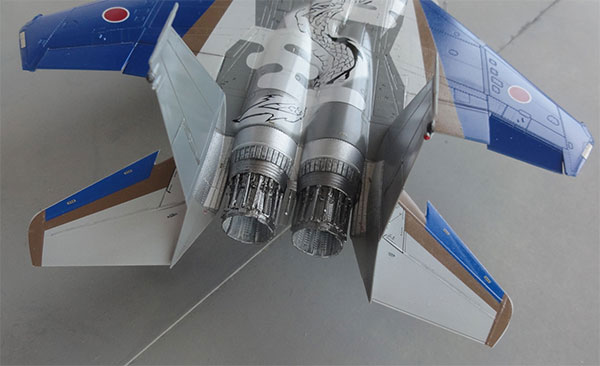
Exhaust nozzles are without "turkey feathers". They were airbrushed Vallejo 77.701 aluminium metal acrylic. Inside the nozzle pedals, mat burned white was painted to suggest burns. Leave the exhausts for later installment. The metal rear fuselage areas near the exhausts were airbrushed after some masking as well. This is easier as the vertical tails are not yet installed.
PAINT SCHEME
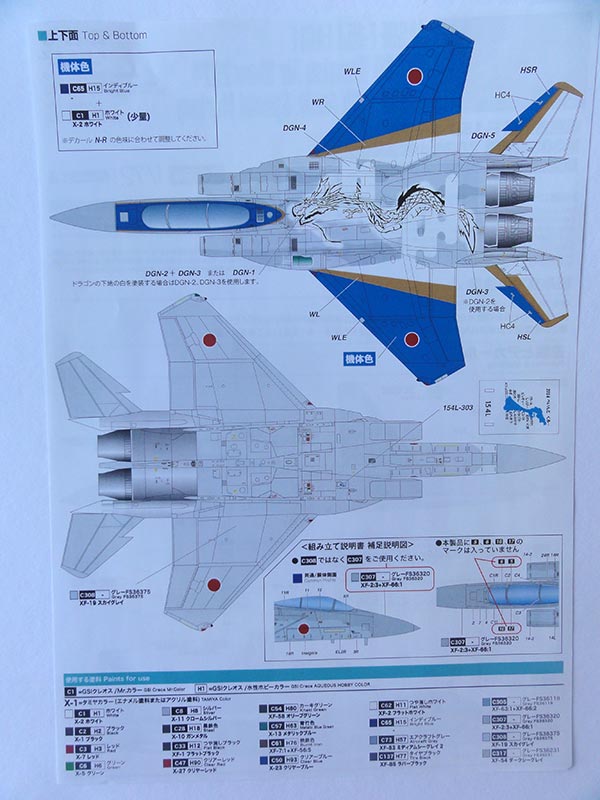
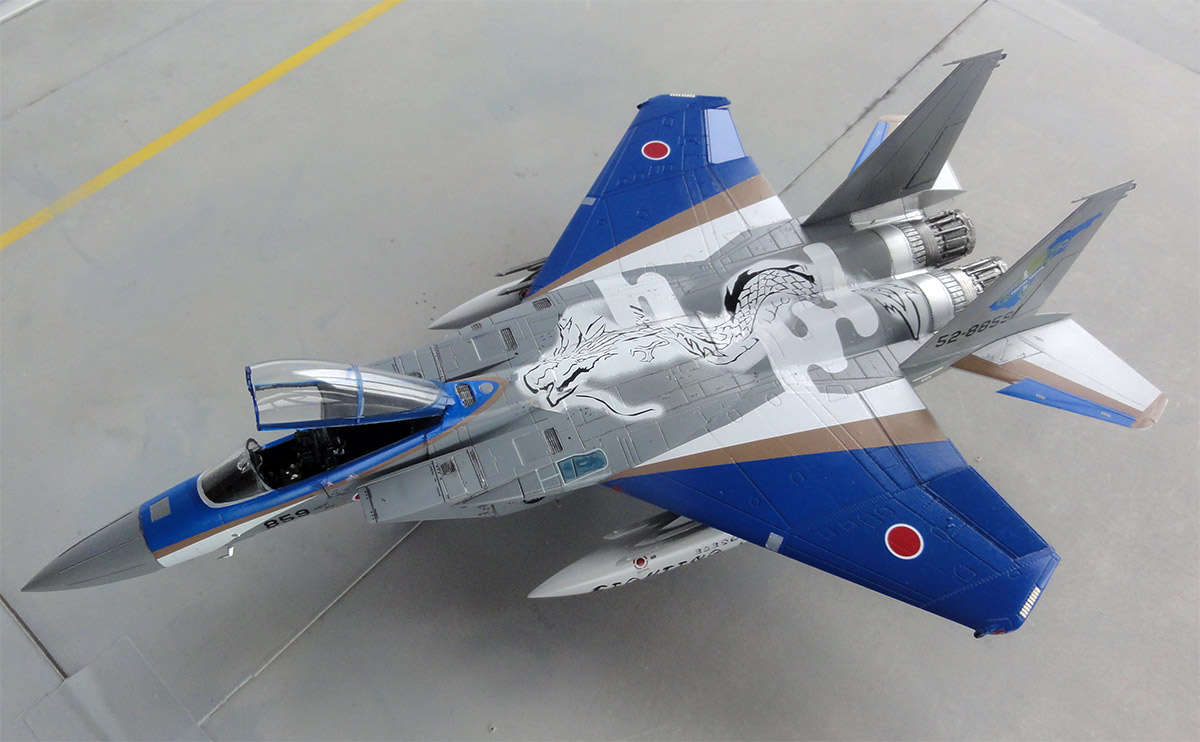
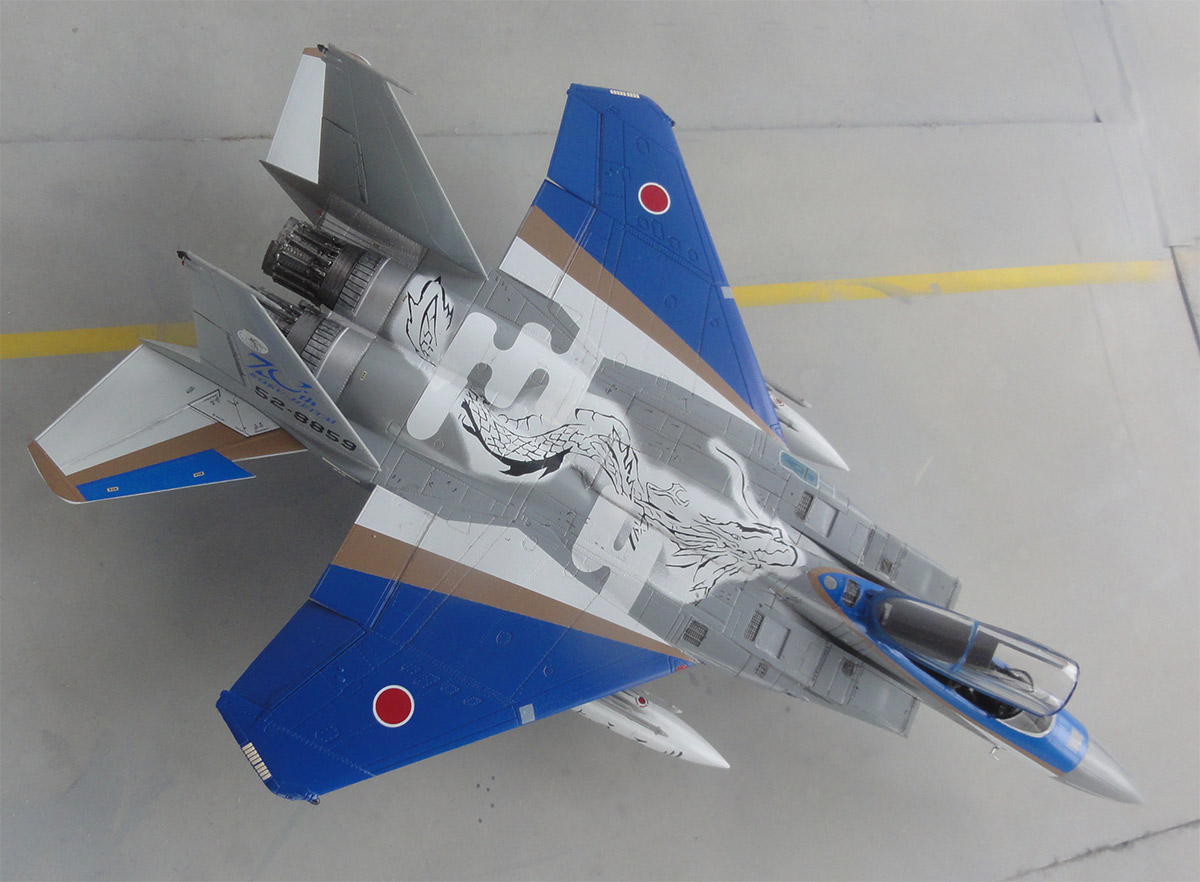
This special Komatsu Air Show 2024 scheme has first the standard "ghost" camouflage scheme of Fed.Std FS36375 with a FS36320 pattern except on the wing and stabilizers; on those are white and blue panels so these areas were not airbrushed in the camouflage scheme.
For the "ghost gray" scheme, airbrushed first was Fed.Std FS36375 with Gunze Sangyo Mr.Hobby H308 acrylic. Than the pattern of FS36320 with Gunze Sangyo H307 was airbrushed "loosely" with some paper masks hand held over the surfaces.
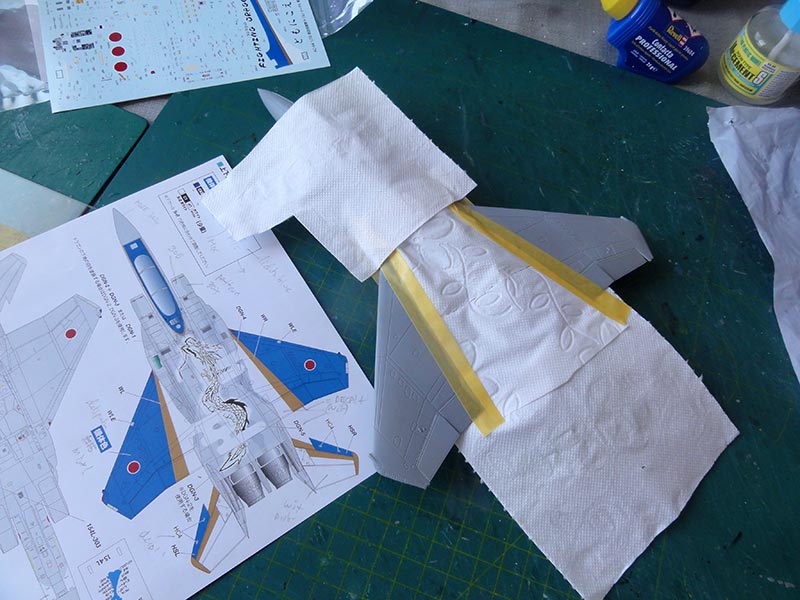
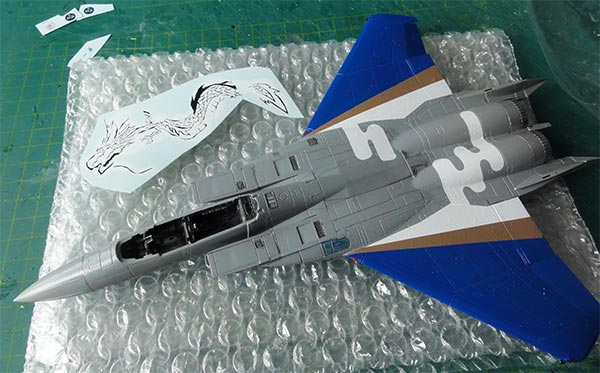
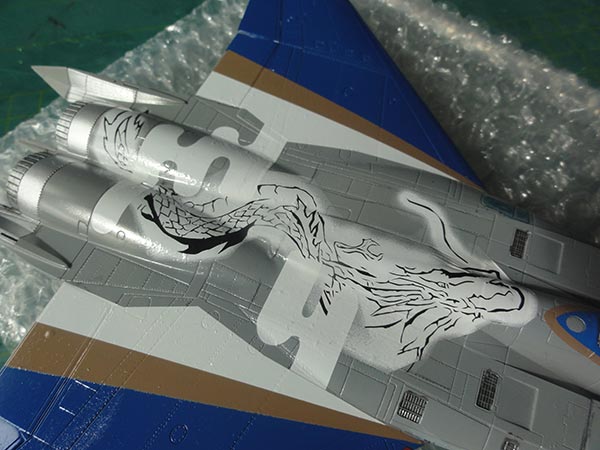
The wing sections and upper stabilizers were than airbrushed white after masking. The central dragon pattern is an excellent decal and includes the white curves.
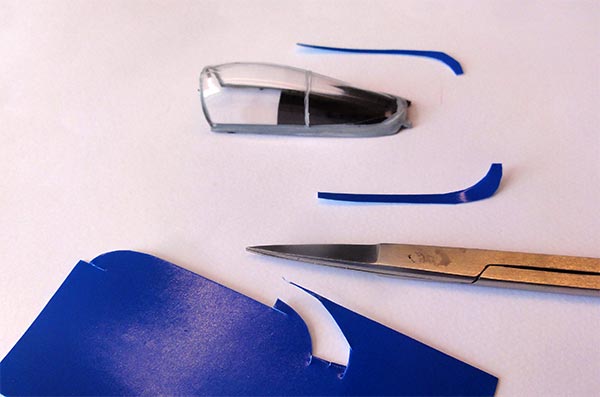
The white areas were masked and than followed airbrushing the suggested Gunze Sangyo Mr.Hobby mix of 80% H15 blue and 20% white. I airbrushed some spare decals sheet just in case repairs were needed as well.
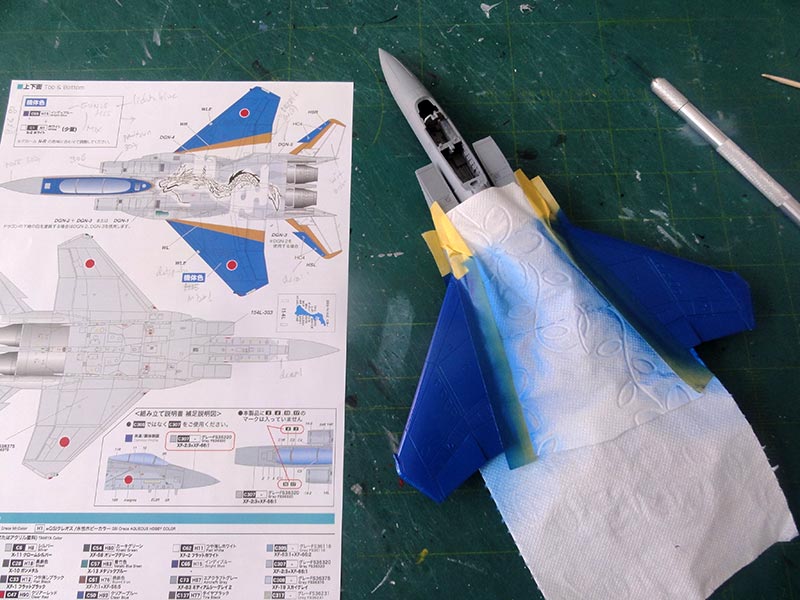
Note the spare blue airbrushed decal.
The wing fuel tanks of the kit with thick ridges were not used but available spares from a Hasegawa F-15 kit. For this scheme they were airbrushed gloss white.
While still in their sprues, the gear legs and insides of open doors were also airbrushed white.
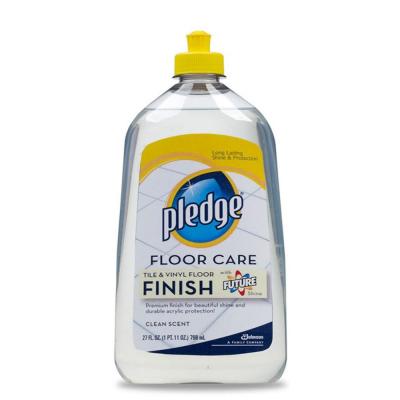
For this model made, I opted not do a lot of weathering and washing. A gloss Johnson Future/Pledge varnish coat was airbrushed for better decal adherence and to avoid "decal silvering".
Now decalling the model can be done with the kit decals.
IMPORTANT: Platz decals are very thin, after wetting slide them off their decal backing paper on the appropriate model spot!
For F-15's a lot of markings and stencilling is usually to be set and that also applies to JASF aircraft. It took 6 hours to set all the excellent decals!
The Platz kit decals are also very tightly printed on a very cramped sheet. Some stencils are combined on a carrier film. Blink/ turn the decal sheet in light to see where to cut the decals with fine scissors as many decals are grouped on a single carrier film. I wish that the decals had been printed on larger sheet.
It is best to set decals always on a horizontally held surface using a hold....
Stencilling decals should also be set on the model but start with the large decals on top.
Take your time. Any small remaining wrinkles and air traps were stabbed with a very sharp knife.

Apply softening decal fluid on top again and the decal will set better.
Some touch up work was done now at some grills, flap edges and panels with thinned black paint wash. JASDF F-15's are well maintained so no more weathering was needed.
Next step was the landing gear and setting the pylons and wing tanks which was quite easy. Paint landing gear bay interiors with a brush white. I also added a few hydraulic lines from thin black stretched sprue.
The decals for the low-visibility light panels on the wing tips were cut in halves and set on upper and lower wing tips. Some tiny red and blue anti-collision light were painted on wing tips and inboard wing leading edges. Also a few on the vertical tails.
The metal exhausts were set in place, they needed a bit persuasion.
NOTE: I later found out that Platz made an error in the instructions. This particular jet 52-8859 did not have the tail hook fairing, so do not install #C26-C27. Many model photos show the fairing still installed, it was later removed.
When done, the vertical tails were set, the gaps at the base are very tiny and they fit OK at 90 degrees angles and in parallel. (if your model has some tiny gaps, fill with white glue and paint surrounding colour with fine brush when dry).
No missiles were installed (though Platz nicely provides a sprue with JASDF missiles), only the wing pylons with launchers and wing fuel tanks. The fuselage missile braces #D19 were installed as well.
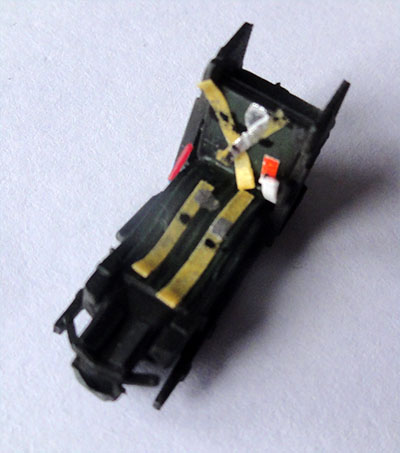
All other detail parts were installed as needed like pitots etc as per kit. The ACES II seat was painted and got straps made from tape. For the cockpit, nice instrument decals are provided. Some wash was applied inside the open rear bay and some extra electrical "wiring". The ACES II seat was installed and the canopy bar.
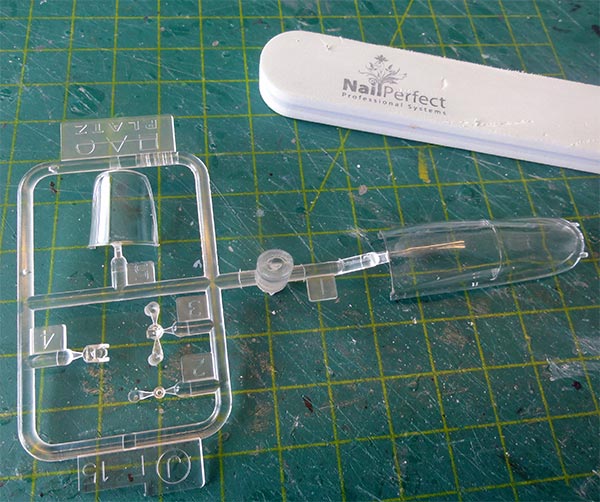
The clear canopy needs polishing to remove the central moulded seam. I only used a fine nail polish stick and it took only 3 minutes.
The canopy cross section looks good and the frames were hand painted. Inside it got 2 mirrors and a few handles at the front frame as well as some locks from scrap.
The extra spare blue decals sheet came in handy now to cut decals for the canopy frames.
The fit of wind screen is excellent after setting the HUD glass on the instrument coaming.
The final step was airbrushing a protecting semi-matt varnish coat to get an even sheen and protect the decals. In this case a coat of Johnson Future/ Pledge with 5% X-21 "flat base" with the usual technique. (mask a bit the metallic exhaust areas and obviously any clear areas).
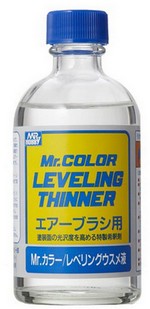
It is a good idea to add some 10% Gunze Mr.Hobby Levelling Thinner in the varnish mix. This really helps airbrushing a nice varnish layer.

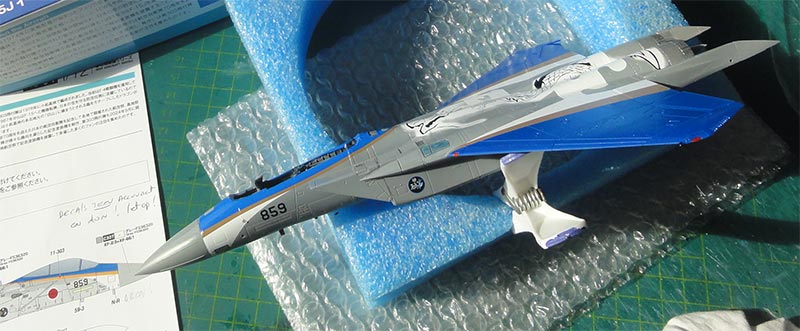
The canopy was positioned (without glue) open and the model was ready for display!
JAPAN 
F-15J JASDF, coded 52-8859, c/n Mitsubishi 059, flown by no.303 squadron during the Komatsu Air Show 2024 with JASDF 70th anniversary marking.
F-15J JASDF、コード 52-8859、c/n 三菱 059、飛行 小松航空ショー2024開催、航空自衛隊創立70周年記念第303飛行隊。
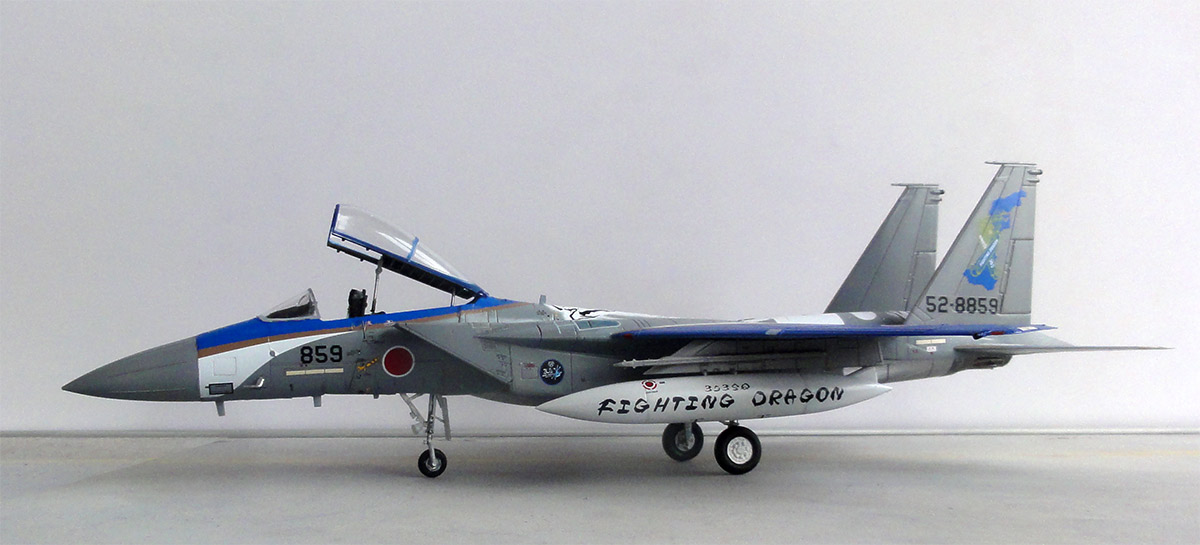
SUGGESTION: above here it is seen that the radar strips are a bit thick, on the real jet there are a bit more subtle. So sanding off slightly can be done.
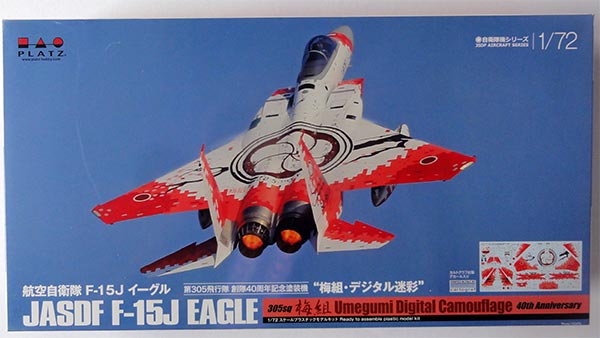
Kit #AC-31 has decals for a single but nice JASDF scheme of an F-15J as flown by no.305 squadron as of its 40th anniversary. They call it the Umegumi Digital scheme.
NOTE: Platz suggest to fill the airco grill at starboard cockpit side in STEP 5. But the kit instruction photos show that the airco grill was still there! I was not sure about the ECM antennas #D28 and installed these as shown in the instructions.
This particular jet has the tail hook fairing #C26+C27 (still) installed.
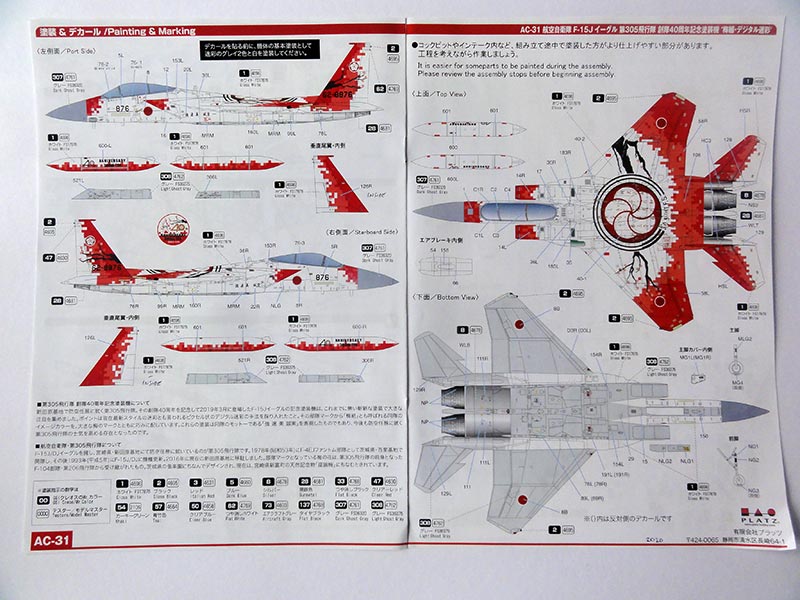
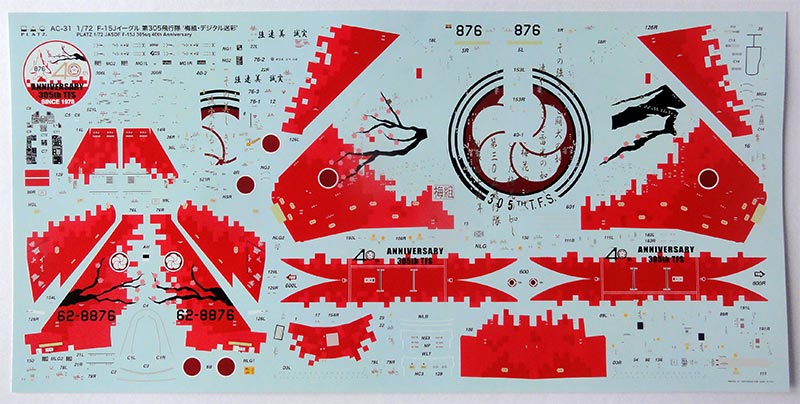
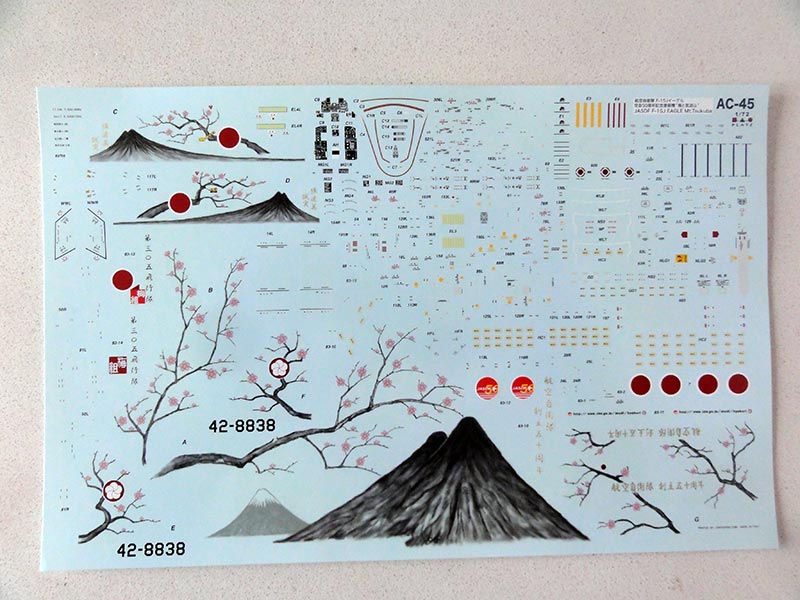
The decals sheet is impressive.
The colour scheme has gloss white upper colour and the lower fuselage sides, lower wing and lower stabilizers are FS36375 ghost grey.
After airbrushing a base grey primer coat, these rear exhuast areas were airbrushed after masking Vallejo 77.701 aluminium metal. Than followed the overall special scheme with Gunze Sangyo Mr.Hobby gloss white H1 acrylic and H308 FS36375. Masking is needed on the lower fuselage sides.
The leading edges of the air intake were handpainted gloss red though decals are provided to ensure a complete coverage.
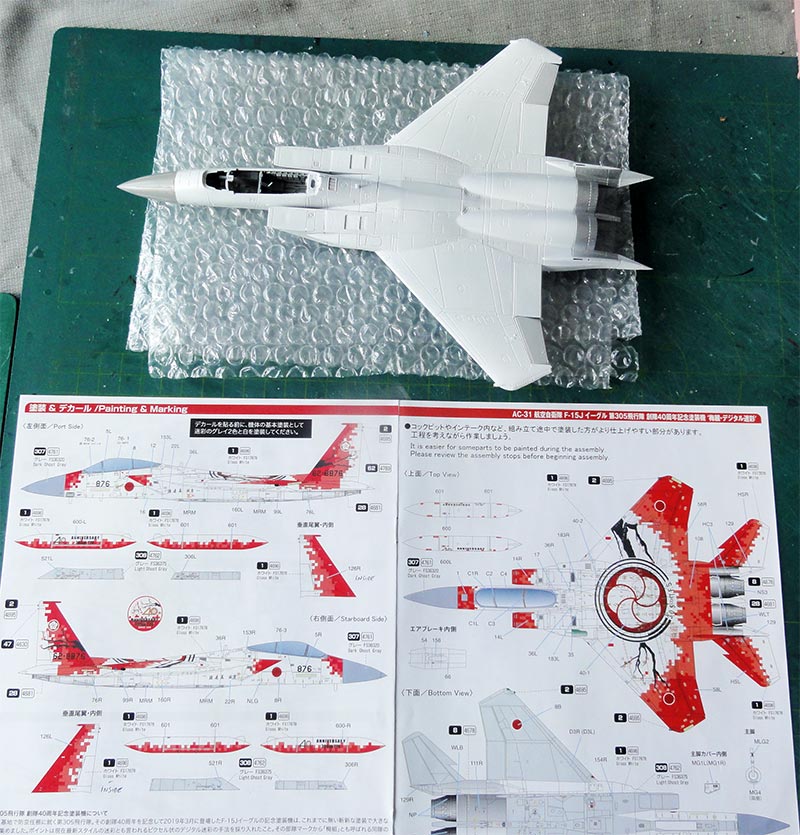
Decalling takes a lot of time, some 5 hours. But they are very good.

Set the decals 108 first at the rear fuselage and than align the circle aft of the air brake.
Some tiny areas were hand painted to cover the wing trailing edges and wing tips. For example at the vertical tail bases. And the big circle apparantly was not 100% set by me in the center, so a tiny white edge was painted next to the left "tree branch".
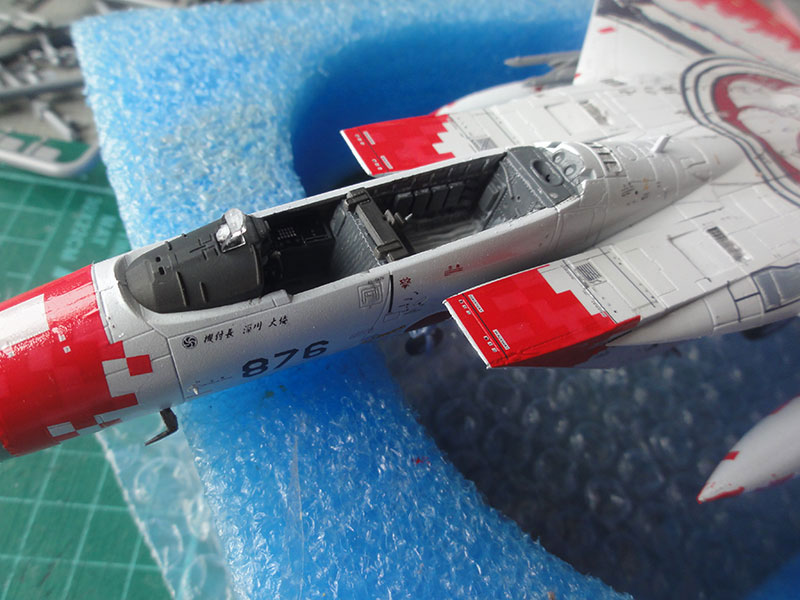
The cockpit bits were installed. The rear avionics bay was painted dirty white and the sides aircraft grey. (this varies on JASDF F-15J).
The wing fuel tanks of the kit were not used, they have thick ridges and as spare Hasegawa F-15 tanks were available and used. The tank decals are difficult to completely conform to the curvatures. It cut them in two sections. DACO decals setting was used and in the end it did not look too bad.

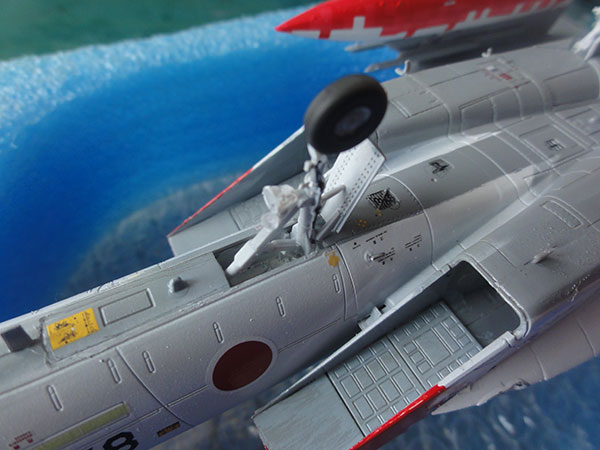
The landing gears were installed and some tiny hydraulic lines made from black stretched sprue.
No armament was installed, the fuselage missile braces as per kit were thus set.
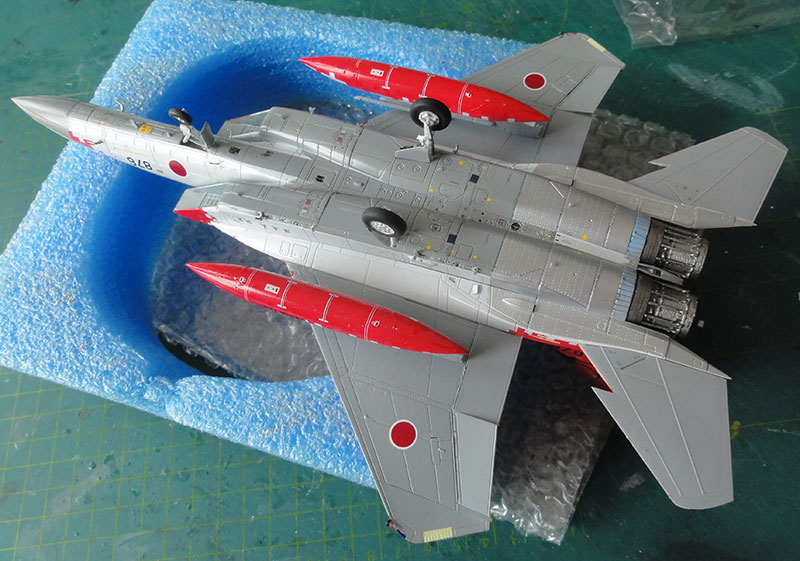
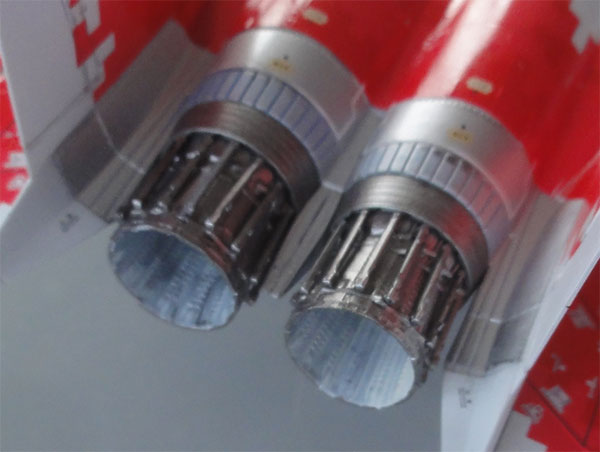
Note the white painted "burned" exhaust pedals insides.
For the remainder, the model got a semi gloss varnish as described above and the canopy was set open.
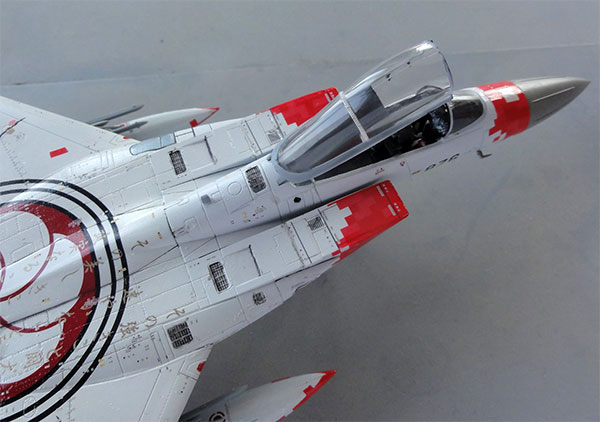
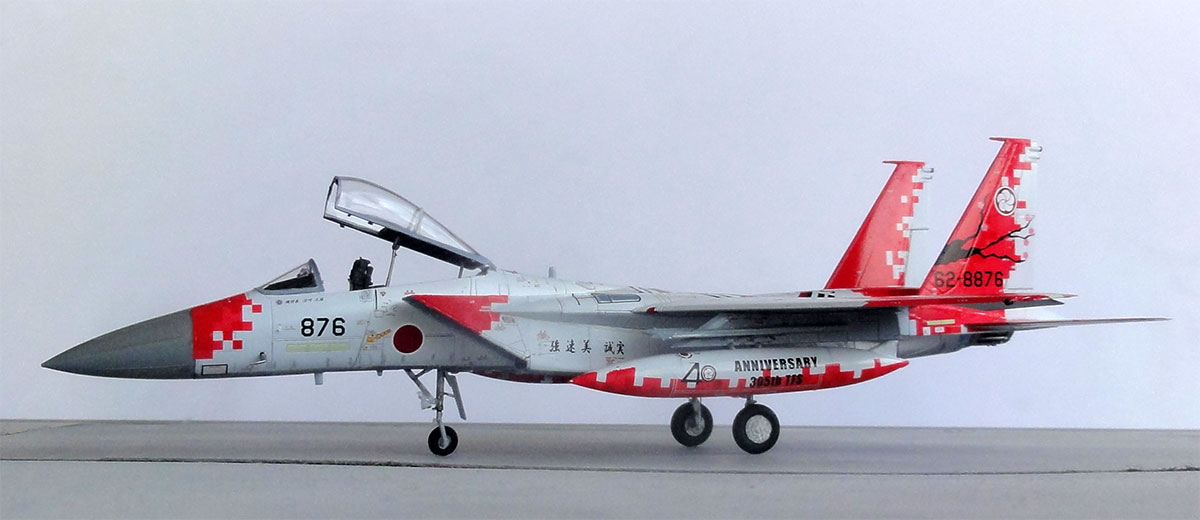
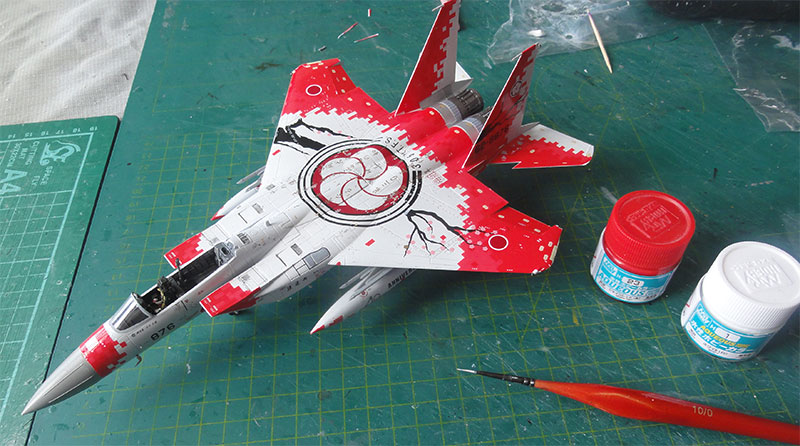
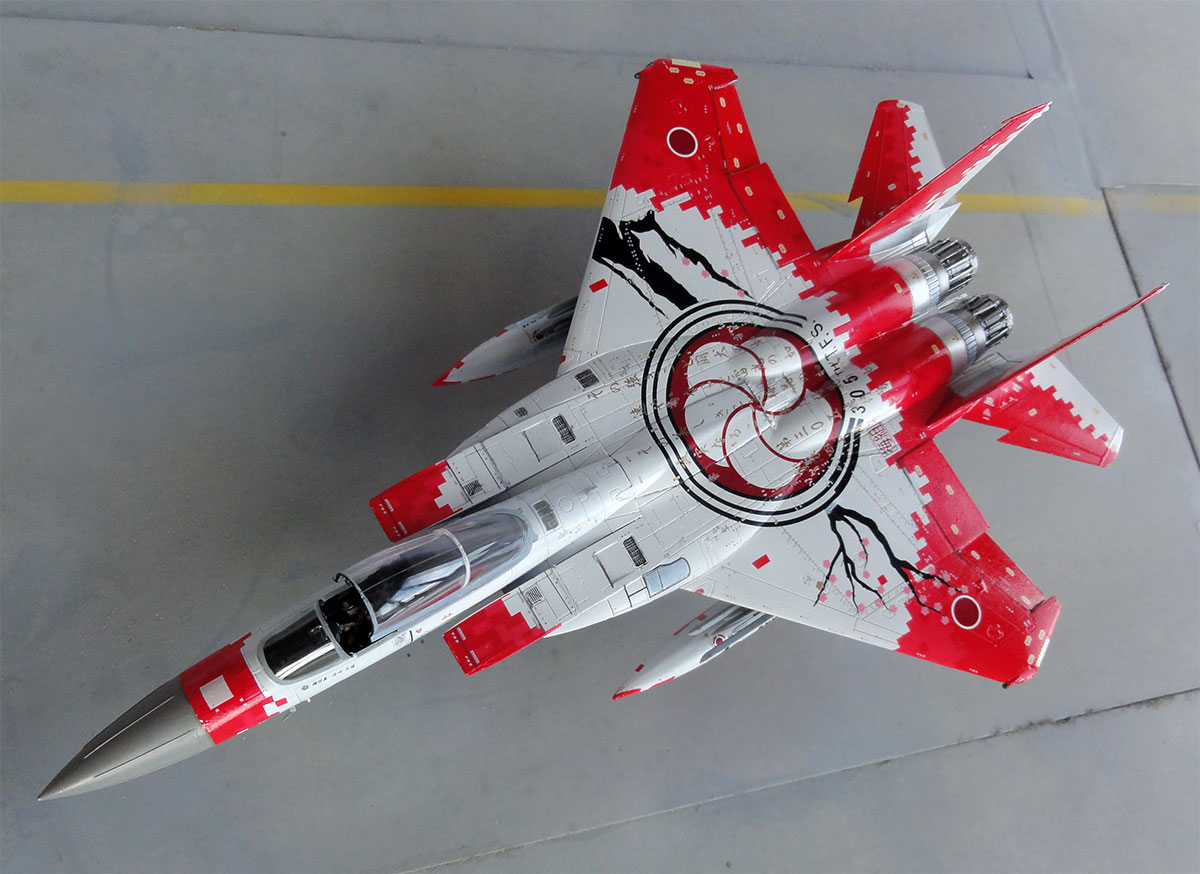
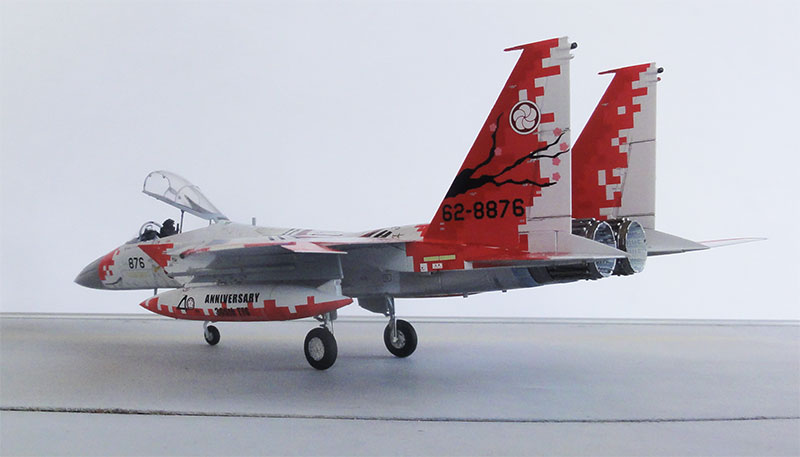
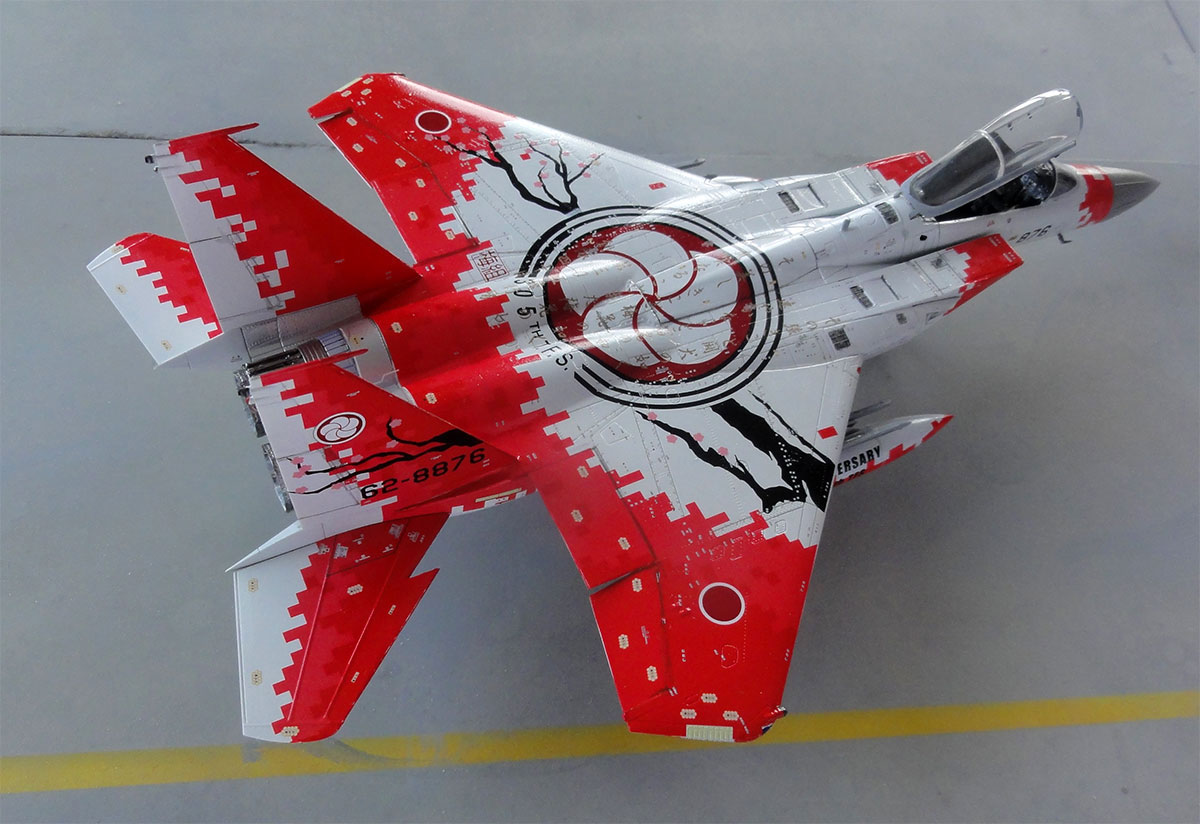
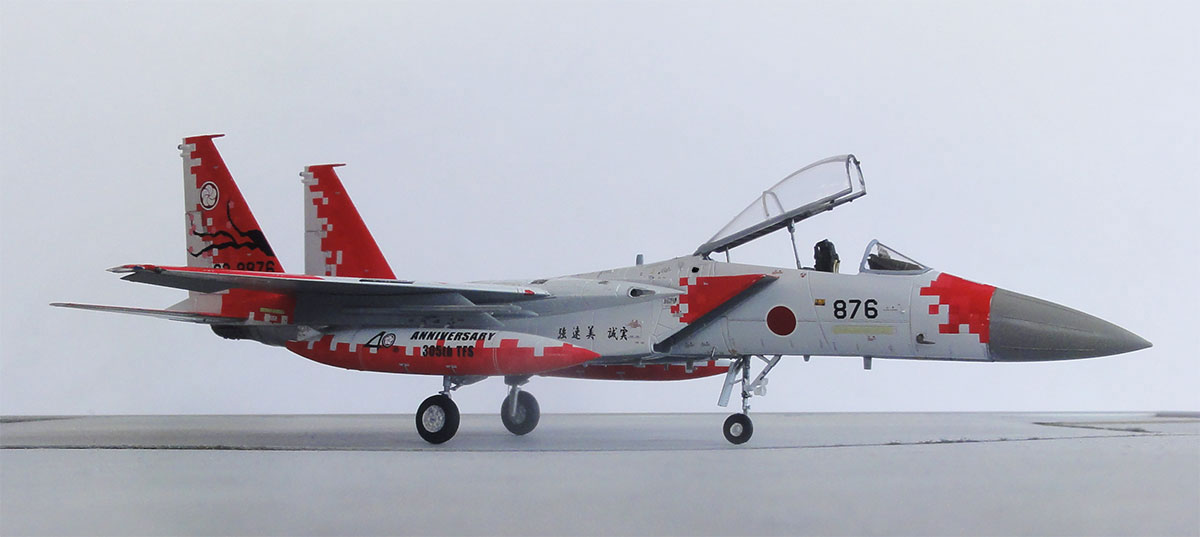
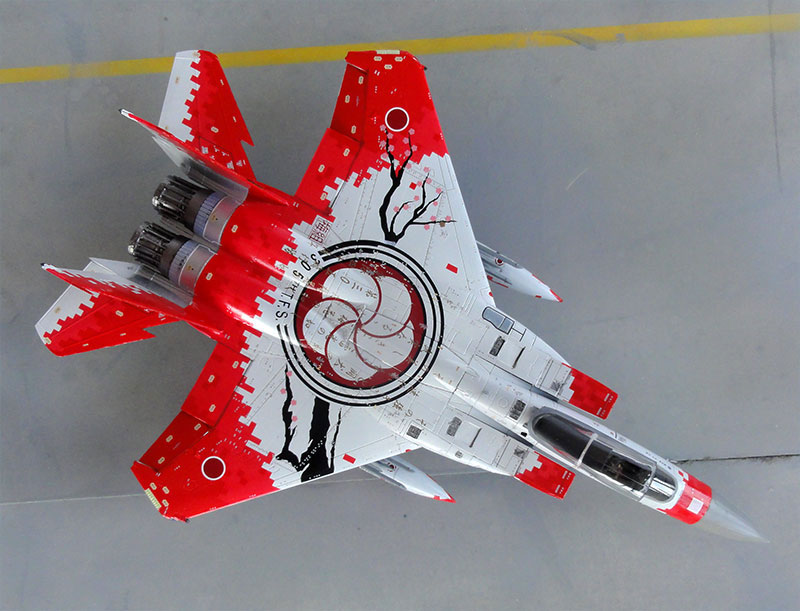
F-15J, coded 62-8876, as flown by JASDF no.305 squadron as of its 40th anniversary. They call it the Umegumi Digital scheme.
F-15J、コード番号62-8876、創立40周年時点で航空自衛隊第305飛行隊が飛行。彼らはそれを梅組デジタルスキームと呼んでいます。
...set in a scenery...
The kit has the same standard parts as described earlier.
The lower surfaces have the standard ghost grey FS36375 for which Gunze Sangyo Mr.Hobby H308 acrylic was airbrushed. The forward upper fuselage, nose and stabilizers has some small intake areas with FS36320 as have the upper wing tips. The nose sides are white as are the insides and outsides of the vertical tails; this is clearly indicated in the instructions. The center fuel tank is also white.
Some masking is thus needed when airbrushing the scheme.
I checked out real photos of this particular jet. It had the tail hook fairing (still) installed. And it seems to have been upgraded so install as per instructions the ECM antenna parts #C48, #C49, #D28 as described in the Platz instructions. But the rear end ECM knob was not seen, so in STEP 6 do not use ECM part #C50 but part #C23 in stead to have the old standard tail ends.
The decals are really nice but thin so be careful when applying these. The remainder of the model was made as described for the other Platz F-15's made.
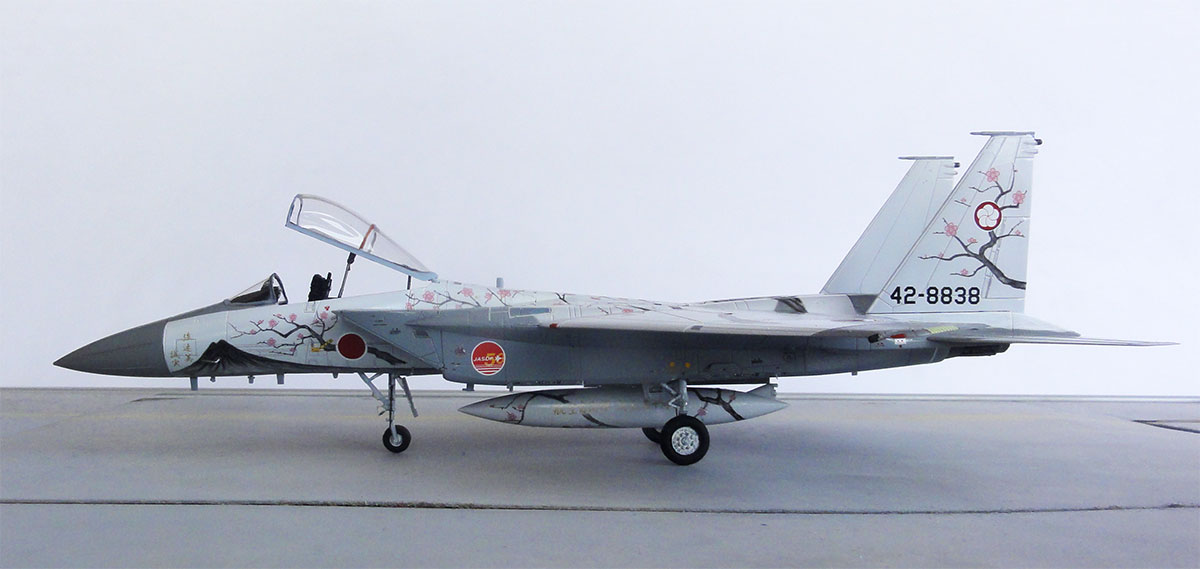
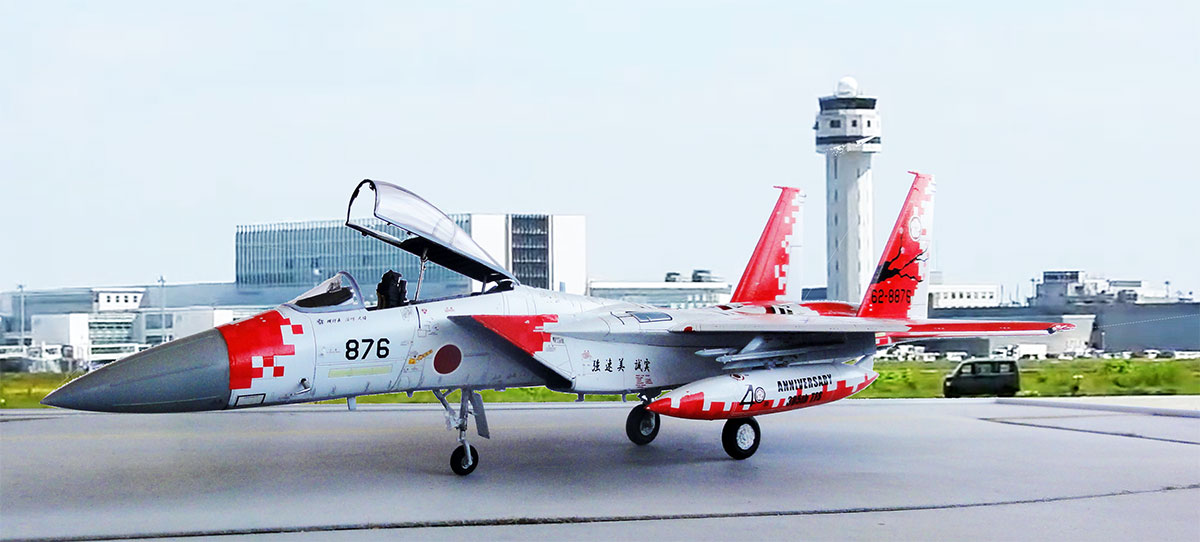
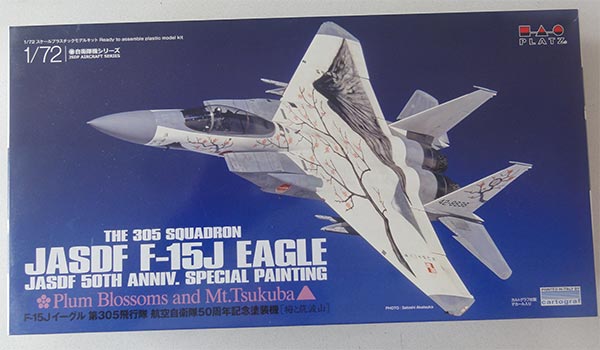
F-15J, JASDF, coded 42-8838, JASDF no. 350 squadron with a "blossom and Mt.Tsukuba" scheme of 2004. Occasion was the 50th anniversary of the JASDF. The upper fuselage painting scheme shows Mt Tsukuba located near Hyakuri air base where the no. 305 squadron was based in 2004 with in the background holy Mt. Fuji (though that is quite far away to the South West of Tokio).
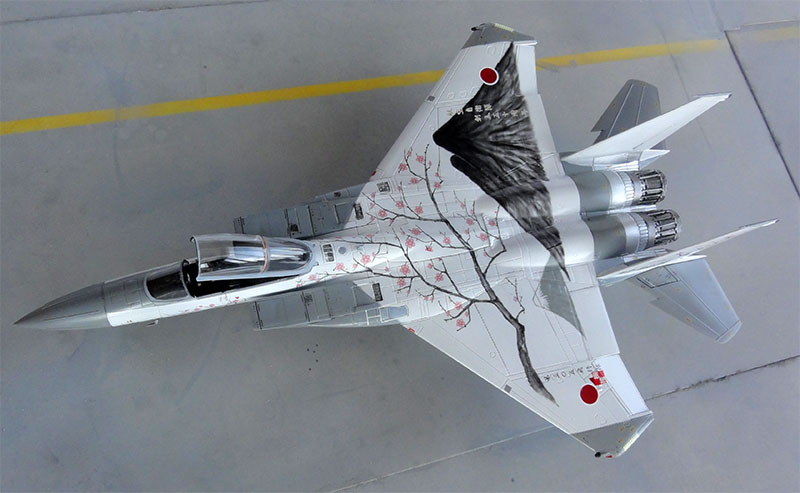
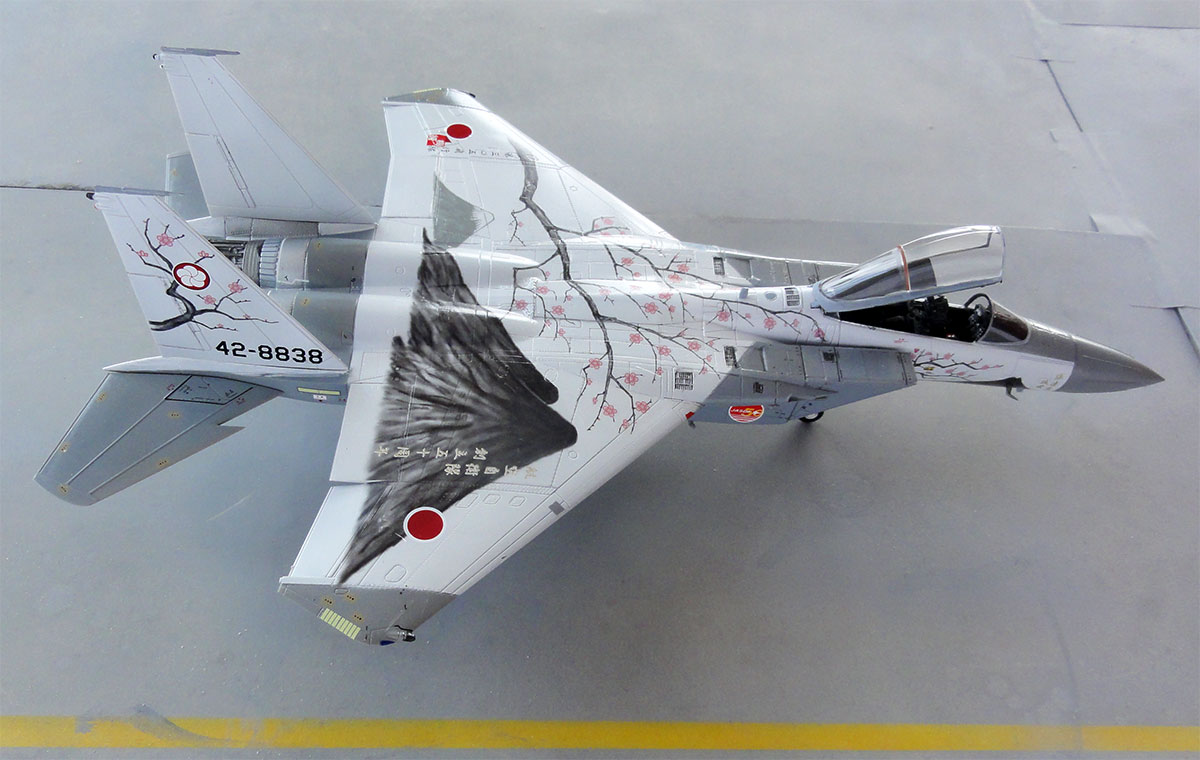
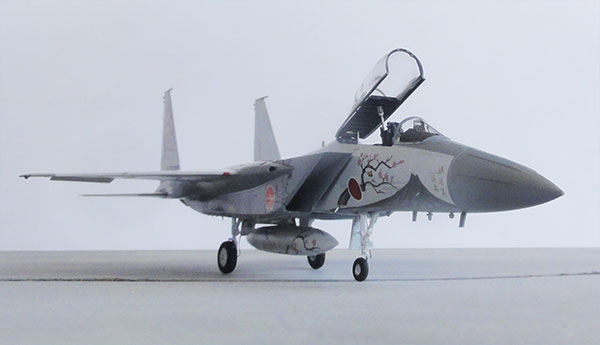
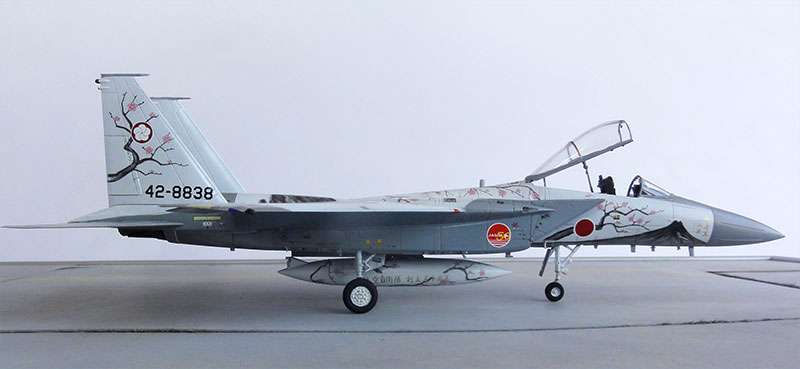
... model set in a scenery at Hyakuri air base in 2004...
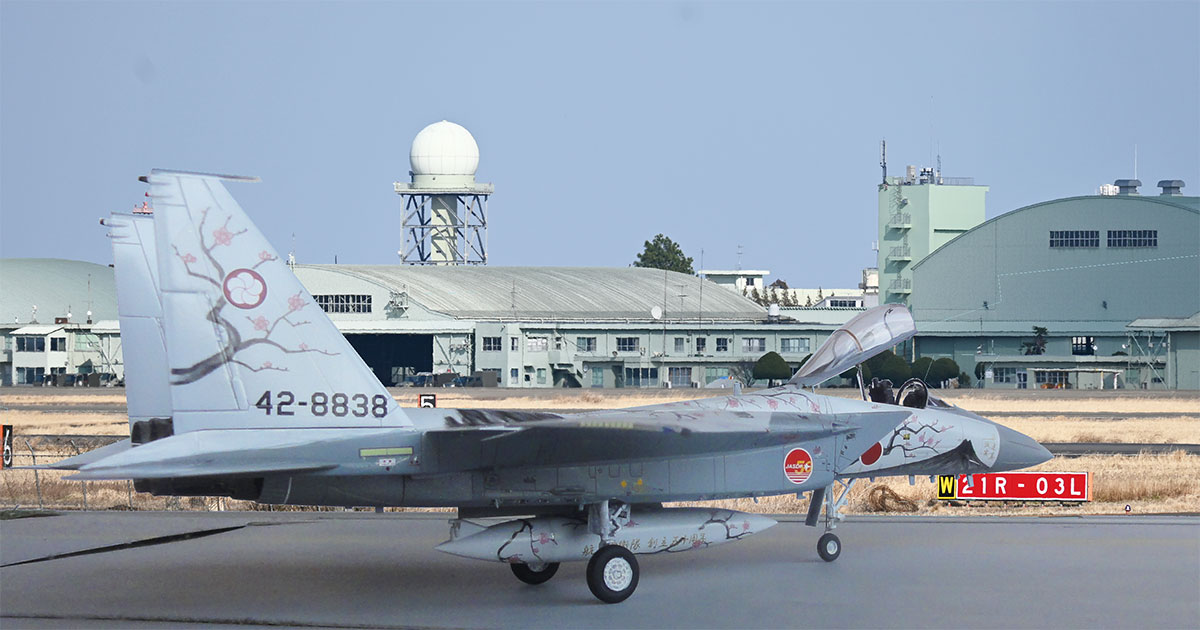
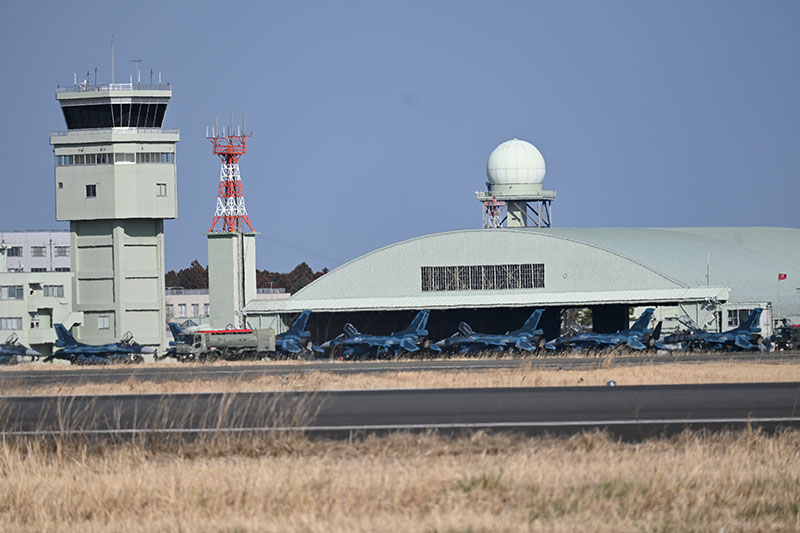
In 2024 I visited Japan and various JASDF air bases and museums and off course hobby shops. Part of the tour was also Shizuoka city where many Japanese model companies have their offices. Including Platz, Hasegawa and Tamiya that was visited.
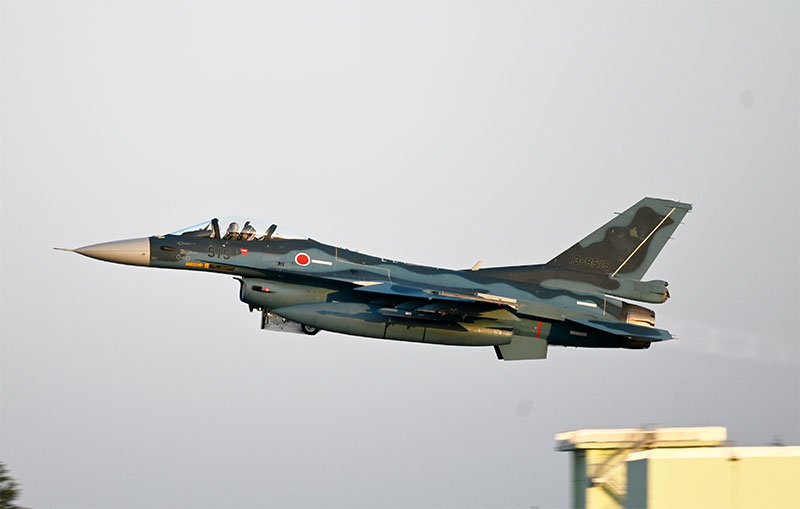
Hyakuri air force base was also travelled to, a base 3 hours drive east of Tokio. Now F-2 fighters are based at Hyakuri for the defense of Tokio area. I have a few 1/72 F-2 kits as well, to be built in the future.
On to next [ Page 13..... ]
(c) Copyright "designer"/ All rights reserved. Your comments are welcomed by webmaster
Created this page August 13, 2025