[ page 3 ]
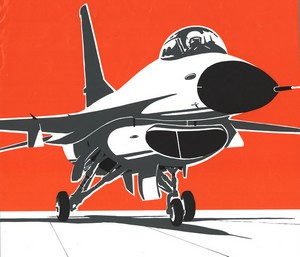
General Dynamics F-16 in 1/72 scale : kit review & modelling report of REVELL kits
.. continued from page 2...
Revell also issued several kits for the F-16C.
The F-16C block 50/52 was also issued by Revell in 2002 as kit #04633. The F-16C is the later version after the F-16A/B and has for example a vertical tail with a longer and thicker base. The quickest way to recognize a F-16C is the antenna on the vertical tail dorsal fin. More info on the F-16 version page here....

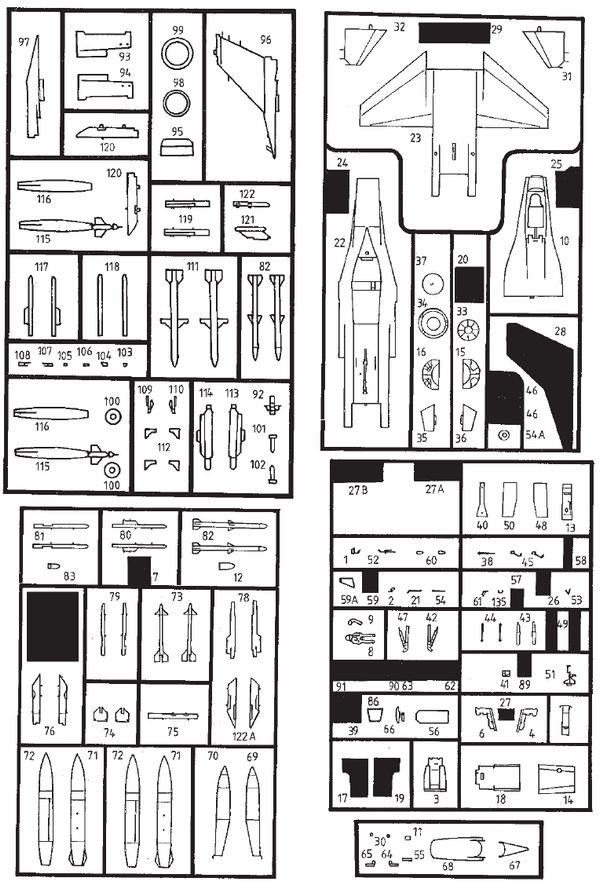
The part layout diagram for the F-16C
is seen here... and
there are also a lot of older
parts in the sprues (blanked black in the drawings)... Such as for the "A". These are quite
useful!
This nice Revell F-16C kit has some of the specific features through an extra sprue of parts for this variant like:
- thick tail base vertical fin but
only with the short rear tail fairing;
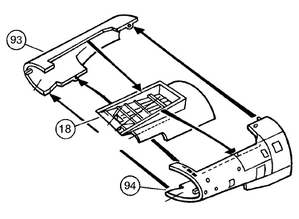
- wide mouth air intake parts #93,
94;
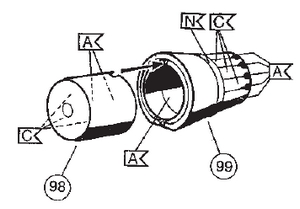
- other type exhaust (GE engine for
F-16C block 50/52 ), parts #98, 99; (For an early block F-16C with Pratt
and Whitney engine use the other exhaust parts #33, 34 still in the kit);
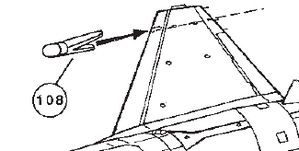
- wing leading edge ECM antennas parts
#107, 108;
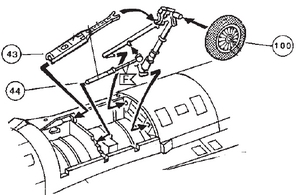
- thick main wheels #100, so new
parts (and the thin wheels #46 are still in the sprues); but it appears
than Revell did not bother to provide
the "bulged" main gear doors. Maybe they thought in 1/72 the difference
is minimal.
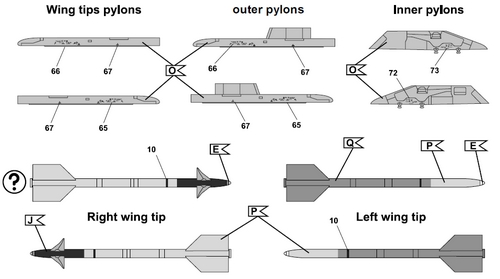
- Stores like AIM-120C AMRAAMs, AIM-9
Sidewinders, optional pylons like different styles of wing tip launchers
are also included LAU-107/ LAU-114 and later LAU-128 (or is it LAU-129?) for the AMRAAMs and advanced Sidewinders.
- Bombs like GBU-10 and HARM anti-radiation
missiles.
- Fueltanks comprise two of 370 gallon
under wing tanks and a central 300 gallon tank.
Also included is an AN/ALQ-131 ECM
pod and a HTS pod.
- the canopy is clear so not tinted as seen on many F-16's. Check photos and use transparant paint as required.
Also in this nice kit...
- the different style of gun nozzle
for the F-16C with other ventilation grills is nicely provided (though
it does not fit very easy).
- different type of instrument panels
and consoles for A, AM and C ;
- repositioned landing lights #55
on nose gear door (not on older F-16C's, there still fitted to main gear
legs so check photos);
The panellines are great but the upper fuselage again has the same 2 halves as for the F-16A (so slightly different engraved panel lines are not incorporated).
In steps 25 to 29, check the particular F-16C to be modelled and if smaller parts are needed. For example, the air scoops #106 and #104 are not always standard.
Decals in this kit are for:
(1) F-16C block 50B of the USAFE
52 FW/ 22 FS as based in Spangdahlem, Germany.
(2) F-16C block 52D of the USAF 366
FW/ 389 FS based at Mountain Home AFB, USA.
The schemes are standard and the
markings a bit dull.
The kit will be made as a Poland F-16C using after market decals.
[7]USAF
The F-16C block 50/52 described above was also issued in a nice kit by Revell in another release #04669 of in 2011.
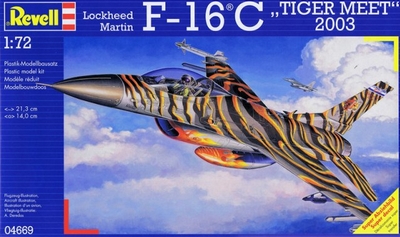
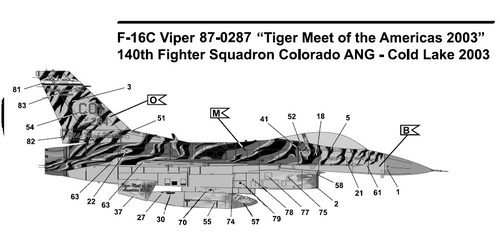
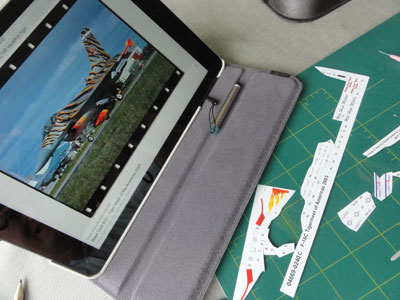
The decals in this kit 04669 are for a "Tiger Meet of the Americas" of 2003 F-16C coded with printed no. 87-0284 of the 120 Fighter squadron: the Revell instructions indicate 87-0287 of the USAF 140th Fighter Squadron as based at Cold Lake of the ANG in Colorado, USA which both numbers are according to an F-16 database a F-16C Block 30 and 87-0284 has been seen in this scheme.
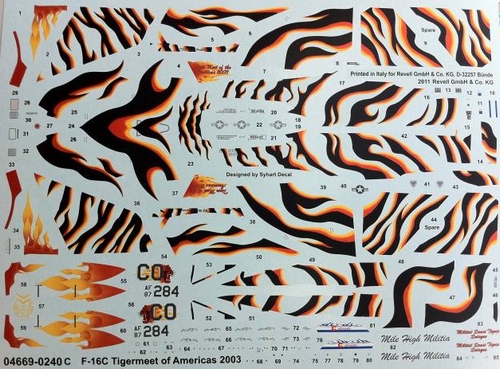
This decal sheet is impressive and designed by Syhart but printed for Revell by Cartograph? (If you want another scheme, you often will need walkway striping and these are not on the sheet).
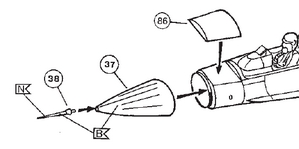
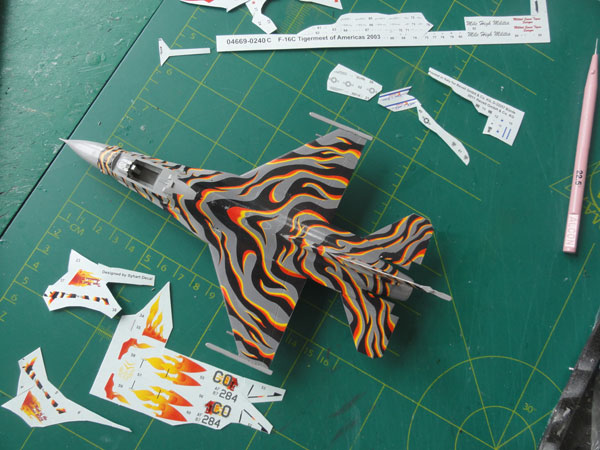
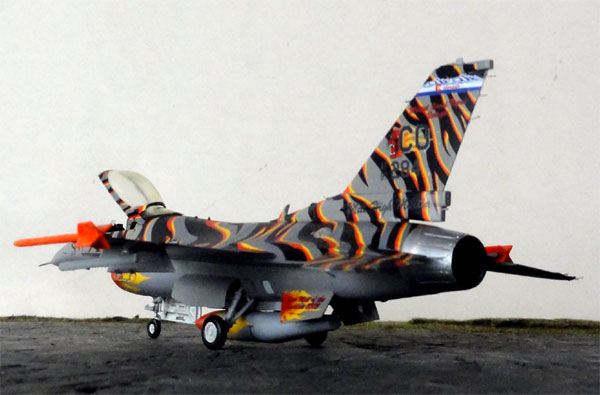
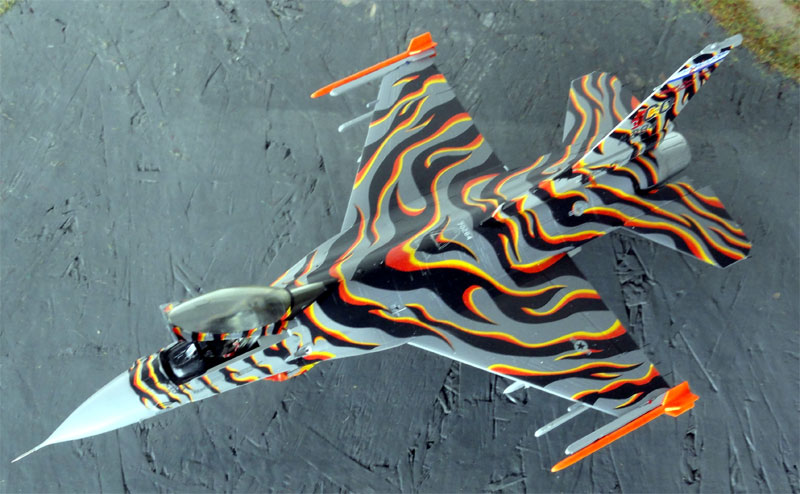
It was decided to make the TIGER MEET
scheme as per kit which looks great! This also means that the IFF
antennas are NOT to be fitted on the nose, but part #86 as indicated.
Most of the assembly is per instructions,
but make sure that the upper fuselages halves are glued first without any
ridge to avoid filling and sanding. Some little filler was needed on the
lower air intake. Also fit the later style wing tip launch rails.
The wide mouth intake (for the General Electric
F110 engine as fitted in the F-16C Block 30) was fitted as per instructions with parts 93, 94, 95 and
the heating probe #21. Note that the drawing for part #21 is shown incorrect, it should run to the rear..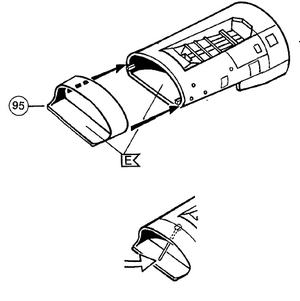
The cockpit is nice with an adequate ACES II seat, but the instrument and console decals are too large and to bright, you may seek alternatives here.
The outside initial base colours for the scheme as per kit starts as standard F-16 with Federal Standard FS36270 lower surfaces and FS36118 upper areas. Note that later on a two tone grey scheme was adapted for USAF F-16's and also there are some variations on how the grey is set on the air intake. So check photos.
The base acrylic colours used here
were: FS36270 with Gunze Sangyo #306 and FS36118 with Gunze Sangyo
#305. So this is the newer USAF scheme which has only two tones of grey.
AMRAAM pylons and launchers can be
fitted.
 ....
....
The Revell kit decals are good but
it is recommended to cut some large decals in several sub-decals so they
fit better. The CLEAR decal sections were mostly cut away so many decals
set in place in several parts. The decals were fine but need particular
persuasion on the mid lower central fuel tank and vertical tail fin base.
Use DACO setting fluid as well.
Decal application took 5 hours to
complete.
The air intake lips and so on were
painted red and orange to blend in the decals. This was also done at various
other spots where tiny gaps were still there in the decals applied.
Final kit detailling was mostly
as done on the other F-16 kits seen on page 2,
but in this case the canopy was NOT tinted.
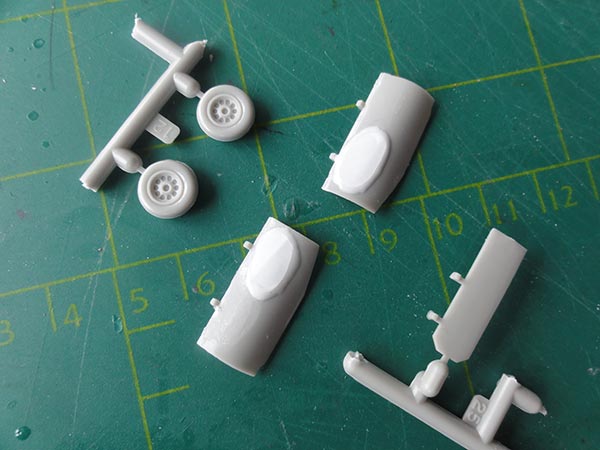
(1) The thicker main wheels
#100
of the later F-16 Block's are nicely provided. (But unfortunately the
kit
does not have any parts for the required "bulged" main doors; you may
correct this by glueing on some card bulges and sanding these as shown here for a Hasegawa kit).
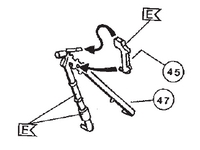
The main
gear legs on this Revell kit are also bit awkward to install. A few extra details were made
from thin wire and added in the gear bays. Some black wash was applied
inside the white painted gear bays and on the white gear legs.
(2) The F-16C
type stiffener plates (NOTE THAT THESE STRUCTURAL STIFFENERS vary per
variant); here next to the vertical tail base and on the inner wing panels
as for the F-16C on the upper fuselage. These were suggested by handpainting
with a fine brush a bit darker colours than the surrounding colours.
(3) The nose pitot was made from a metal needle.
(4) The anti-collision lights on the intake and wing tips got a drop of blue and red paint followed by a drop of Micro Kristal Clear.
(5) Inside the GE F110 engine exhaust pipe also, the horizontal stripes were hand painted using white paint to suggest the ceramic coating.
(6) Inside the canopy, 2 handling bars were added made from thin rod. This is always seen inside a F-16 canopy.
(7) The wing tips and stabilizers static dischargers are moulded on the trailing edges but I cut these of as these extended bits are too thick; I replaced these with thin fishing wire painted black.
(8) the kit ACES seat looks good and got some harness starps made from painted tape. The seat was simply fitted in the cockpit as well as some decals fro the side consoles and instruments. A HUD was added as well along with the flying control stick and throttle.
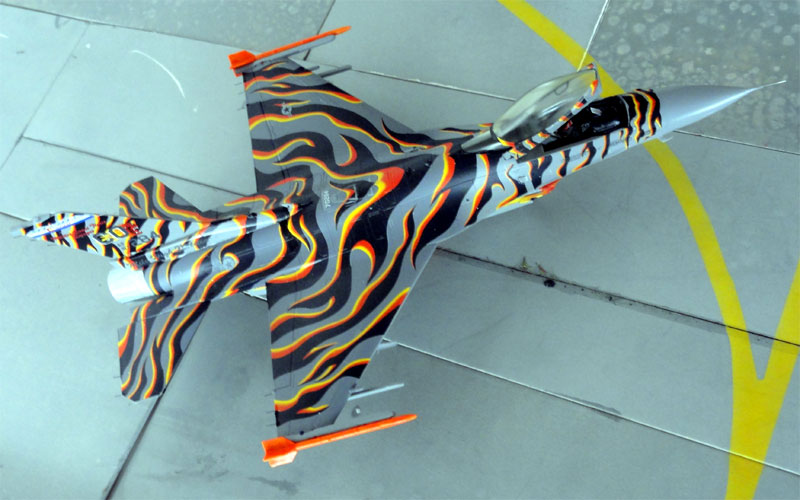
The F-16C wing pylons were fitted
as well as the AMRAAM type launch wing tip rails. On the wing tips, 2 "smoke
winders" were added made from kit's Sidewinders missiles, this time with
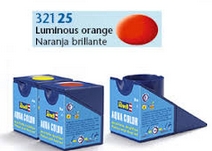
their fins retained. These were painted bright dayglow orange colour using
Revell
Aqua 25 leucht orange. The central fuel tank was also added
and the decals on it required quite some decal softener to ly down.
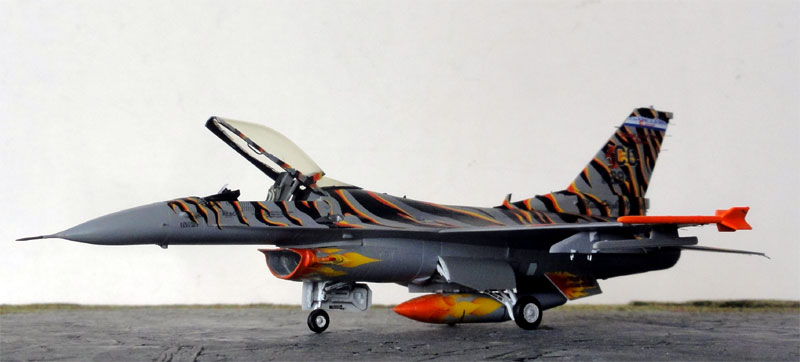
The model got a semi-gloss varnish
coat, this will give an even sheen and will protect the decals. A coat
of Johnson Future/ Pledge was applied with the airbrush in several thin
layers using the usual technique...
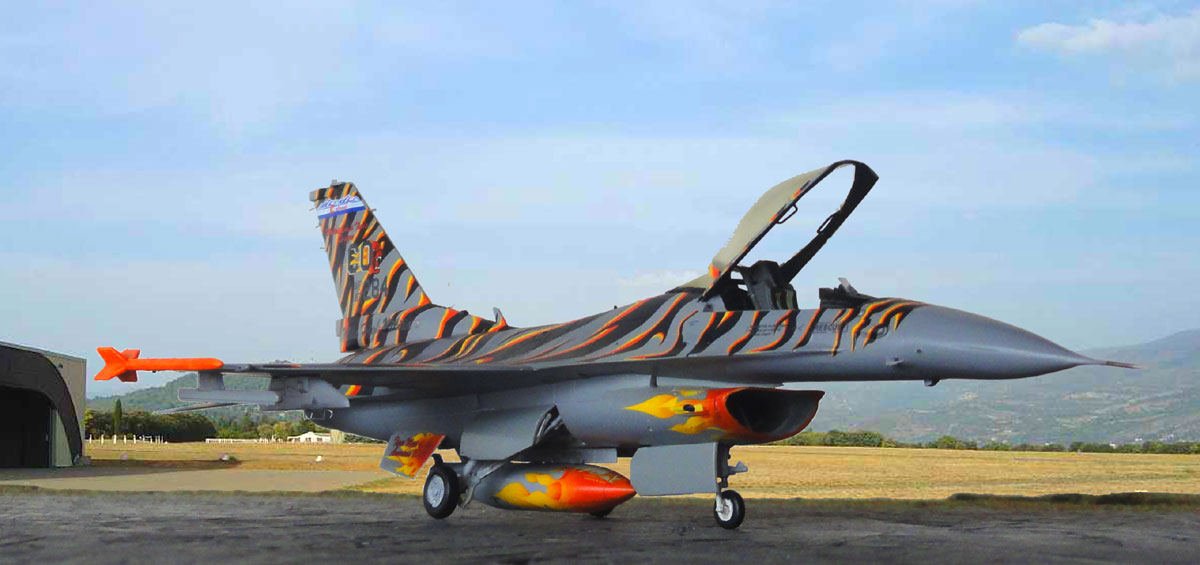
Finally the canopy was installed after its frames were hand painted with a fine paint brush and some Tiger and pilot name decals added. The canopy was kept clear and was set open and the rear glass section set in place with white glue.

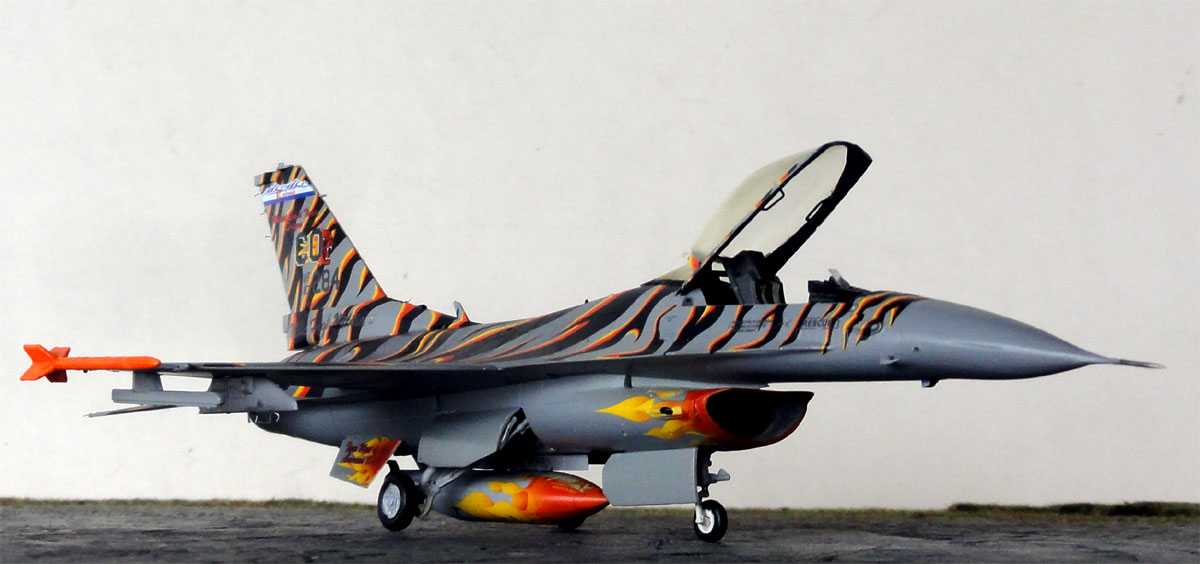
F-16C Block 30 coded "87-0284" of probably the United States Air Force 120th Fighter Squadron as based at Cold Lake of the ANG in Colorado USA during "Tiger Meet of the Americas" of 2003.
..
..
..
..
 [8]
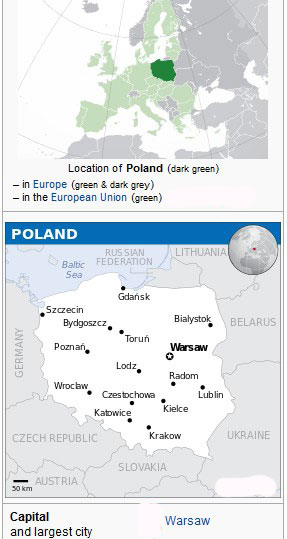
[8]POLAND
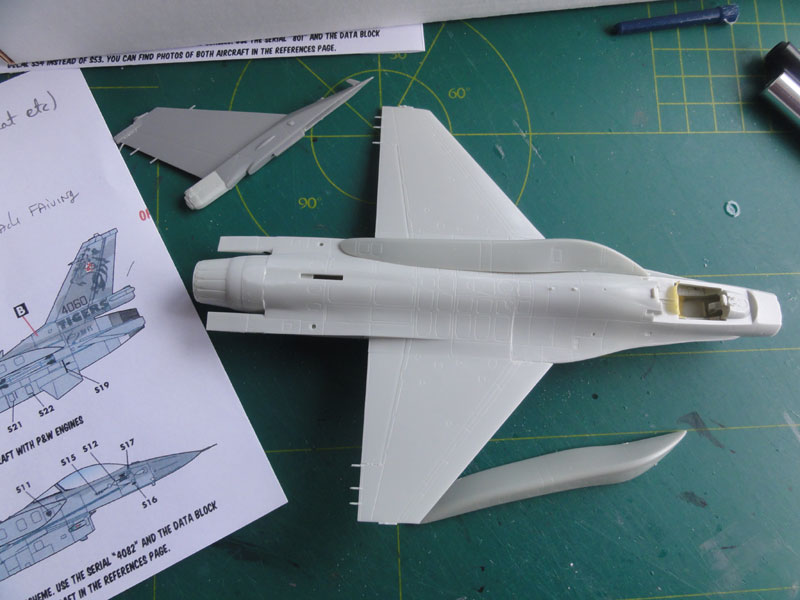
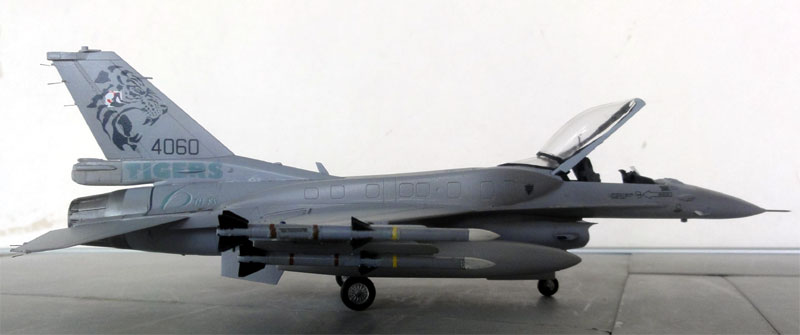
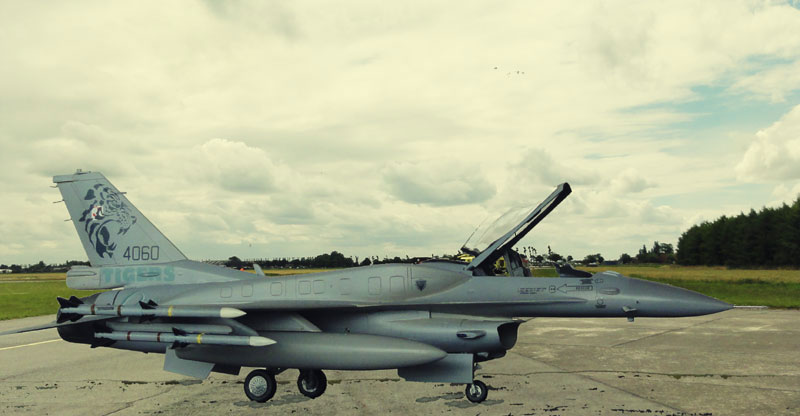
The Revell F-16C kit #04633 as described above was made as a model of the Polish Air Force block 52 F-16C-52CF as seen at the NATO Tigermeet 2011. This particular aircraft is coded "4060"/ serial JC-21 and flown by the unit 31.BLT no 3 and 6 squadrons. It was delivered May 2009.
Kit decals came from CARACAL set 72019.
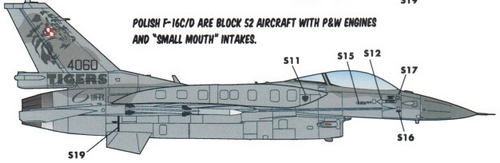
This Block 52 aircraft has the small mouth intake and the Pratt and Whitney F100-229 engine.
The Revell kit has many "extra" parts
in the sprues and in this kit, so these were very useful! The F100 engine
parts are #33, 34.
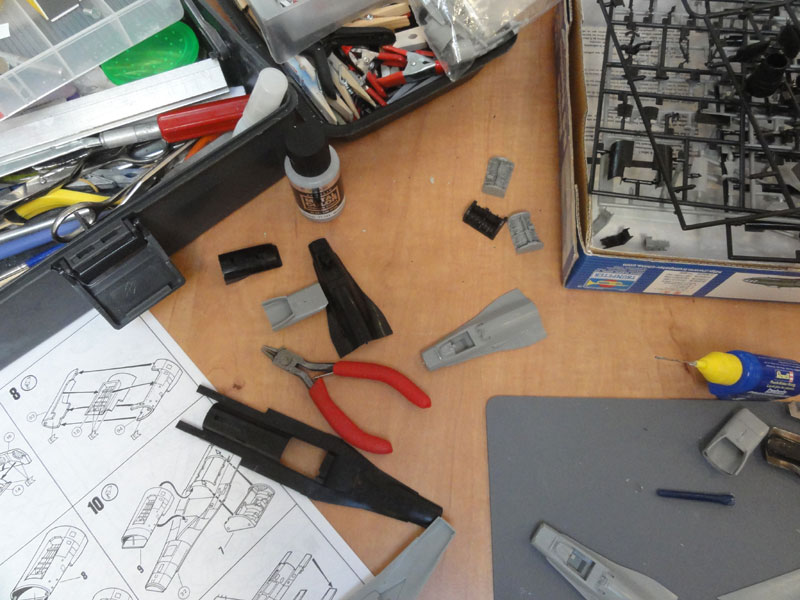
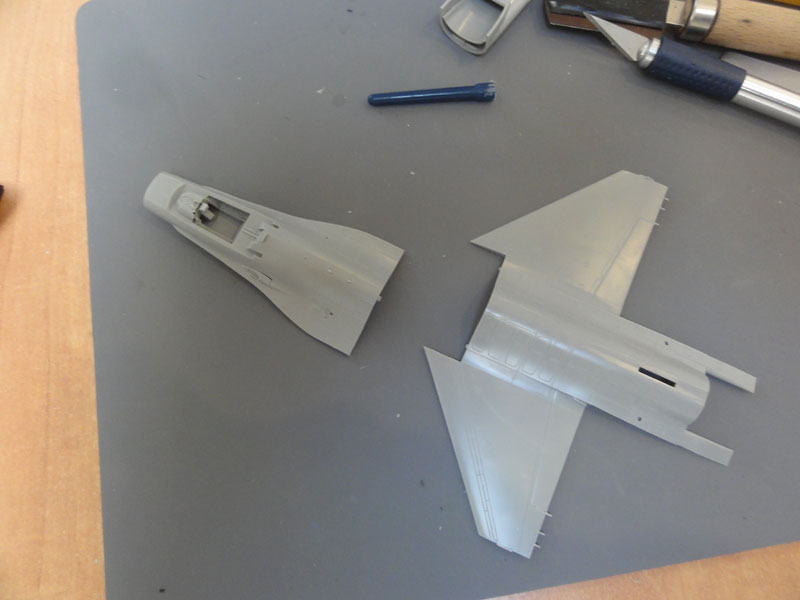
CONSTRUCTION
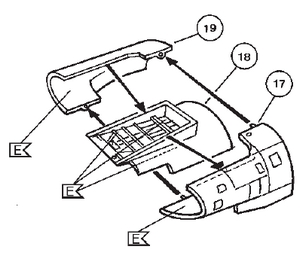
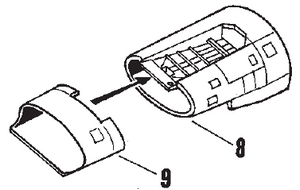
In STEP 8-9-10 not the kit parts
#93,94 and 99 were used but the other parts also in the sprues such as
#17, 18, 19, 20 for the small intake. Here, a sketch from another Revell
kit on how...
In STEP 6 the gun port #84 does not
fit very well, so some work is needed here. When aligning the upper forward
and aft fuselage halves, join first these to ensure a flush joint. I also
had to bend the wing a bit to get these flat.
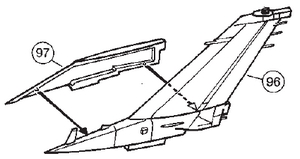
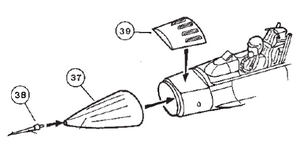
In STEP 12, the thick base vertical
tail is nicely provided but I cut off the base as to fit the parachut pack with antennas provided with parts #27A,
27B, 27 for the Polish aircraft.
(here the instructions are in the SOLO
TURK kit also applicable for this Polish Block 52 F-16C ):
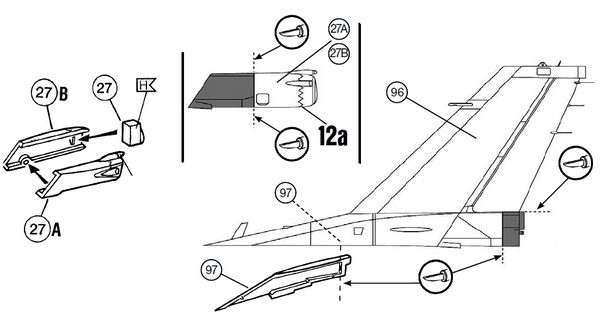
The fairing on the side is a bit
longer.
In STEP 15, regarding the nose plate,
part # 39 with the advanced IFF antennas was fitted instead of part #86.
Illustrated here:
The main gear landing gear lights #64 in step 17 were not used, this F-16C block has the larger nose wheel door lights, part #55 in STEP 23.
In STEP 37, the later style LAU-129 AMRAAM wing tip launchers
#118 were used.

The remainder of the kit assembly was per Revell instructions like fitting the ECM stubs #107, 108 on the wing leading edges and the intake anti-collision lights.
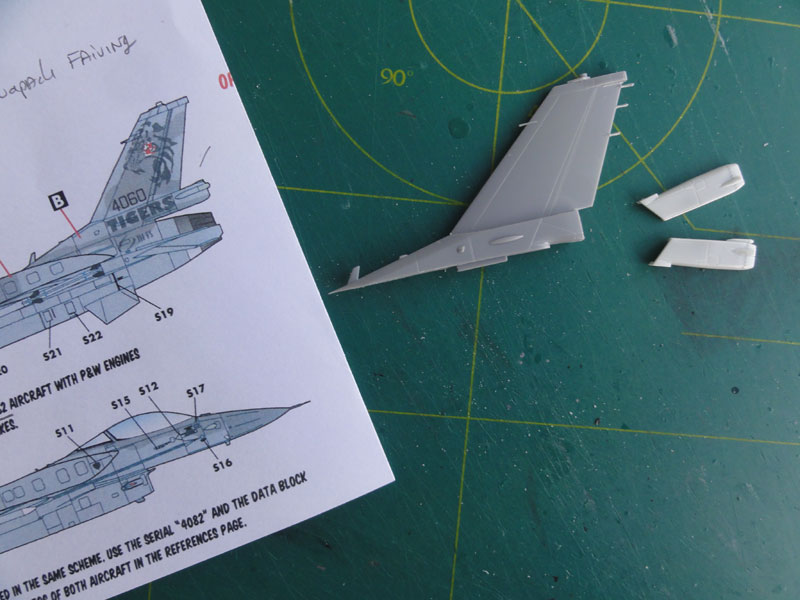
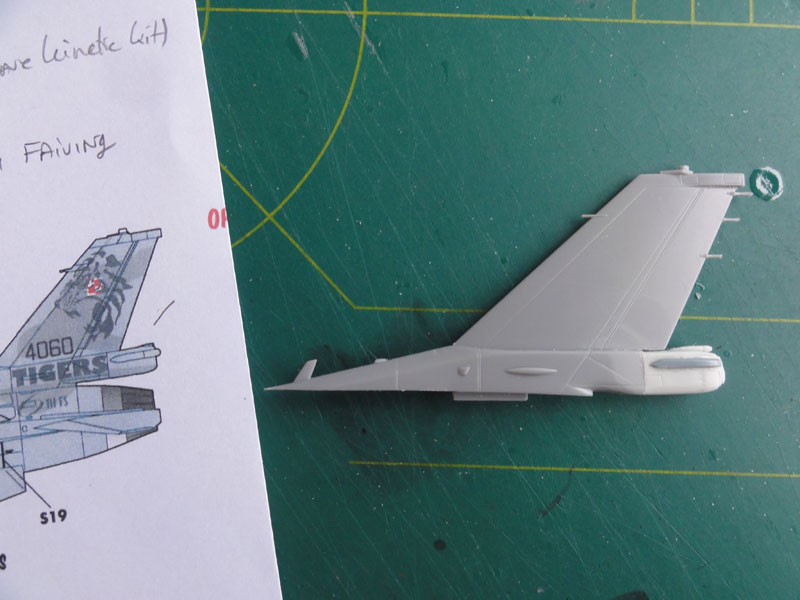
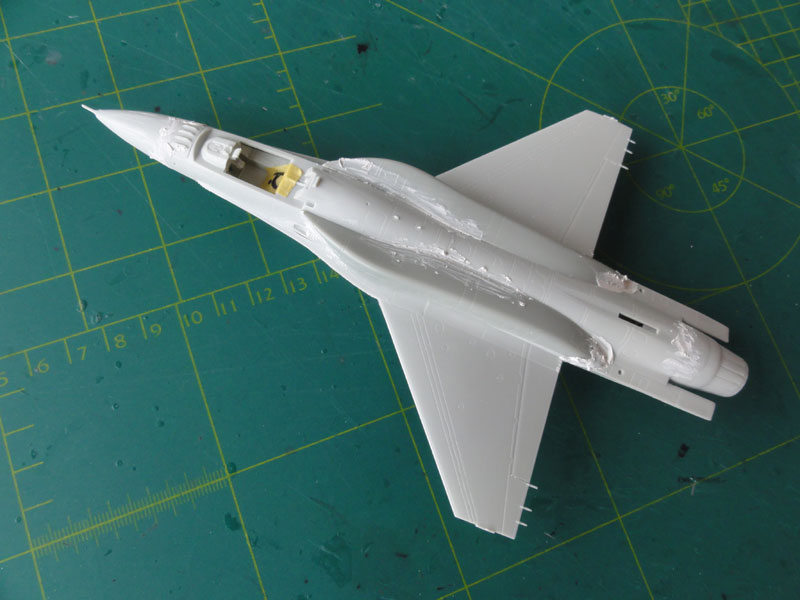
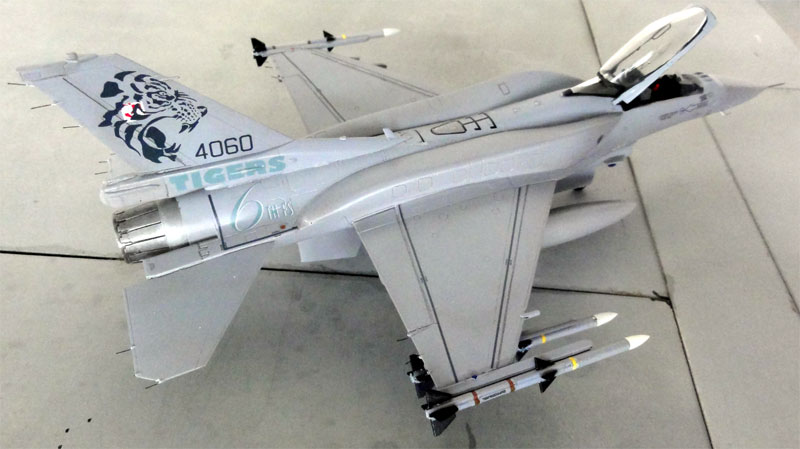
But I wanted to add some CFT (conformal
fuel tanks) on the upper fuselage as often seen on Polish F-16C's as well.
These parts are not in this kit, I got these from the Kinetic F-16D kit;
note that after market resin CFT's can also be bought (like from Attack
Squadron).
The CFT fitting required a bit filler/
putty and sanding but can be done.
After that the base model got a grey
coat. Any irregularities liks gaps and ridges were treated and the model
was ready for the colours.
The model got these acrylic colours airbrushed:
FS36270 grey using Gunze Sangyo H305;
FS36375 grey using Gunze Sangyo H308
for the upper surface camouflage "splashes";
The landing gear main wheels are for this version (with Pratt and Whitney engine) probably the normal ones, so use kit wheels #46 that are still in the sprues. The wheel bay interiors were painted "dirty" white as well as the gear legs.
The edges of the CFT got slightly
darker grey lines being hand painted, this is the "sealing" rubber.
The structural stiffeners
often found on the F-16C Block 52 were mostly hidden under CFT's but I
painted the two long ones forward of the vertical tail with a tooth pick
in light grey.
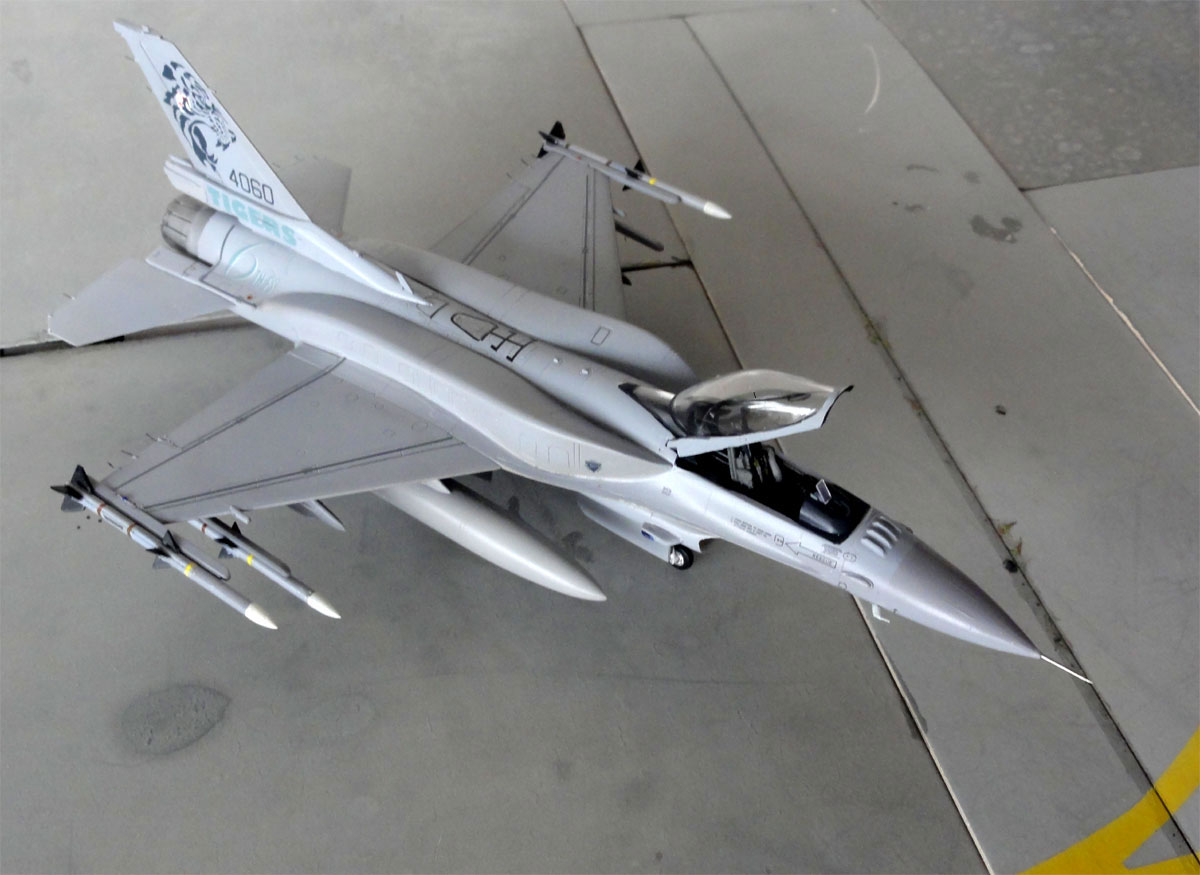
The model is for a Poland F-16C Block 52 coded "4060" as seen at NATO Tiger meet 2011. Note that hardly any Polish roundels are seen, only at the lower wing these are present. The decals were applied after a gloss varnish coat was airbrushed to prevent "silvering". Note also that the walkway lines need some cutting because of the CFT's.
A couple of AMRAAM AIM-120C "small fin" missiles and fuel tanks were fitted as included in this kit. In the canopy, a small piece of stretched sprue was mounted to suggest the Helmet cueing sensor. The model got the final treatment of painted lights, new static dischargers from fishing line etc as applied of the other F-16 models....
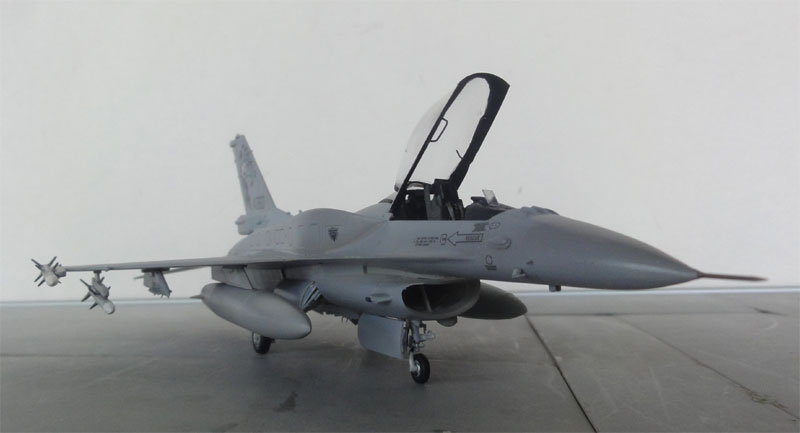
Canopy installed and... a nice model
completed for the collection.
![]()
 ..
.. .............
[area: 312,696 km2 | population: 39 million | capital: Warsawa | GDP 18,000 Euro per capita nominal]
The Polish
air force was established at the end of World War One. Later on, several
local designed aircraft were used such as from PZL. The armed forces suffered
large losses under the German attack in 1939 and the country was occupied.
After the Second World War Poland became part of the Communist block "behind
the iron curtain" and Warsaw Pact. Various Soviet aircraft were used including
MiG-15, MiG-17, MiG-19, MiG-21 and MiG-29 Fulcrums as well as Sukhoi SU-20
and SU-22 bombers and many other
types including the Polish PZL TS TS-11 Iskra trainer.
After the collapse
of the Soviet block in 1989-1991, Poland became really an independent democratic
state again and wanted to become quickly a NATO member. This was realized
and for the "Polskie Sily Powietrzne" (Polish Air Force) had a total of
36 F-16C and 12 F-16D Block 52 fighters ordered under the U.S "Peace Sky"
program. First delivery was in 2006 and last aircraft delivered in 2009.
They got very advanced weaponry including AIMX-9X and AIM-120C AMRAAMs.
Also JDAM bombs and a helmet mounted cueing system capability is there
as well as the Sniper range pod.
Now the
Polish
air force is called "Wojska Lotnicze i Obrony Powietrznej" and the
F-16C's
operated by 31.BLT no 3, 6 squadrons based near Poznan and no.10
squadron near
Lask. In January 2020 some 32 Lockheed Martin F-35A were ordered for
delivery from 2027. Summer 2022 48 KAI FA-50PL light combat jets were
ordered.
Poland
F-16C-52CF so Block 52 , no.6 squadron, coded "4060" , NATO Tiger meet 2011
.
..

..
..on
a rainy afternoon....
..

(c) Copyright "designer"/ All rights reserved. Your comments are welcomed by webmaster
Created this page
July 4, 2016