Dutch ML-KNIL
[ page 2 ]
Tamiya North American P-51D Mustang model kit in 1/32 scale
Page 1
Page 2
...continued from page 1....
As noted, after fuselage assembly, now the wing and much more are to be assembled.
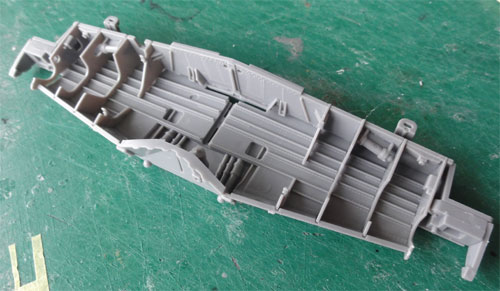
STEP 34
The main wheel
bays are well detailed, but still a lot of additional hyraulics can be
seen on the P-51. Additional details with metal wires, stretched sprue
etc will be added at a later stage on this model. Here the kit main gear
bay is seen:
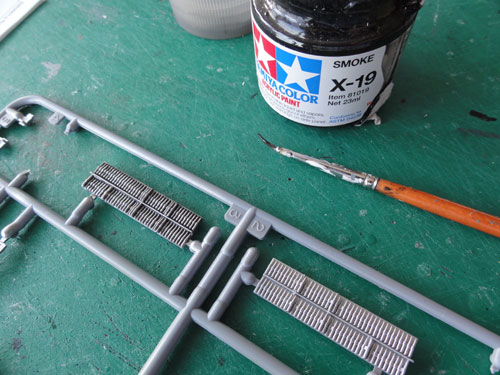
STEPs 35-40
This deals
with the wing gun armament and bays. Painting with various metallics greatly
enhances the look. Tamiya Smoke X19 colour deepens the gun bays and was
used as well. Only on one side of the model, a gun bay will be set open.
This needs also cutting the panel part as seen in STEPs 68/69.
These panels
fit very well.

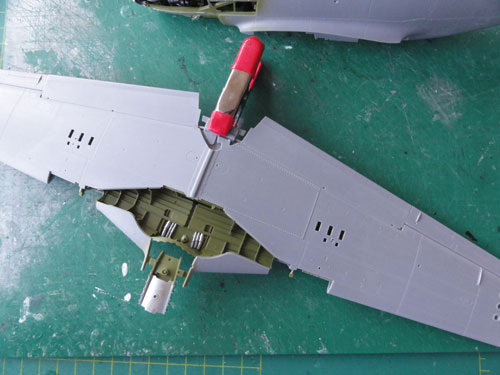
STEPs 41-43
The metal rods
and fittings are in the kit in order to have movable flaps and ailerons.
I had some difficulty on fitting the side panel B21 and B22 when the flaps
are drooped. It was decided to indeed droop the flaps a bit.
STEP 44
The anti-collision
lights were NOT yet fitted, will be done after painting and airbrushing
the overall model.
STEPs 45-50
I set the landing
light F10 and the gun ports fixed in position as the landing gear will
be
set deployed and model set on the ground. Same was done for the bay doors.
STEPs 51-54
The main gears
are nicely done with metal re-enforcements. However, I did not like the
rubber tyres in this kit with an awkward ridge in the middle. If you can,
replace these wheels with resin ones (I used the kit wheels).
STEP 55
The gunports
were fixed, so the magnets not needed.
STEPs 56-58
The droptanks
fit well, the 75 gallon ones were used. Please note that a large omission
by Tamiya is that the retrieving tubing and vent pipes are not in the kit!
These are forward of the tank pylon and between each tank and wing and
well seen. Will be fitted from electrical wire later on the model after
painting.
STEP 59
The propeller
is nice, but of part R23 its purpose is a bit vague. It was fitted anyway.
The spinner was fixed in place as well, to be done after painting.
STEPs 60-61
Several clear
canopies are in the box! This enables several options and canopy part "B"
N1 was used here.
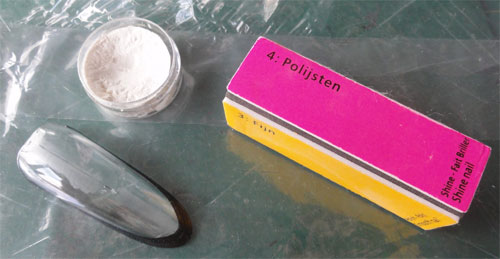
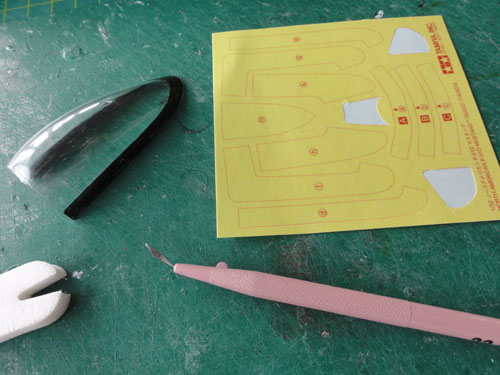
There is a
small moulding seam in the canopy middle, so sand very carefully and polish
to remove it. Polishing paste was used here, together with sanding/polishing
sticks.
Next, please
note however that a long antenna wire should run RIGHT THROUGH the canopy
towards the tail. This is not an Tamiya option here.
The antenna
wire is well seen on real P-51's, so I had to drill a hole in the
canopy! A hand pin vise with a small drill was used.
STEPs 62-65
The separate
engine panels of the cowling can be set loose with the magnets holding
them in place. It was decided to do this, as it may show the nice engine
and its compartment. Assemble as indicated.
Please note
that the propeller keeps the panels in place as well with the tiny notches
on parts U1 and U2.
STEP 66
The rear upper
fairing is to be set loose in order to move and fit the canopy. It was
to be fixed in place, so I cut off the lip on part 33 (see step 61). The
small light L8 was not needed.
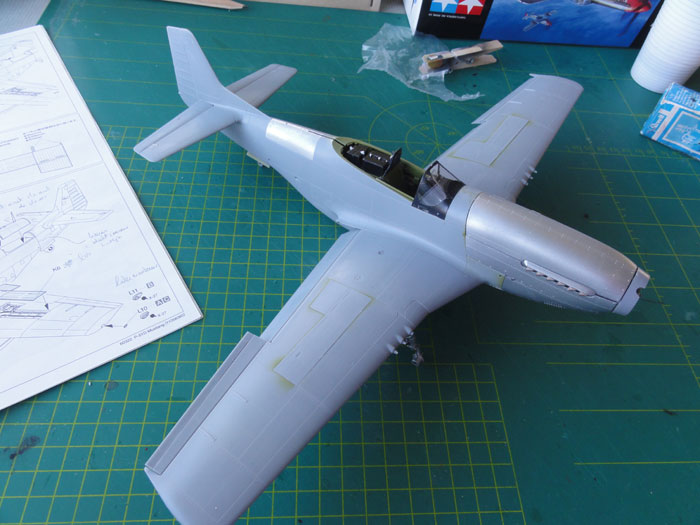
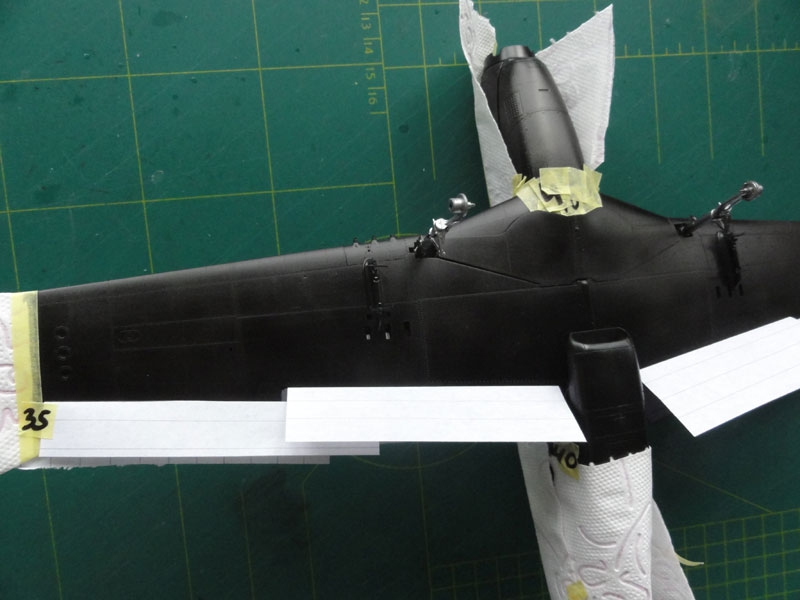
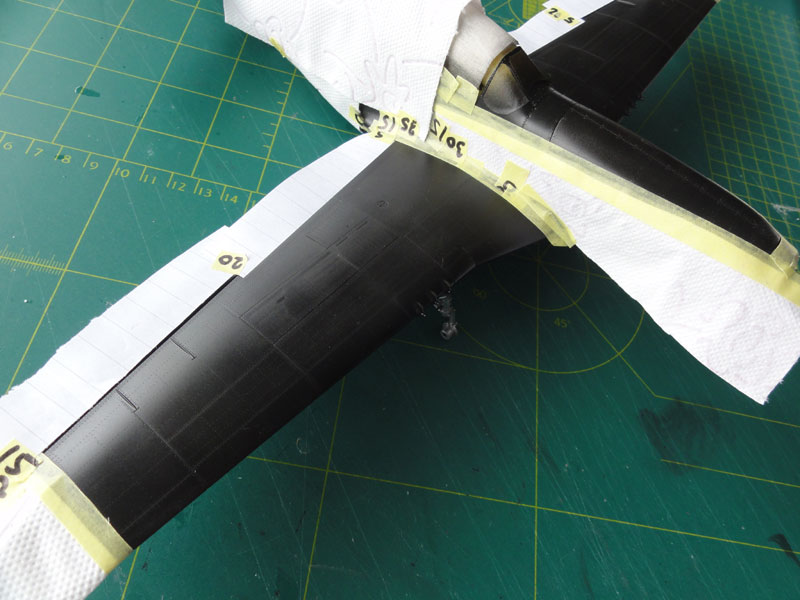
Here the overall model assembly is seen with tailplanes fitted. No putty was needed!!!!
The gear legs
were fixed, with the appropriate screws.
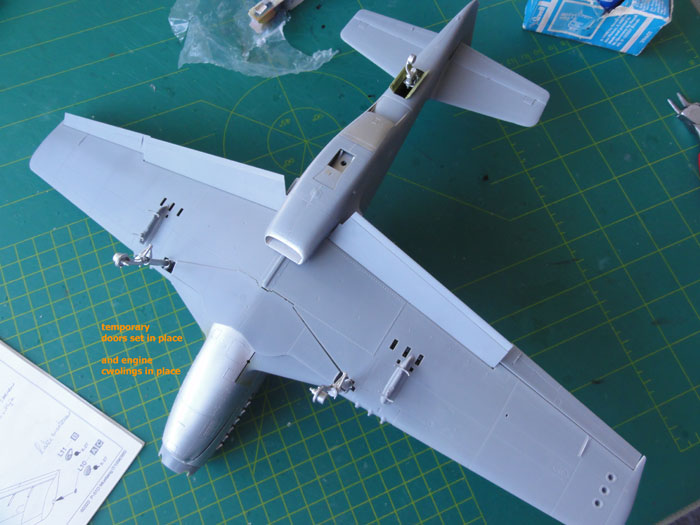
The model is now ready for getting a first base colour paint.
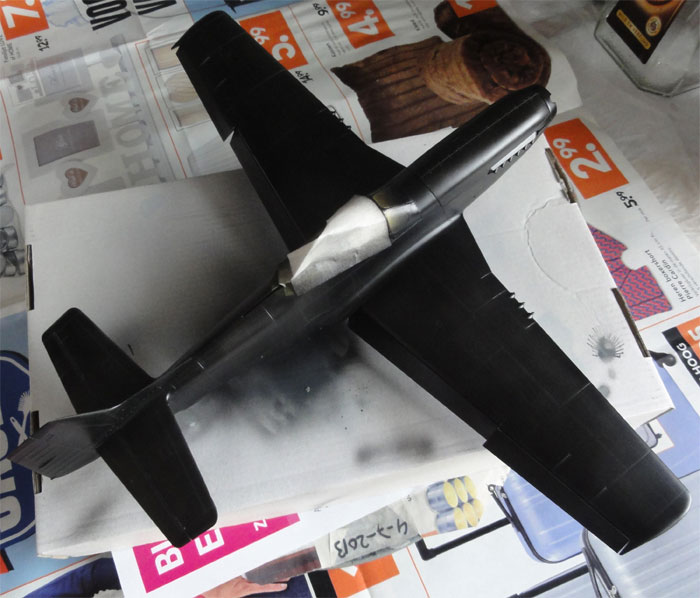
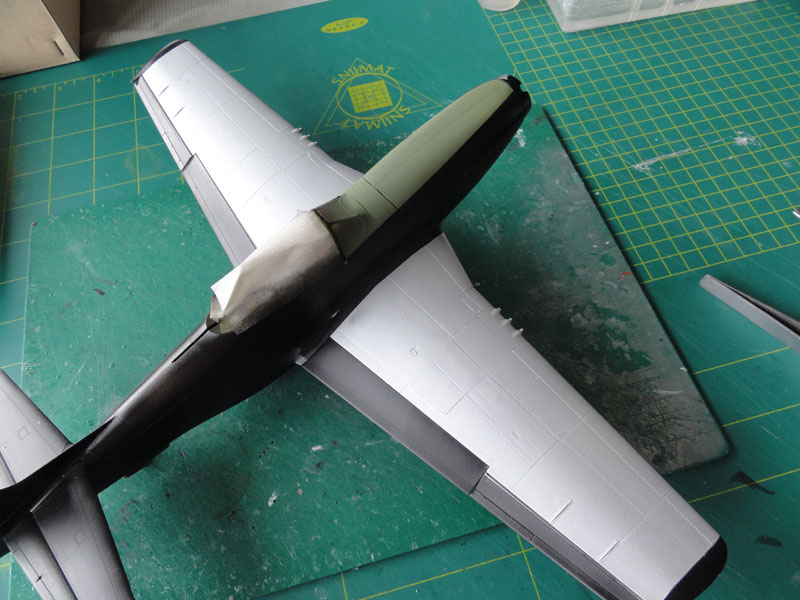
The model for the Dutch ML-KNIL P-51D
would get bare metal areas and aluminium coat on large parts of the wing.
ALCLAD II for the bare metal
would be used and this requires a gloss black undercoat. So the model got
a base coat of gloss black, using Revell Aqua gloss black 07 acrylic.
Note that the canopy and windscreen
were sprayed, after being masked, cutting the Tamiya masks with a very
sharp knife is needed. Not all masks were used as tape was used as well.
The result is seen here. The loose
parts like gear doors, engine panels and so on were not forgotten.
The next step is to airbrush the aluminium painted areas, particularly the "laminar wing" areas. The wing tips and flaps are to get a bare metal finish. Masking was done and next, Revell Aqua aluminium 99 acrylic was airbrushed.
The spare main gear door was used
as "mask" to protect the painted main gear bay.
Next, the olive drab anti glare panel
was masked and airbrushed. (part is on the removable upper engine cowling).
with the result seen here....
Now, the bare metal areas are airbrushed
after masking off the aluminium and drab areas. ALCLAD II Polished Aluminium
ALC 105 was used. Do not forget to airbrush the loose parts like engine
panels and canopy edges.
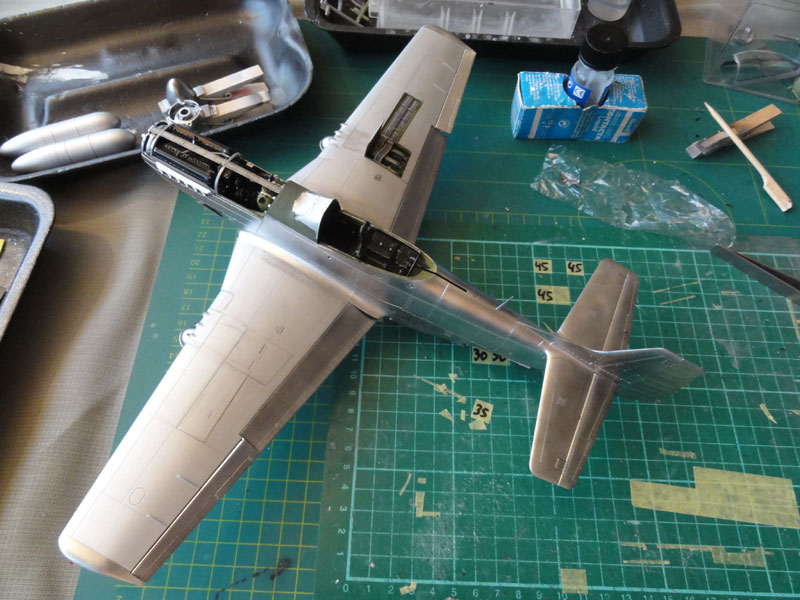
Next step is applying the markings.
On to next
[ Page 3... ]
Back to 1/32 scale Models.......

(c) Copyright Meindert "designer"/ All rights reserved. Your comments are welcomed by webmaster
Created this page November 6, 2013