Dutch ML-KNIL
[ page 1 ]
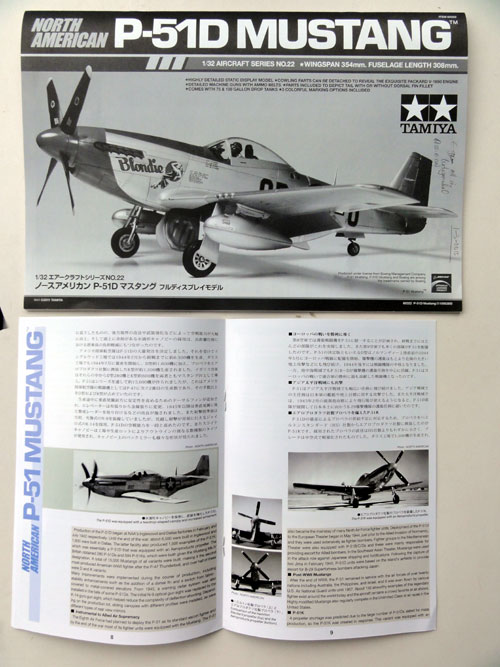
Tamiya North American P-51D Mustang model kit in 1/32 scale
Page 1
Page 2
Page 3
The American North American P-51 Mustang was developed in the end Nineteen Thirties following a British Specification as the threat of the Second World War emerged. The design of North American was for a high speed and long range aircraft that would operate along side the Spitfires of the RAF. The P-51 utilized a (partially) laminar flow wing, reducing drag and giving longer range. The Second World war was in 1939 a fact and there were urgent needs for aircraft from all Allies.
Various versions
of the P-51 were developed, including the P-51D that got a license built
Merlin engine, had a large canopy hood for better pilot view and an improved
armament. Drop tanks were also possible and the P-51D was able to escort
Allied bombers all the way to Germany with its range of about 3700 km.
It was first used as fighter but later also for ground attack. Although
not without its faults, the P-51 was an important aircraft.
After the Second
World War, many P-51 aircraft were surplus and used by various Allied countries,
including the Netherlands. In the retrieved Dutch East Indies colony air
power was needed and the Dutch ML-KNIL air airm used P-51D and P-51K
aircraft. The P-51K is only internally a little different than the P-51D.
The Indonesians
wanted independence and during various battles and campains (called "police
actions") , the KNIL P-51's performed various ground attack missions.
But after a few years, under United Nations pressure, Indonesia obtained
independence. Several P-51's were even transferred to the new Indonesian
Air Force TNI-AURI.
The 1/32 P-51D
model will be made as an early Dutch ML-KNIL aircraft with large Dutch
flags.

The Tamiya P-51D kit no. 22 / 60322 in 1/32 scale was issued in 2011 and replaces all the older kits in this scale as it is superior as far as detail, accuracy, fit and overall execution.
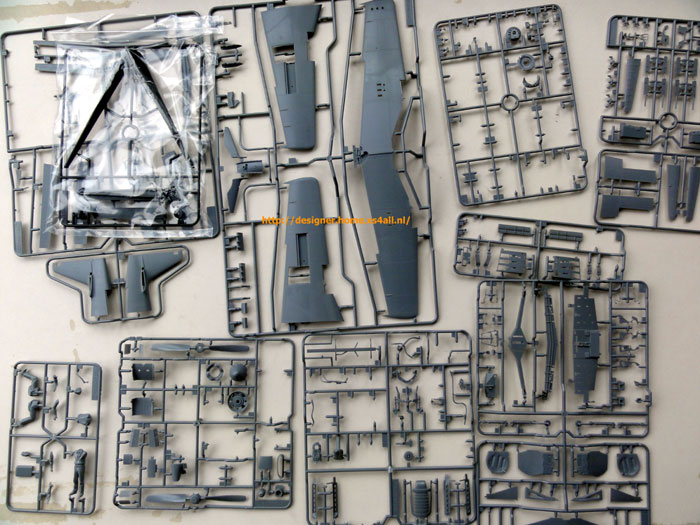
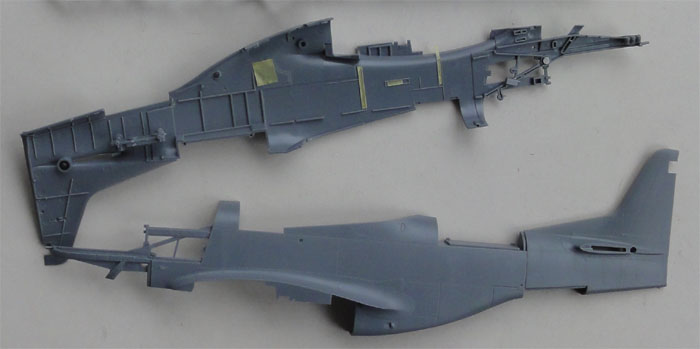
Parts are crisply moulded and the
model gives various "options" that enable it to be posed with our without
undercarriage down, engine shown or not with loose panels (kept in place
through tiny magnets), open or closed intake, etc etc. Screws, magnets
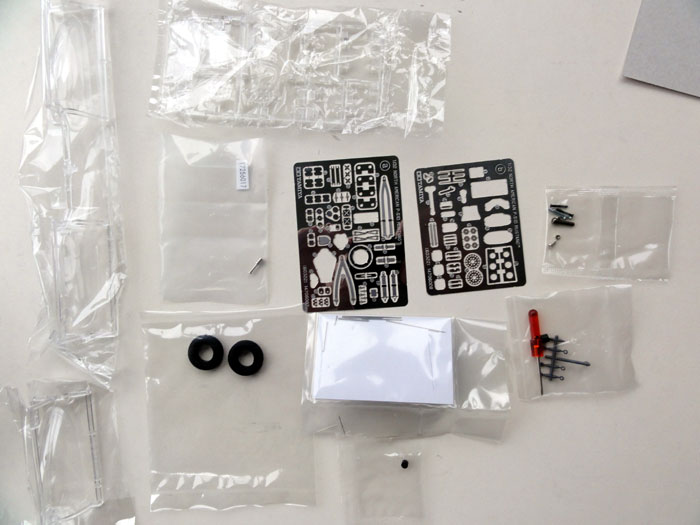
etc. are in the box. Also in the kit are a canopy masking set (although
you have to cut the masks yourself) and some small tooling like a screwdriver.
A display stand for "in flight pose" is also in the box.
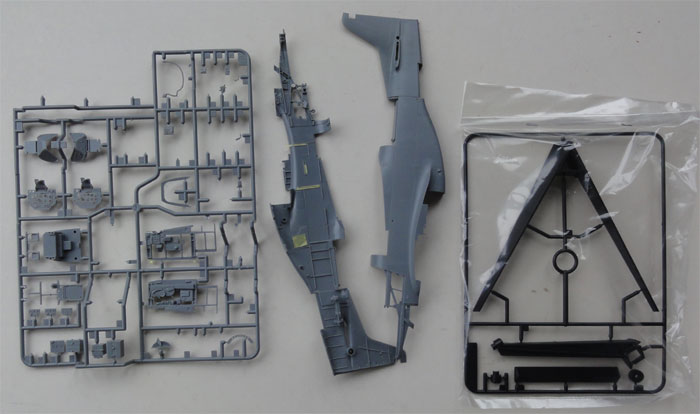
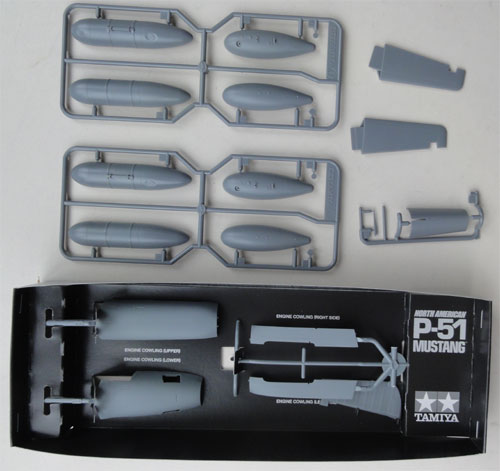
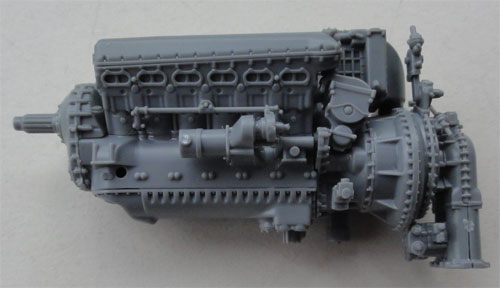
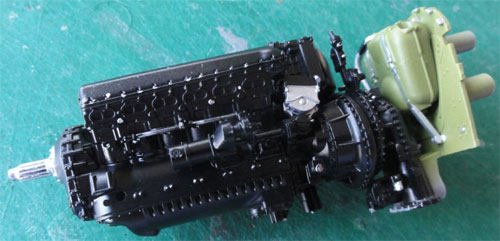
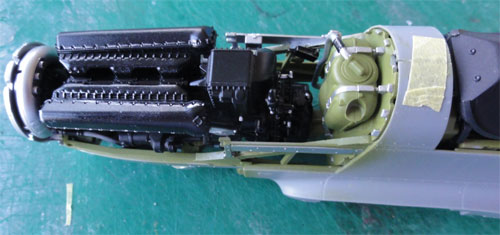
The Packard V-1650 "Merlin" engine
is a separate item in the kit and can be seen when cowling panels are not
fitted.
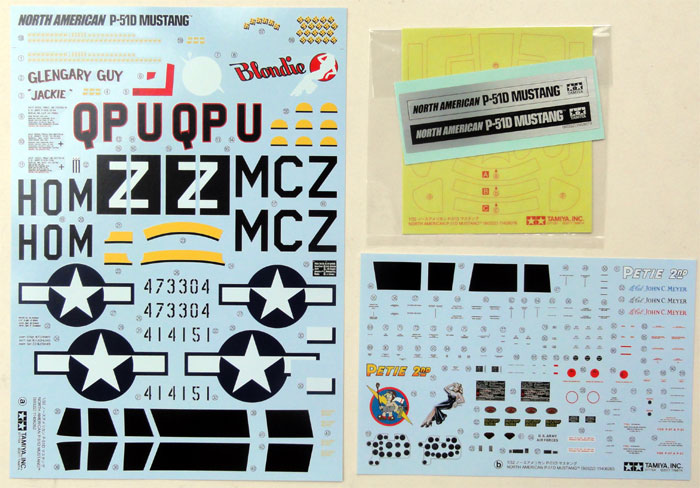
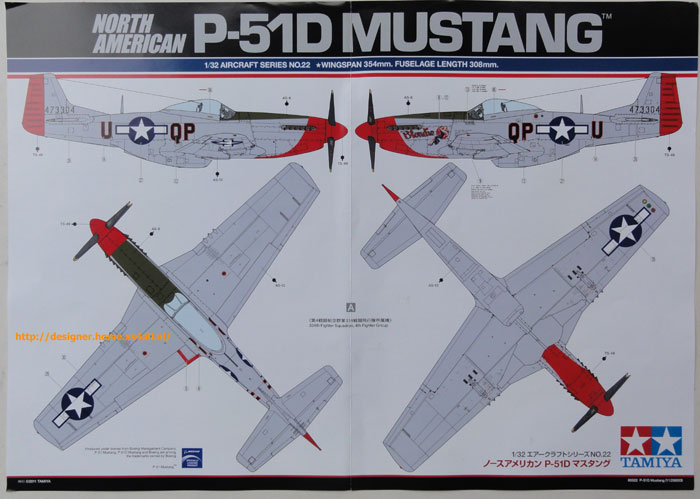
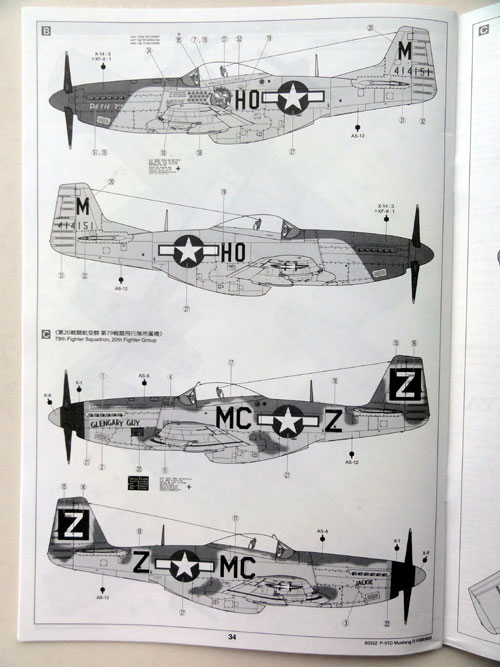
The kit decals are a bit thick although
stencilling is also provided. Decals are for:
- USAF 487 Fighter Squadron, 352
fighter group
- USAF 79 FS / 20 FG
- USAF 334 FS / 4 Fighter group
Better use decals obtained elsewhere.
An early P-51D without dorsal fillet
can be made from the kit, a P-51D with the fillet and some optionable parts
are there for interior parts like different instrument panels, 2 seats
etc.
Two types of droptanks are also in
the box.
Very nice is also a booklet in colour
with history about the P-51 with photos and text.
I did not use all the "movable" options,
as the model is "static" displayed. The only thing kept detachable are
to be engine cowling panels to show the very nice Merlin engine in the
kit.
The model parts fit is very good with
no putty/ filler needed.
Starting the build
The kit will be made following the Tamiya kit instructions. I missed parts layout drawings in the pages, making searching for some parts a bit difficult.
A "straight out the box" build will be done as far as possible.
During assembly, you will note this: in order to achieve a good fit, Tamiya has the sprue gates on the part mating edges. So all these gates were to be removed after cutting the parts with a special cutter and the sanding with a file and sandpaper. This is a tedious job, but will ensure a very good and neat fit on the parts. This is done for each sub-assembly and each part.
Next, pre-painting
of various parts and sub-assemblies was done while still on the sprues.
Paints used
were acrylics from Revell Aqua, Gunze Sangyo. For interior
green, White Ensign WEM ACUS09 / FS 24151
enamel was used.
![]()
The model will
be made as a P-51D in Dutch ML-KNIL
scheme , which has in fact these colours:
- aluminium
"painted" sections of the main wing, this being aimed at getting laminar
flow; on new aircraft the many rivets were filled to have a smooth finish
as much as possible, and the wing painted aluminium to get a smooth finish.
Later on this was often, after maintenance, not so well kept after.
(also note
the detachable large panels to access the guns/ armament).
- bare metal surfaces on fuselage, empennage with fin and rear tailplane, wing trailing edge flaps and wing tips.
- olive green like anti-glare panel in front of the cockpit wind shield.
- for the interior, I believe the Dutch ML-KNIL Mustangs had the "interior green" surfaces. This applies for the cockpit but also gear bays.
Several sub-assemblies
were made, such as for the engine (STEPS 1 - 6) and bulkheads. These were
airbrushed beforehand with the appropriate colours as indicated by Tamiya.
The lower intake
was also assembled as shown in STEP 19 for "pre-painting".

STEPs 1-4
The very nice
Merlin engine was assembled.
STEP 5
At the bulkhead,
I cut off the small knob on the bottom of part V3.
STEP 6
Some extra
detailing with electrical wires and rods is worthwhile but will be done
later on as the engine is accessible.
STEP 7
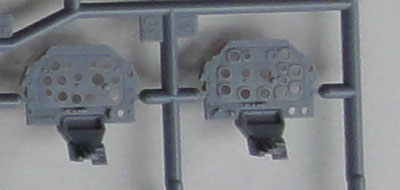
The instrument
panel for the Dutch ML-KNIL to be used was unclear, I settled for the later
panel D31 (option A/B). A transparant glass part with decal is provided,
very nice.
STEP 8
The nice "etched
metal" seat belts, harness and straps will be painted first and later fitted.
STEPs 9-12
The simple
seat was used (option A/B) and the nice cockpit interior assembled. Much
pre-painting was needed here.
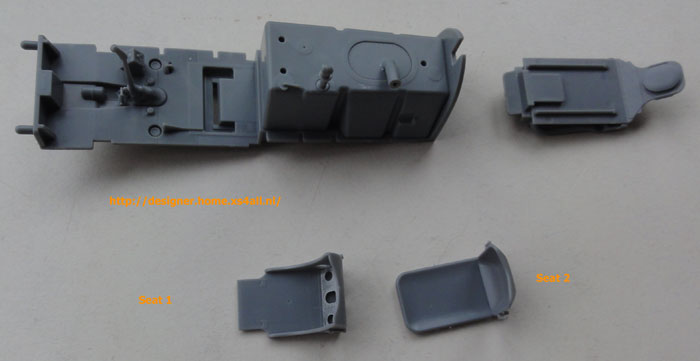
Note that the seat straps/harness
is not yet fitted on the seat as well as the parachute pack.

STEPs 13-18
Assembled as
indicated for option A/B with the K-14 gunsight. The interiors are nicely
done.
The frames in
the forward fuselage require carefull painting/ airbrushing as well. Some
areas are aluminium.

STEP 19
The intake
and radiator was assembled, but I had some minor fit problems were the
etched metal parts A-13. The whole interior was sprayed aluminium later
on.
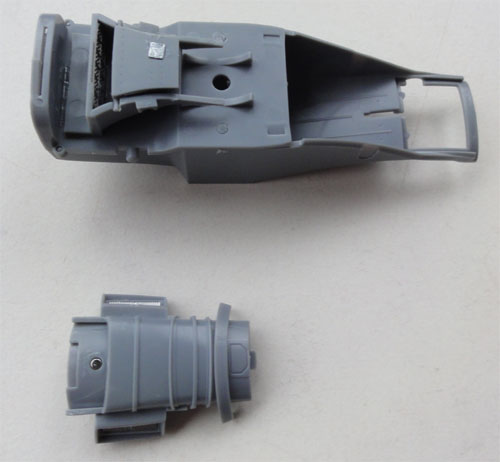
Note the small
magnet.
STEPs 20-22
I will not
use the "detachable" rear tail wheel option, so V26-V28 not really needed.
The 2 fuselage halves were joined using clamps, fitting in the lower air
intake and interior with forward engine.
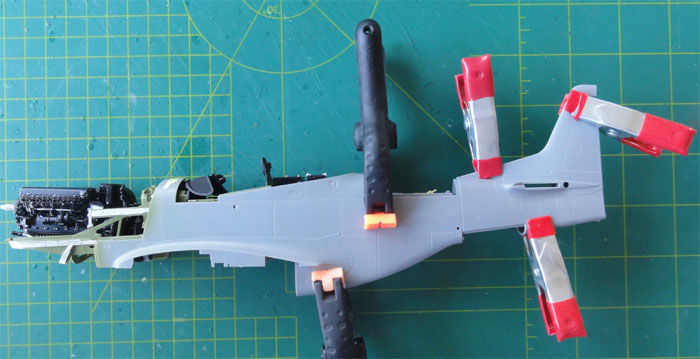
STEP 23
The shorter
engine exhausts were used (option "B") with parts J19.
STEPs 24-31
Interior piping,
tailplane and so on were assembled. Cleaning up the sprue gates is a lot
of work.
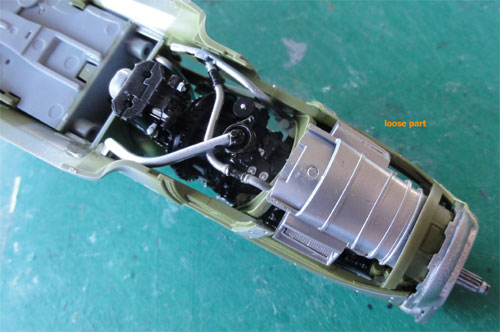
The carburator duct is a detachable
"loose" part.
STEPs 32-33
As noted, the
tail wheel will be set fixed in place. So the magnet idea is not needed.
The fuselage is now assembled. Next are the wing with flaps and landing gear and much more.
On to next
[ Page 2.... ]
References
- Book: P51D/K Mustang, Dutch Photofile 1, G.Casius and Luuk Boerman, 2011
- Book: Camouflage en Kentekens, van de Nederlandse Militaire Luchtvaart, JHN Greuter et al.., Bonneville uitgeverij. (rare standard "must have" reference book in Dutch)
Web:
http://en.wikipedia.org/wiki/North_American_P-51_Mustang
IPMS NL P-51
Walkaround
Back to 1/32 scale Models.......

(c) Copyright Meindert "designer"/ All rights reserved. Your comments are welcomed by webmaster
Created this page October 31, 2013