(Revell conversion)
[ Page 2 ]
1/32 scale Hunter mk4. through conversion of Revell kit
.... continued the mk.4 ... (see page I for previous steps)
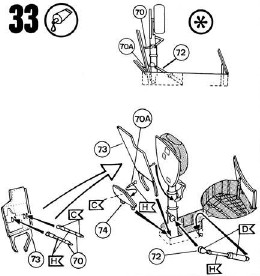
STEPs 25 up to 36. Leave the major undercarriage assembly7 for later stages after painting. Only some details of brake wires and hydraulics were added inside the bay with some stretched sprue. The bays got a coat of silver later on.
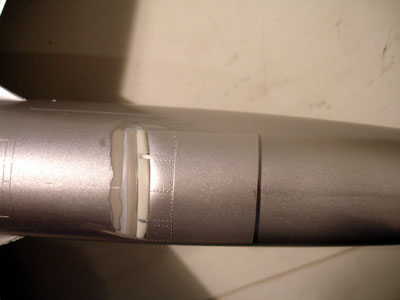
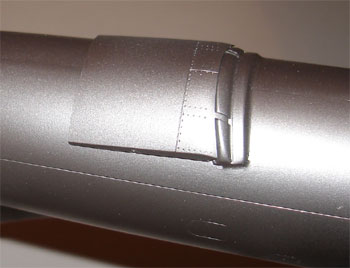
STEP 37
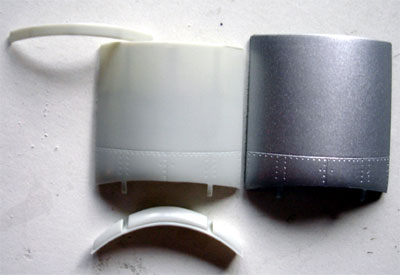
The Hunter mk.1-5 had the earlier
type airbrake that is different from that of the later marks like the Mk.6.
On the mk1-5, the airbrake is about 2 mm shorter in 1/32 scale as to the
Revell part # 76. So I simply cut off the 2mm on the rear of this
part (note: I re-used it on the mk.6 model).
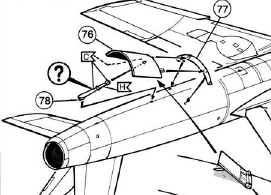
The airbrake hinge fairing part #77
on the mk.4 is also a bit deeper; this was suggested with some card and
putty. For planes on the ground, normally the airbrake which is electrically
actuated is in retracted position so do not use part # 78.
STEP 38
Glue on the tail bumper, leave antenna's
for later.
STEP 39
Not needed for the mk.4
Skip STEPs 40-42. You can add the
front windscreen if you want, but I skipped it to later!
Paint the instrument coaming "tyre
black".
Go to STEP 43 and 44
Fit the normal "sabrina's" (named after a famous British female singer) parts
# 98+99 for the mk.4. Some white glue was needed to fill the tiny gap at
the rear. (NOTE: On the early mk.4 , the scope part #94 is not needed).
The scoops parts #94 and 95 are seen only on later mk.4 variants, so study pictures. I did not fit them on my early RNeth AF Hunter. (The Swiss parts with different "sabrina's" are obviously not needed).
STEP 45
The 100 gallon tanks were also used
on the mk.4 but often on pictures the two fins are not seen. If you want
to use them, assemble but leave of the fins. Fill the slot gaps.
RNeth AF mk.4 Hunters used straight
pylons and kit parts #145-148 were used. I did not see the bulges
on these pylons so sanded these off.
STEPs 47-52
Not in scope for the mk.4
STEP 53
Do not fit the stores yet, so skip.
STEPs 54-64
Not in scope for the mk.4 of the
RNeth AF.
STEP 42
Only the windshield and canopy needed
for the mk.4. Make sure to have a good fit on the windshield and you may
close the gap later. Fit the windshield, painted instrument cover and gun
sight details later.
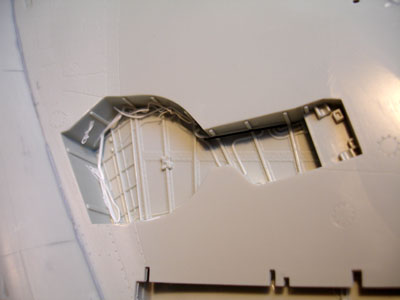
The wing-fuselage joints were given a light amount of putty were needed, particularly on the intakes. Also, there are some gaps in the stabilizers' edges to fill.
Please note that the cockpit was NOT YET detailed; this will be done later to avoid handling damage to these delicate parts.
![]()
The overall model was checked for any small gaps. The basic Hunter model now got a light grey coat to check for any flaws in construction using Revell 74 or Humbrol 64. These were corrected with putty and sanded as needed. The stabilizer and underwing stores were not forgotten.
Now the basic model is ready for applying the paint scheme. All colours were applied using the Badger 150 airbrush.
Do not forget
the underwing stores, pylons and undercarriage doors outher' surfaces!
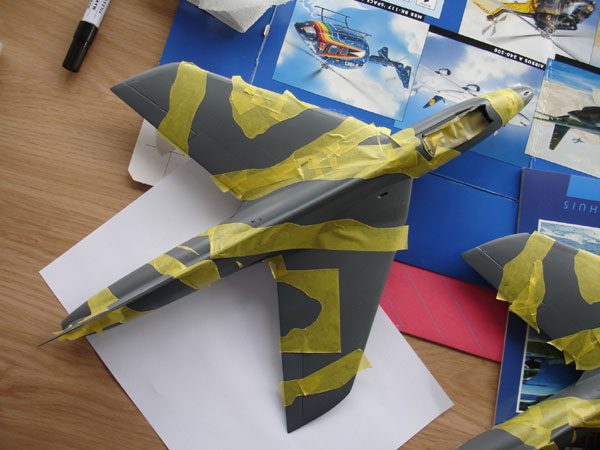
Masking and
spraying takes some time and effort, but the results are worth it!
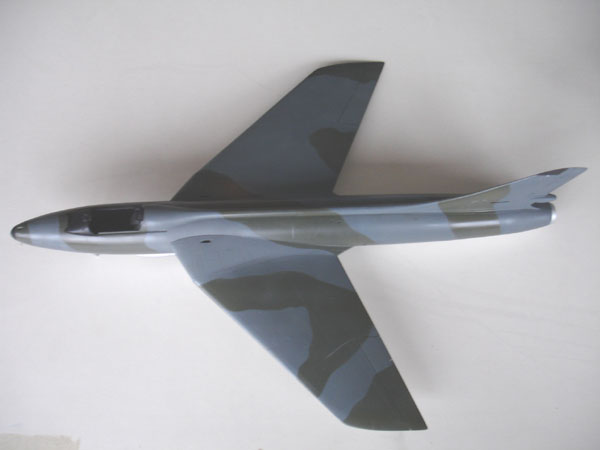
Typically RNeth air force mk.4 Hunters got a fresh camouflage scheme with "high speed" silver undersides and a Dark green and Dark grey camouflage on upper surfaces , a scheme very similar to that used in the Royal Air Force.
For the high speed silver you can use a high gloss silver coat. For the Dark green Humbrol 163 or Xtracolor X1 enamels. For the Dark Grey Xtracolor X130 or Revell 77.
During air force service these colours quickly faded on mostly the horizontal surfaces with the green en grey becoming lighter and the silver becoming duller. For the faded green en grey DACO has the Hunter colours readily available. (Alternatively you can use mix in some white paint with the fresh colours). For the faded silver, Humbrol 11 was used.
All enamel colours were thinned with 60% paint, 20% thinner and 20% white spirit.
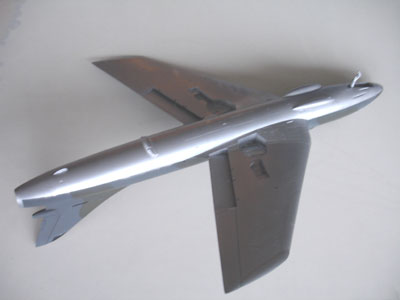
The mk.4 model
was first given an undercoat of Humbrol 11 Silver.
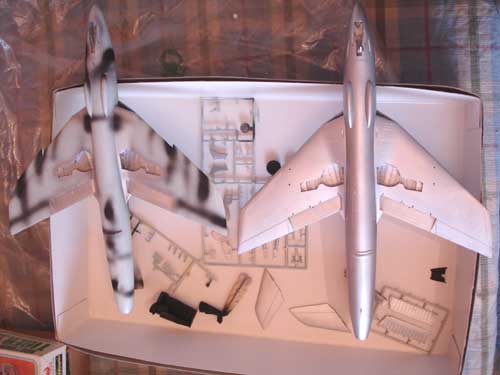
(mk.4 seen
on the right)
After drying, a protective coat of Johnson Future acrylic varnish was sprayed on the silver. Than the horizontal demarcation line was masked off with Tamiya masking tape.
Next, the upper
and side surfaces first a coat of the darker
grey Revell 77. Than, on the upper horizontal
surfaces the DACO slightly less dark grey was sprayed on most areas. This
gives the model a good look as the vertical surfaces (ge. under the vertical
tail and at the light grey demarcation) are still the darker grey.

The green
camouflage colour has a rather "sharp" edge as rubber paint masks were
used on real planes. I used Tamiya tape and tissue to mask it.
On the fuselage end there was on the first delivered mk.4 planes a metal coloured ring at the exhaust area. This later became a bigger metal area (as on F.mk.6) planes; I suspect that the camo paint would not hold at the hotter end.
On to next Hunter page......
Back to Hunter main page
Back to 1/32 Models.......

(c) Copyright Meindert "designer"/ All rights reserved. Your comments are welcomed by webmaster
Created this page
January 5, 2007