(Revell conversion)
[ Page 2 ]
1/32 scale Hunter mk4. through conversion of Revell kit
... continued from page 1...
After the colours were applied, the overall model got a coat on Johnson Future gloss coat. This will prevent "silvering" when adding the decals. Another trick when applying the decals is to use Johnson Future as "glue" by sliding the released decal through an amount of Future holding it with tweezers.
The decals came for 70% from the Revell
kits (especially the stencilling), 20% from a Dutch Decal set (mainly the
numbers and roundels) and 10% from other decals (like the Echelon Hunter
sets).

Revell also provides in this Hunter
kit their currently usual very high quality decal sheet. There are hundreds
of decals! The markings and stencilling are all there.
Please note
the decalnumbers #xxx differ between the different Revell Hunter kits.
You find however many similar stencilling symbols.
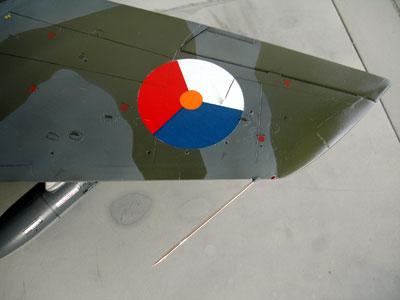
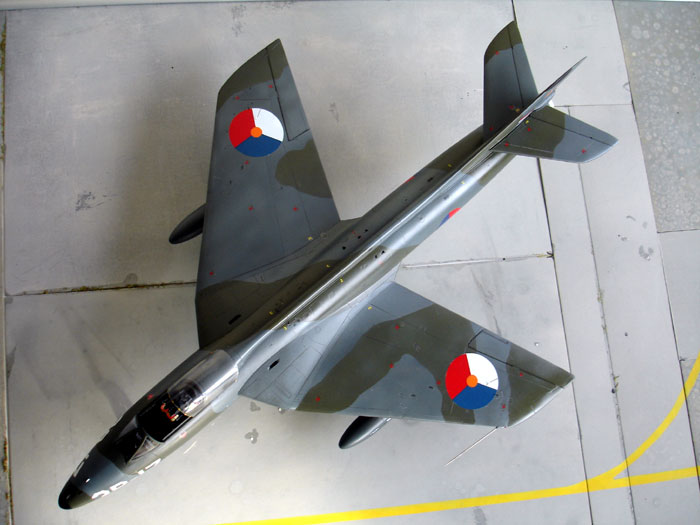
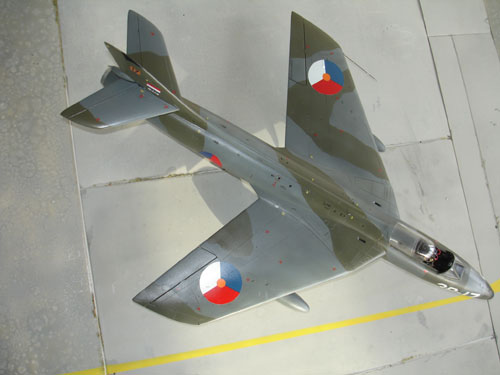
Royal Netherlands AF (KLu) markings for the Hunter mk.4 consisted of roundels in 6 positions. The wing roundels were on mk.4 usually very big (120 cm) and the fuselage roundels standard 75 cm.
![]()
Mk.4 had also small Dutch flags on
their tails and KLu squadron colour codes; these were small rectangular blocks
with different colours:
Hunter Mk.4 RNeth AF
| squadron | "code" | colour of block | |
| 322 sq | 3W | dark blue | |
| 323 sq | 9Y | light blue | |
| 324 | 4R | light red | |
| 325 | 4R | yellow/orange | |
| 326 | 9I | light red | |
| 327 | 7E | light red |
The roundels came from Dutch Decal #72029 . When you use the DD decals roundels, carefully trim with scissors their edges otherwise you will end up with nasty white edges!
The Hunter markings came from the Dutch Decal set #32004, including the mk 4 coloured squadron blocks on the vertical tail. Also, the numbers and a/c numbers were used from that sheet but you carefully need to cut and put each number as a seperate decal. This is quite some work to get them perfectly aligned.
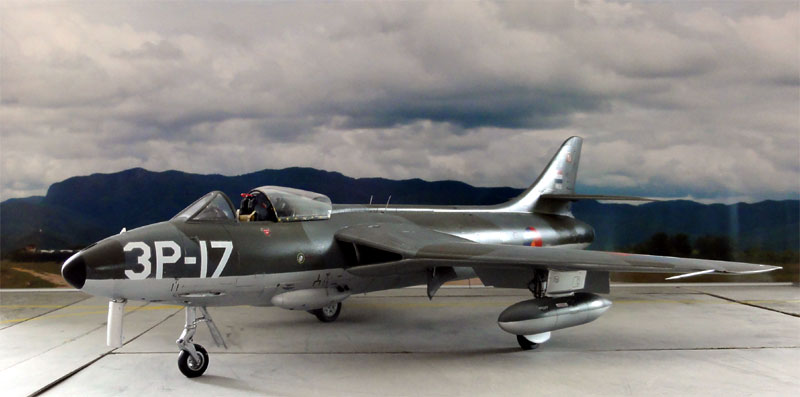
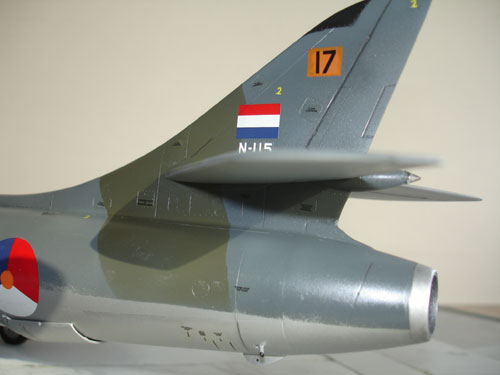
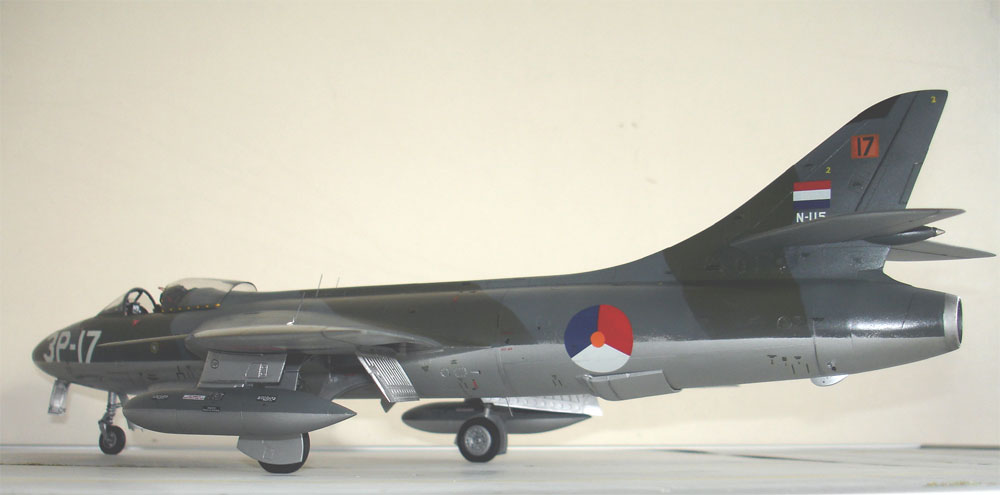
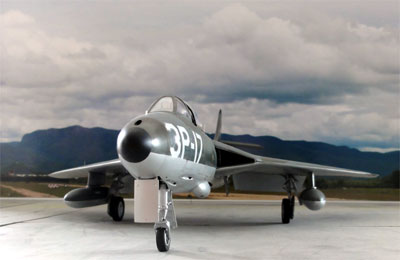
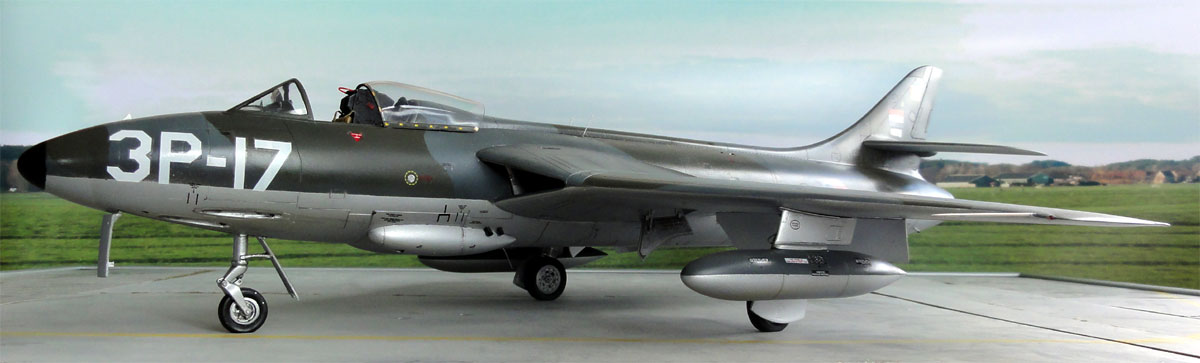
The model will depict a mk.4 model of RNETh AF (Klu) no. 325 squadron with code "3P-17" / serial N-115.
It took me over 2 days to get the appropriate decals in place on the model, but the result is worth it.
The Revell kit FGA9/mk.58 provides excellent decals for the smaller stencilling that are usuable for the Dutch AF mk.4. For Dutch AF planes, the correct "lift" symbol #103 is provided.
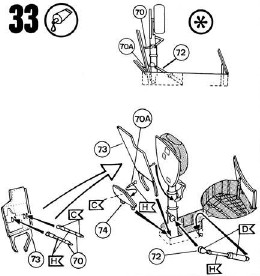
Warning marking #60 can be used, but remove the red-border tri-angle lines.
![]()
STEPs 25 up to 36.
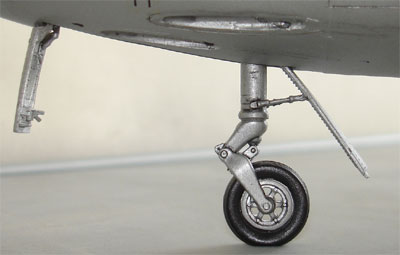
It is no problem to assemble the kits undercarriage and no modification was needed.
As noted before, some of these parts were already aluminium painted. The moulded flattened tyres are a bit exaggerated though, but I left them as they were. Note that the tyres should be vertical on the ground. So do not fit them on the legs yet, but leave off. First assemble the gears without their wheels, the legs are fitted at an angle.
When dry, fit the wheels to get a perfect horizontal and vertical fit. I had to enlarge the aixle hole a bit.
 .
.
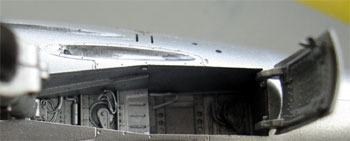
The bays are silver and got internal details like hydraulic lines etc. Note that the rear nose gear doors extends into the bay.
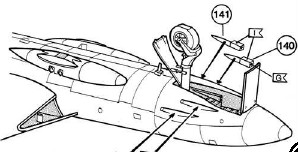
STEP 39
these antennas not needed on the
Dutch Hunters. (also on Step 38, the antenna parts #82 not needed)
Skip step 40 pitot for later..
STEP 41
Only the tail light is needed on
the mk.4. It needed some sanding at its base to get a good fit.
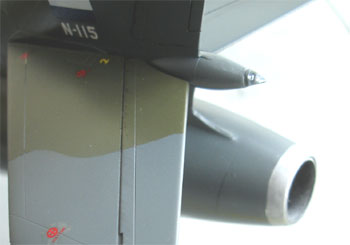
Also the wing tip lights were tinted with transparant RED and GREEN with Tamiya transparant acrylics.
From STEP 24, the horizontal stabilizers
were fitted that had also been airbrush. The fit was not perfect! I had
to thin down the lips and add some white glue to suggest there is no gap.
STEPs 43,44
The gun pods #96+97 small ejectors
were fitted and painted black. (NOTE: On the mk.4 scope part #94
was not needed).
The gun blast area did not
get the deflectors, as on early mk.4 these were not fitted. The holes were
opened up
STEPs 45-48
The smaller type fuel tanks can be
used for the mk.4.
Some fueltanks had no fins, so do
not use the fins #107,108 and fill the slots. The pylons parts #101-104
are OK for a mk.4.
STEPs 48-64
The gunpods, large tanks and kits'
fuselage belly antennas and special Swiss AF equipment are not applicable
for a Dutch AF mk.4 Hunter, so leave them off.
![]()
Weatering and
panelline details
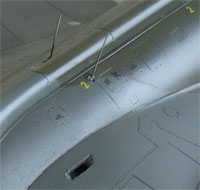
I now did some weathering.
First by using acrylic paint of Revell of their new range of acrylics. Used were the black, dark grey and silver acfyllics. These were heavily thinned with car window washing anti-freeze fluid bought at the department store and applied with a very thin brush. Wipe off any excess and do NOT overdo it! This works perfectly!
Also, I did some "sanding" with very fine polishing paper at some painted areas and the edge between the aluminium lower areas and the upper camo areas.
STEP 40
The pitot tube was fitted; if
you can, replace it with a metal needle. (make slot at the leading edge
as you modified the wings without slats).
![]()
FINISHING UP
The Hunter has
numerous small antenna's:
- VHF wire
antenna's, made from tine wire: 2 on upper wing tips, 2 next to the fuselage
spine on top and I also think 2 on the fuselage belly. (their bases were
painted in the appropriate colour) and 2 VHF antenna's are on the two big
roundels!
 .
. 
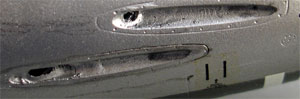
On the right
you can also see the opened up intake slot on both sides on the fuselage.
Also, I found
that on the forward nose gear door there are visible lock mechanisms. These
were made from thin card.
After a total clean up, the model got a semi-gloss overall coat of Johnson Future mixed with some Tamiya matting agent. This give the overall model a very nice sheen.
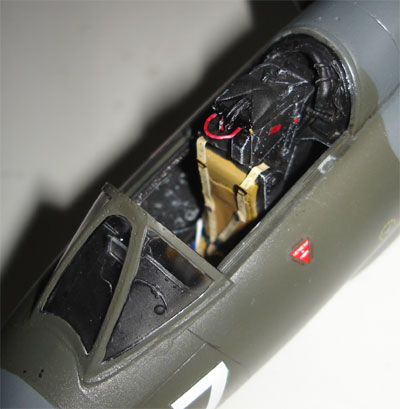
The ejection seat was painted mostly
black and safety harnesses added. A little drybrushing highlighted the
smaller details. For an early mk.4 the red ejection pull rod was painted
red. (NOTE: I first put 2 pull rods on top of the seat but found out there is only one! this was corrected ).
The ejection
seat was put into the cockpit and the canopy fixed with a tiny drop of
white glue on its lower edge.
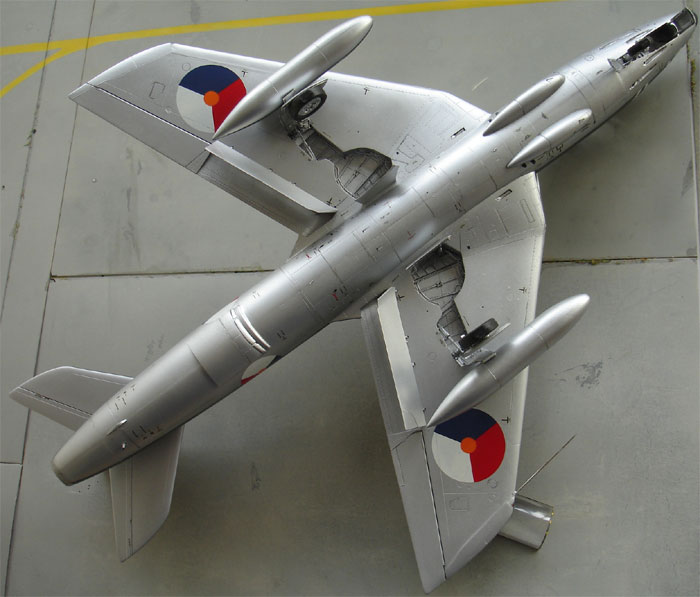
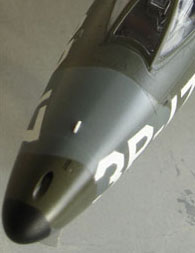
Here you can see the lower details, not the slightly weathered panellines
The model is ready! What a nice one for the collection!!
Here you see the weathered edge between
the upper and lower areas.
 ....
....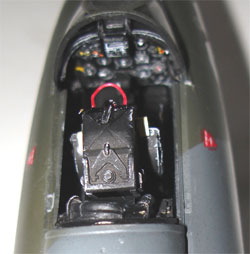
the cockpit area and nose camera
(click to enlarge photos)

 .
.
Hawker HUNTER mk.4 of RNETh AF 325 squadron with code "3P-17" / ser N-115, based at Leeuwarden AFB and Twenthe at the end of nineteen fifties. Delivered April 1956 to 325 sq, went to 324 sq August 1956 and written off March 1963.
Back to 1/32 Models.......

(c) Copyright Meindert "designer"/ All rights reserved. Your comments are welcomed by webmaster
Created this page
February 11, 2007