improving the 1/32 Revell kit
[ page 1 ]
1/32 scale Harrier
The Hawker Siddeley Harrier was developed in the 1960s as the first operational ground attack and reconnaissance aircraft with vertical/short takeoff and landing (V/STOL) capabilities. Development started with the Kestrel prototype aircraft and this evolved into the Harrier GR.1 first flown end 1967. The design had a single special Pegasus turbofan engine mounted in the fuselage and four vectoring nozzles for directing the thrust generated: two for the bypass flow and two for the jet exhaust. The nozzles rotated to a horizontal aft position for normal flight, reaching about MACH 0.98. When a normal runway was available, the pilot selected that the engine nozzles were retained in near horizontal position enabling a larger take-off weight and thus more fuel or stores. For control at low speed, several small reaction nozzles are also fitted, in the nose, tail and wingtips. The Harrier is equipped with four wing and three fuselage pylons for carrying a variety of weapons and external fuel tanks for mainly a ground attack role.
The Harrier was first ordered for the Royal Air Force, with the GR.1. A version of the GR.1 was exported to the United States as the AV-8A, for use by the US Marine Corps (USMC) in the 1970s. Interesting is that all AV-8A jets were manufactured in the UK by Hawker Siddeley but got fitted by McDonnell Douglas with American systems like other IFF, another Stencel SEU-3/A ejection seat and Sidewinder capability. The engine is similar to the Pegasus mk.103 but designated F402 RR.
The T.2 was the dual Harrier trainer with longer fuselage, large tail and dual cockpit. The dual USMC trainer was the TAV-8A.
(Spain also ordered the AV-8A and TAV-8S and called these the Matador).
The Harrier GR.3 was developed in the 1970s with a more powerful Pegasus mk.103 engine. During the Cold War, Harriers were also stationed with RAF Germany. GR.3 later got a laser designator in a longer nose, ECM and an extended vertical tail tip.
For the Royal Navy Fleet Air Arm (FAA) a navalised Harrier was developed based on the GR.3 and this was the Sea Harrier with Pegasus Mk.104 engine. It got another nose with a raised cockpit floor for the MB Mk.10 ejection seat and a more bubbled rear canopy. Systems were fitted for carrier landings and it got modifications to reduce corrosion by seawater. This was the FRS1.
The FAA also got the RAF Harrier trainer as T.4N and T.8.
The Sea Harrier FRS.1 and the Harrier fought in the 1982 Falklands War. They were transferred with ships and carriers. The Royal Navy Sea Harriers provided fixed-wing air defence while the RAF Harriers focused on ground-attack missions in support of the advancing British land force at the Falklands.
Some first generation Harriers were also exported to Spain as the AV-8S "Matador" (later in 1996 these aircraft were sold to Thailand) and Sea Harriers FRS.51 were sold to India.
Later on, the RAF Harriers obtained system and radar upgrades that enabled the use of more advanced missiles.
Hawker Siddeley sought further cooperation with McDonnell Douglas to sell the type to the USMC. The new generation AV-8B Harrier II evolved with many variants. Many first generation Harriers were replaced by the second generation of which several versions were developed.
With my modelling friend Bas, I made an extensive article about the Harrier / AV-8 "jump jet" way back in 1995 for the IPMS Nederland MIP magazine. (in Dutch, see references).
page 1
page 2
Sea Harrier:
page 3
page 4
In 1/32 scale Revell USA released kit #h248 for the Harrier "jump jet" in 1972. It is for a first Harrier GR.1.
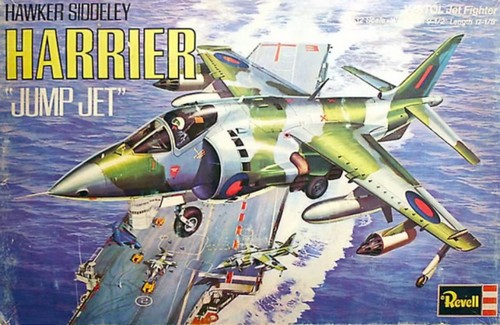
The same kit appeared as "Jump Jet" #H194 for a USMC AV-8A with decals in 1973 but it had the same parts which I will make here.
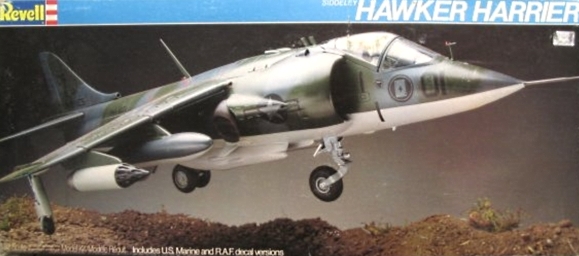
In 1982 re-popped the same kit #4718.
Decals in kit #4718 are simple for RAF Harrier GR.1 and a USMC AV-8A:
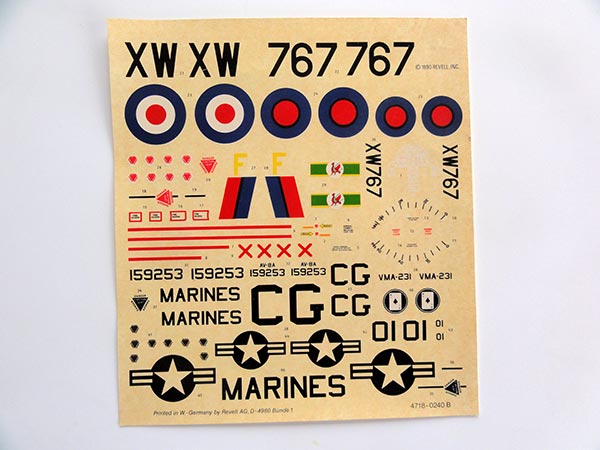
This first kit will be made as 1/32 AV-8A of the Royal Thai Naval Flying Service [Thailand] (with self designed decals).
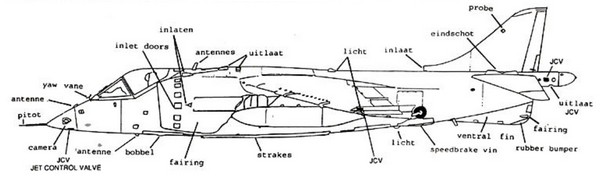
An AV-8A drawing I made ages ago for the IPMS NL magazine is seen here:
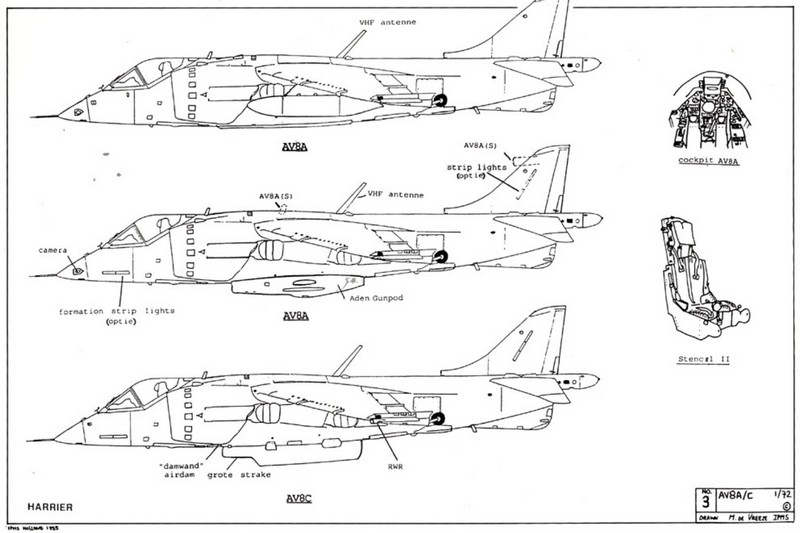
In those days, I made many drawings of several Harrier variants and the AV-8A and later developed AV-8B family.
Over the years more information and books were gathered.
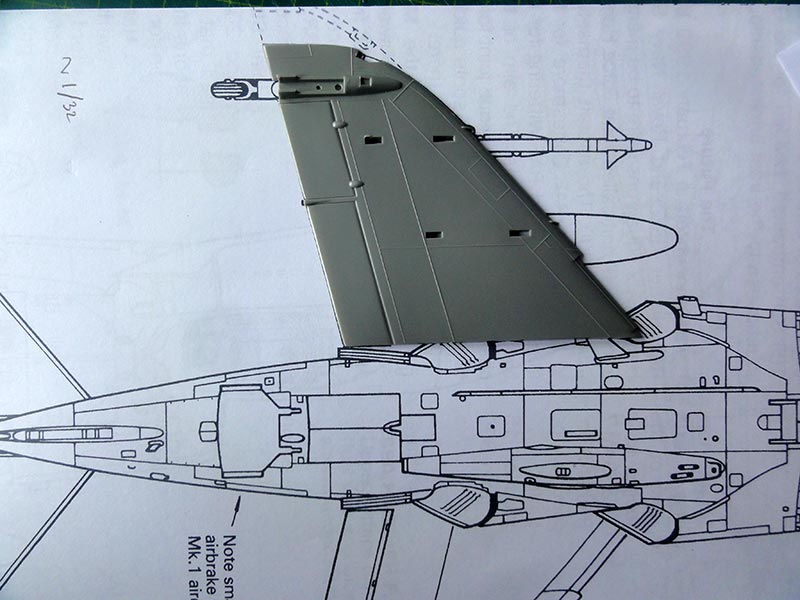
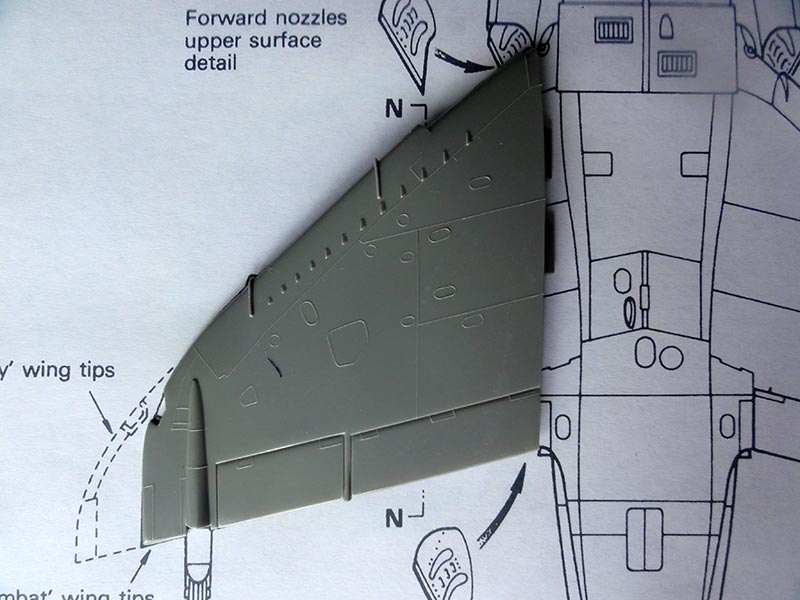
To check the dimensions and shapes of this 1/32 Revell model, I was lucky to find good 1/72 scale Sea Harrier drawing of Mike Keep (SAM), see references. I enlarged a few of these drawings to 1/32 scale for further investigation of common Sea Harrier and standard Harrier airframe sections.
Wing planform looks fine as per kit.
The Revell kit itself is very basic but checking the main dimensions and the shapes and with many many photos showed the main dimensions are OK for a GR.1 or AV-8A.
But work is to be done on the shapes to get a more accurate model. It seems the old Revell kit has some characteristics of the Kestrel development and pre-production aircraft:
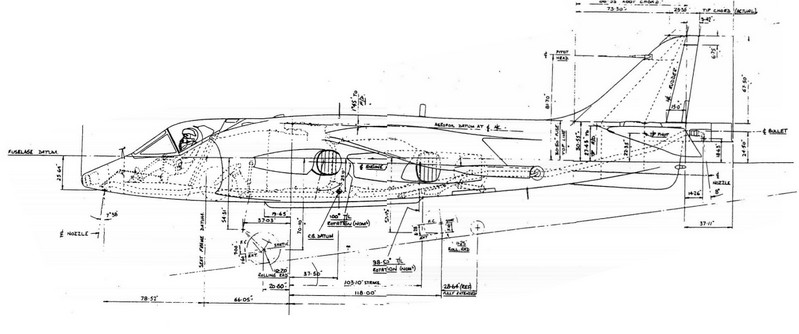
Here an old drawing of the Kestrel, note the different shape at the bulge forward of the front nozzle as seen also in the kit.
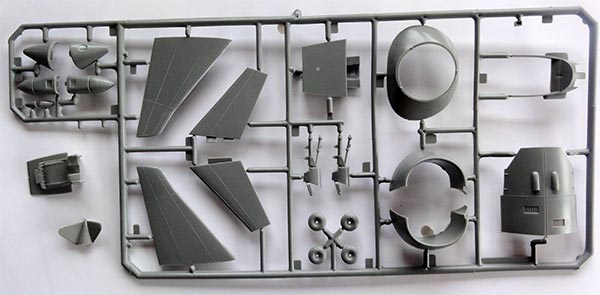
Preparations for improving the 1/32 REVELL HARRIER KIT
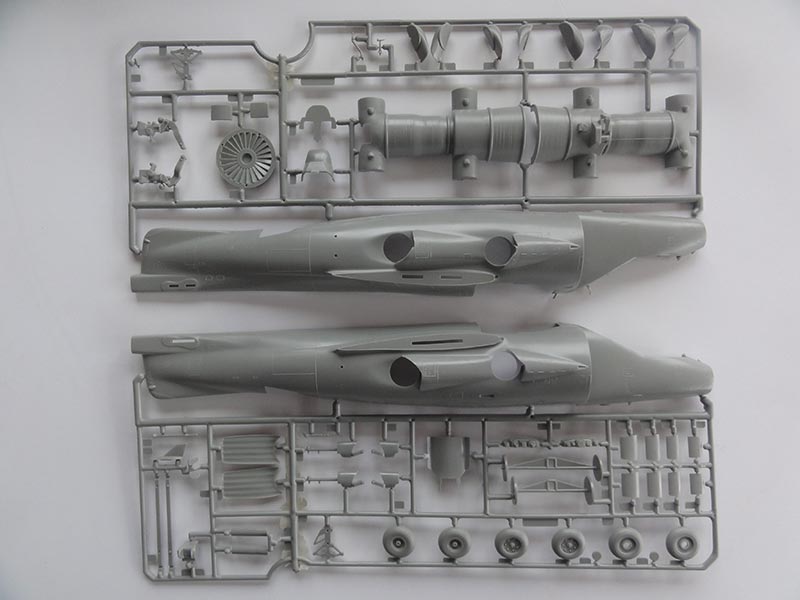
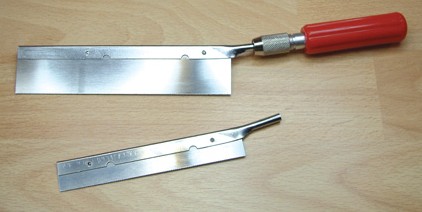
First.... all kit panel lines are raised so it is recommended to enscribe these using the raised line patterns as guide with a scriber; this is best done before assembly.
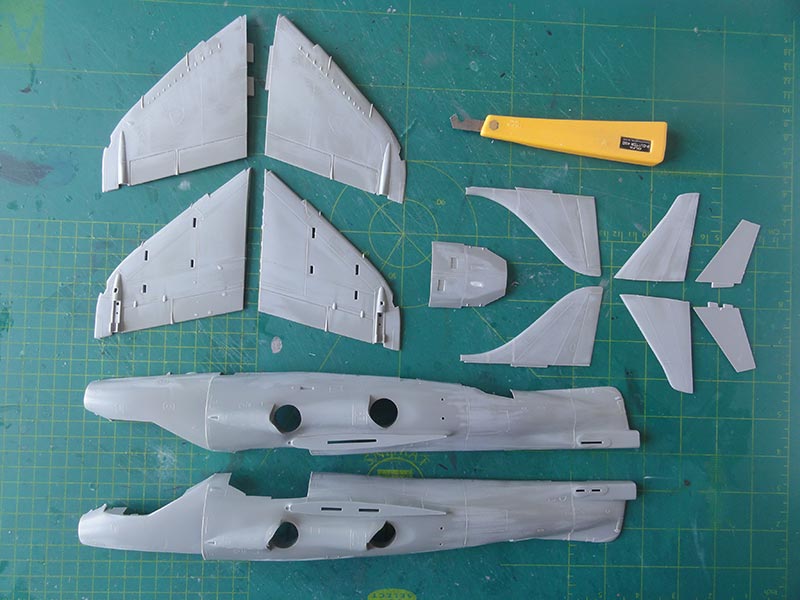
There are a Pegasus engine parts and a separate hatch. Revell suggests a sort of mechanism inside so that the exhaust nozzles rotate parallel with a set of plastic rods. Do not even try this, far better to set the nozzles fixed in place later on. So the engine will not be further detailed and the top hatch will be set closed and will be blended in.
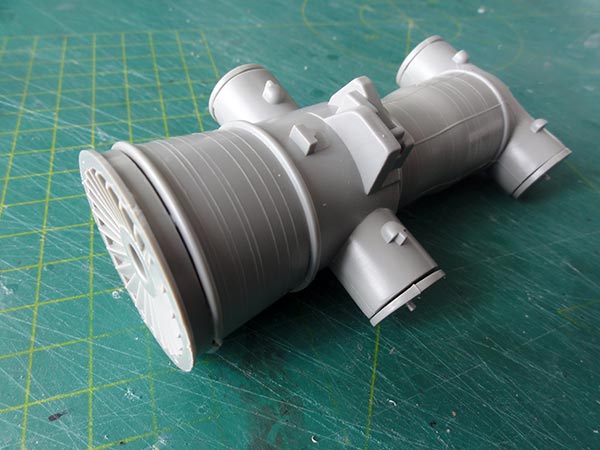
There is inside a sort of air flow plate towards the engine and fan.
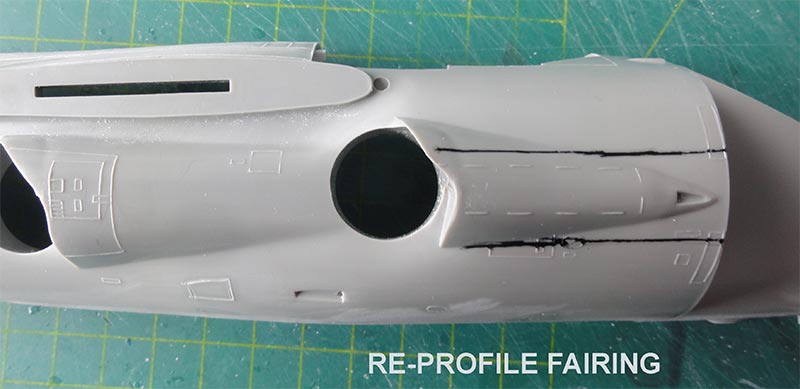
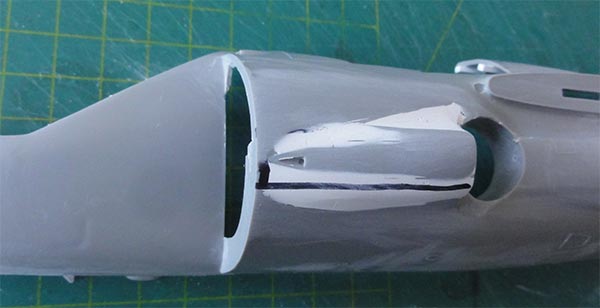
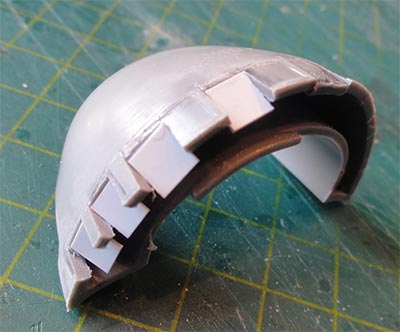
- the shape of the bulge forward of the front nozzles are more for a Kestrel as noted above so need modification. On the Harrier it is NOT a pointed shaped but more parallel and the height at the top is not that large. Difficult to explain here, look at photos of the real Harrier. It should be done as it has a great effect on how the model will look and takes a loty of effort to re-profile and have a symmetrical port and starboard outcome.
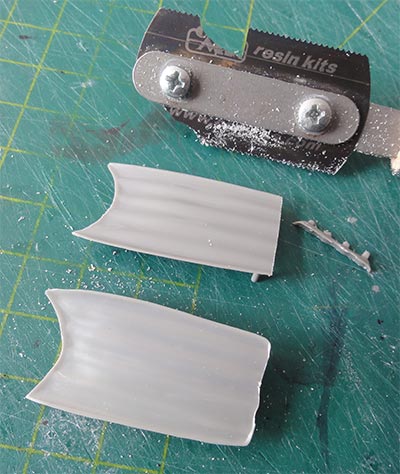
IMPORTANT NOTE: I could not verify if the kit large intake opening sizes with parts # #37 and #38 are correct as it is often reported that the Kestrel had smaller intakes. So the large intake openings were kept as per kit.
I cut away a section of plastic at the upper curve with a razor saw, set card behind the gap and filled the sides with putty. Making symmetrical shapes left and right is not that easy but doing it will vastly improve how the model looks.
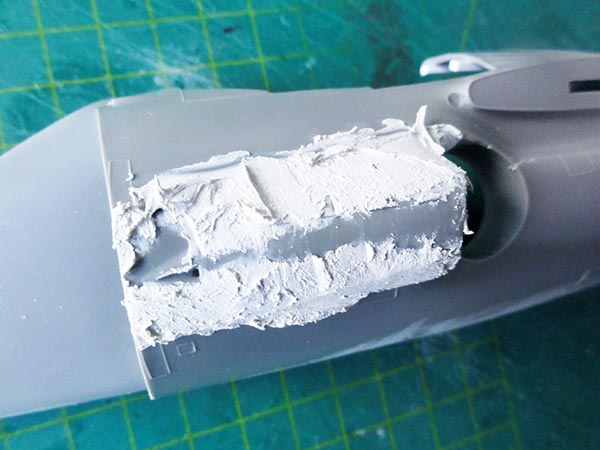
... and after sanding...
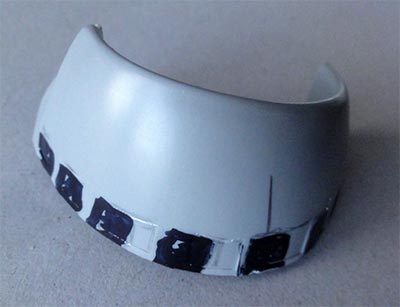
- the blow-in doors in the large intake outsides need more detail. These doors provide more air when the Harrier starts hovering. On all Harriers, the upper 4 blow-in doors also gravity droop when a Harrier engine is turned off for a parked aircraft.
An extra door needs to be added as for a standard Harrier there are 9 doors, not 8 as for the Kestrel as outlined in the kit.
The doors also need repositioning, there is a door directly in front of the small NACA intake.
So some razor saw cutting and making new doors is recommended. Don't use the kity panel lines here as this needs "shifting" a few indented door lines to get the extra door. Making these doors and getting a good surface finish took a lot of measuring, cutting, filling and some card and is better done before hand.
... after ...
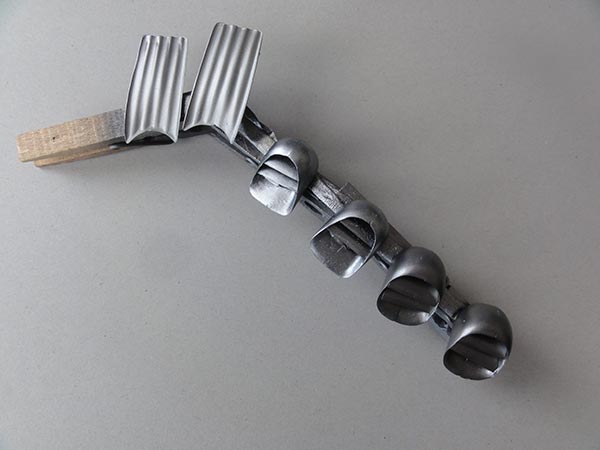
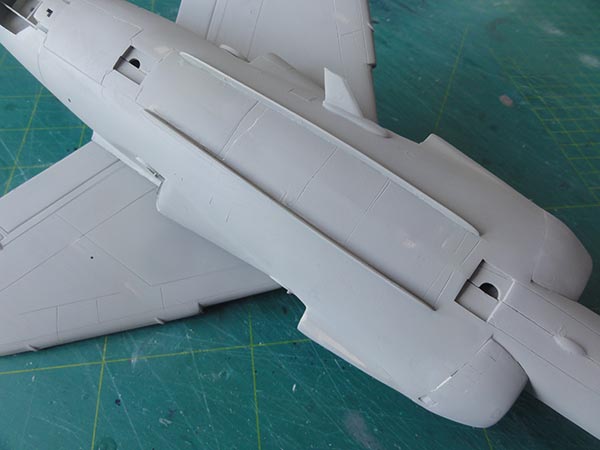
- the 4 swivelling Pegagus exhaust nozzles consist in the kit each of 2 halves and have gaps at the grills. Filling is quite difficult and needs a lot of sanding. I did not get perfect nozzles but good enough and much better. The rear exhaust protection plates #31, #32 were shortened a bit by removing about 2 mm at their rear ends.

The forward nozzles were after getting a gloss black coat airbrushed after a black gloss undercoat aluminium Vallejo acrylic 77701. The "hotter" rear nozzles a bot darker with Vallejo dark aluminium 77703.
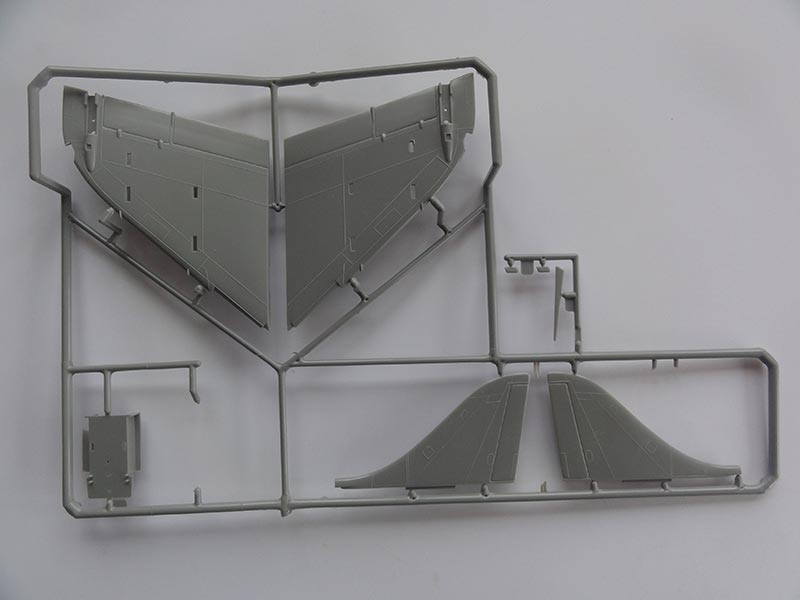
- the vertical tail height is OK for a Harrier GR.1 or AV-8A. (for later marks like the GR.3 and Sea Harrier, the vertical tail is heigher).
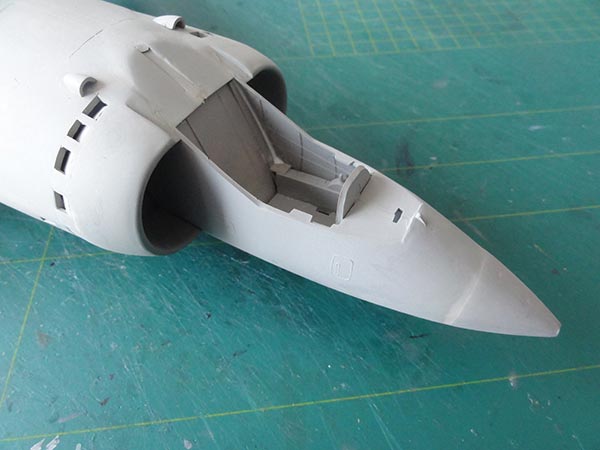
- the kit cockpit deserves more detail and a better ejection seat. The kit seat is rather crude and better discarded, which needs cutting. For a British Harrier you will need a Martin Baker mk.9 but for the AV-8A a U.S. Stencil SEU-3 ejection seat. (more on that later on).
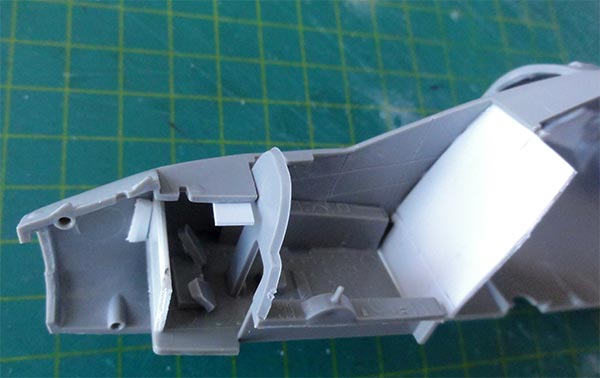
I started with a new rear bulkhead from card. I used the kit tub but will make a new panel and add detail.
- the kit instrument panel is just flat with a basic decal. As usual with many large 1/32 aircraft models, all can be improved with card, drilling holes for instruments etc. To be done later on.
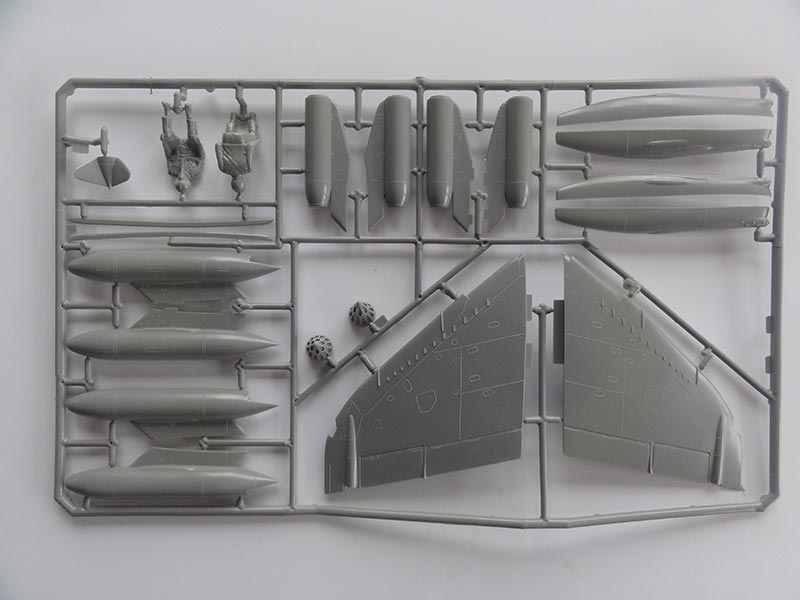
- the small vectoring exhausts ("reaction control valves") near wing tips, rear tail boom, lower nose can be drilled out e.g at wing tips, nose and tail fairing what I did. Or suggest each with a bit darker "burned" paint.
- the outrigger wheel fairings at the lower wing tips can be made a bit deeper (or leave as is). Also, add a bit more detail on the outrigger gear at a later stage.
- the kit wheels are a bit simplified but not a lot can be done here except buying an expensive Reskit #32-0211 wheel set. I kept the kit wheels.
- the air brake is mostly seen open/ drooped for a parked Harrier in rest. The kit bay aft of the main landing gear is a bit basic. Box in and add structural beam details as the air brake droops on parked aircraft.
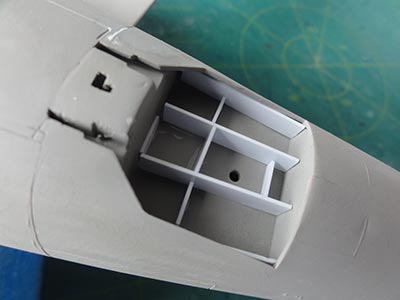
- on the upper engine panel part #97 there are 2 faired exhausts (as for the Kestrel) but there should be only 1 for the standard Harrier or AV-8A and at another position. So remove, putty, sand and make a new one.

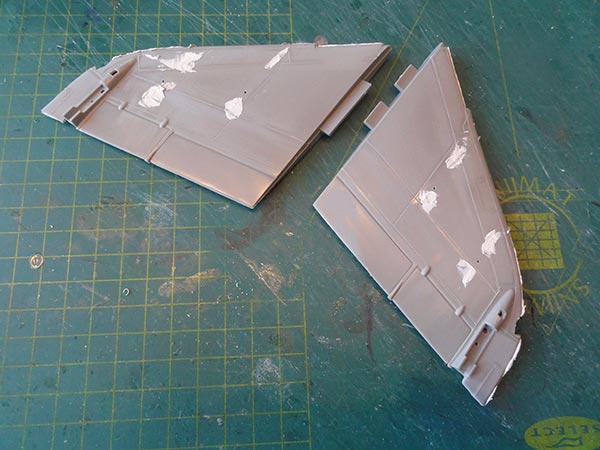
- the horizontal stabilizers have the correct shape but need some putty and sanding as well. It is a good idea to drill holes and use a metal bar running through the fuselage to join the stabilizers and setting these at an "neutral" angle as these tilt a bit for a parked aircraft. Their fixed side plates than also move with them. So fill the rear fuselage locating openings, remove the lugs, sand off the plates from the rear fuselage and make new ones from thin card. These were made using the raised pattern o the kit tail sides e.g. scale drawing. Also drill open some vent holes that are well seen just forward of the horizontal stabilizer on both sides.
- USMC AV-8A had the rounded end tail fairing as per kit. (on other AV-8 aircraft and later Harrier GR there seems to be a RWR antenna here). Drill open some holes in this fairing and tiny knobs.
- when fitting as option the Aden gun pods on the fuselage belly, their gun nozzles can be made to look better by using a piece of tube and drilling the vents open. Alternatively, add not the gun pods but the correct small strakes that are included in the kit and look OK. Any small gaps can be closed with white glue though on a real aircraft, some gaps are sometimes seen.
- the underwing fuel tanks had in operational use their rear fins removed. So on the kit parts cut these off. Adding a bit more detail on the attachment pylons braces also makes these look better.
- nose gear doors can be either open or closed on a parked Harrier and the main gear doors are than closed. The 2 thick small gear doors are better replaced with their mounting stubs removed. The strange nose gear leg gaps can be closed up and with some hydraulics detailed a bit more.
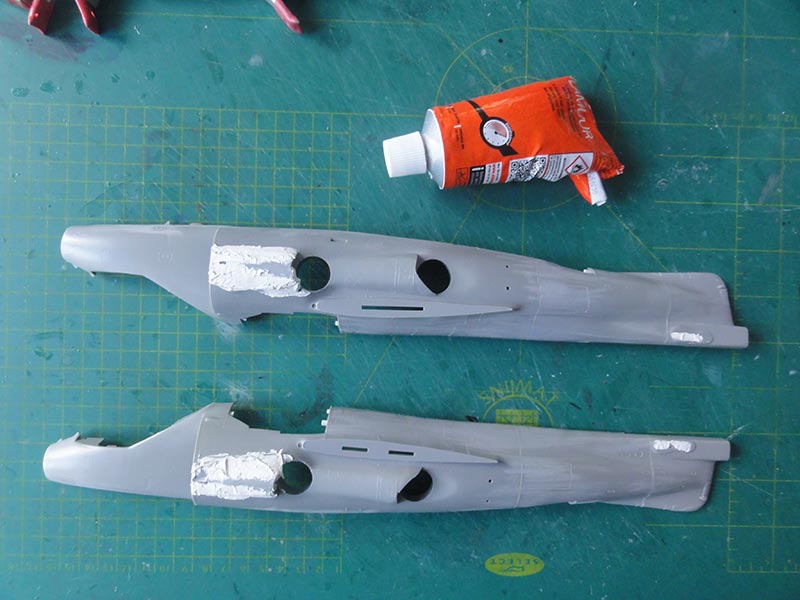
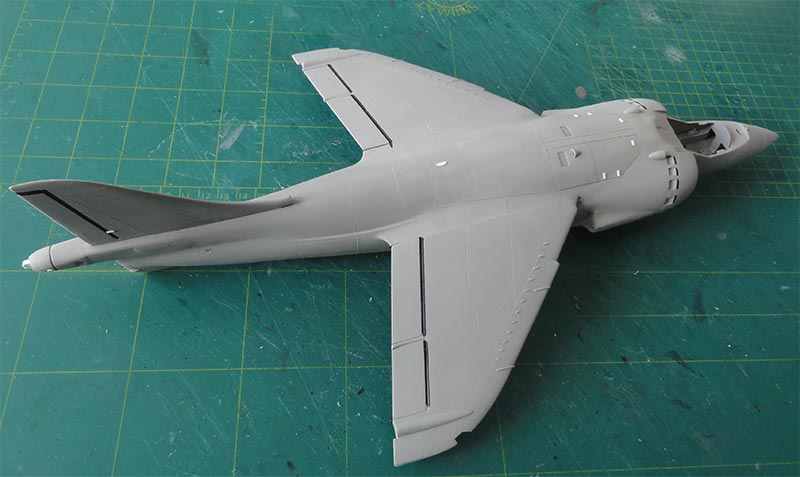
Assembly of the AV-8A is seen here after setting the cockpit bits, the airbrake and the Pegasus engine parts the fuselage was closed. I also added nose weight.
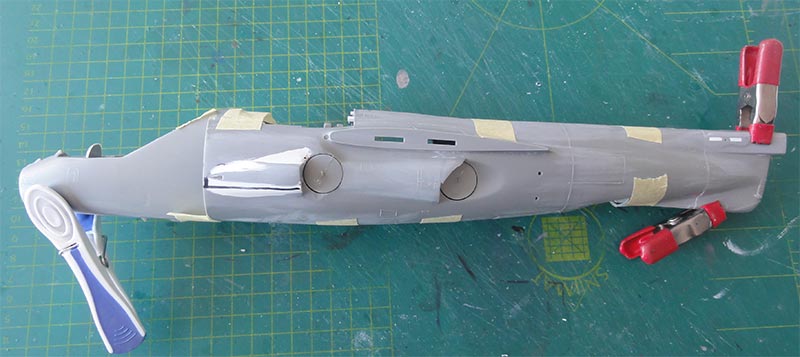
Putty is needed with this kit, particularly the engine hatch which is a seperate part. I added some strip inside the hatch opening to get more strength. The prepared intakes with corrected blow-in doors were set as well, again putty is needed. The drooped down doors are bits of plastic strip.
The wing pylon gaps were closed up as I was not sure if I would install all the pylons.
At the wing-fuselage junctions putty and sanding is needed and make sure the wings have the correct considerable dihedral angle.
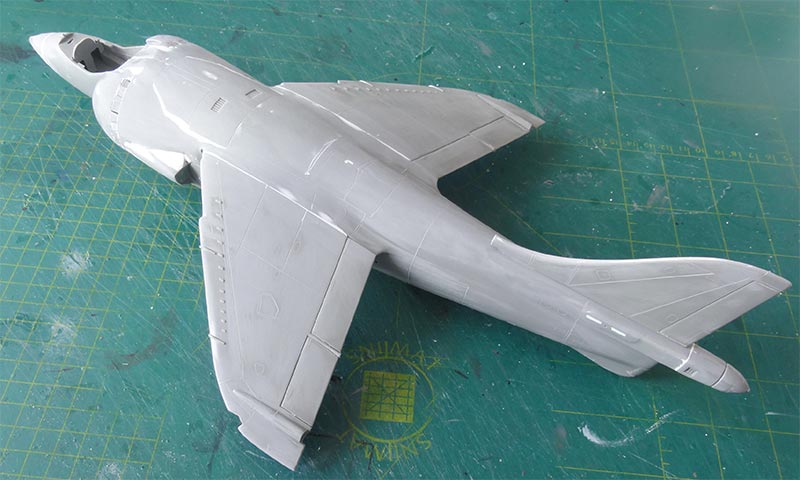
At the vertical tail base is a RAM air intake which is in the kit.
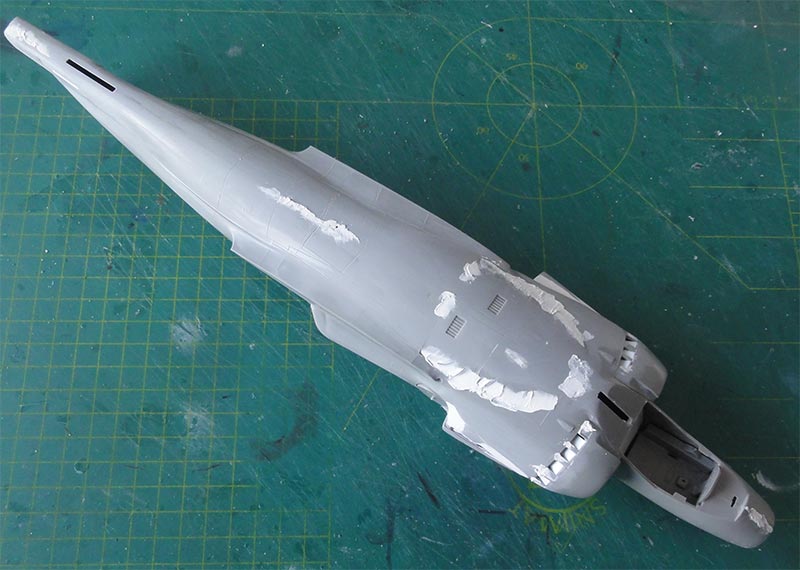
The improved bulges in front of the forward nozzles are seen here having a straight outline. The small intakes aft of the canopy were set.

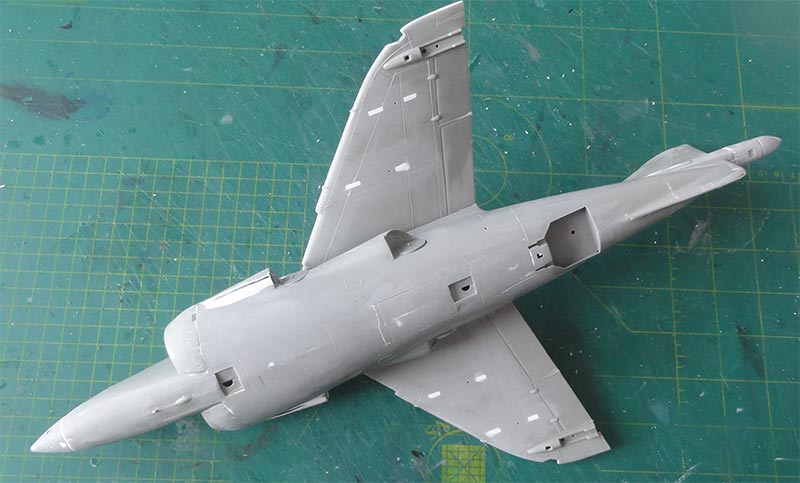
All got a base grey coat airbrushing Revell Aqua 75 grau acrylic. Any imperfections will show up, so some passes with putty and sanding were again needed.
The lower fuselage strakes were set with closing the tiny gaps with white glue as this model would not get Aden gun pods.
A next few things are now done:
- drill open the circular "fire access" holes in the wings at the leading edge junction, which are indented holes in the kit.
(NOTE: the USMC AV-8A had also an air-to-air refuelling light in the left wing leading edge next to the cooling hole).
- re-instate some tiny raised locks at the top fuselage engine hatch; these were moulded on the Revell kit but filling and sanding the hatch had them sanded off.
- saw-in and rescribe the trim tab at the vertical tail. Add a tiny raised stiffener on the right side of the vertical tail just forward of this trim tab.
Further AV-8A notes:
- many USMC AV-8A aircraft later on got low visibility formation lights, add when desired from thin strip.
- many USMC AV-8A also had Sidewinder capability, so make a pylons with adapter/rail and search Sidewinder AIM-9 in the spares box.
NOTE: later on the USMC AV-8A's from 1976 the jet was modified and designated AV-8C it was fitted with "lift improvement devices"; these are strakes on the gun pods and a movable droopable "dam" aft of the nose gear; if no pods were fitted, the AV-8C got other strakes that are larger in size.
- Spanish and thus Thai AV-8A had on the vertical tail a leading edge fairing with an antenna and a small bump on the spine next to the anti-collision light.
On to next [ Page 2... ]
References
Books:
- AV-8 Harrier, Detail & Scale, Part 1 USMC, TAB Books
- Harrier, Bill Gunston, Specialty press
- Harrier in action, no. 58, Squadron Signal publications
- AV-8A NATOPS Flight Manual, NAVAIR 01-AV8A-1, 1975
Brochure:
- the Harrier, an engineering commentary, J.W. Fozard, the Chief designer (Harrier), Hawker Siddeley Aviation ltd., circa 1970
Magazines:
- Harrier SIG IPMS U.K, magazine issue 12, Spring 1998
- Harrier, Aircraft illustrated special, Ian Allan publ.
- Scale Aircraft Modelling, March 2010
- IPMS U.K. SIG Asian Air Arms newsletter #33 about Thailand Harriers
- Scale Aircraft Modelling, Aircraft in detail, August 2002, Vol 24/6, pages 362.. with Sea Harrier drawings of Mike Keep
- Sea Harrier, Andy Evans, Modellers Datafile #11, SAM publications. Recommended! Note: I could only find this book AFTER I had completed my 1/32 Sea Harrier conversion...
Internet:
WIKI:
https://en.wikipedia.org/wiki/Hawker_Siddeley_Harrier
My modelling friend Cees and "me myself" supplied the IPMS NL with many photos for the IPMS Walk Arounds.
With
my good old friend Bas (in 1995, ages ago) I made an
extensive article for the IPMS NL www.ipms.nl about the Harriers and
AV-8. Check out our article that is now a "special" on the IPMS NL
website at:
https://www.ipms.nl/artikelen/specials/harrier
![]()
Check out my 1/32 Sea Harrier modelling report on YouTube..
You can also view the AV-8A report on YouTube

(c) Copyright "designer"/ All rights reserved. Your comments are welcomed by webmaster
Created
July 15, 2022