[ conversion 1/32 Revell kit ]
[ page 3 ]
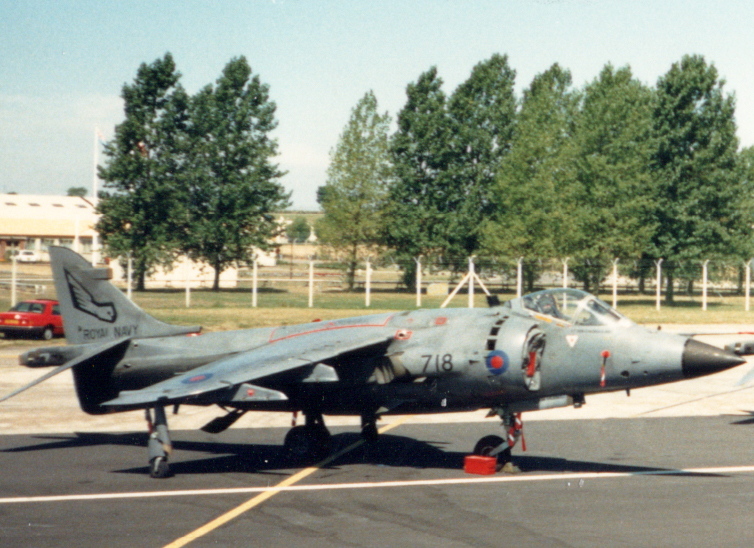
Sea Harrier photo made by me at Fairford during the "open bus" tour
For the Royal Navy Fleet Air Arm (FAA) a navalised Harrier was developed based on the GR.3 and this was the Sea Harrier with Pegasus Mk.104 engine. It got another nose with a raised cockpit floor, a more bubbled rear canopy and a Martin Baker mk.10H ejection seat. Systems were fitted for carrier landings and it got modifications to reduce corrosion by sea water. This was the FRS.1.
The FAA Sea Harrier FRS.1 and the RAF Harrier GR.3 fought in the 1982 Falklands War. They were flown from ships and carriers and the Royal Navy Sea Harriers provided fixed-wing air defence while the RAF Harriers focused on ground-attack missions in support of the advancing British land force at the Falklands.
I wanted a 1/32 scale Sea Harrier FRS.1 so a substantial conversion is needed of the old Revell Harrier kit. The Sea Harrier is also called the SHAR.
page 1
page 2
page 3
page 4
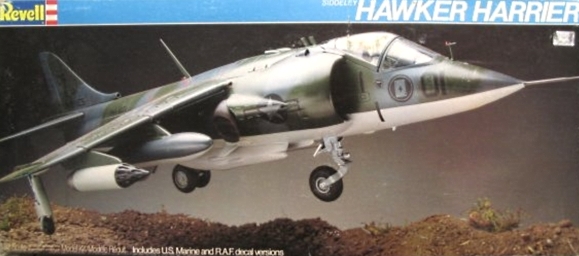
The 1/32 scale Revell USA Harrier kit was discussed on page 1....
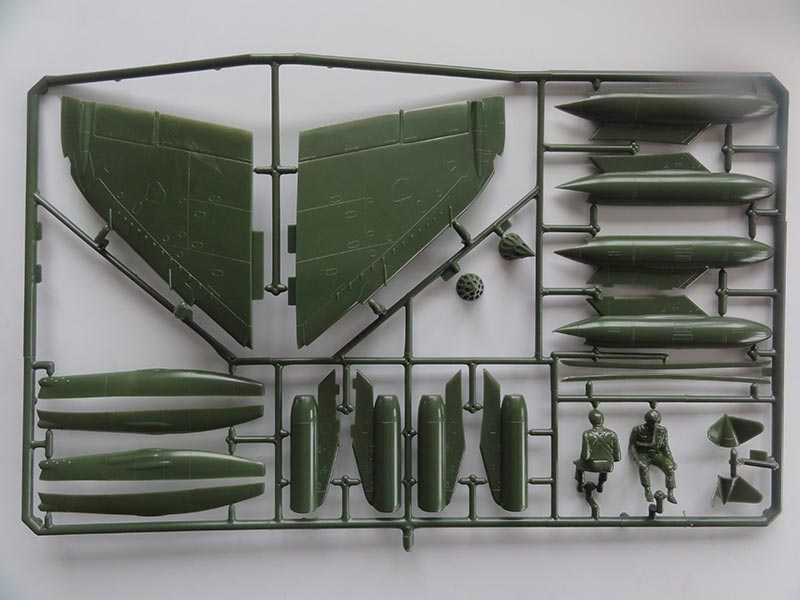
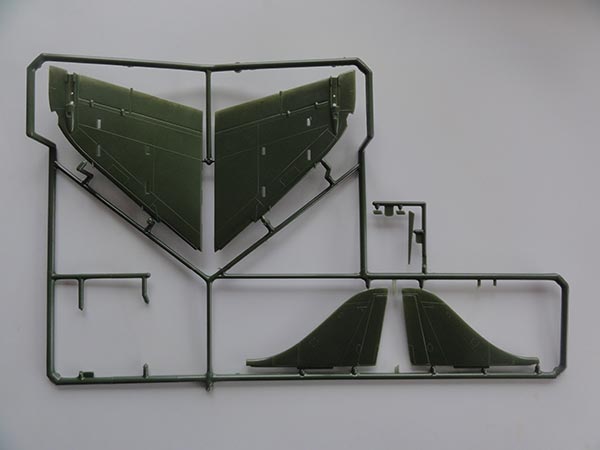
I had bought another kit second hand, some parts were already detached or assembled. The main parts were now in green plastic and seen here:
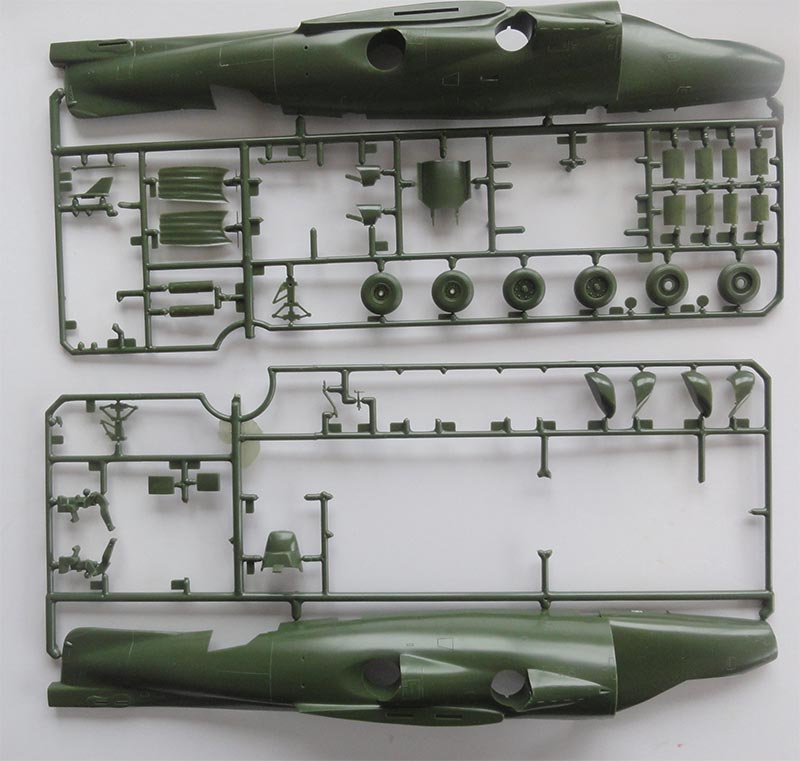

.. with some parts of the second hand kit assembled...
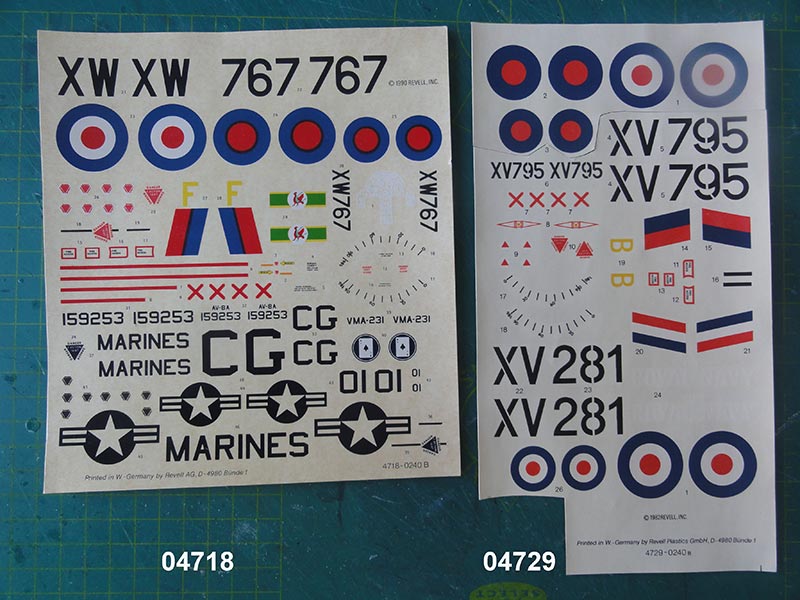
Decals in kit #4729 are different as in the other released kits and simple for RAF Harrier GR.1
On the basic kit many areas need improvements and obviously also a conversion for the Sea Harrier (SHAR). Many improvements were discussed on page 1 so I recommend to look at that page as well.
For example, start again with rescribed the panel lines and than sanding off the raised lines.
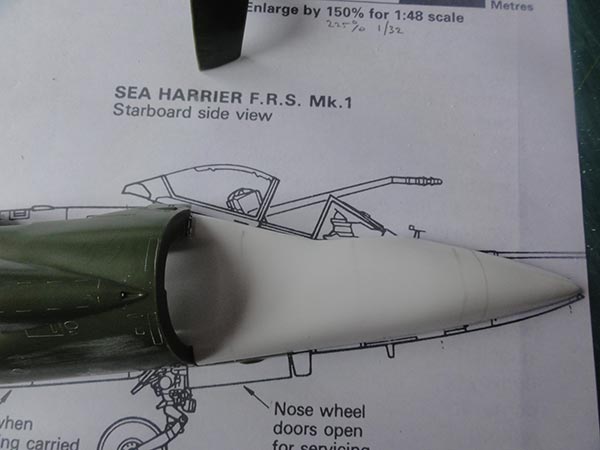
I used the excellent Sea Harrier FRS.1 drawing of Mike Keep found in Scale Aircraft Modelling August 2002 (Vol 24 /6). I enlarged it to 1/32 scale by 72/32 = 225% to have some sort of reference during this SHAR conversion.

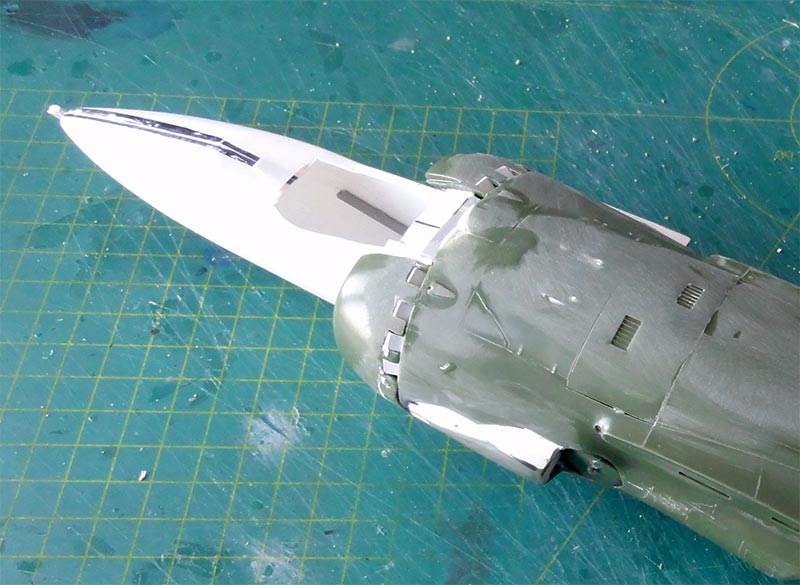
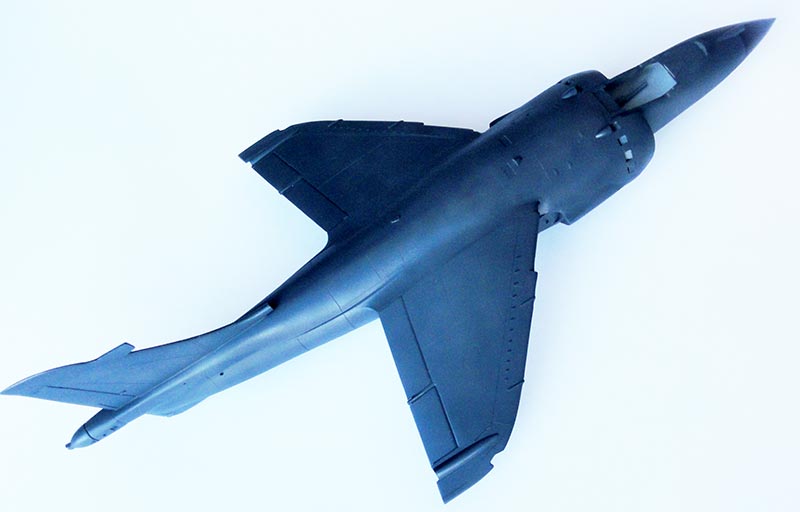
The basic kit fuselage is seen here as compared with the enlarged drawing and the different SHAR nose section is obvious, the most distinctive feature. The SHAR has another nose with a raised cockpit floor.
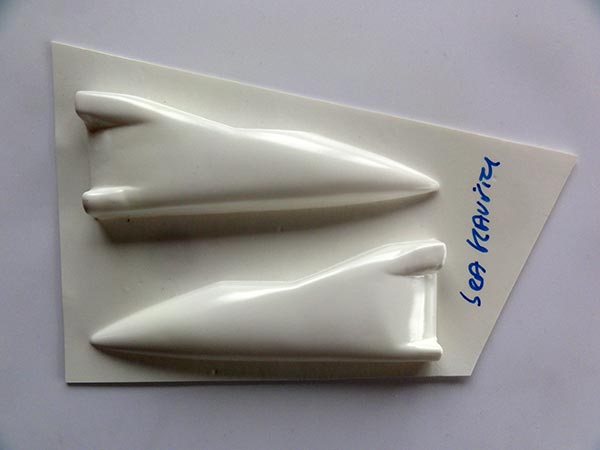
The new SHAR nose was made with an old 1/32 "Tigger" vacuform nose set. Unfortunately the rear bubbled canopy was not provided in my package so this has to be dealt with later on.
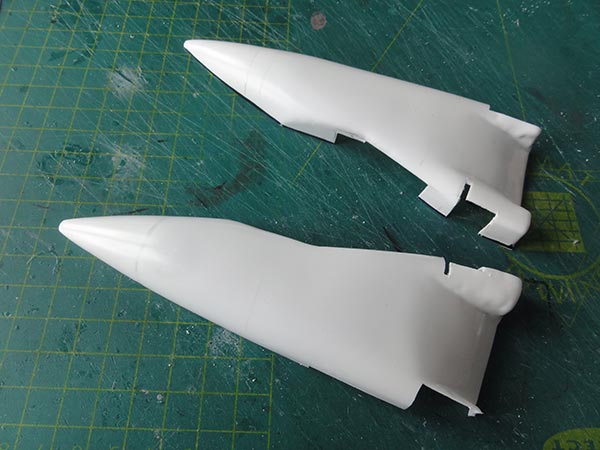
The vacu nose halve shells were marked with a black permanent marker in the corners. The sheet corners were scored with a sharp knife. With scissors remove large portions of the sheet and than break away very carefully from the sheet. Than sand wet on a flat piece of 250 thou sand paper until the black lines look good and the 2 halves will meet in outline.
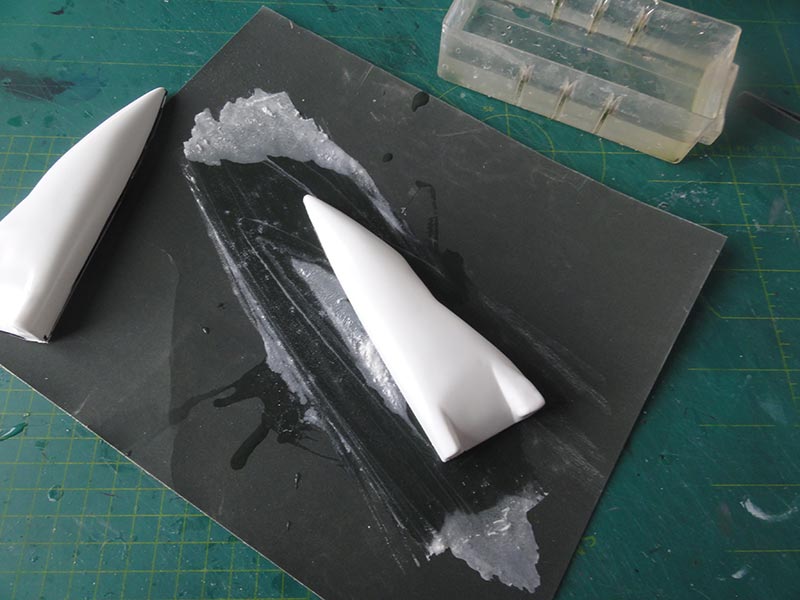
The nose halves also have an inside air flow guidance section, this was retained. It was decided to retain the curved air intake section of each vacu nose halve. It keeps the shape as needed and in each vacu nose. (They will interfere a bit with the kit Pegasus engine front so this engine front was cut off). Laying the 2 halves on the drawings shows that they have quite good contours.

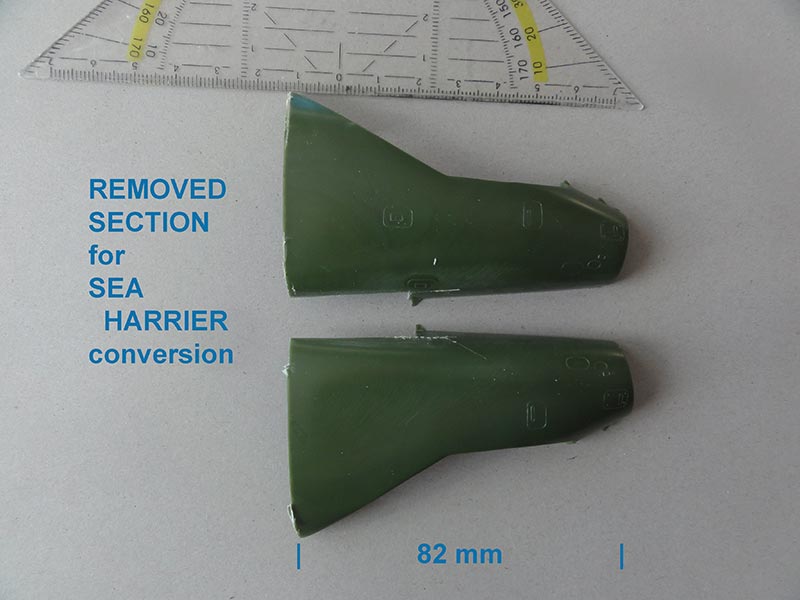
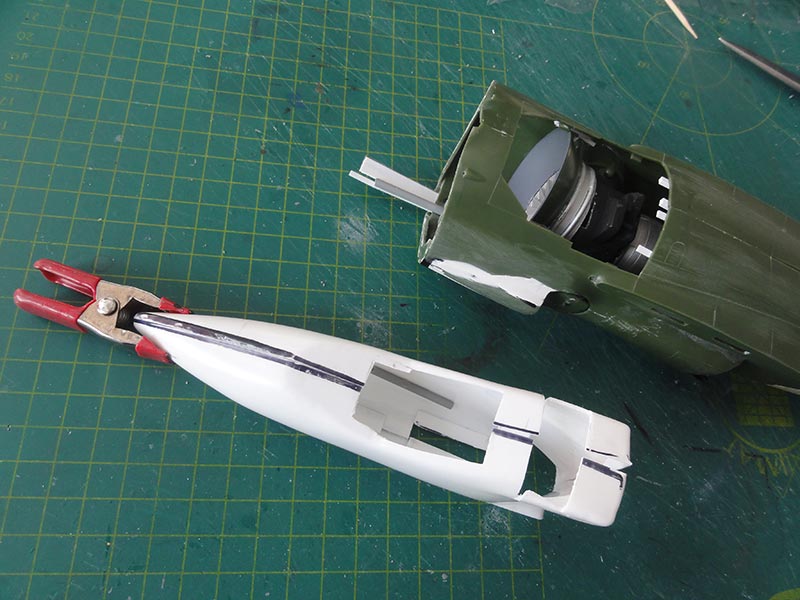
Crafting the new nose on the old Revell Harrier took quite some time sorting out exactly what to do. A lot of measuring is needed before making the razor cuts to remove the standard kit nose from each fuselage halve.
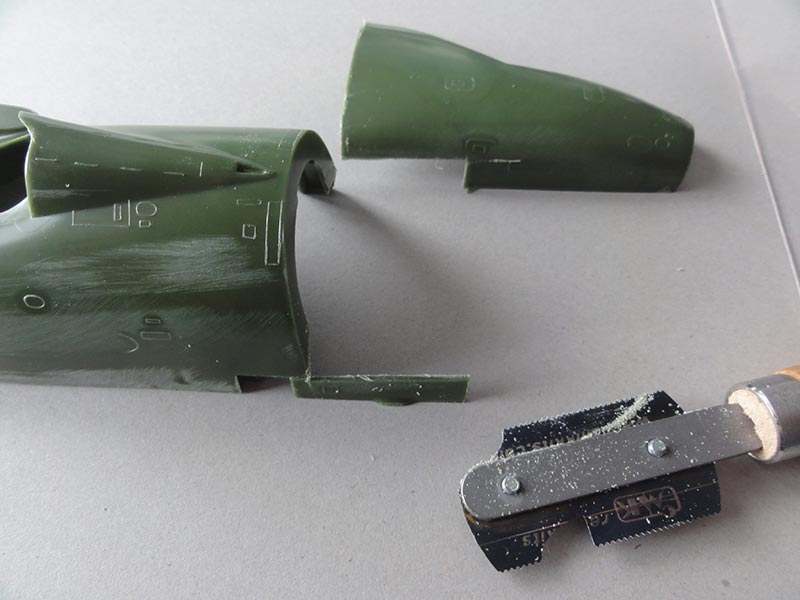
The razor cut line runs vertical on each fuselage halve 82 mm measured from the lower front fuselage nose edge. I tried to keep a section at the nose gear door for added strength.
I made a slot at the top of the curved vacu section to get a more strong joint later on.
The cockpit opening should also be opened up at this stage in both vacu halves. I did not open up the front nose gear doors, assuming these can be either closed or open depending on servicing.
Note that I did not have other vacu transparancies so the kit wind shield will be used. A small lower wind shield fairing should be made from scrap; the canopy also needs modification, to be covered later on.
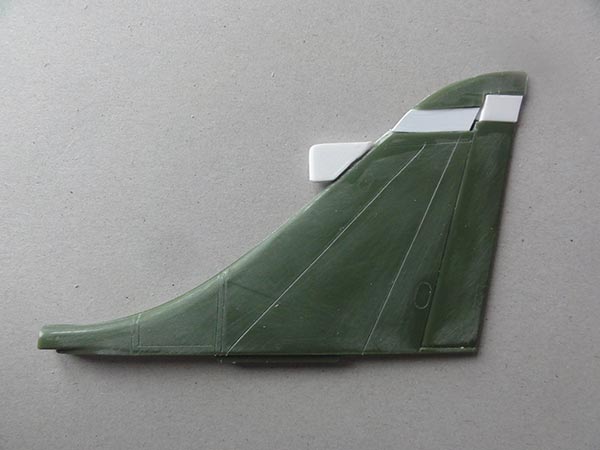
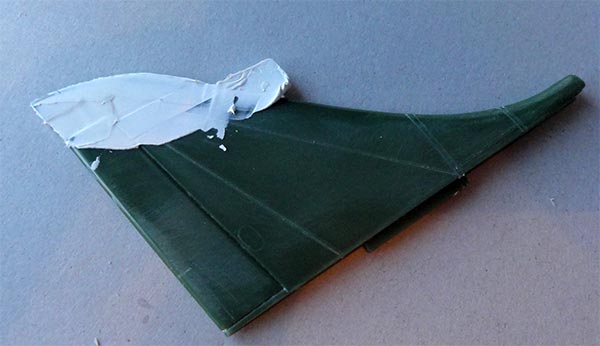
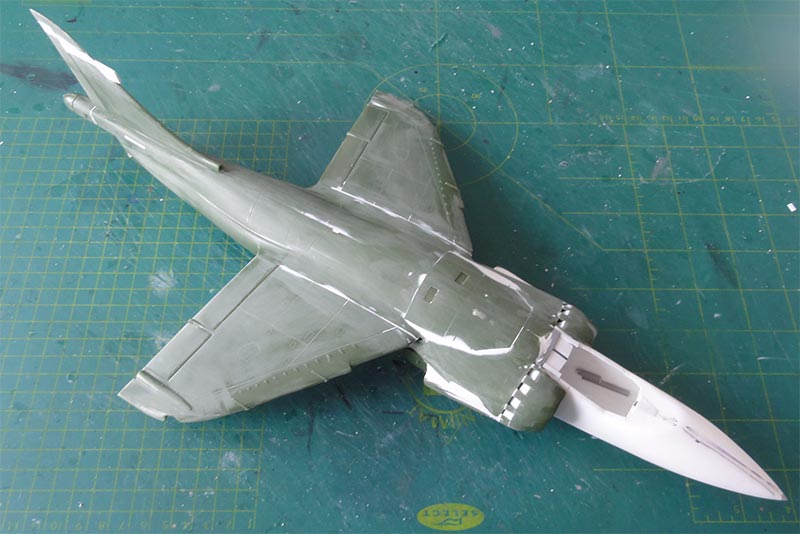
The next step was enlarging the vertical tail. The SHAR had an extended fin tip of about 4 mm in 1/32 (like the GR.3). The kit part is seen here...

A cut was made, card inserted and puttied and sanded. Also an ECM Radar Warning (RWR) fairing at the vertical tail leading edge is needed.
The wing parts need no further modification, in fact the looked surprisingly good. I only closed up the slots for the pylons.
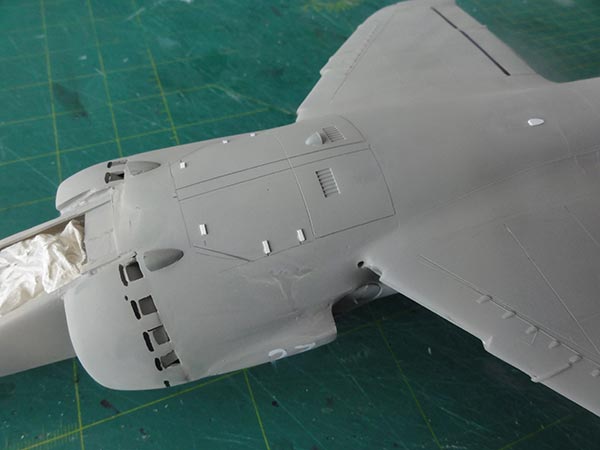
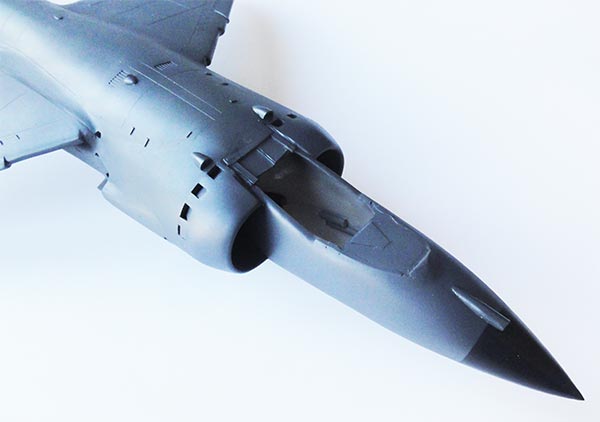
Next the fuselage rear halves need as with the standard Harrier again a different buldge profile in front of the front nozzles. The kit has the Kestrel / pre-production shapes, this was discussed on page 1. Making symmetrical shapes left and right is not that easy but doing it is really needed to have a model looking like the Harrier.
The kit has closed moulded engine "blow-in" auxiliary doors that need to be improved. An door is missing as well so needs adding, this was done similarly as described here on page 1.
The kit Pegasus engine front was cut off and the air flow plate and engine fan will be installed a bit more aft as they may interfere with the vacu shells. The prepared fuselage halves were joined after fitting the engine parts and airbrake bay. At the edges of the large open maintenance hatch opening, strips were set. This will strengthen the joints with hatch closed.
(NOTE: I later decided to install intake covers, so some interior work could have been skipped).
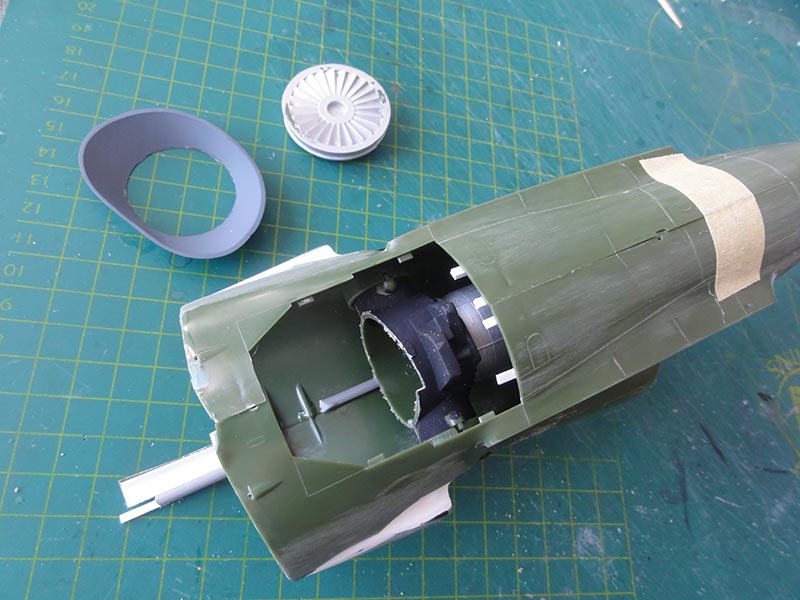
Note the changed shape and the fan and flow plate set....
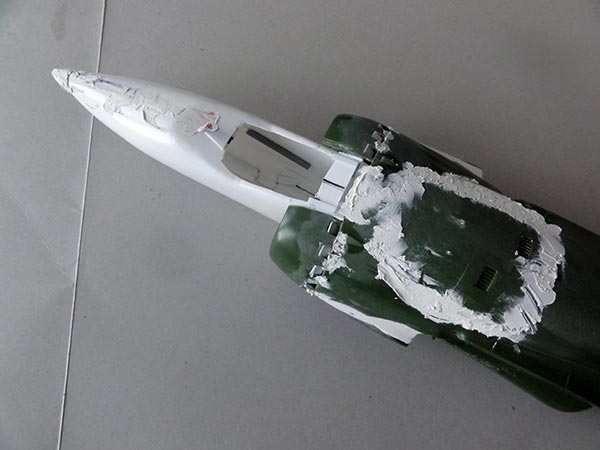
The vacu nose needs a cockpit floor and obviously cockpit details, this will be done later on.
With tape, the SHAR nose, fairings etc were joined for a check. Joining can be done.
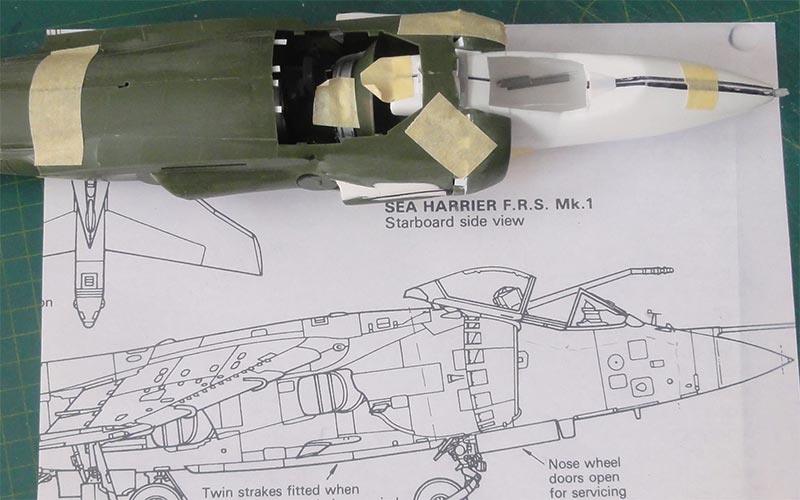
The nose sections were also set making sure to have the correct pose and being symmetrical.
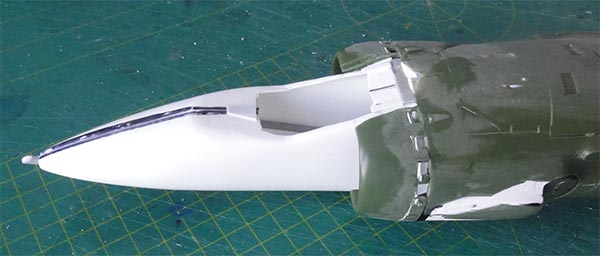
Not only the nose but also the engine top hatch needs putty and a lot of sanding.
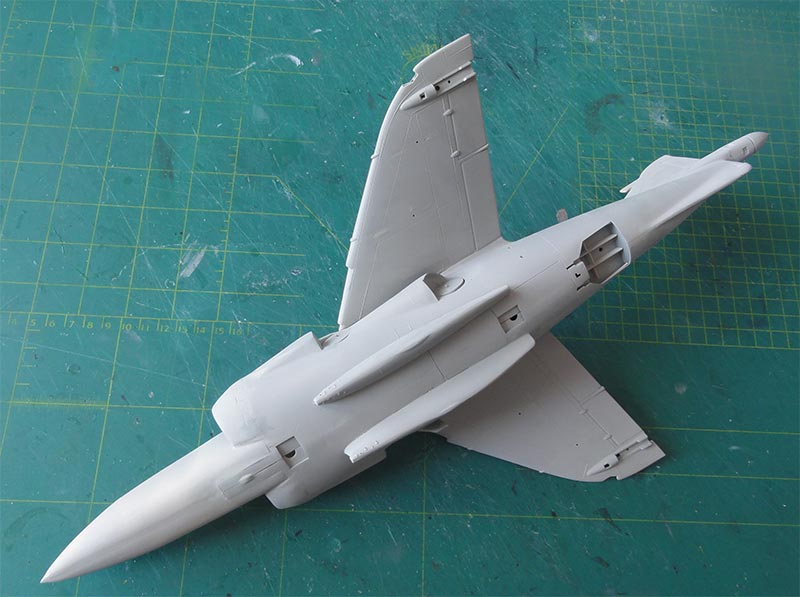
The wing is similar as for the standard Harrier. The wing halves were assembled, had their pylons slots closed up and set at correct anhedral. This was an easy task. Various gaps at the joints were filled with putty and sanded.
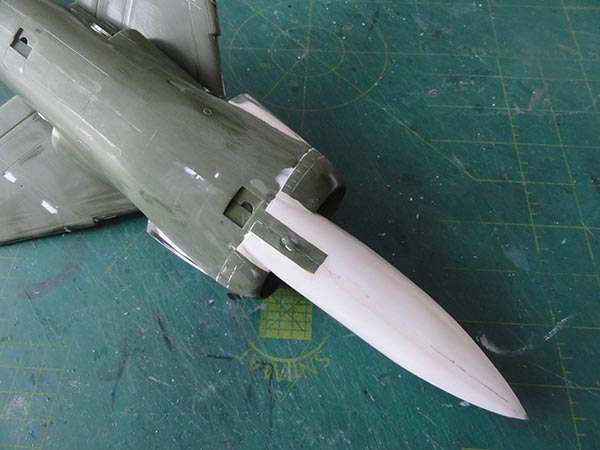
The lower nose is seen here. The nose gear main doors will be kept closed. The small nose gear aft bay was not opened up further to keep strength and a lot is not inside either.
The horizontal stabilizers got a similar treatment with their side plates as discussed on page 1.
Inside the air brake bay, some extra structural detail was added.
On the vertical tail leading edge, a small section of curved strip was set. It is a HF antenna and the strip has a black edge.
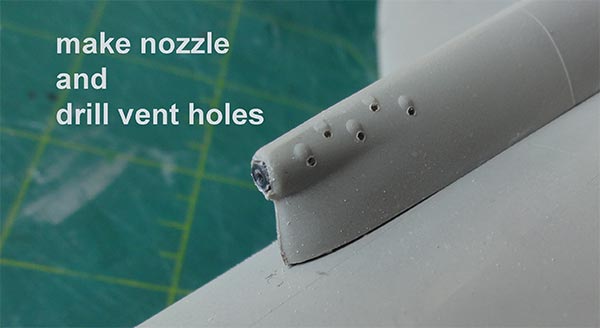
The 2 gun pods below the mid fuselage were installed after their gun vent holes and gun nozzle firing opening were all drilled open. A nozzle was made from a plastic pipe. Small gaps with the fuselage were closed with white glue.
The main assembly was complete and the model got a base grey coat airbrushing Revell Aqua 75 steingrau acrylic.

Any imperfections were repaired with putty and sanding and it also helps as primer for the paint coats. The other bits like stabilizers, gear doors etc were not forgotten and also got this primer.
Again, as described on page 1, the small engine hatch locks and smaller bits were set and holes drilled open like the circular "fire access" holes in the wing. (NOTE: some of the Jet control openings still should be drilled open).
For the SHAR pitot tube, a nose fairing was set on the nose made from scrap. The kit wind shield will be used and has a flat front. This means that the small fairing should be added on the vacu nose; all was made from card and putty.

The main airframe parts were now ready for the colour scheme.
I wanted to make a Sea Harrier (SHAR) FRS.1 as used during the Falklands War in 1982. After the outbreak of the war and the occupation of the Falkland islands the British Government decided to send armed forces to retake the Falkland islands. Along the aircraft used were some 20 Sea Harriers FRS.1. The first 12 SHARs were carried on the HMS Hermes carrier and initial 8 SHARs with HMS Invincible.

The SHARs had in the U.K. their standard Extra Dark Sea Grey BSC381C: 640 with white lower surfaces peacetime scheme but during the voyage to the South Atlantic the white surfaces were overpainted. The large serial numbers, any squadron markings and most stencilling were also overpainted Extra Dark Sea Grey.
The roundels are look different: in the roundels, the white portions were quickly overpainted with the Extra Dark Sea Grey. So the red dot is small. Some special code numbers were also applied, some in dark blue but also black. Almost all deployed SHARs send to the Falklands got this treatment.
On the HMS Hermes this overpainting was done by "brush painting" the Extra Dark Sea Grey over the white surfaces. On the HMS Invincible it seems that on their onboard SHARs this overpainting was done with "sprays" as this carrier had facilities to do so.
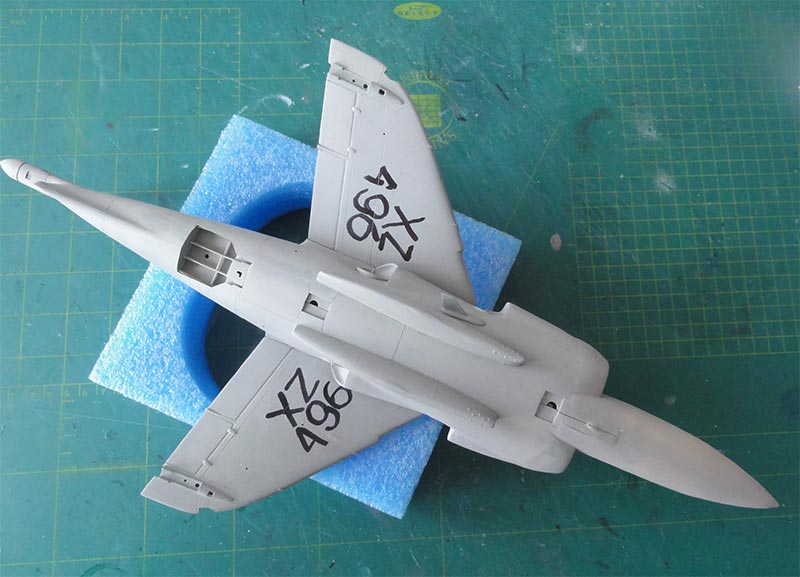
I picked Sea Harrier FRS.1 "XZ496" of no. 800 squadron as deployed from the HMS Hermes in the South Atlantic. L/Cdr Blissett shot down an Argentine A-4C Skyhawk on 21 April May 1982 with a Sidewinder near San Carlos water at the Falklands.

On the model I would obviously airbrush the Extra Dark Sea Grey but wanted to show a bit the "overpainted" large lower wing codes. The black codes for XZ496 were drawn with a permanent marker.
The white Royal Navy titles were roughly brush hand painted first in white....
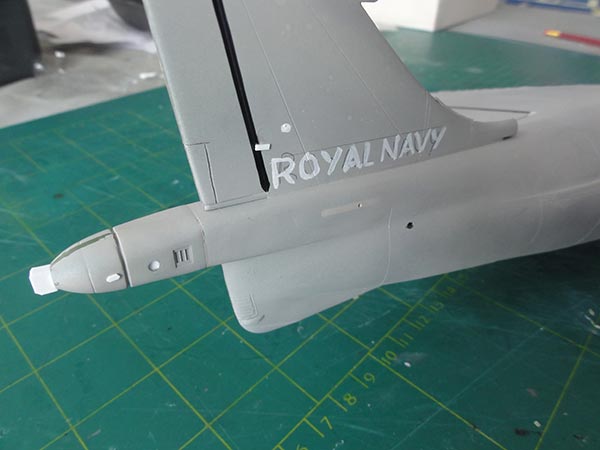
The rudder and flap edges also got black scriber line to give some "depth".
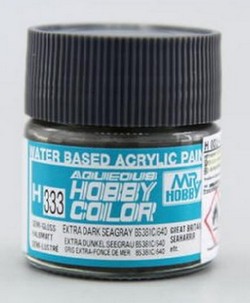
The model than got the Extra Dark Sea Grey (EDSG) overcoat by airbrushing Gunze Sangyo Mr Hobby H333 acrylic paint. On the lower surfaces the paint was not fully airbrushed to cover the codes and not on the tail, showing through a bit as on the Hermes SHARs.
The other bits like stabilizers, gear doors etc were not forgotten.
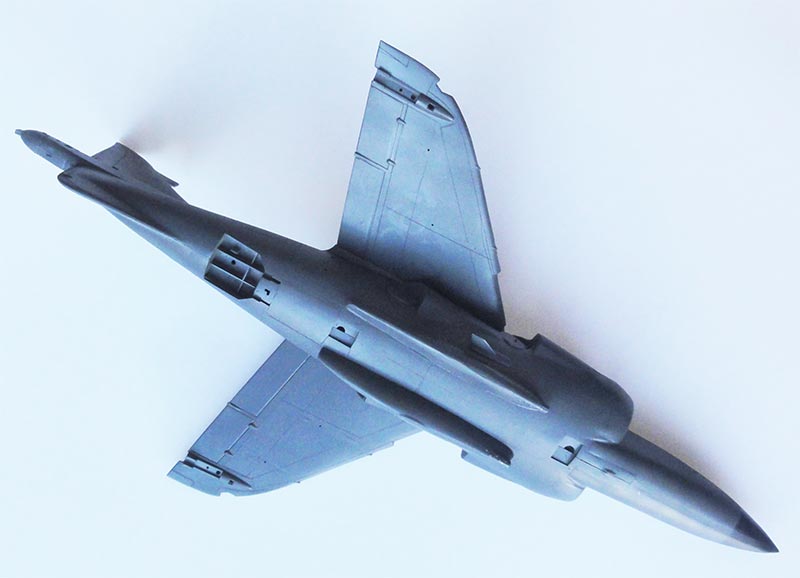
The nose radar section got, after masking, a black nose and the overall model now had the correct scheme.
The 1/32 Sea Harrier model can now be further detailed.
On to next [ Page 4.... ]
Back to 1/32 models.......

(c) Copyright "designer"/ All rights reserved. Your comments are welcomed by webmaster
Created
August 18, 2022