in 1/32 scale
[ page 1 ]
1/32 scale REVELL Eurocopter EC-135 helicopter: old and new kit
The normal EC-135 cabin has 3 side windows (incl. forward door) and accommodation for the pilot in the right forward seat and five to seven passengers. Two pilots are also possible. The cabin has sliding doors in the cabine but also depending on customer needs, various configurations are possible such as clam shell doors at the rear. Fitting can be for MedeVac and Police duties with various equipment. Military versions have designation EC-635.
Various versions were developed. Designations "P" with Pratt and Whitney engines and "T" with Turbomeca engines.
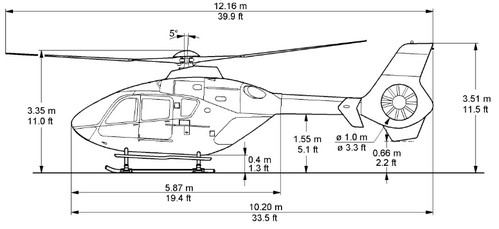
The EC-135 P1 had PW206 engines and the T1 Turbomeca Arrius 2B1 engines. The main rotor diameter is 10,2 meters and fenestron diameter 1,0 m.
Eurocopter is from 2014 part of Airbus Industries, the large European aerospace consortium, and a "renaming" was done with H- type designations; the EC-135 is now redesignated H135. The main rotor is unchanged with diameter is 10,2 meters and fenestron diameter 1,0 m.
The EC-135 T2 / P2 from 2011 with PW206B2 has a bit more powerfull transmission and the T2 the Arrius 2B2 engines; the P2+ has system upgrades such as FADEC with higher take-off weight and the same applies for the T2+. The designation for the military version is EC-635 P2e/ T2e (now H135M P2e/ T2e).
The EC-135 P3 from 2014 has more powerfull PW206B3 engines enabling higher take off weights as well as the T3 with Arriel 2B2Plus engines requiring an enlarged main rotor of 10,4 m diameter. It also features a different tail layout without the end-plates on the horizontal stabilizer. Also the bump below the fenestron is no longer present and the fenestron housing is a bit fatter but still a 1,00 m diameter. Full digital glass cockpit is now standard.
Different skid types on the EC-135 can be installed as some have longer legs so sit higher. Optional are also Inlet barrier filters (IBF) for the engines.
It can also be fitted for military tasks with designation H135M. Eurocopter later on developed the larger EC-145.
Page 2
Page 3
ANWB page

![]()
The Dutch Government
ordered end 2007 for the Dutch National Police (KLPD: korps landelijke
politie diensten) six EC-135 helicopters. Initially the KLPD ordered the
MDD-902 helicopter but this was heavily overweight and could not meet mission required,
so this order was cancelled. Instead, the EC-135 was ordered. The EC-135's
are equipped with two Pratt &Whitney Canada PW206-B2 engines, have
a maximum take-off weight of 2,910 kg and seating capacity for 1 pilot
+6 crew or 2 pilots +5 crew. Maximum speeds is about 256 km/h and a 600
km range. Special equipment are night-vision goggle compatible cockpits,
FLIR (forward-looking infrared) camera, a video downlink system and a 20-inch
operator screen with “picture in picture” system. The first chopper was
delivered mid 2009.
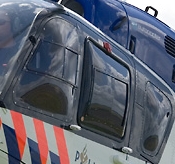
KLPD helicopters
regularly fly over my house (photographed by me):
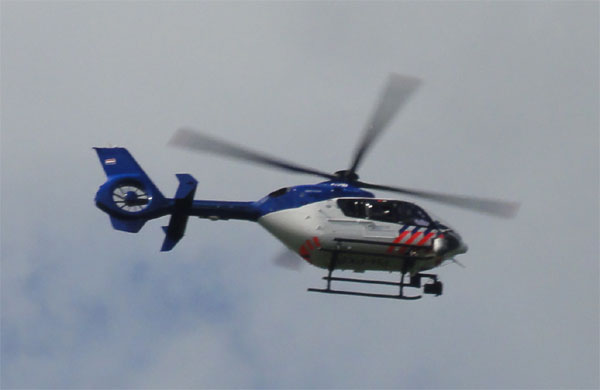
..
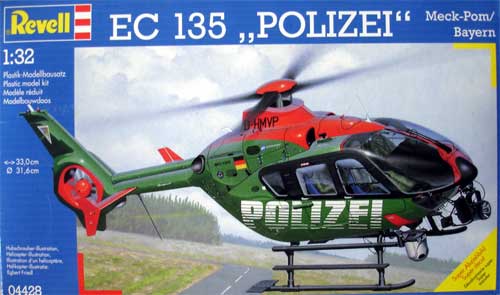
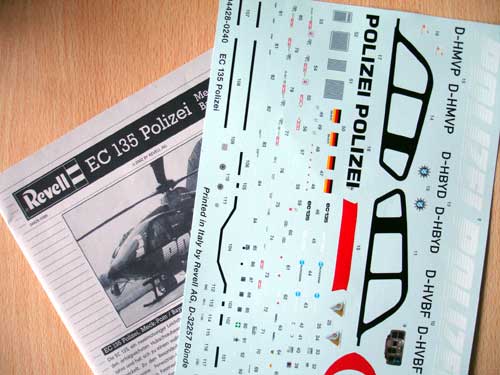
Revell Germany
has issued the EC-135 helicopter in both 1/72 and 1/32 scale kits. Appearing
in various kit boxes for various versions, parts may differ. For the EC-135
of the KLPD, the kit #04428 POLIZEI is the most appropriate one. Many of
the special equipment parts can be found in this kit.
UPDATE: REVELL has issued a brand new 1/32 kit of the EC 135 ADAC (kit # 04659) end 2013. It has much better details and parts. If you can, buy this newer kit released! It is discussed on page 2....
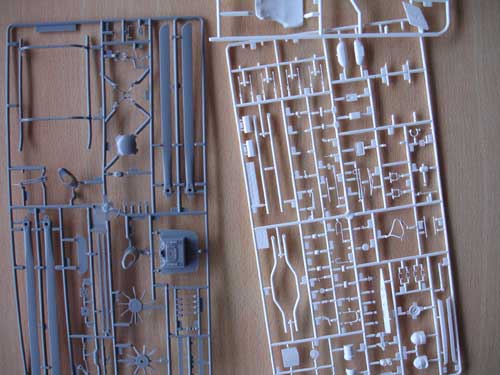
Parts detailing varies in the kit
sprues. Some parts are quite basic, whereas other parts are included in
new sprues with much more detail. Several parts are rather rough, the moulds
not being very good after so many years.
Some older parts are also replaced
with some newer sprues.
The decals are excellent, but for
the KLPD home made decals are required (more in that later on...).
Kit assembly was done quite straight
forward. It was decided to limit the build effort on this kit, you can
not spend hunderds of hours for each model. For the KLPD helo's, only some
small changes are applied (see later on in the modelling report...).
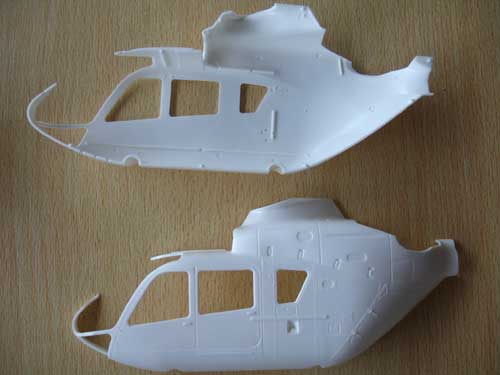
In order to see more on the interior,
it was decided to remove the left doors on the fuselage shell using a very
fine razor saw. The rear door would be slided open aft, the pilot door
would turn open.
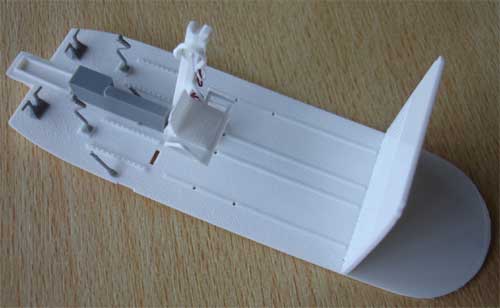
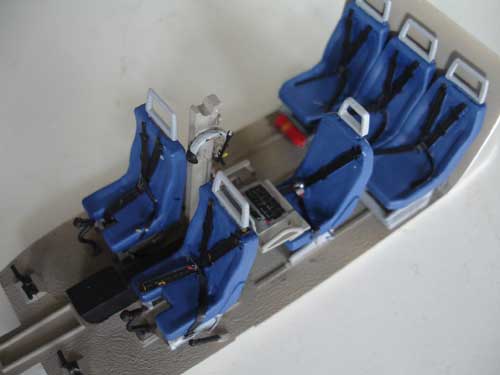
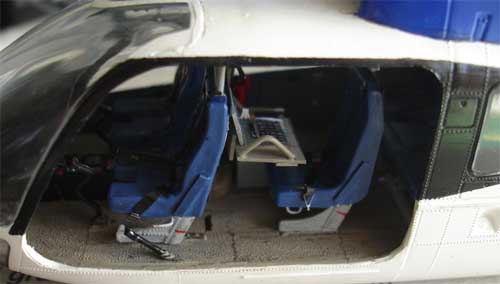
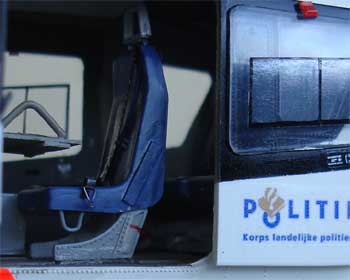
I started obviously with the interior.
The floor of the kit part is 2 mm too wide, so reduce this.
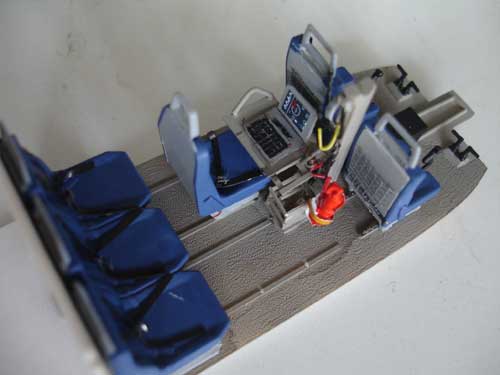
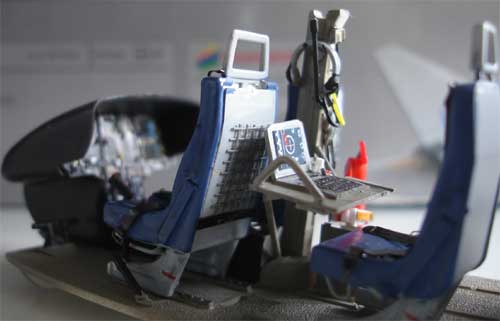
Some scratch modelling was done for
the mission specialist station, adding a computer laptop and screen and
some other details using plastic card and rod. The overall interiors was
sprayed in a base coat of brown-light grey and details painted in various
colours.

 .
. .
.
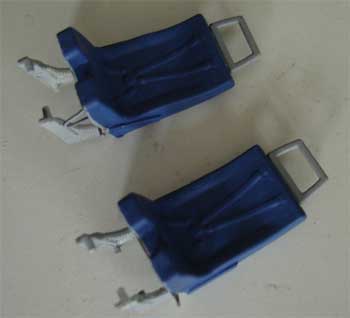
Seat belts were also added and a
fire extinguisher.
 .
.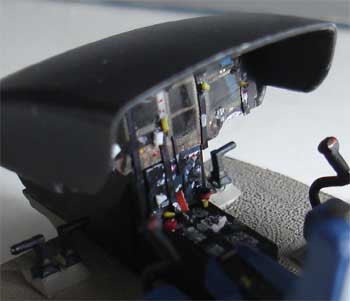
The instrument panel was detailed
with a piece of card, with the dials and instrument displays drilled out
and decals used from the spare box. I had to reduce the height of
the pedestral base part #2 with 2 mm. Do not forget to add heavy led within
the instrument pedestral/console. Otherwise you'll end up with a tail heavy
model.
Also make the collective pitch handles
a bit longer with rod, the kit parts being to small in length.
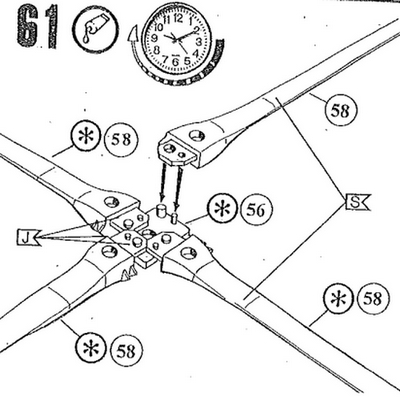
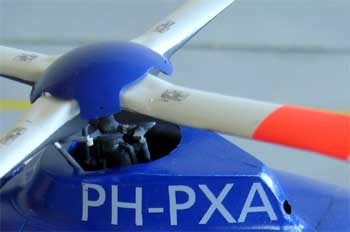
The rotor of the real EC-135 is very
simple, being a rigid hub design. Only minor detailling was needed on the
kit rotor parts. New pitch rods were made, not using part #59.
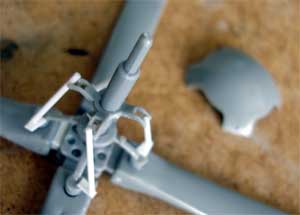
IMPORTANT:
I discovered a few years later that I assembled the rotorblades reversed
with their tips in the wrong rotation direction. This is not very clear
in the Revell instructions...
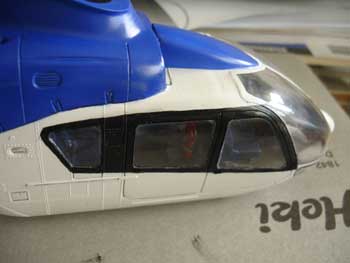
With every helicopter build, I always
spray first the areas around the windows and also the interior sidewalls
before next assembly. So grey sidewalls and black outside window panels
were sprayed (this is better than using the black window decals).
 .
.
It was also decided to insert the
window panels at this point, fixing them with clear fix. This is easier
with no interior fitted yet. The edges of the windows were made black with
a black permanent marker. This will look much better later on and will
hide any glue traces.
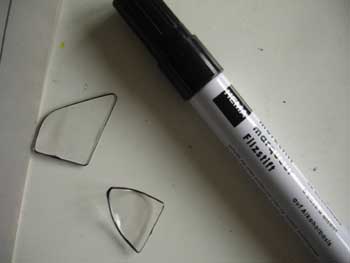
NOTE: on the real KLPD EC-135 curved
hollow windows are seen, these are unfortunately not in the kit. I decided
to simply use the kit windows, making 6 new windows with 6 different moulds
would be a very lot of work.
The real windows also have rectangular
sliding panels. These were suggested using cut out FRISK FILM.
![]()
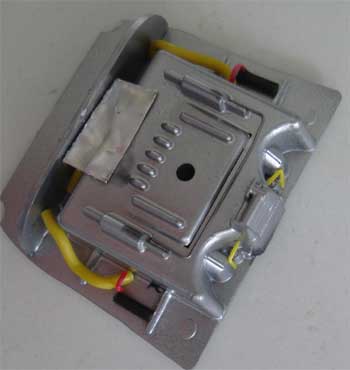
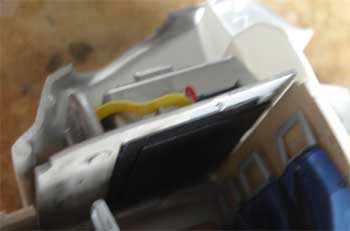
The gear box area was detailed with
some rod and electrical fuse wire.
 .
.
A roof panel was also added. Aft
of the gearbox, also a bulkhead was added from card to close the gap.
Now the fuselage shells were set
together, with the interior.
NOTE: do not glue the forward nose section together, only the aft mating areas. The reason is that the windshield on the kit is TOO WIDE. This can only be nicely corrected by inserting a plastic strip later on between the two halves at the nose later on.
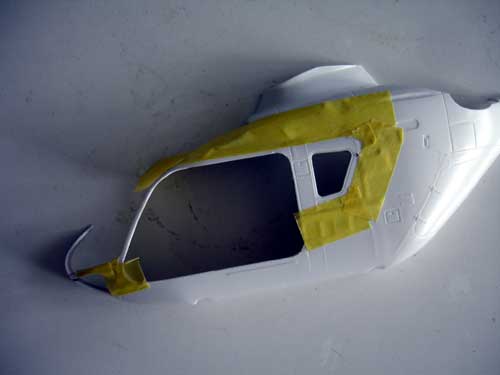
Mask the wind screen to protect it.
Note that at the inner edges, an additional panel is white on the real
EC-135, so mask accordingly.
Test fit the wind screen and
insert
the strip. A large part will be obscured with the nose radar #215. It
was now glued in place, after its edges also being made black
with the marker.
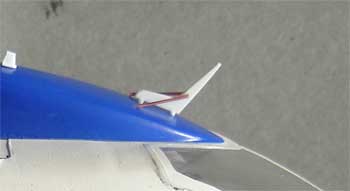
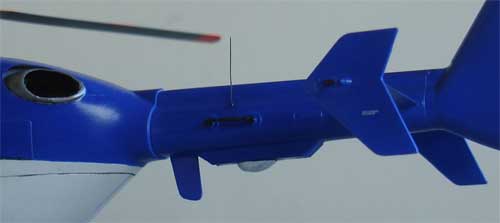
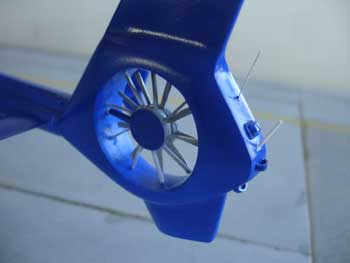
Next, the tail boom was assembled. Do not fit yet the fenestron rotor part #44, first fill the gaps and edges on the tunnel. On the fenestron aixle, I added a round cut plastic circle disk to have a neather appearance. I found that there are tiny recesses for grips and handles at the rear fenestron duct on the real EC-135, but this was left as is and the kit parts were used.
The tailboom on the KLPD helo also has a boxed fairing below the tail. This was made from plastic card. On the fairing there is also a bulge. Carefully study the antenna layout, some parts are not needed.
Next, all the gaps were filled with white putty on the overall kit. This is not a lot of work and only minor sanding was needed. Please note that there is a clear step where the tail boom meets the fuselage, so not extra work needed here. The Revell kit depicts it correctly.
![]()
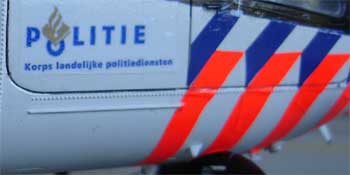
Colouring
The real KLPD EC-135 had white RAL
9003 and Blue RAL 5002 colours, with Dayglow and blue stripes.
The major outside parts were give
a coat of lightgrey, followed by white, using REVELL enamel semi-matt white
#SM301. This is a very good white paint to apply with the airbrush.
For the KLPD blue areas, REVELL blue
#51 is a good match. (later on, a gloss varnish coat will be added). The
various areas were masked off with low tack tape, like the one of TAMIYA.
 ...
...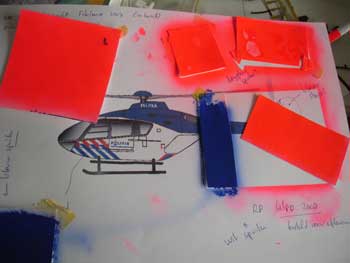
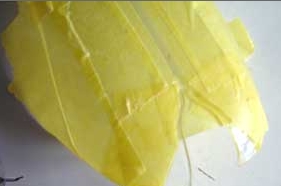
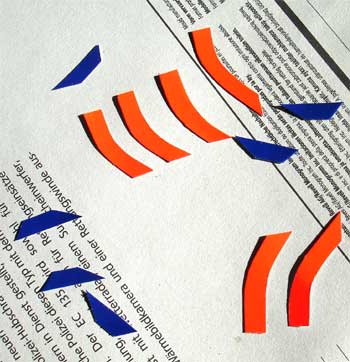
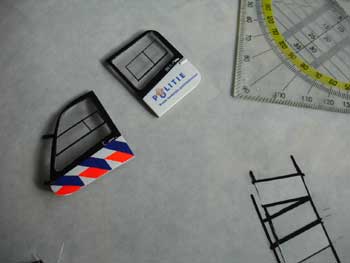
While at it: as the KLPD helo has colourfull striping, I also sprayed white decal (eg. from BareMetal foil or use another brand) also REVELL Blue #51. Also, the dayglow stripes were sprayed on white decal, using REVELL #332 RAL3026.
Also, the rotor blades were not forgotten as they are on the upper areas white with dayglow stripes, so mask and spray accordingly. The lower areas were sprayed black.
Any gap between floor and fuselage
can be closed with white glue painted after drying. Note that the upper
intake fairing is not fitted yet. It was also sprayed blue separately.
The upper intake fairing is seen
fitted here, the gaps at the rear were filled with white glue and painted
blue with a brush.
On this fairing, a cable cutter was
set, made from card and rod. Also below the cockpit nose, another one was
made. Various other details like antennas can be found in the kit as well.
Look carefully and you will find a lot of usefull kit parts.
The exhausts are a bit of a problem
in the kit. I kept them open (not using parts #29), added some internal
piping and painted them black inside.
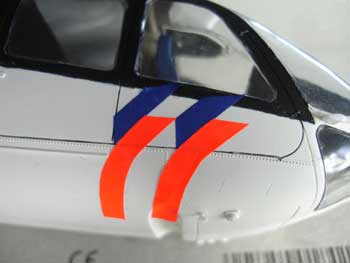
Now it was time to add the blue and
dayglow striping, using the prepared decals. This took a lot of work, using
cut out paper templates for both right and left sides.
NOTE: I found out after two days
work, that on the left side, I reversed the dayglow and blue striping.
As I would keep the door open, I did not correct this error.
 .
.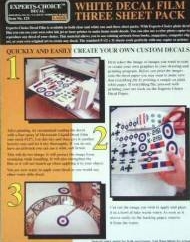
The required KLPD logo's and markings
were downloaded from Internet and printed, in the correct size, a white
decal from BARE METAL FOIL suitable
for Inktjet printers at 2400 DPI.
The registration below the fuselage
with also printed on white decal.
These decals were protected with
3 airbrushed coats of JOHNSON FUTURE/ PLEDGE.
![]()
The white KLPD registration numbers
I made myself and the decals were ordered from a ALPS printer decals
supplier. The font is Frutiger, with Frobisher font looking very similar.
I have some spares left, if you need
some drop me an email...
 ..
..
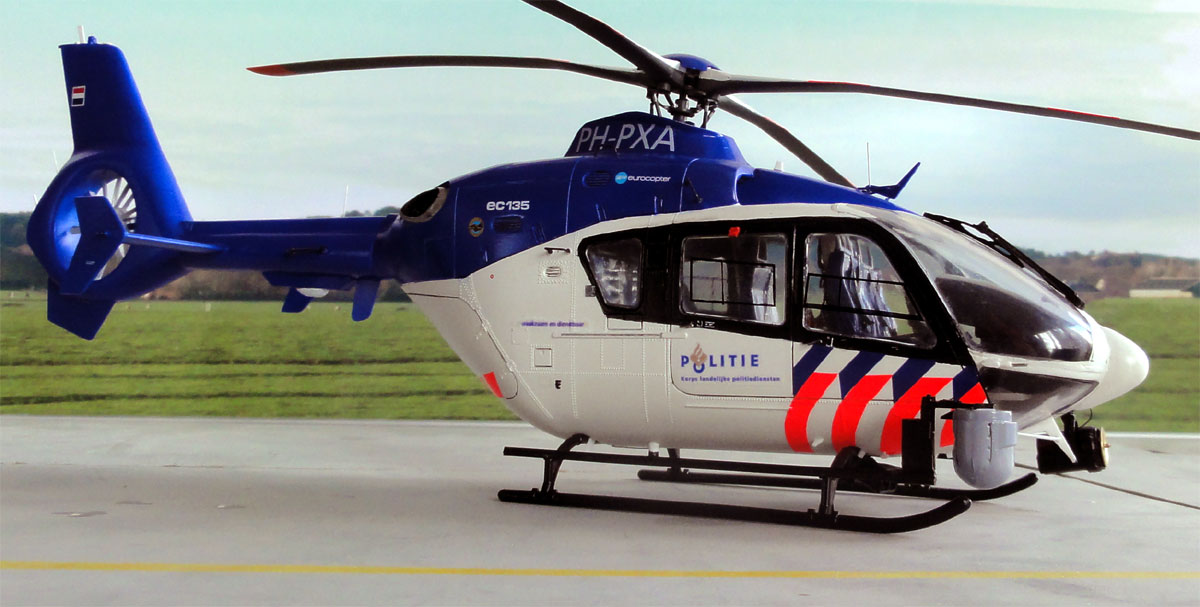
the ALPS printed registration
PH-PXA
 ..
..
On this left photo, you see also
the rectangular sliding panels on the windows, made from FRISK FILM.
The kit has several options for the skid. I used the lower skid parts. It is not indicated in the instructions, but still is in the sprues! The skid was painted black.
Some gaps were closed on the lower
fuselage area with some filler needed. A also added a flat piece of cart
at the retractable landing light (decal 24).
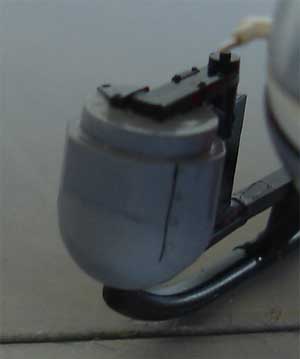
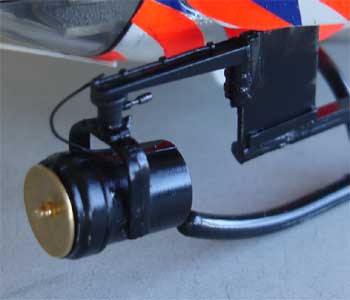
The FLIR turret and search lights
are also in the kit, the real KLPD EC-135 is also often seen flying without
them. If you use them, you will need to adjust their attachment structure,
leaving out parts like #244 and 245. I used card instead.
 .
.
FLIR and left search light, with
part #250 for the search light reduced in height.
Final assembly was now done, adding
the better windscreen wipers #216 also in the kit. Below, the search light
can be seen as well. The various smaller parts were added and painted.
Particularly on the lower fuselage, various details were added. Hard to
describe, check pictures. The pitots #176 + 177 were refined as well. The
black loud speakers are in the kit.
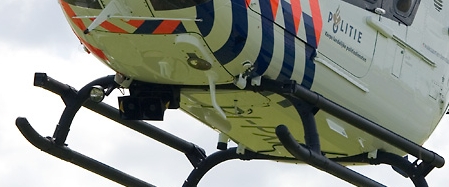
some
pictures of the real KLPD EC-135, here without the FLIR and search light
The grips and handles were replaced using plastic rod. Antenna #228 was repositioned. (no hoist and parts like the large wire antennas #224 are needed on the KLPD helo).
The model was not weathered, being
brand new and being kept in splendid condition bij the support crew.
Here the sliding rear door is seen.
The kit has the various markings, the white registration and logos'can
be seen as well. At the rear clamm shell doors, some dayglow - blue striping
was also added.
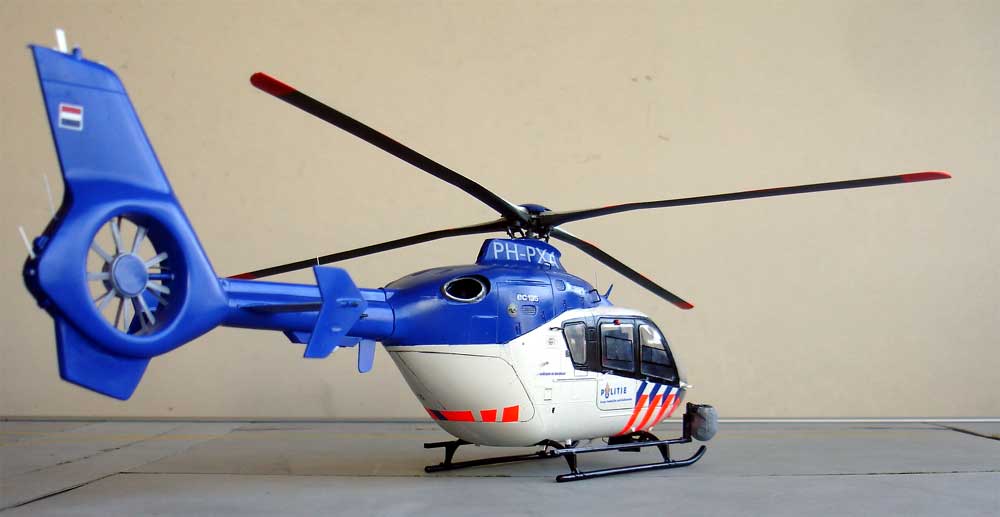
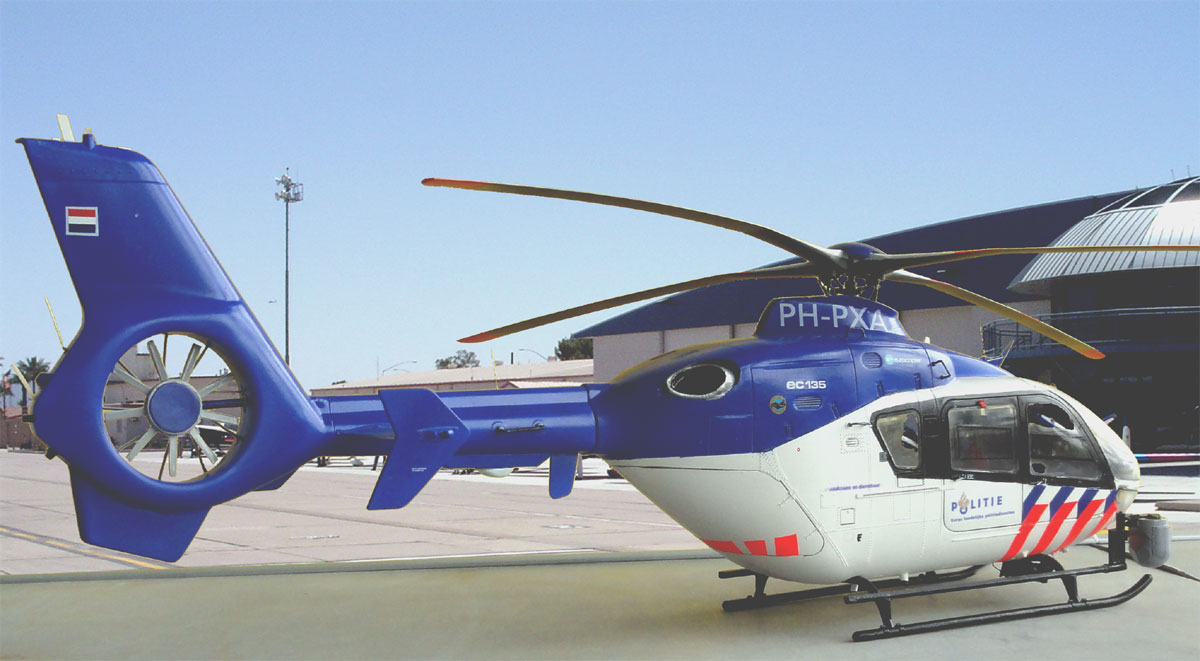
After assembly,decalling and finshing,
the model was almost ready. The model got a couple of clear gloss coats
of JOHNSON FUTURE/ PLEDGE.
![]()
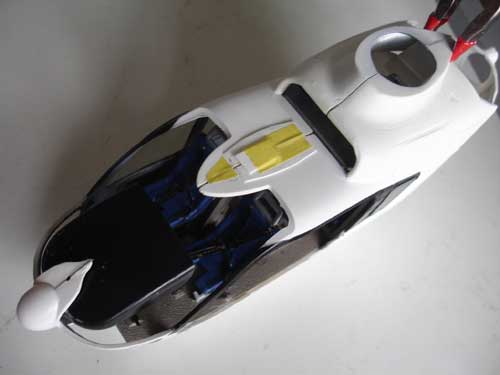
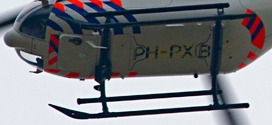
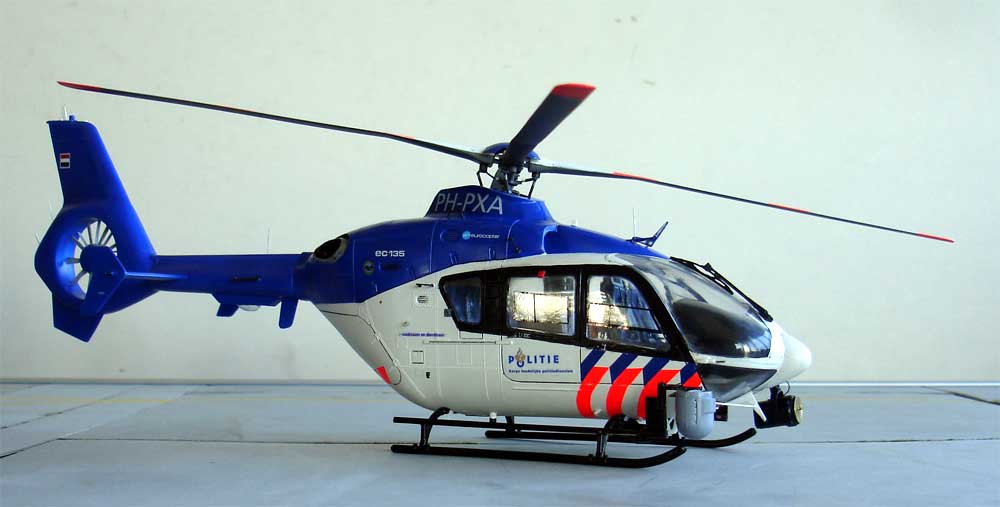
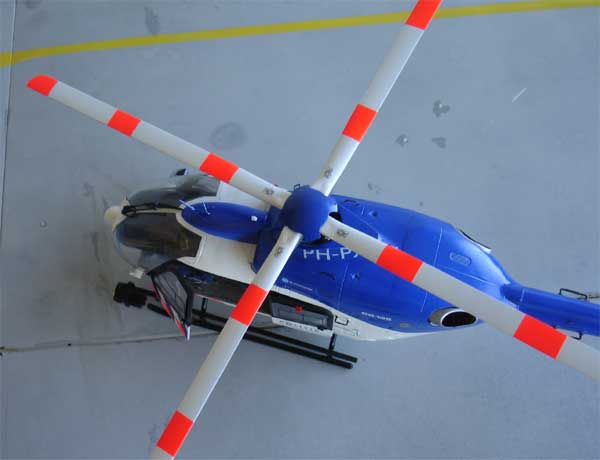
Some views of the finished model....
Note the carefully bended rotor blades....
 ..
..![]()
..
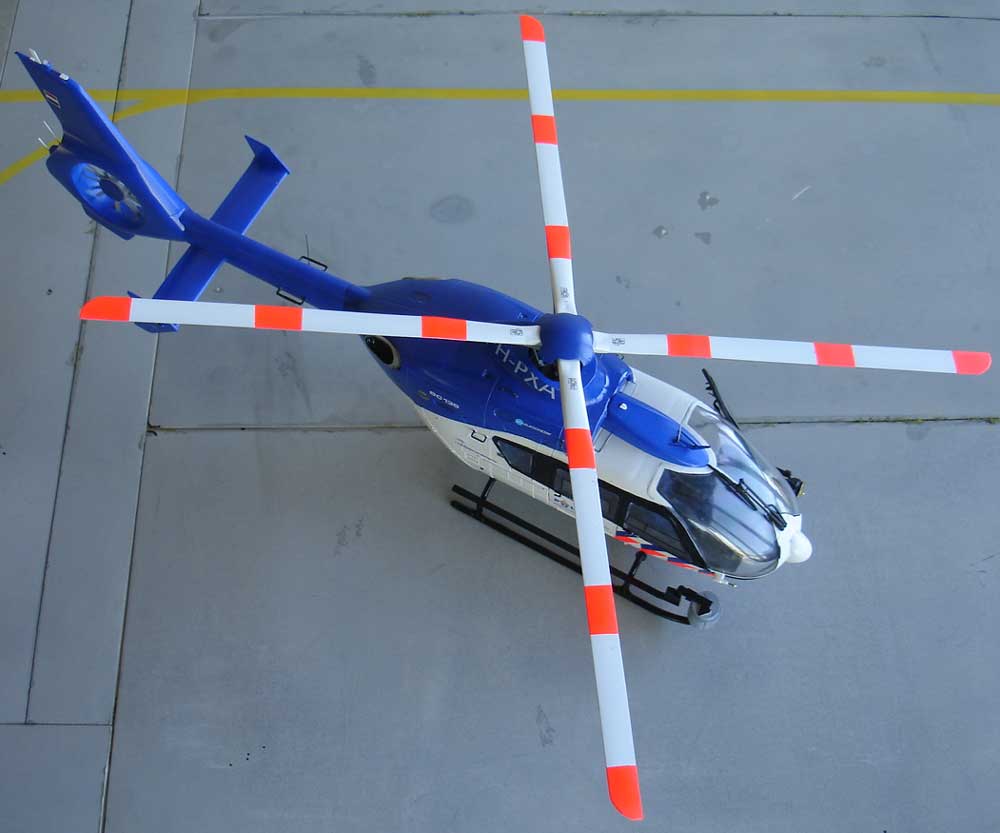
Upper views
A nice addition in the 1/32 scale
model collection.
On to next [ Page 2 ..]
http://www.politie.nl/KLPD/
http://www.youtube.com/watch?v=mR-TQJ8BtgM
- Wikipedia: https://en.wikipedia.org/wiki/Eurocopter_EC135
- My EC-135 walk around of the ANWB PH-EMS on the IPMS.NL website
- AIRBUS/ Eurocopter official website
Back to 1/32 Models.......
(c) Copyright "designer"/ All rights reserved. Your comments are welcomed by webmaster