[ page 1 ]
1/32 scale Eurocopter EC-145 / Airbus H145
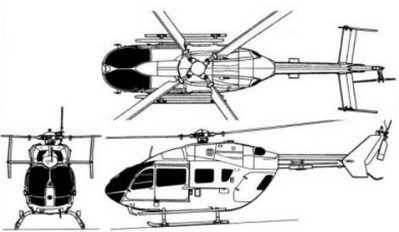
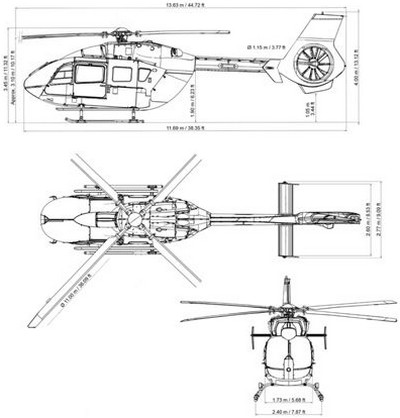
The Eurocopter consortium developed using BK-117 experience, with the Kawasiki Heavy Industries the twin engined EC-145 in the 1990s. The BK-117 C-2, now referred to as the EC-145, got a longer and slightly wider fuselage and thus bigger cabin as compared to the EC-135. The cabin has 2 forward stations for pilots/observer and up to 9 passenger seats. It has an extra window on each side behind the sliding entry doors. Also new systems were used. At the rear of the cabin, 2 clam shell doors also provide access. The engine is a pair of Turbomeca Arriel 1E2 and main rotor diameter 11,00 m.
 <T1
<T1Initially, the EC-145 T1 had a conventional tail rotor of 1,96 m diameter but later versions got the fenestron layout that was also used by Aerospatiale in its Gazelle and Dauphin helicopter. Now in the fenestron, the tailrotor is enclosed in a tail fairing that improves safety on the ground and gives less noise.
The U.S. Army uses the military transport version of the EC-145 T1, called the UH-72 Lakota with first delivery in early 2007.
 <T2
<T2The EC-145 was further developed with a Fenestron tail layout. This EC-145 T2 also got stronger engines such as the Turbomeca Arriel 2E and improved rotor system. The main rotor diameter is still 11,00 m with the fenestron diameter 1,15 m. The fenestron has its blades are irregularly spaced to reduce interference and thus noise. Digital avionics were installed and a 4-axis autopilot. There are many cabin layouts possible with additional systems to fill the role of emergency / ambulance, troop carrier, surveillance, police observation and special forces deployment. Various skid layouts are also possible, including inflatable floats. For emergency / ambulance versions, medical equipment is installed depending on medical needs and 1 or 2 stretchers and 3 medics.
Many companies use the EC-145 and Eurocopter is from 2014 part of Airbus Industries, the large European aerospace consortium; the EC-145 is now redesignated H145. ("Helicopter 145").
The German army uses the type as EC-645 where it is armed with 7.62mm FN machine guns or M134 guns and fitted with counter measures systems for self defense. Later it was referred to as the H145M LUH KSK.
Over 1,000 EC-145 / H145 helicopters were manufactured and exported to dozens of countries worldwide. The Dutch ANWB medical air assistance also use a pair of H145 ambulance helicopters with Bucher interiors. (ANWB also operates many EC-135 medical emergency helicopters called "Lifeliners").
Page 2
Page 3

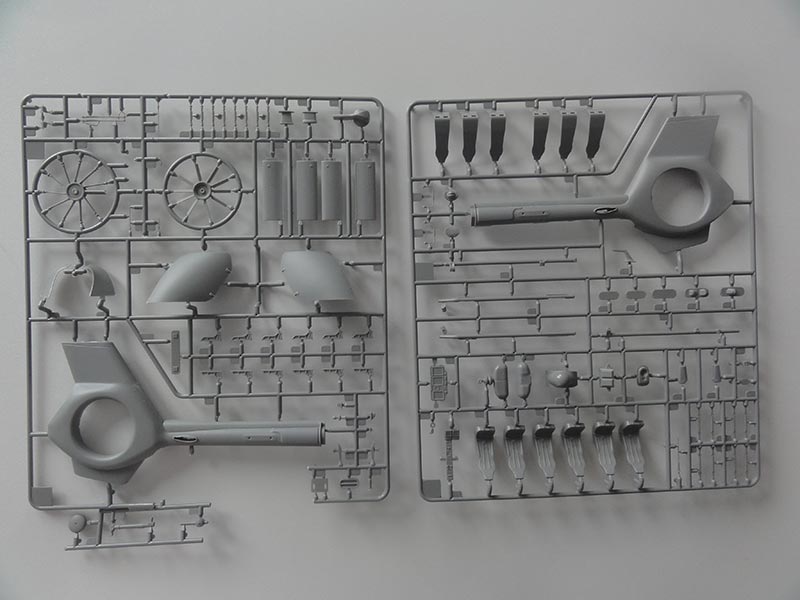
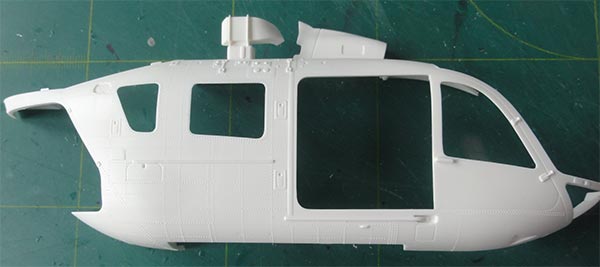
Revell Germany is the main supplier of nice helicopters scale model kits in many scales. Particularly in 1/32 they have very nice kits. Initially, Revell had 1/32 helicopter kits such as the EC-135 in 1994 but these kit moulds have now been superceeded by far better ones. From 2005 a completely new kit came that has appeared in following years in various releases with often extra parts and different decals.
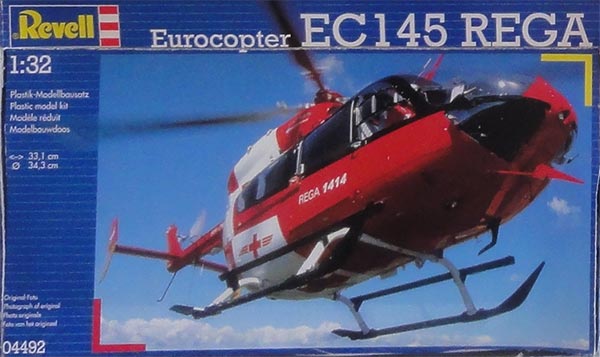
Kit #04481 was for a EC-145 T1 with conventional roto layout of the ADAC Luftrettung GmbH. Kit #04492 is similar but has decals for the Swiss REGA rescue version.
Other releases were kit #04648 released in 2010 for Medstar in Florida and German Polizei. Kit #04897 was for German DRF Luftrettung and kit #04927 is for a military U.S. Army UH-72A Lakota.
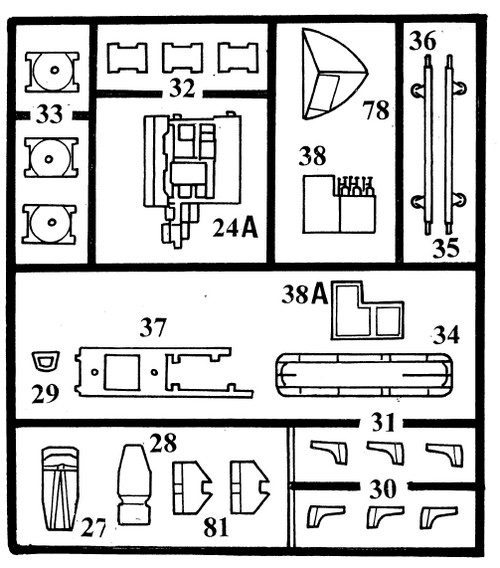
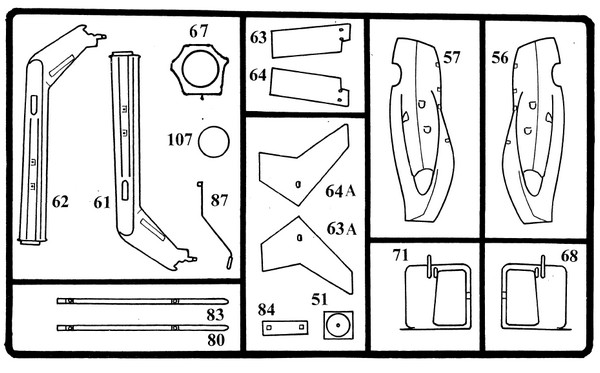
These kits have many common sprues with parts but also often a different sprue for e.g. troop seats and medical equipment parts:
These kits have the old style T1 tail with conventional tail rotor:
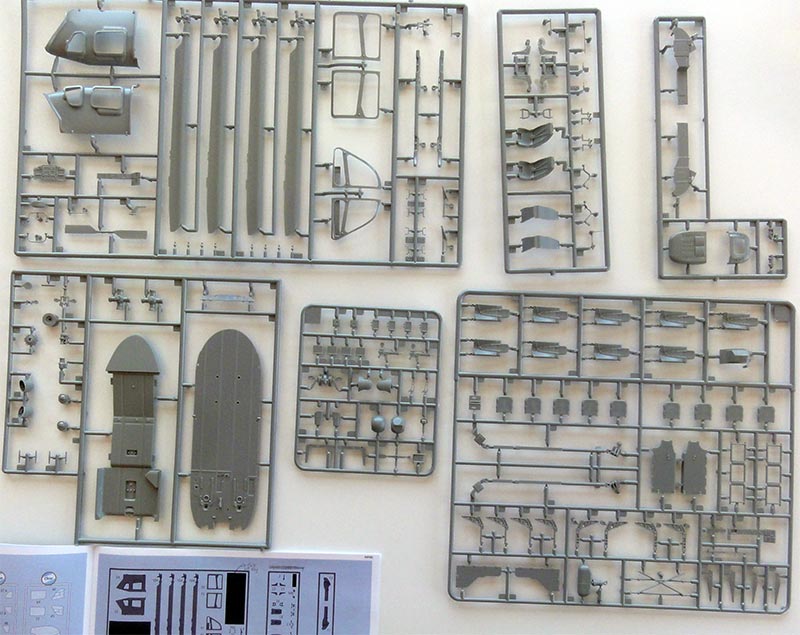
A kit was also released for the H145 T2 based on the same EC-145 kit but with a few new sprues with extra parts enabling a later Fenestron tail to be used:
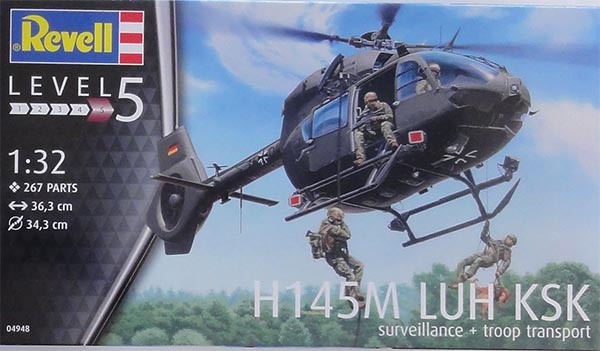
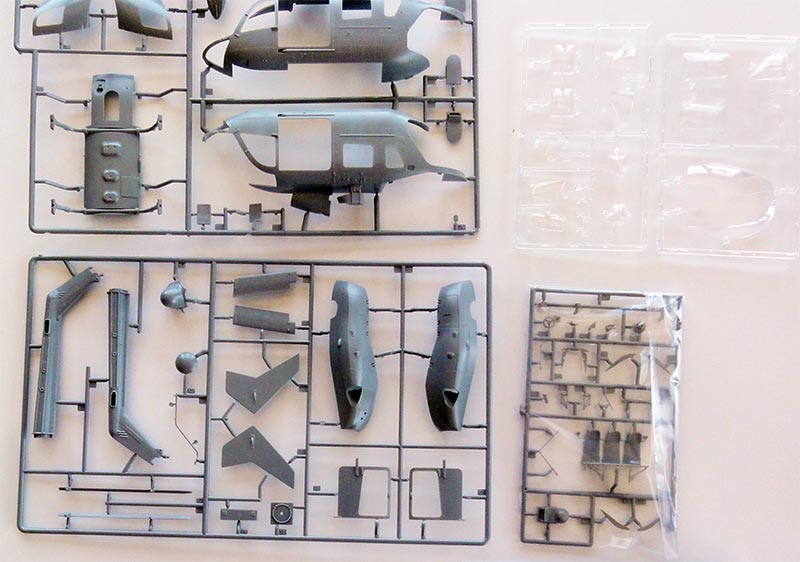
Revell kit #04948 is for a military H145M T2 LUH / KSK in 1/32 and it has the extra Fenestron sprues. Parts are seen here in this kit:
The larger Fenestron type T2 has the correct diameter of 36 mm in scale (real size it is 115 cm).
(Note: the older T1 tail and tail rotor sprues are still in this kit as well).
You also have a choice of skids and parts for the "Troop transport" such as armoured troop seats.
(Revell Kit #04980 is also this H145 T2 kit with decals for the German Polizei but without the armoured seat sprues).
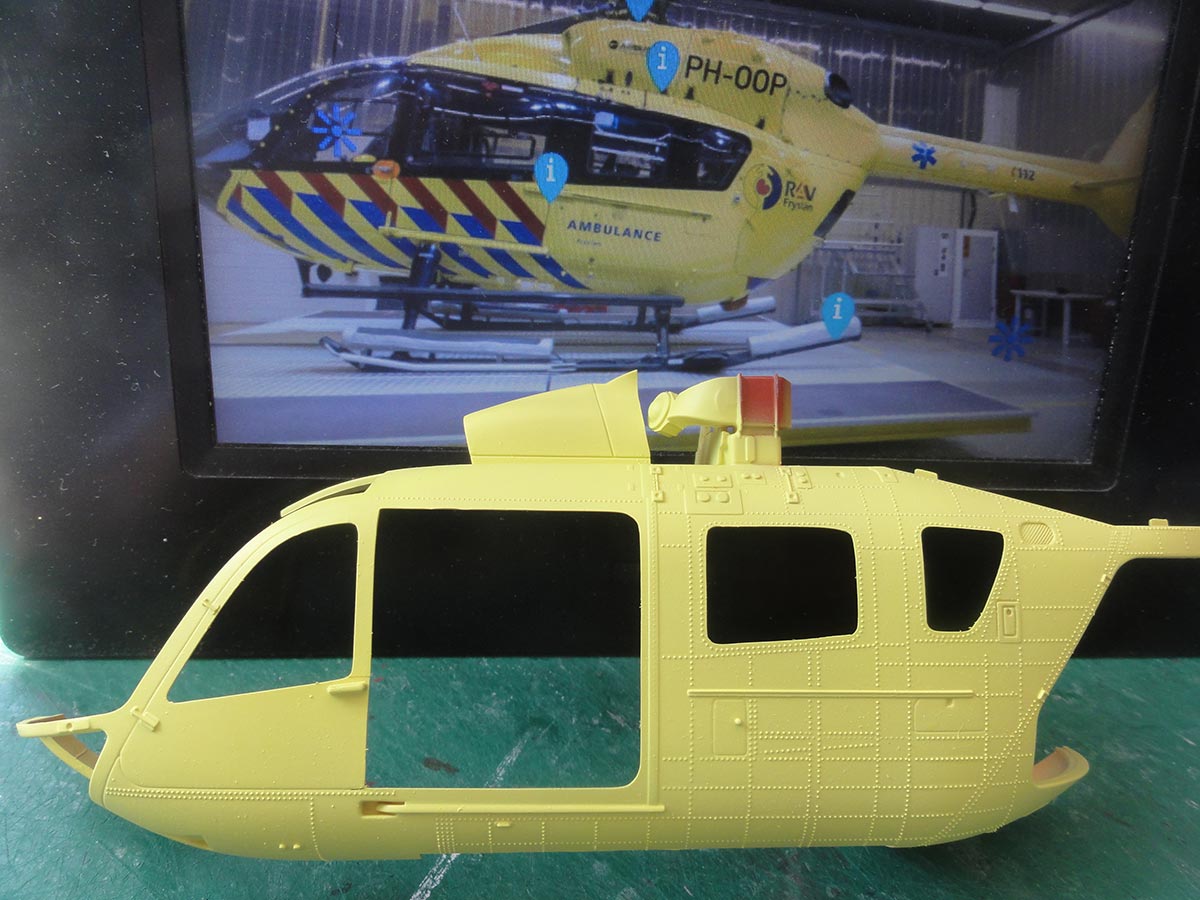
It was decided to make this 1/32 kit as a Dutch ANWB medical air assistance H145 T2 ambulance helicopter registered as PH-OOP. The ANWB is the "national car association of The Netherlands" and is over 100 years old. The same ANWB started to operate helicopters in May 1995 for medical emergency support and medic ambulance tasks. Close cooperation was done with the German ADAC. The ANWB helicopters have call sign "LifeLiner" and over these years made more than 100,000 flights. The ANWB fleet has been modernized all the time with newer helicopters.
The ANWB has also a pair of H145 helicopters with registrations PH-HOW "Lifeliner 5" and PH-OOP "Lifeliner 6" for particularly services to the Dutch Wadden islands. (The ANWB also flies the smaller EC-135 and updated H135 helicopters).
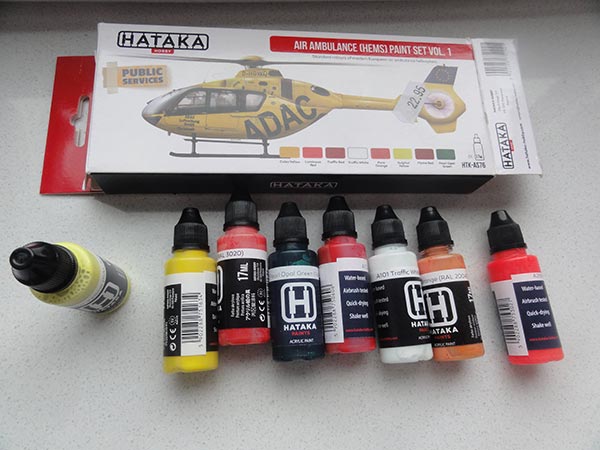
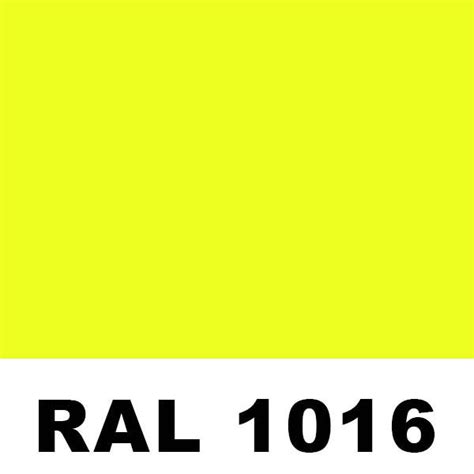
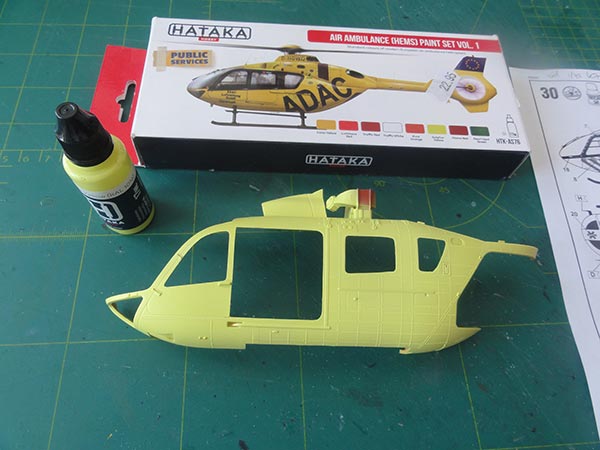
These ANWB helicopters have a "sulphur yellow" RAL 1016 livery whereas their German ADAC companions have the darker yellow RAL 1021 yellow livery. HATAKA Hobby from Poland has acrylic paints of these colours with their "Air Ambulance Volume 1" set #A269.
 ..
..
For the desired ANWB ambulance version, I also purchased the Revell REGA kit described above for the medical equipment parts but found out that these will need to converted a bit.
Decals and markings were made by my IPMS modelling friend Maarten designed at home and printed at 1/32 scale at an internet print shop. H145 PH-OOP "Lifeliner 6" model will be made which often flies from the University Medical center / hospital at Groningen in the North of The Netherlands with technical support at Leeuwarden. (Sister PH-HOW flies often from Volkel air base in the South).
In this modelling report a STEP by STEP approach will be presented. As with many helicopter kit assemblies, another approach is needed to avoid too much masking efforts with complex paint schemes.
H145 kit #04938 has nice decals and the new style of Revell instructions with colour layouts.
I also used the REGA instructions, which are still the old type in plain black and white drawings.
OK, where to begin?
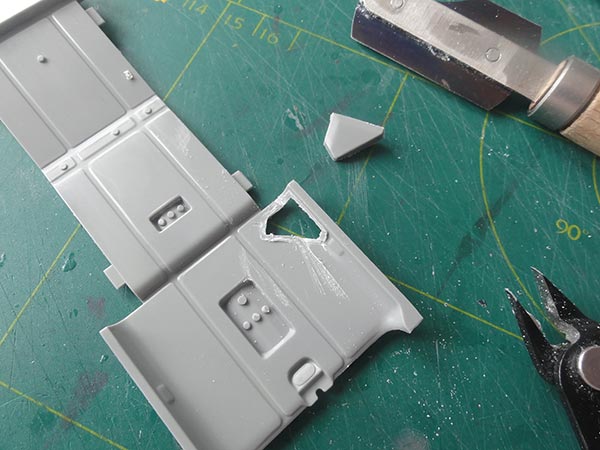
But first it was also decided to open up the right pilot entry door; this was done with a TIGER razor saw but needs extreme care to retain the door and keep the strut unbroken.
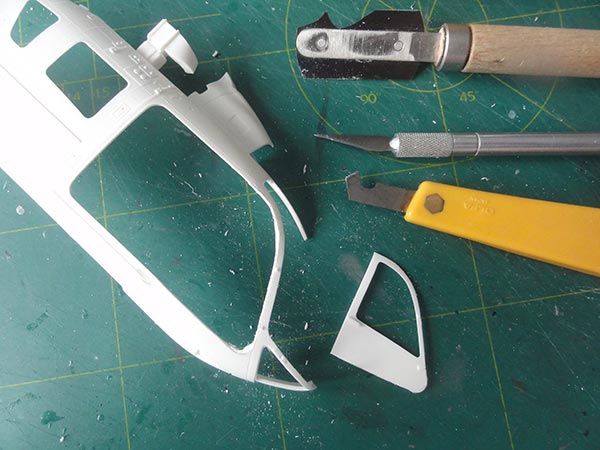
Support the strut while sawing... the door came out all right.
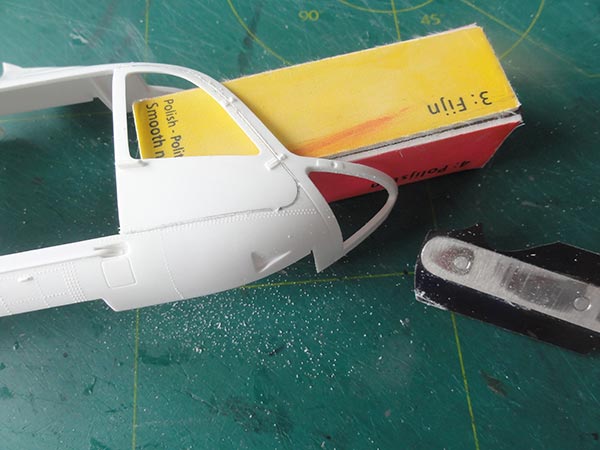
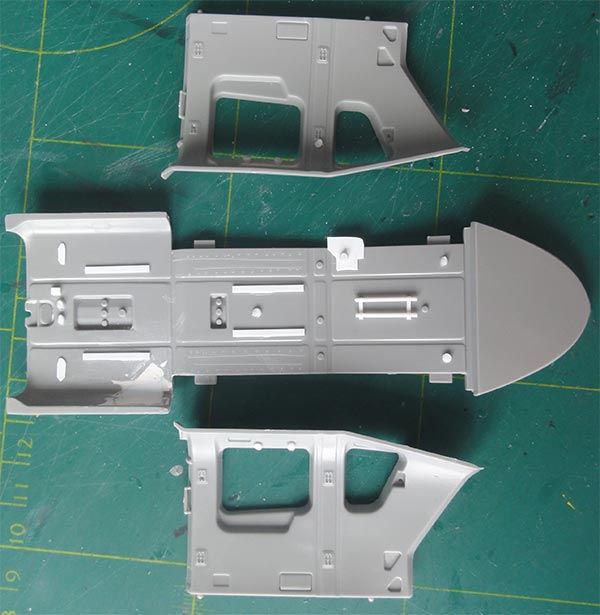
The next good thing to do is preparing the main outside surface parts as it is best to finish these in the desired end livery colours. Helicopters kits in large scales are complex and often have large clear windows, open doors, skids and so on. Masking is extremely difficult if the main livery colours are put on later after main assembly is completed.
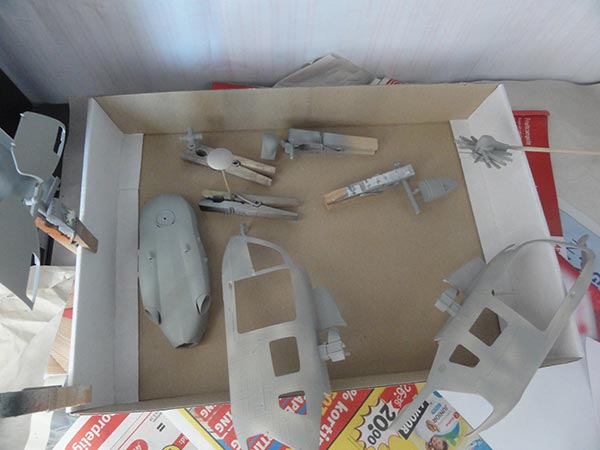
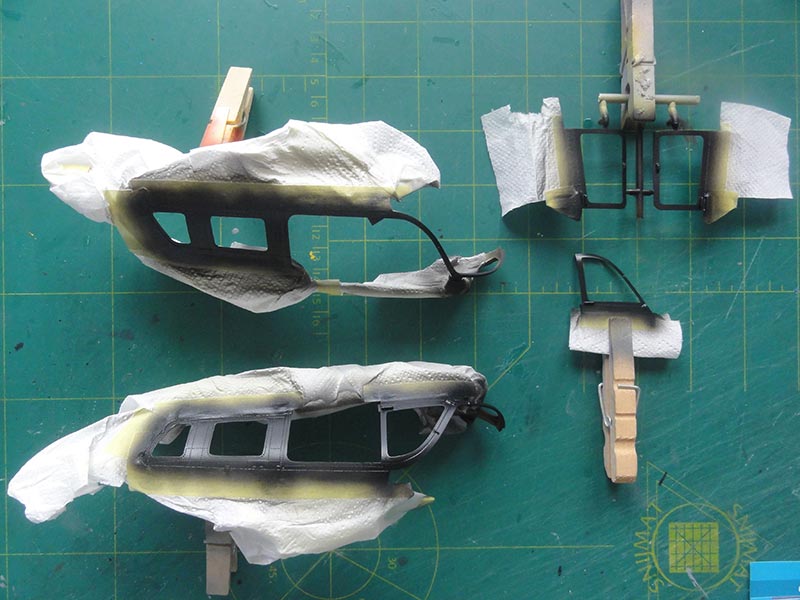
Another factor is that the ANWB H145 has a very light sulphur RAL 1016 yellow livery. This is extremely difficult to airbrush as most "yellows" paints. The parts to be prepared to be pre-painted before hand are the fuselage shell parts #39, 44, tail booms and so on like the skid part #49 and doors. These parts were mostly removed from their sprues and cleaned up. The tail boom halves were not yet joined together as later on the Fenestron rotor needs to be fitted and obviously the cabin interior.
The engine compartment shown in STEPs 34-36 was assembled and part #50A was set in place. Some putty and sanding the seam was needed. (The main rotor will not be set fixed to the model later on, so the rotor head assembly can be done later on).
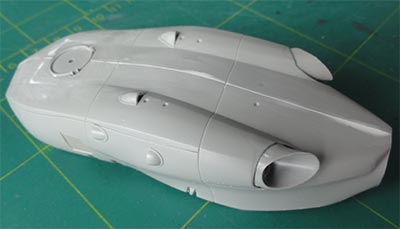
The lower fuselage shell with skids legs is also best pre-painted.
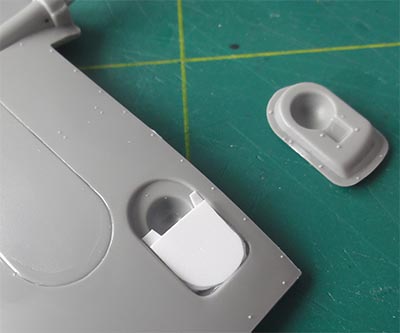
Looking at STEP 67, the lower fairing #H4 with the head light should be fitted a bit more raised, a piece of card was used at the front base to raise it a bit and fill the gaps with white glue. (The smaller pitots #H100 are installed later on).
These preparations are now ready, so first painting can be done:
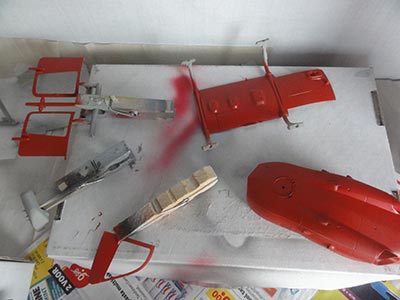
The Revell plastic is pretty dark. So first, the main parts and also many other parts were airbrushed base grey; This is base coat [1].
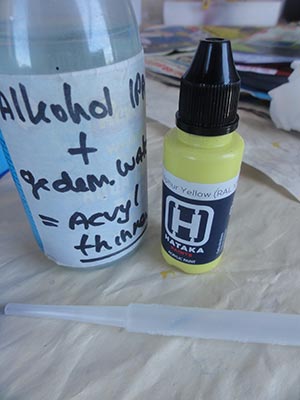
Revell Aqua 75 steingrau "light grey" acryllic for this. As Aqua paints are very thick in their blue container, I always thin Aqua paints with a thinner of 25% IPA (iso propyl alcohol) with 75% distilled water. Thin in a ratio of thinner 1:1 paint.

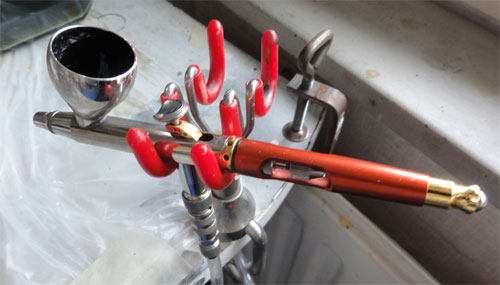
A Harder Steenbeck Infinity airbrush is used. (see workshop page for more info).
Also airbrushed were some areas of the cabin and cockpit interiors in light grey.
Next a red base coat [2] on the outside surfaces was airbrushed, yes that's right! Red, this is a good base for any yellow paint. Thinned Revell Aqua 330 "Rot" acrylic was airbrushed.
 .
.
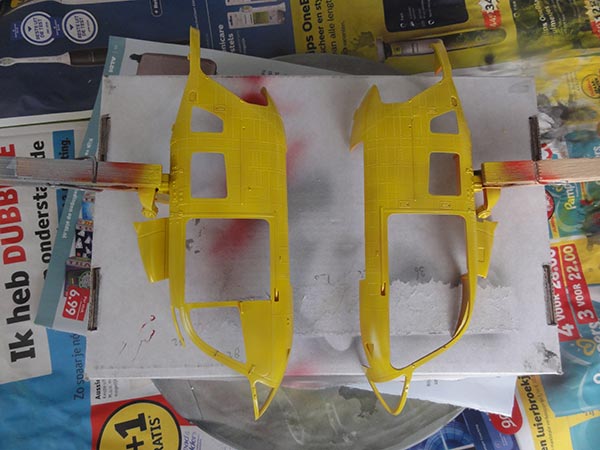
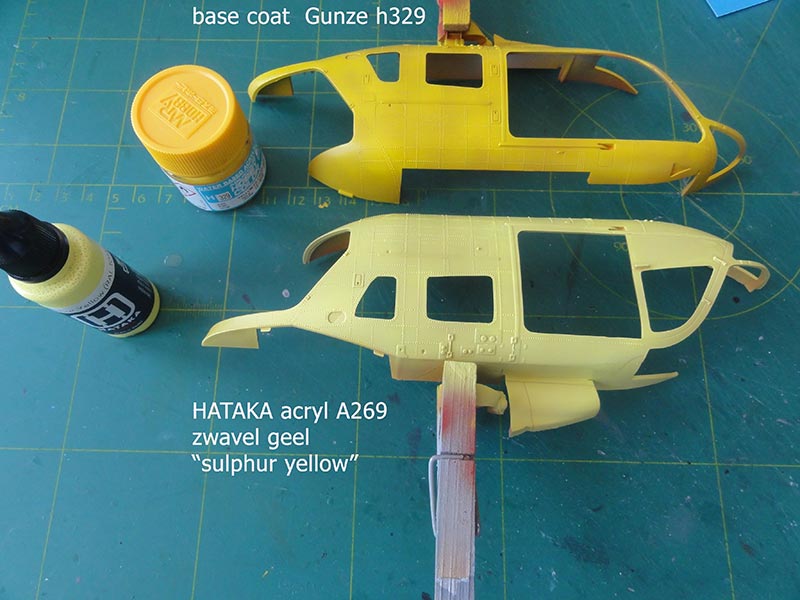
The next step was to airbrush the main outside surface parts on to the base red. As I expected the HATAKA paint to be hard to cover and having only 1 bottle of paint, it was decided to next add another base [3] yellow coat of Mr.Hobby Gunze Sangyo H329 acrylic (you can also use other yellow paints such as Gunze H4). This will help covering with less HATAKA paint yellow on.
The appropriate coat was next: the paint "sulphur yellow" RAL 1016 HATAKA as paint #HTK-AS76 in the Air Ambulance set #A269. (NOTE: the German ADAC uses another paint e.g RAL 1021 yellow which is also in this set).
These paints are acrylic and supposedly "airbrush ready". Shake the bottle for at least 5 minutes, but still I found the paint in the HATAKA drooplet bottle to be rather thick. So thinned it with my usual thinner of 25% IPA (iso propyl alcohol) with 75% distilled water.
Even than, considerable troubles appeared as the thinned HATAKA paint dries in the fine airbrush nozzle. So a lot of cleaning was needed between passes. Airbrush in thin coats and wait at least an hour between coats.
Here the difference is seen between the Gunze H329 yellow base and the HATAKA coat:
The yellow paint covering is still difficult but here seen is the result for the left fuselage shell:
... and the other main parts...
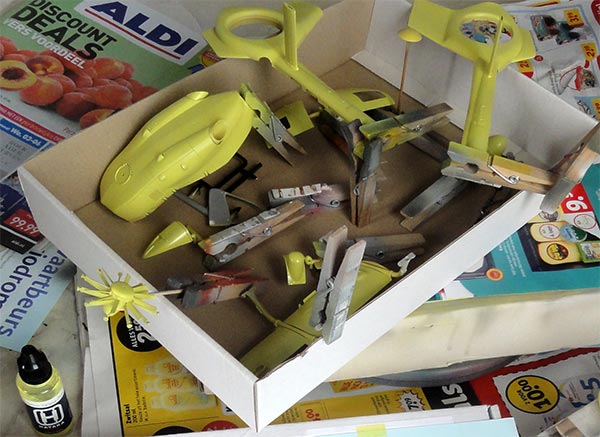
It looks OK now.
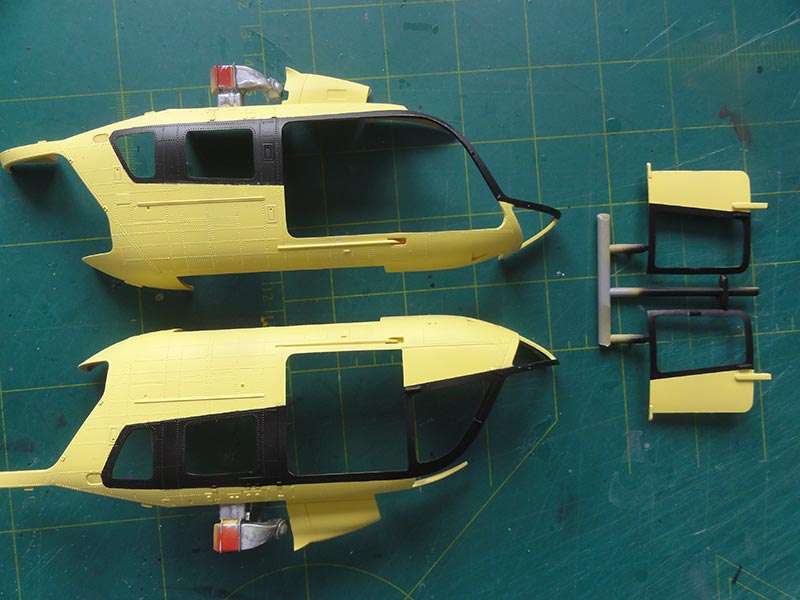
For the black areas around the windows often Revell provides also decals in their helicopter kits. But it looks better to airbrush these as well. This is best done at this stage, this will save a lot of masking work later on. (Note: on the PH-OOP the lower forward windscreen frame is also black but on the PH-HOW still yellow).
The yellow areas were masked with low tack tape and protected.
A nice coat of black was airbrushed (using in this instance Revell Aqua 07 schwartz "black" but any black paint will do). This is the result:
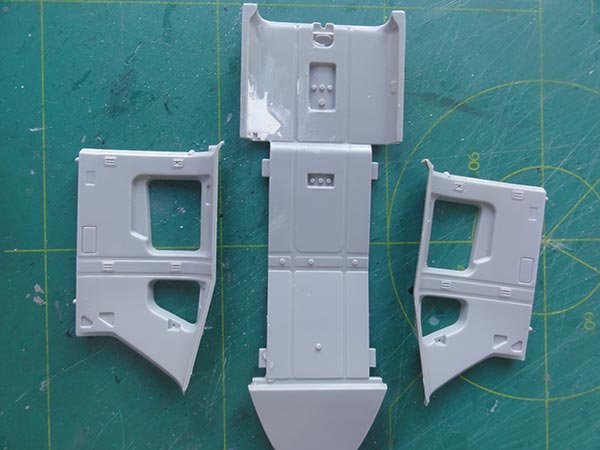
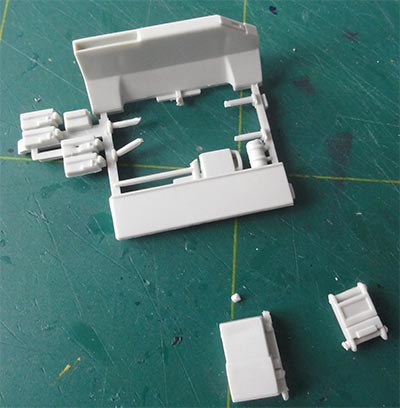
CABIN INTERIOR
The overall cabin interior colours are about "FS36375" grey using Gunze Sangyo H308 acrylic.
STEPs 1 - 5
The ANWB helicopters fly with a single pilot on the right seat, so the control parts like the foot pedals #3, collective #4 and control column #2 on the left station should not be installed. Fill the empty spaces with card and a small box from scrap was installed at the left foot pedal location.

STEPs 6-8
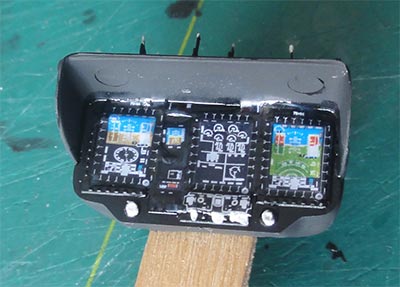
Use for the central instrument and system control panel not part #H74 but #H73. The main instrument panel #H72 is a new part and fine for the ANWB with the CRT screens and a decal. Later on, not a lot will be seen so not too much effort done here and the decal is sufficient.
On top of the coaming part #15 some extra detail was added but this varies between individual helicopters.
STEPs 9-12, 15, 18-24
Not required as these are for the "troop transport".
STEPs 13-14
This deals with the pair of seats for the pilot and observer/ assistant. The seat base struts #22, 23 should have weight saving holes, these were drilled out with a fine drill.
Seat colours vary between individual helicopters. For the ANWB H145 PH-OOP the base seat colour is about grey "FS36375" using Gunze Sangyo H308 with pretty light-blue for the cushions/ upholstery of Revell Aqua 374 blau with a drop of white. Add a few seat straps in dark grey as well, these look better than the provided decals.
Do not yet install the seats at this stage seen in STEP 14.
STEPs 16-17
The ANWB helicopters have customized cabin seats from Bucher and equipment. The 3 cabin seats can be made of the kit parts #H96, H97, H98, H99 and H100 but with a different head rest. The kit head rest was sawed off and new head rest installed using the ones of the troop seats also still in the kit.

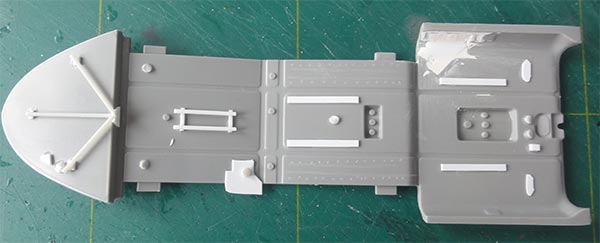
STEPs 25-26
These steps deal with the very nice side walls which are also relevant for the ANWB helicopters. At the rear windows, I also installed a pair of grid bags of wire that on the real ANWB helicopters holds cloths and teddy bears for kid patients!
STEP 27
The cabin ceiling is fine but the air triangle moulded section for decal @98 should be removed with a razor saw. Fill with card.
The cabin floor, walls and ceiling do fit but I cut away some tiny bit of their locating lugs to get a bit flexibility when installing.
Also some additional lights rails were added and smaller bits.
STEPs 28-29
This kit has the feature that cabin windows should be installed from the inside between these wall and the fuselage shells. So this is why it is a good idea to paint the cabin interior and outside shell in the appropriate colours before window transparancies are to be installed.
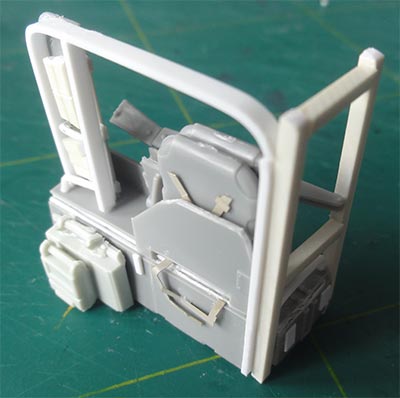
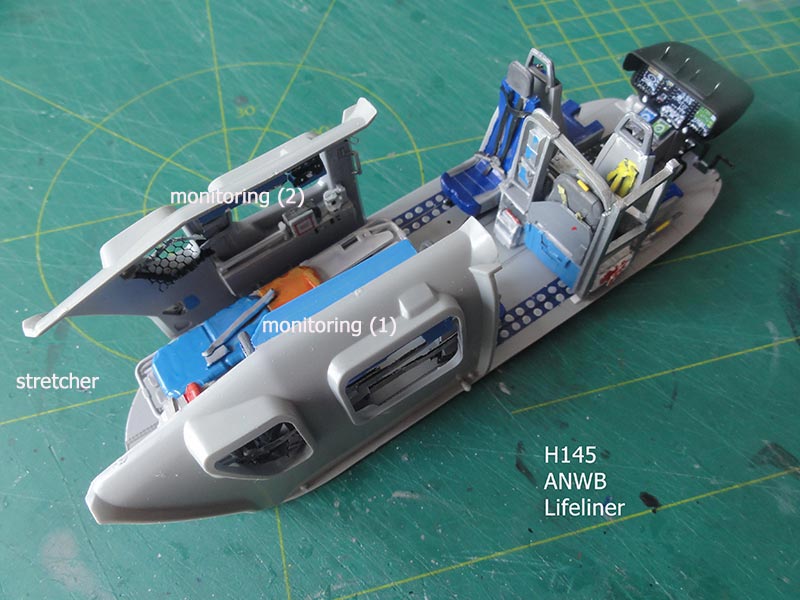
The cabin interior on the ANWB helicopters are for the ambulance and emergency roles fitted with medical equipment. The fit may vary per mission. The area can even be left "empty".
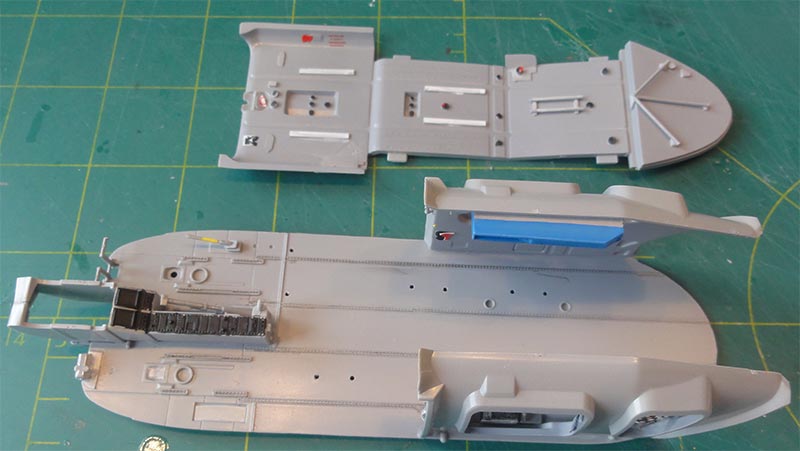
I had the Revell REGA kit #04492 that has a sprue with these medevac parts as well as a stretcher as seen here:
The part #24A was adapted a bit and some stuff removed.

Some repositioning was done on the equipment rack at part #24A. Some were installed at the left side wall.
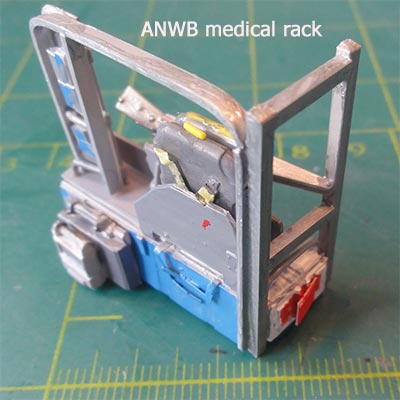
Part #38 has the oxygen bottles. In the H145 there is provision for extra oxygen and medical pumps.
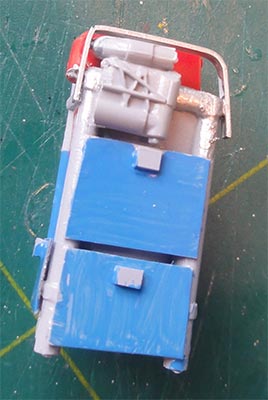
The stretcher got some extra cushions etcetera from thick card.
There is a central structure with medical monitoring equipment, this was made from scratch using bits and pieces.
 ..
.. 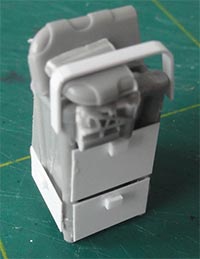
In the rear near the right clampdoor next to the stretcher is also a medical rack. Some scratch building was needed.
Colours of the medical equipments is white, grey and light blue, using Revell Aqua 50. Some decals from the REGA sheet were used for the instrumentation panels.
 ..
.. 
I added also some netting / wires at the rear window openings.
Some views of the interior with bits loosely shown in place.
On the PH-OOP there seems to be a sort of seat rail. This was made from a decal with circles found in the spares box.
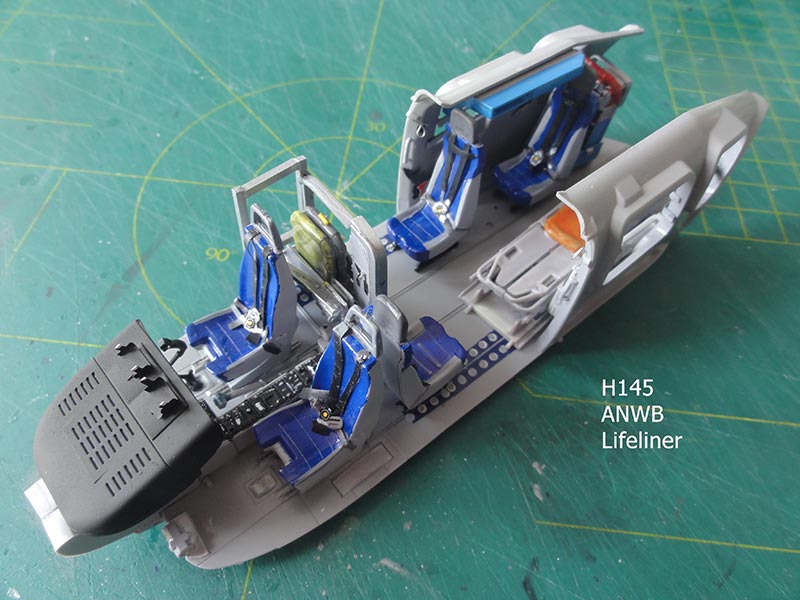
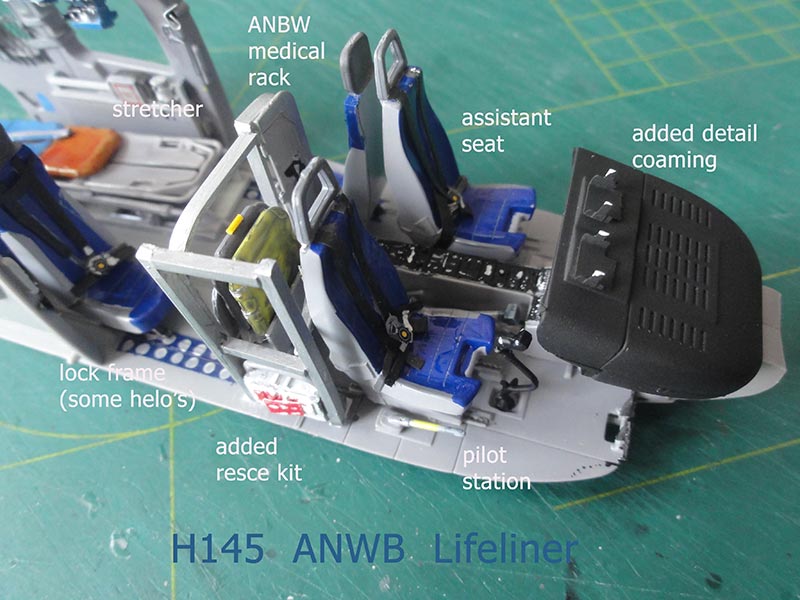
The 2 + 3 seats were set on the floor. The medevac equipment bits were not yet set as well as the instrument coaming as these can be set later on through the door openings.
On to next [ Page 2... ]
- Wikipedia: https://en.wikipedia.org/wiki/Eurocopter_EC145
- ANWB medical services: https://www.anwb.nl/maa
- AIRBUS: Eurocopter official website
Back to 1/32 Models.......

(c) Copyright "designer"/ All rights reserved. Your comments are welcomed by webmaster
Created this page
April 2, 2022