[ page 2 ]
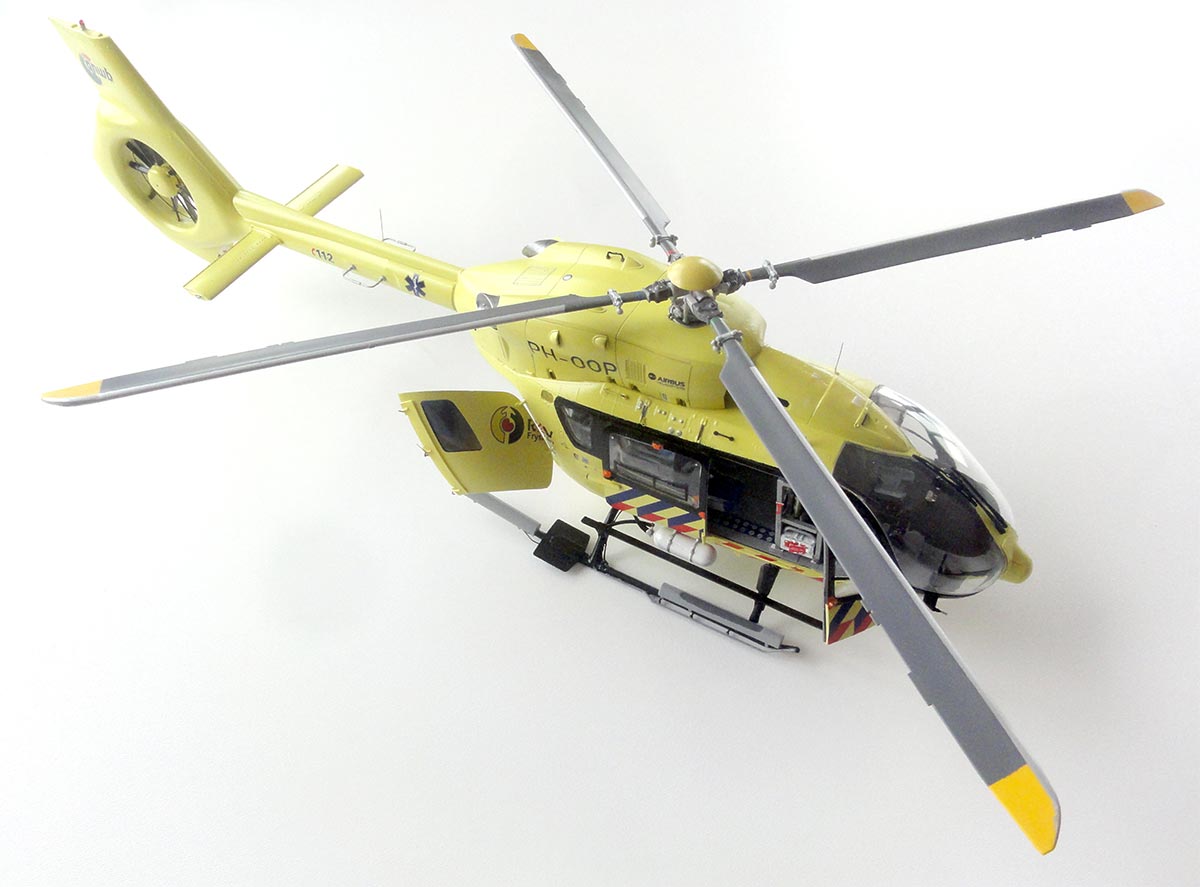
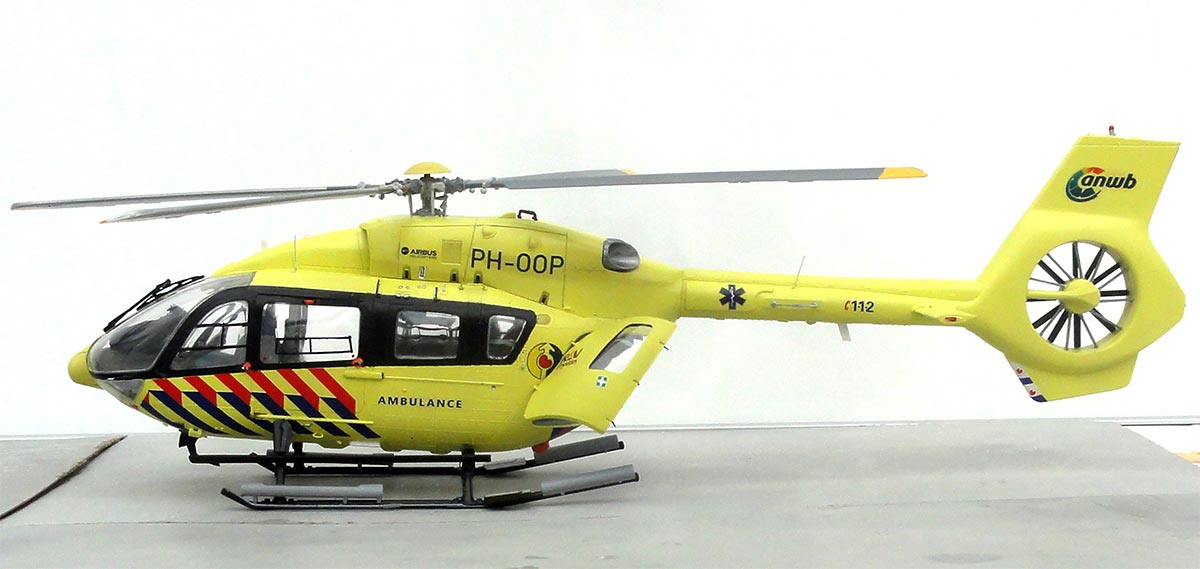
1/32 scale Eurocopter EC-145 / Airbus H145
page 2
page 3
NEXT ASSEMBLY STEPS
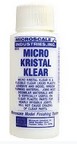
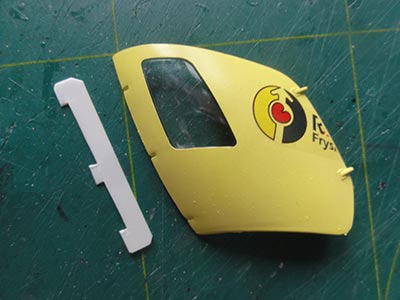
The ANWB helicopters have the bulged cabin windows and these are in the kit as well as the flat ones. Be careful when removing the vulnerable transparant windows from their sprues. Glueing the cabin windows from inside is best done with Micro Scale Kristal klear or Clearfix to avoid visible glue stains.
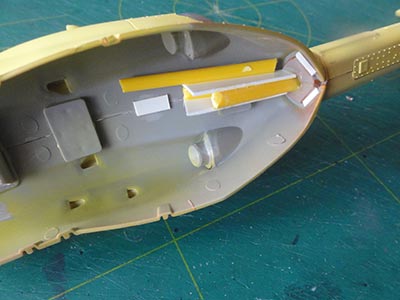
STEP 43
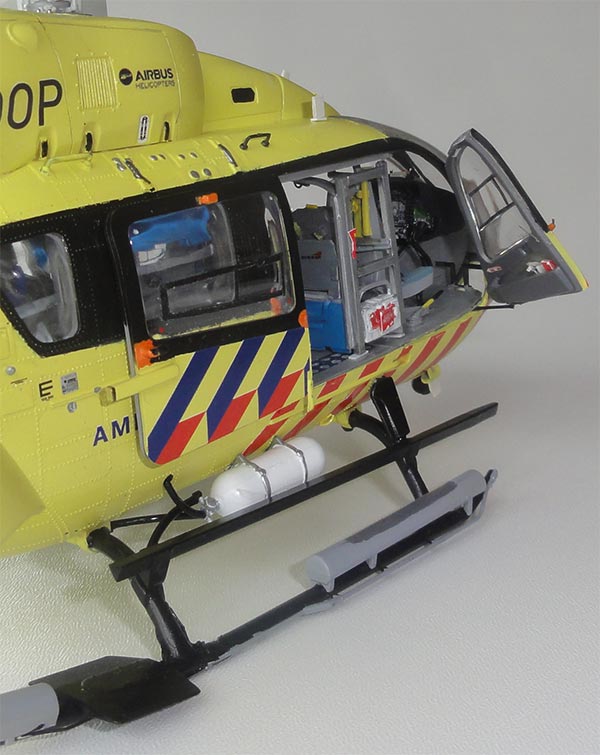
It was decided to set the main sliding door closed on the left side, so the door part as seen in STEP 43 was installed in the left fuselage shell. It had already obtained the needed in- and outside colours. Fitting is better done now to handle it and to achieve a good fit and all it needed was a bit sanding and "pressure".
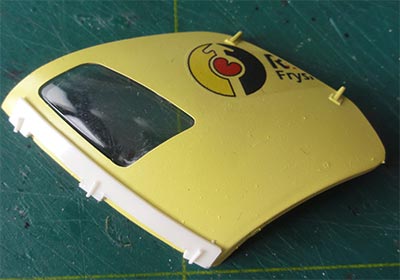
STEP 44
The right slide door will be kept open, so prepare as shown but not yet install.
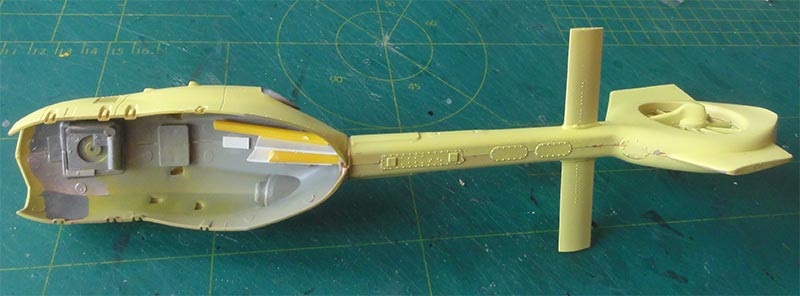
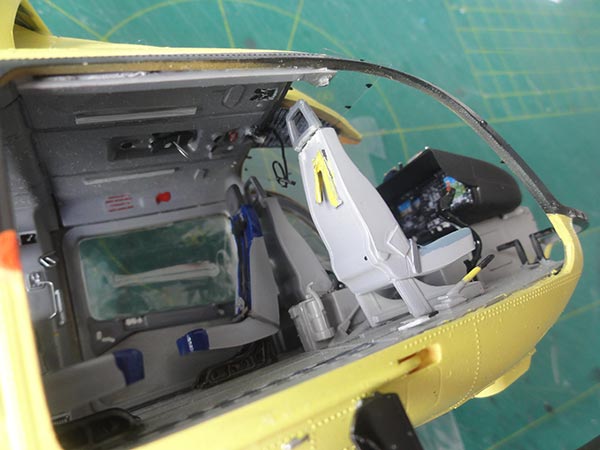
STEP 30
This deals with closing up the fuselage shells with cabin.
Note that the fuselage shells were already pre-painted in sulphur yellow, so be carefull to damage the paint. Seams will be there but these is mostly hidden later on. Use soft clothing with strap tape and clamps and let dry for 24 hours.
First glue one side, let dry. Than the other side of the shell.
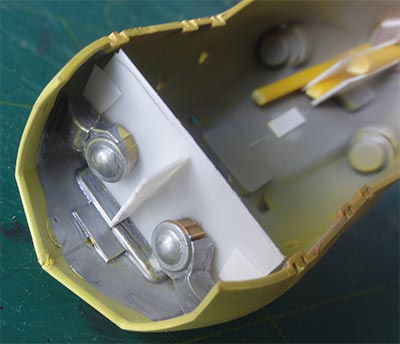
STEP 31
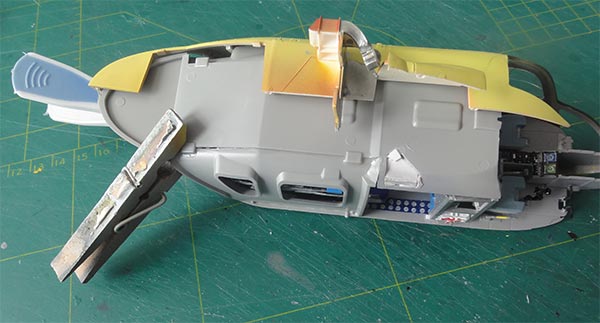
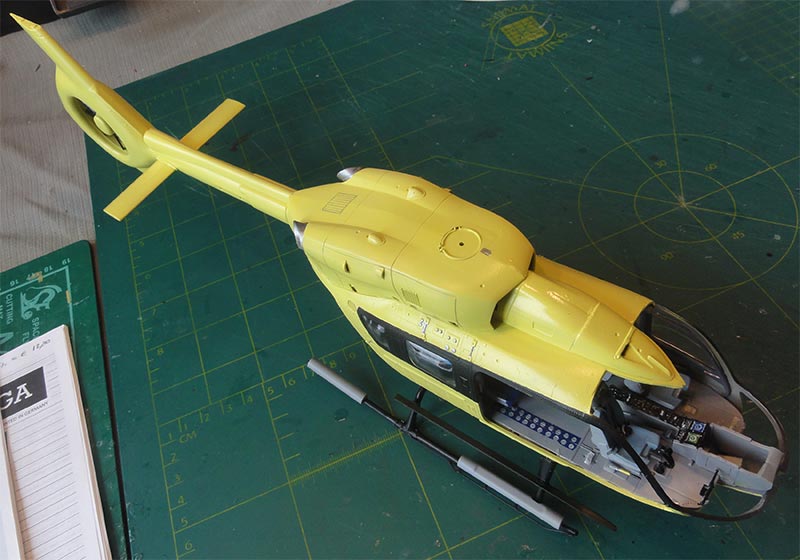
The base section with skid legs was installed. It needed some sanding and trimming to fit. But important: ensure to PUT ENOUGH nose weight! At least 40 grams of led was glued onto the floor in the nose.
There is a seam so some putty and sanding is needed. This will damage the seam yellow paint, but nothing can be done about it. It needs some sulphur yellow airbrushing to resore the coats.
STEPs 46-47
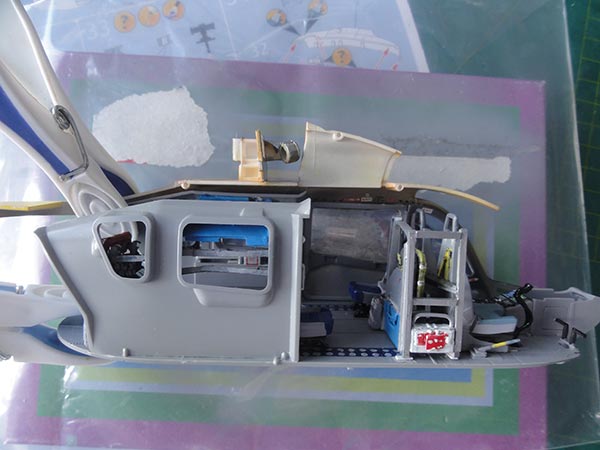
The streamlined fairing #66 was set in place. I needed to remove the rear edge to get it to fit. The windows and large windscreen were NOT yet installed, wait untill later on to avoid damage.
STEPs 48-50
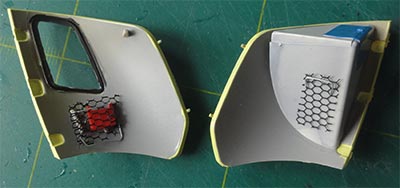
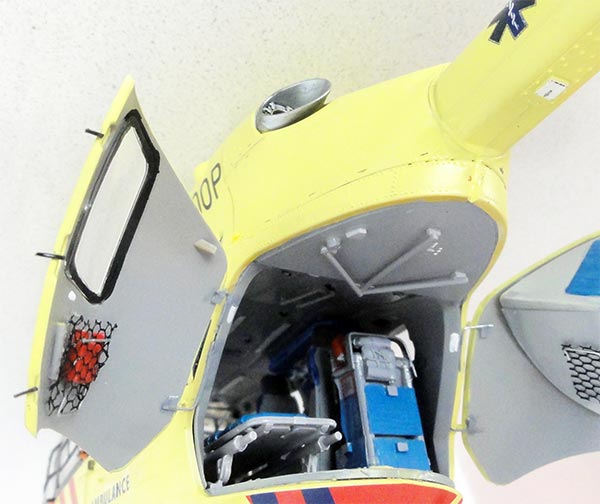
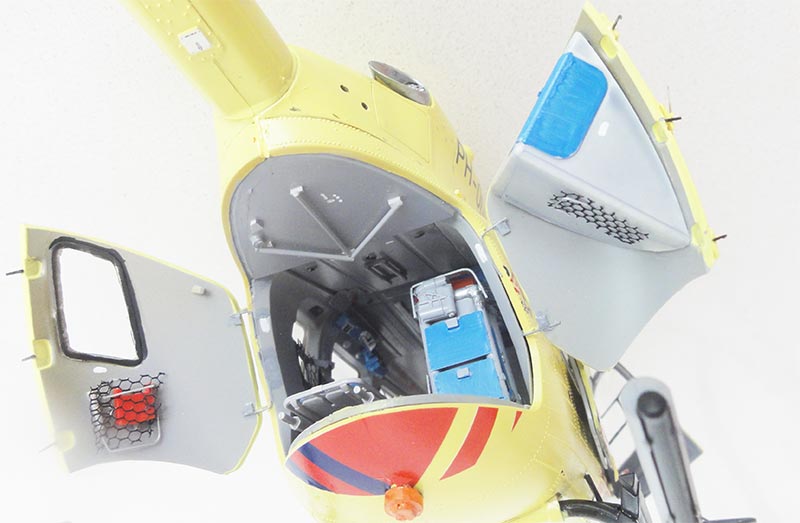
The pair of clam shell doors will be set open in this model. Later on it was discovered that on the right door there is a fairing at the locks, this is not in the kit. It was made from thin card and bended set in place. The doors will be installed later on.
 .
. 
Inside the clam shell doors some extra detail was added including the fairing #78 that is in the kit.
STEP 51
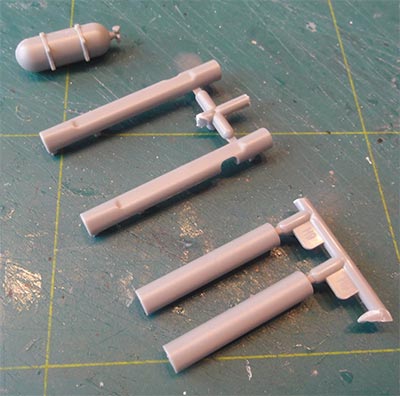
Fit after painting in metal the exhaust pipes of the engine pair.
TAIL BOOM
STEPs 37-42
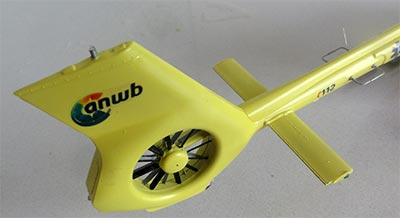
The tail boom and fins with large fenestron had been pre-painted and can now be assembled.
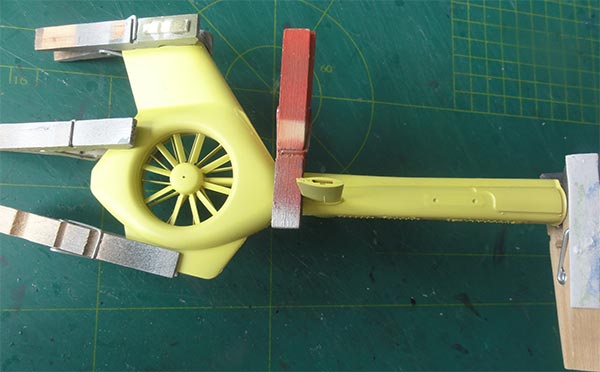
Tip: I forgot to paint at this stage the fixed rotor part #H40: this has black struts and the rotor #H41 with light grey blades. It is better to paint these now. The hubs are sulphur yellow for the ANWB. (Part #H60 is not needed for the ANWB helicopter tail boom).
STEPs 61-64
The detail bits for the tail boom:
- not needed is plate #H57, use #H56 in stead.
- do not install sensor #H64, H65 and antennas #H66, H67. Another shaped blade antenna was made from card and set.
- the small lights #H45 and #H46 seen in STEP 42 are fitted at the end of model completion.
STEP 45
The tail boom will fit into the rear gap of the engine compartment but I strengthened the fit as it looks rather weak. A hole was made in boom base and a thick piece of sprue with card set that was glued onto the compartment and the tail boom.
Some white glue was used to close the tiny gaps but note that a step is visible on the real helicopter. So do not use putty here!
I found that the upper engine compartment with tail boom gives some troubles to fit onto the fuselage. So I simply cut off the outward sections of the engine pedestrols on top of the fuselage assembly. There is also still a large gap, so a piece of cart used to install the intake filters #60. Part #49A is than not needed. All will be painted in aluminium.
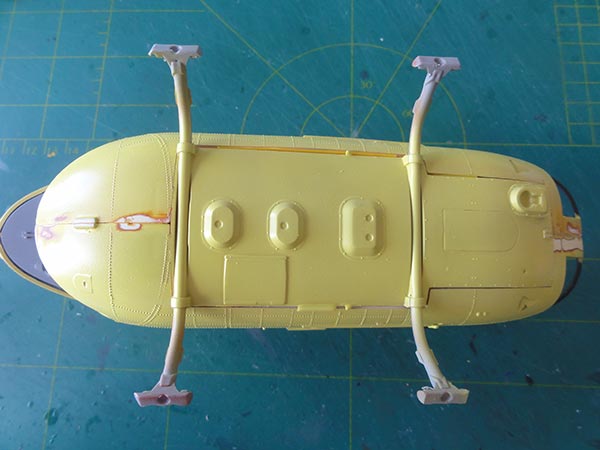
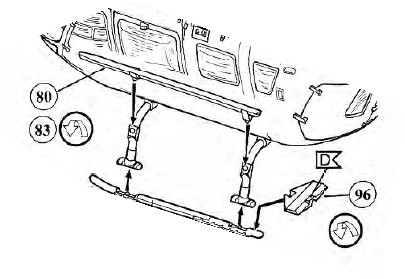
SKIDS and GEAR
STEPs 54-57
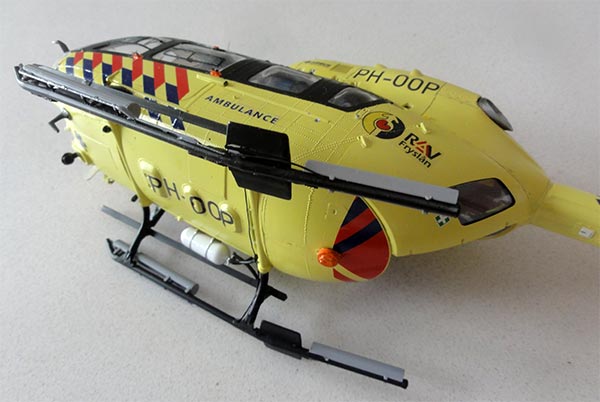
These steps can be skipped as these deal with the skid with the shorter horizontal bars. But the ANBW H145 PH-OOP has long horizontal skid bars (whereas PH-HOW has the shorter bars). In the kit both skid types are supplied.
STEPs 52, 59-60
These steps are relevant as they deal with the longer bar skids also fitted on the ANWB H145 PH-OOP. So use parts #H5 and #H6.
The skids were airbrushed semi-gloss black after masking.
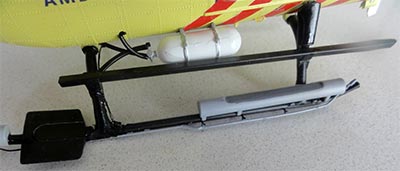
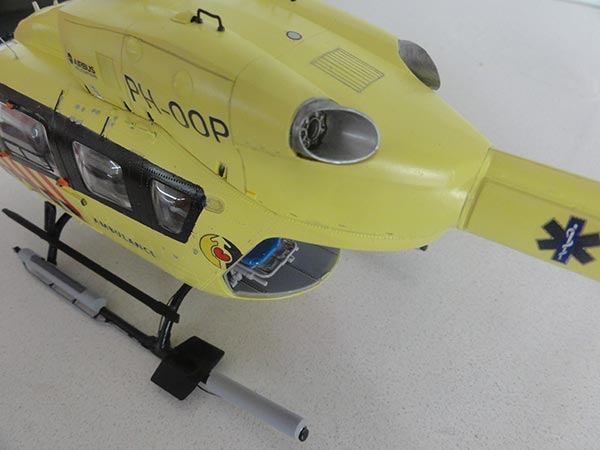
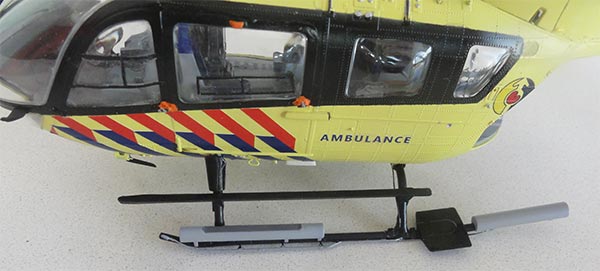
The ANWB H145 PH-OOP usually has often flotation gear fitted which weighs 60 kgs but enables longer over water flights. These parts are fortunately in the Revell kit as #H7, H8 and the air bottle as seen in STEP 52 were installed.
Also, the forward skid leg fairings are seen on the ANWB H145. These are supplied as parts #H14 and H15 in this Revell kit #04938 extra small "troop arms" sprue;
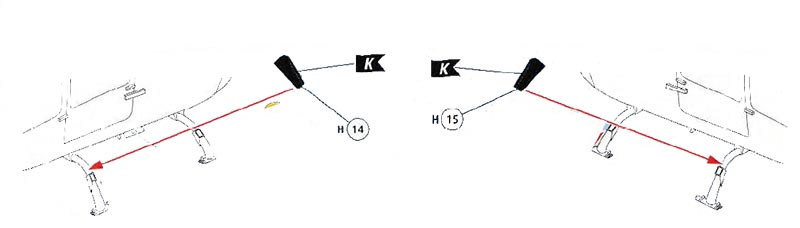 these are thus probably
not in the other kits, but if you don't have them, they can be made
from scrap. See STEPs 54, 55 where to set these or sketch above.
these are thus probably
not in the other kits, but if you don't have them, they can be made
from scrap. See STEPs 54, 55 where to set these or sketch above. 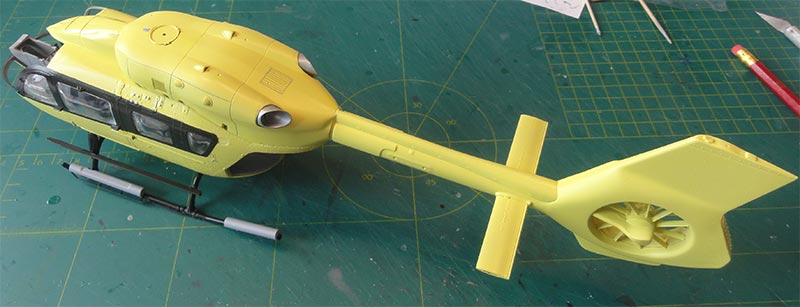
NOTE: I later found out that also the horizontal skid plates should be fitted; see notes later on.
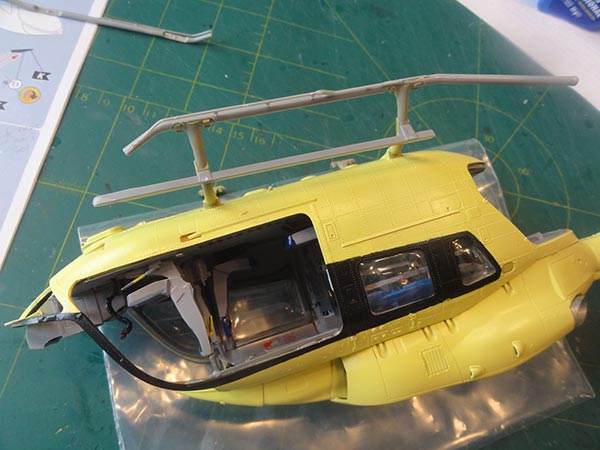
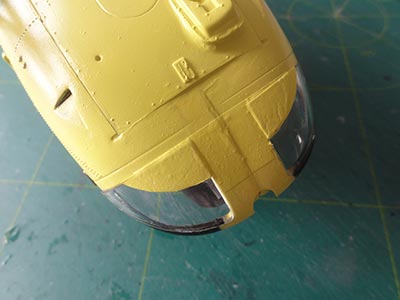
STEP 46
This steps deals with the lower cockpit windows.
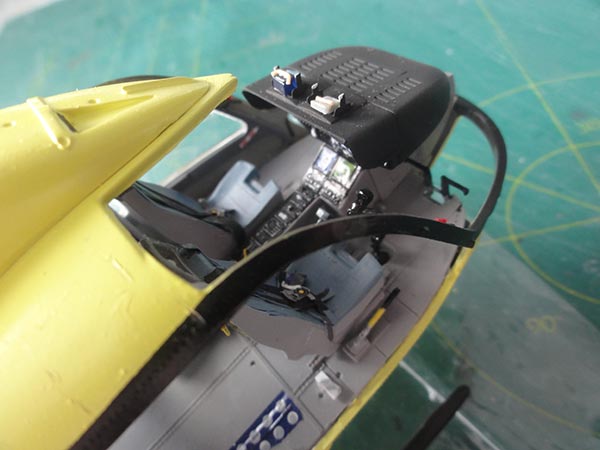
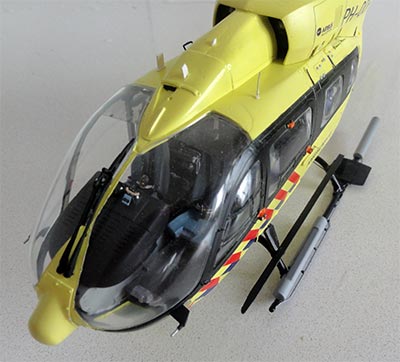
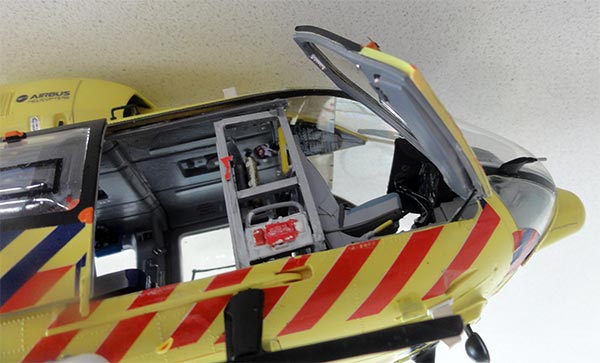
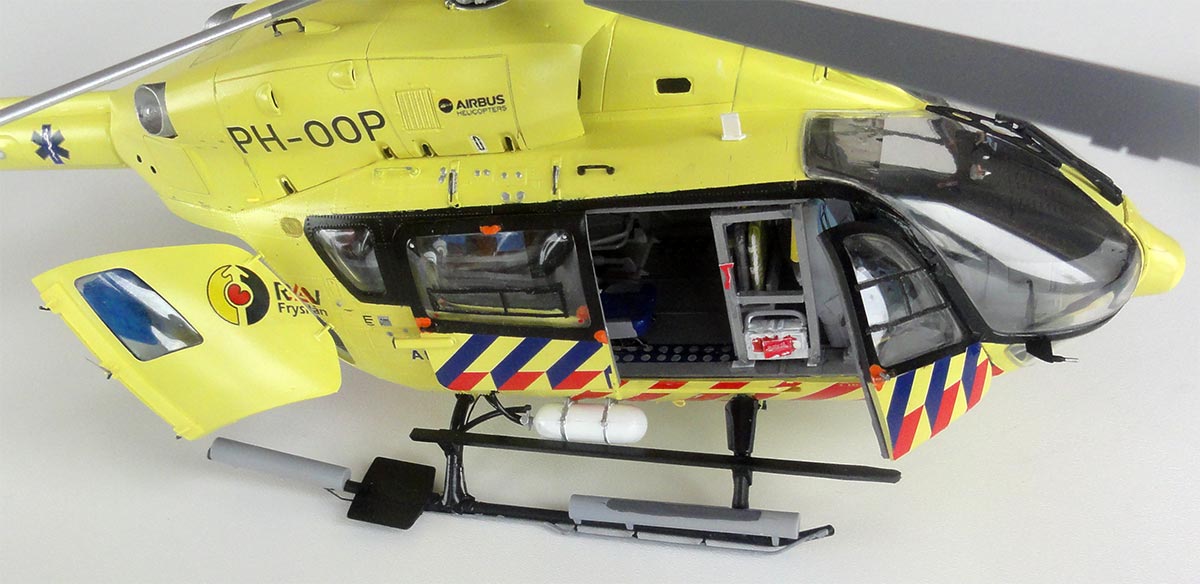
Note: on the ANWB helicopter PH-OOP the pilots have a pair of separate smoke coloured sun protection screens above their seats. This was made from thin clear sheet and painted Tamiya Smoke transparant paint X-19. It was fitted below the pointed roof bit and than the instrument circuit breaker decal @35 in the kit set in place.
Next were the cockpit windows. The lower cockpit windows #67A, 67B fit OK, but use again use Micro Scale Kristal klear or Clearfix to avoid visible glue stains.
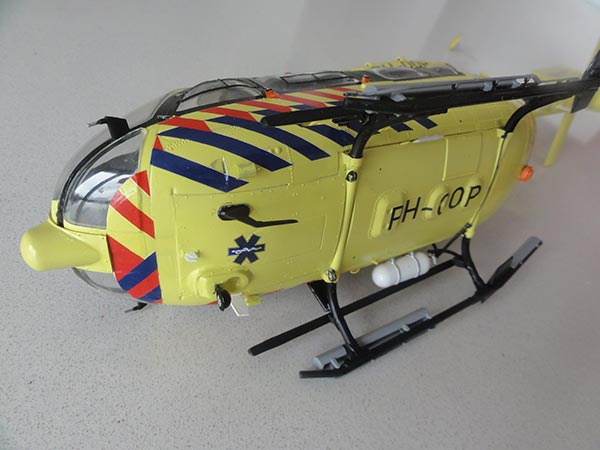
On the H145 of the ANWB the lower cockpit windows are partly covered in yellow. I had pre-airbrushed some white decal in the sulphur yellow. A few covers were cut from the decal and set in place over the windows. (Later on, the ANWB H145 small nose radar fairing #H21 will be installed that is in the kit).
DECALLING
It is a good idea to add the decals for the ANWB livery now before all smaller bits are installed that may be damaged through handling.
My modelling friend Maarten had home made decals for various ANWB helicopter models; for me he scaled the design up to 1/32 scale. PH-OOP registration is also provided with markings. (NOTE: the other ANWB H145 registered PH-HOW has identical markings but these are on different locations on the helicopter).
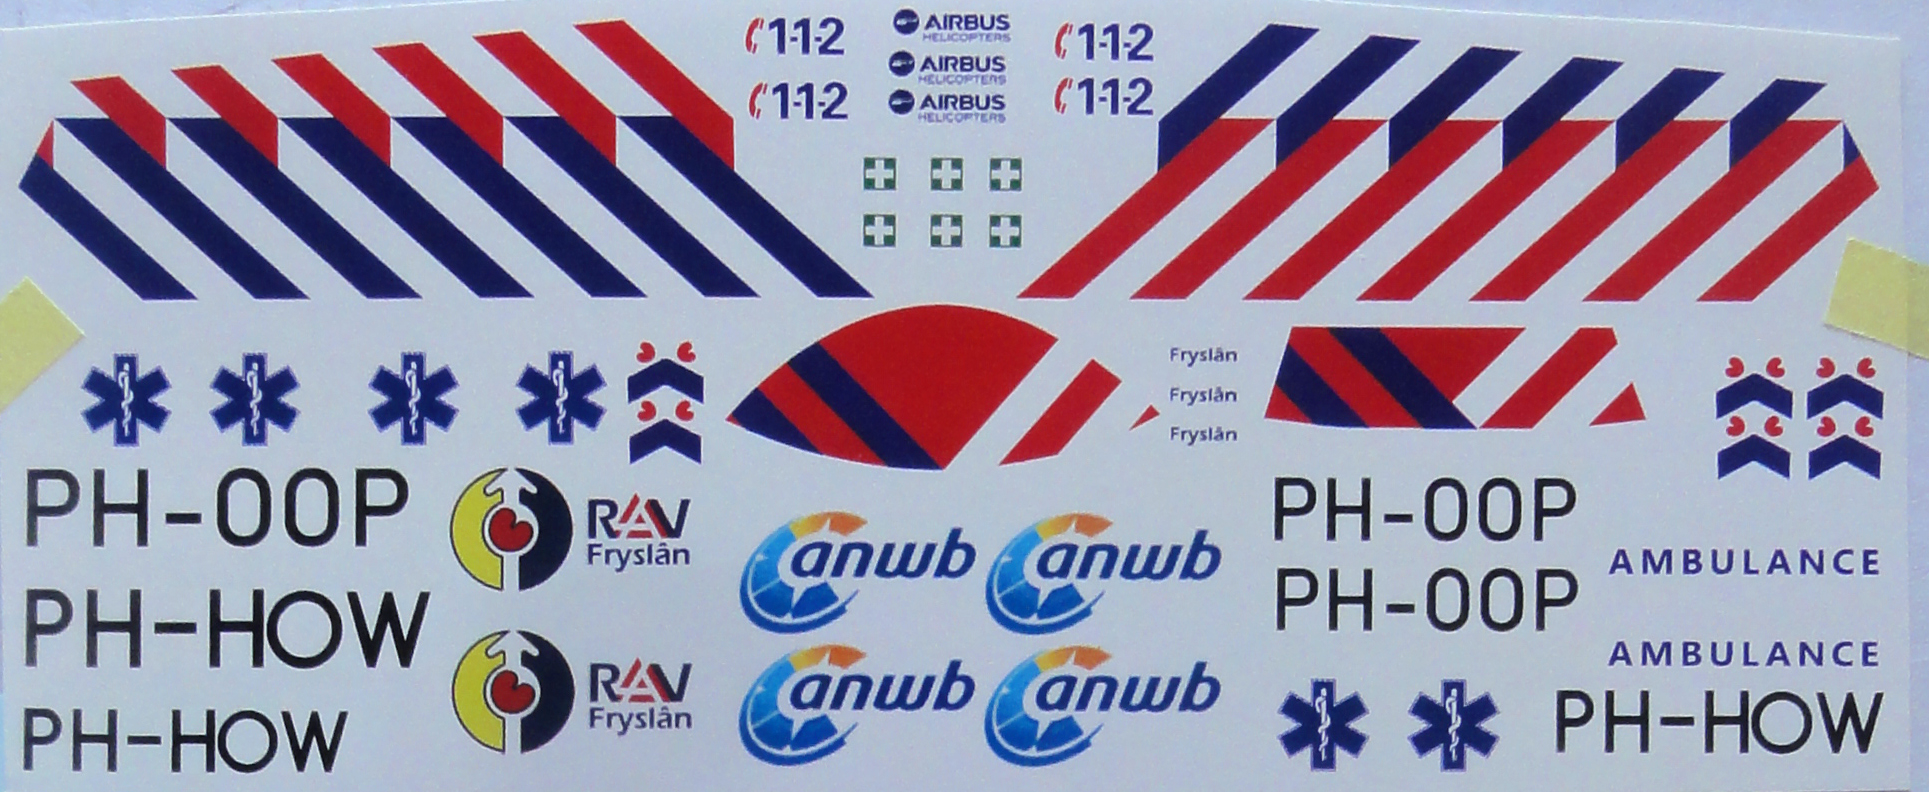
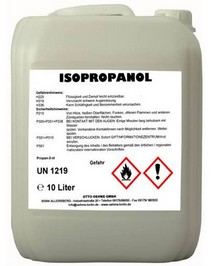
The decals after printing got at least 8 layers airbrushed of Johnson Future / kleer varnish to prevent in the decal ink. The decals are printed on one big sheet so cutting is needed of each decal.
Note that the slide doors rails are still "sulphur yellow", so not over coated.
(Later it was discovered that the central sections of the skid below the fuselage are also black; these were painted later on).
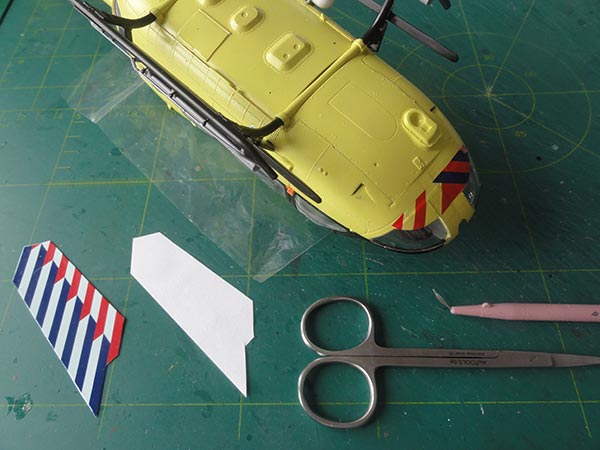
Of the decals I had a few spares so sometimes 2 over each other were set to get a better colour coverage such as the ANWB markings on the tail.
As "white" could not be printed, below the medical symbols a bit of white was painted first and at the tail bumper "Frisian flag" marking before setting these decals.
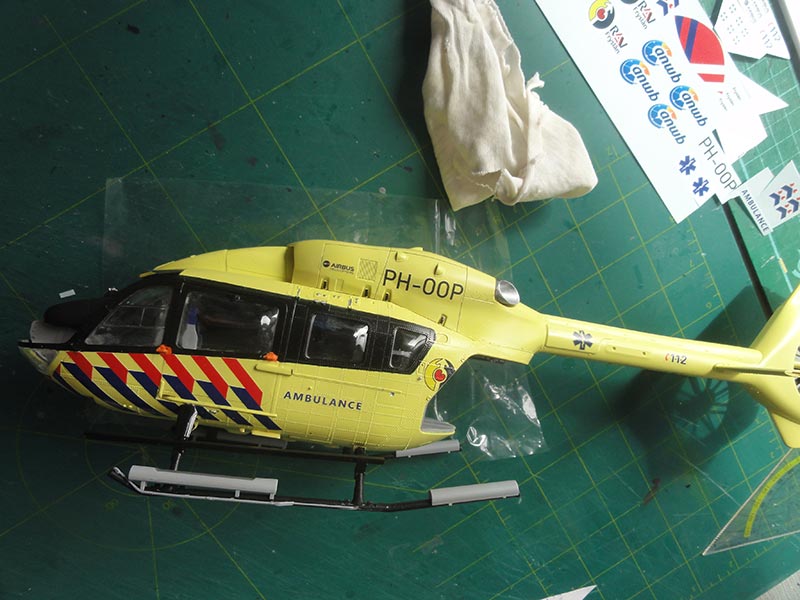
For the seats, even BUCHER logo's were on the sheet of Maarten for the seats in the rear cabin. On the fuselage bottom, the PH-OOP registration needed a bit of decal softener, I used MicroScale Sol.
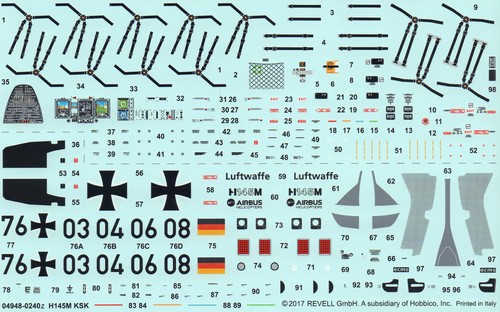
I needed only a few smaller stencilling decals from the Revell decal sheet.
Once decals were applied, clean the areas with the SOL fluid. Leave to dry for 24 hours.
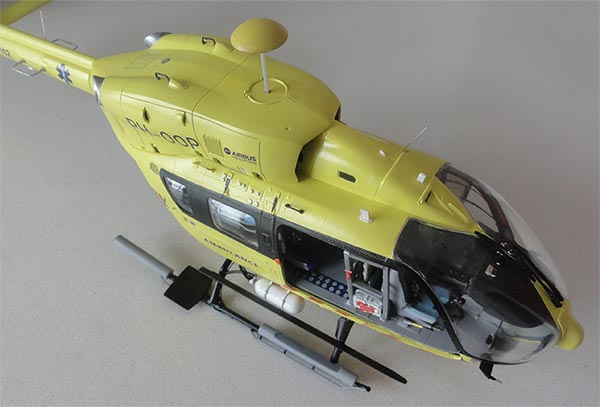
COMPLETING THE MODEL
STEP 47
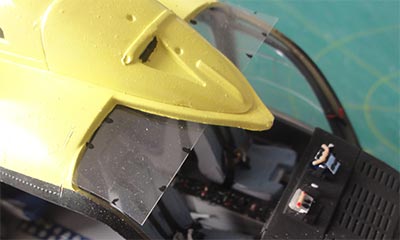
The big windscreen central strut was also pre-painted first. The clear windscreen #65 will fit but the rear edge was sanded slightly a to minimize the small gaps between transparancy and door struts. First fix the screen at some corner points and let dry.
Than, Micro Kristal Klear At was used here to close the still considerable gaps around the whole screen. It will dry up invisible and looks OK but it is a pitty that the gaps once dried are still pretty obvious.

STEPs 65, 66, 68-72, 75-77
These are not needed for the ANWB and also it has no hoist/ winch fitted and no troop equipment.
STEP 67
The pair of small pitot tubes #H236, H237 were set in place as well as the light below the fuselage.
STEPs 73-74
First an important feature is that the ANWB H145 has a small nose radar! This part #H21 is thank fully in the kit and installed. (a larger other radar nose is also in the kit).
There are small brackets seen on the ANWB H145 with parts #H236, 237. Paint yellow. Do not install part #H232. The small light #H227 should be a pair, fitted on both skid sides; make from scrap (seen here as black bits).
Also a large black Z-blade antenne should be fitted next to the light fairing; this is in the kit as part #H233. Add also a smaller white blade antenna from thin card.
STEP 78
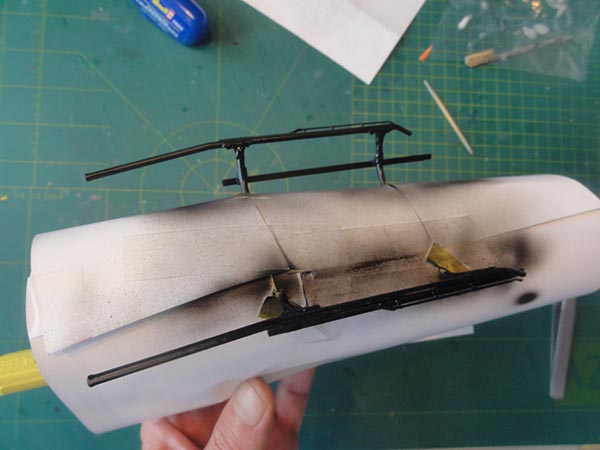
Only the windscreen wipers are to be fitted. Cut the small bits from the wiper very carefully as indicated. (Do not fit any of the cable cutters #137 and #136).
STEPs 79-86
These are not needed for the ANWB, these are military troop parts.
STEP 87
The small antenna #H228 should be fitted. Antenna #H226 is a slightly different spot. Wire antenna #H229 was replaced by metal wire and is at slightly other location on the roof for the ANWB PH-OOP. (on the PH-HOW it is on top of the fairing).
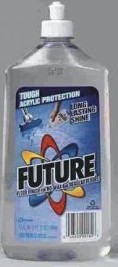
At this point, the model got a few coats of gloss varnish to get an even shine and to protect the decals. I airbrushed a few thin layers of Johnson Future (or use Pledge) thinned 25% with IPA. Protect the clear cabin windows while airbrushing!
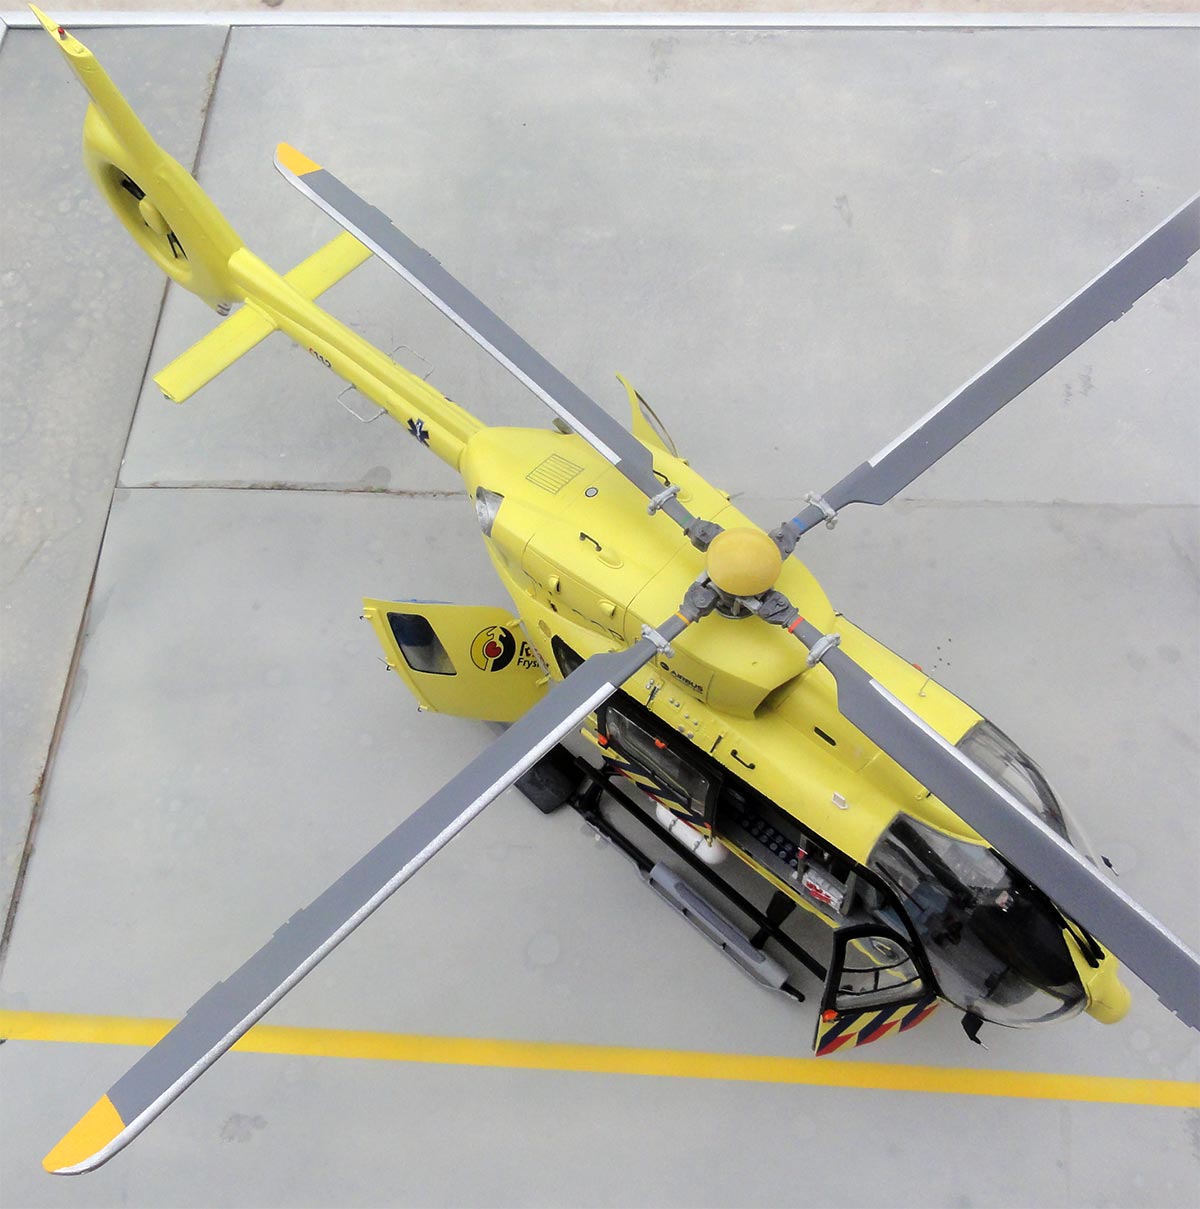
MAIN ROTOR
STEPs 32-33
The main rotor head assembly can be done as per kit.
STEPs 88-90
The main rotor blades fitting is now to be done.
IMPORTANT: Revell indicates INCORRECTLY that the main rotor turns clockwise when seen from above. This is a common error in most of their helicopter kits such as their old EC-135.
The real main rotor turns ANTI-CLOCK wise on both the H145 and EC-135! This is also (correctly) shown in the front instruction sheet illustration. So, in this assembly step, the main rotor blades #104 should be fitted flipped over.
The blades fit in the lugs, I had to use pliers , be careful not to brek these. Each blade due to gravity was bended just a little as the Eurocopter has a "rigid system".
Also, each blade has a balance colour code which are decals on the sheet, make sure the "order" is OK.

FINAL DETAILS
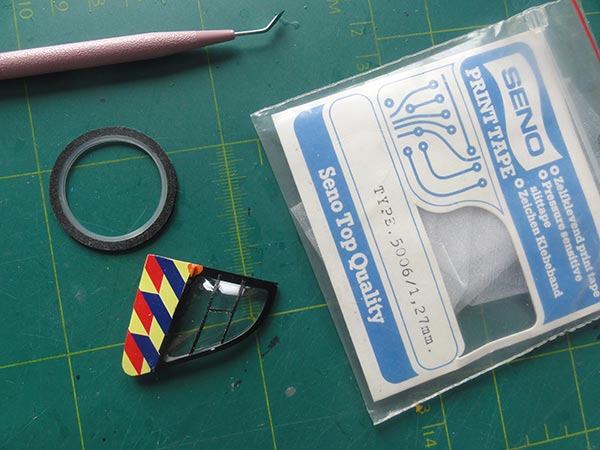
On the cabin slide doors and indeed the forward crew doors smaller sliding ventilation windows are seen as rectangular black frames. To avoid damage to the transparant windows, these frames were made from self adhesive black "print" tape cut in thin slices.
I found out that horizontal skid plates are fitted on the ANWB H145. But I found thee parts in a Revell kit, probably the EC-145 REGA kit as parts #213 or use part #96 when you have other kits. The pair of skid plates can also be made from scratch with plastic card easily.
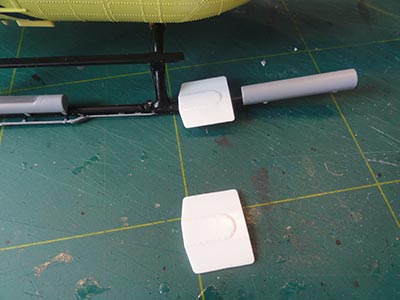
I also added some extra air tube lines with metal wire for the floating gear.
Float sytem
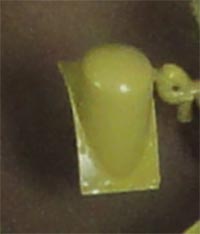
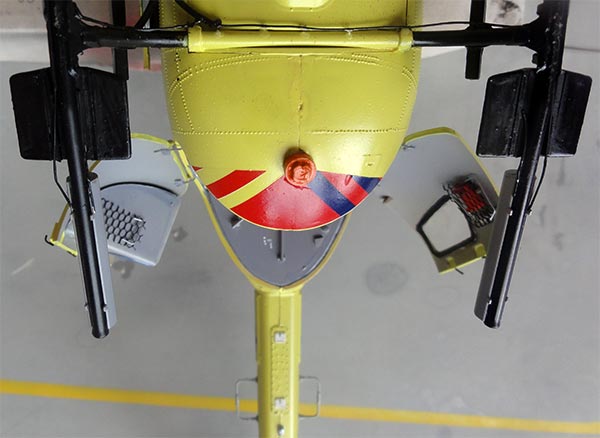
The ANWB "over water" H145 PH-OOP also has an orange emergency water beacon, this was made from scrap and is seen here:
(Later it was discovered that the central sections of the skid below the fuselage are also black; these were painted later on).

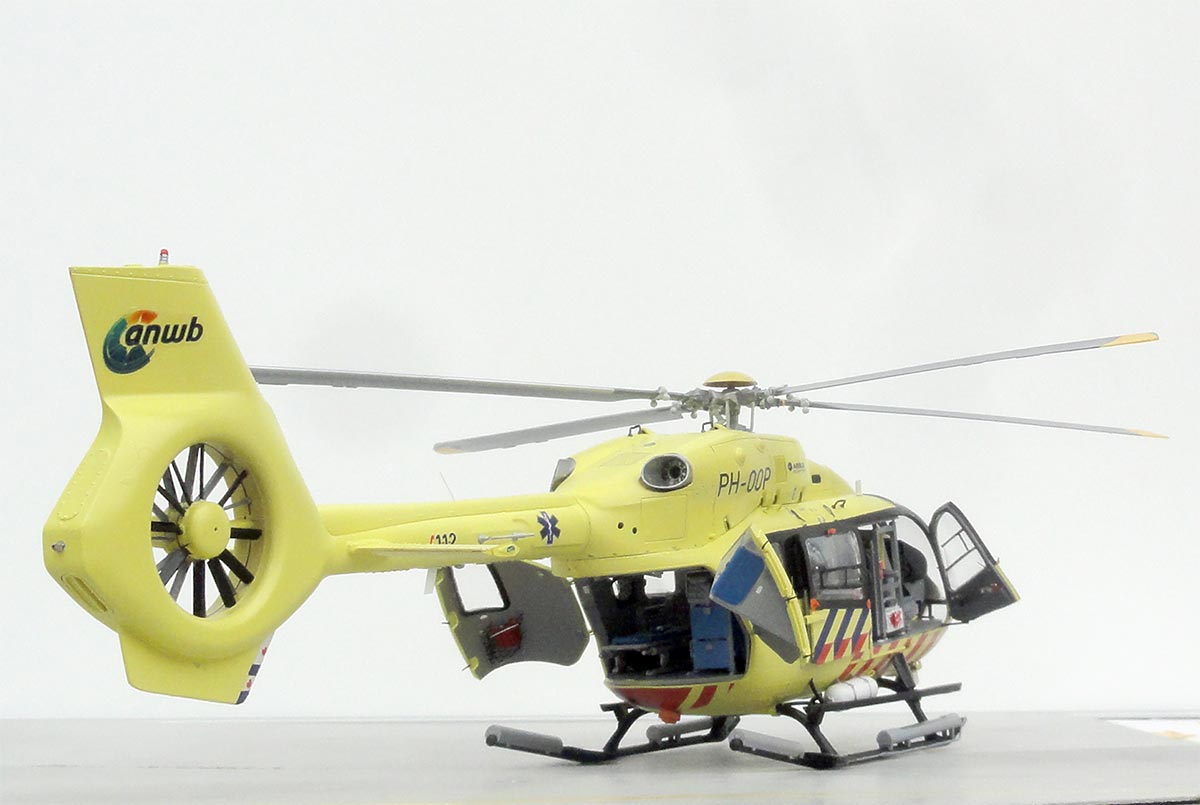
The final installments were:
- the cockpit door;
- the sliding cabin door on the right side;
- the pair of clam shell doors set open and the right pilot entry door (strengthen the hinges with metal wire).
A last gloss varnish was airbrushed, using Johnson Future/ Pledge wth some 20% IPA thinner mixed in; shield off the transparant windows when applying the varnish coat. This coat gives a nice even sheen and protects the decals.
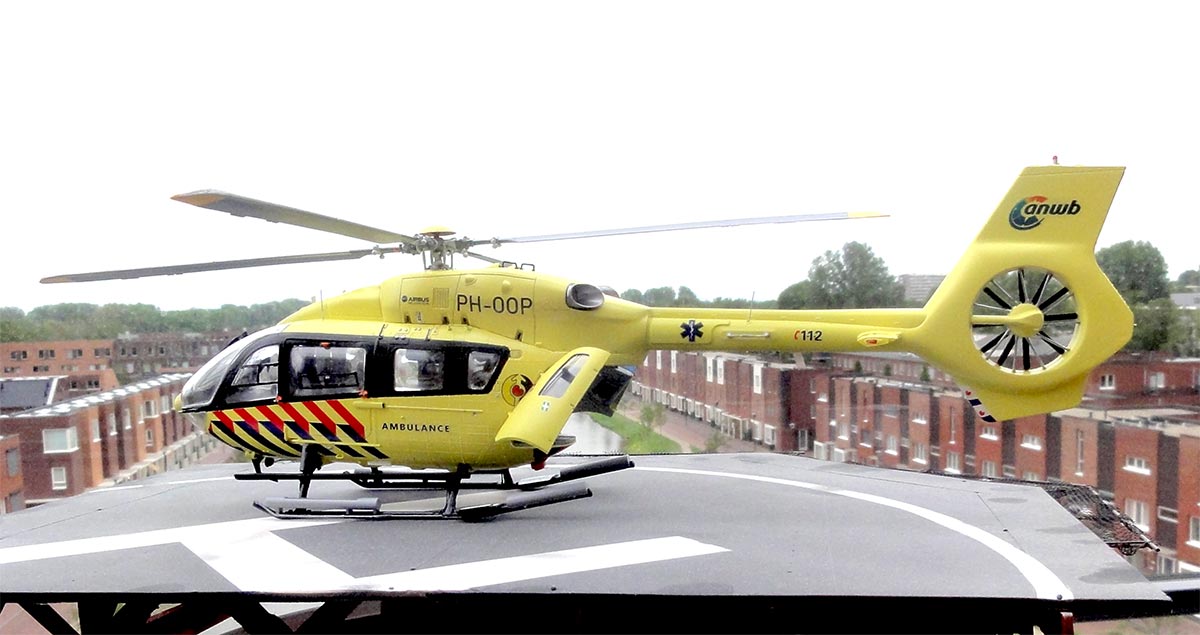
The main rotor was loosely set and... the model is completed!
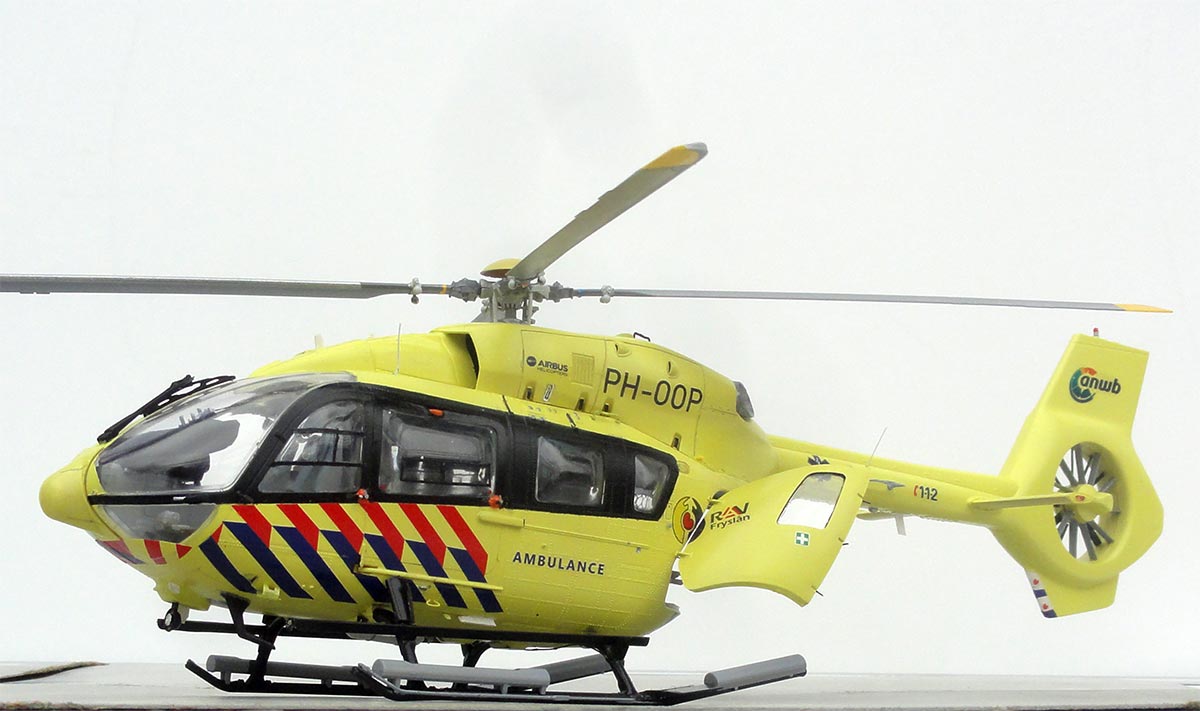
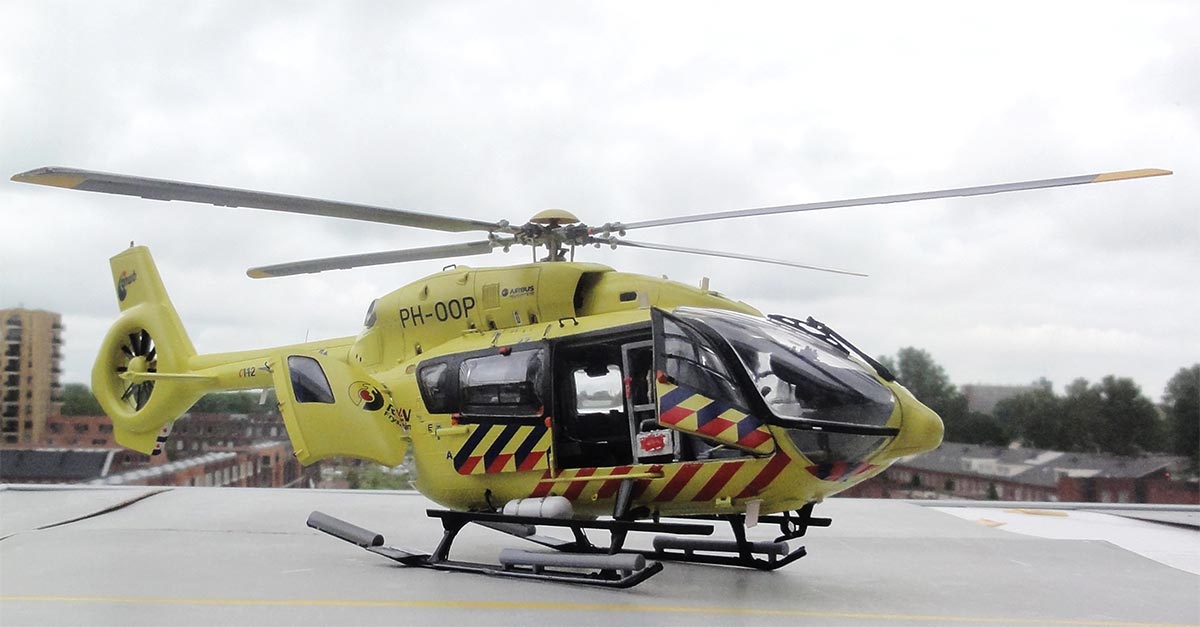
.... on the roof platform at the hospital:
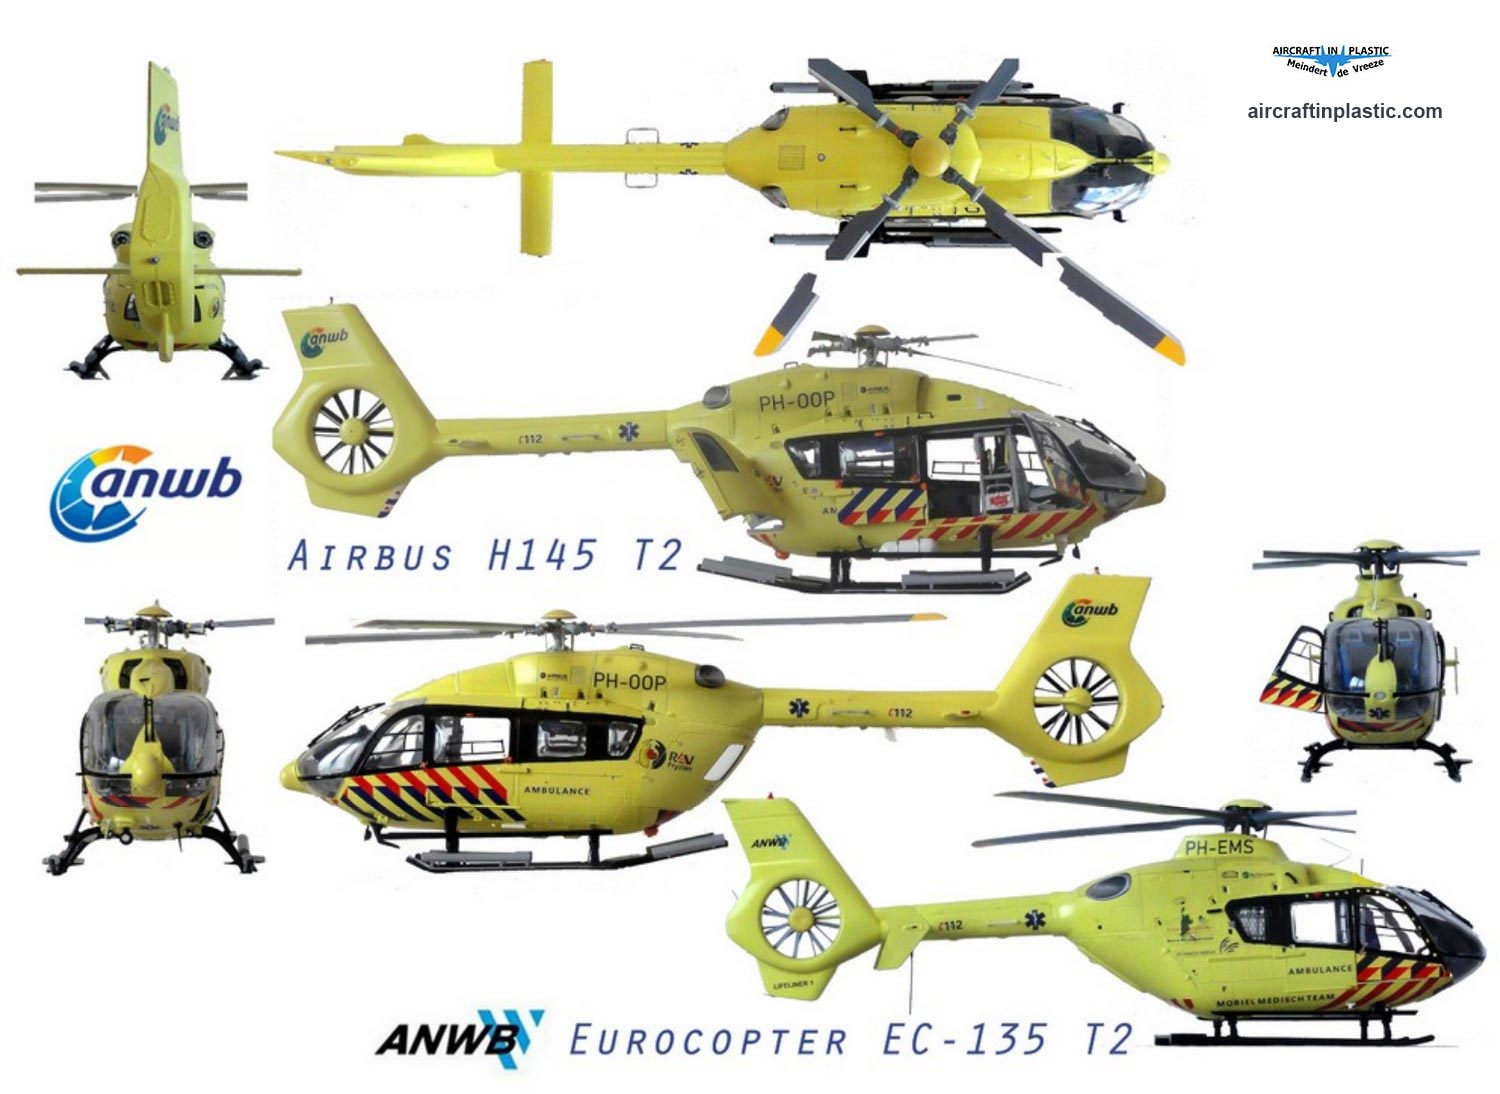
SPECIAL PREPARED POSTER WITH THE H145 and EC-135 MODELS
On to next [ Page 3...]
Back to 1/32 Models.......

(c) Copyright "designer"/ All rights reserved. Your comments are welcomed by webmaster
April 12, 2022