Roden
[ page 1 ]
Albatros D.III in 1/32 scale: building the Roden kit
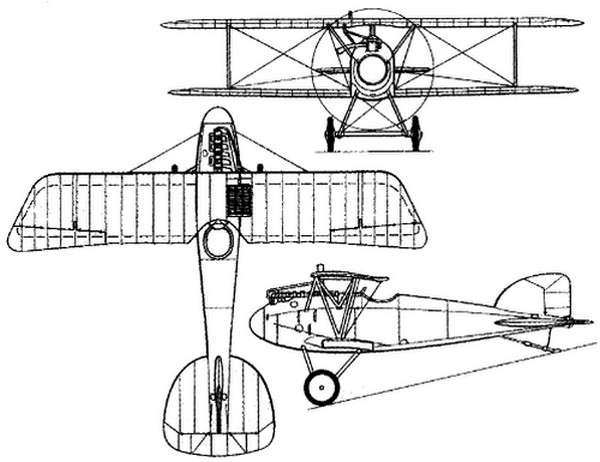
The German Albatros D.III biplane fighter was developed by Albatros Flugzeugwerke during World War I, and first appeared on the Western Front in late 1916. It quickly gained a reputation as a formidable opponent, particularly against the British and French aircraft. Drawing on the experience gained from its predecessors, the D.I and D.II the D.III was developed. One notable modification made to the D.III was a narrower chord on its lower wing, which had proven to significantly improve maneuverability on the French Nieuport 11. The Albatros D.III had exceptional maneuverability, speed, and climbing ability, making it a popular choice among German pilots. It was also noted for its distinctive V-shaped struts, which added strength to the wings and allowed for a streamlined design.
In late 1916, the D.III was introduced to the German Flieger Staffeln. However, initial tests revealed that many aircraft were prone to crashes, which were often caused by manufacturing errors in the wings. These problems were eventually resolved, and by mid-1917, the D.III had become a notorious opponent to the English and French aircraft over the Western Front. Despite the introduction of the successor Albatros D.V, the D.III remained in production until 1918.
Over the course of its production, there were several variants of the Albatros D.III, including those built at the Ostdeutsche Albatros Werke (OAW), which featured a larger, curved rudder.
The Albatros D.III remained in production until 1918, even after the introduction of its successor, the Albatros D.V. In total, over 4,800 Albatros D.III aircraft were produced, making it one of the most successful German fighter planes of World War I.
On September 19, 1917, a German Albatros D.III biplane fighter made an emergency landing on Dutch soil near the small town of Breskens, on the southwest coast. Despite the ongoing First World War, the Netherlands managed to maintain its neutrality. However, it was not uncommon for both German and Allied aircraft to land on Dutch soil. The Dutch armed aviation section, known as the "LuchtvaartAfdeeling" (LvA), had orders to intern such aircraft, and the Dutch Government was committed to remaining neutral at all times by paying for both the aircraft and engine.
Upon landing, the German pilot, Unteroffizier Franz Becker, claimed to have experienced an engine failure and had become lost in the clouds. The commander of the LuchtvaartAfdeeling at Soesterberg immediately dispatched a recovery team, led by First Lieutenant A. Plesman. Interestingly, Albert Plesman, who led the recovery mission, went on to become the founder of the world-renowned K.L.M. Royal Dutch Airlines.
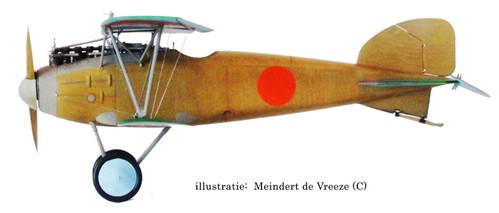
The Albatros D.III, with c/n 2002/16, was subsequently emblazoned with large Dutch orange roundels of that time and registered as "AL211" by the end of 2017. Based on photos of the only Albatros D.III interned and used by the Dutch LuchtvaartAfdeeling (LvA), it appears that this aircraft had a normal rudder.
See for old black and white photos of the National Institute of Military History (NIMH) website of reference [F]

page 2
The model
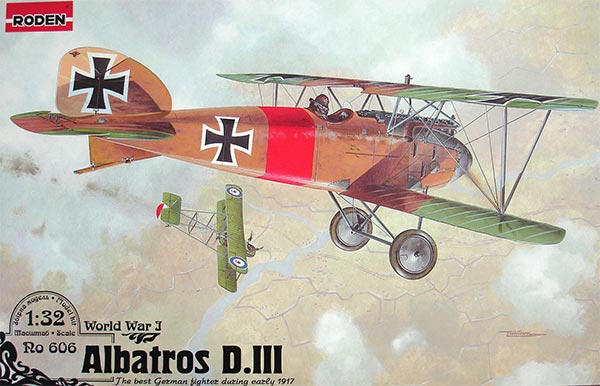
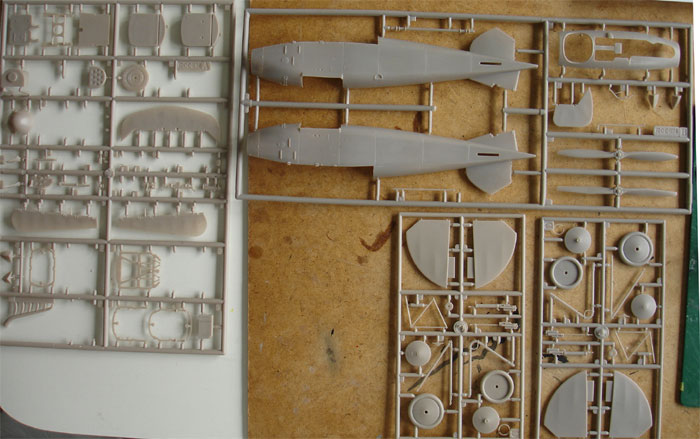
In 2006, Roden released the Albatros D.III kit #606, which is widely regarded as an excellent kit. The parts are delicately molded in very light brown plastic, and the kit comes with different propellers and two types of wheels.
The accuracy of the kit is impressive, with the standard rudder and main dimensions of the model in length and wingspan proving to be correct at 1/32 scale. This makes it a popular choice for modelers looking to create an accurate representation of the Albatros D.III.
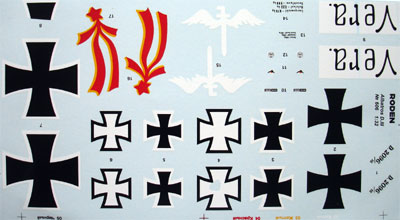
The decals give a choice of seven German schemes.
Construction
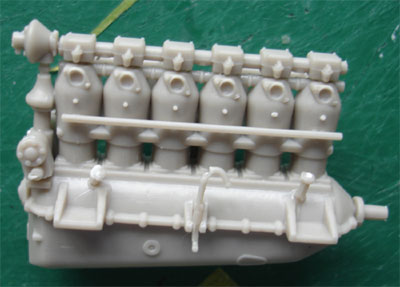
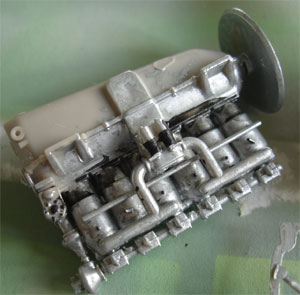
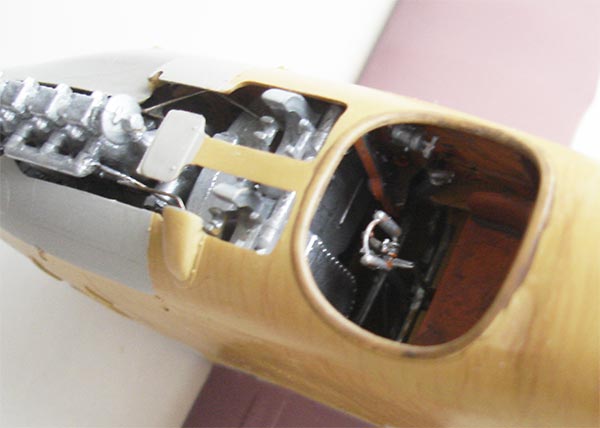
First some light flash is removed and the few sink marks filled and sanded. The parts for the appropriate Mercedes DIIIa engine are fine, but some extra cabling made from wire was added. Some wash with thinnen black paint was added on the metal painted parts for realism.
The fuselage insides were painted light "plywood" brown.
The engine is placed in nice nose frames but not a lot of these are seen once the fuselage is closed up. Apply the large exhaust at a later stage and the pipe end was opened up with a drill.
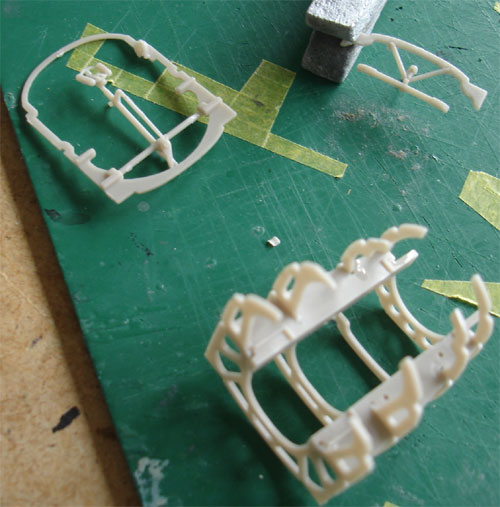
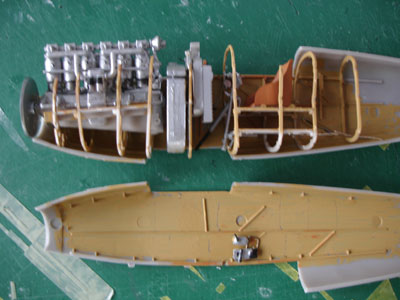
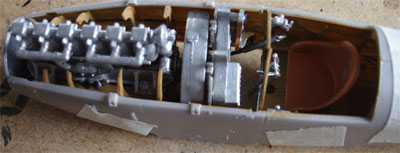
The cockpit built straight out of the box has nice details. The vast majority of the interior is in wood color (read further how to paint it). I painted the seat with leather upholstery a bit darker brown.
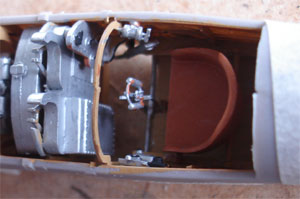
Seat straps will added later on.
The fuselage assembly of the kit is straightforward, but I recommend attaching the LMG 08/15 Spandau machine guns at this stage, as it can be difficult to reach them later on in the build. While there is a Karaya aftermarket set #B07 available for the Spandaus, I opted to use scrap fine mesh to create the cooling jacks on the plastic parts.
It's worth noting that I initially missed a speed indicator, which I plan to add in at a later stage of the build.
Four small holes were drilled in the fuslage tail for the elevator cables. Roden correctly indicates where all cables and wires are set on the airframe in their drawings, but also look at the box illustration.
The fuselage was then given a light grey base coat with the airbrush to check for any flaws.
It is likely that the LuchtvaartAfdeeling Albatros D.III retained its original German camouflage paint scheme. However, determining the exact colors used on a 100-year-old biplane can be a challenge, as color accuracy is difficult to determine from old black and white photographs. The photo development processes used at that time varied widely, and different techniques were employed.
The most reliable sources for determining the colors of the era are factory paint instructions from the time. The Germans began introducing aircraft camouflage in the fall of 1916, using pigmented varnish in two colors: brown and dark green, as described in reference [D]. The Albatros D.III was typically provided with a brown-yellow varnish layer or clear lacquer over wood on the fuselage, as noted in [D] and in the Windsock data file from reference [A].
It's worth noting that while the Germans later began using various lozenge patterns printed on canvas on many aircraft, this was not yet the case on the Albatros in question.
Colors on the model
To create a realistic finish, I suggest studying reference materials on the aircraft's color scheme and finishes, such as technical manuals or historical photos.
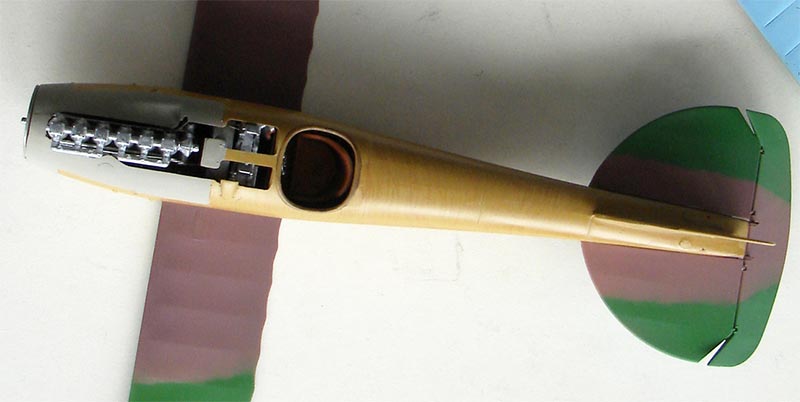
The Albatros D.III's fuselage was covered with varnished plywood, while the engine covers were likely made of corroded alloy. To recreate this look, I airbrushed the engine covers with a mixture of aluminum and light grey. For the rest of the fuselage, I used Humbrol Hu93 light brown enamel to mimic the plywood color.
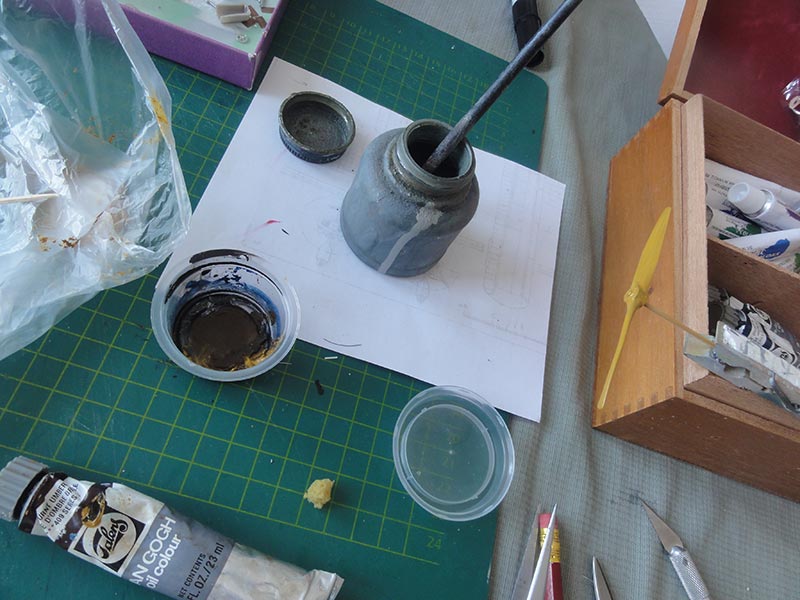
To achieve a wood grain effect, I recommend the following method: first, paint the part with the Humbrol Hu93 enamel. Once it's slightly dry, use a thick artist oil paint, such as Talens van Gogh series. Dip a piece of sponge into the darker brown oil paint and draw grain in one direction, mimicking the finish of a wood panel. Use a tissue to spread the paint further and wipe away any excess.
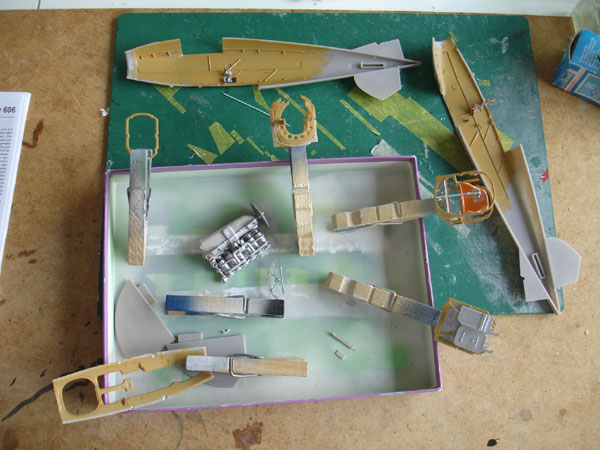
It's worth noting that the Albatros D.III had a varnish layer over the plywood fuselage, which allowed the wood grain to show through. (on the photo, the propeller is seen for this treatment).
The rudder, which was a tube frame covered with fabric, was painted a little lighter brown. The whole assembly now got an gloss varnish layer of Johnson Future/ Pledge airbrushed over.
The colours were discussed above. On upper surfaces of the wings and the tailplane, wide bands of green and brown will be airbrushed. For the "brown and green" I used Revell Aqua acrylic paints #83 Rost and #364 Laubgrün. For the light blue undersides I used Vallejo acrylic #961 Sky Blue.
(The camoulage pattern will be presented later on Page 2).
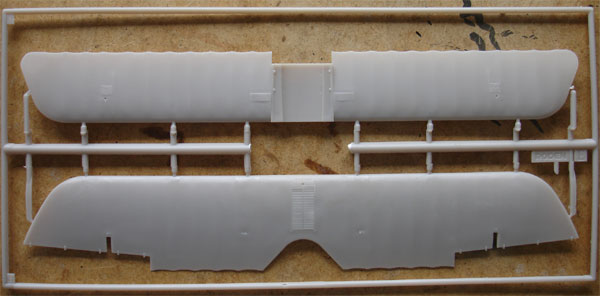
Continueing with the wings.
Assembling each wing as a single piece is a relief because it makes alignment easier. On this particular LvA Albatros, the radiator is correctly positioned in the middle of the upper wing (though in later Albatross variants, it was typically set more to the right). Don't worry about wire rigging at this stage as it can be done later using a technique that will be explained later.
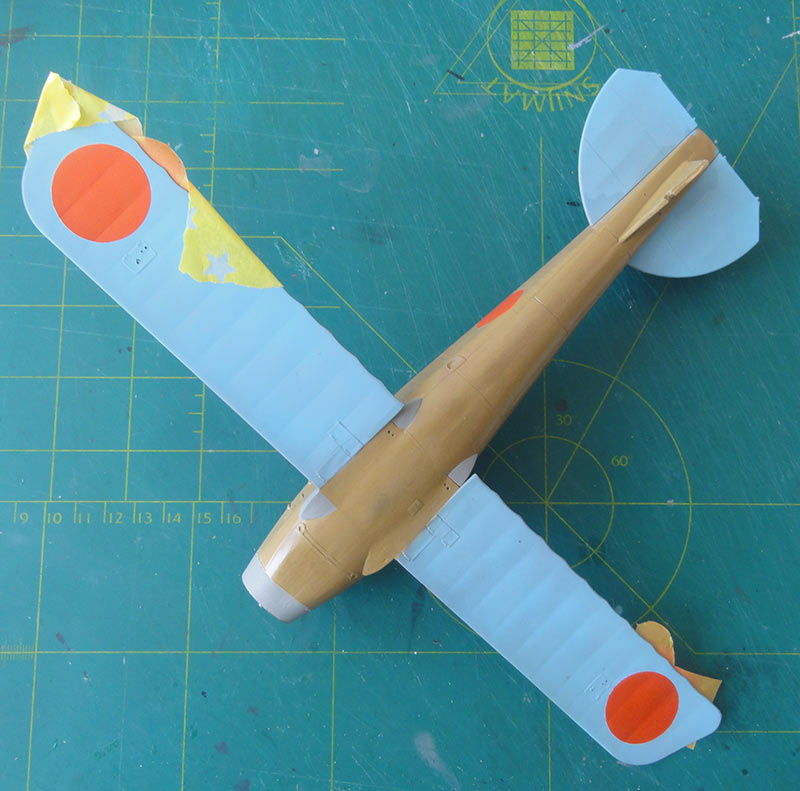
Before proceeding to color the wings and tail surfaces, it's important to paint the orange areas for the LvA roundels. Using Gunze Sangyo H14 orange acrylic, airbrush orange areas were created on a light grey background at the location of each LvA roundel: four large roundels on the bottom and on top of the upper wing, and two smaller roundels under the lower wing. The diameter of each roundel was slightly smaller than the wing chord. To ensure the accuracy of the size, round circles of masking tape were applied to these surfaces using a compass cutter. The two 19mm-diameter roundels on the fuselage were also airbrushed.
Once the roundels were done, the lower wing and tail surfaces were set onto the fuselage. Then, the fuselage was wrapped with paper to protect it from the airbrush, and the wings were airbrushed with their respective colors.
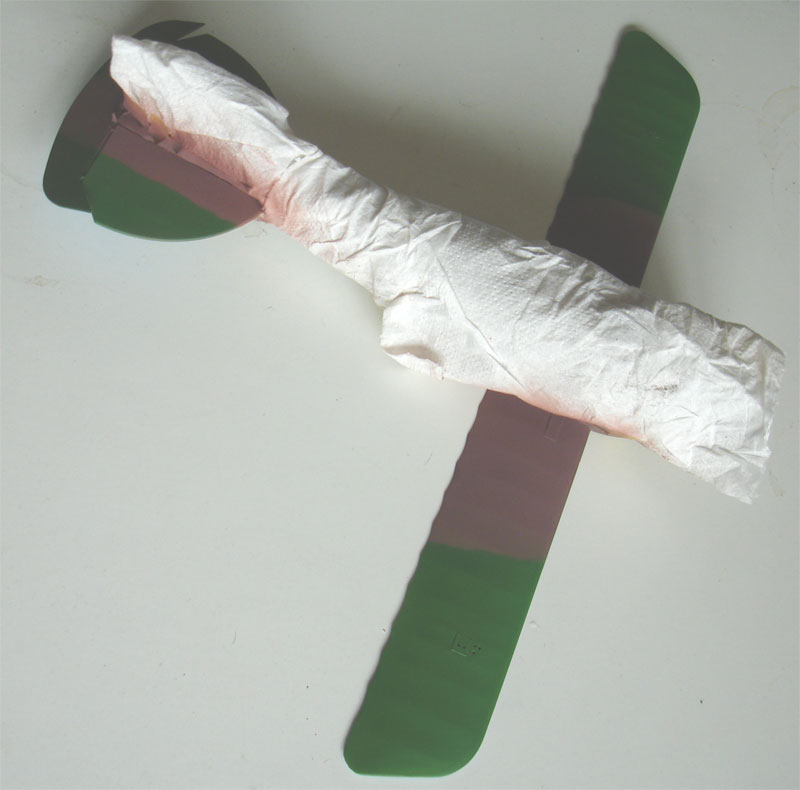
The airbrushed orange roundels were masked with tape using a compass cutter.
Next on upper surfaces of the wings and the tailplane, wide bands of green and brown were airbrushed.
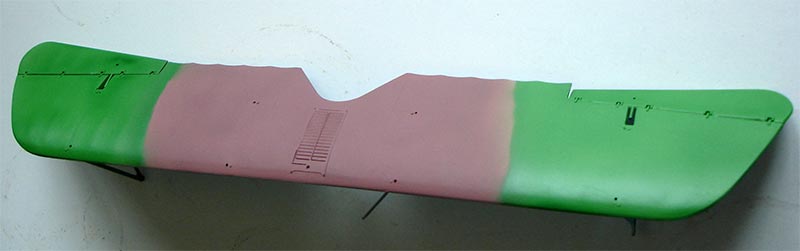
Note the grain shown on the fuselage

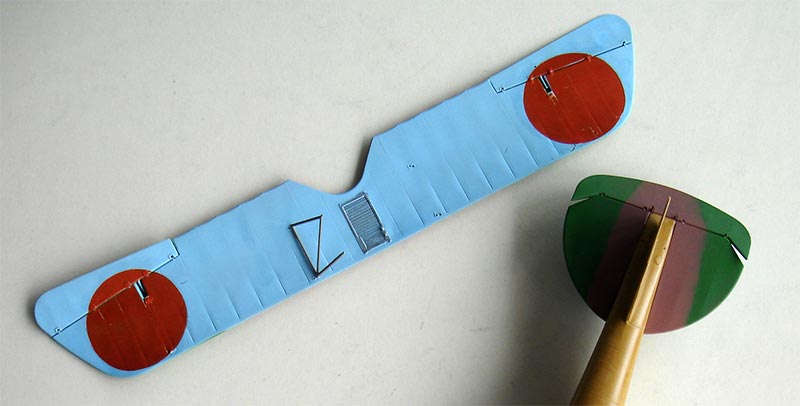
The small fairings at the bottom wing joints were painted light grey.
After the paints dried, the next step is the upper wing. The top wing with the struts can be mounted well, but the outer V-struts are rather weak. I chose to make the front strut of these V-struts out of brass metal with a set of Skybirds '86 Strutz wire. The strut length is obviously similar to the plastic and use super glue.
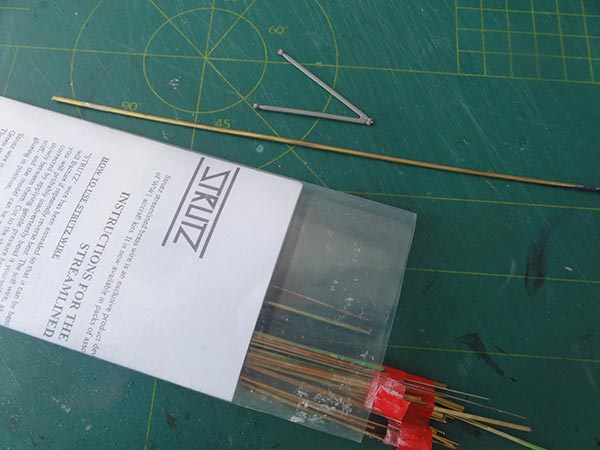
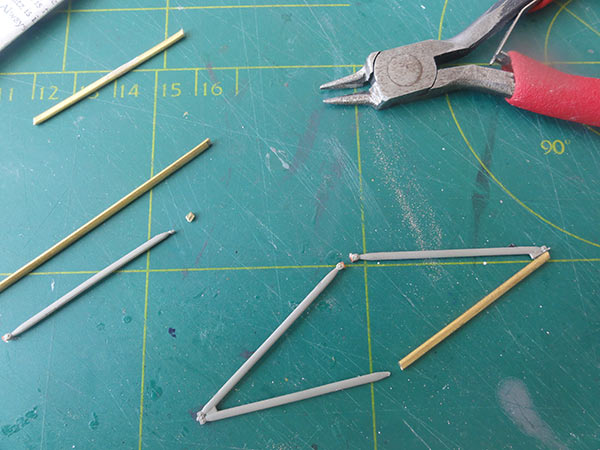
The central “cabane struts” are also a bit weak, so be careful. Check with a triangle that the whole is set symmetrical. You will inevitably get some glue stains, but you hide them later trough tipping with a fine brush.
Back to 1/32 scale models...
References
[A] Albatros fighters, Ray Rimell, Windsock datafile special, Uitgever Albatros Productions, 1991.
[B] Albatros info on NedMil pages of the IPMS Nederland site...
[C] De interneringen van vliegtuigen tijdens de Groote Oorlog, Gerdessen en Geldhof, Uitgeverij Geromij, 2016. Page 96. (text in Dutch)
[D] De geschiedenis van “Camouflage en Kentekens op de vliegtuigen van de Nederlandse Strijdkrachten”. John Greuter, Joke Bossong, Max Schep en Luuk Boerman, Uitgeverij Bonneville, 1997. Several pages. (text in Dutch)
[E] De Eerste Wereldoorlog en Nederland, Meindert de Vreeze, Modelbouw in Plastic, MIP 2014-4 , IPMS Nederland, 2014. (text in Dutch); on IPMS webpage
[F] Dutch National Institute of Military History, NIMH,
https://nimh-beeldbank.defensie.nl/
> link search Albatros
This article in Dutch language was published in IPMS Nederland magazine MIP 2020-5
Back to 1/32 Models

(c) Copyright Meindert "designer"/ All rights reserved. Your comments are welcomed by webmaster
Created this page December 11, 2020