Lockheed Martin F-16B Orange Jumper
[ Page B-5 ]
F-16B conversion of the SUFA Academy kit
... continued from F-16B page 4......
The rest of decals were applied, using a mix of the Academy kit, spares box and Dutch AF roundels, as mentioned earlier here....

The crew names on the canopy frame were for me difficult to apply as I was unable to make decals for them myself. I decided to use a black permanent marker.
For reference, I use an electronic picture frame with the various photos I have. This next to any books available.
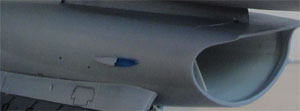
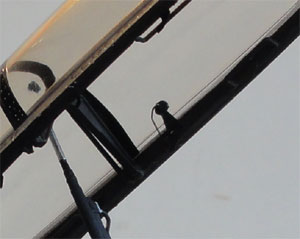
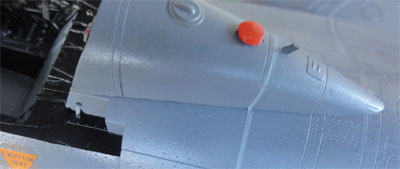
The various lights like those on the
intake were fitted, using for the Orange Jumper parts #G10 and the antennas
#D72 in front of the canopy on the nose. Please note that the anti-collision
lights have tiny red and blue colours here as well.
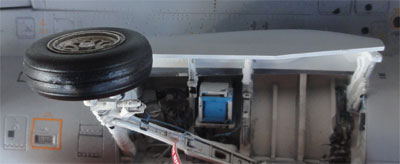
The wheels and undercarriage were
added and weathered with PROMODELLER black wash. The details in the bays
got details with various colours. Please note that Academy provides decals
for these parts as well.
 ..
..
The exhaust area was also added now.
The parts #E5 were given a metal coat and a couple of gloss coats.
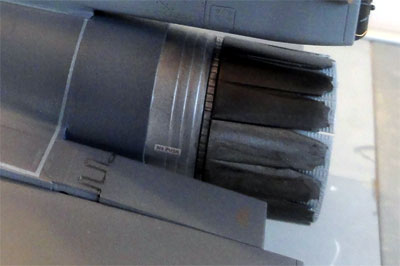
The trailing edge flaps were set
down at an angle, but the rear speed brakes set closed as seen above.
![]()
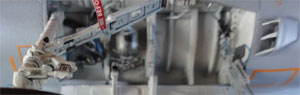
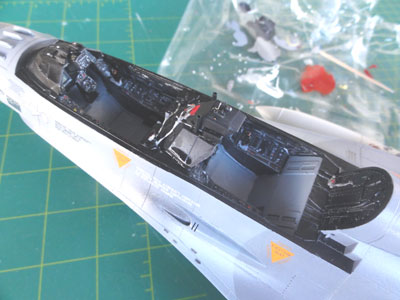
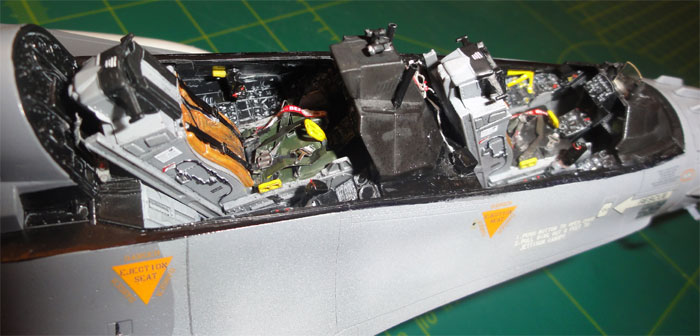
Detailling the cockpit was now done.
Although I had purchased 1/32 seats from AIRES, I found these to be much
too small. So the kit seats were detailed with bits of tape, sprue, wire
and making straps from a wine bottle package.
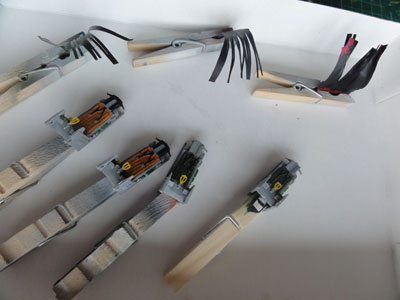
Academy nicely provides decals for
the ACES seats as well. The seat cushions vary, often red-brown as well
as a black "sheep" cushion seen in the aft cockpit.
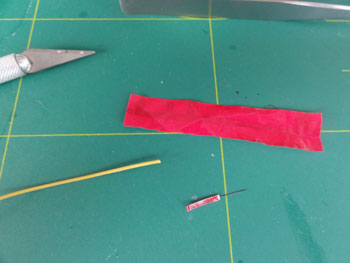
Inside the cockpit and around the
Orange Jumper airframe, often warning vanes and red remove before flight
covers are seen. These were added to the model, this adds more colors to
it. From pieces of plastic from a bag, remove before flight decals from
the kit and bit and pieces these were all made.
The canopy has nice details provided
with the Academy kit. On the edge of the cockpit at the canopy area, a
very thin edge was added from sprue to suggest the closure seal.
Inside the canopy, 6 hooks were added
as well made from a photo negative frame.
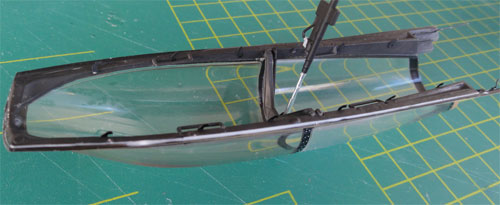
I needed to use white glue to close
some canopy frame gaps. Also, I drilled open 2 holes at the rear end in
the fuselage to fix the canopy later with 2 small metal rods. These rods
were set inside the canopy itself. I found that installing an open canopy
interfered a bit with the spine part. Inside the canopy, the mid frame
was covered by a spare black decal and outside using the excellent kit
decal #85.
Inside the canopy, this plane has
the MLU goggle sensor on the left frame, seen here... this was added from
some card.
I also had to lengthen the actuatorbar part # K44 as well by 5 mm to have the canopy looking correct in the open position.
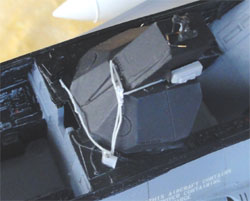
The parachute pack was fitted as well,
using part #B17 (which is in the kit). This was fitted on the Dutch F-16
tailfairing already changed before.

![]()
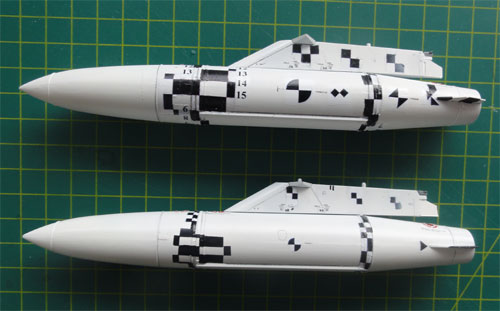
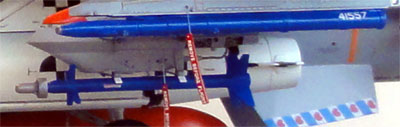
The Orange
Jumper was now in the stages of completing the model. Various
stores can be seen on this plane.
Various orange particular details
can be seen, these were airbrushed using International Orange from Modelmaster,
acrylic 4682 (Humbrol 82 can be a good match as well).
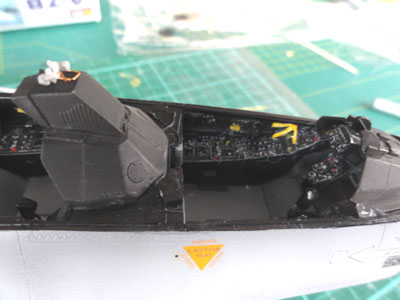
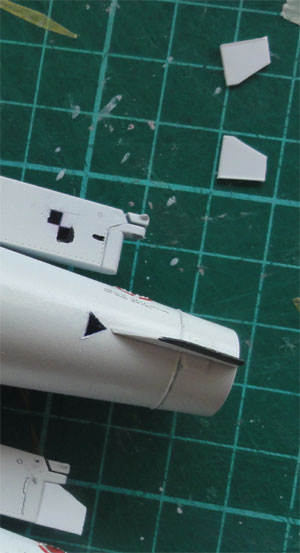
1. On the mid instrument cover, the
Orange Jumper has some electrical wires as well as a couple of tiny video
camera's. These were all added from scratch. On the insides some yellow
bars were also added. Here you see the result.
 ..
..
with the result.....
2. The main fuel tank pylons are a bit different than those in the kit. With card these were changed.
 ..
..
3. Various wing pylons have some measuring
and cameras installed as well. With rod en plastic card these were adapted.
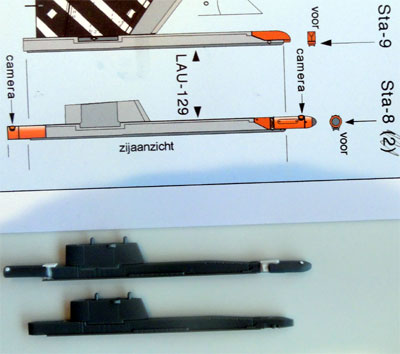
4. Different pylons are also often
seen, with one chaff housing used of the three. With with card the pylons
were changed.
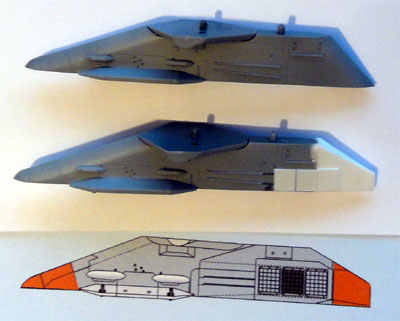
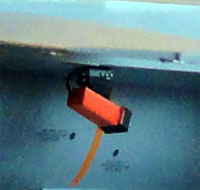
5. The recording cameras below the
aft fuselage were made from card. Also, a telemetry measuring pod was made
from rod and a practice bomb made as well from scratch.
 ..
..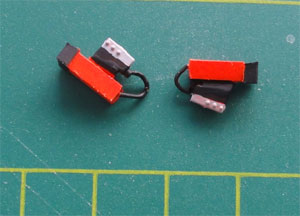
With the result....
6. Behind the canopy, a recording
camera is fitted as well in a circular housing.
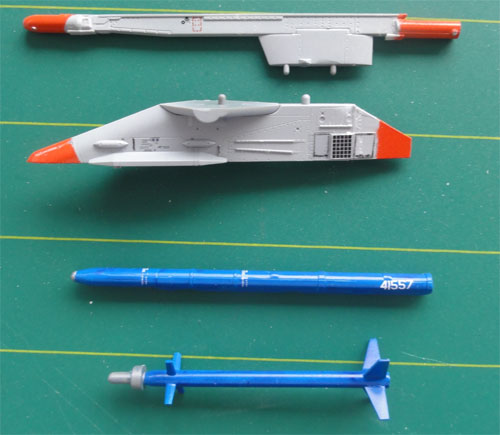
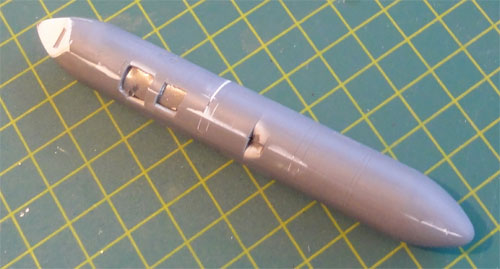
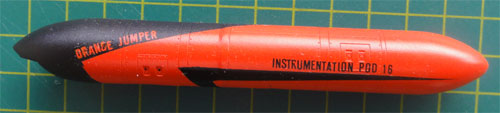
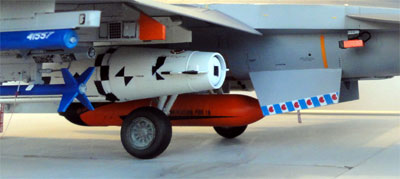
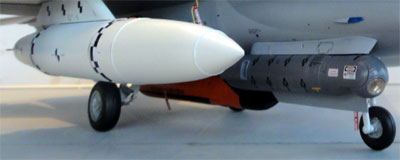
7. The large instrumentation pod below
the fuselage is a modified Orpheus recce pod. The pod was made from a couple
of fueltanks using parts from the two sprues J in the kit. Some slots were
cut open en with filler the pod was shaped.
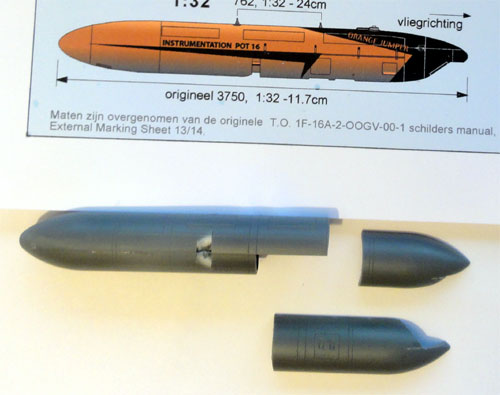
The pod has a length of 11.7 cm in
1/32 scale.
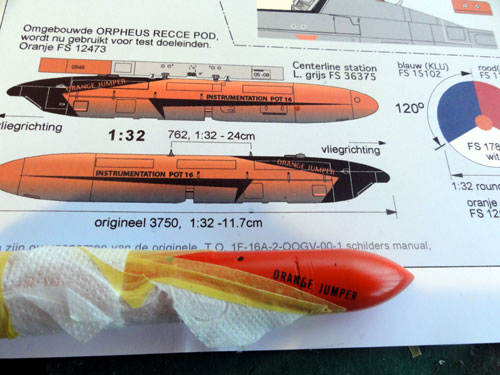
A challenge are the markings on this
pod.
a> For the orange lettering, I sprayed
the pod in orange first.
b> When dry, dry lettering
transfers were set over the orange to get the word ORANGE JUMPER.
c> Next, the front part was sprayed
black after masked and the dry transfers removed. Some re-work was needed
with a fine brush.
d> The black lettering INSTRUMENTATION
POD was made using black dry transfers.
e> The black arrow shape was made
from black decal.
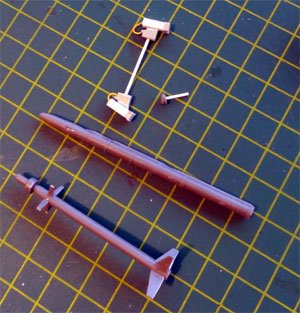
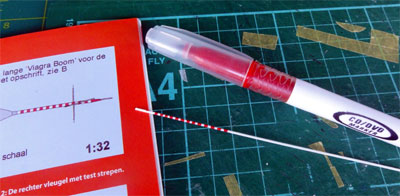
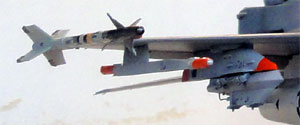
8. The Orange Jumper has a very long
pitot and measuring tube, ironically called by the crew the "Viagra boom".
The red stripes were added with a
CD/DVD marker on a white plastic rod. The airflow vanes were made from
thin wire.
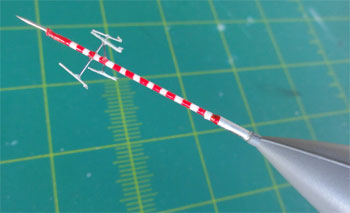
A protective plate was added as well
as seen on the ground.
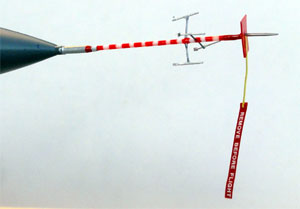
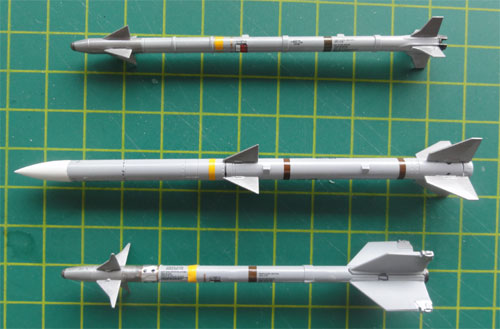
9. Some additional stores may be added
as well, the Sidewinder (seen at bottom of picture) was set on the right
wingtip pylon.
Final details added were:
- adding static dischargers from thin wire (thus not using kit parts #B13)
- coloring the various anti-collision lights
- add the pitot tube D47 and D44 sensor as per kit instructions
- add various braking wires and hydraulic lines on the undercarriage legs etc
- the MLU lights on the nose wheel door as per instructions (parts G7 and D45)
- the details on top of the vertical tail as per kit instructions, but not using part C10.
- add the HUD as per instructions, part L1
Some wash was applied regarding panels and flap hinges using PROMODELLER black was.
After all this was done, the model got a protective coat of Johnson Future with some drops of TAMIYA Flat base X21 to protect the decals. The flat base makes the varnish duller.

(c) Copyright "designer"/ All rights reserved. Your comments are welcomed by webmaster
Created this page
January 7, 2010