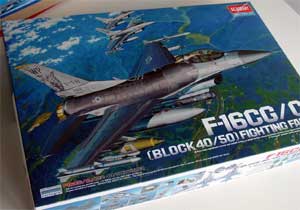
Lockheed Martin F-16C Block 40/50 (52D)
Fighting Falcon
[ Page A-1 ]
to page A3...
F-16C "late Block 52D" using the Academy kit
 .
.
The Academy kit of the F-16CG/CJ block 40/50 (52D) is very good as seen on this page with details. (this page compares it to other 1/32 F-16 kits, like the one of Tamiya).
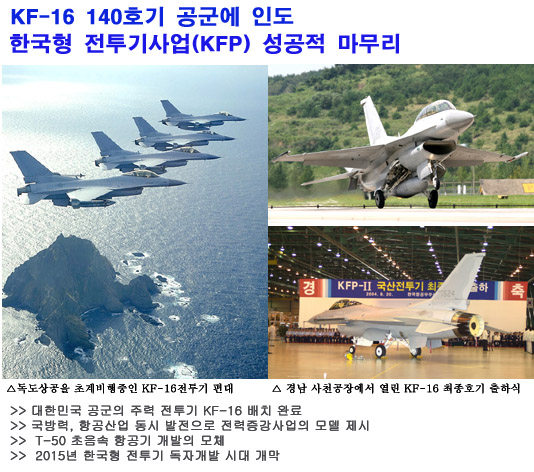
As of 2019, over 110 KF-16 aircraft are operated by the South Korea Air Force (ROKAF). For more details on the real plane, look at this page.
![]()
This kit from
Academy
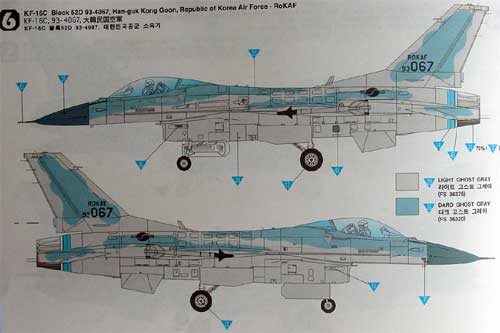
will be used to model a KF-16C Block 52D of the Korean ROKAF, an option
supplied
in the kit. It will also be improved in some areas (but more on that
later
on). The kit provides a number of options, such as an opened gun bay,
ammo bay and open up radar nose. To keep the nice lines of the
model,
it was decided not to use these options.
The steps as indicated in the Academy instructions are not entirely followed in that order. In this build, a more logical order is followed...
so let's start !
Begin first
by making small sub-assemblies and "pre-painting" the smaller parts. This will
take quite some work as there are many parts in this nice kit. Some airbrushing
is done with parts still in the sprues.
Steps 1 - 2
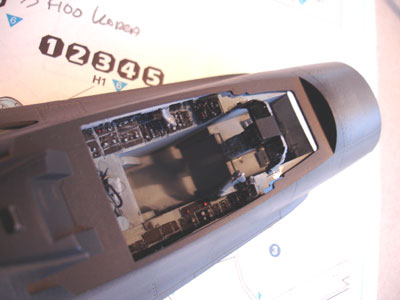
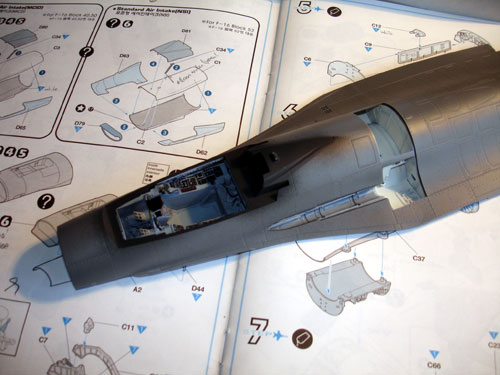
The cockpit area is pretty well detailed and assembled as indicated in the instructions.The main areas are dark grey. The ACES II seat is OK but straps are moulded on (Remove these and make separate straps).
Step 3
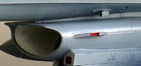
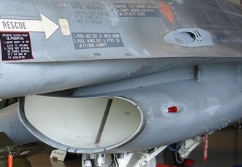
You get either the "big mouth" or older type F-16 intake parts, a very nice feature of the kit. For the KF-16C, the small old type intake was needed. I recommend that you only glue the intake heating probe part C34 at the lower end.
Issue found later regarding the small intake: on the Academy kit the distance between the intake and the lower fuselage is too small. The RAM intake and duct are barely visible. (Some modification may be needed here, a good alternative being to use an old Hasegawa F-16 intake).
kit real
Steps 4-5 Main
gear bay
The bay is
OK, but fit some extra detail by adding tubing and hydraulics through
stretch sprue and some card.
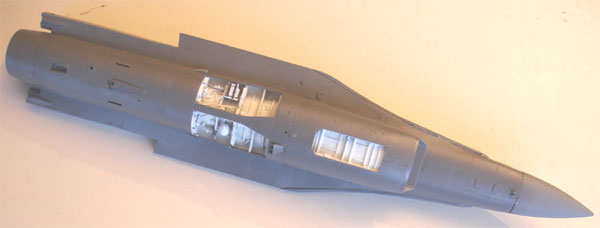
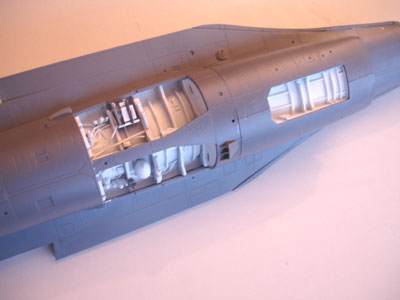
Step 6
The intake
tunnel is a very nice feature; you get 2 types of engine compressors.
Issue found
later:
on the small
intake: on the Academy kit the distance between the intake and the lower
fuselage is too small. The RAM intake and duct are barely visible. Some
modification may be needed here.
Steps 7-8
It was decided
not to show an open gun bay. The basic bay was assembled and glued inside
the fuselage to give it some strength. The panel #C44 was carefully aligned
with the edges to get a perfect fit. The gun went into the spares box.
Steps 9-10
Assemble as
appropriate.
Now go to step
17 , dealing with the main assembly including main wing to fuselage.
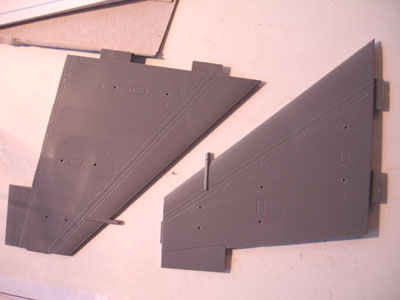
Assembly main
wing halves, do not use the parts B13 for the static dischargers; these
are best replaced with thin electric wire.
NOTE: early
F-16's before and up to block 30 have at the slat at the inboard position
only "2" slat rotating fingers". Later block beyond block 30 F-16 have
there "3" fingers. Probably this is modification applied later to cope
with more stress.
The old Hasegawa
kits have indeed "2 fingers" which is correct for the earlier F-16's. This
Academy F-16C has the "3 finger" style inboard slat rotating fingers" which
is OK.
Step 18
Assemble the
wing to the main fuselage; take care to get a good alignment. let dry for
24 hours, the mating surfaces are a bit thin. I had to use filler here
to close the gap.
Do not fit
the horizontal stabilizers, leave until later.
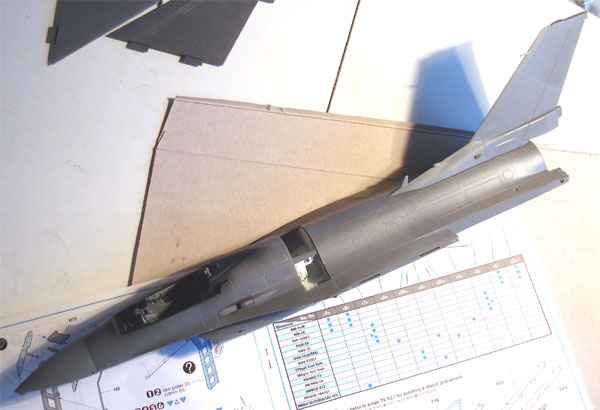
Step 19
Assemble the
trailing edge flaps as shown.
Steps 11-13
The gear assembly
was OK, but I had to reduce the beam part #D27 2 mm in length to get a
correct setting of the forward gear nose leg. Academy provides 2 parts
for the nose gear door (#D77 / D76) but I could not see a difference.
The kit has the correct main wheel hubs and bulged gear doors.
Step 14
Assemble as
shown.
Step 15
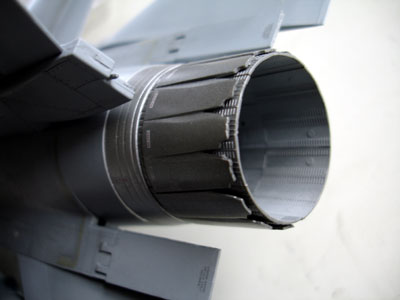
Two types of
engine exhausts are provided, either for the F100 or F110 engine. For the
KF-16, the F100 is appropriate. Assemble as shown.
Step 16
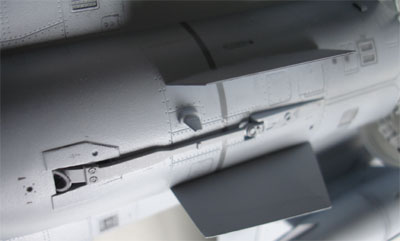
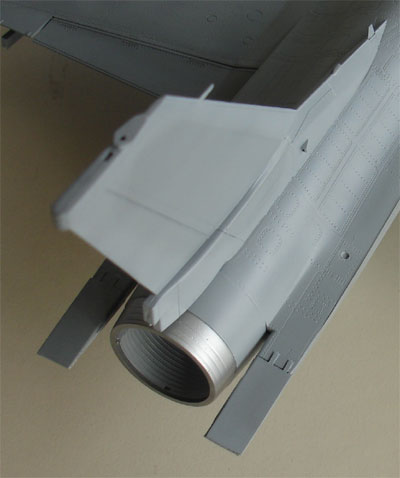
The air brakes
are OK, but were selected "closed" for this model; if you want to
display them open, add a couple of two very tiny spring doors at the hinge
base from thin card.
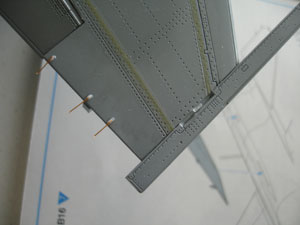
Steps 20-21
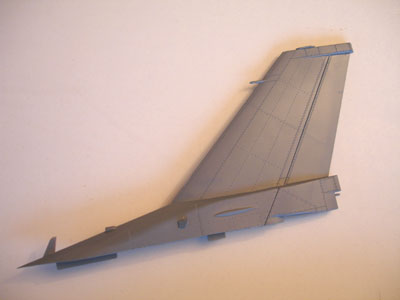
The tail and
brake parachute fairing are OK, but the edges at the base of the vertical
fin a bit to "sharp". I simply sanded these a bit smoother at the forward
leading edge.
A nice touch
is the extra fairing with parts B1,B2, B17, B18 supplied on the kit (this
was used on the Tamiya kit for a Chile AF F-16C).
 .
. 
I did not use
the parts B13 for the "static dischargers"; replace with thin wire.
Step 22
As noted, the
radar was not assembled, a closed nose was preferred.
Step 23
The instrument
cover part C57 has a bit strange shape, but only an expert can tell. It
is dark anyway and the older style HUD was assembled for the KF-16C
Step 24
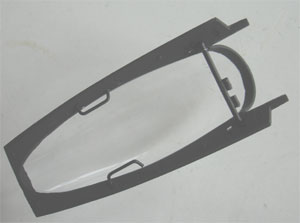
Two canopies
are provided, a very nice feature: tinted "gold / smoke" or clear. You
will need to sand and polish the mid moulding ridge in the center. I was
not able to get it completely polished smooth to be "unseen" however' ;
some distortion is inside the transparent plastic. The locating pin on
the rear canopy glass is not in the correct position. VERY CAREFULLY remove
this pin, otherwise the part will brake!
In the main
canopy, I added a missing horizontal bar at the rear made from thick rod.
Step 25
The ladder
is a very nice feature.
Step 26
The KF-16C
has a couple of very typical antennas and ECM fairings like the ASPJ antenna,
carefully depicted by the Academy kit. They seem a bit strange but are
correct.
Step 27
The missile
launchers are very good. You also get the wing tip lights. As noted, the
static dischargers #B13 were replaced with thin wire and their bases made
from a drop of white glue.
Steps 28 up to 34
These deal with the external stores and lots of them are provided in the kit. The stores are of very good quality and you get lots of decals for them.
Listed and provided are: AIM/9L./M, AIM-9X, AIM-102-B/C, AGM-88, GBU-12, GBU-12 W/TER, GBU-31 and tanks and pods like the 370 gallon and center 300 gallon tanks, AN.AAQ-13 / 14/ 213 / 184 and AN/ALE-50. A very big decision here and you also get the needed adaptors and pylons. The stores are to assembled later.
Step 35
This gives
you 3 figures: a pilot and two ground crew. They are very good.
The final stages cover the decals for the markings and stencilling.
During kit construction,
hardly any putty was needed. Only at the wing-fuselage joint was this required.
Tape and mask both sides of the gap and fill with putty. Remove with Nail
polish remover, this will reduce the amount of sanding and will save the
surface details.

(c) Copyright "designer"/ All rights reserved. Your comments are welcomed by webmaster
Created this page
March 20, 2007