F-15I Eagle
[Page 5]
F-15 plastic scale models in 1/32 scale
VARIANTS:
F-15J
Japan Self Defence Air Force
F-15B
USAFE
F-15I Ra'aam
Israeli Air Force (on these pages..)
Modelling report
TAMIYA
[KIT C] The Tamiya kit is now further tackled. The kit of Tamiya used was released as an F-15E in 1992, and this kit is very impressive and detailed, kit # 60302.
It has good instrument panels, nice ACES seats. Decals however are very thick. Also, you get only a single fuel tank, whereas often two or even three tanks are seen loaded on the Eagle.
The TAMIYA F-15E kit is converted into an Israeli F-15I Ra'aam, a basic F-15E with special Israeli equipment.

Also, a new set of purchased decals will be used: IsraDecal Set IAF 19 for a 1/32 scale F-15I (more on these later on....)
The F-15I does have the exhausts 'with" Turkey feathers. These are not in the Tamiya F-15E kit. So I obtained a pair from an old Revell F-15 kit and these were made a bit longer with a "ring" section as described on page 2.
So now lets go through the step-to-step
approach...
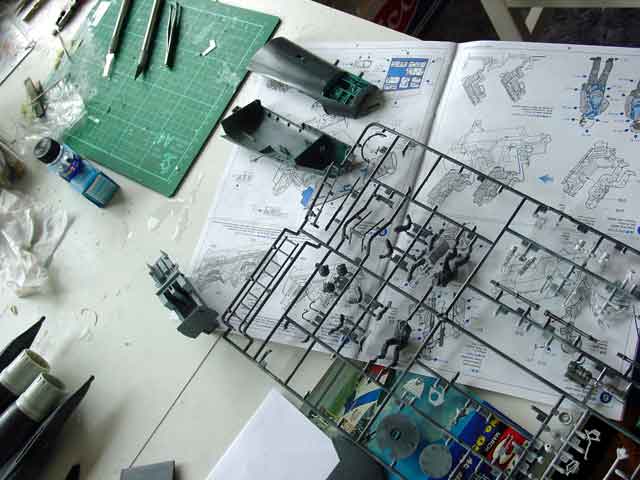
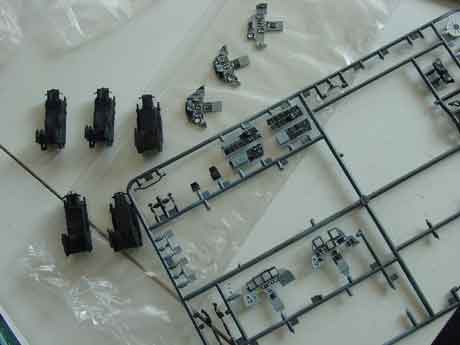
Some kit parts are seen here and
got their base coats.
The cockpit details as supplied in the kit are quite good with raised instrument details and special decals.
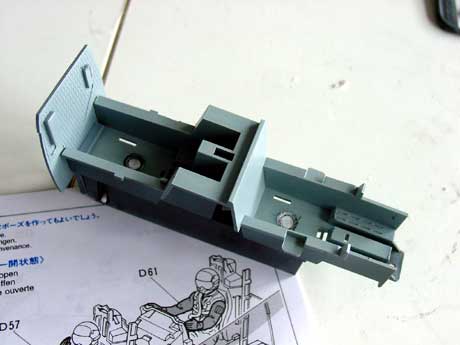
The cockpit tub has screw mouldings in the floor, I removed these as I also may want to display the cockpit without installed seats. The screws were thus not used, the nose gear bay was simple glued to the upper tub.
By the way, I hardly used the screwing and fixing methods of the Tamiya kit. A good glue is enough for me to do the work.
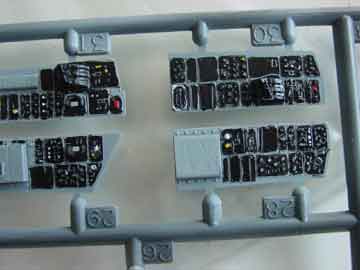
The Tamiya parts for the instrument panels and side consoles are fine, with raised detail. They only need basic painting using references. The F-15 cockpit are pretty clean so not a lot of detailling can be added; the only things really obvious to add are:
- add some details on the edges of the tub
- add oxygen hoses
The instruments were painted as indicated
in the instructions. Be aware not the put the instrument decals #68-73
backwards. The basic tub is light grey.
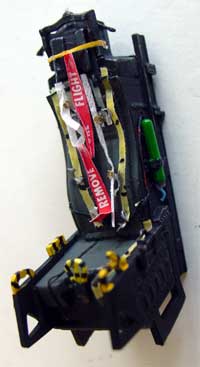
The supplied ACES seats are quite
good. Early Israeli F-15 were also equipped with the ESCAPAC seats but
to my knowledge, the F-15I's have similar more modern ACES seats as standard
in the F-15E. I added seat harnasses and some thin wires. Also, the central
firing handle is not present in the kit (as model pilot figures are supposed to
be put onto the seats), so these handles were added from sprue. The seats
were also given a red warning tag (these are nicely supplied by Tamiya).
The seats were not yet set into the model.
The nose landing gear is next. The
wheel fixing screw did not work on my kit (I will simply glue the
wheel later on). The leg is after some cleaning up with a file very nice
and made from metal. You are supposed to install it already at this stage.
I did not like this so did not install it but than the screw assembly fixation
can not be done. When you (super)glue the leg later it, this will also
be good enough.
STEPS 7/8/9
The cockpit was further assembled. The cockpit sidewalls have some moulded circuit brakers. These were emphasized using a black permanent marker pen.
I did not use the supplied crew figures. If you do, remove the mould edges on the figure' sides.
The Tamiya kit comes with a radar
cone ready to be displayed and an avionics bay. These are nice add-ons
to this kit. (more on that later on)
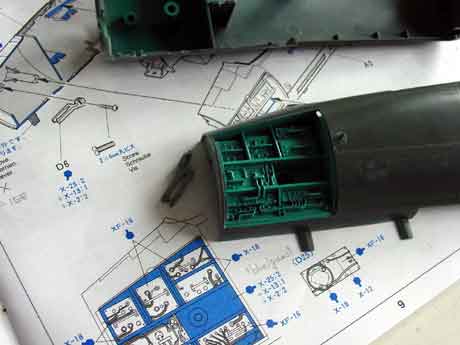
The moulded avionics bay detail in
the part # A2 is fine to start with. It will benefit from some added wires
and the solid hand grips were removed and replaced with handles from plastic
rod.
STEPS 10/11
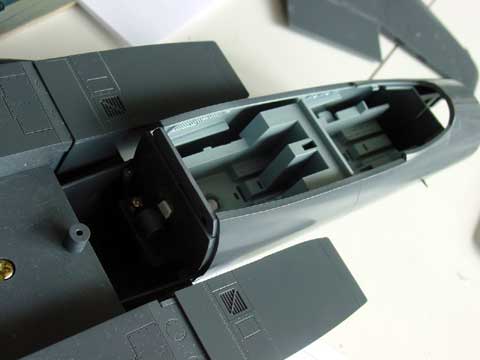
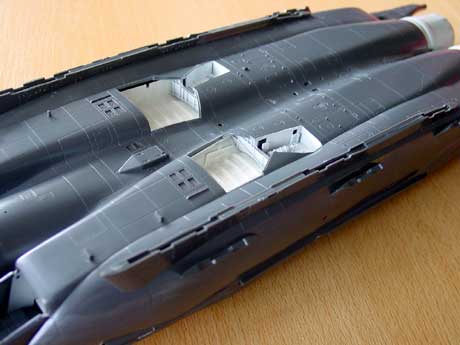
Intake ducts
There are ejector
pin marks in the intake ducting parts. A real pitty. These were all filled,
sanded and the parts # C13 and C12 painted inside white. After glueing,
it was necessary to fill the seams. A lot of work is needed here.
The intake ramps gave no problems. I opted to fix them later on but the kit enables the ramps to be "moved"; I selected a fixed "up" position as usually seen on planes on the parking tarmac. Also later on I put on 4 painted pieces of decal to cover the hinges
The 'Revell" exhausts with Turkey feathers were added as these were prepared as described on page 2.
STEP 14
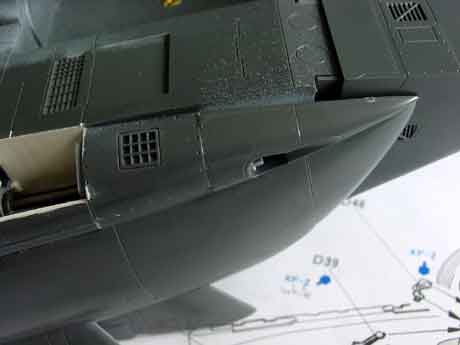
The rear internal exhaust ducts are nice but there is a remained gap that is difficult to sand due to the detailling. Fill with white glue! From the impressive single piece lower fuselage part , remove the longitudinal moulding edge near the CFT (fast packs).
The Israeli F-15I Ra'aam has additional cooling air scoops on the side of the conformal fueltanks (fast packs). The intake scoops were made from scrap from old bombs and plastic card.
STEP 15
The Tamiya kit comes also with the 20mm gun,; this can be displayed with an open panel. The grill vents on the panel door part # A13 were "opened up" by carefully using a scalpel on the inner surfaces, improving how it looks. The inner gunbay was sprayed white.
STEP 16
Assemble as shown.
STEP 26
Assemble the main wing halves first now!
The wings pose no problems, but check their fit and sand. A small amount of filler is needed at the rear. Ailerons can be set "down" later, a nice touch.
STEP 28
Assemble the main cockpit section and upper fairings. Glue, fix and use some very limited amounts of filler/putty.
The low vis lights parts #E21 are
a bit thick. Sand them on their back sides and glue them on the fuselage.
Please note that on the F-15I they appear very dark grey (and not yellow
or brown as on USAF planes...).
STEP 18
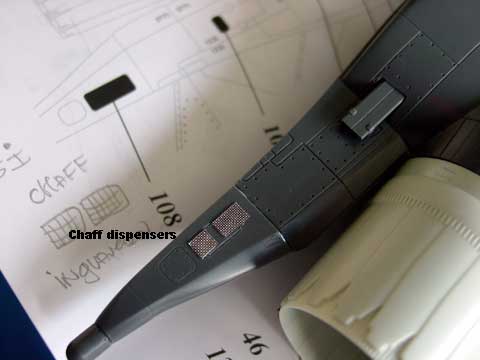
Assemble as shown including the ECM knobs at the rear ends. The F-15I has additional chaff dispensers are near the tail booms. These were made from cut out mesh. (The tailhook will also fitted later on).
Note: the long pylons on the Conformal Fuel Tanks CFT were OK.
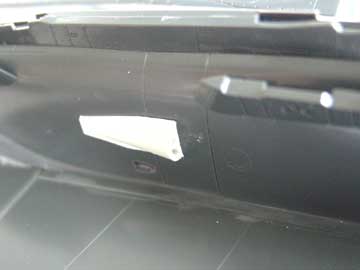
On the lower fuselage in front of the main gear bays, a small fairing is seen. It is triangular. I added some more detail here.
Go on with....
STEPS 32/33 Tailplanes
The vertical tails will be fitted later on. Through this way, handling the model will be easier during painting and airbrushing and applying all those tiny decals.
I removed the fitting "hooks" at the edges of the parts #B7 and B6. It is possible to fit the vertical tails later on, the very small gap can be filled with white glue, smoothed and painted with a very fine brush in the camouflage colour needed.
The horizontal tail planes can also be fitted later on after painting as is.
Obviously, the tailplanes were at the same time also sprayed as the rest of the model (see later on page 6..)
Do NOT fit any transparant parts such as lights etc. Leave for final assembly steps obviously.
Check all parts, fill, sand and correct. Clean the model!
On to next [Page 6 ....]
(c) Copyright "designer"/ All rights reserved. Your comments are welcomed by webmaster
Created August 4, 2005; updated August 2018