Matchbox / Revell
Twin Otter in 1/72 scale: modelling report
page 2
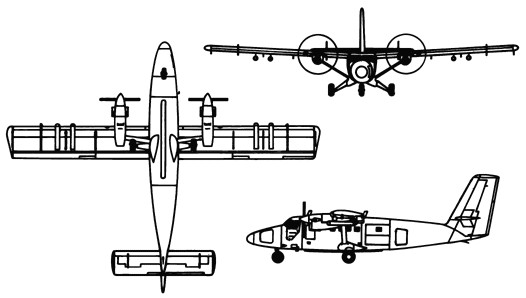
The De Havilland Canada DHC-6 Twin Otter was designed as a 19 passenger STOL (Short Takeoff and Landing) utility aircraft at De Havilland Canada. First flight was May 1965 and it was fitted with Pratt and Whitney PT-6A engines which later proved to be reliable engines. It was an excellent aircraft that could be flown in difficult circumstances and by bush pilots. Some different noses could be fitted and use for the storage, could be turned open and usually had some electrical systems fitted.
The Twin Otter could be fitted with wheels, skis as well as large floats. The type was widely used in particularly the North Americas. Nearly a 1,000 Twin Otters were manufactured (including "Viking air" made aircraft after 2006).
This is another model of the "SABA Project" for which I also made the Dornier Do-28A and Sikorsky S-51.
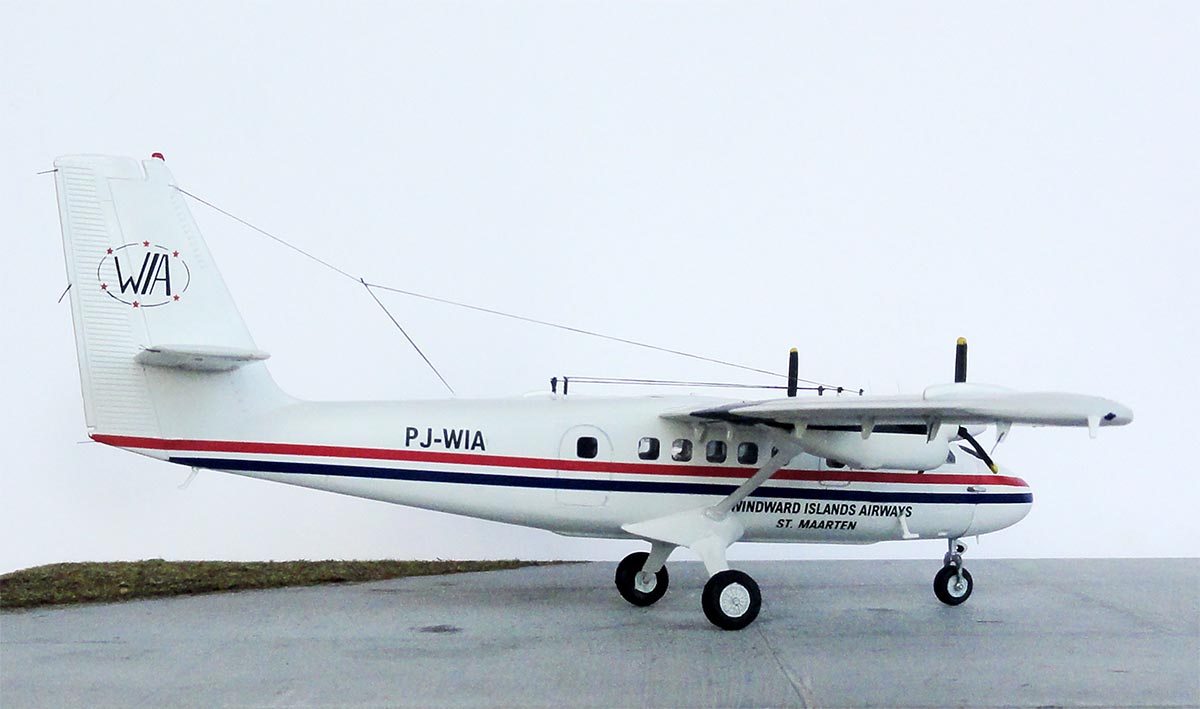
This model will be made as the first Twin Otter "PJ-WIA" as used by Windward Islands Airways (WIA) in the Dutch Northern Caribbean.
Aviation specialist and historian Gerard Casius worked as head of the WIA technical services department at St.Maarten in the sixties and seventies and asked if I could make a model. Gerard actually made the design for the first WIA Twin Otter paint scheme with drawings on paper and it was done quickly as the aircraft would be painted at the De Havilland Canada factory prior to delivery. The aircraft had a few liveries over the years but for Gerard I made it in his "first WIA scheme" Twin Otter livery with horizontal cheatlines. Gerard gave me information that was used while building the model.
These WIA aircraft fly to and from the small "sleeping volcano" island of Saba of only 13 sq.km. Saba has one of the smallest airfields in the world with a short air strip of just 400 meters sitting on top of man made peninsula in the deep sea called "flat point". Here the small "Juancho E. Yrausquin" airfield was established in 1963. Only special trained and approved pilots may fly from and to this field.
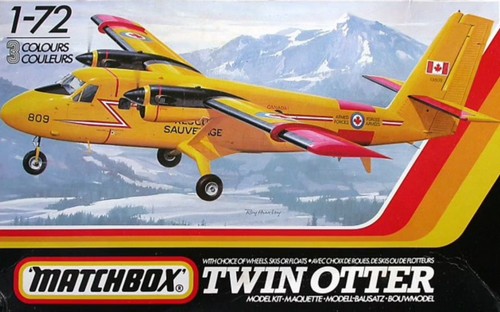
The 1/72 kit of the Twin Otter was released by Matchbox in 1983 as kit #40127. It had multiple coloured parts and decals for Canadian Armed Forces plane and a civilian Aurigny aircraft.
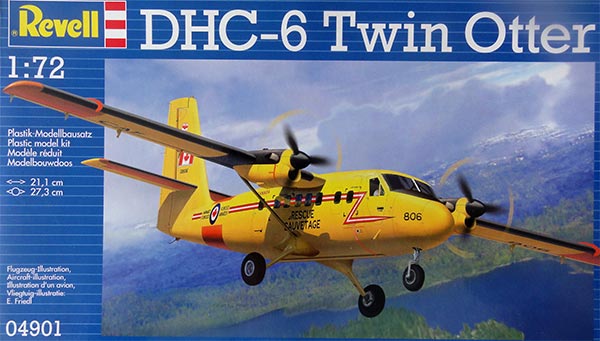
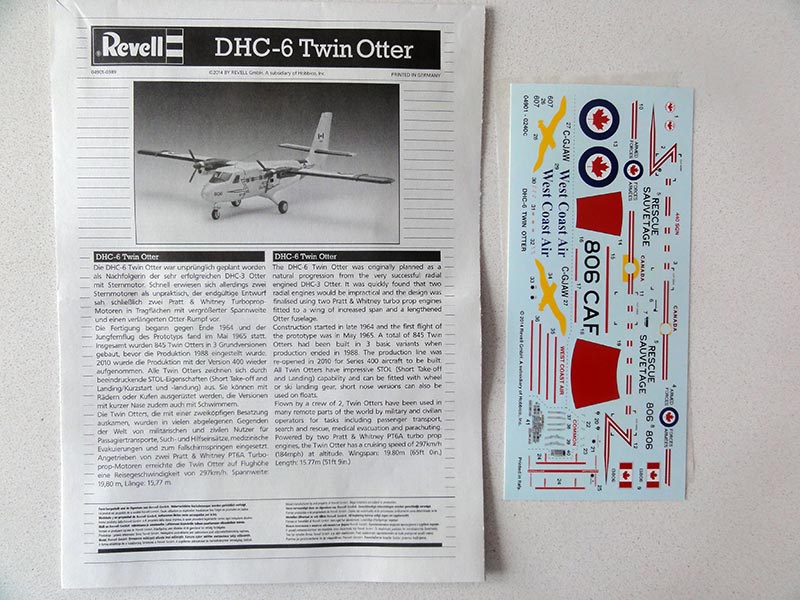
The same kit was also released by Revell from 2008 but with other decals for again Canadian Armed Forces but now civilian West Coast Air and now light grey plastic. I had a few Revell kits in the loft such as #04901. (Revell kit #03954 has decals for SwissTopo).
The kit is basic with about 70 parts. But it is in fact the only 1/72 kit that can be easily found.
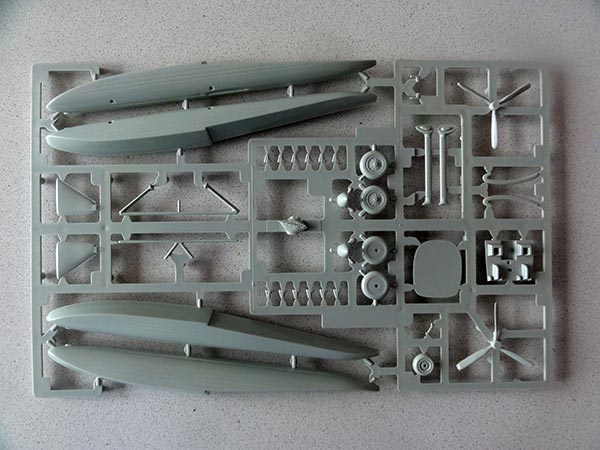
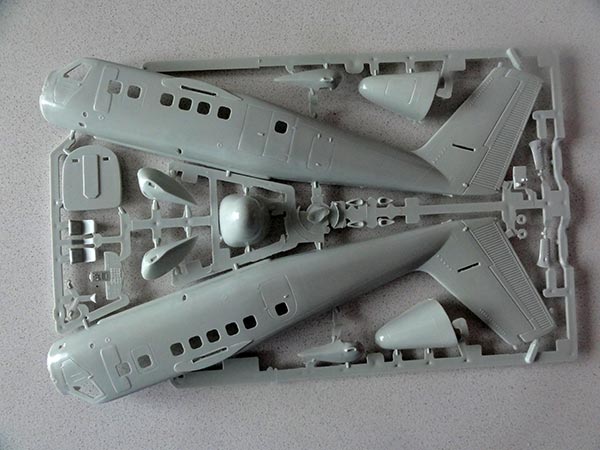
The sprue gates aere rather thick, use a razor saw to separate the parts. There is a basic kit interior in the cockpit but no cabin interior. But nice is the option for a short or long nose.
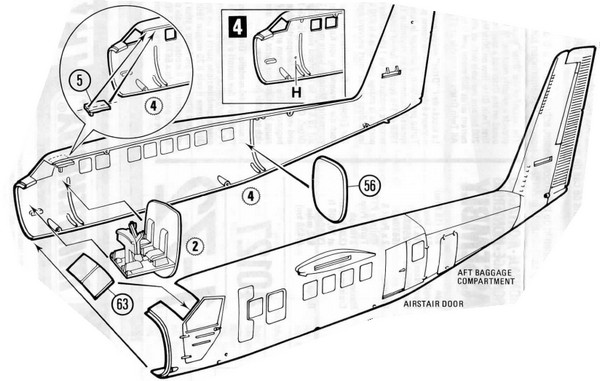
Not a lot can be seen of the interior as all doors are moulded closed and cabin windows are small. You can made this model with 3 different gears:
- tricycle wheel gear
- fitted with skis and wheels
- fitted with large floats.
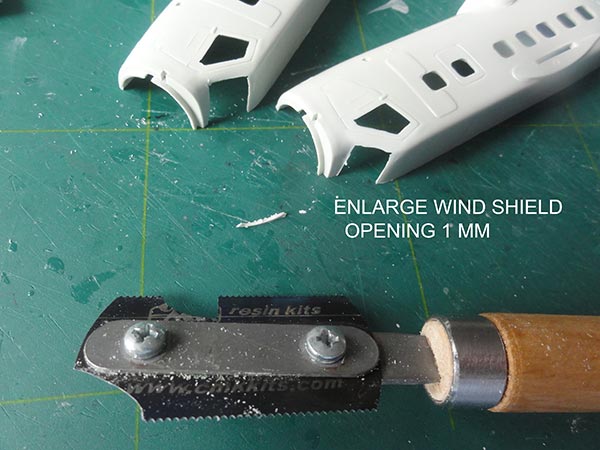
The shape of the model is not too bad, the biggest flaw is that the large cockpit front window is slightly too narrow and the side door window frame is a part of a glass window.
Assembly can be done rather quickly with most work being the paint scheme as usual with civilian aircraft.
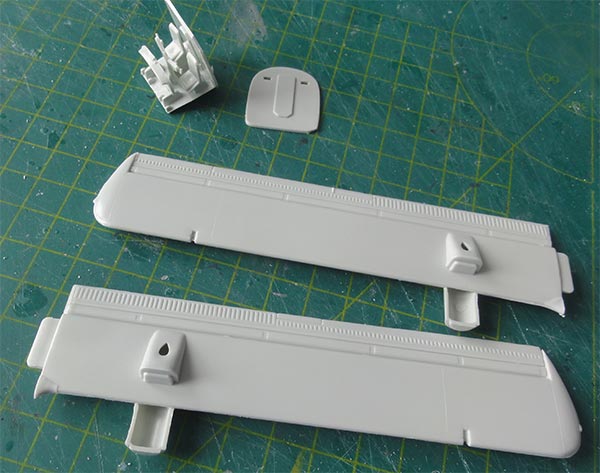
First, the wing halves were tackled. Some putty is needed at the engine nacelles. The props were not installed at this stage.
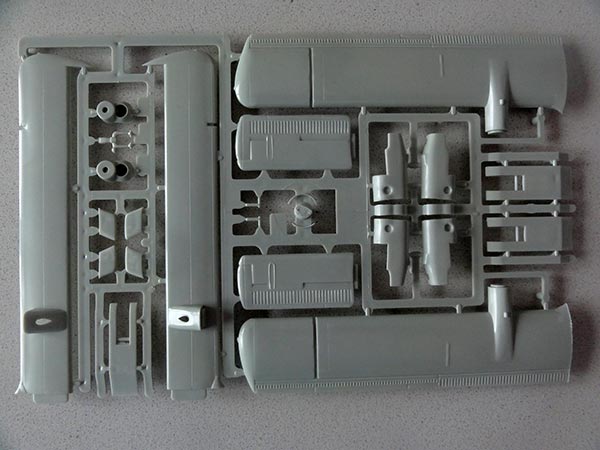
Next is the fuselage:
There is an expensive after market set to improve the nose and large front window but I thought the same can be achieved with some home done modification.
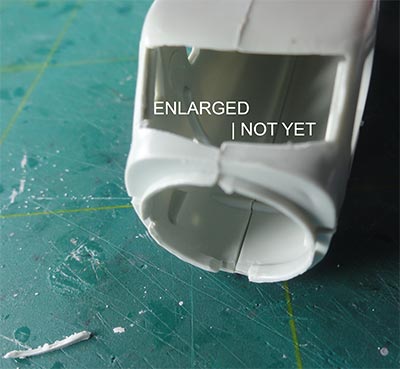
The cockpit front window opening was enlarged at the lower edge by removing 1 mm of plastic, this will correct the inaccurate shape. The kit front window will now not fit anymore, a new one will be made from clear plastic sheet later on.
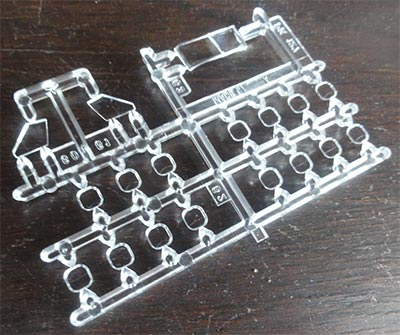
The model assembly needs you to insert the many small cabin windows from the fuselage insides.
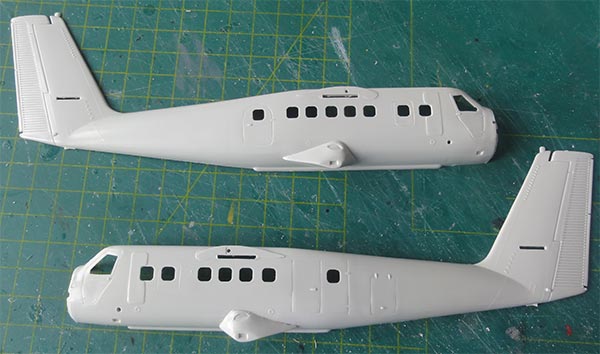
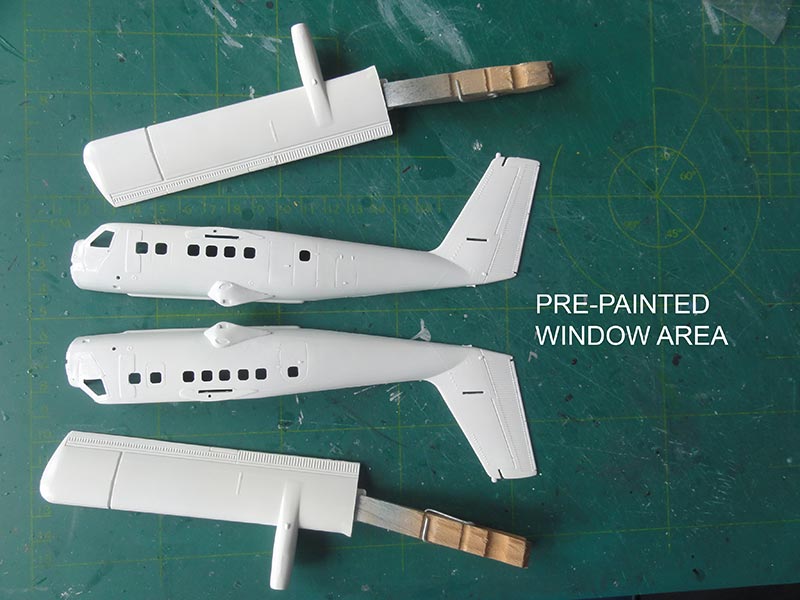
But this will make masking difficult later on for any paint scheme. And you run the risk of "loosing" a window when any pressure is applied. So it was decided to pre-paint the cabin window outside fuselage areas first, prior to assembly.
Only the wheel gear fairings #13 and #14 were set at this stage as well.
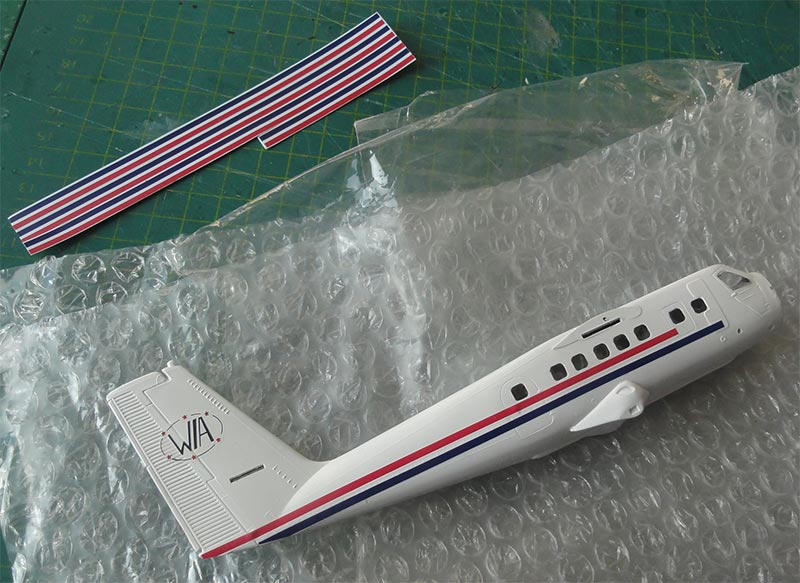
The desired WIA scheme is an overall white Twin Otter with red-white-blue cheatlines (same at the Dutch flag). So the fuselage halves' window areas were airbrushed first matt white, followed with a few gloss white coats using Gunze Sangyo H1 white acrylic.
The wing also got a white coat.
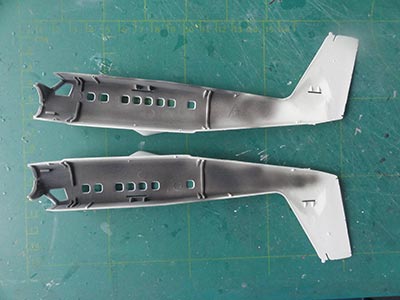
On the fuselage insides, darker grey was airbrushed.
After the paints had dried, the windows were set from the insides. This is not easily done as one would like to avoid any glue spills. The cockpit was installed and the bulkheads. When done, leave to dry.
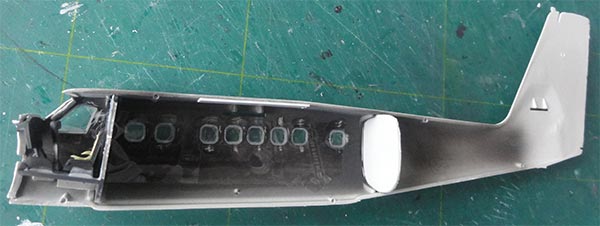
The fuselage was closed up, with only some added basic details in the cockpit like seat straps at the pilot seats. I also painted the cabin bulkhead door a bit bigger.
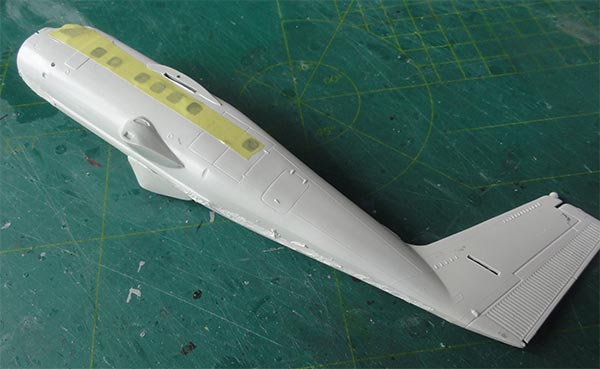
The windows were protected with masking tape.
Putty was needed now at the centres of lower and upper fuselage.
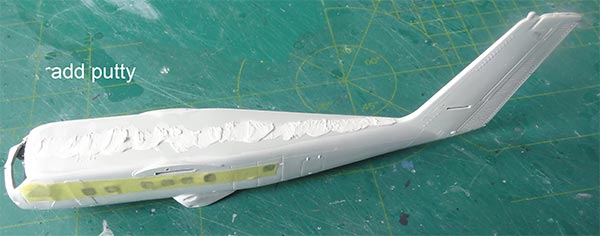
The main parts were given another few coats in white.
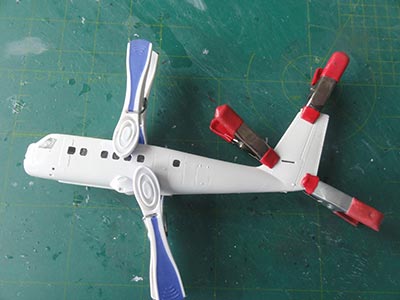
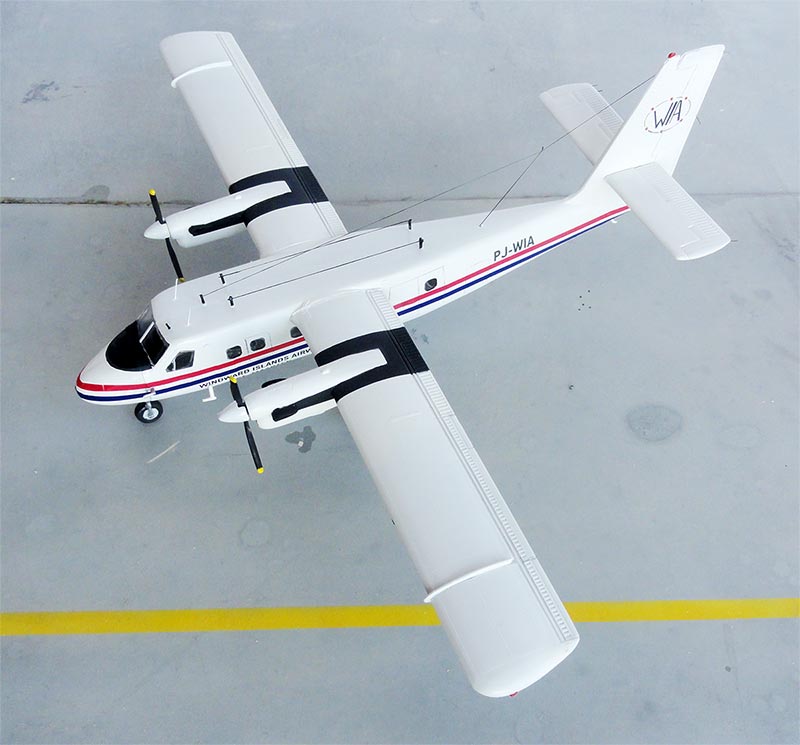
On the wing, black panels are seen. These were first not seen on the plane but after the areas became very dirty due to smoke, the livery got black panels. Masking was needed and these were areas airbrushed matt black. At the same time, the props were airbrushed black. Note that these Twin Otters had no de-icing pneumatic boots.
The prepared and airbrushed main wing halves were NOT YET set onto the model. First, an attempt was made to set the long cheatlines and markings as the fuselage is easier to handle without wings fitted.
The markings had to be home designed and custom printed by a third party. (kit decals not needed). With a graphics programs a decal layout was drawn.
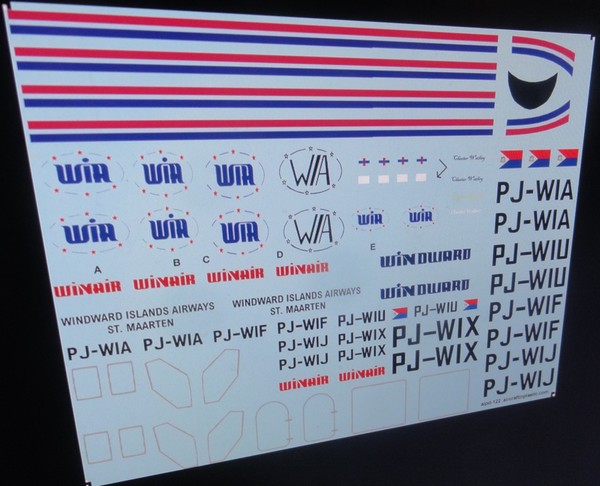
NOTE: on special request the decals were expanded with other early WIA Twin Otter schemes. These AIPD-122 decals are available for other modellers, see the decals page how to get these...
The Windward Islands Airways St.Maarten titles and logo at the tail with coloured stars were drawn. What is lucky here is that the basic aircraft colours are white. The decal design was custom laser printed.
The application of the cheatlines at the nose was a bit difficult. (Note that the first scheme had horizontal lines, later schemes also showed curved nose lines). This particular WIA Twin Otter had the short nose, so nose #12 was installed AFTER a lot of nose weight had been added. Otherwise you will get a tail sitter.
Note also that on the real Twin Otter the nose can be swivelled open to reach the nose storage area so there is a vertical nose panelline here. The forward cheatlines were applied now.
So small paint corrections were needed using red and blue.
The other markings are small red painted emergency stripes at the doors.
The bigger required front window was made of clear sheet and bended a bit. It was set in place with Micro Kristal Klear. The central frame was made with a white plastic strip and the thin side door window frame suggested by painting that white.
Before added the wing halves, small holes were drilled in the mating surfaces of both fuselage and wing halves to accommodate a piece of metal rod. This will give a stronger joint (I forgot to make a photo).
The wing with two struts was set. Do not mix up these! Let dry under some pressure and make sure the wing has a bit dihedral. I still had a small gap at the wing-fuselage joints. White glue and after drying white paint was applied.
The horizontal stabilizers were set horizontally (do not use the vertical fins #24).
A single large PJ-WIA registration decal made was added below the left lower wing only. The wing fences #58 were also set as per kit as were the many flap supports #47 on the lower wing and all hand painted white.
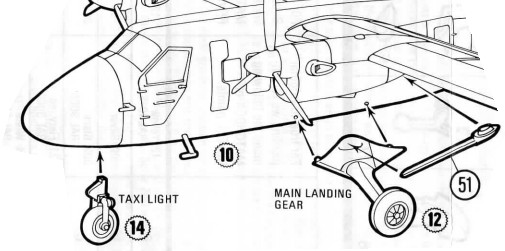
The wheels were painted. In the nose strut, the anti torque bar was drilled open and small taxi light installed.
Smaller details were added as engine exhausts (each part #9 was cut a bit thinner). The propeller got black airbrushed blades but small yellow tips and white spinners. The props were fixed with white glue on the nacelles.
The tail bumper and pilot entry steps were set at the cockpit. Note that on Twin Otters these steps may vary.
On the PJ-WIA over the years different radios were used with different antennas. For the first WIA Twin Otter PJ-WIA after delivery, a long antenna wire runs from cockpit section to vertical tail. There is also a cross wire and two separate antenna wires on top of the fuselage with black supports. The wiring was made with flexible EZ-line but was not easy to install with superglue. (Normally I use fishing line but that is very vulnerable).
Anti-collision lights were painted on wing tips and top of tail and some static dischargers were also added at outboard flap tracks, tail rudder and stabilizer made from bits of EZ-line.
The small nose pitots #54 were set. A few thin coats of varnish were airbrushed to get an even sheen and to protect the decals.
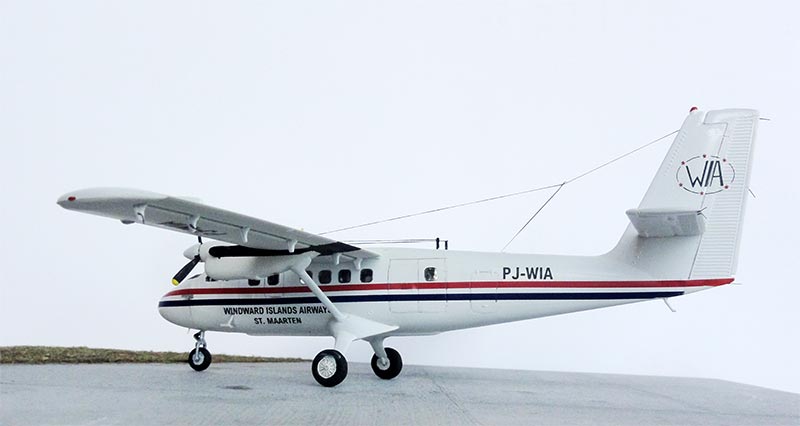
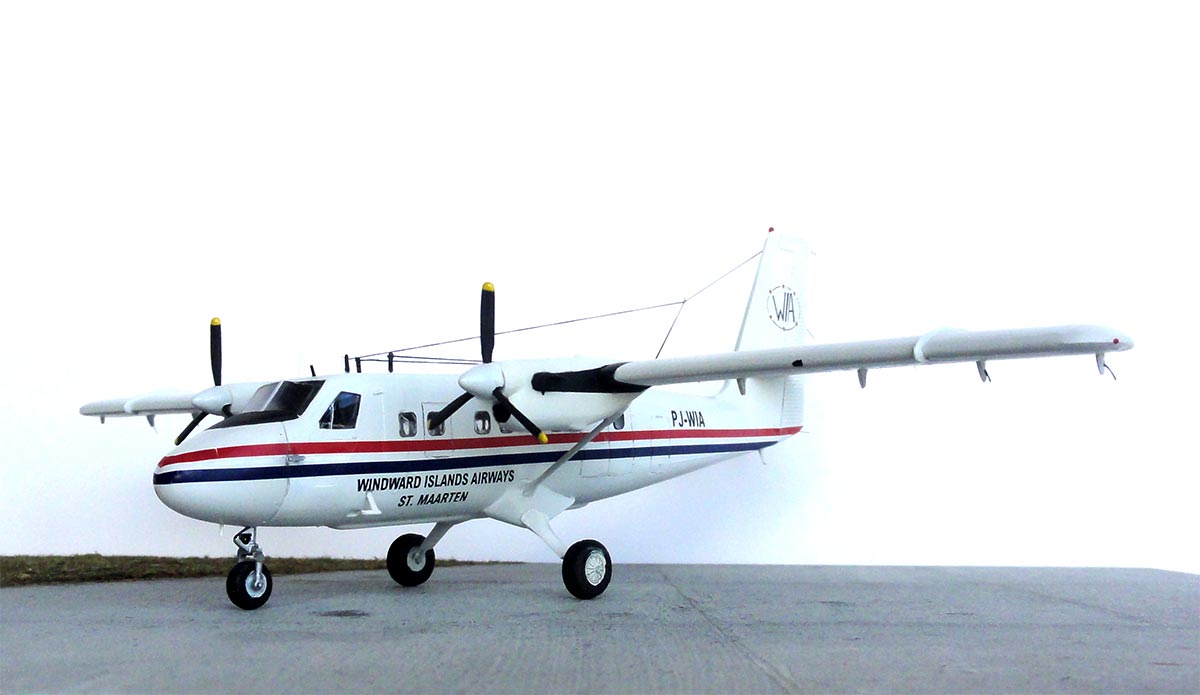
The first WIA Twin Otter in 1/72 model form was ready!
... model set in a scenery at St.Maarten.....

On to next [ Page 2... ]
References:
- information provided by Gerard Casius (former Head technical services Windward Islands Airways)
- Piloot en vliegtuig, Dutch magazine, april 2007.
Web:
Twin Otter Wikipedia info;
SABA airport Wiki: https://nl.wikipedia.org/wiki/Juancho_E._Yrausquin_Airport
Back to 1/72 Models

(c) Copyright Meindert "designer"/ All rights reserved. Your comments are welcomed by webmaster
Created this page May 31, 2022