[ page 7 ]
1/72 scale kits of the Jet Provost
... continued from page 6...
For the Jet Provost and Strikemaster collection it would be nice to have a Jet Provost T. Mk 1 in 1/72.
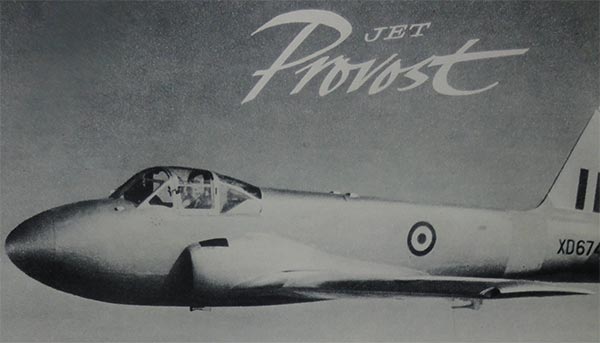
The Jet Provost project P.84 prototype first flight was June 1954. It used components from the "piston prop" Provost such as the similar wing, fuselage but changed tail section. As it got a Viper jet engine, a long fairing at the lower tail and jet pipe was needed as well as side air intakes. It also featured a retractable tricycle landing gear with large nose gear bay and main undercarriage bays. The wing had no tip tanks and the crew had no ejection seats. This Jet Provost was designated T. Mk 1.

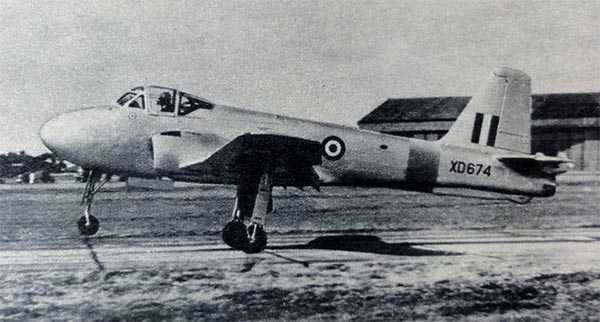
Here a view of the prototype with still a long pitot tube.
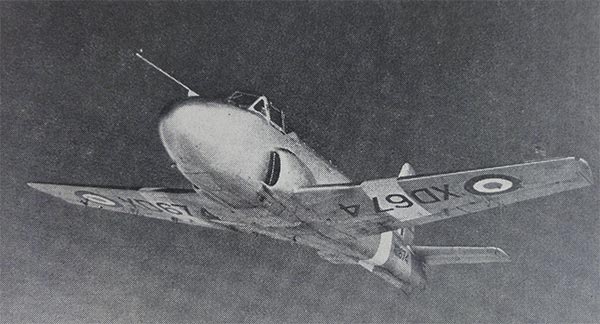
... and a view of the retractable rather long gear struts.
Some data as appeared in a Janes All the World Aircraft 1953 (performance was still unrevealed!).
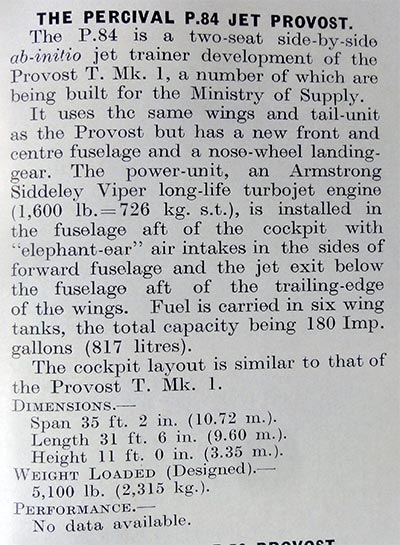
Wing span was 10,72 m, length 9,6 meter.
Only a dozen were manufactured of the T.1 and these were flown by the Royal Air Force Central Flying School at Little Rissington.
(NOTE: a Jet Provost T.mk 1 was restored and flown as G-AOBU in the scheme of RAF 2 TFS Jet Provost XD693 in the 2000's).

KITS
In the past there was a 1/72 resin kit from PROTOJETS but this is nowadays quite rare and expensive. SIG Aerobatic and Display Teams of IPMS UK [website] member Henk came up with the idea to make a T. Mk 1 by converting a T3. Henk used an old Airfix Jet Provost T3 for this and gave me some suggestions how to do the conversion. As Airfix had released a new kit of the T.3 #01029, it could be done with that better kit to start with:
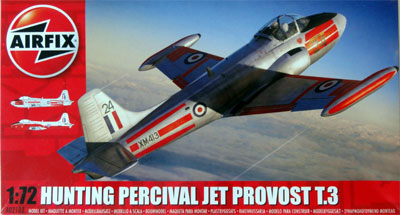
The newer Airfix kit was described earlier on page 3..... ..
page 2
page 3
page 4
page 5
page 6
page 7
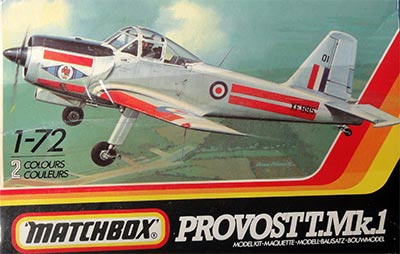
I compared the T.3 kit also with a drawing found and checked out with a 1/72 Matchbox "piston prop" Provost I had.
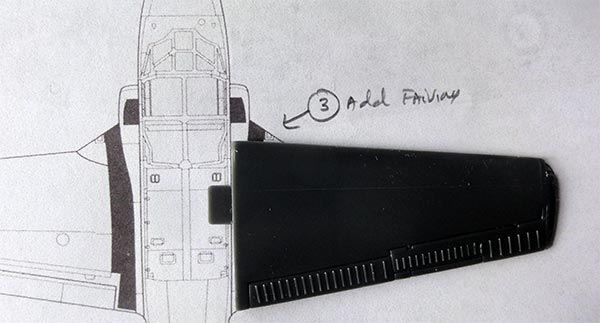
First start with the wing.
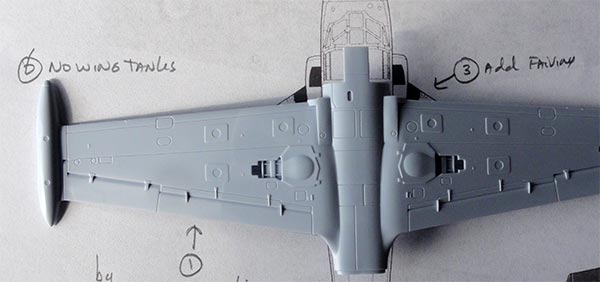
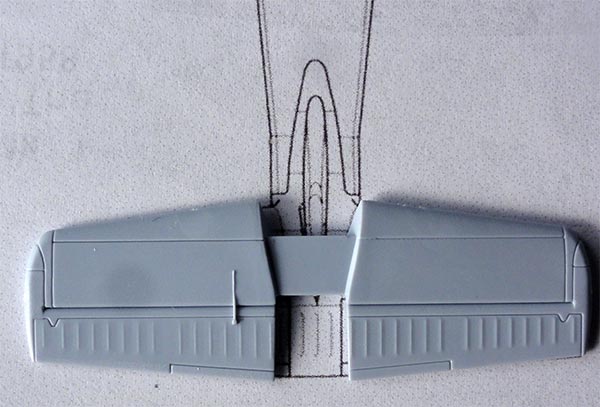
Seen here compared with the Prop Provost wing, a leading edge extension fairing is needed:
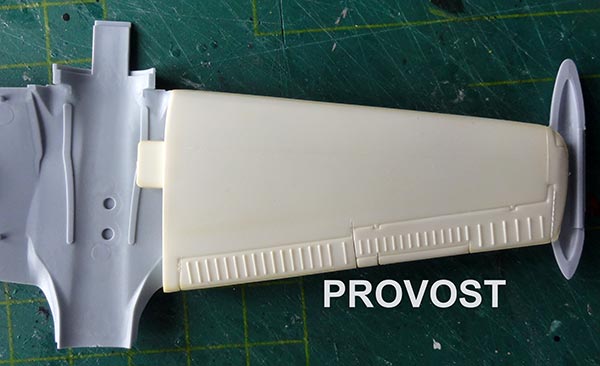
The Airfix kit wing tips were modified without tip tanks. So by removing wing tip tanks plastic and add rounded tips from card. The wing span should be 10,72 m (= 14,9 cm in 1/72). Seen here with the Prop Provost wing:
Removed wing tip tanks...
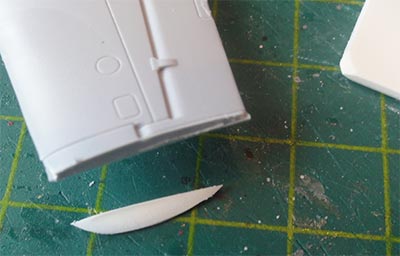
Wing tips were made from thick card.
It also needs increased ailerons span (and reduced flap spans). This is a matter of inscribing and filling the old panel lines. The aileron edges were "sawed in" for added realism.
The T. Mk1 had longer gear struts that could be retracted in undercarriage bays. So, change main gear bays and extend these towards the lower central fuselage. A nose bay is added later on.
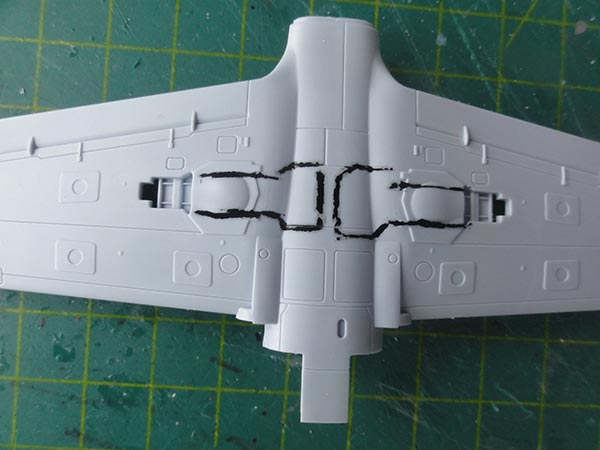
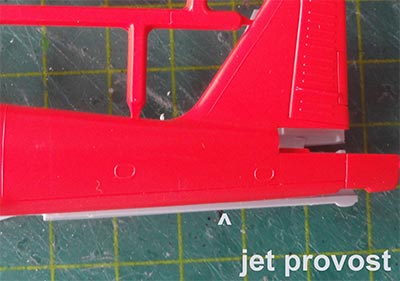
As the T. Mk 1 had a jet, the lower rear fuselage tail section was modified. Red is the Matchbox Prop Provost for comparison on which the Mk.1 was mostly based. The reduction is about 3 mm at the rear end excluding jet pipe fairing.
The Airfix T./3 fuselage is seen here with the T./Mk 1 drawing.
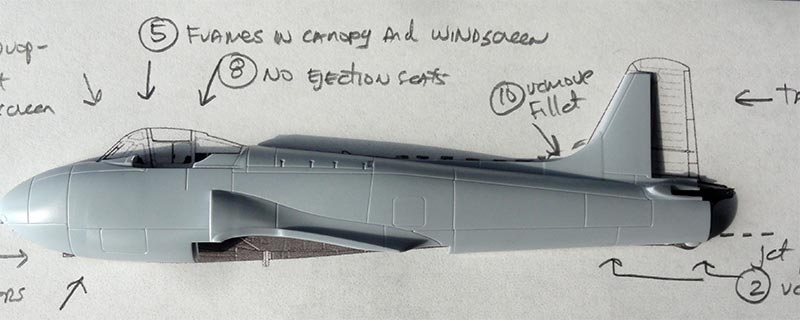
The nose and general shape of the fuselage looked OK, but a long slice in height at the tail section was removed. The tail plastic will be joined and a jet pipe fairing added.
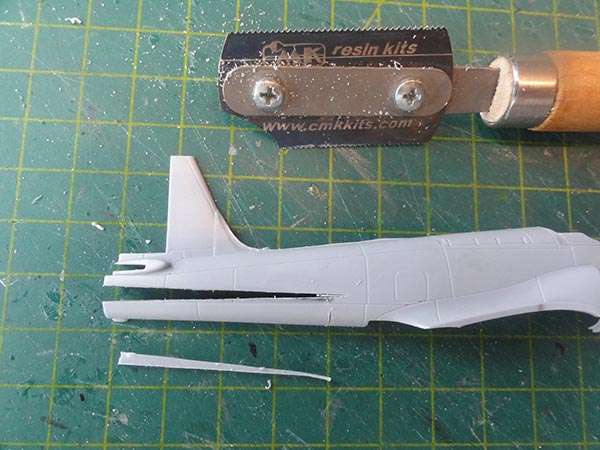
The Airfix kit rear end was cut open, later on a lower rear jet pipe fairing will be added.
The horizontal stabilizer is OK and is here seen with a Matchbox Prop Provost part, this is similar.
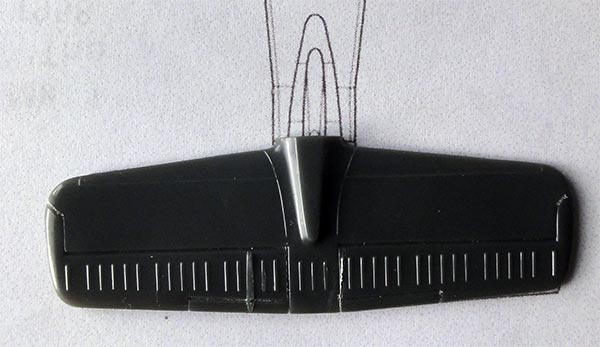
.... and the Airfix part, so no change here.
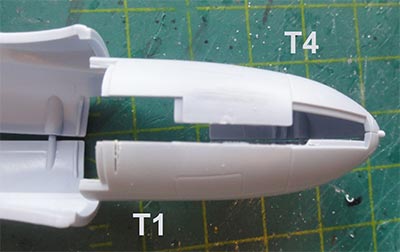
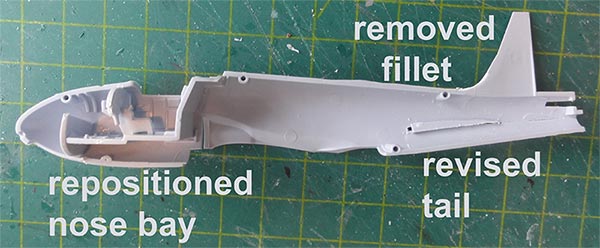
Another important mod is to add a nose gear bay for the retractable nose strut and wheel. The Airfix T3 kit fuselage bay needs repositioning to another airframe position. On the T Mk.1 it is also much longer to accommodate the retractable gear. With the razor saw do some work on the Airfix T3 kit here...
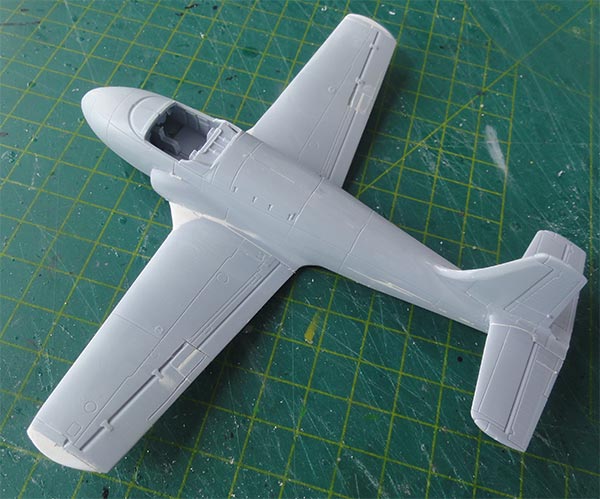
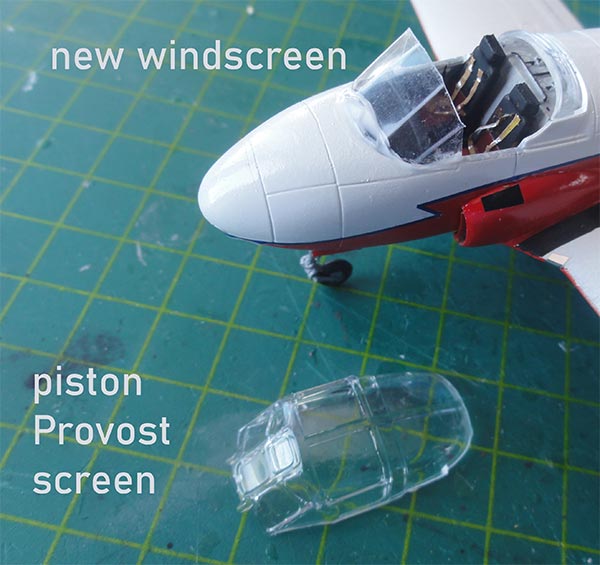
A changed windscreen with more rectangular panels and frame is also needed comparable with the piston prop Provost.
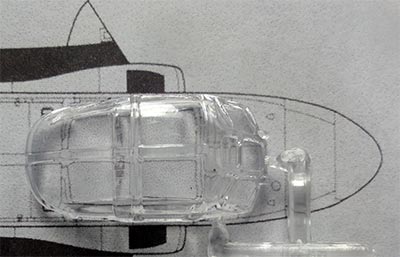
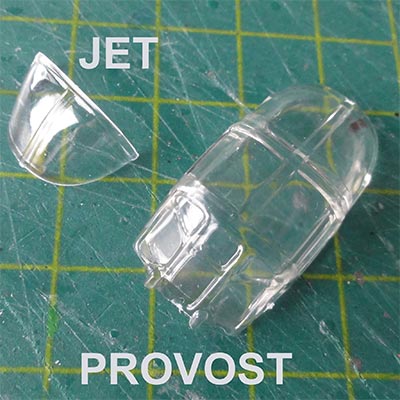
Here is clearly shown that the windscreen of the T.Mk 1 is really different as compared to the Airfix T3. Also need to check rear sliding canopy for extra frames. Will be done later on.
At the vertical tail, remove tail fillet of T3 and later marks.
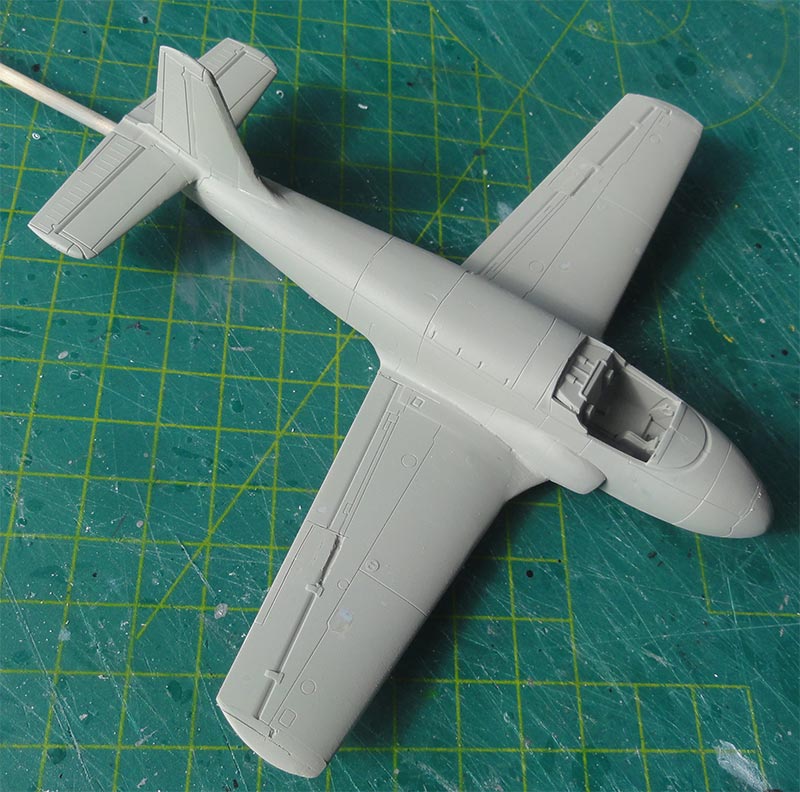
All seen here.... lower tail fairing to be added as well.
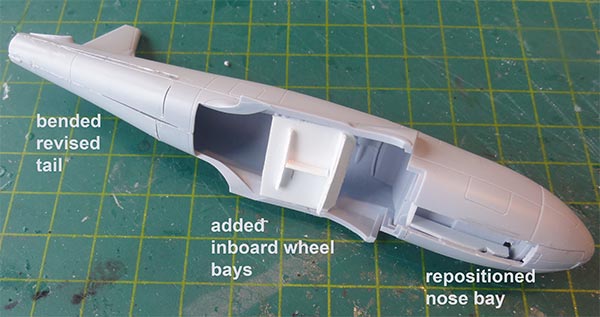
The T3 kit cockpit floor and panel were installed and fuselage was now glued with bits and main gear bay roof and nose bay added from card. Don't forget to add nose weight to avoid tail sitting when closing the fuselage.
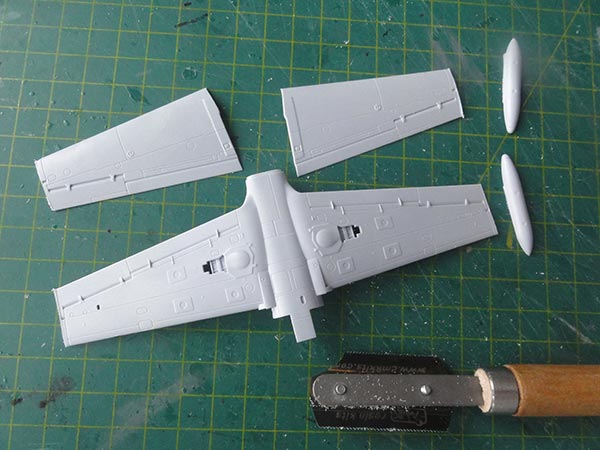
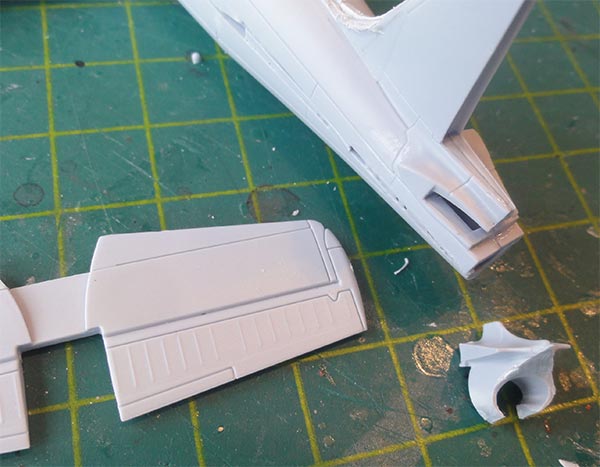
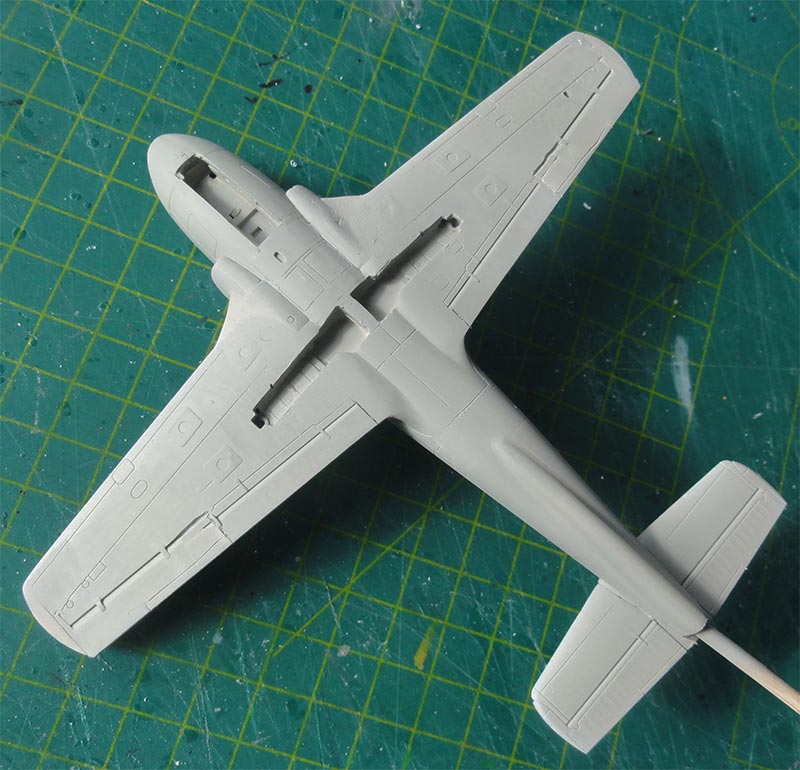
The modified wing was set. From card and with putty the leading edge fairings were added. At the inboard wing leading edge, added fillets were made. To be puttied and sanded.
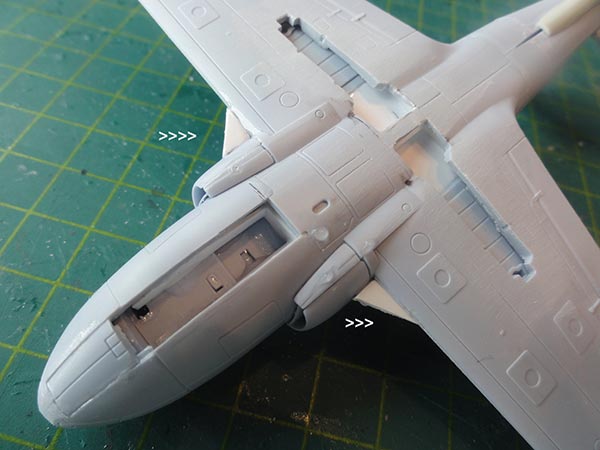
Note the larger extended main gear bays and nose bay, all these were "boxed in" with plastic card and white glue to close the gaps.
An extra jet pipe fairing was added, from a half round bit found the spares box and all faired in with putty...
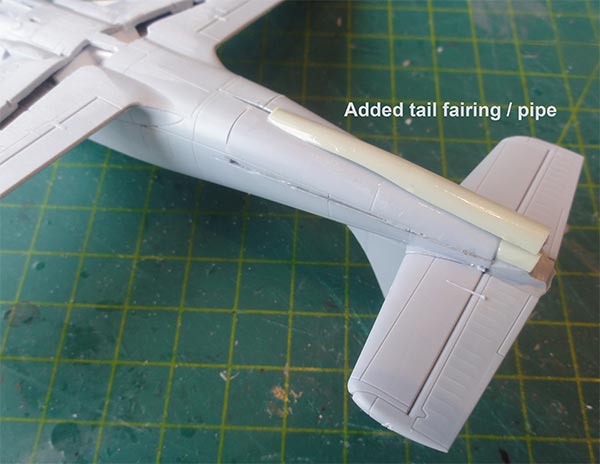
NOTE: later on it was found out that the fairing seen as here was made too long. It will be made shorter and a bumper will be added.
Putty and sanding to be done...
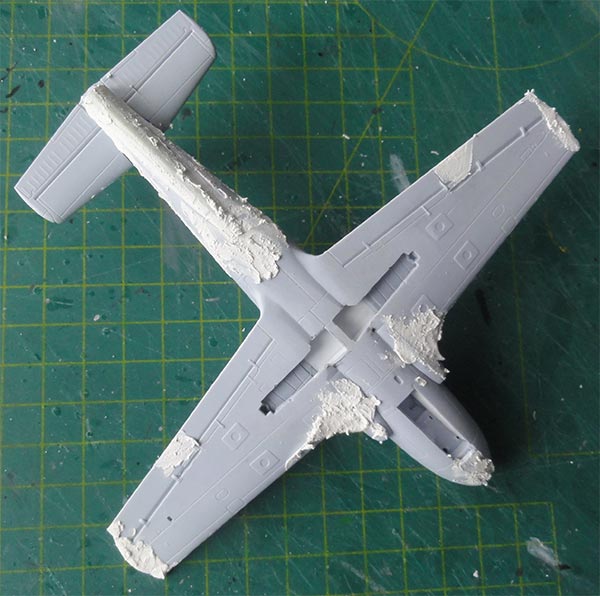
... and after sanding
Three tiny trim tab control rods (left side rudder, upper left side elevator, lower right elevator) are moulded on the Airfix parts. These were shaved off and I will add later tiny rods from thin wire.

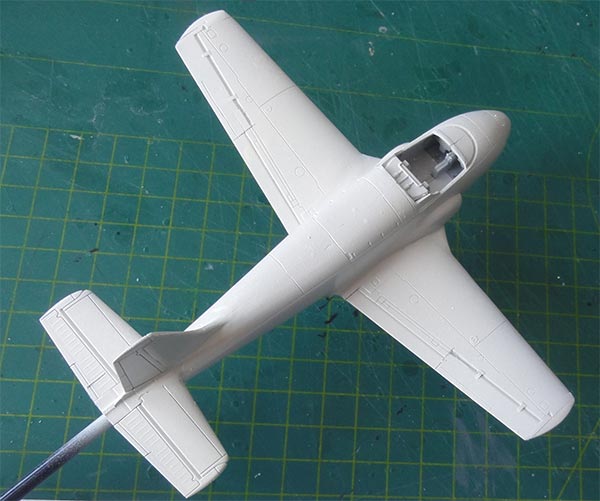
Major conversion work was completed, and for checking any flaws a base coat of Revell Aqua 75 steingrau was airbrushed.
As noted, it was found out that the fairing seen as here is too long. Still to be corrected.

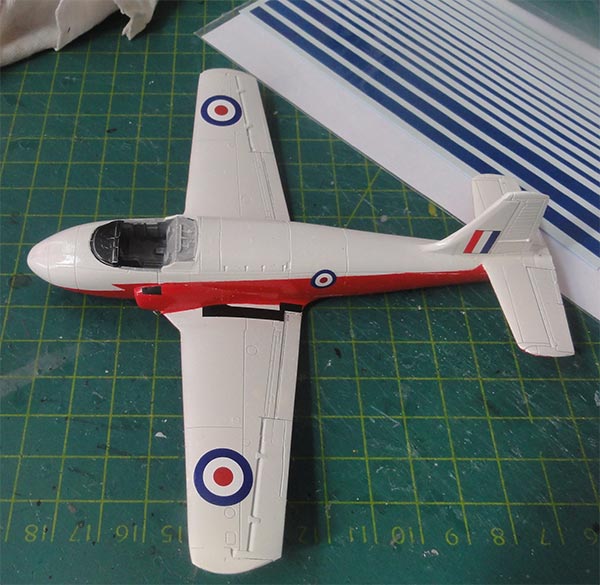
The paint scheme opted is for one of the dozen Jet Provost T.Mk 1 flown at the RAF Central Flying School at Little Rissington in 1958. In those days a small aerobatic team was active, called "The Sparrows". These Jet Provosts T Mk.1 had a white and red colour scheme with thin blue cheat lines. So the model now got an airbrushed white first coat, using Gunze Sangyo H1 acrylic white.
The white areas were carefully masked off at the cheat line boundaries and than (probably it was "signal red") gloss red airbrushed with simply a base Revell Aqua #36 with top coat than of Revell Aqua #330 "rot".

The masking was removed and the basic scheme is now applied.
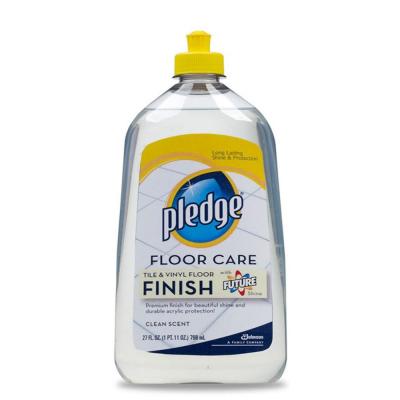
Before adding any decals, make sure to have a gloss surface to avoid "silvering". I airbrushed a few layers of Future gloss varnish mixed 1:1 with IPA.
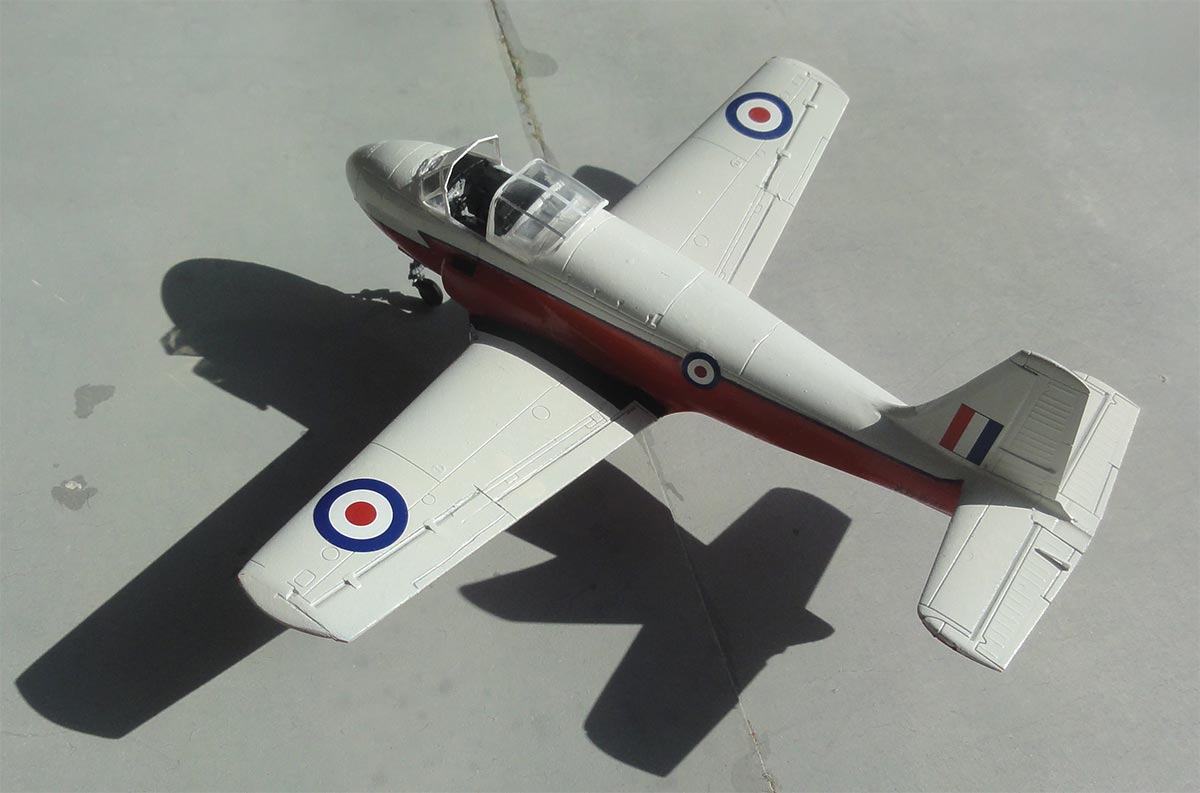
The desired markings for "The Sparrows" came from various sources, like the Airfix kit. Upper wing roundels diameter approx 13 mm from a Xtradecal set, lower wing roundels approx 10,5 mm from Airfix kit. The fuselage roundels on this model seen are slightly too big but I had no others (approx 4 mm diameter is needed I believe). Walkways still needs some changes...
NOTE: the Xtradecal roundels are rather thin. On the red surfaces 2 will be added over each other.
Blue cheat lines came from an Airmods stripe set. I believe that this "Sparrows" Jet Provost did not have the large serials on the lower wing.
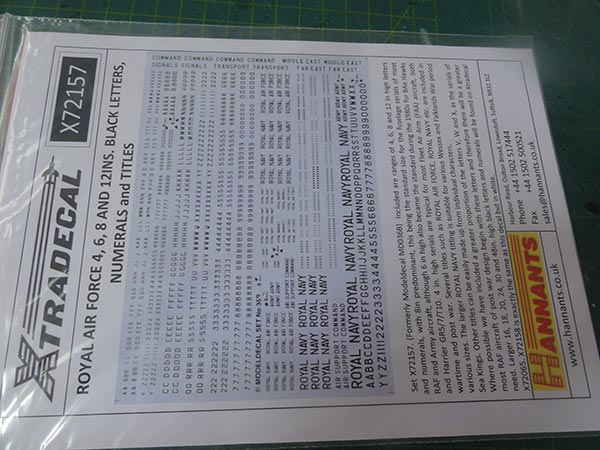
The very small serials on the tail of the "XD675" were made with the codes and numbers from Xtradecal set #X72157. Very small ones that takes some time a align.
The correction was finally done on the tailpipe that I made too long. A section was removed with a razor saw, pipe closed and small bumper added. White glue closed the gaps. All was painted when dried.

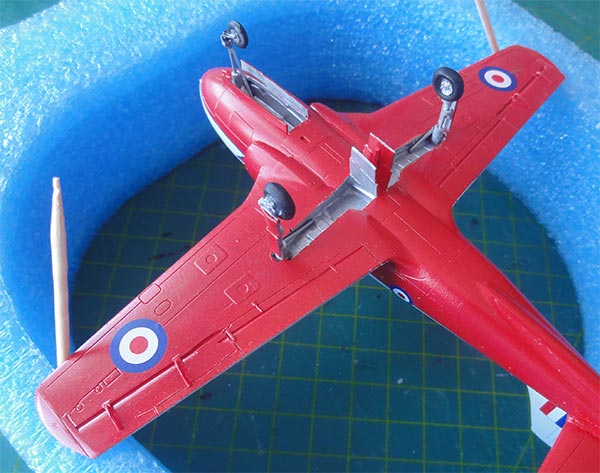
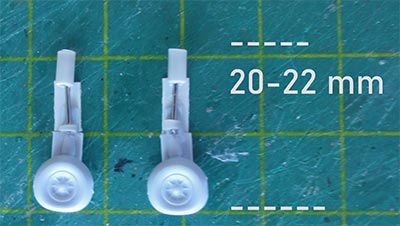
On the T. Mk.1 the landing gear struts are very long. The aircraft sits "high". I used the Airfix kit parts and metal wire was used to lengthen the legs to an overall 22 mm (with 2 mm for the main gear recesses). The long gear doors were made from plastic card. The nose gear was also made that way with the nose wheel used from a Matchbox kit.
These were set in place and all painted aluminium.
The previous shaved off tiny trim tab control rods (left side rudder, upper left side elevator, lower right elevator) were made of tiny rods with thin wire. At the flaps, the lower hinges were also added from rod, these were painted red.
The still empty cockpit interior was hand painted assuming it was painted mostly BSC381C: 623 interior grey with
black details. Revell Aqua 371 seemed a good match in this scale.
The
T.Mk 1 had plain seats and no ejection seats. I used a simple part from
a Matchbox kit and suggested some details with plastic card and strip. Some harness straps
were made from thin cut tape. The
instrument panel decal was simply used from the Airfix kit though not
100% correct it was similar to the piston "prop Provost".
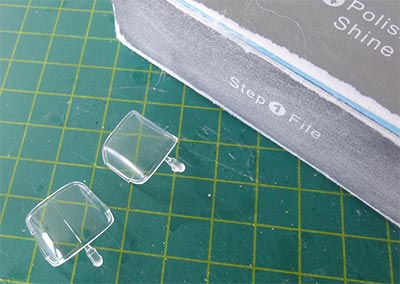
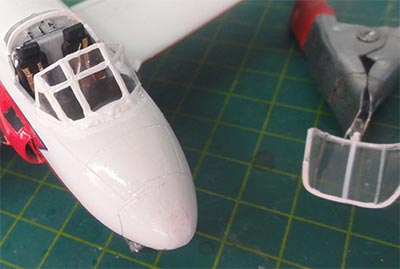
The windscreen is similar to the T. Mk 1 is "prop Provost". I was not willing to offer a windscreen from a now pretty rare 1/72 Matchbox piston "Prop" Provost kit I had. So the windscreen needs to be made from scratch bending in corners a bit of clear thin plastic acetate sheet.
All was set with white glue. When dried, the prominent frames were suggested with thick white paint. The small rear fixed transparant panel #D03 was used from the Airfix kit.
The movable rear sliding hood for a T. Mk 1 can used from the Airfix T3 part #D04. But first correct the moulded raised central canopy hood frame on the outside. On the real Jet Provost this is a frame running on the inside. So the raised frame was sanded carefully away, than with a (nail) polishing pad the scratches were buffed away until the canopy hood looks clear.
On the T. Mk 1 sliding canopy a few tiny frames are seen, these were added from very thin decal. Inside the sliding canopy hood 2 mirrors were added from thin metal foil.
A tiny antenna was fitted below the belly and a pitot #B14 below the wing. Wing tip anti-collision lights were added with their "notches" cut out, lights painted red on left and blue on right and than dots of Microscale Kristal Kleer filled in the notches.
Finally to protect the decals and have an even sheen, a model got a few airbrushed layers with Johnson FUTURE gloss varnish (with the usual technique).
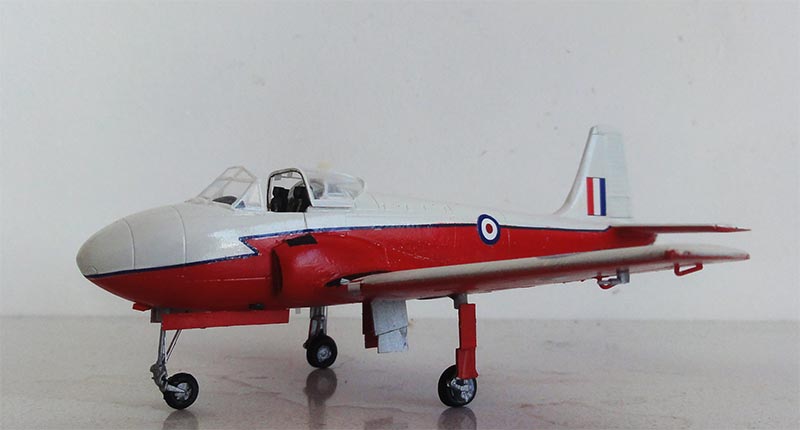
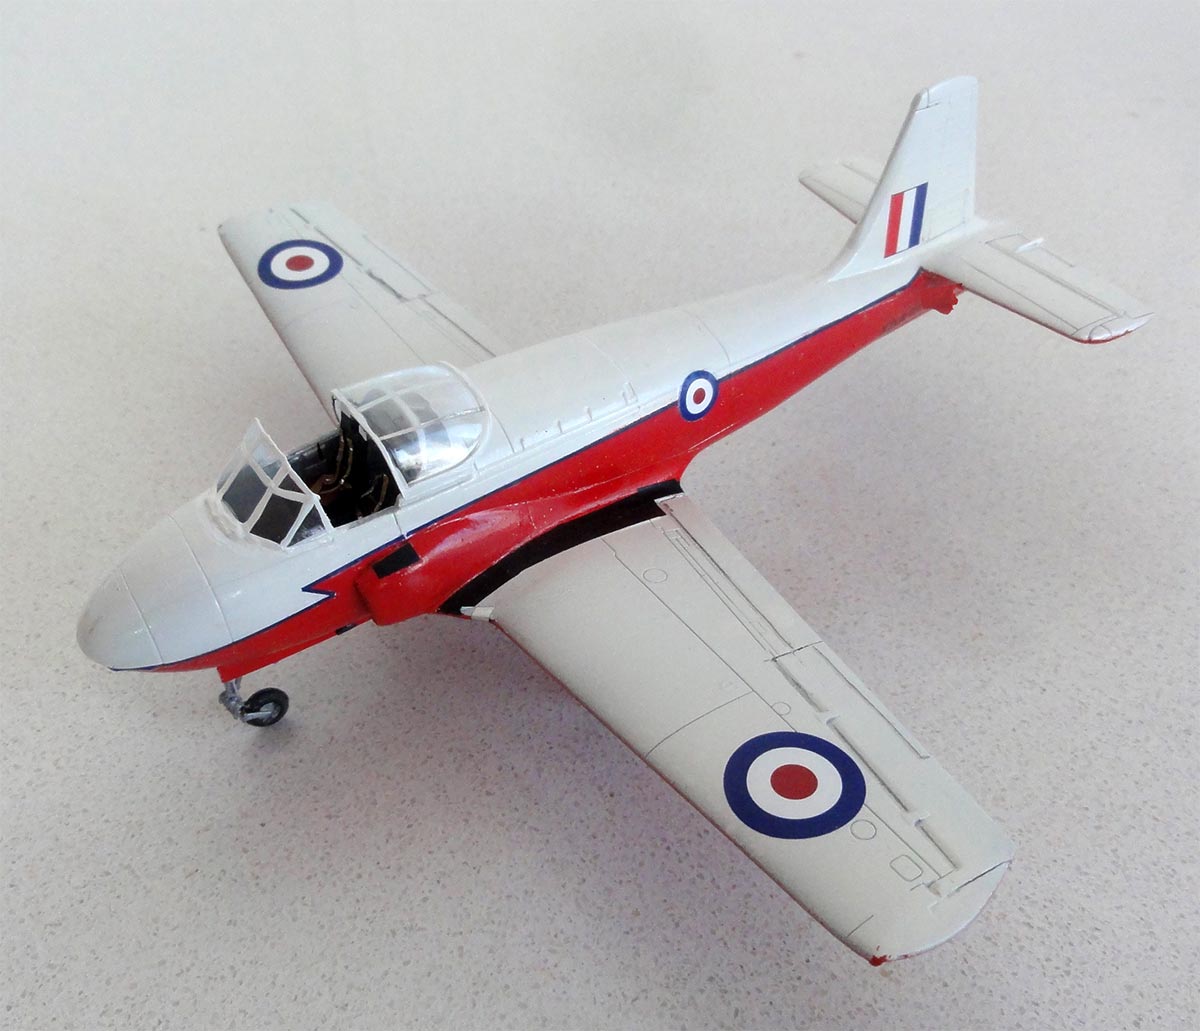
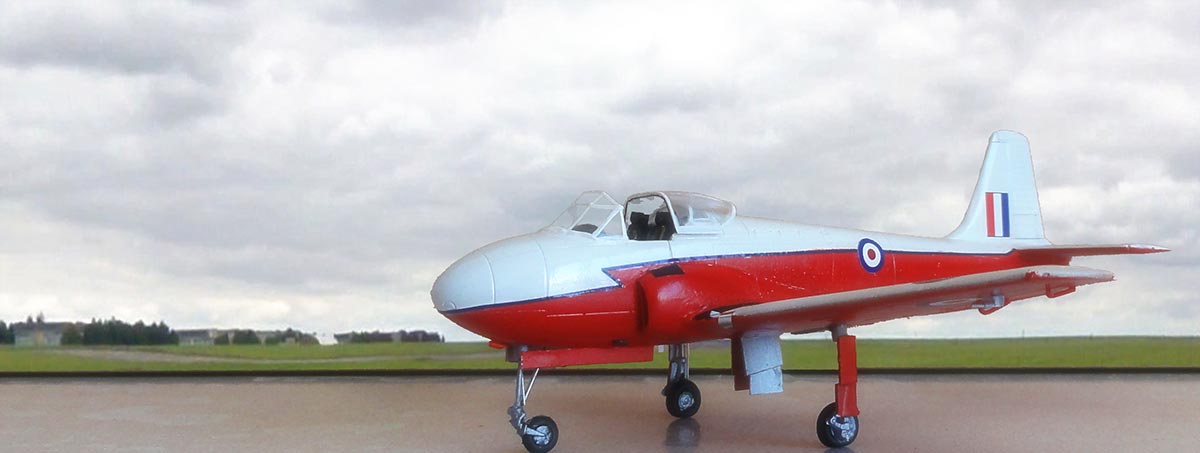
That's it! A nice conversion to a Jet Provost T. Mk 1.
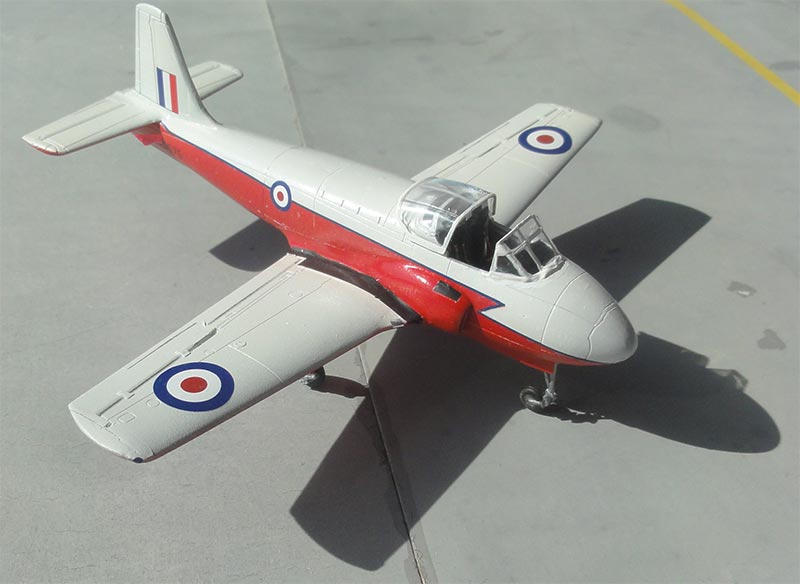
Jet Provost T.Mk 1 flown at the RAF Central Flying School at Little Rissington in 1958.
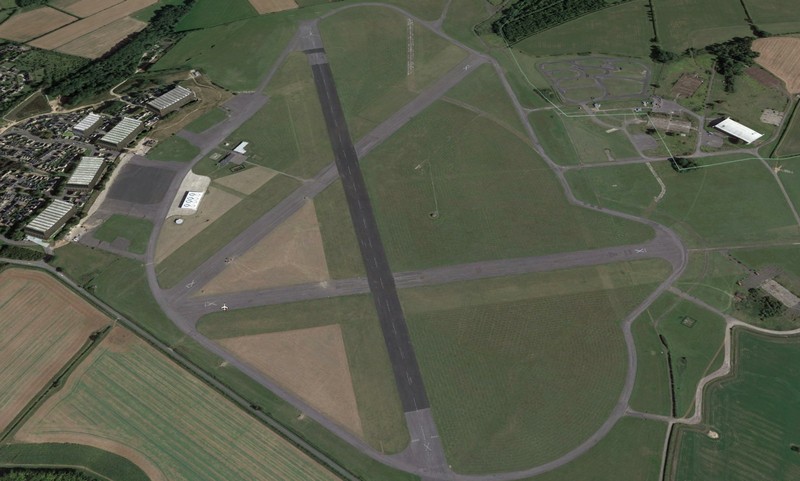
"The Sparrows" aerobatic team flew from "basic Central Flying School" in South Cerney from 1957 prop piston Provosts. They got the Jet Provost T. Mk.1 and the Sparrows were now based at Little Risington, the "jet" Central Flying School under the leadership of Flt Lt Giffin. It appears that the name later changed to "The CFS Jet Aerobatic Team". (info from David)


... at Little Risington (courtesy Google Earth)

.. 1958
On to next [ Page 8.... ]
Back to 1/72 Models.......

(c) Copyright Meindert "designer"/ All rights reserved. Your comments are welcomed by webmaster
Created this page
May 14, 2021