[Monogram/ Revell]

Monogram/ Revell SR-71 model in 1/72 scale: kit review & modelling report
page 2
page 3
... continued from page 1...
Using experience of the Top Secret Lockheed A-12, the SR-71 strategic reconnaissance plane was developed at the Lockheed Skunk Works. Flight testing was done at Groom Lake but also Edwards AFB. It had a 2 man crew with a systems' officer aft of the pilot (whereas the A-12 had the recon systems "Q-bay".). The type was called the Blackbird because of its black paint and "black" missions.
Some 31 Blackbirds were manufactured and 2 twin seat trainers. The Blackbird had great reconn capabilities though some aircraft were lost due to accidents during its service life. It was quite well known later in its career. Missions were flown from Kadena at Okinawa (Japan), Mildenhall U.K. and other deployment sites.
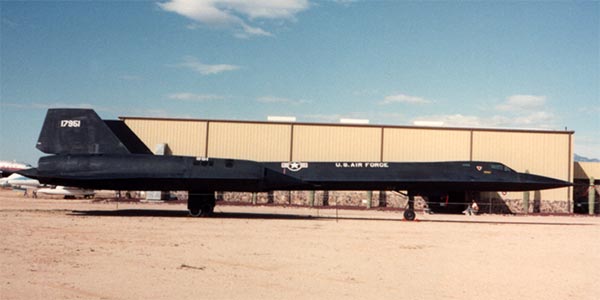
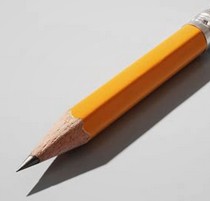
(SR-71A seen by me at Pima air museum, Tucson, 1990)
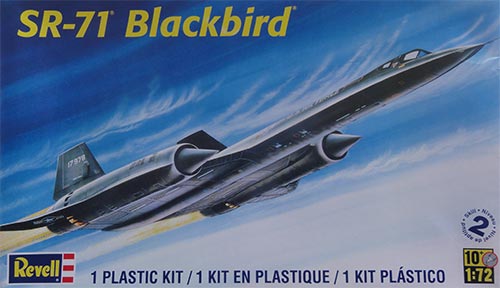
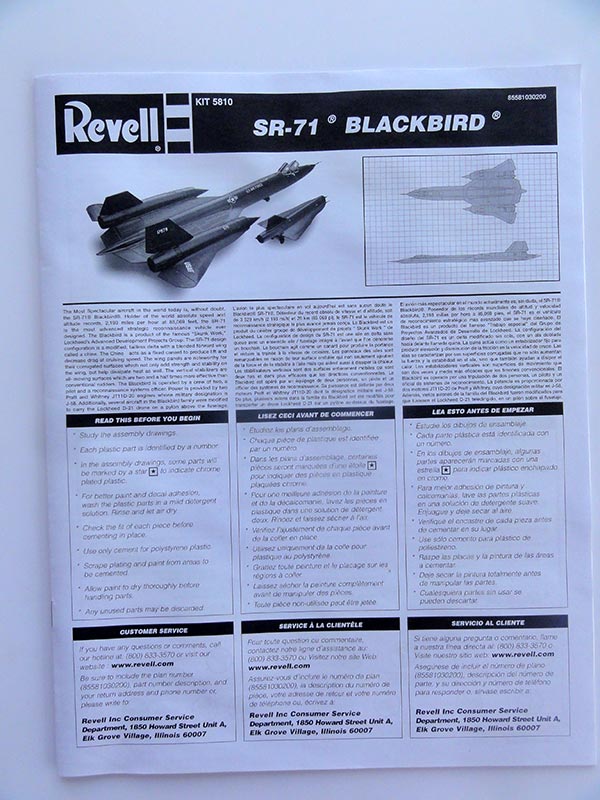
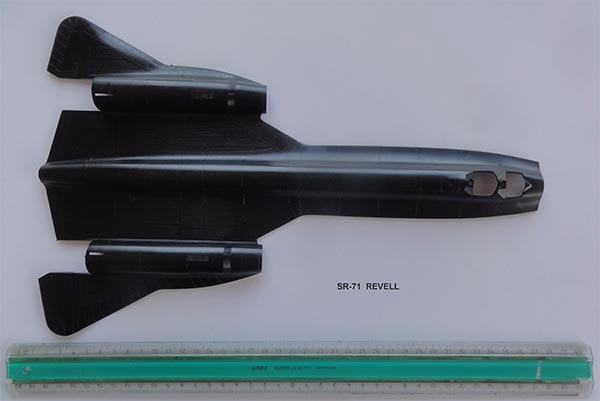
In 1984 Monogram came with a Lockheed SR-71 Blackbird kit #5810 in 1/72 scale.
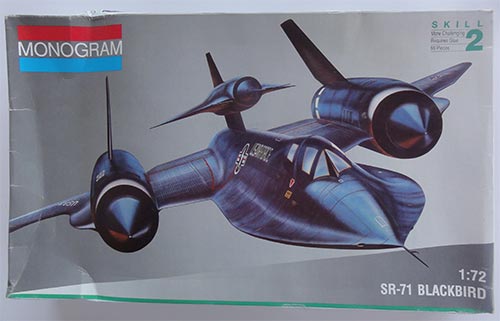
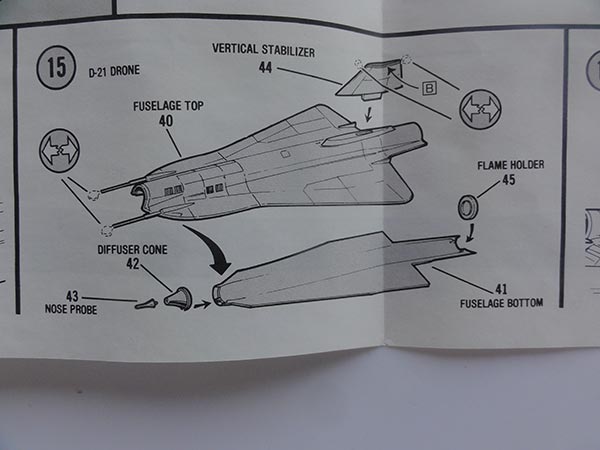
It also contained a D-21 drone to be set on a spine pylon. But the SR-71 never flew with this drone. Monogram simply thought that a two seat SR-71 kit would be "accurate enough" to suggest a M-21 mothership. And at the time the kit was released in 1984 the actual D-21 deployment was unknown.
The same kit with same parts was released by Revell USA kit #5810 in 2001 so 17 years later. (not to be confused with the very old 1968 Revell kit).
The Revell kit also has the D-21 drone parts but not shown in the instructions as it never was used by the SR-71 and this was now quite clear after 40 years had gone by. So the kit is to build a SR-71 Blackbird.

Kit parts in both kit releases are in glossy black plastic. This means that finer details are less visible while assembling the kit. All panel lines are unfortunately raised but show the tri-angular RAM panels at the chines and leading edges.
(note: I forgot to make a lower large fuselage photo)
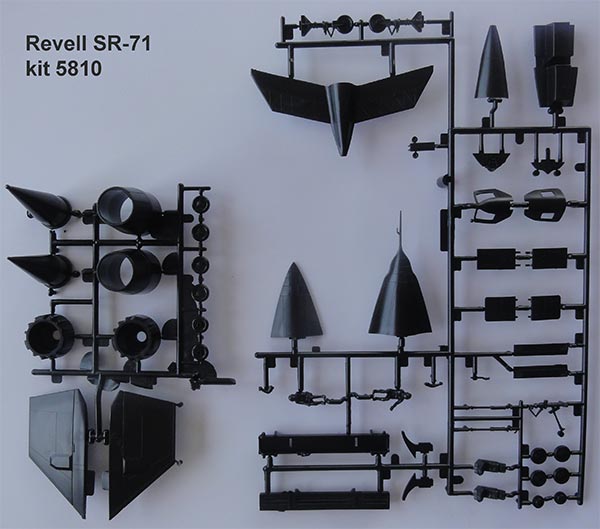
D-21 drone:
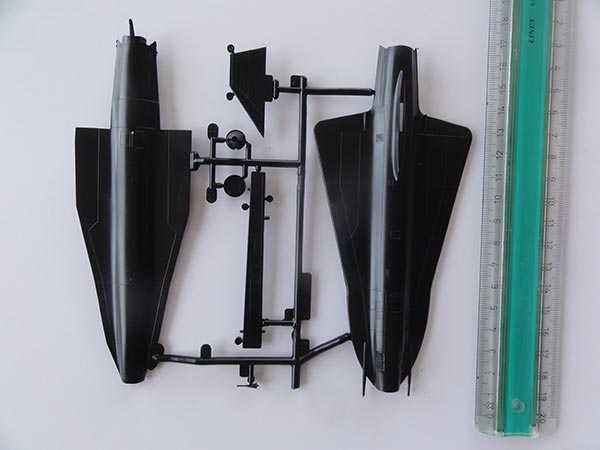
The transparant parts are windows inserts for the cockpit hatches. The clear wind shield has correctly the "cooling ridge" moulded.
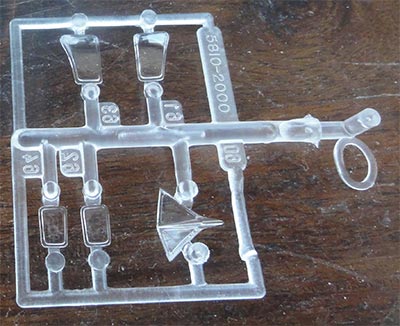
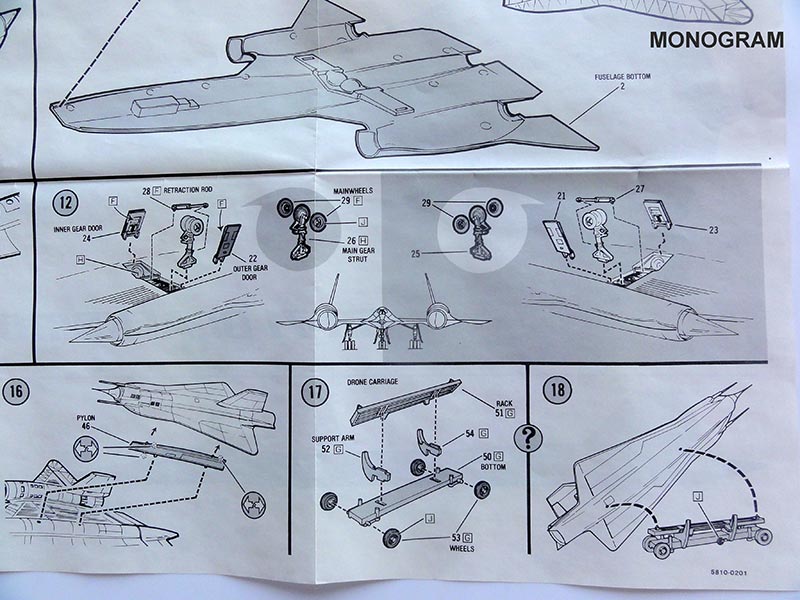
There are about 66 parts including 2 seated crew figures wearing David Clark 1031 pressure suits with posable arms.
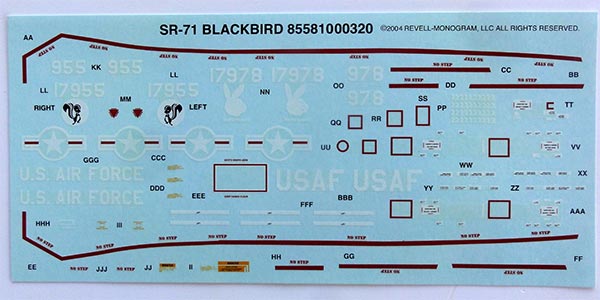
Decals are for "black" USAF SR-71 flown:
[a] coded 17978 with Rapid Rabit marking (this aircraft was written off July 1972 after a hard landing at Kadena, Okinawa);
[b] coded 17955 but the instructions do not show this second one.
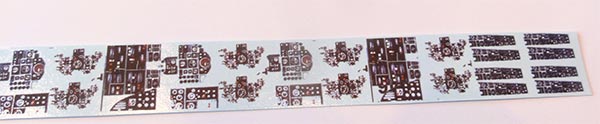
Fortunately the red walk way lines are also provided as decals as is stencilling.
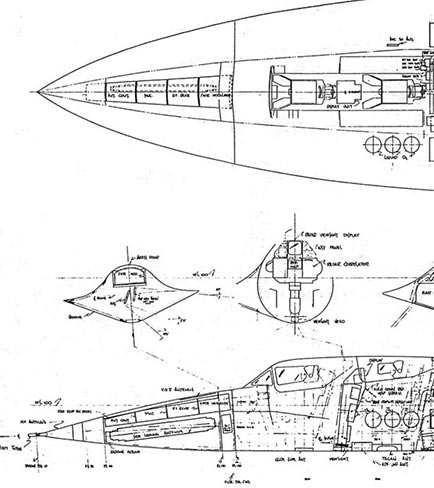
SR-71 drawings and dimensions were searched both in the references and on internet. Drawings found were inaccurate unfortunately.
The dimensions of the real SR-71A:
Common wing span: 55ft.7in. (16,94 m) = 235mm in 1/72 scale.
The kit wing span of 234mm is OK.
length: 107ft.5in. (32,74 m) = 455mm in 1/72;
It seems that the pitot tube is included in this overall figure. The real pitot tube length is about 0,95 m without streamlined nose tip fairing or with fairing about 14mm in 1/72.
The 1/72 Monogram/ Revell kit measures up to 463mm including the too long kit pitot tube of 21mm long.
Note: Monogram/ Revell states incorrectly a kit length of 470mm on the carton box.
The measured kit fuselage length without kit pitot tube is 463-21 = 442mm.
The probable actual SR-71A fuselage length without pitot tube is 103ft.10in (31,64 m) which in 1/72 is 440mm.
The Monogram/ Revell kit fuselage length is 442mm without pitot so 2mm too long which is less than 1/2 %. It seems that of the length difference is somewhere aft of the main gear bays. The engine nacelles also look about 2mm too long, somewhere amidst the nacelles. So in fact, the main kit dimensions are quite good.
When looking at photos it is clear that canopy hatches of the kit look to flat and too wide. That's because the forward fuselage cross sections of the kit are to shallow; that causes the kit canopies are about 4mm too wide as well.
NOTE: the fuselage horizontal width is about 51 1/2mm and seems to be correct in the kit. This was checked with the excellent 1/48 Revell SR-71A kit released in 2022 that was measured up. (NOTE: the 1/72 Italeri and Hasegawa kits' fuselage widths are about 47mm and thus about 4 1/2mm too narrow).
I concluded that the Monogram/Revell kit fuselage cross sections can hardly be corrected without major surgery changing all the fuselage cross sectional shapes. It was decided to leave the main parts and simply use them. Some shape inaccuracies in the Monogram/ Revell kit can be "camouflaged" a bit though:
- the cockpit openings + cockpit hatches will be made 3mm less wide.
- gear track "tread" is too large and can be corrected.
More about that later on.
There are several 1/72 SR-71 kits but none of the 1/72 kits are perfect. Compared to the Italeri/ Testors, Hasegawa and Academy SR-71 kits it seems the Monogram/Revell kits overall has the best shapes. The Academy kit is a sort of copy from the Hasegawa kit but with engraved panel lines.
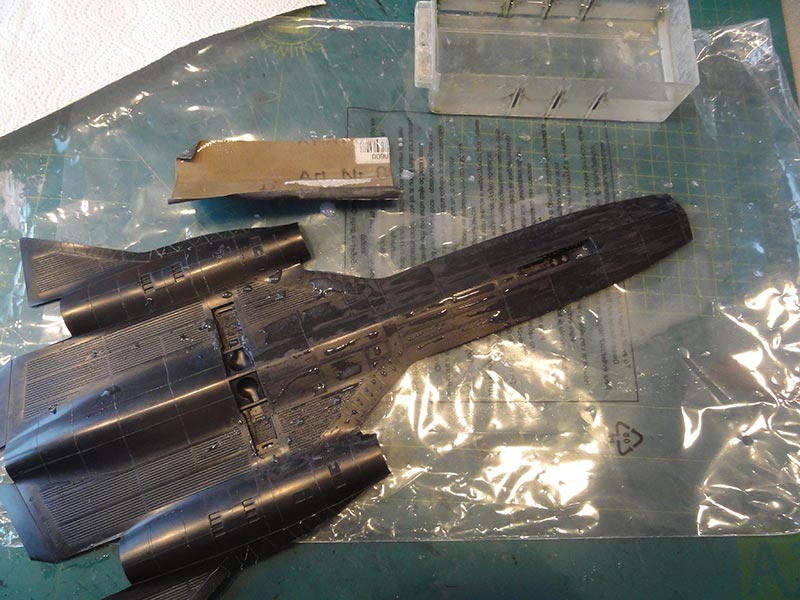
The panel lines in the Monogram/Revell kit are raised so all were inscribed with an Olfa scriber using the panel lines as guide. This is better done before assembly and takes about half an hour.
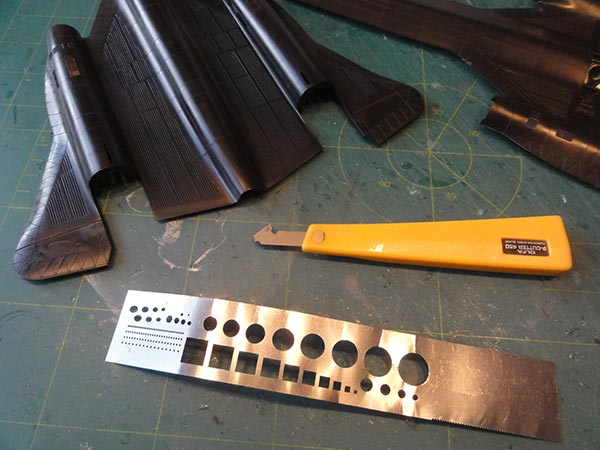
After rescribing all raised panel lines were sanded off and surfaces polished to remove scratches.
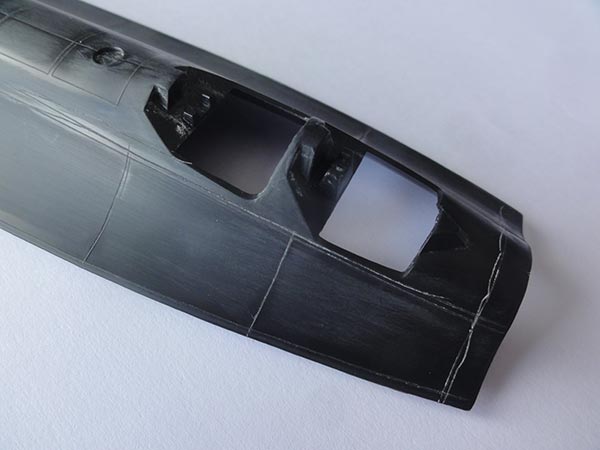
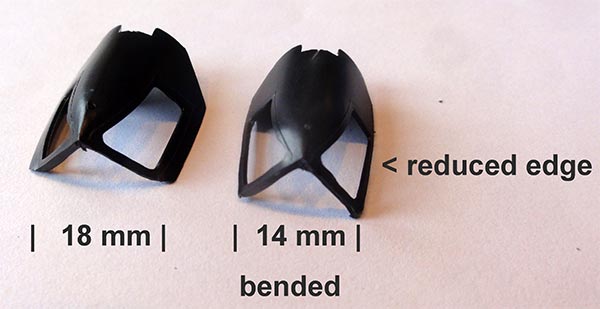
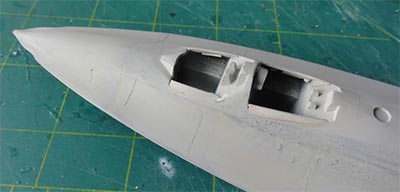
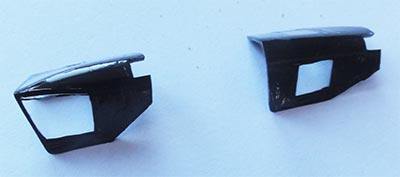
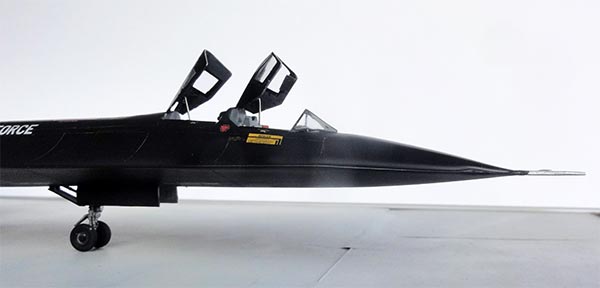
The cross sections of the fuselage are too shallow and that affects the cockpit openings and cockpit hatches as well; these are 4mm too wide (about 30%). The correct width of the forward pilot hatch at the lower base should be about 14mm and this is really visible.
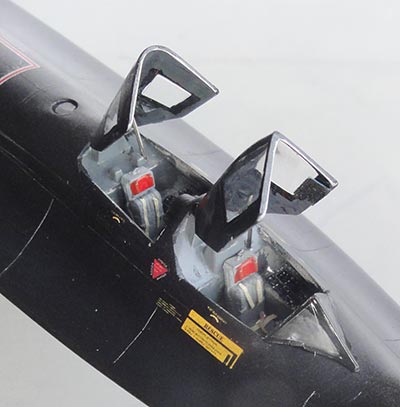
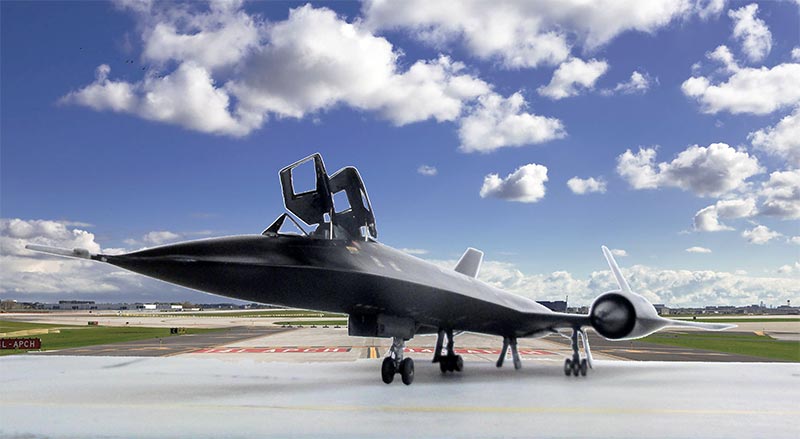
A work around was used for a better looking SR-71 model. First, decided to set the hatches opened up to show the cockpit interiors...
(a) the cockpit openings were corrected with small 2mm card strips set flush at the curved fuselage sides; this reduced the both opening widths by about 2x 1,5mm = 3mm, so good enough though this does not correct the too shallow cross sections.
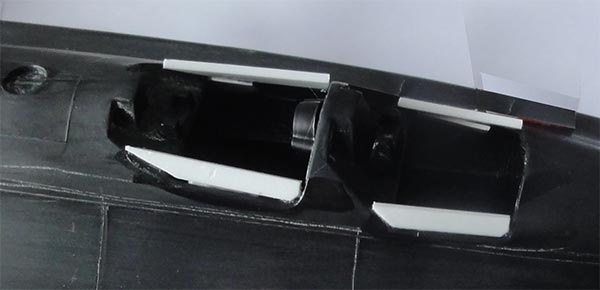
(b) fortunately the cockpit hatches parts #7 and #8 are plastic with clear window inserts. The hatches can be bended and re-shaped. The plastic hatches can be "bended" to a smaller width with the lower edges sawed off.
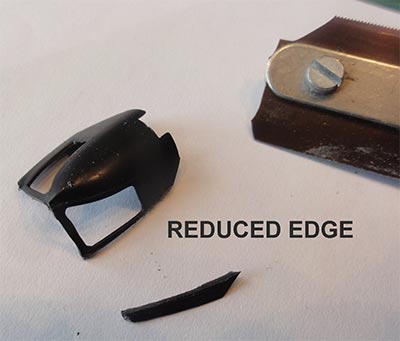
The lower edges of each hatch need a reduction about of 1mm, cut off to get less height when bended. Each hatch can be bended, the forward hatch now has a better width of 14mm (so -30%).
If these hatches are installed opened up, the model will look better.
(c) the wind screen can be used, it is small and its width is less obvious.
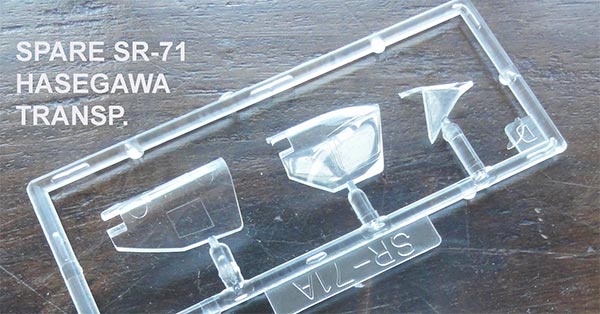
NOTE: I was lucky to have a spare Hasegawa SR-71 set of cockpit hatches with a better width, these will be used in stead. They are a bit too small in lengths but that is hardly visible when posed open. The wind screen looks good and has the "ridge to cool the screen to avoid high temperatures".
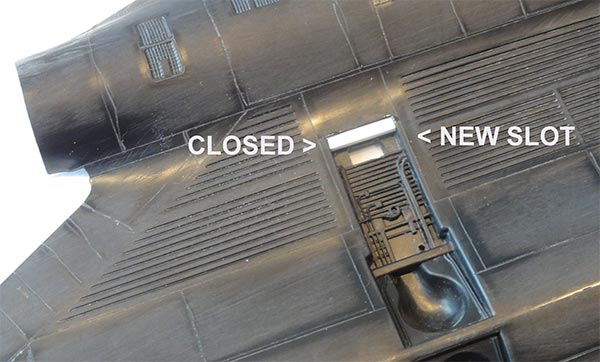
(d) the "tread" of the middle wheel centerlines is according the SR-71 Flight manual 5,08 m or 71mm in 1/72. In the kit this is 75mm so 4mm too wide. A simple correction is to cut new slots for the main gear legs 2mm more inboard. A small strip will close the other edge where the gear door will go.
Major kit assembly can now be done as panel lines were also re-scribed earlier.
The fuselage lower and upper shells were joined. I cut off the vulnerable pitot tube, to be re-installed later on. Clamps are needed. Let dry for an hour.
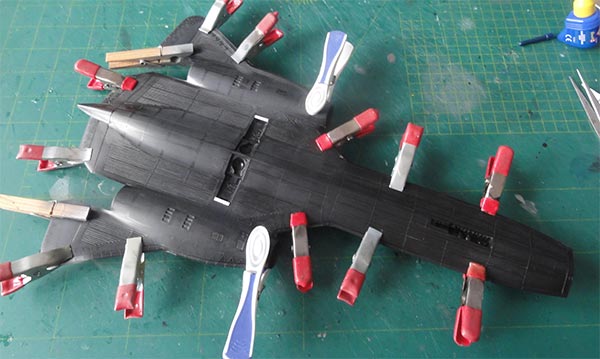
After mating the lower and upper fuselage shells, long gaps needed closing up with putty.
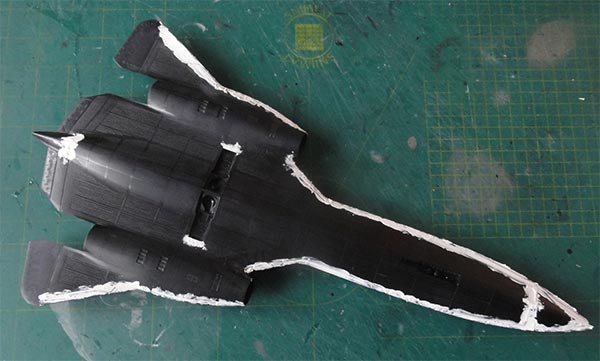
The nose was installed and the corrected fuselage openings puttied and than wet sanding was done.
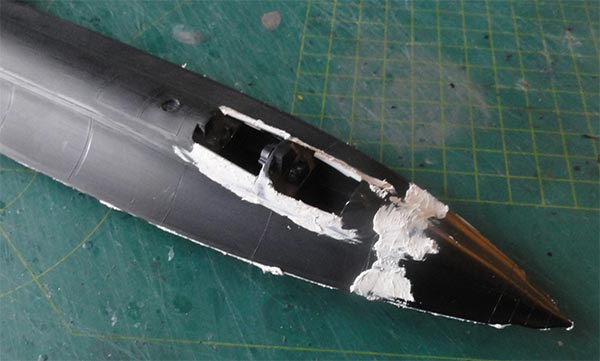
A check on the kit nose shape suggests this to be OK after the distance between nose tip and rear crew opening was measured.
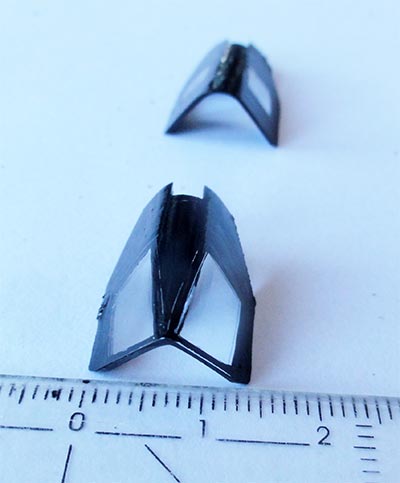
The vertical tails #9 and #10 were installed set at an angle. Ensure symmetry. NOTE: I later found out that the raised plate on each tail is too thick, better sand these flat.
The exhausts of the kit are a bit basic and moulded slightly closed whereas for a parked SR-71 they are often seen wide open with also the intakes cones in the fully forward position. But I did not change the exhausts and all is to be installed later.
The landing gears were not yet installed, the model is now ready to get a first base primer paint coat.
Airbrushed was my usual standard light grey primer with Revell Aqua 75 "grau".


Some small repairs with putty were done mostly on some re-scribed panels and the model is ready for its paint scheme.
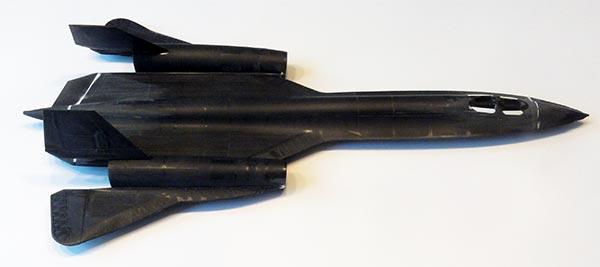
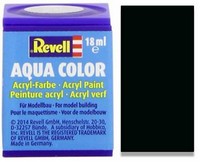
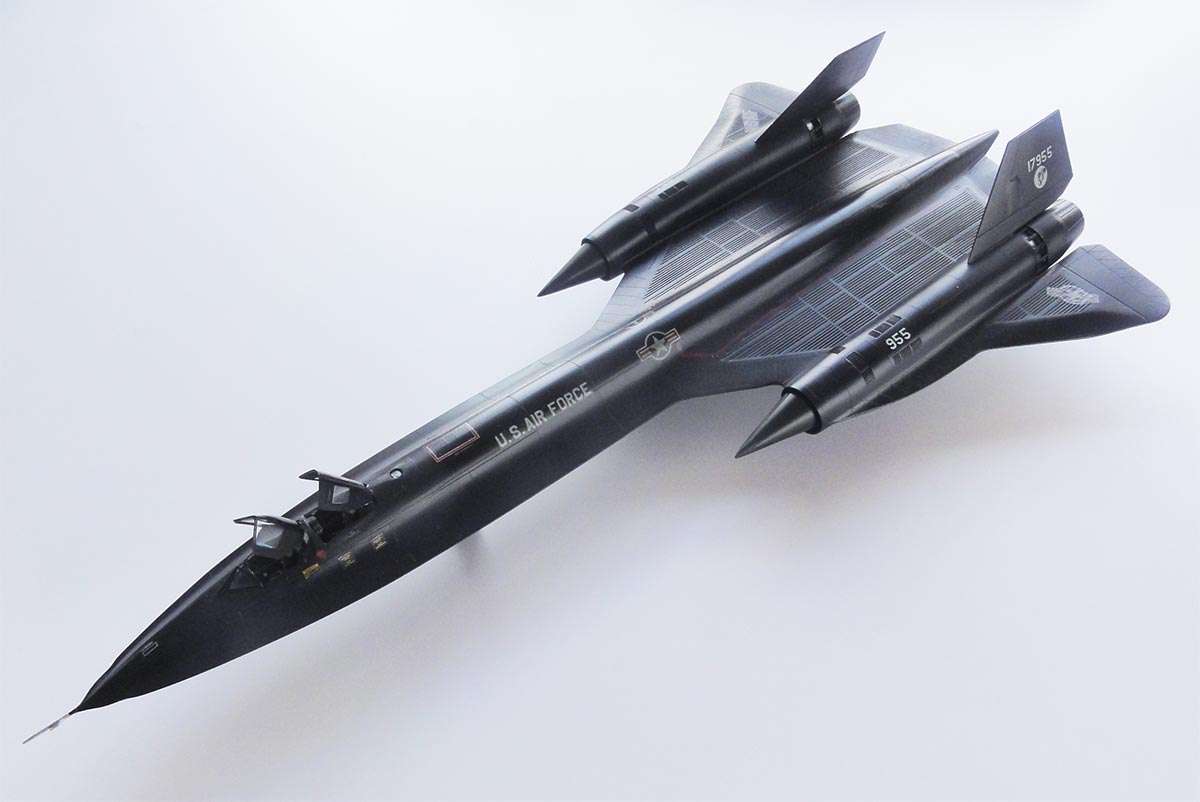
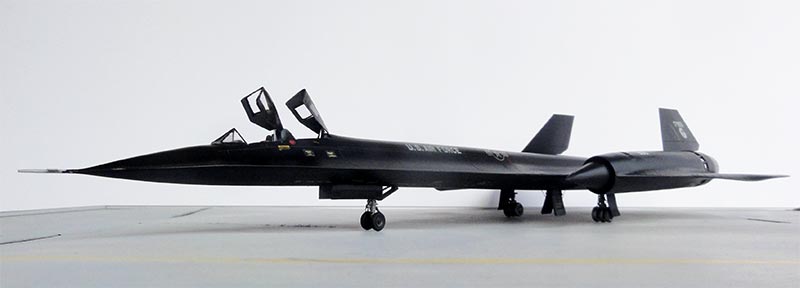
The paint scheme for the USAF SR-71 is an overall black but some panels coloured very dark grey/black. I first airbrushed a mat black coat with Revell Aqua acrylic 08 to help paint adhesion; than followed a gloss black coat with Revell Aqua 07. All was polished with polishing paste to get really gloss effects.
Also airbrush the landing gear doors black on their outsides. The doors' insides and undercarriage struts were airbrushed aluminium but on some aircraft also appear to be black. This can be re-painted if desired as I did for this SR-71 model.
ALCLAD II "jet exhaust" ALC-113 was airbrushed on the exhausts.

NOTE: when airbrushing ALCLAD please wear a face mask!
The exhaust parts and movable intake cones were installed. To install the exhausts I needed to enlarge the opening a bit to fit. Note the notch to ensure the correct orientation of each exhaust. The insides were painted burned white.
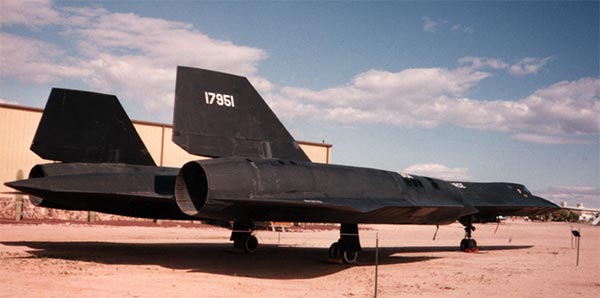
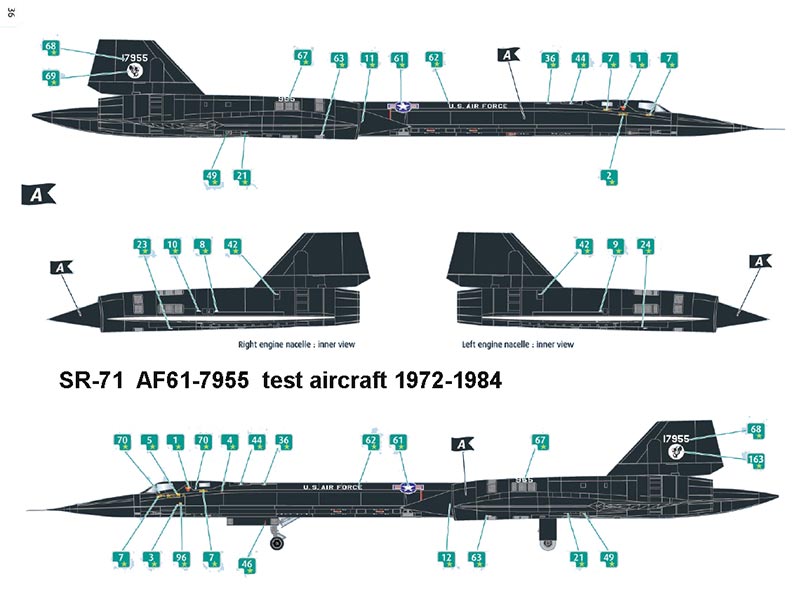
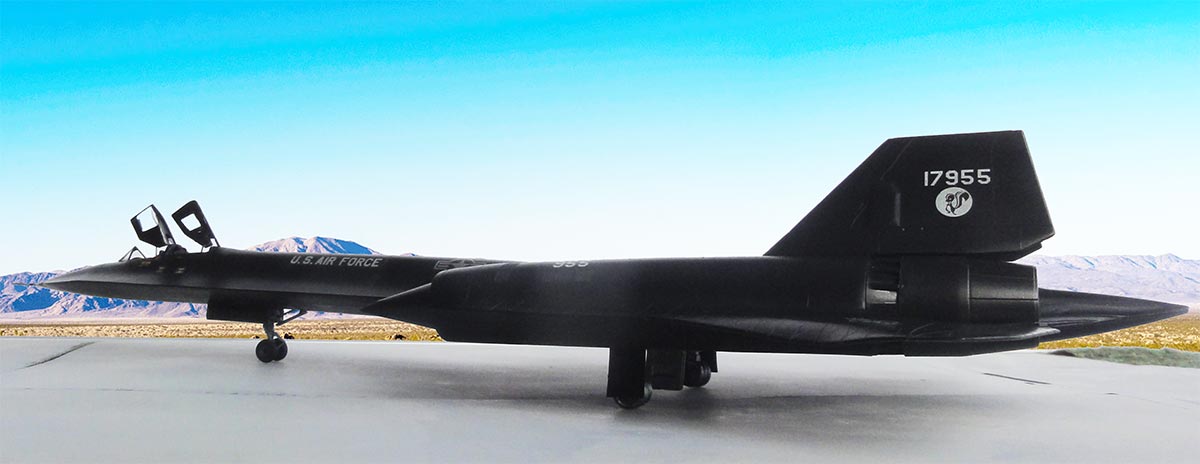
Decalling was done, I had a later released Revell decalsheet that is of good quality. The scheme picked was for the SR-71A "17955" article 2006 test aircraft flying mostly from Lockheed Palmdale which are not shown in the instructions. It was the 6th SR-71 aircraft manufactured. It had later "Skunk Works" badges on the tails. Here the later 1/48 Revell SR-71 kit scheme for the "17955" is shown for information:
Decalling went fine on the glossy surfaces. Take your time especially for the long red walkway stripes. Decals are also provided for the camera and sensor hatches in the lower forward fuselage.
The landing gear and the bays are a bit simplified on the kit. But some raised details are seen in the bays. These were painted aluminium as were the gear legs and wheel hubs. (sometimes the gear and doors' insides were black on later SR-71's). The tyres were first airbrushed tyre black; the nose tyres were kept black, but the rear 2x3 main tyres got a wash of silver over the black as many operational Blackbirds had main tyres with metallic particles to cool the tyres.
When dried, the gears were installed with the main gear installed in the re-positioned slots. Note that the anti-torque scissors face forward. The doors #21 and #22 hinge braces were cut 1mm smaller to have a better angle. They got some small rods running to the gear leg and the inside door retraction rods as well. Inside each main gear bay, a small red tyre strip was set. Some hydraulic tubing was added on the gears made from stretched sprue and painted.
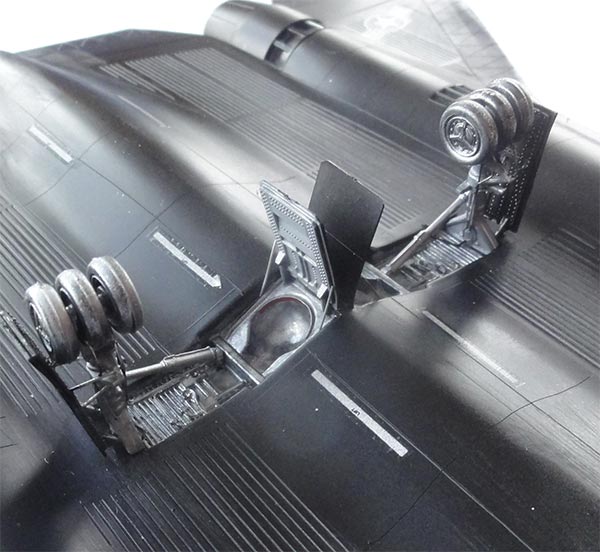
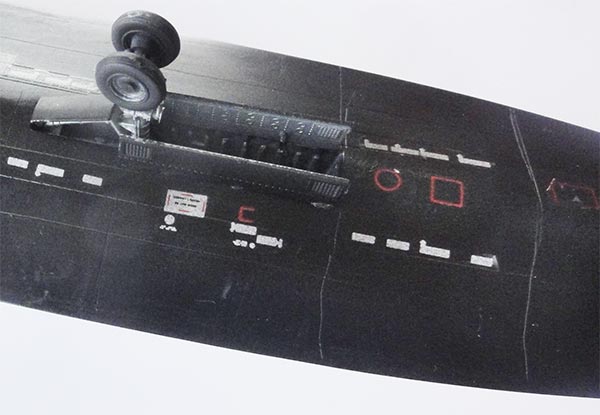
The nose gear bays looks good and has good depth with some details. It was installed as per kit and 2 landing lights were added on the nose gear strut as were a few hydraulic lines.
The various vents and blow out doors at the nacelles and a few panel lines were highlighted with a soft drawing pencil.
The applied decals really show off and stand out, a bit too much for a good 1/72 scale effect. To make the decals less bright, after cleaning up the model surfaces another thin coat of ALCLAD ALC-113 "jet exhaust" was airbrushed; this will give the model slightly a metallic hue as well and protect the decals. Again wear a face mask while airbrushing this harmful stuff.
The cockpit interior shows variations of medium and dark grey with dark grey rear cockpit bulkheads. The instruments and consoles were suggested with spare decals I had (older Monogram kit releases had these on the kit decalsheet but not the Revell release).
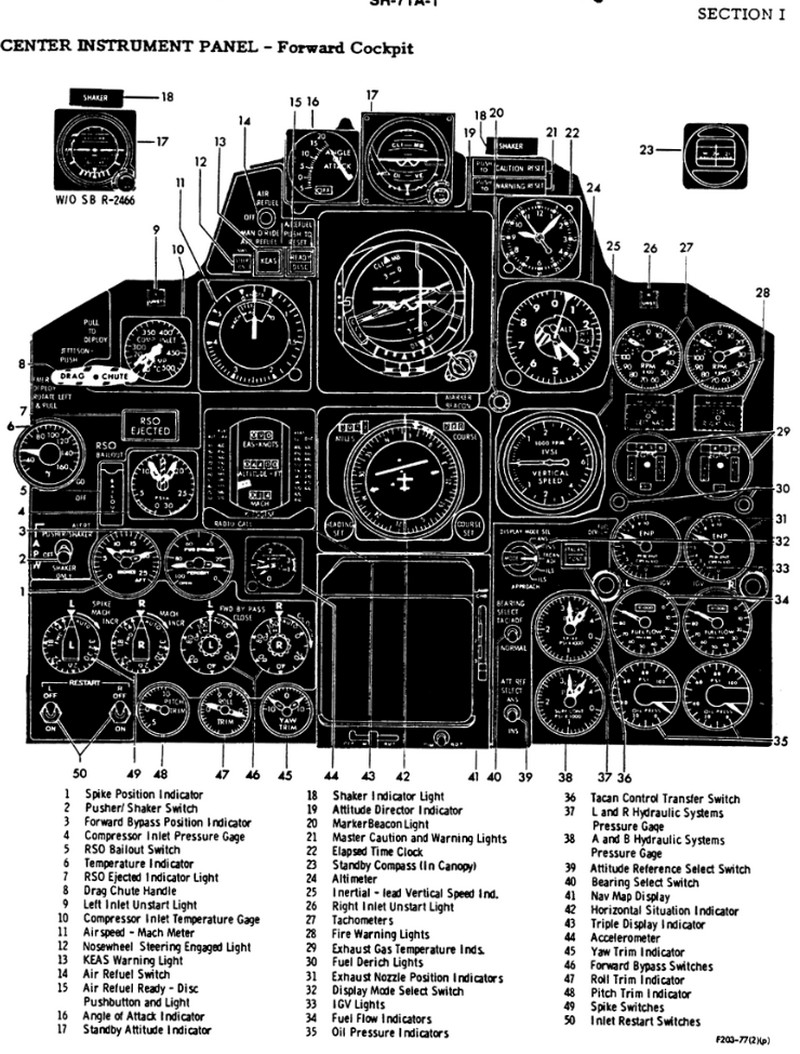
(flight manual drawings)
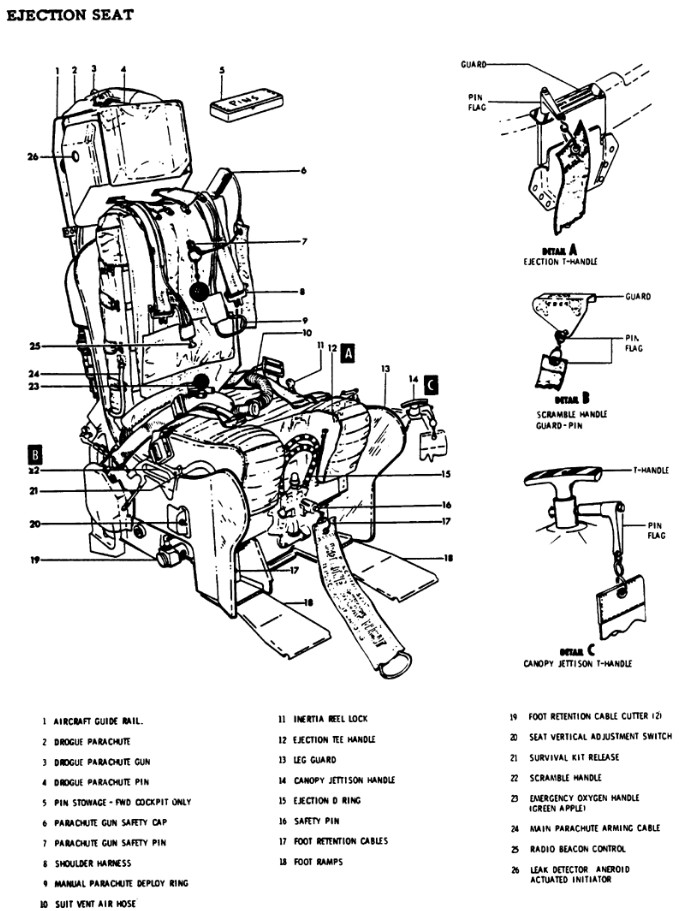
The kit seats were used. The Lockheed seat had a "double" D- activation handle. The seat head rest is red, frames black/ very dark grey and grey packs and harness made from tape slices.
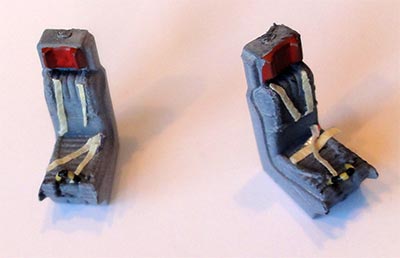
Note: in the kit you also get a apir of nice seated crew figures wearing David Clark 1031 pressure suits, but I did not use these.
As described the inaccurate kit cockpit hatches can be corrected; but they were not used as I was lucky to have spare Hasegawa kit SR-71 canopy hatches. These have better widths than the Monogram/Revell kit hatches e.g. the forward hatch width is about 14mm. These were painted black and dark grey inside.
The SR-71 wind screen has a "ridge to cool the screen to avoid high temperatures". This is correctly moulded in the Monogram/Revell wind screen part and this was set in place fixed with white glue.
Two actuator jacks were made from scrap and added slightly offset to port as the canopies were set tilted opened up. That completed this 1/72 SR-71A model.
The SR-71 kit pitot tube had been cut off earlier to avoid damage. A new one was made with a length of 15mm.
As noted: I later found out that the raised plates in front of the rudder are too thick, better sand these flat.


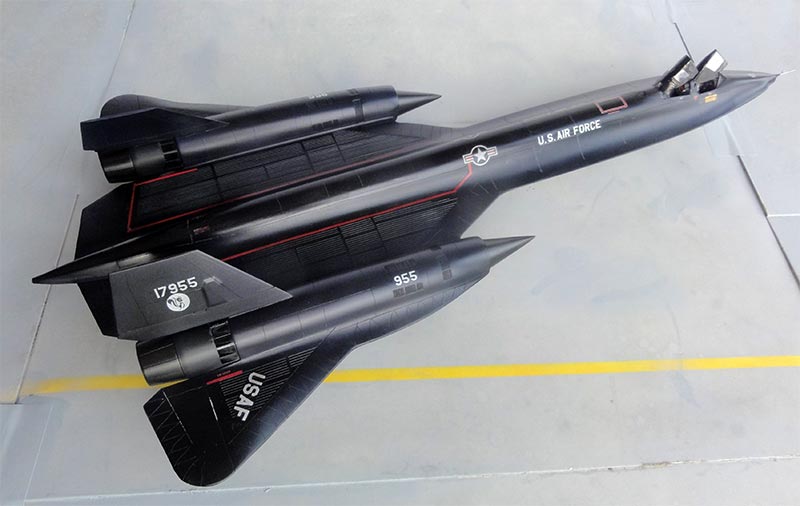

... lower view:

SR-71A "17955" article 2006 aircraft was the 6th manufactured SR-71A flying from Lockheed Palmdale for testing. It is now on display at Edwards Flight Test museum.
On to next [ Page with the A-12....]

(c) Copyright Meindert "designer"/ All rights reserved.Your comments are welcomed by webmaster
Created this page Jan 22, 2023