[ page 3 ]
Sea Venom model in 1/32 scale
... continued from page 2...
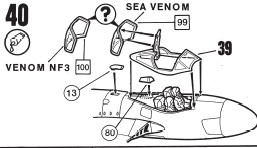
Step 40
The remaining section of the forward
ridge was glued on the fuselage. Filler was applied between the ridge and
the fuselage as the fit is not perfect.
Next, careful sanding was done for
both models. With plastic strip, sprue and card details were added.
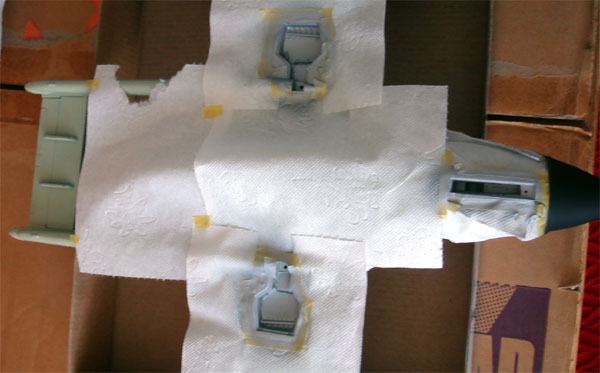
Masking took
considerable time in the cockpit area. I put on Tamiya masking tape in
the insides and outsides of the windshields. This is really required to
protect your clear windshields.
The small intake scope #13 was not
yet fitted.
Steps 28-33
The wing tip tanks were assembled,
needing minor sanding and filling. The tanks are not yet fitted as they
will be fitted after painting the model.
The too thick wing fences were sanded thinner on a flat surface and put on the wings. For the Aquilon, the outboard wing sections were kept separate as these would be set in a folded up position.
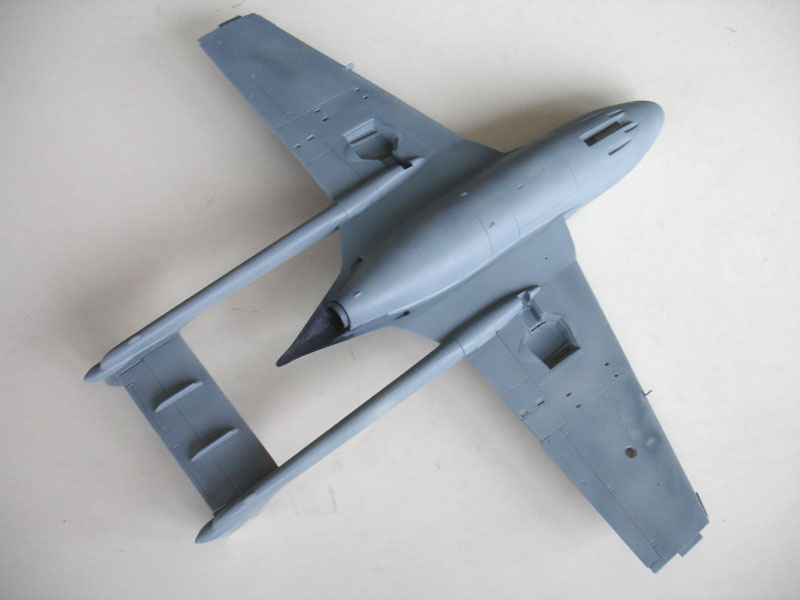
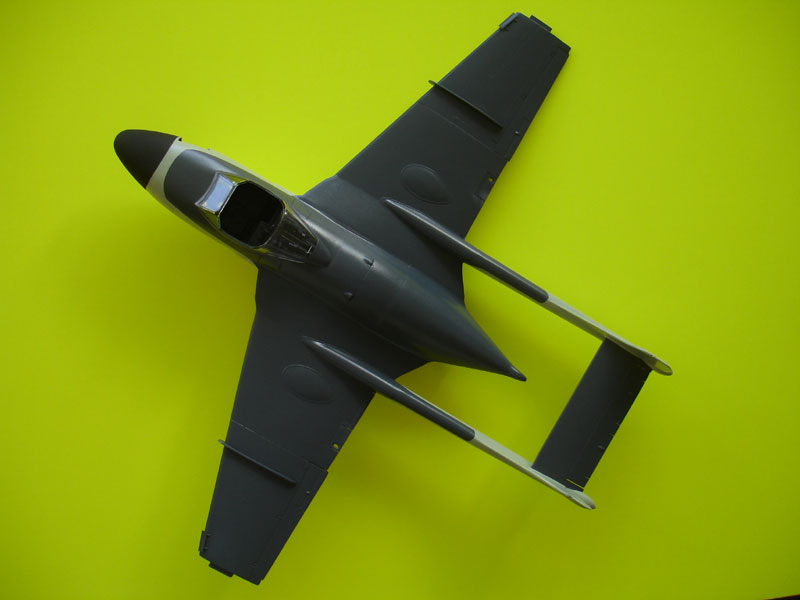
This all completed the main assemblies.
![]()
The overall model was given a light
grey base coat using the airbrush to check for any flaws. These were corrected
with filler and sanding everything smooth and "invisible".
The cockpit areas were airbrushed mainly in black.

For the Australian Sea Venom, the
enamel colours are Dark Sea Grey (using Humbrol 128)
and Sky (using Humbrol 90). (Note: in the
Revell instructions light blue is indicated as lower colour but this I think is
not correct). At the Sea Venom model, first the Sky was
applied. After 24 hours drying time, the lower leading edges of wing and
stabilizer needed a lot of masking. Next followed the Dark Sea Grey.
The wing tanks
also need some time to paint. For the Sea Venom of 724 NAS I used Revell
50 for the blue and bright yellow for the tips and ends.
The gear bays
got a coat of aluminium / metal.
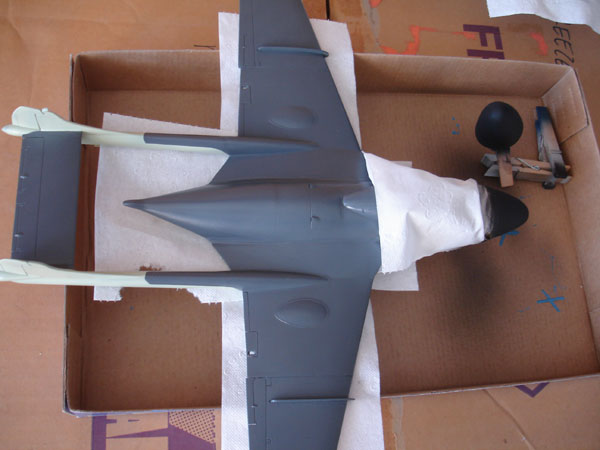
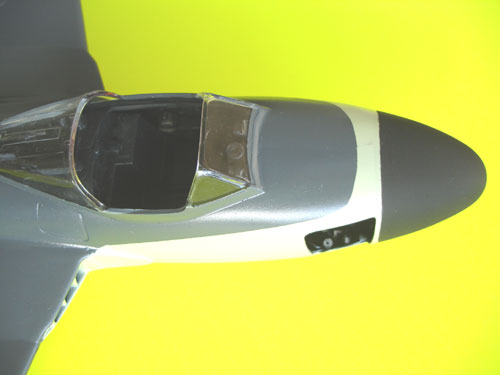
Sea Venom final results...
.
Sea Venom nose area, the central rear
canopy spar still to be painted (here still clear).
Step 34
The folding wing option was not used on the RAN Sea Venom.
Steps 35-37
The pilot figures were discarded.
Step 38
The ejection seats in the kit are
a bit basic. These were detailed with strip and card. It seems that the
seats are (based on) Martin Baker mk.4A. On Internet a picture was found,
but I am not sure if this is correct.
The seat curtain pull was made
from red stretched sprue.
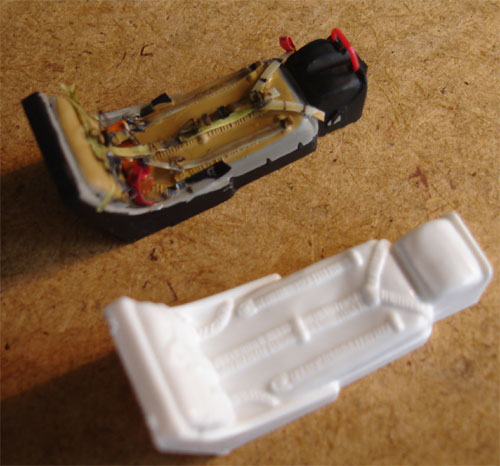
I closed the open rear of the seat
with tape, cut to the contours and simply added details to kit part from
strip, tape and belts & buckles pieces of etched metal to add realism.
The seat cushions seem to be leather colour.
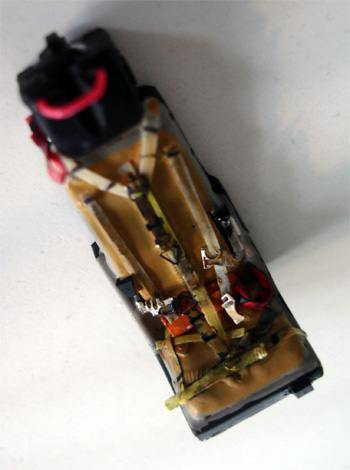
The seats do fit into the tiny space in the cockpit tub.
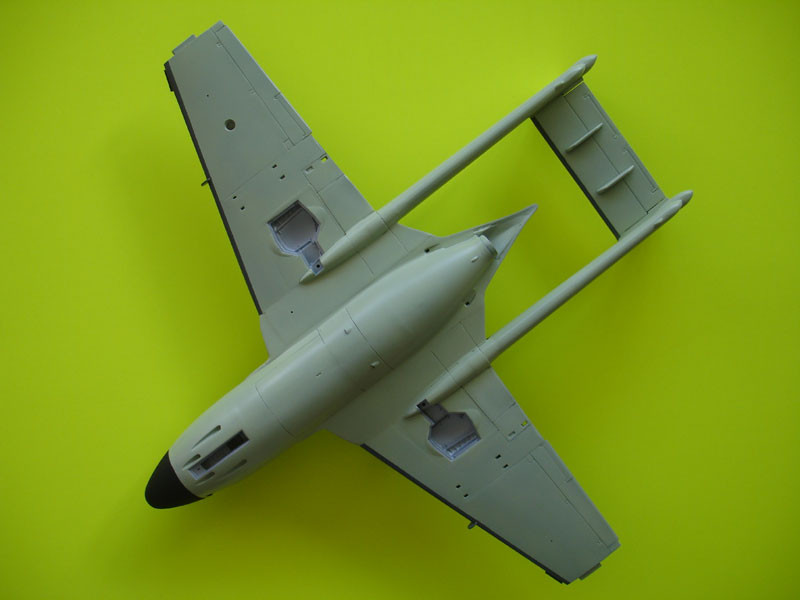
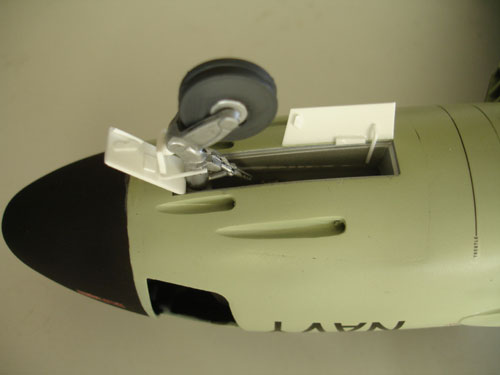
Steps 41-47
The undercarriages were assembled
as shown. Some minor details were added from thin metal wire and the legs
painted aluminium. The nose wheel looks strange but is OK as on the aircraft
anti-shimmy tyres were used. I had trouble aligning both nose wheel halves.

The wheels can be "rotated" as per kit; I left
out the parts #34 and fixed the wheels to the legs. Painting the wheel
hub requires a steady hand. Make sure to align the wheels 90 degrees to
the ground.
Steps 48-49
These cover the armament with rockets.
There are some sink marks on some of the rockets. Fill these. The rockets
were painted aluminium with black heads and set on to the Sea Venom.
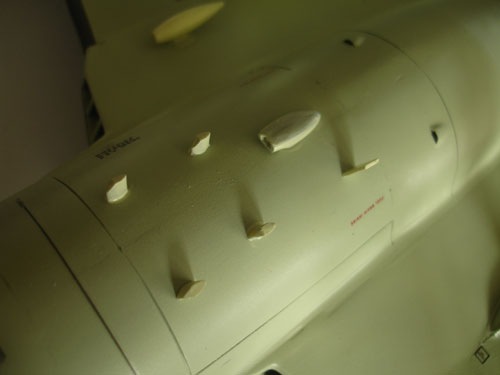
Steps 50-52
The various antennas may differ between
aircraft. For the RAN Sea Venom, the belly antennas and stubs can be seen here.
I replaced some antennas with thin metal wire.
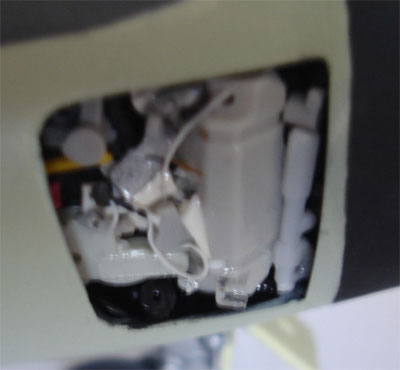
As nice extra, a hatch was opened up for the RAN Sea Venom immediately aft of the nose. Based on some vague photos, some detail was added from strip and parts from the spares box; it is all black anyway.
to next [
Page 4 ......]
Back to 1/32 models...

(c) Copyright Meindert "designer"/ All rights reserved. Your comments are welcomed by webmaster
Created this page
February 16, 2008