HPH 1/32
[ page 3 ]

building the 1/32 HPH L-29 Delfin
... continued from page 2...
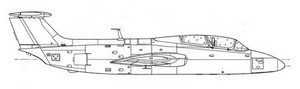
real L-29
page 1
page 2
page 3
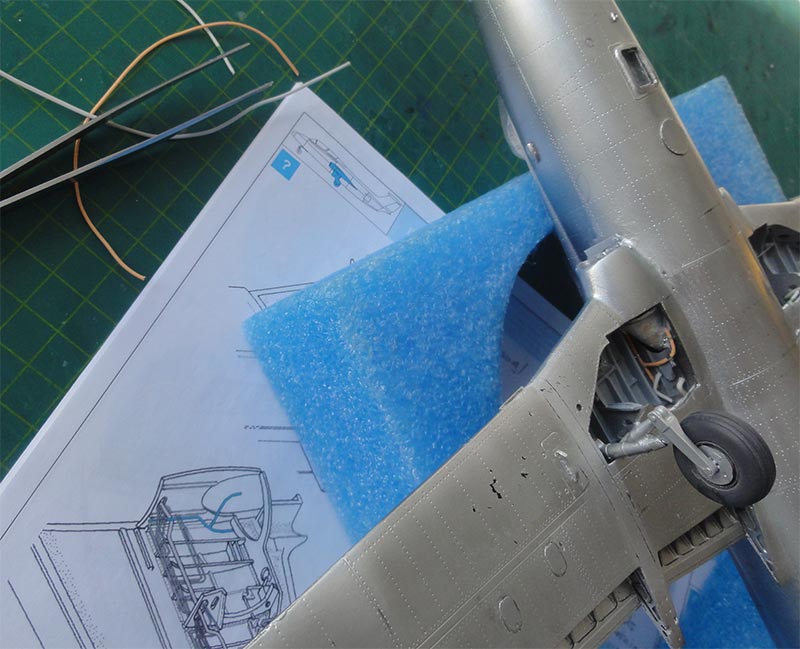
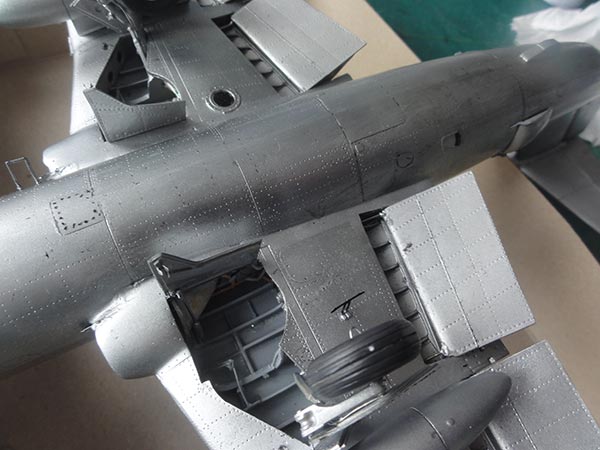
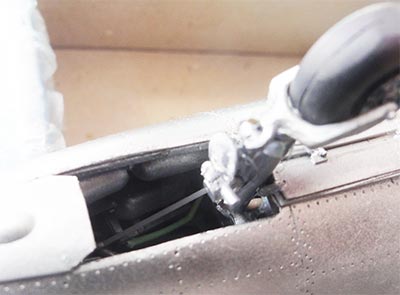
GEAR and BAYS
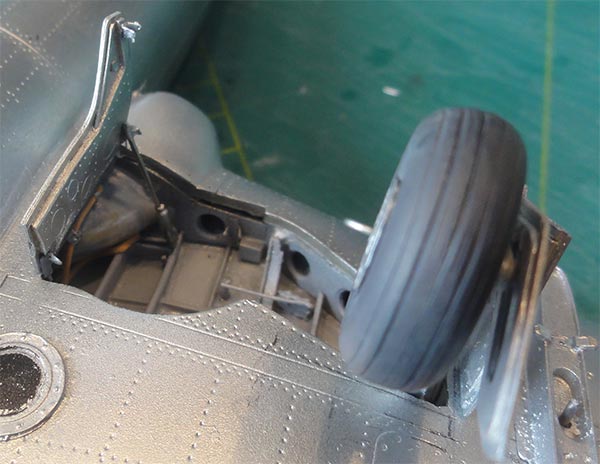
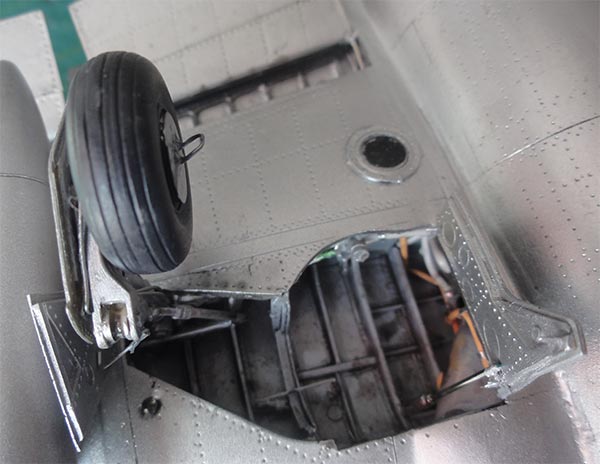
Thankfully, the gear legs have a metal core given strength. Well done HPH! This is needed as the resin model is quite heavy.
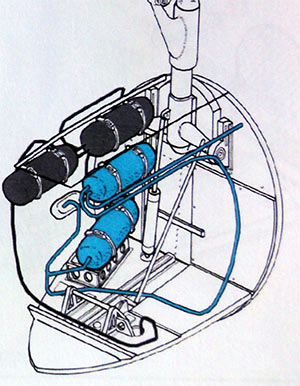
In the gear bays the various hydraulic pipes were added from scrap using bits of coloured (electricity) wires that can be found in your home depot shop. HPH provides nice drawing how these pipes run. This gives a nice result.
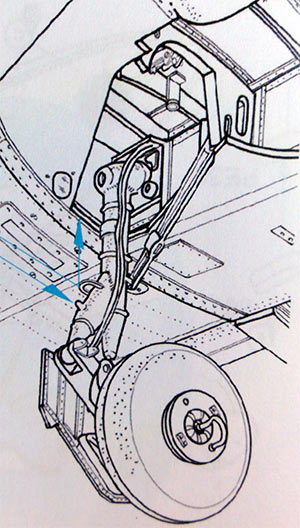
The wheel hubs require a bit drilling the holes to fix them. This was done with a simple hand drill. Check with each gear leg is the wheels do fit indeed. For the nose wheel a clever solution is suggested by HPH to get a strong assembly.
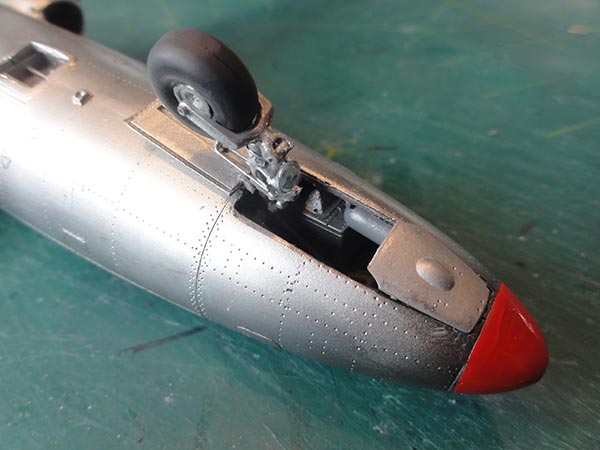
The nose wheel bay also has details inside. I replaced the light with something from the spares box. The front nose door is usually seen slightly open.
The main undercarriage was installed with the main gear legs to be set and fixed in a corresponding hole in the gear bay. Make sure to get a 90 degree angle. I added a piece of rod between the leg and the bay roof to get extra strength.
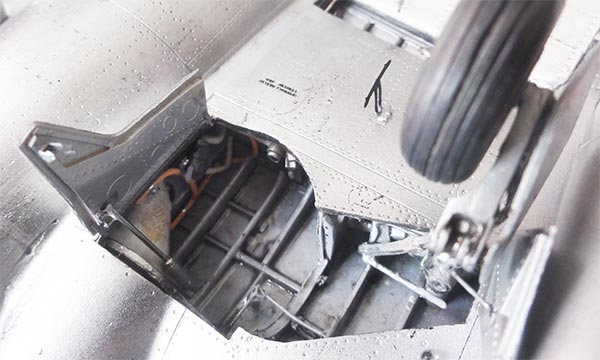
The doors were also installed.

A load of details were added. Many bits are provided in the kit, others were made from scrap. The kit instructions are very helpful here as well.
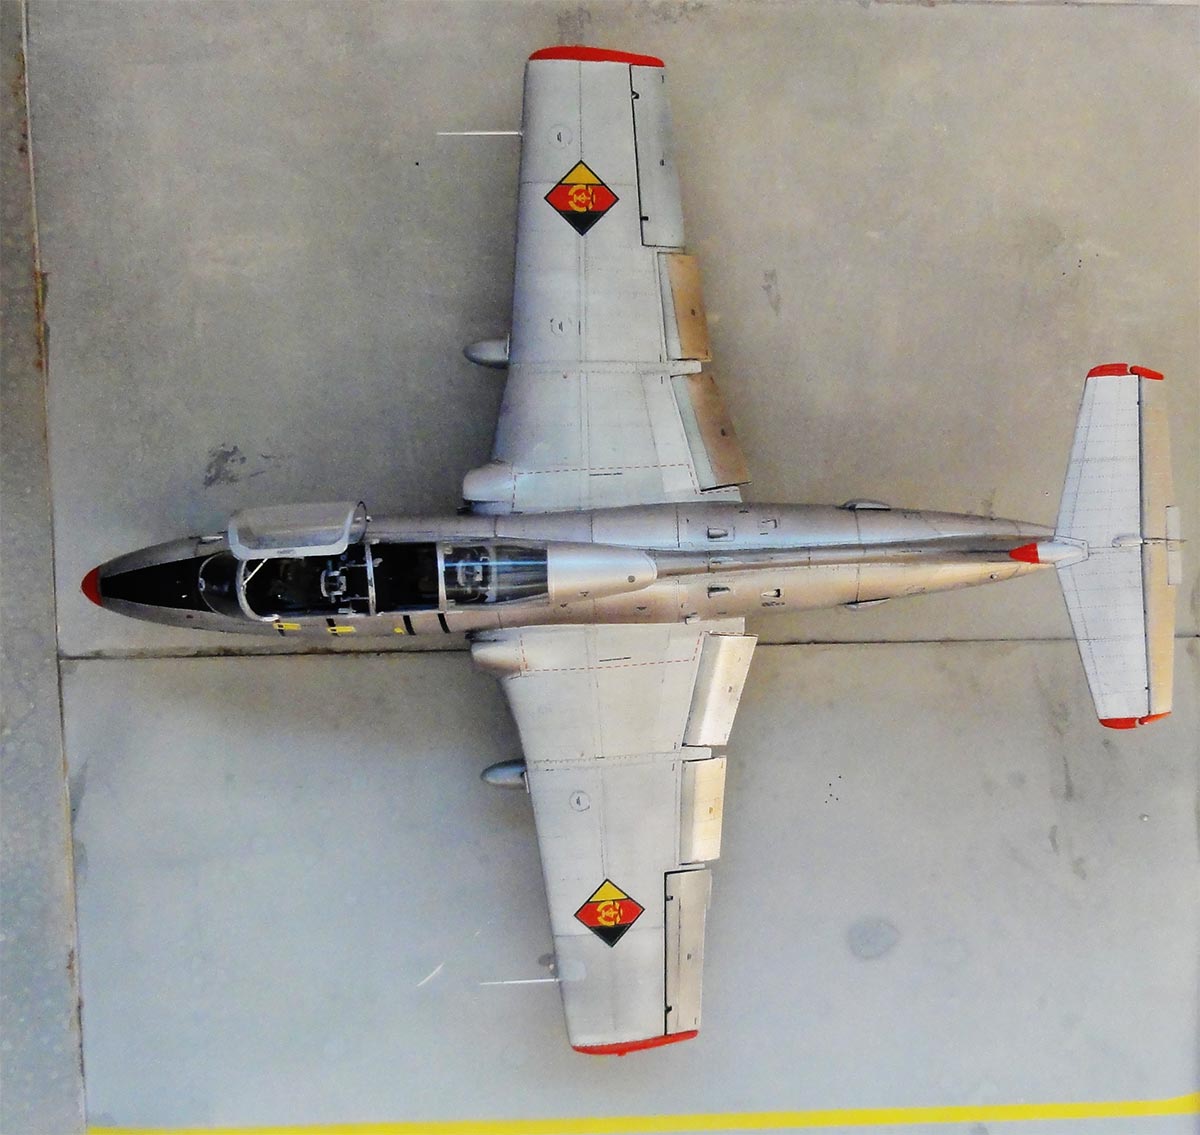
FLAPS and AILERONS
The various Fowler flaps were set (these had been airbrushed in metal paints earlier). For a parked L-29 the inboard flaps often are seen drooped as to 30 degree down.

The actuator rods were made from bits of metal needle.
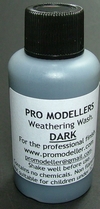
Inside the bays I used water based ProModeller wash that needs not to be swiped off, so on gear legs and gear bay rib corners and flap bays.
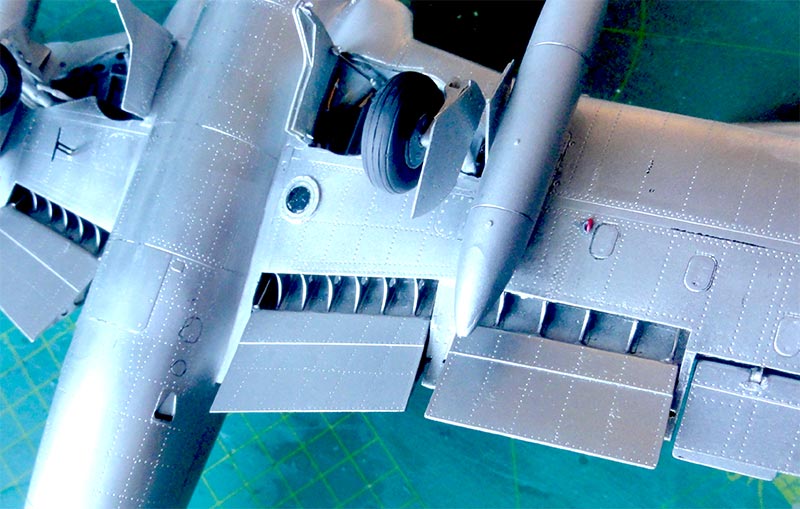
AIR BRAKES
The air brakes were set close and installed without any problem. Also, the large antenna on the spine.

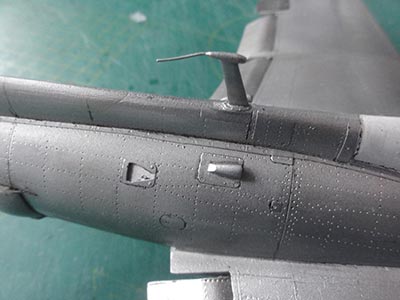
TAIL
The T-tail parts were set in place. The rudder needed a bit trimming to fit without too large gaps. Some white glue and plastic strip was needed to close gaps at the lower joints and these were painted aluminium when dried.
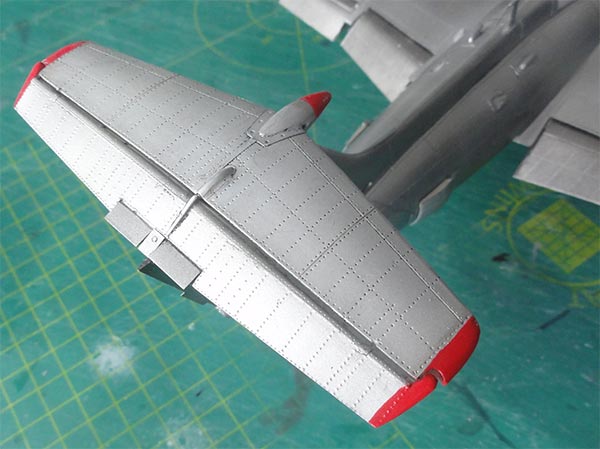
PYLONS
The two wing pylons were installed, these were also airbrushed in metal previously as well as the many flaps and ailerons.
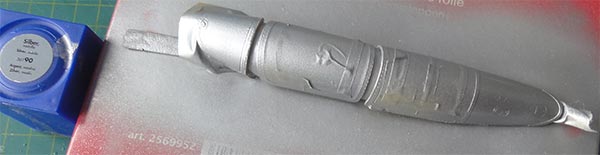
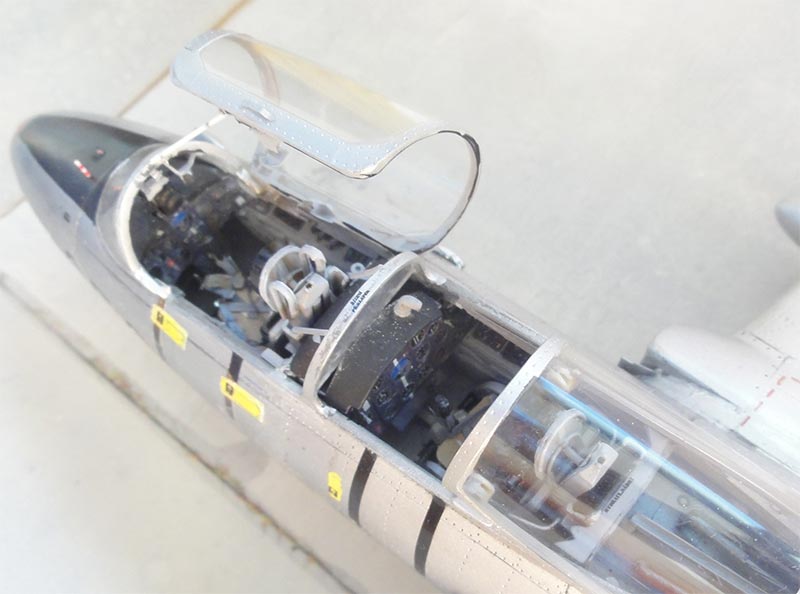
CANOPIES AND WINDSCREEN
The clear resin canopies were masked off with the provided masking tape. The frames were airbrushed Revell Aqua Silver.
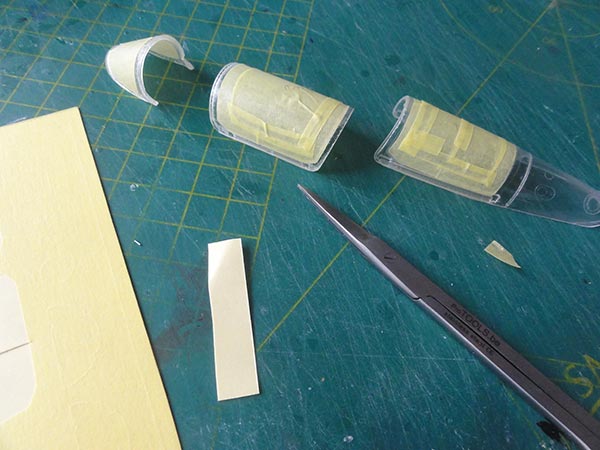
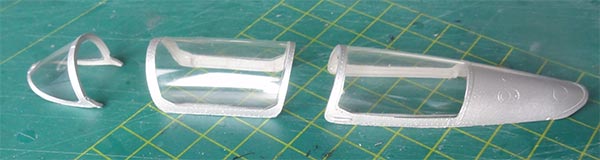
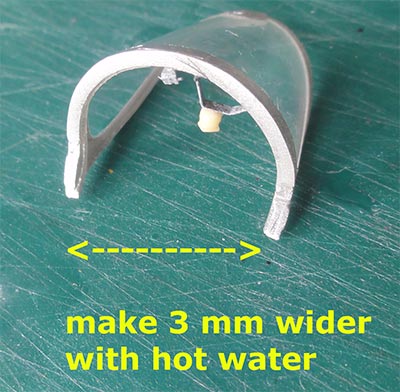
I than discovered that the wind shield was 3 mm too narrow at the base. Very gently, in hot water that was corrected:
Clamp the shield to correct width with cloth pegs. Gently dip in water, increasing water temperature under the hot water tap. Be careful! The clear resin windshield will reform and will fit now.
The small parts such as mirrors and locks were set inside the canopy frames.

The windshield was now set on the nose, a few small gaps remained and these were closed/ filled with White Glue.
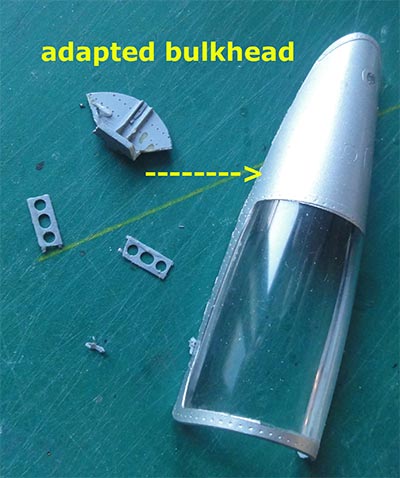
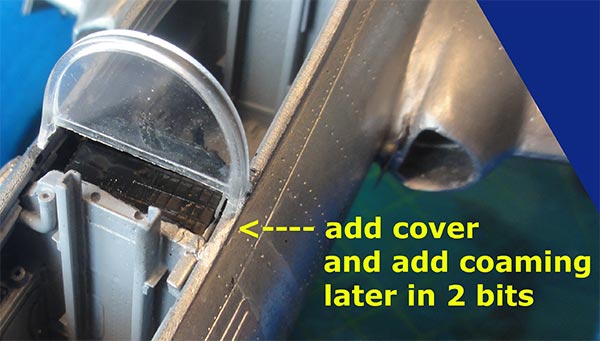
The rear sliding canopy and even its interior (not seen later on) is nicely provided in the kit but the bulkhead was adapted a bit. Two notches were cut out, so the canopy will sit correctly on the fuselage spine when slided open to the rear.
The installment of the mid frame with blast screen was easy.
 .
. 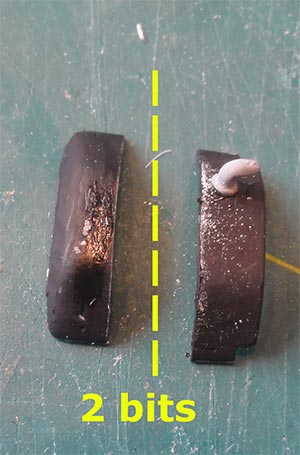
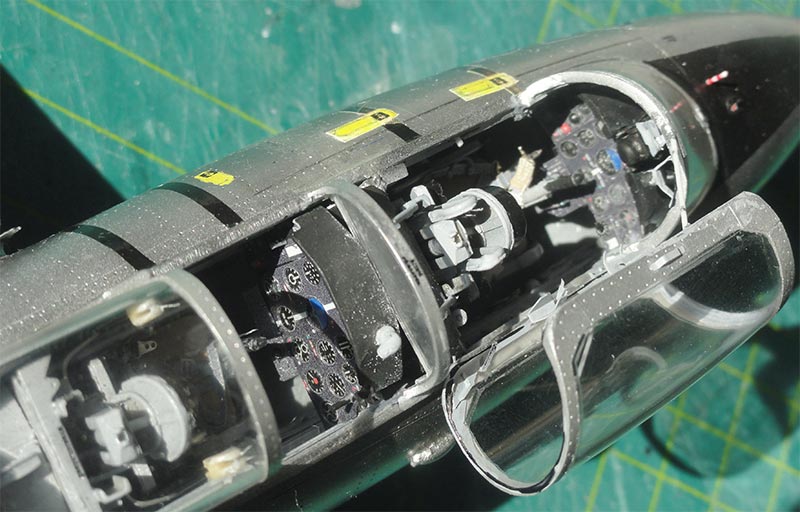
The instrument cover interfered however so this part was cut in half; these were set on both sides.
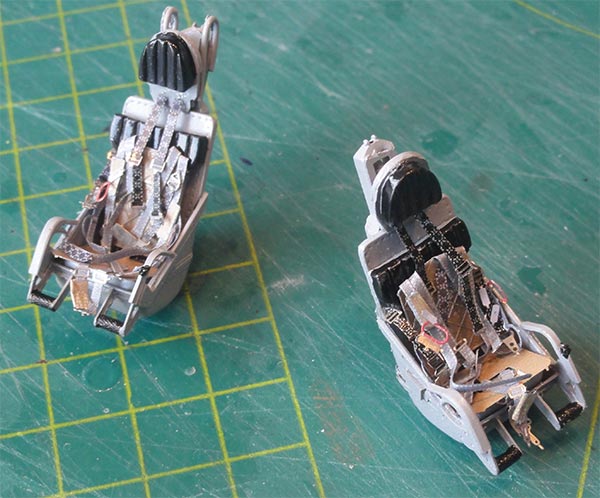
SEATS
The ejection seats are nicely provided in the kit. You get painted etched metal seat straps. The seats were airbrushed grey earlier in about FS36375 grey.
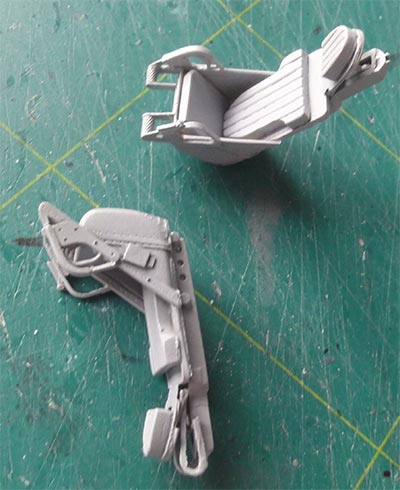
The seats will fit without any problem in the cockpit tubs. Paint some cushions and head rest "leather" black as per kit instructions.
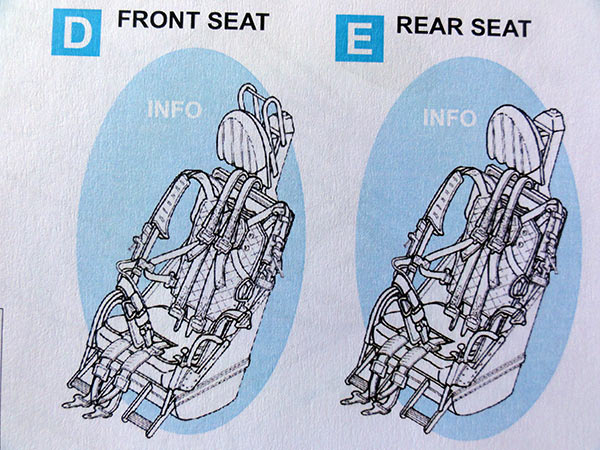
The installment of these straps / harnass takes quite some time and super glue. The results look great.
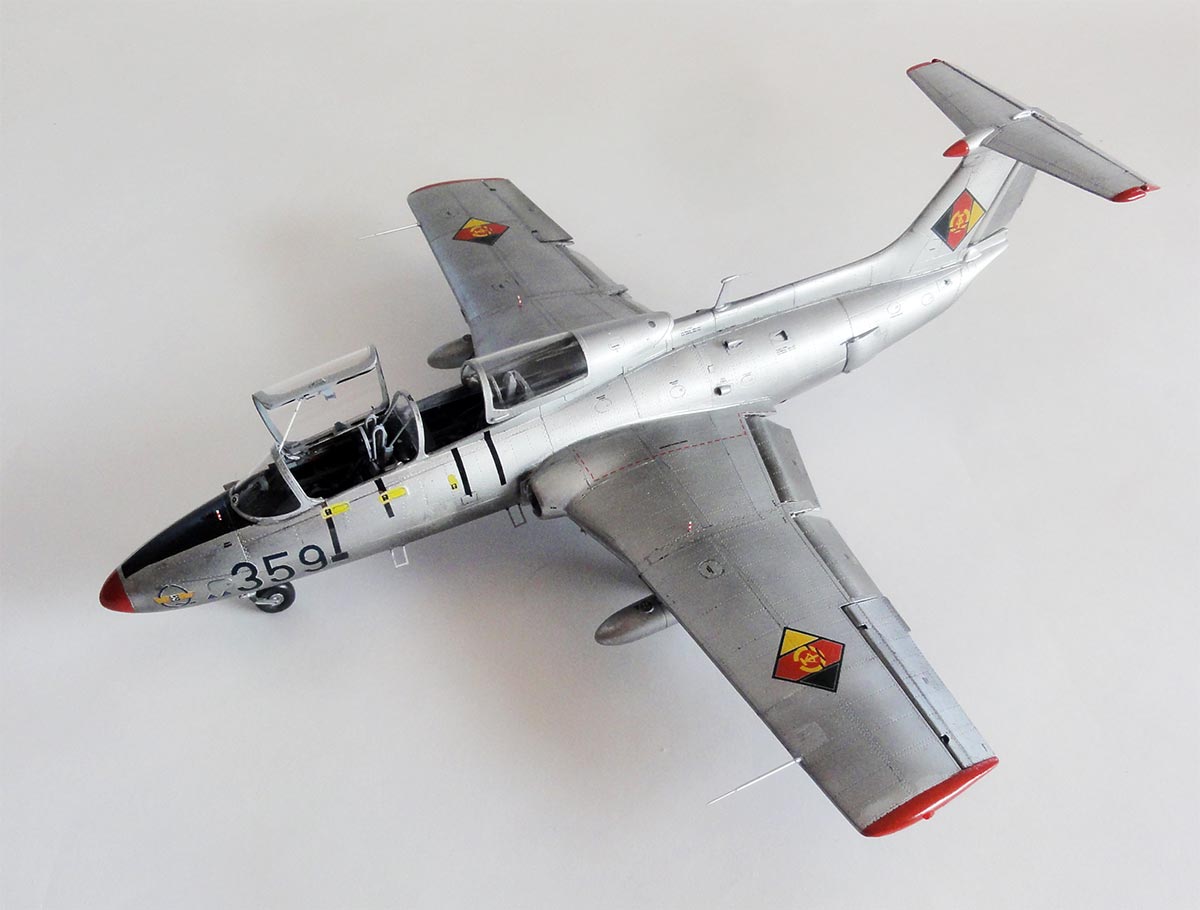
WEATHERING AND WASH
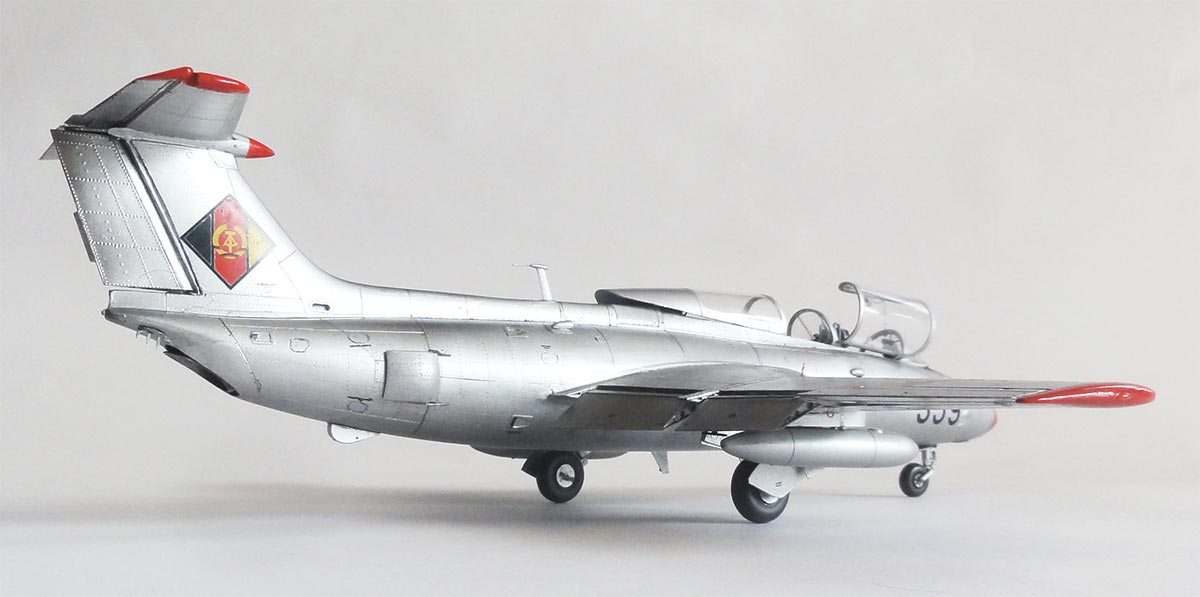
After the model got the ALCLAD paint treatment (1)-(5) as described on page 2, it now was given a wash. This is feasible as the HPH kit has very fine recessed panel lines an rivets.
I started with AK Interactive oil pegment based #AK075 after the Alclad surfaces had been given a few airbrushed gloss acrylic varnish coats with Johnson Future / Pledge. This protects the paint work.
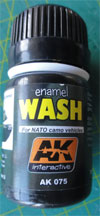
Let the wash dry for some 20 minutes and than swipe off any excess wash with an old shirt and white spirit.
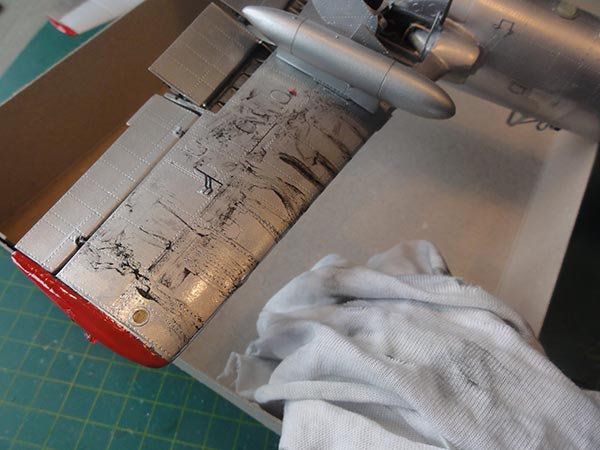
The result is a subtle wash. Redo if you want more.
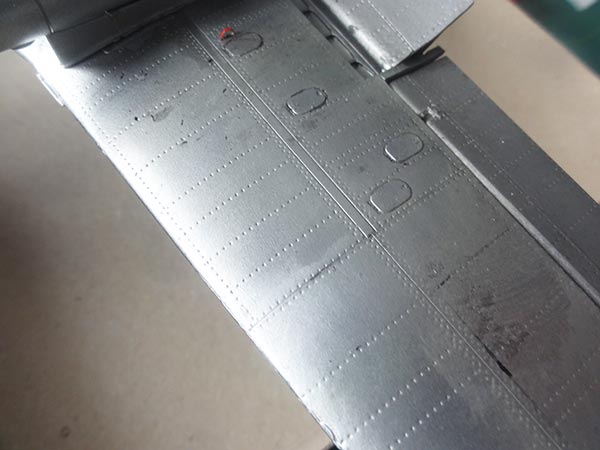
Some panellines were also given again stroke with a soft pencil.
The model than got again a few coats of acrylic varnish with Johnson Future/ Pledge thinned with IPA. (Obviously shield off any clear transparancies).
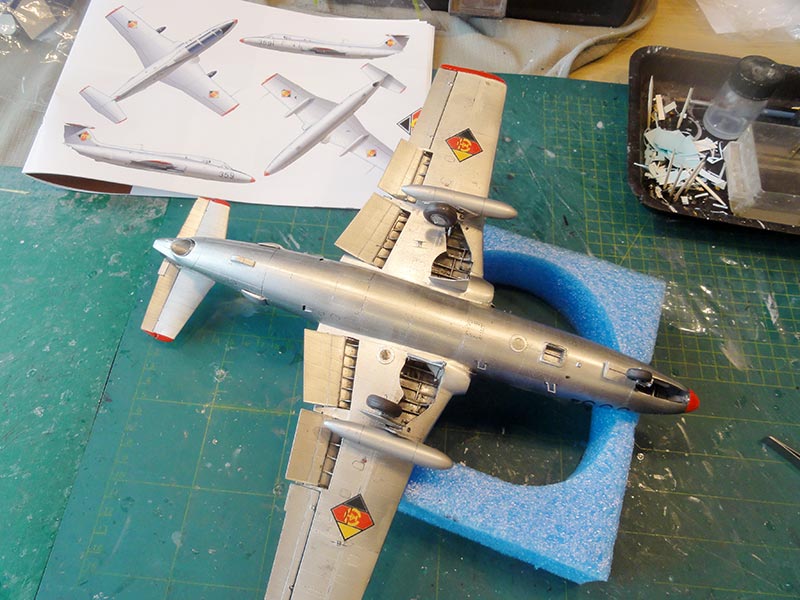
MARKINGS
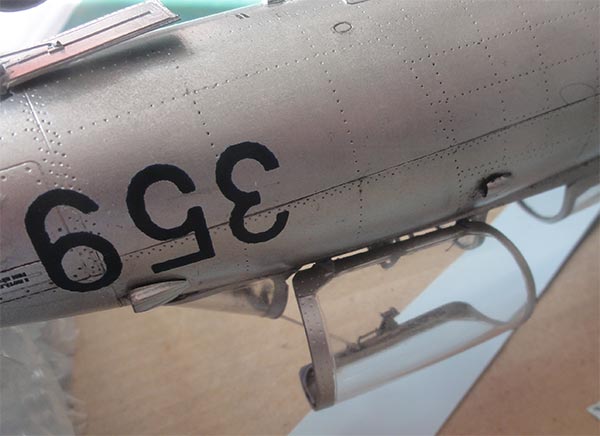
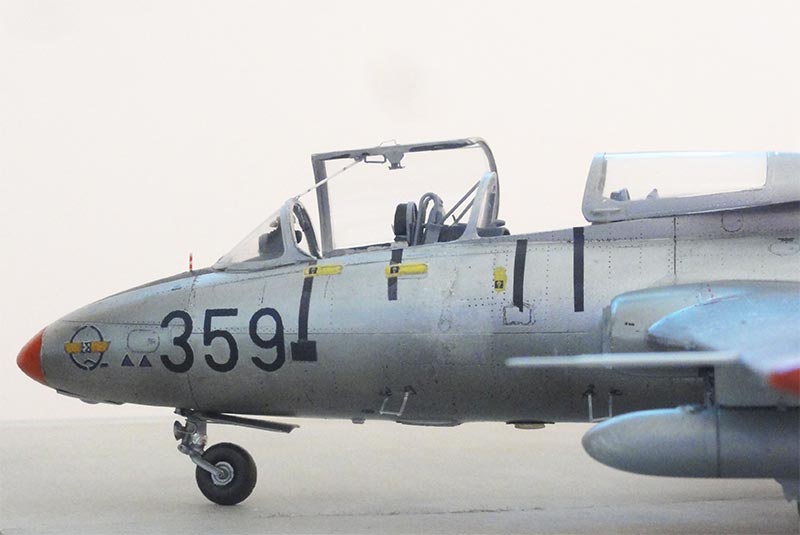
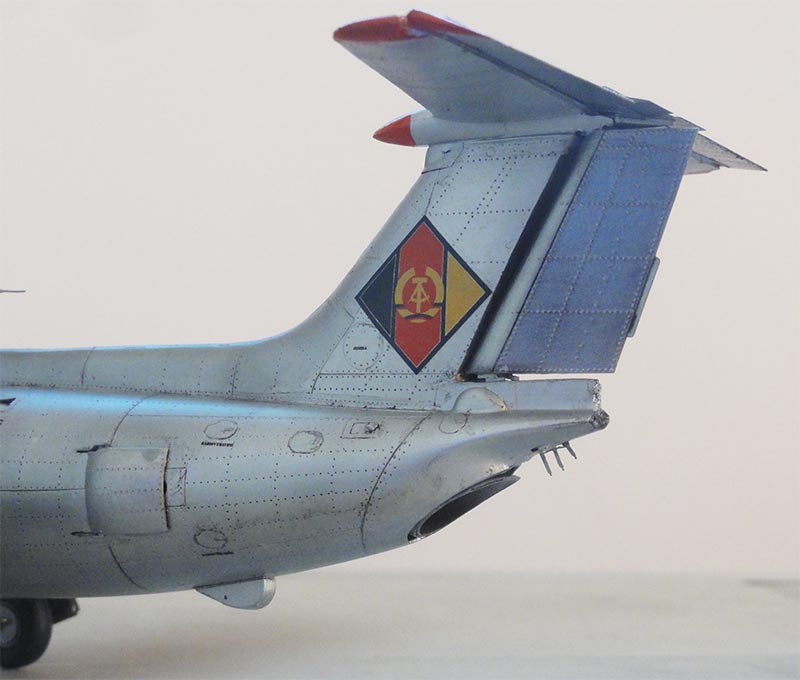
I needed to find the DDR markings of correct size in a 1/32. Note also the black horizontal bars.

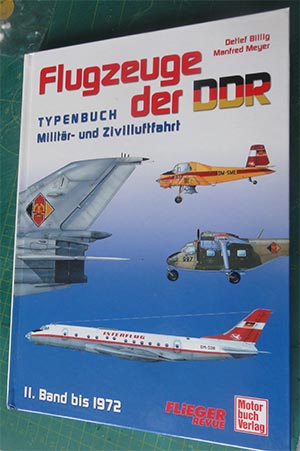
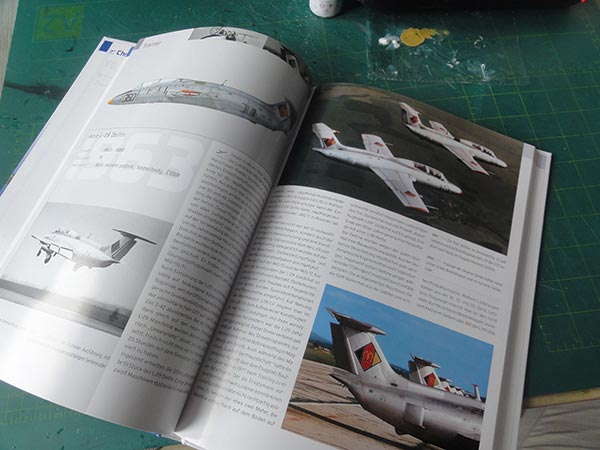
The book about DDR military aviation was a crucial source of reference. This scheme needs custom decals as no DDR decals were found in the spare decal box, nor in any commercial aftermarket sets.
The "DDR squares" were estimated to be about 16,5 x 16,5 mm. The markings can be found in the internet in good resolution and these were processed in a graphics program. The nose codes were also made as was the "Q" excellence award on the nose.
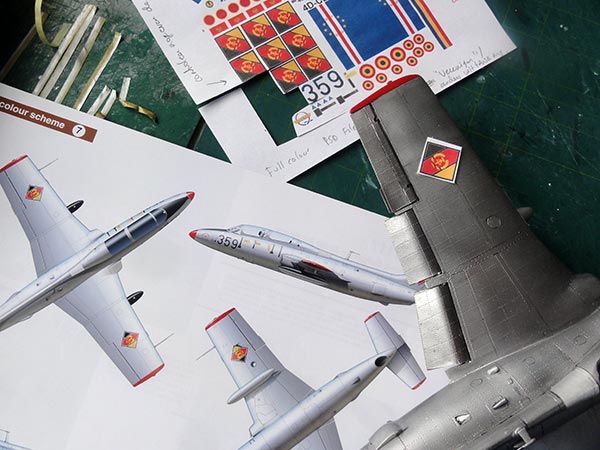
The decals were custom laser printed by a friend. Six are needed but a few spares printed as well.
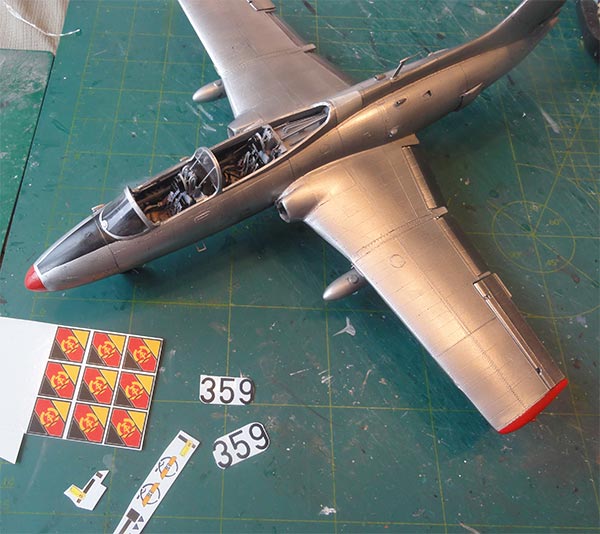
Obviously German language stencilling are not provided through the HPH decals of the kit. So, for these spare decals were found for in the spare decal box and added (such as in 1/32 Revell's MiG-21 DDR and 1/32 HPH L-39). It was not that clear what stencilling was set on the real DDR L-29 but they are small and using the kit stencilling guide, it was merely suggestion with the stencils.
The nose gear door had become loose so was again set.
The kit surfaces were cleaned up and another few coats of gloss Future/Pledge varnish airbrushed.
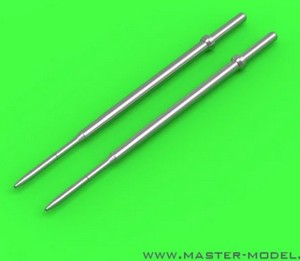
Two wing leading edge pitots are not provided in the kit. But are available from an aftermarket set MASTER MODEL 32-076. These were set after drilling a hole in each leading edge.
In a last round up the various smaller parts were set like:
- the coloured plastic anti-collision lights that are nicely provided as clear coloured plastic in the kit;
- Note that the vane #PE110 on nose was not seen on photos so not added;
- "gear down" indicator rods on nose and 2 on wing made from white stretched sprue with tiny red stripes.
(NOTE: I later found that there is only on the left wing also a similarly coloured "flap down indicator" as well; this was added after the photos were made so not seen on the model).
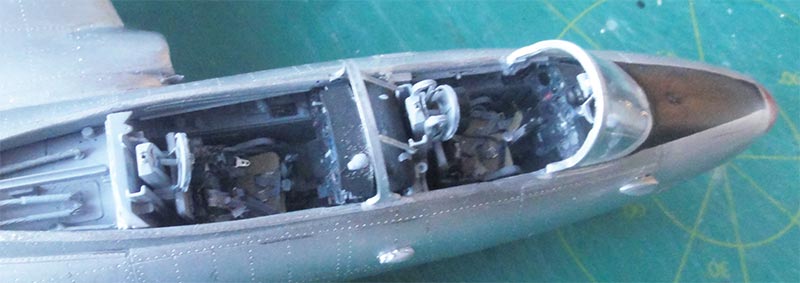
The sliding hood and front pilot canopy was set. Inside, some small rods were added as well as the hold bar.
The final small bits in the cockpit were set.
That completed a very nice and quite rare 1/32 model of the L-29 Delfin.
Note the tiny stencilling, subtle rivet and panel lines wash

DDR
[1949 - 1990] [ area: 108,000 km2 | capital: East Berlin | population: 17 million in 1970]
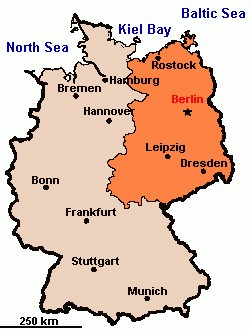
After the end of the Second Worl War, Germany was split and divided in several Allied sectors. The Soviet Union controlled sector in the East that became the German Democratic Republic (DDR)
For more historical information about the DDR air forces look at the MiG-21 page here...From 1963 to 1980 some 51 L-29 Delfins were used by the DDR Air force for jet training. The first dozen L-29 were based at air base Rothenburg (JAG-15 and later FAG-15 "Geschwader"). Another important training base was at air base Bautzen (with JAG-11 and after 1972 FAG-25 unit/ "Geschwader"). All except one DDR L-29 trainers were bare metal with red trim with black numbers (only one L-29 no. "338" flew with a camouflage scheme). The last DDR L-29 went out of service in 1980, being replaced by the Aero L-39 Albatros.
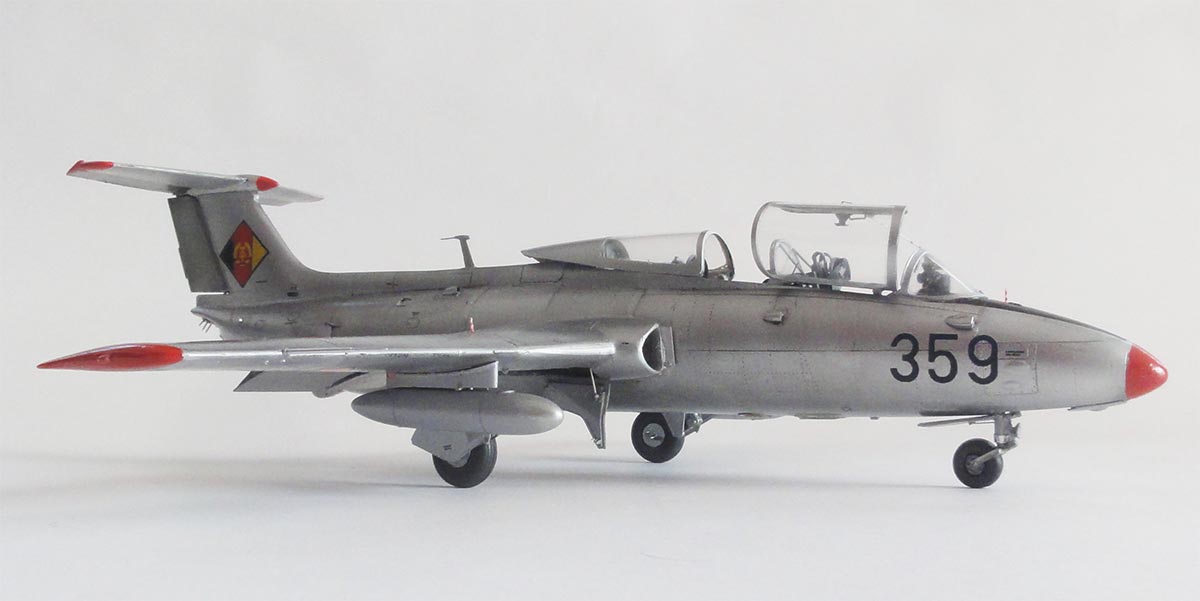
DDR, L-29, JAG-11 ausbildungsgeschwader,
Bautzen , mid 1960s

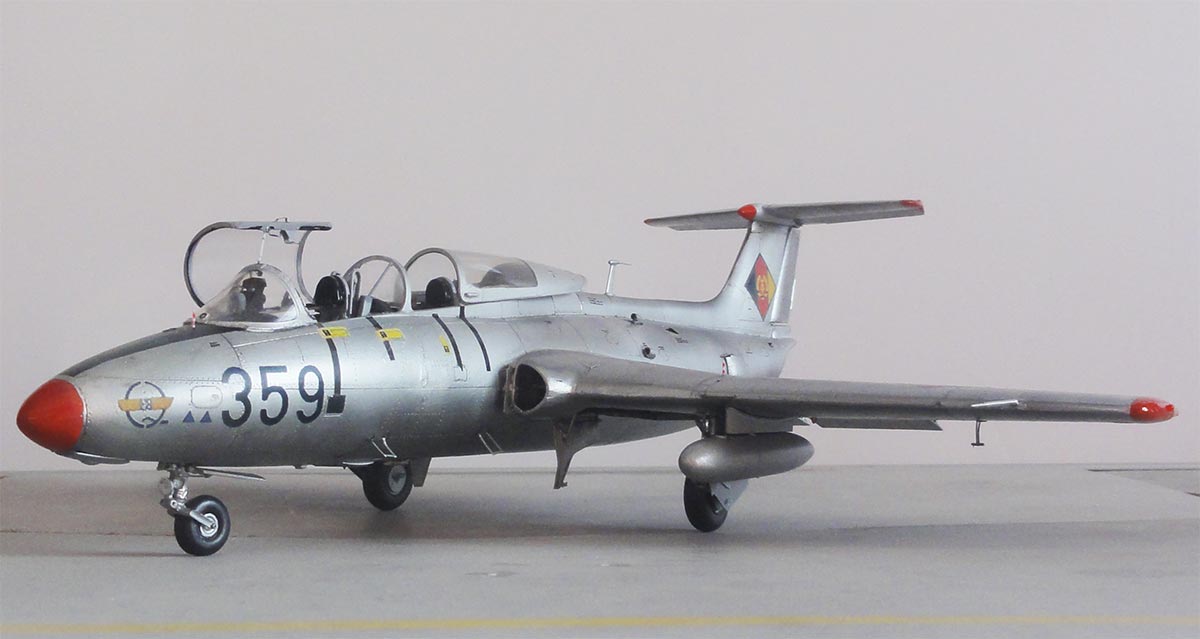
The "359" has the excellence award marking on the nose
 NOTE:
I later found that there is only on the left wing a similarly coloured
"flap down indicator" as well; this was added after the photos were
made so not seen on the model
NOTE:
I later found that there is only on the left wing a similarly coloured
"flap down indicator" as well; this was added after the photos were
made so not seen on the model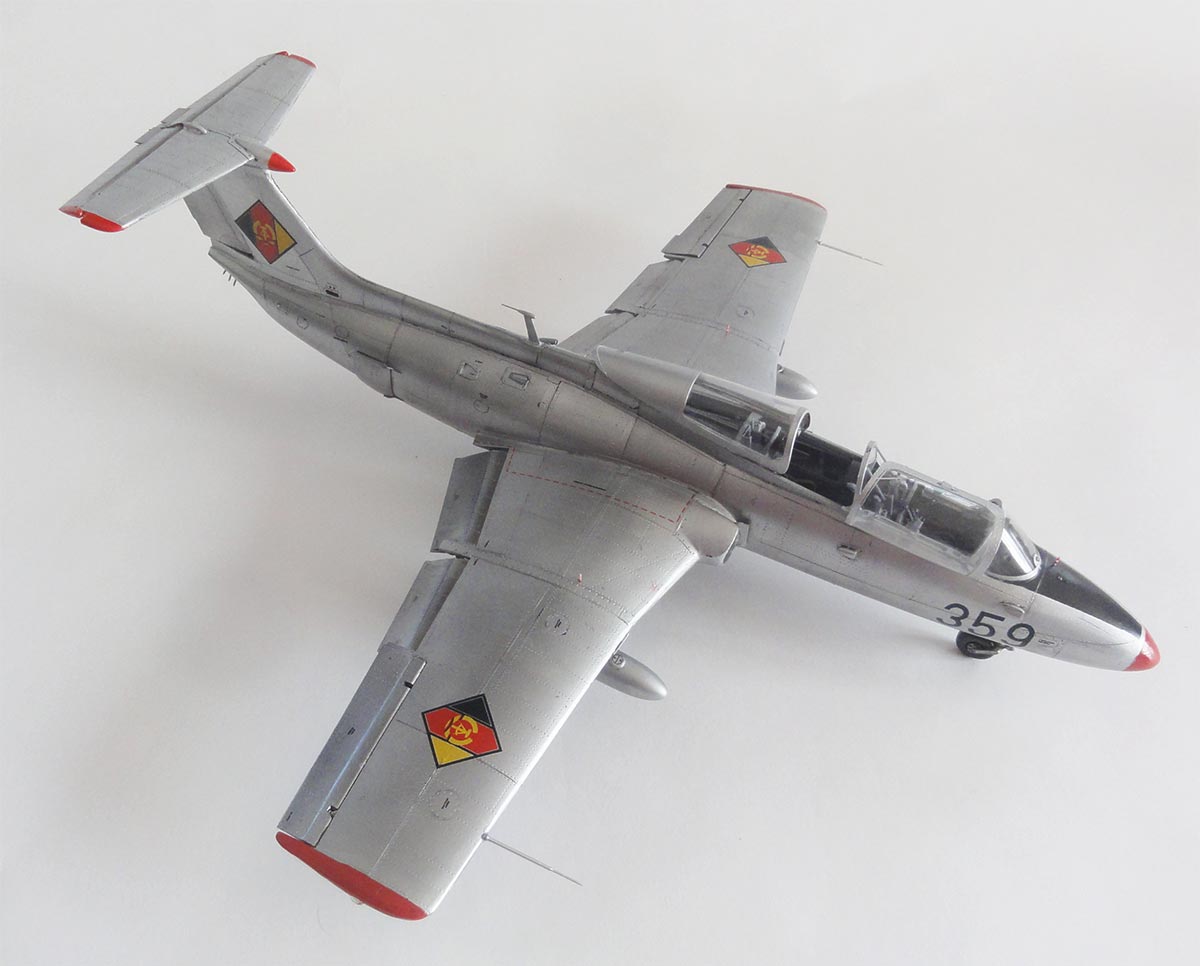
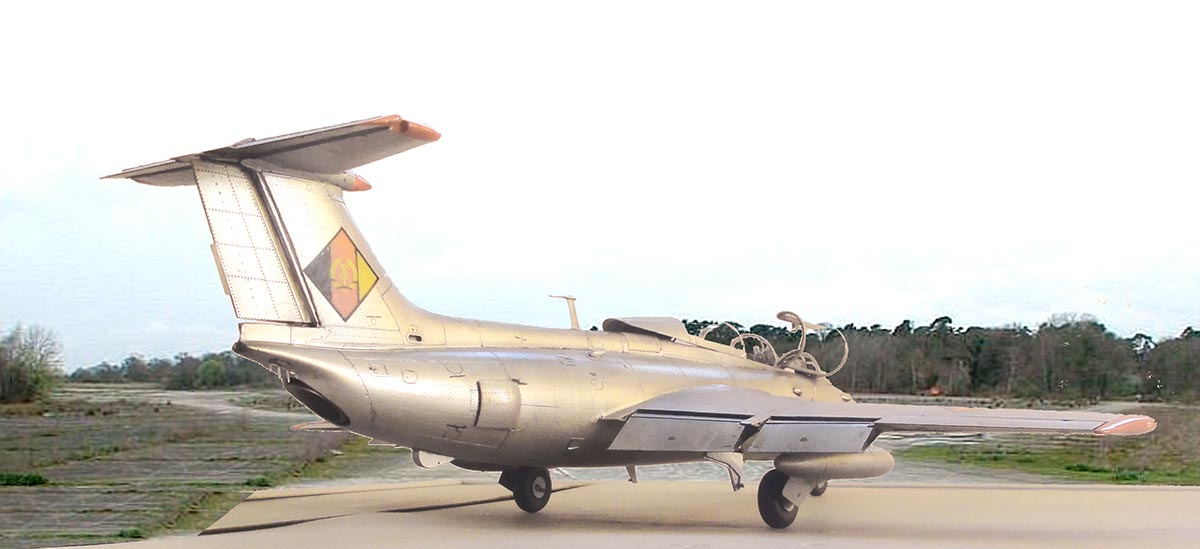
.. set in scenery

(c) Copyright Meindert "designer"/ All rights reserved. Your comments are welcomed by webmaster
this page created
August 4, 2021