1/32 vac / scratch
[ Page 4 ]
1/32 scale vacuform: ID Models (Tigger) SAAB J29 Tunnan
..continued from page 3....
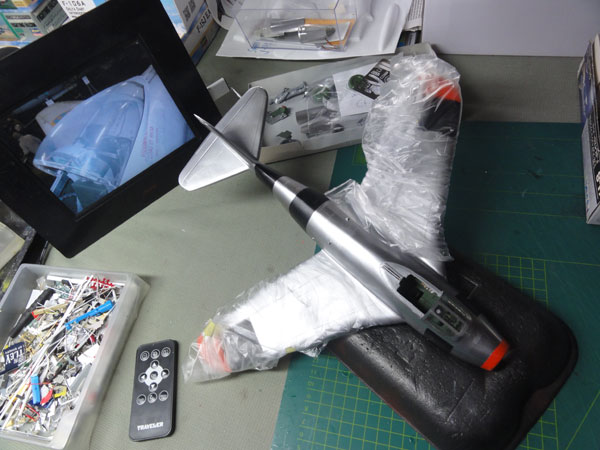
The model was protected during next
finishing and assembly with thin plastic wrapping foil to avoid finger
prints and handling damage.
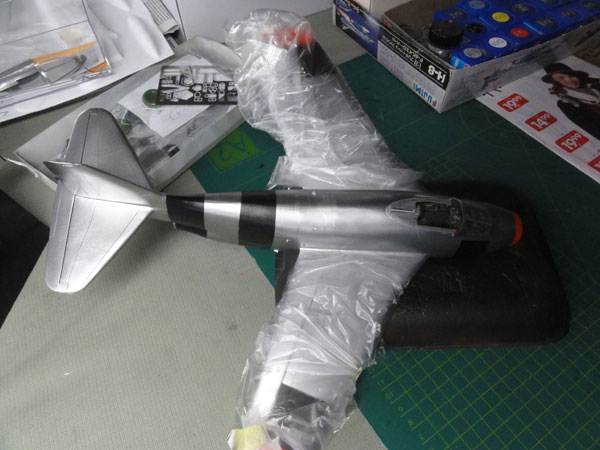
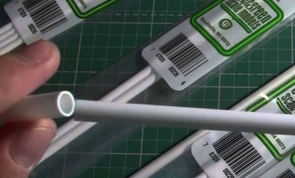
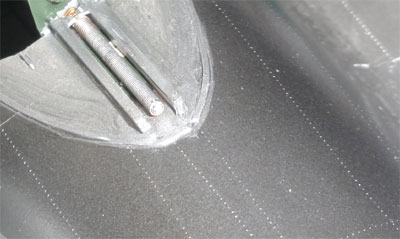
The 4 lower nose 20mm canon fairings
were made from cut hollow plastic tubing cut at an angle and added. A
simple metal coat was painted onto these.
![]()
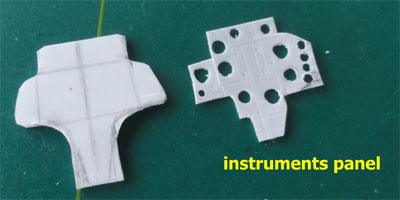
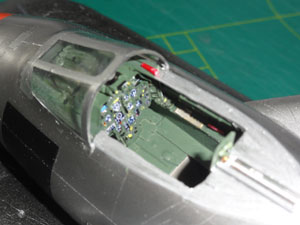
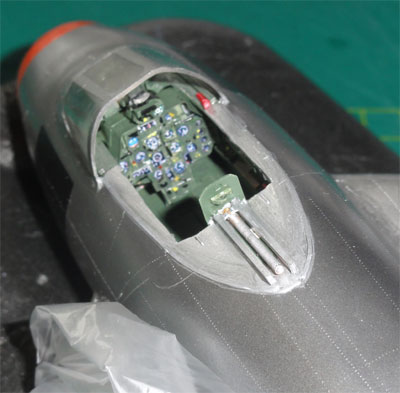
The cockpit details were now tackled.
I used various photos and the flight manual drawings, some of it seen on
my scrap page here...
The cockpit main instrument panel
was made from plastic cart with drilled circular holes.
.
 .
.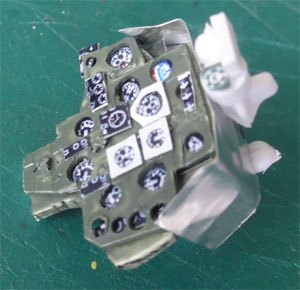
Instruments came from my home printed
instruments sheet. Several layers were used with also small knobs and switches.
Glasses were suggested with Micro Kristal Kleer. Large portions
have a green coat but the floor looks to have a metal colour.
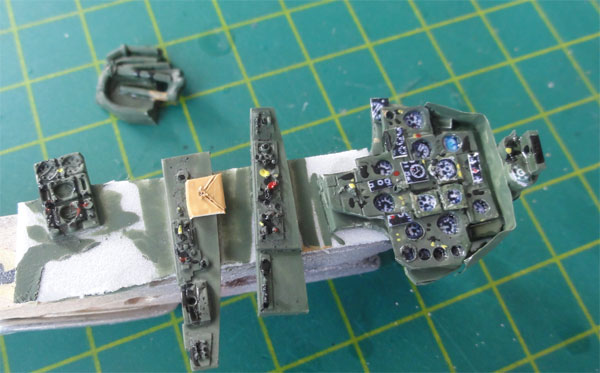
The side consoles were also made
from card and scrap. The panels were installed. The canopy cockpit edges
still need some detail work.
![]()
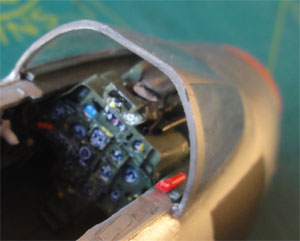
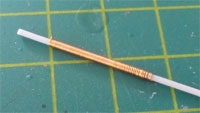
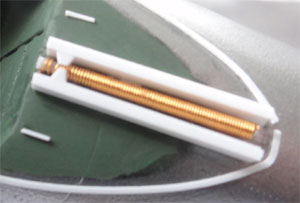
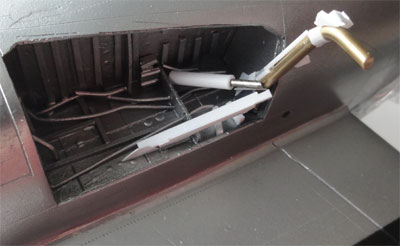
At the canopy rear deck the canopy
moving spindle is seen. This was made with rod and electric wire.
 ...
... .
.
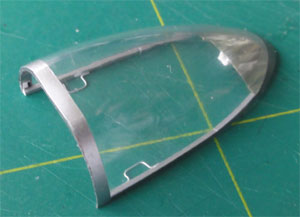
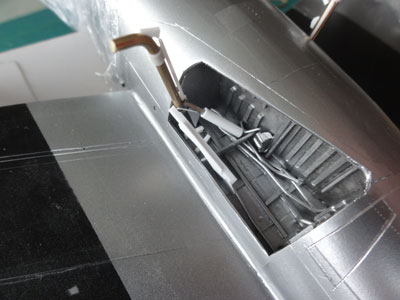
The vacuform canopy is in the ID Models/
TIGGER kit, but basic. I added the internal framing. There is no mirror,
this is positioned in the windscreen.
Now the remainder of the details were
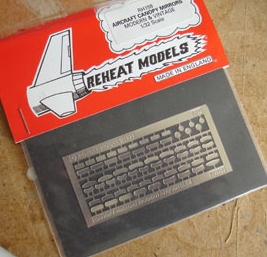
the handle and a single lower mirror in the windscreen. These were made
with a REHEAT etched metal set for the mirror.
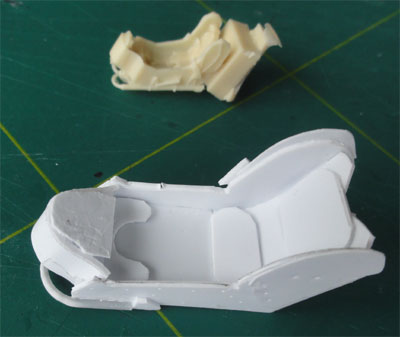
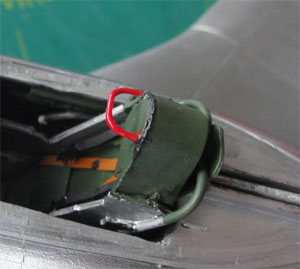
The rear plate at the ejection seat
from card is also installed. Note that the floor still needs painting in a metal colour.
.
.
The "Raketstol" was made from plastic
card and detailed looking at photos.
The frame is metal with green details. Straps and belts were made from
card and the buckles from various etched metal sets like from REHEAT and
from the spares box.

I also used a resin 1/72 seat for
checking the dimensions. Often, the seat is quite bare, so without parachute
pack fitted. This is installed when the pilot is going to fly with the
aircraft..
The seat was after painting dry-fitted
in the cockpit to check if it is OK. A red firing handle was set at the
top.
(sorry, I forgot to make a photo
of the completed seat before installing it; it has a lower frame with a metal colour).
![]()
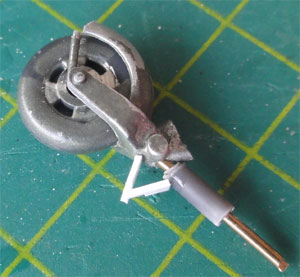
The undercarriage was now tackled.
It had to be made from scratch, looking at drawings and photos. The main
legs are metal rods for strength and the details were made with tubes,
card and sprue.
It took a lot
of time to get it well positioned. I used a paper made jig to align all
angles and get a symmetric assembly (but forgot to make a photo...).
.

I had trouble to find correct main
wheels. But my modelling friend Peter suggested to take a look at F4U Corsair
wheels and they looked 90% similar to J29 wheels! I could purchase resin
Corsair 1/32 wheels from EDUARD set 632019 but they are NOT CHEAP!
But the detail is excellent. The main wheel diameter is about 24 mm.
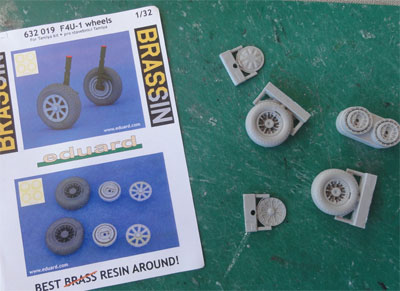
Wheel hub colours on most J29 is
dark green and the tyres were airbrushed Revell Aqua panzer grau (very
mat dark grey).

For the nose wheel I was lucky to
find one in my sprues box complete with mud guard of appropriate size of
12 mm diameter. I do not recall what kit it came from...
I added some details from card such
as the anti-torque scissors.
Some painting still to be done...
The wheels will be installed later on.
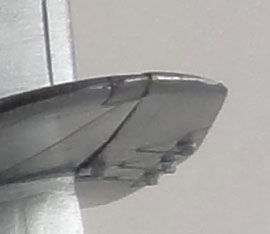
Below the horizontal elevator, various
trim tabs and control rods are seen as well. These were made from scrap.
...
On the airframe, various panels were airbrushed with ALCLAD II for some different shades as on the real J29.
But also, some sections of a plain
aluminium coloured decalsheet (e.g using Microscale Trim Film or any other
you may have at home) was airbrushed. With a template, several panels were
cut from the decals with small scissors. And in various notably round and
elliptical panels. These were seen on J29 photos and the scale drawings.
These decals were applied on some areas on top of the airbrushed ALCLAD
surfaces on the model. This gives a very good result with the model becoming
quite realistic.
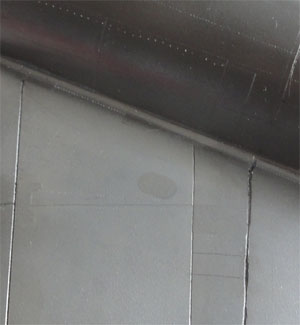
On the various panels (with some covered
with a decal) with a "riveter tool" (in my case from Trumpeter) the small
rivets were engraved.
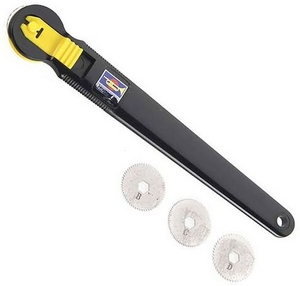
This is not easy on curved surfaces
and it was done only along a few panel lines.
The effect gives a feel of a recessed
riveting. Here seen aft of the cockpit.....
...
![]()
Now it was time for the J29 markings.....
The problem noted
on page 3 of getting large enough Swedish "Svenska Flygvapnet" roundels
was solved after a response on a post I made on the Large Scale Planes
(LSP) discussion forum.
See topic
here....
The modeller AndersN. from Sweden responded and offered me several decal sheets from a FIAT CR.42 which had the correct sized roundels. And he send them without any costs! Thank you Anders!
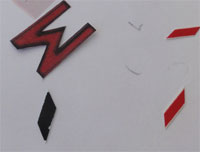
The decal roundels were applied. The
model had the gloss ALCLAD surfaces so that was OK to avoid silvering.
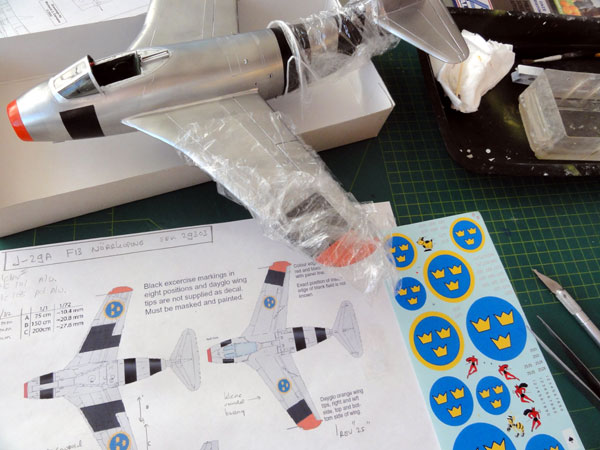

Note that the lower roundel is very
large and partly sits on the aileron.
 .......
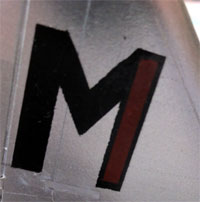
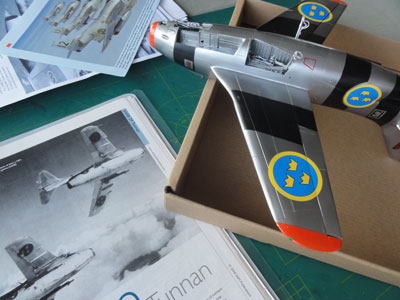
The F13 air force unit based at Norrkoping
had a black bordered letter M on the tail. This was made from red and black
decal stripes using a printed M in 1/32 scaled size as guide.
 ..
.. ..
..
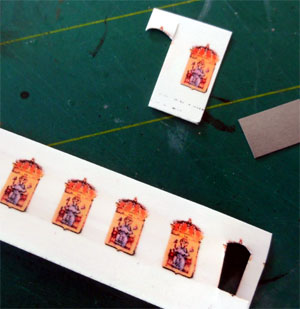
The Svenska Flygvapnet F13 squadron
unit badge was found on internet in appropriate resolution. It was printed
to correct 1/32 size on white inkjet decal paper from BARE METAL
FOIL. A few were printed and after the ink dried, several layers of gloss
FUTURE varnish was airbrushed on the decals to seal the ink. The badge
could be applied as usual decal.
The decals were set onto the model with also various stencilling and numbers found in my spare decal box. (during the process I noted that the PRINTSCALE J29 DECALS I had in 1/72 with stencils were far too large!).
There are not a lot of stencils on a real J29A Tunnan. The small serial no. for a F13 J29A below the horizontal adjustable stabilizer was "composed" from loose number decals.
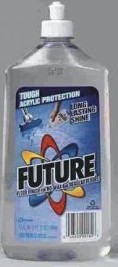
After the decals dried, the model got a gloss varnish coat with thinned Johnson Future with the usual technique. This protects the decals. The model was allowed to dry now for 24 hours.
Meanwhile... it would be nice to make
something extra for a model diorama....
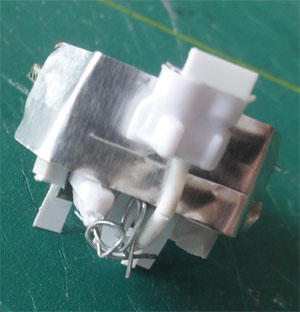
What about a model engine?
The real J29 Svenska Flygmotor RM2 was based on the British Ghost engine. (see info on my scrap page here...)
But the Ghost engine is also in the 1/32 Matchbox Sea Venom kit. I had a spare engine in the spares box so this could be used. (seen here...)
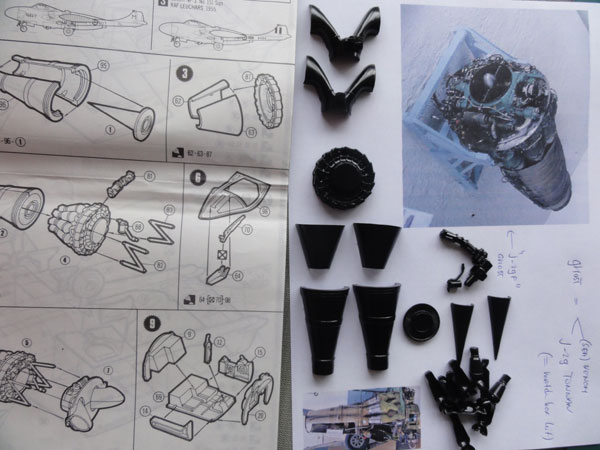
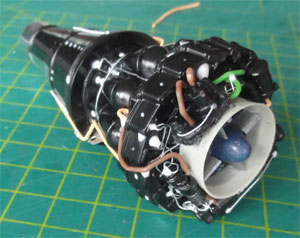
The intake section is different however on the J29 as it has a straight intake tunnel. So of the kit parts, the forward section was adapted with a round section of a cowling from the spares box and card. I added a compressor fan disc and also the various details form stretched sprue, wire and so on.
 .
.
Drops of white glue were used for
the connector pipes and some rivets. The rear jet pipe section got a metal
tape foil on the surface.
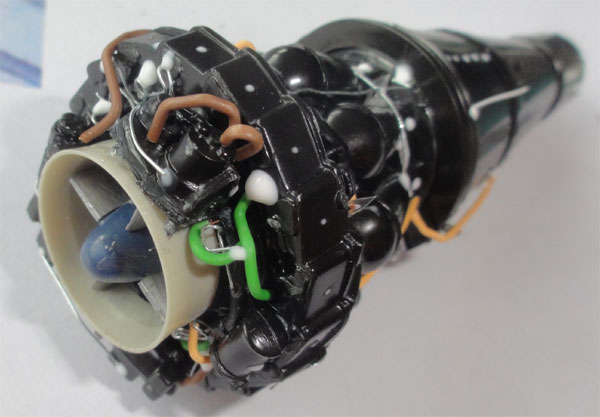
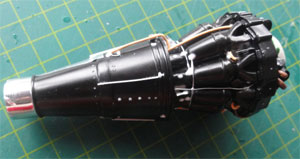
Painting was done with metal coat,
green and various metal shades.
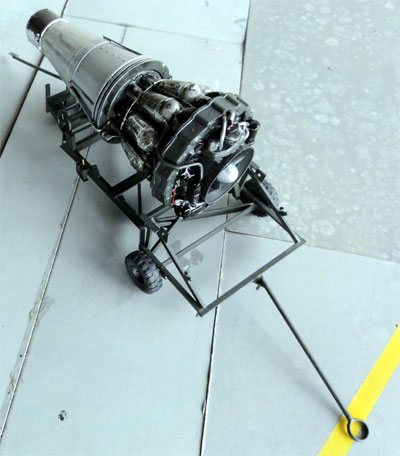
The engine would sit nicely next to
the model on a dolly. I found some photos and the dolly was made from rod
and cart. The wheels came from the spares box.
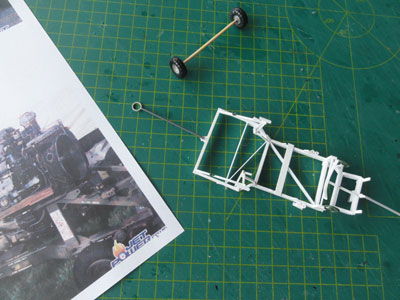
..

The main colour seems to be dark
green of the dolly.


..
Back to 1/32 Models.......

(c) Copyright Meindert "designer"/ All rights reserved. Your comments are welcomed by webmaster
Created this page
October 22, 2016