[ conversion page 6 ]
1/32 conversion to build a T-45 Goshawk US NAVY jet trainer by Meindert de Vreeze
...... back to page
5...
It was now time to apply all the needed DRAW DECALS (as noted on page 5...).
Each DRAW DECAL was cut out as they
are all on "one" carrier film. The silk decals are a bit opaque, but as
the main underlying surfaces are light, this is no problem. Only on the
blue tail, double decals were set on. These are provided on the sheet.
The decals otherwise look fine and accurate.
The decals are set using the usual
technique: each cut out decal is set in water. Wait until it is movable
on its backing paper. Slide onto the model at the correct position. Dep
and dry a bit with a cloth. Let dry.

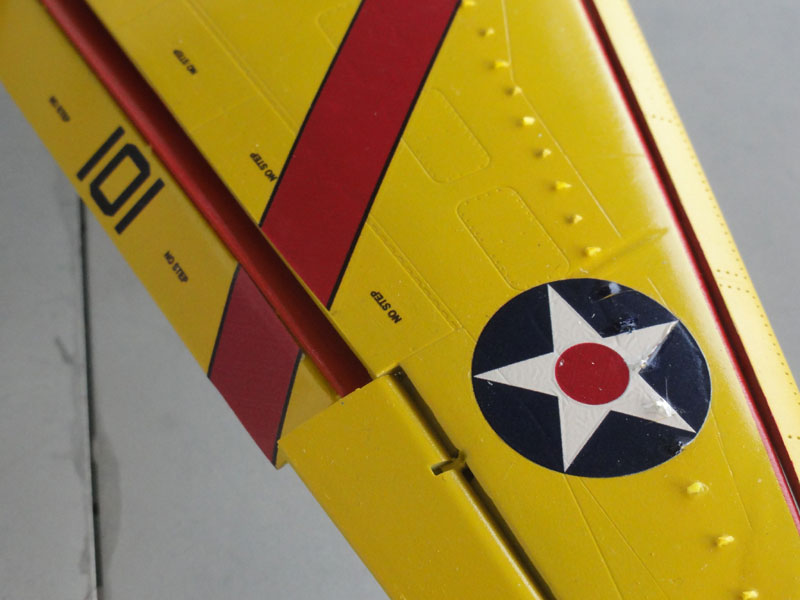
A big challenge was to apply the
tow upper old fashioned US roundels over the wing vortex generators. With
a very sharp scalp cuts were made in the decals. Plenty of DACO
decal softening fluid was used, this took considerable time to settle.
The small damages were re-touched with the appropriate paint.
The decals were now onto the model.
Now final finishing was done.
With a small paint brush and a tooth
pick, tiny small black details were applied on the model like missing stencilling,
markings and so on.
![]()
The unique T-45 wing is now to be
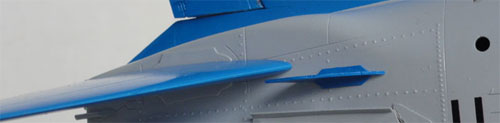
finished. The prepared forward leading edge slats were set onto the model.
These are typical for the T-45 Goshawk. The trailing edge flaps were
also set. (note that these were also slightly altered.). Note the red vane.
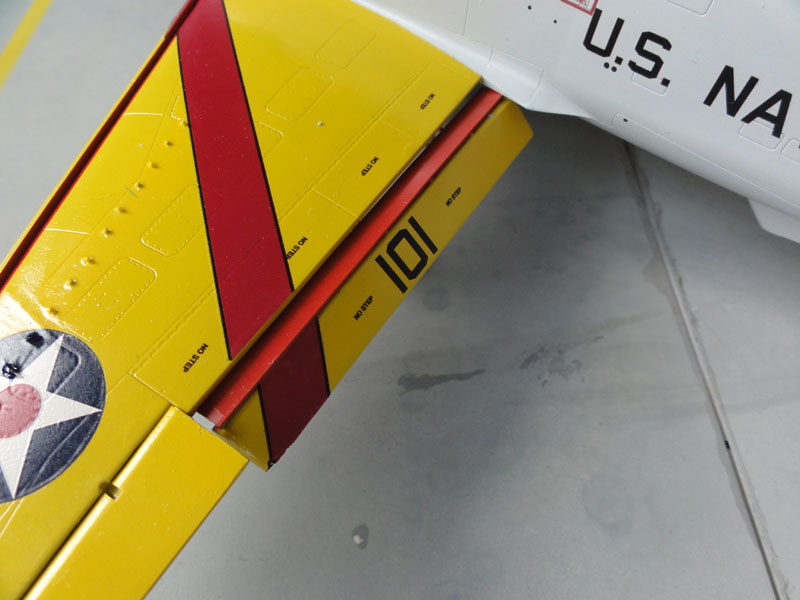
For the old style roundels, some extra
paint still to be applied. Note the many vortex generators.
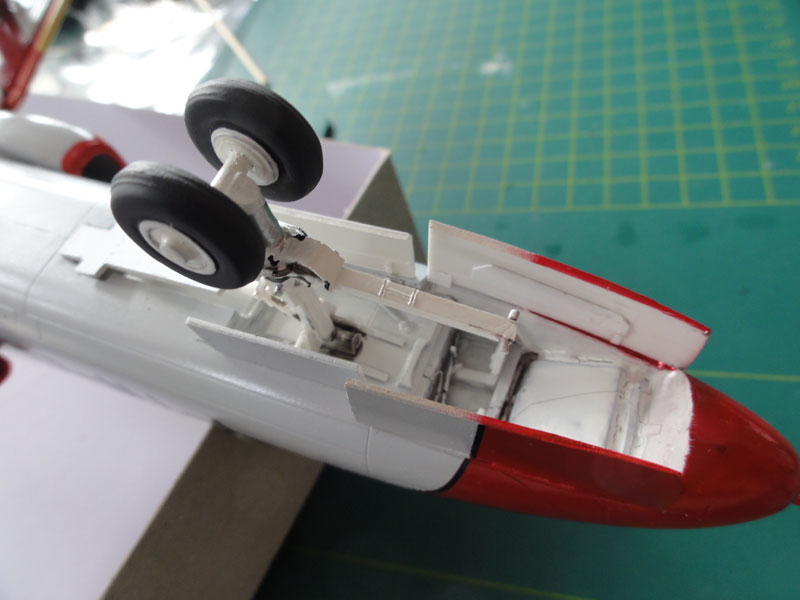
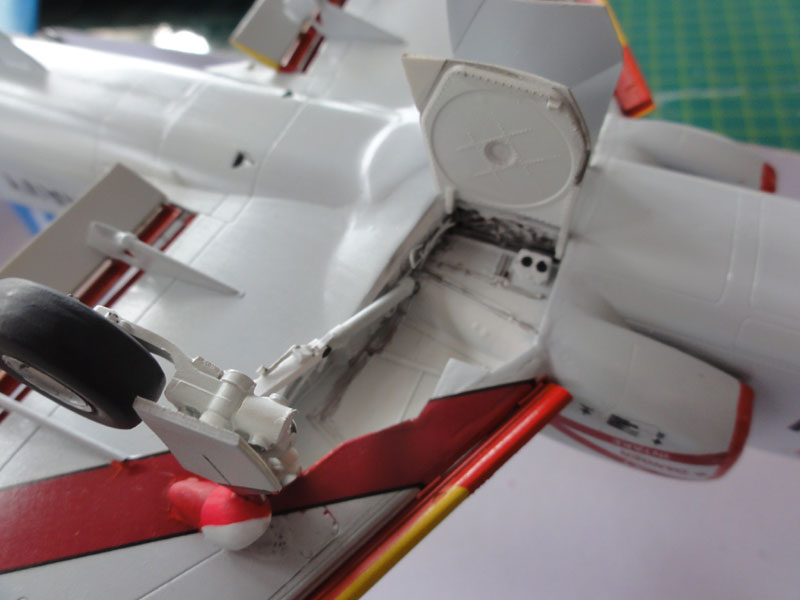
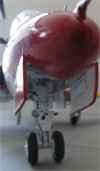
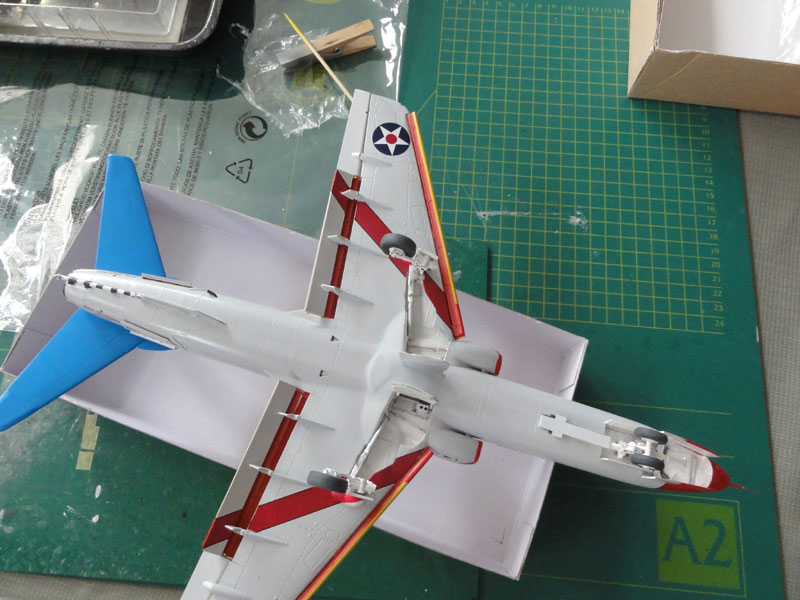
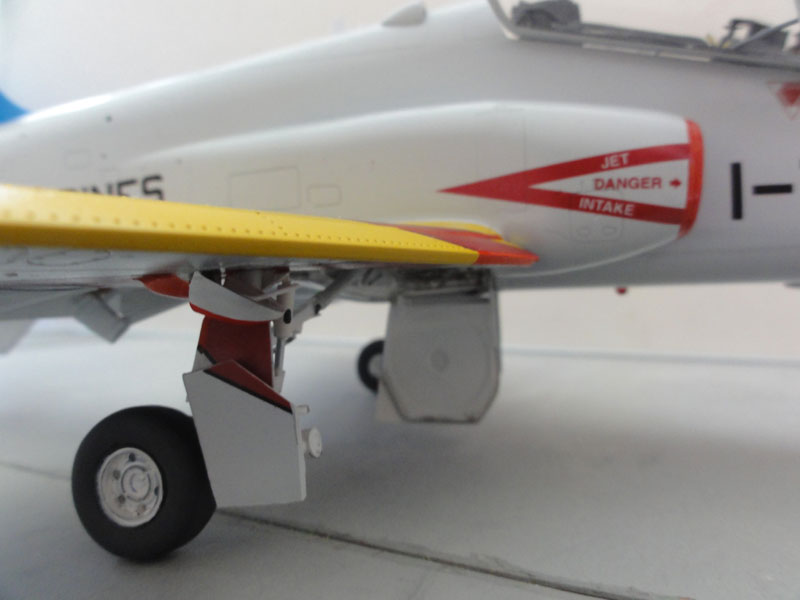
The undercarriages, that were already
adapted and mostly painted white, were fitted. The twin nose wheels were
set. The forward nose bay doors were set open. On a T-45 they are also
often seen closed on the ground, so this is optionable.
Some more weathering/adding some
wash will be done later, but the aircraft are kept in good condition.
The main inner gear doors were also
set open. (closed is also seen on real T-45's). The main gear sidestrut
was made from card and rod previously. The doors were also adapted in an
earlier stage. On some doors, a decal is also seen for the picked T-45
scheme.
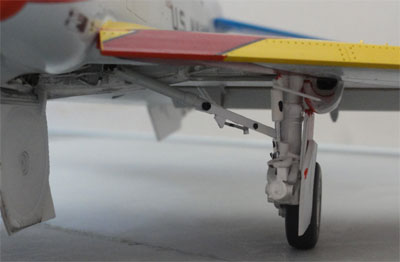
On the gear legs, details were painted.
The forward swivelling fairing was made from parts of a droptank found
in the spares box.
Some touching up with the appropriate
paint was also done.
..
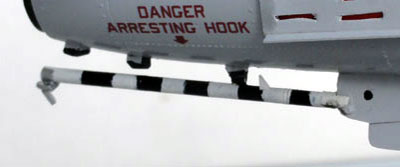
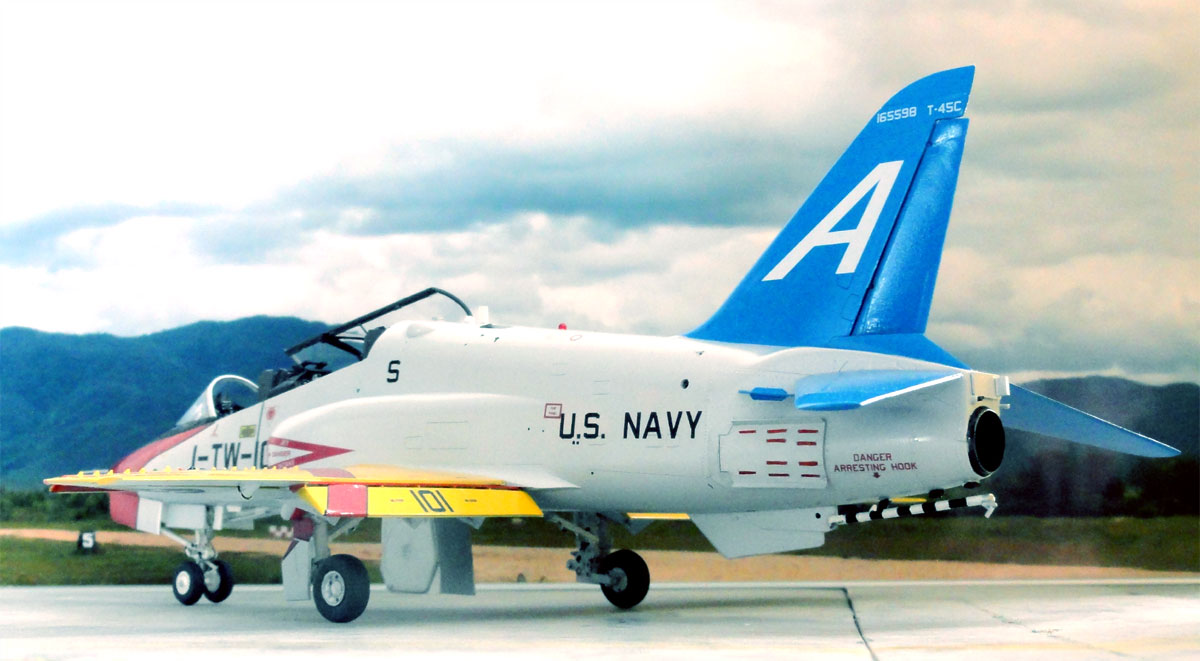
For the tailhook, the black striping
was applied with a paint brush. It was fitted to the single central tail
strake.
Stabilizers were fitted, that was
easy. The T-45 tail vane, that was made from thin card, was set near the
stabilizer on each side.
The vanes in front of tailplane were a T-45 solution to avoid tailplane
stall while landing on carriers needing higher lift (The normal
Hawk does not need them as its landing speeds are higher).
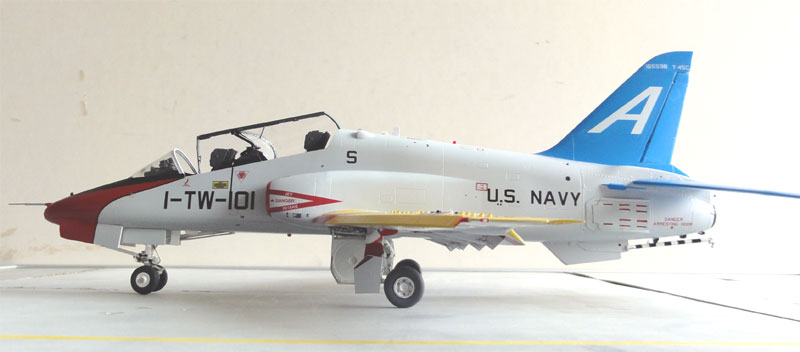
Also now well seen are the raised rivets.
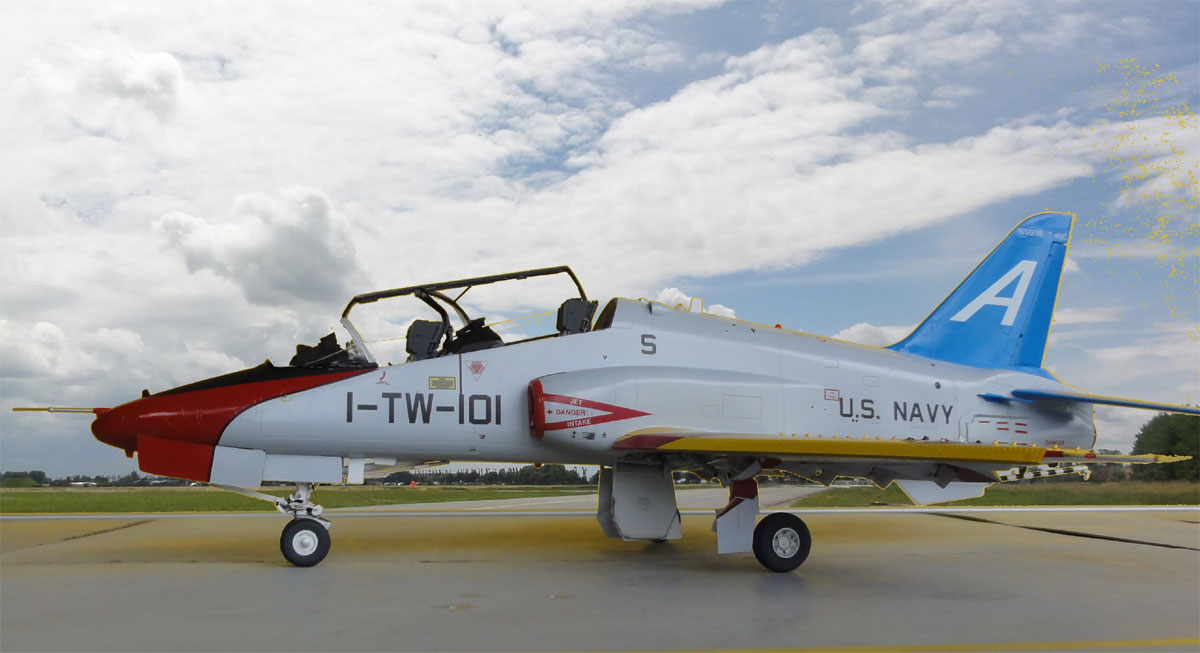
Overall, the result looks fine. Here
a lower view shows the details.
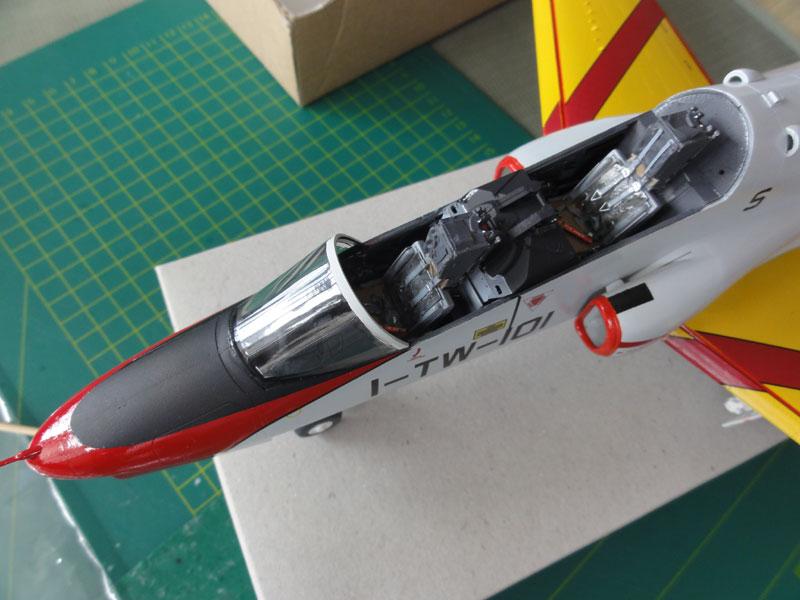
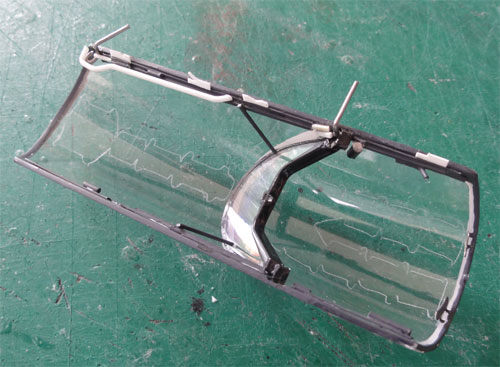
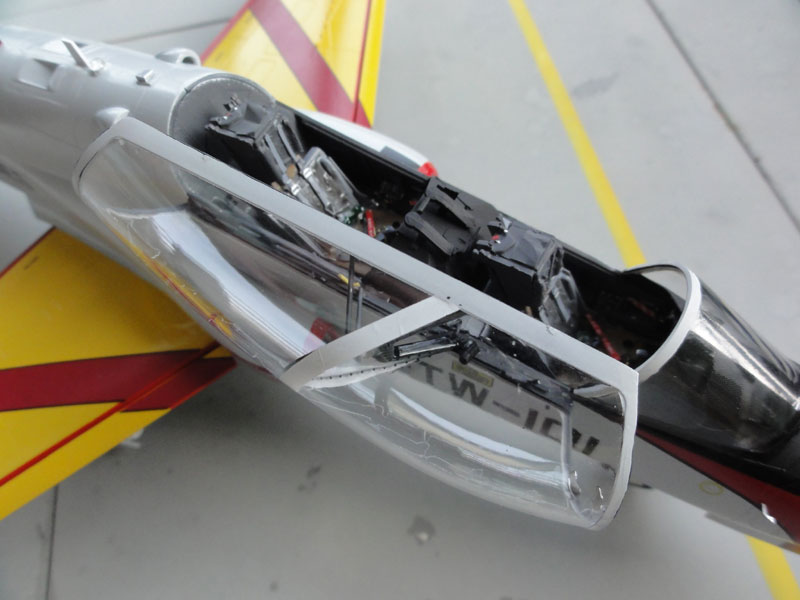
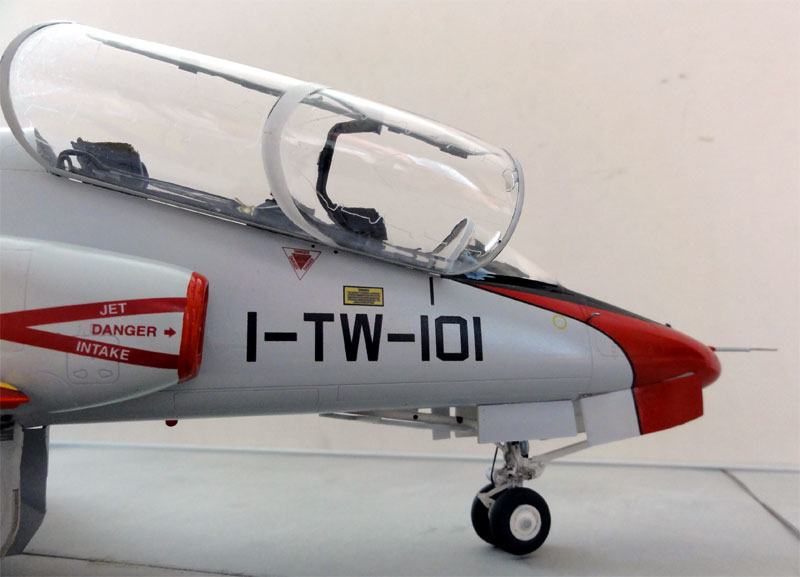
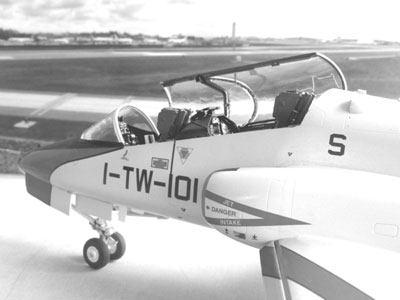
The T-45 windshield and canopy look to have a similar shapes as compared to the Hawk. I checked with the 1/48 Kinetic T-45 and looking at photographes, it was decided the kit parts were to be used. The windshield was set in place and the forward instrument cover/coaming was kept "loose". Otherwise they interfere, preventing a good fit.
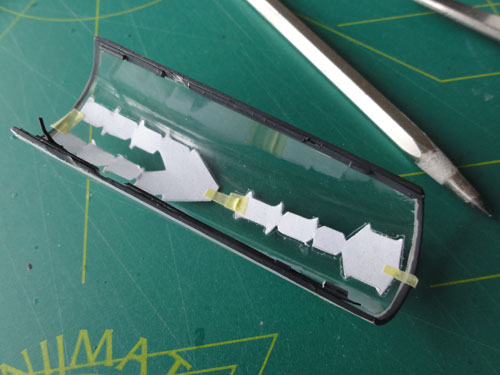
The outher canopy framing was masked
and sprayed with the airbrush. Inside details were added. The detonator
chord was inscribed with a sharp scriber, using a copied paper pattern
as guide. This pattern was taped inside the canopy. (this trick was also
used on the Hawks)....
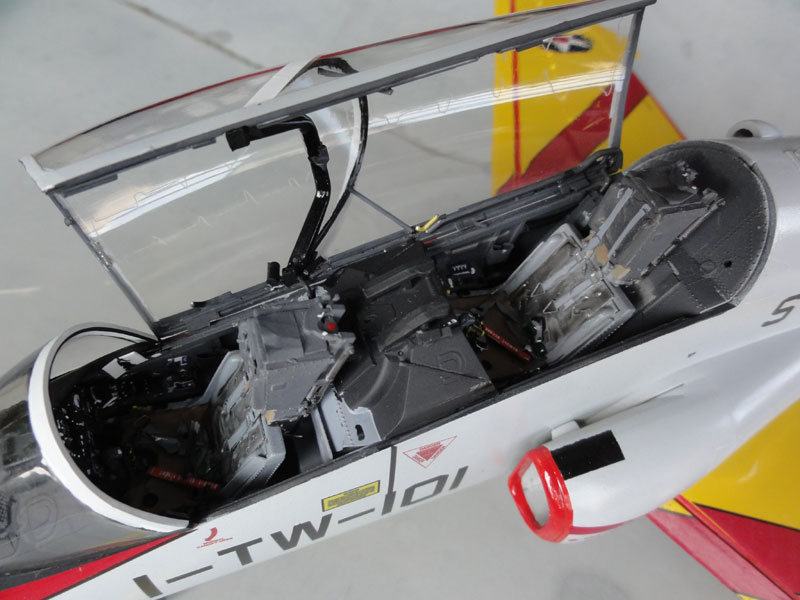
When possible, for larger scale models,
I try to keep the canopy detachable. This enables cleaning up and a safer
transportation to model shows. For that purpose, 2 metal rods were set
at 90 degrees on the canopy frame. These will correspond to tubes with
holes in the cockpit side wall.
The inscribed detonator chord can
be seen here as well the added mirrors from the spares box. Note the heat
pipe, seen here in white rod and still to be painted.
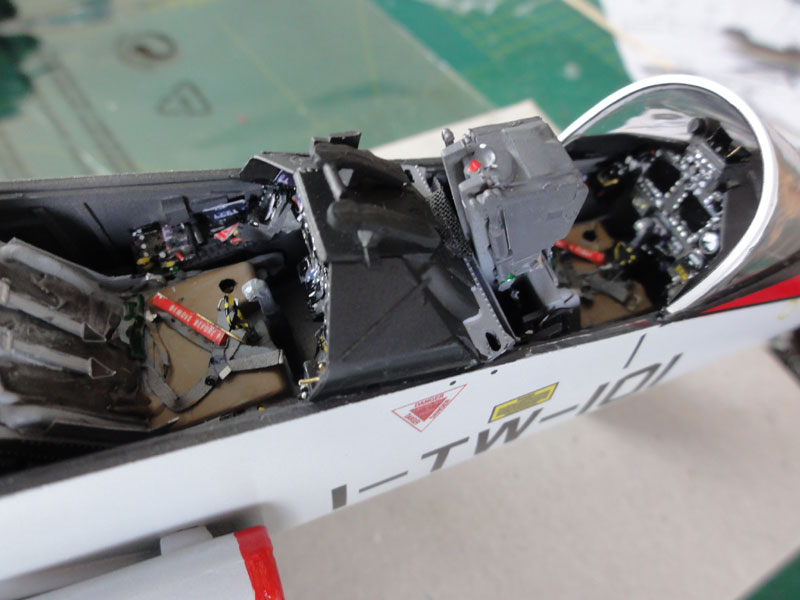
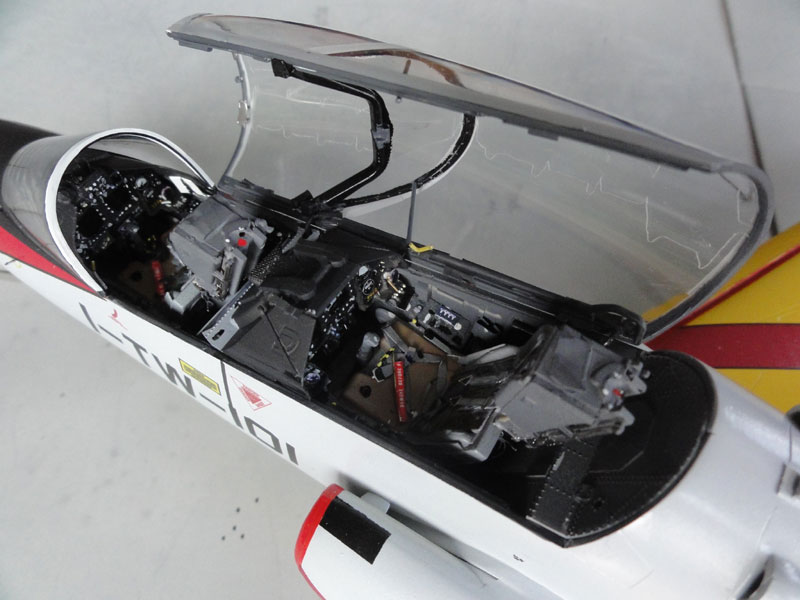
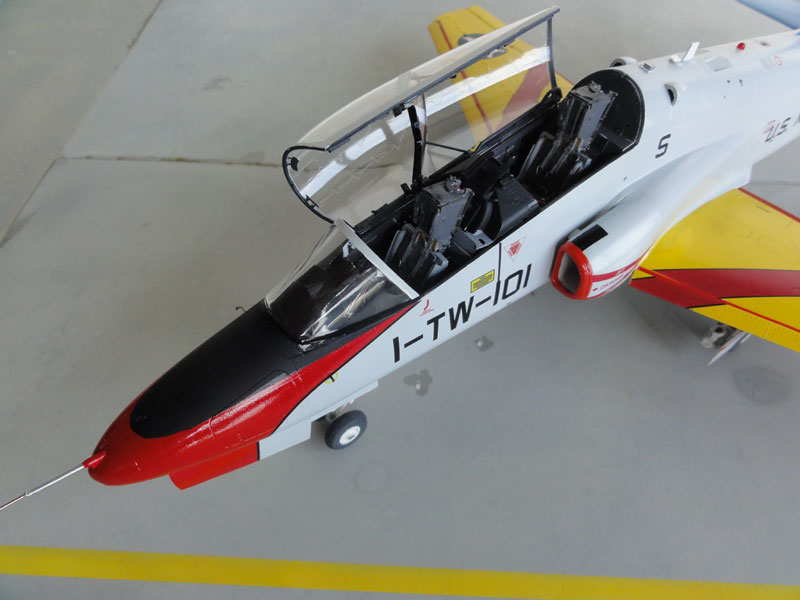
NACES seats that were already prepared
were installed as well as some minor additional cockpit details. Some "remove
before flight" paper tags from PP AEROPARTS were also added and
spare etched metal seat buckles from REHEAT installed.
Here with the canopy set in place...

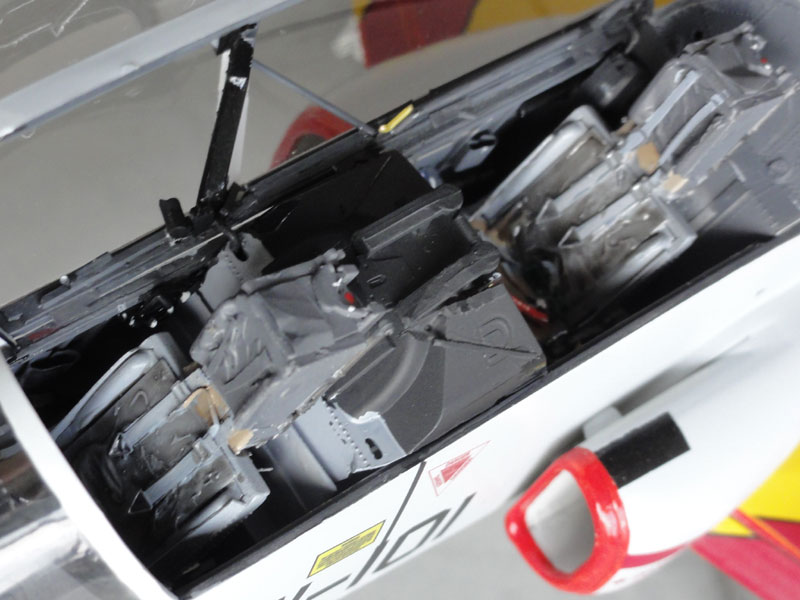
Overall, the cockpit looks quite
busy and as seen on a real T-45.
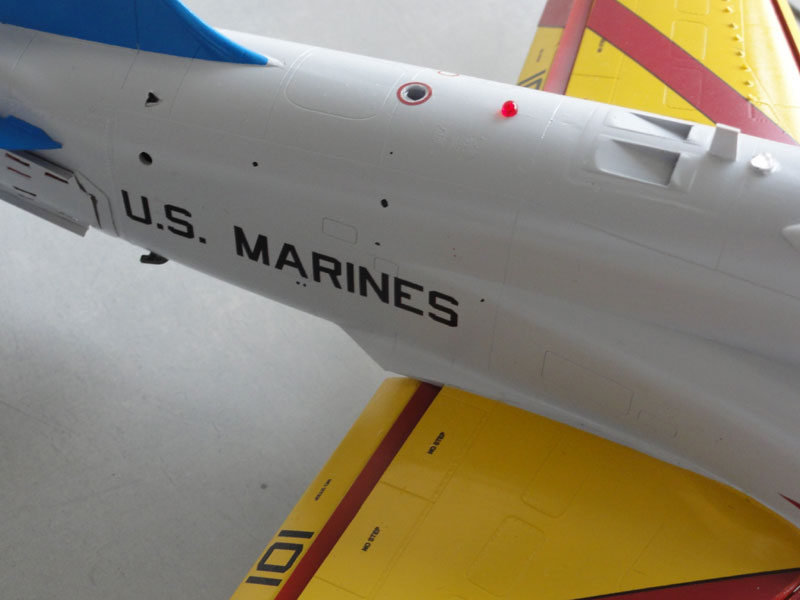
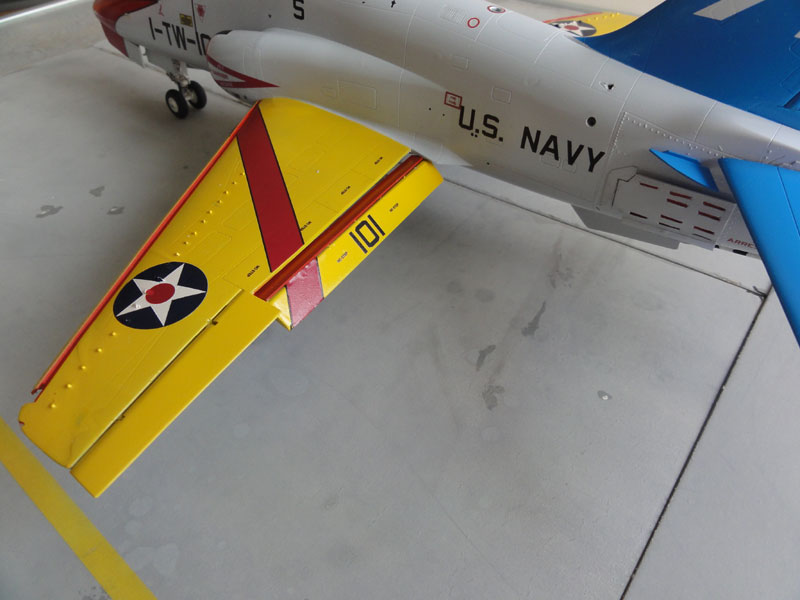
Finally, the navigation lights, anti-collision lights were set using additional sets once purchased. Often, these sets with red, white and other coloured bulbs are seen at railroad and car model shops. On the T-45 wing tips, the aleady cut out notches were painted red and blue and filled with Micro Kristal Kleer.
The small antennas and probes, like
on the spine, below and on front of nose, cockpit sides were added made
from card and metal rod. A pitot tube with a metal needle as tip was set.
Finally, an overall semi-gloss protecting
varnish was airbrushed onto the model (not onto the clear transparant parts
off course). VALLEJO #62.064 acrylic gloss varnish was used. That completed
the model.
Note the small probe on the nose
Here also the antennas aft of the
nose gear can be seen.
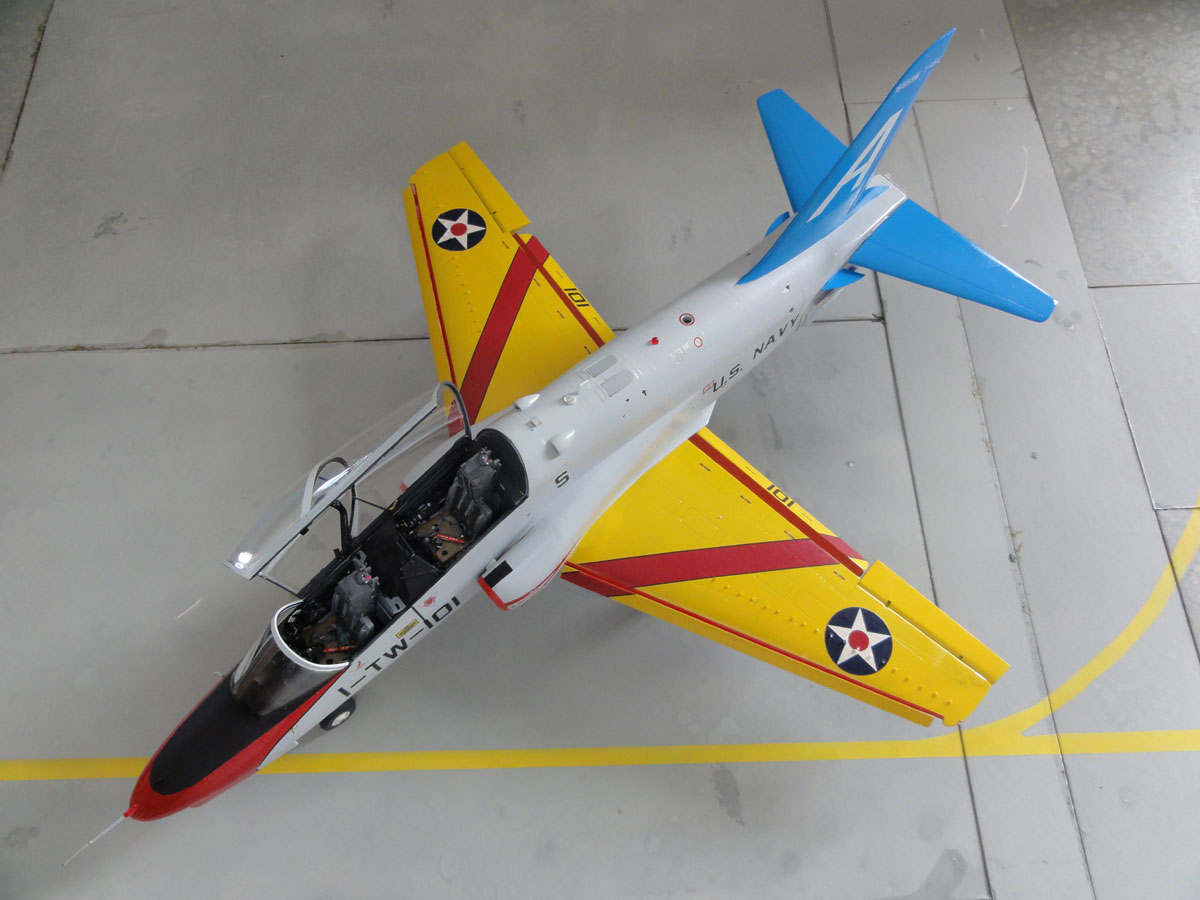
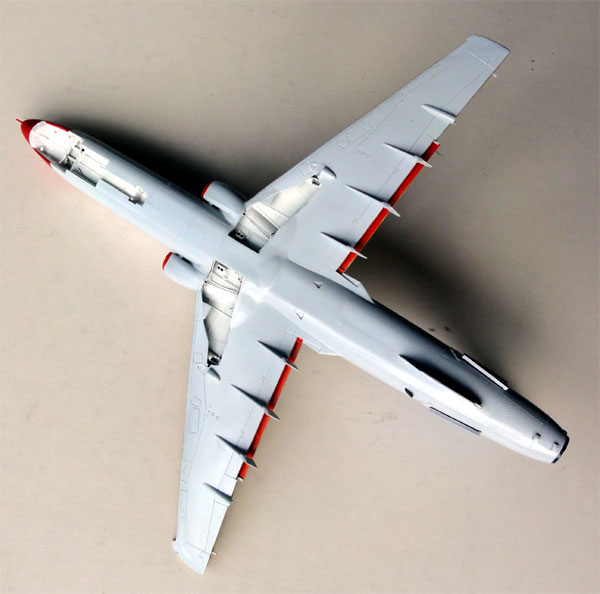
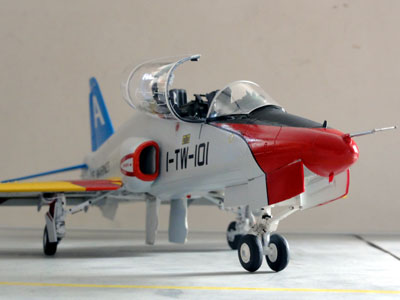
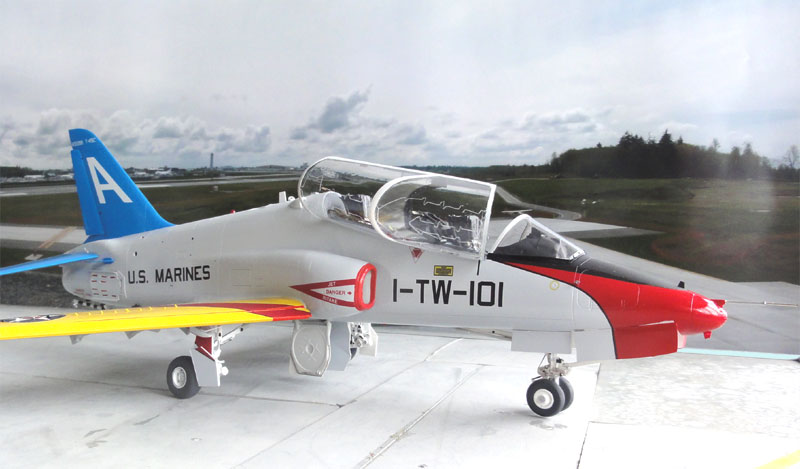
Upper view showing the typical T-45
straight slatted wing leading edge. The larger stabilizers are also obvious
as compared to a standard normal BAE Hawk.
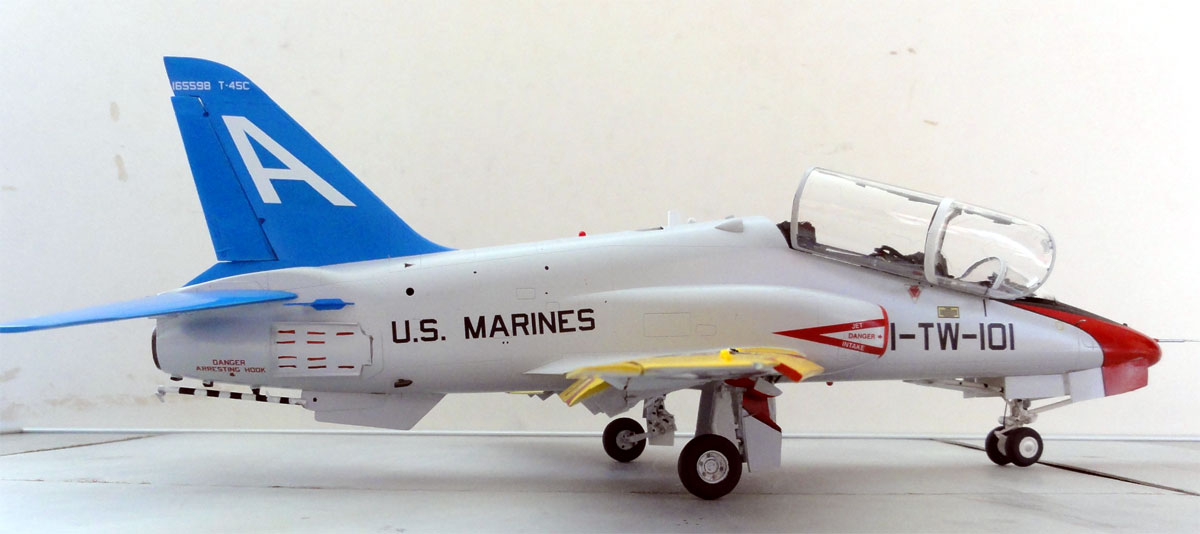
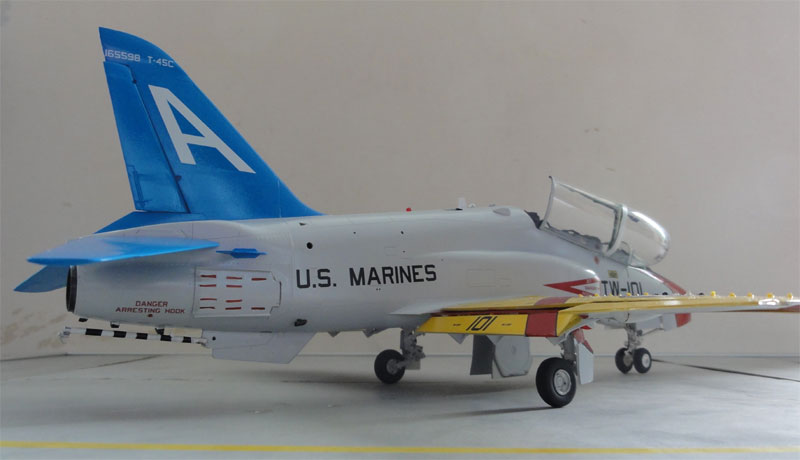
McDonnell-Douglas
T-45C Goshawk assigned to Training Wing 1 (NAS Meridian) , USA

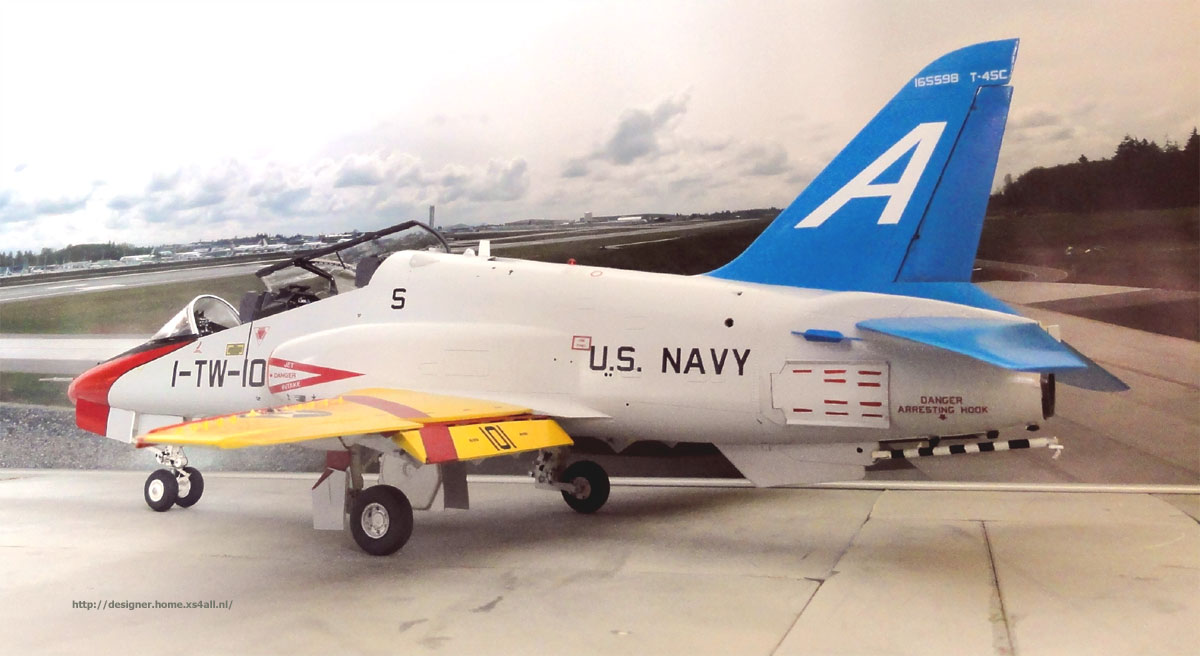
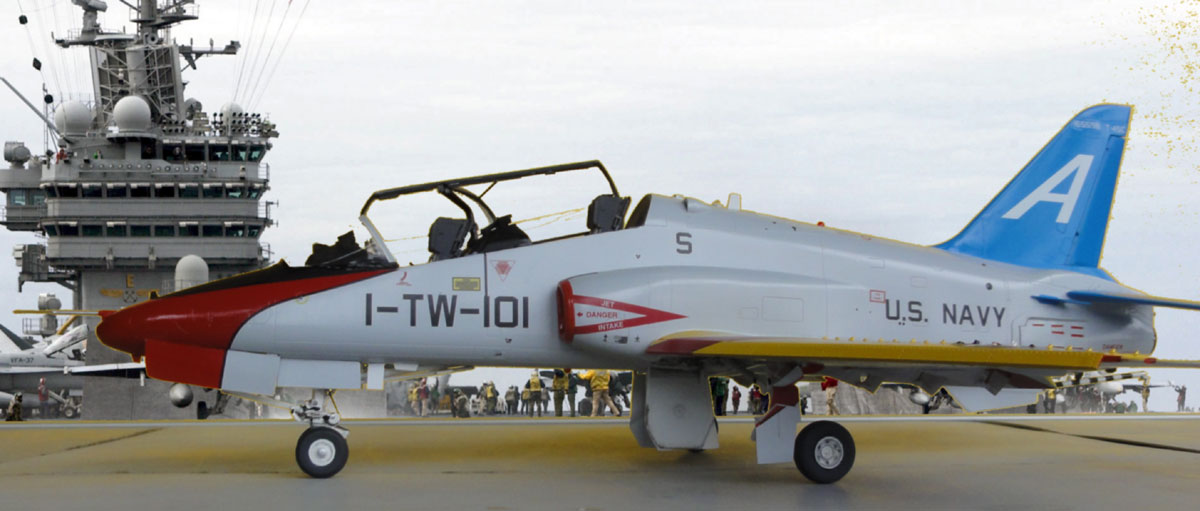
A nice and unique 1/32 T-45 Goshawk
is now in the model collection, sitting next to the BAE Hawks. Now, OK...
where are the 1/32 KINETIC Hawk 100 series kits in my stash.....
Back to main 1/32 Hawk page...
Back to 1/32 Models.......

(c) Copyright Meindert "designer"/ All rights reserved. Your comments are welcomed by webmaster
Created this page
Sept 10, 2013