[ conversion page 3 ]
1/32 conversion to build a T-45 Goshawk US NAVY jet trainer
.... back to page
2
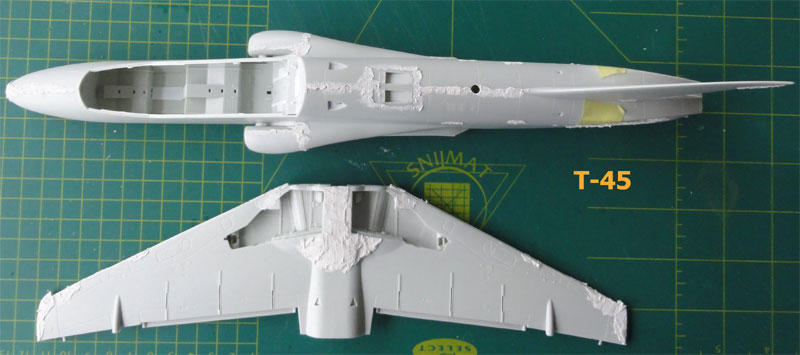
The main "razor saw" work was done for the T-45 Conversion. Now some kit assembly is done.
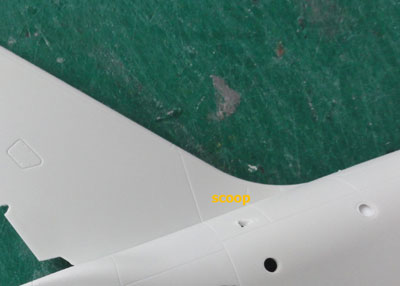
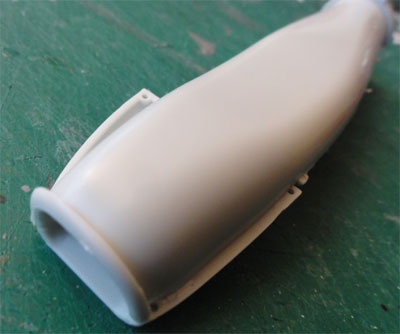
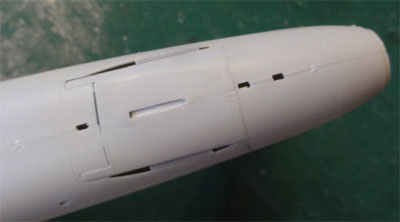
OPEN UP Scoops
On the fuselage some smaller intakes
scoops are only inscribed, these cry for opening up.
Scoops were opened with a knife:
- one on the nose
- one on each side of the rear fuselage
near the vertical fin base
Close the internal gaps with some
card to prevent "see through...".
![]()
STEP 1
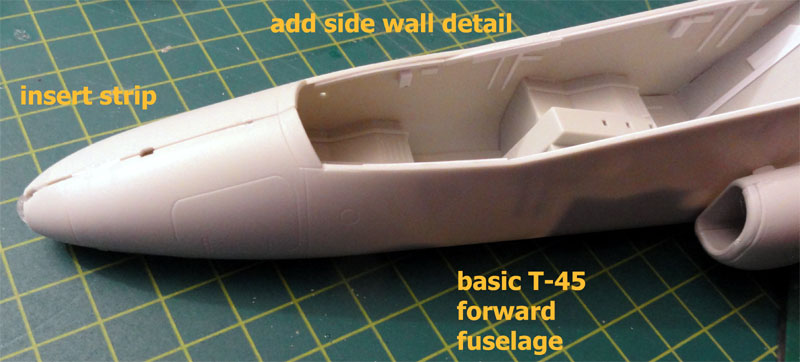
The inner walls at the cockpit need
some extra detail with stringers and panels. With EVERGREEN strip and thin
card, detail was added also on the rear bulkhead #13. This is seen here
for the Hawk, that needs similar details:
NOTE: for the T-45, do not fit yet
the cockpit sideconsoles #3,4,5,6 yet!
Cockpit detailling will be done later
using photos.
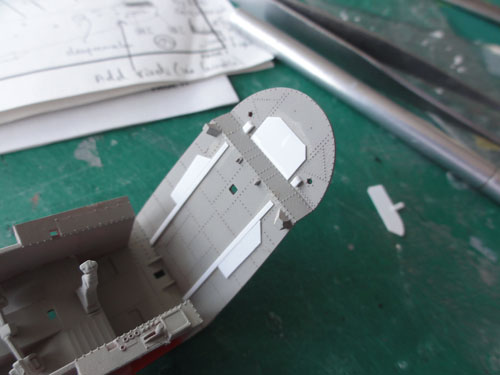 (here
the Hawk kit is seen)
(here
the Hawk kit is seen)
Note that the T-45 cockpit itself
is not yet detailed!
![]()
Skip STEPs 2,3,4,5
STEP 6
Close the fuselage holes (for lights
#21+22 + 36 in STEP 13) with card. Will be filled on the outside later
on.
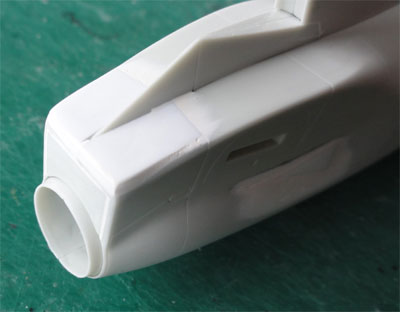
STEPs 9, 10, 11
Assembly the very nice air intake
tunnels, the colour is white. Nice that Revell provides these tunnels,
but not a lot can be seen later on. Also assemble the jet exhaust pipe,
paint black inside.
STEP 12 combined with STEP 15
Insert the prepared cockpit tub/
floor inside the forward fuselage. Insert the two intake tunnels (the airbrake
bay part #34 is discarded).
The intake tunnels are now
best aligned with the air intake parts #40,41,42,43 as indicated in STEP
15. Do this now, it will reduce any remaining gaps and reduce the sanding
work. I found the fit is much better if the guiding locating pins are removed,
e.g. flatten intake parts #41,43.
The fit is than very good, but I
found an awkward injection mark on the inside of the left fuselage #35,
seen here:
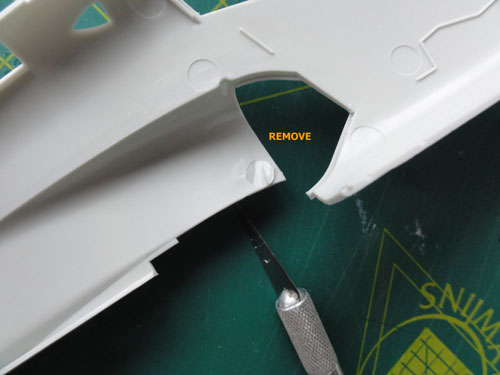
Remove this with a scalpel and the
fit is excellent.
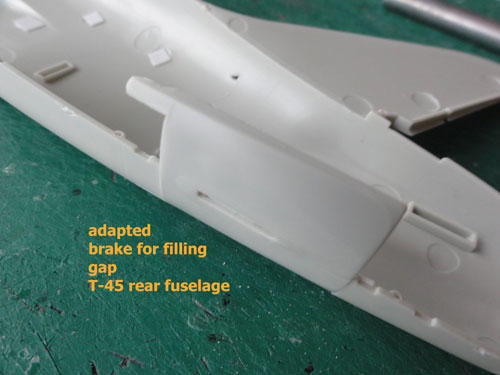
Adapt the speed brake #65 is used
to close the gap (see STEPs 43, 44). Remove the bulge on the brake. Later
on a single ventral fin is added as seen on the T-45.
![]()
The fuselage can now be closed......
(kit STEP 14).
A tiny strip is inserted on the nose
(a larger 2 mm insert was fitted previously on the lower nose in front
of the nose wheel bay.)
Cockpit detailling will be done later.
STEP 15
The upper exhaust panel #39 has a
good shape (in the Kinetic kit a wrong shape). Set in place.
Now filling with putty is done on
various areas. The separate fuselage and wing will make handling easier.
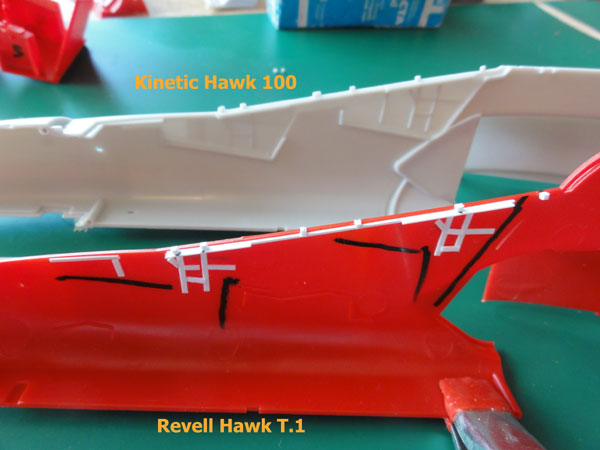
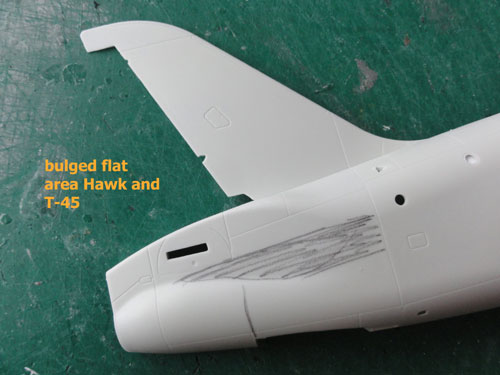
Rear fuselage correction
(1) The curvature below the stabilizer
at the engine jet pipe area on the Revell kit looks too pronounced. Some
card a putty was used here to reduce the curved effect.
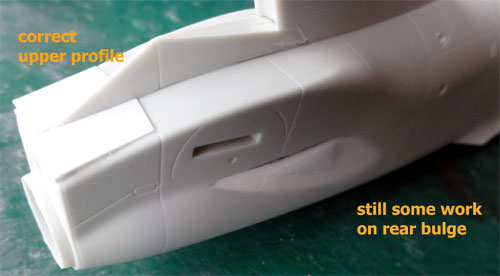
(2) Also on the Revell kit, the rear
upper deck of the rear fuselage looks too much curved towards the exhaust
pipe. Add some 1 mm thick card to correct this, fill and sand in shape
to get a more flattened look. The fairing on top differs per Hawk, REVELL
provides both variations with kit parts #44,45,46,47. For the T-45, use
the longer fairing parts #46,47.
 .
.
Filling still to be done.
(note: these corrections are applicable
not only for the Hawk, but also the T-45).
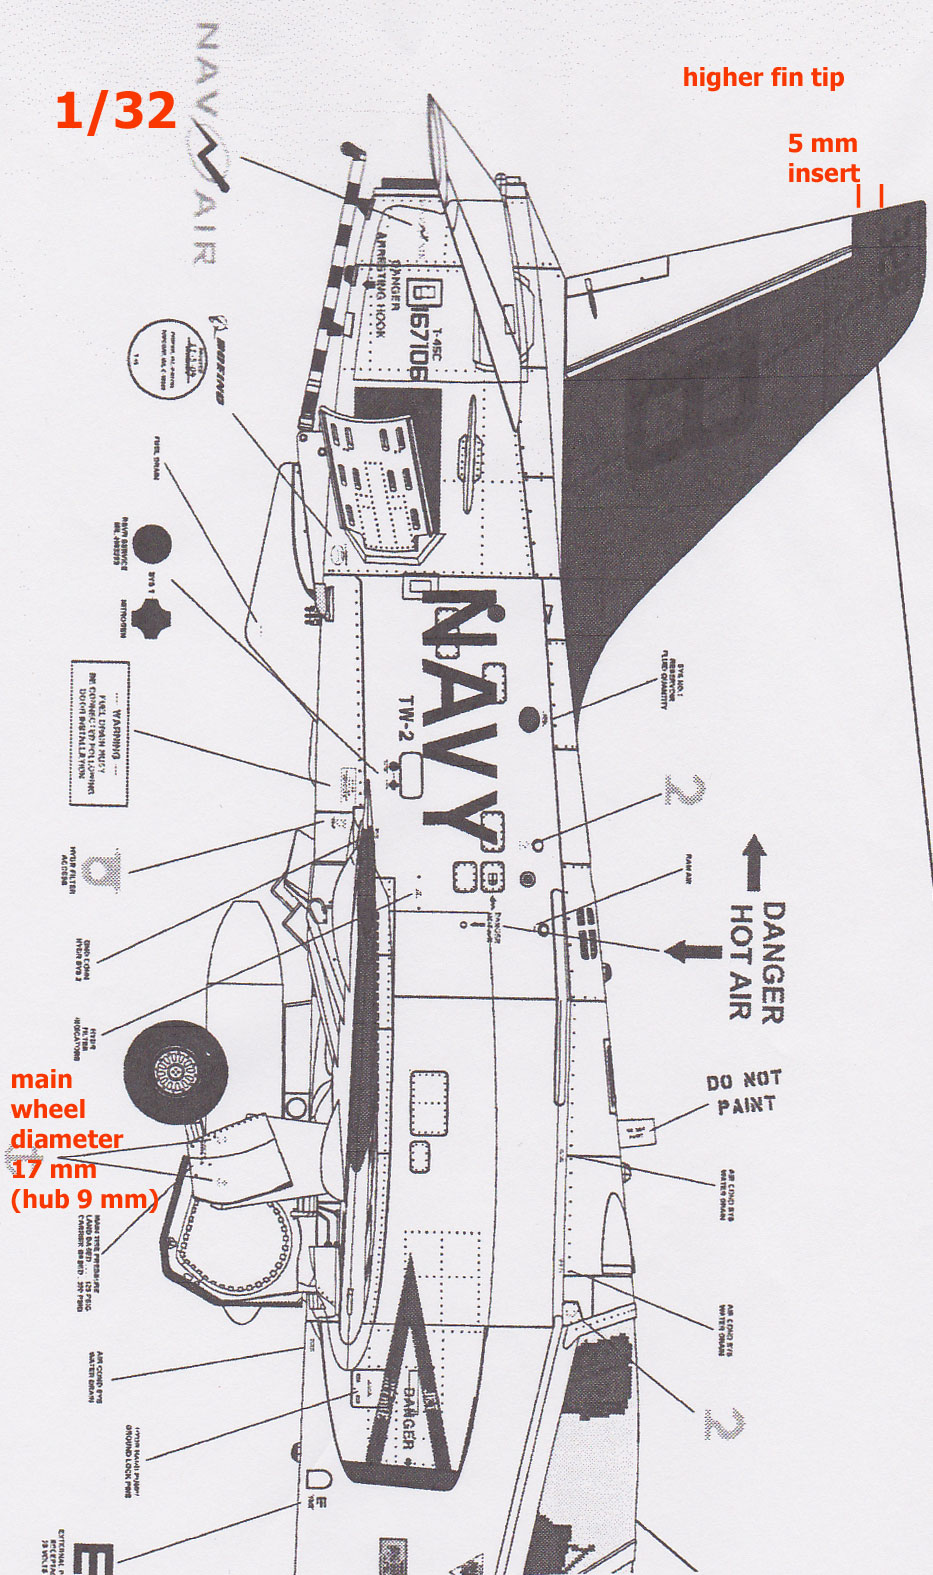
STEP 16
I- higher vertical tail
The T-45 has a higher vertical fin,
the tip was extended 15 cm.
The tip was cut off with the TIGER
razor saw. With card, an extension of 5 mm in 1/32 was added. I found the
best way is to use tow strips that can be bended somewhat. Fill and sand
when dry. The kit rudder is OK. The large base fin fillet was used (parts
#46+47).

 .
.
On to next [ page T4... ]
Back to 1/32 Models.......

(c) Copyright Meindert "designer"/ All rights reserved. Your comments are welcomed by webmaster
Created this page
May 30, 2013